There’s this blackberry bramble in my yard that gets a little out of control every summer, which I am completely okay with because I can’t help but bake those berries up into all sorts of delicious things. I usually go for a blackberry crisp, blackberry pie, or basically any blackberry dessert I can enjoy a la mode. This year I decided it was time to get a little wild and make a full-on cake recipe with our blackberry harvest and let me tell you, it did not disappoint. It started out as a simple blackberry cake with blackberry buttercream, but before I knew it I was swirling blackberry purèe into cake batter and baking crumble topping to sprinkle between layers. The result is the most delicious blackberry crisp inspired cake and I could not be more happy with how it turned out!
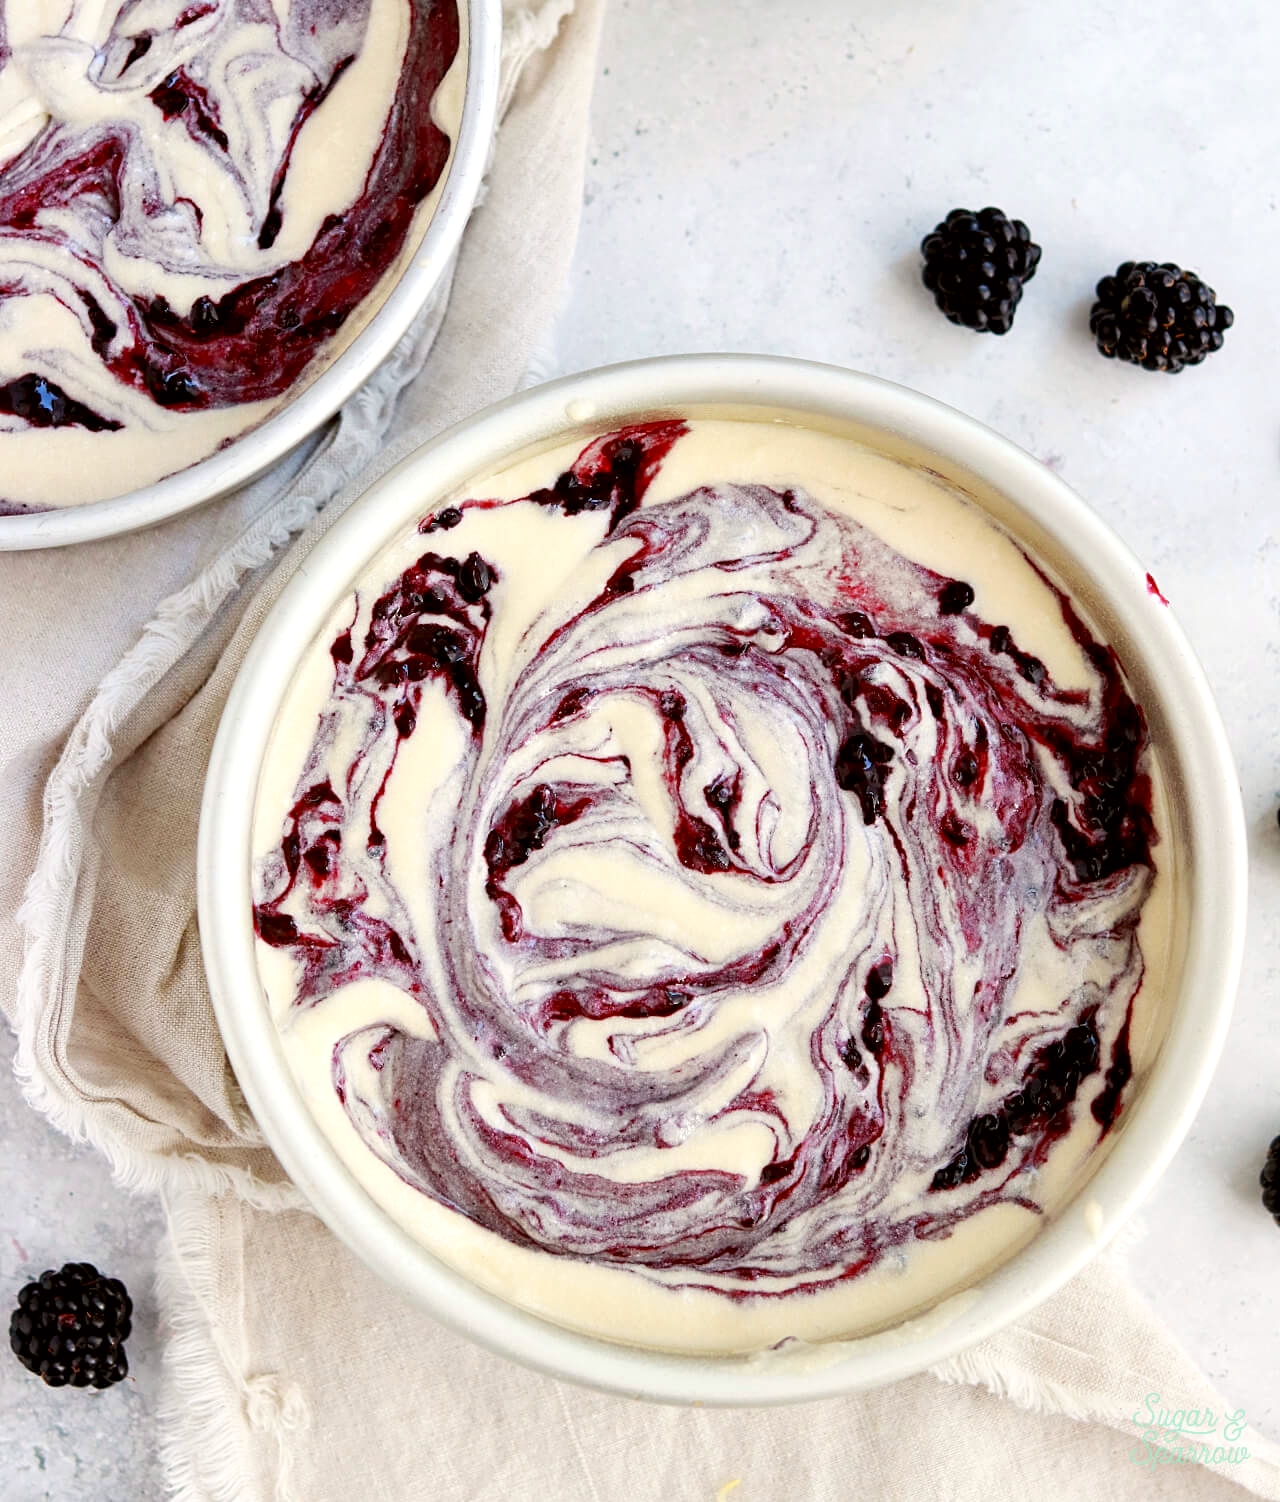
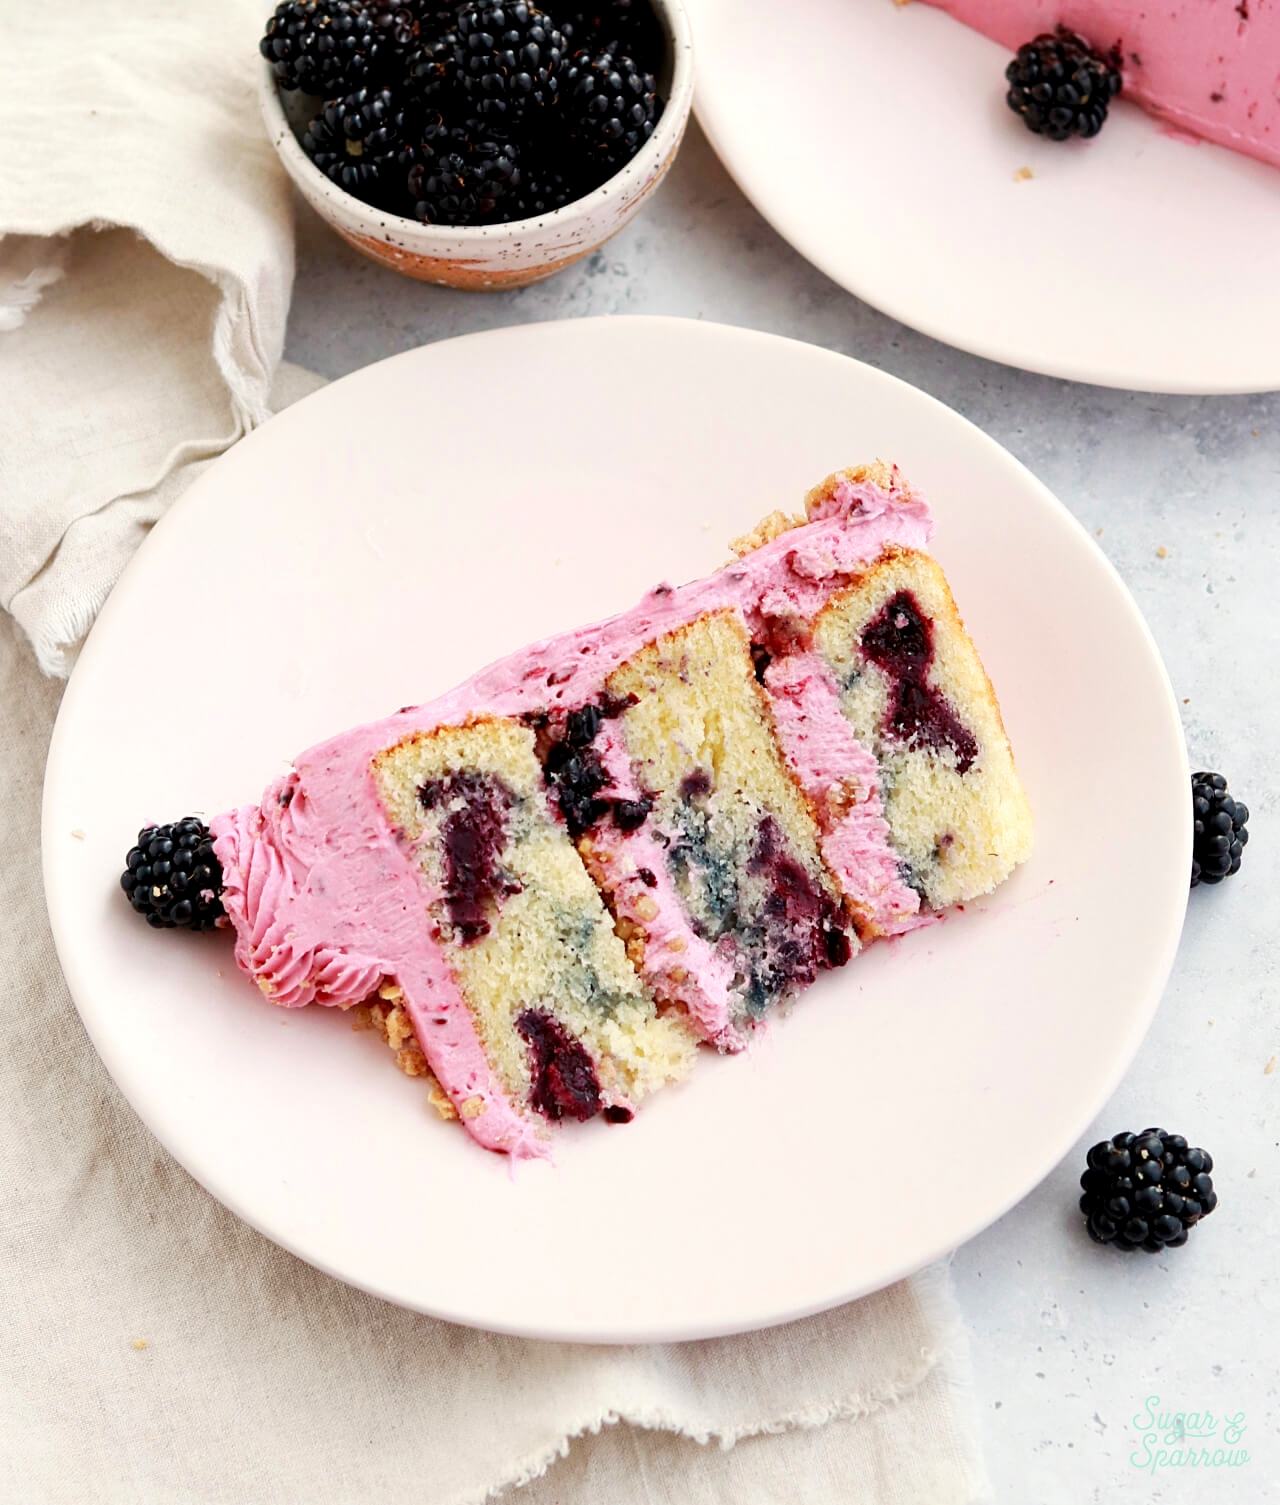
This blackberry crisp cake is so fun to make and completely addictive upon first bite. It’s perfect for a summer gathering, sure to impress your guests with its creative flavor profile and beautiful natural colors. I started by purèeing some blackberries and reducing them along with some lemon, brown sugar, and cinnamon to really enhance the flavor. Then I swirled some of the reduced purèe into the cake batter to create a beautiful blackberry swirl in the baked cake layers. The layers turned out so moist, fluffy, and absolutely delicious.
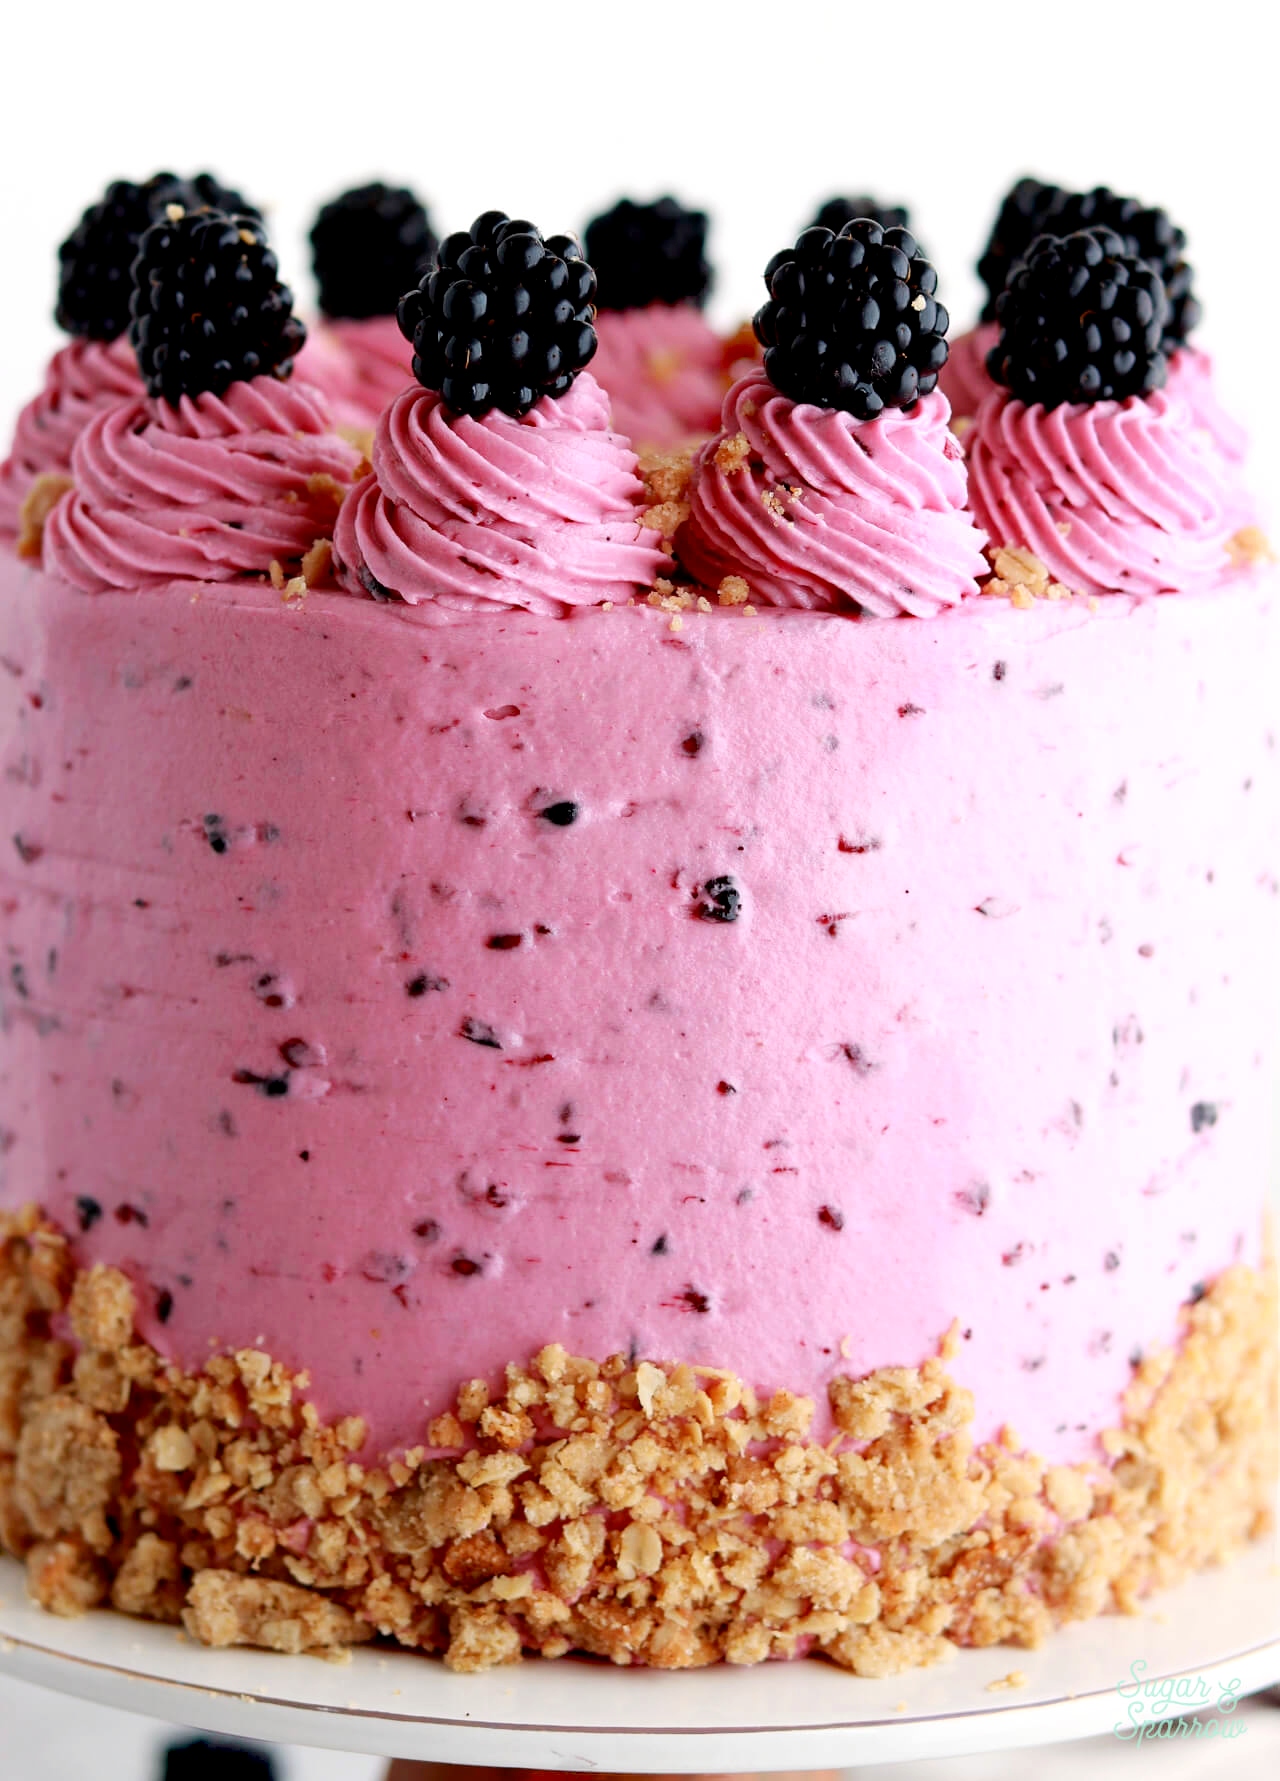
I put the rest of the blackberry purèe into the buttercream and it made the prettiest natural color. I love the little flecks of blackberry throughout and the flavor turned out so spot on as well. It’s got the perfect blackberry flavor, not too sweet, and worked wonderfully for filling, frosting, and decorating the cake.
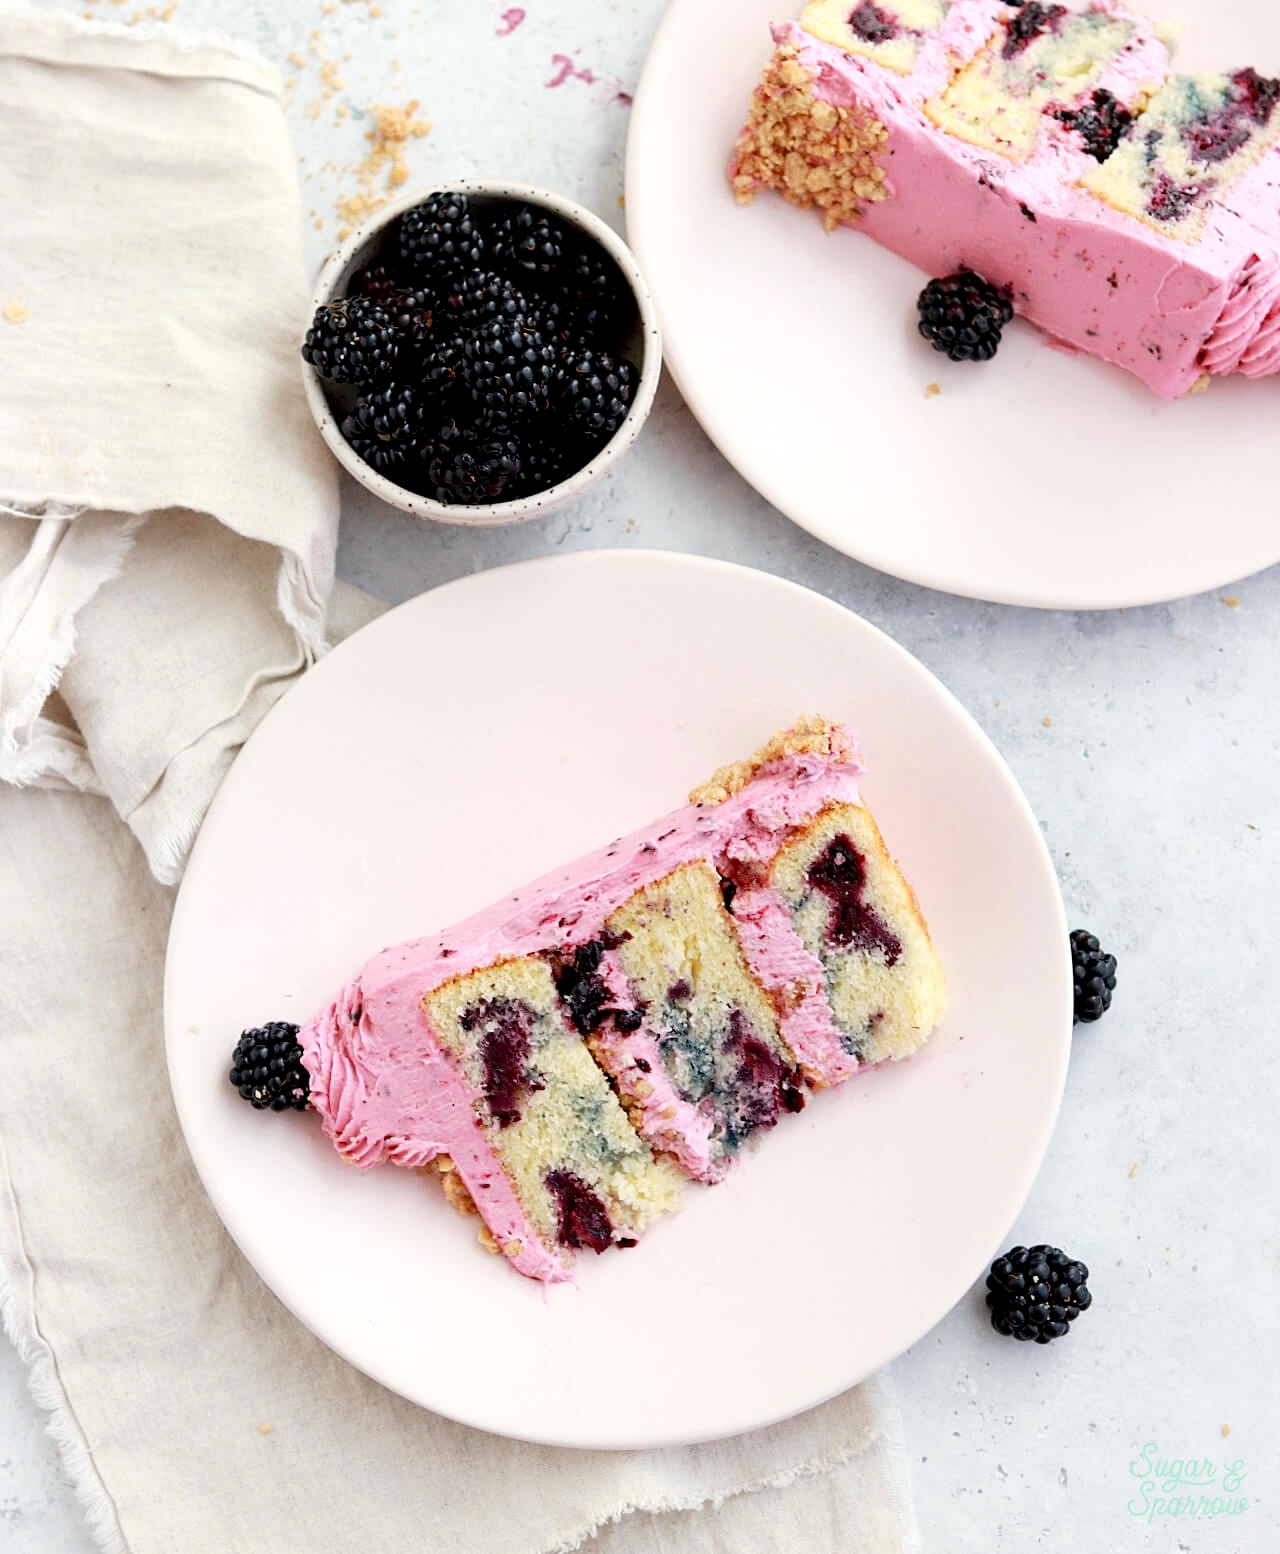
It was my husband who suggested the baked crumble topping for in between layers, and I am so happy that I included it! The crumble topping really takes the flavor of this cake beyond and adds such amazing texture. It tastes like a blackberry crisp in cake form! If you’re already a blackberry crisp or cobbler fan, you’re going to love this one. And if you’d rather make a more straightforward blackberry cake, you can always leave it out. But trust me, you don’t want to leave it out!
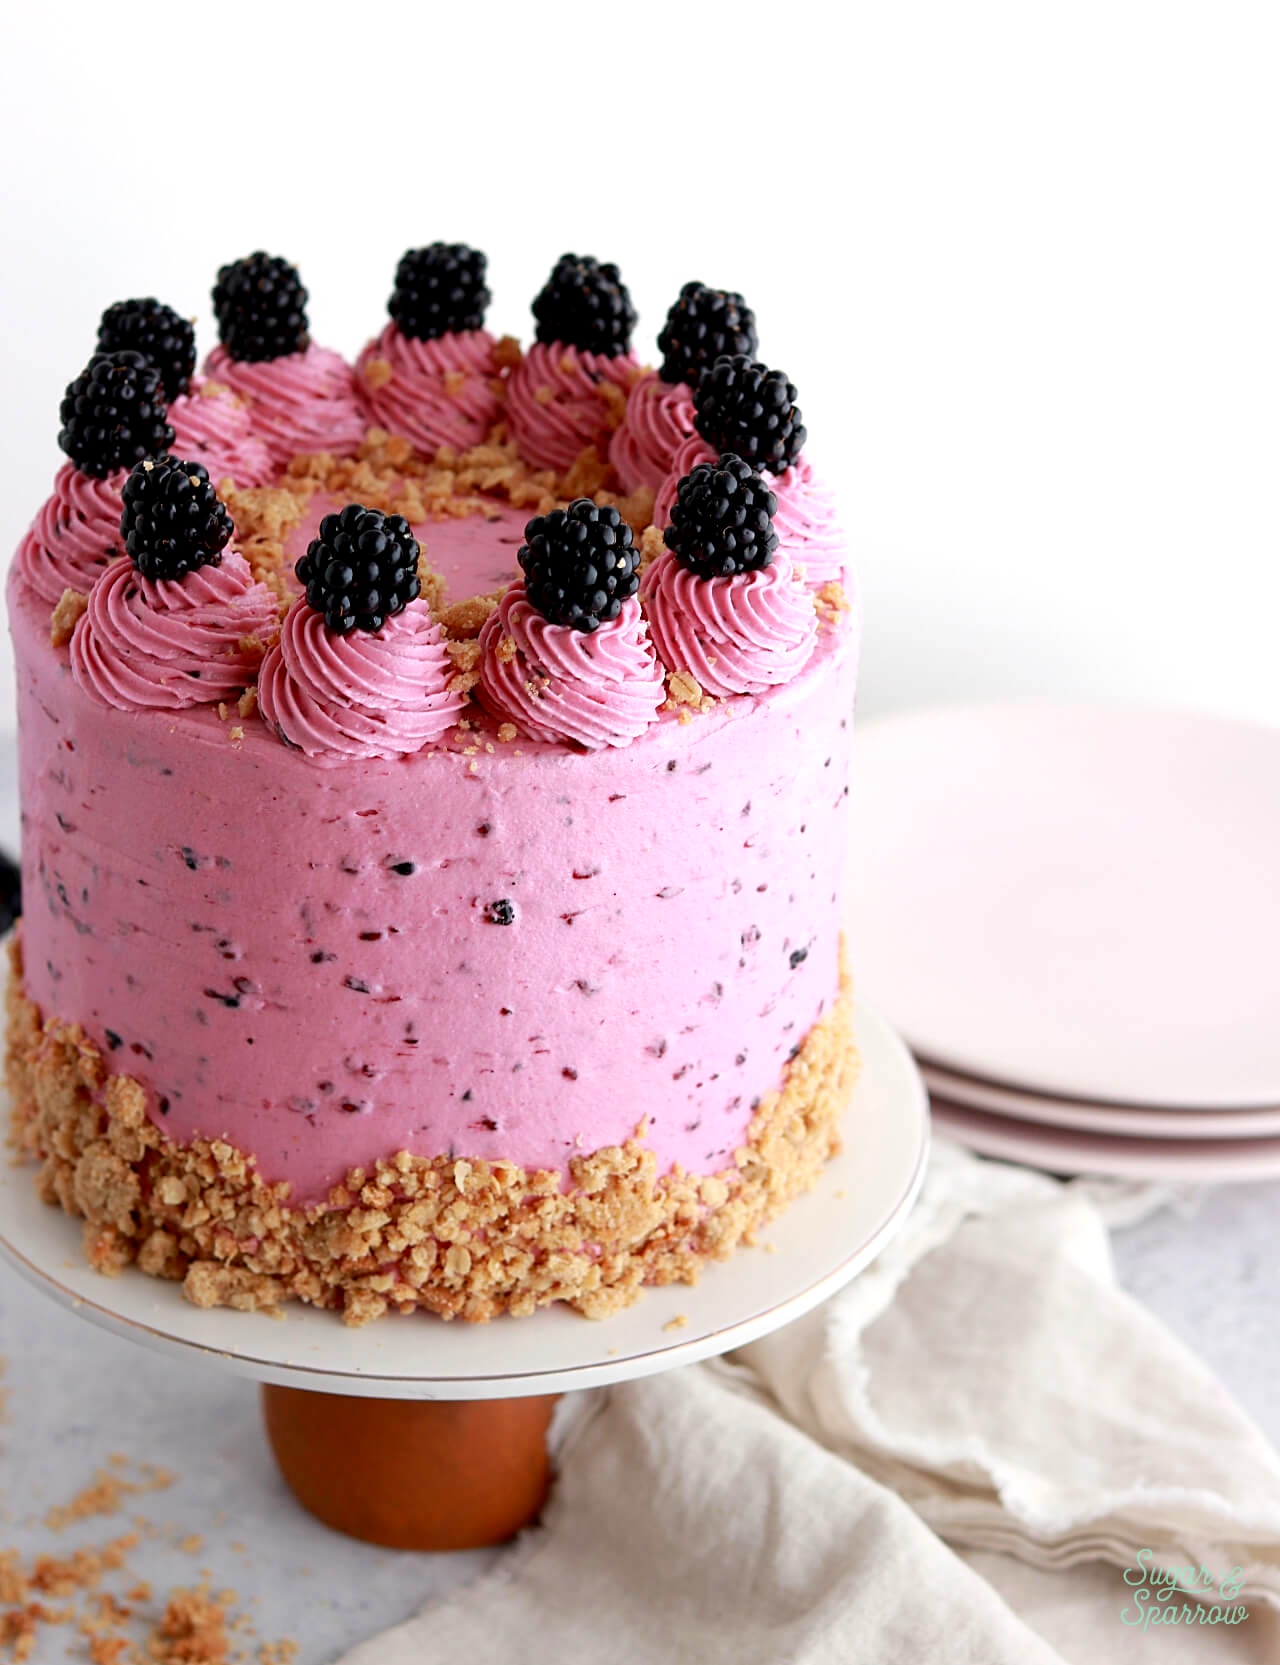
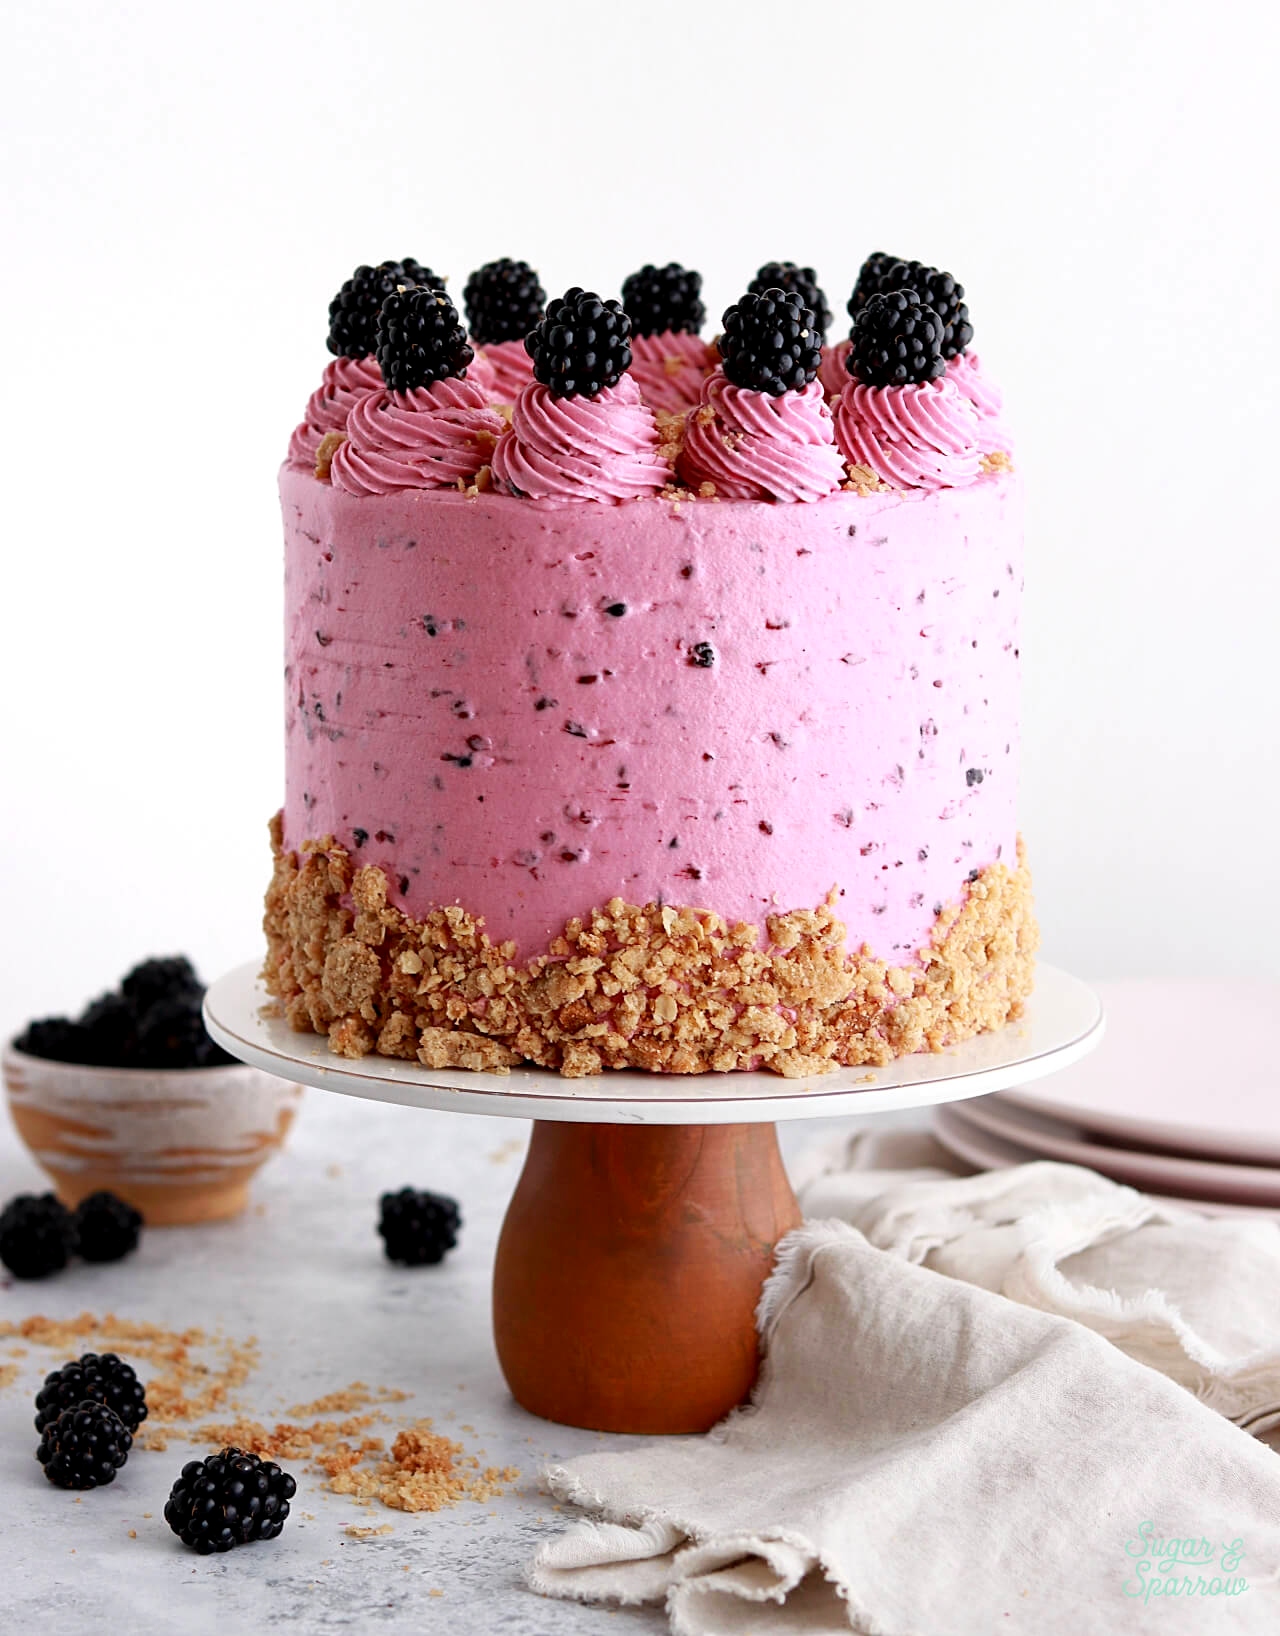
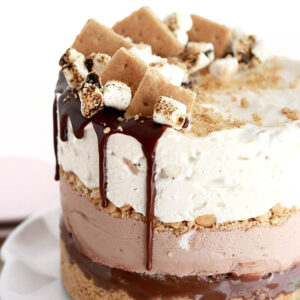
I decorated this blackberry cake with crumble topping, swirls piped with Wilton Tip 4B, and fresh blackberries. I was worried about the blackberry flecks clogging up the piping tip but I didn’t have any issues with it! I love how this design turned out but regardless of how you decorate, this cake is going to taste amazing. I cannot wait for you to try it!

Blackberry Crisp Cake
Ingredients
Blackberry Purèe
- 1 Lb (16oz, 453g) fresh or frozen blackberries
- 1 Tbsp lemon zest
- 1 Tbsp lemon juice
- 2 Tbsp packed light brown sugar
- 1 Tbsp cornstarch
- 1/4 tsp ground cinnamon
- 1/8 tsp salt
Blackberry Cake
- 2 3/4 Cups (290g) sifted cake flour
- 2 tsp baking powder
- 1/2 tsp baking soda
- 1/2 tsp salt
- 3/4 Cup (170g) unsalted butter, room temperature
- 1 1/2 Cups (300g) granulated sugar
- 2 large eggs + 2 large egg whites, room temperature
- 1/2 Cup (120g) sour cream, room temperature
- 1 Tbsp pure vanilla extract
- 1 Cup (240ml) whole milk, room temperature
- 3/4 Cup (180ml) blackberry purèe, room temperature
Baked Crisp Topping
- 1/2 Cup (40g) old-fashioned oats
- 1/2 Cup (60g) all purpose flour
- 1 1/2 Tbsp granulated sugar
- 1/4 Cup (50g) packed light brown sugar
- 1/2 tsp ground cinnamon
- 1/4 tsp ground nutmeg
- 1/8 tsp salt
- 1/4 Cup (57g) unsalted butter, softened
Blackberry Buttercream
- 2 Cups (452g) unsalted butter, room temperature
- 7 Cups (840g) powdered sugar
- 1 Tbsp pure vanilla extract
- 1/2 Cup (120ml) blackberry purèe
- 1/4 tsp salt, or to taste
Instructions
Make the Blackberry Purèe
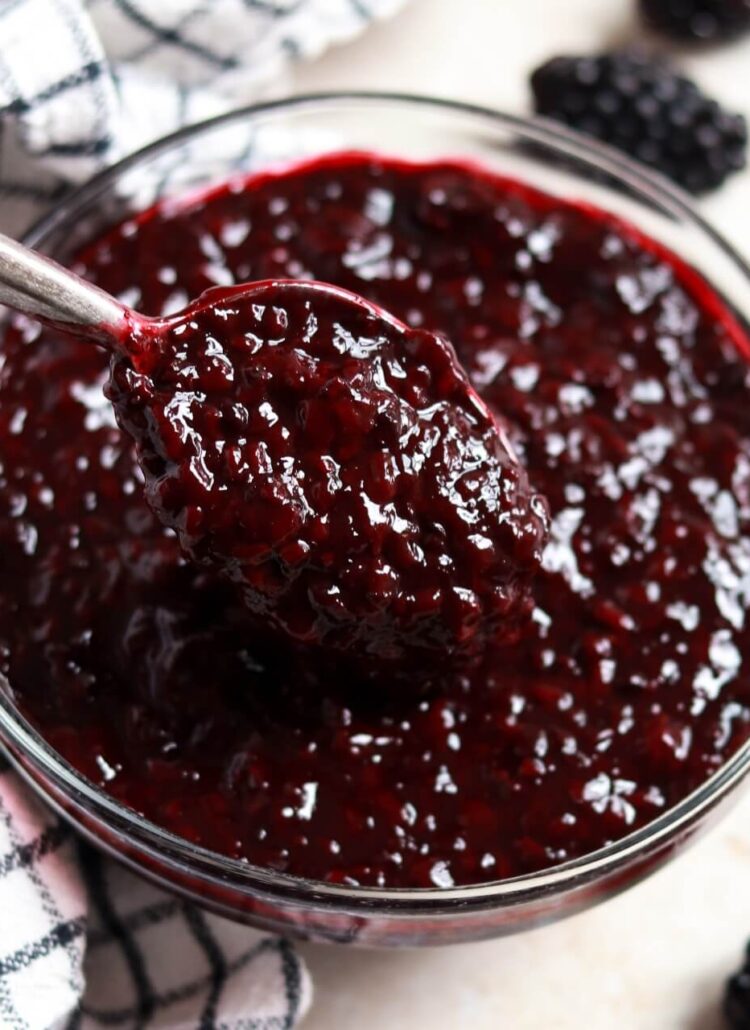
- Add the blackberries, lemon zest, lemon juice, brown sugar, cornstarch, cinnamon, and salt into a medium saucepan. Cook over high heat until the mixture begins to boil, then use a fork to mash up the berries. Continue to cook for 10-15 minutes or until the purèe has thickened and reduced by about 1/3. You should have around 1 ¼ Cups of blackberry purèe after the reduction. Remove from the heat and place into an airtight container in the refrigerator to let cool for about 30 minutes, or until room temperature. It will thicken as it cools.
Make the Blackberry Cake
- Preheat the oven to 350°F. Prepare three 6-inch or two 8-inch cake pans by spraying the sides with a cooking spray (Baker's Joy is my favorite) and fitting a parchment paper circle to the bottom of the pan.
- Sift the cake flour and then measure by spooning and leveling it in your measuring cup. Add the cake flour, baking powder, baking soda, and salt into a bowl and whisk to combine. Set aside.
- In the bowl of your stand mixer (a handheld mixer works fine too!), beat the butter on high for two minutes until it's light and creamy. Add in the sugar and continue to mix on medium-high for another two minutes. Turn the mixer to low and add the eggs and egg whites, one at a time, mixing until just combined and scraping down the bowl and paddle as needed. Add the vanilla and sour cream, turn the mixer to high, and beat for one full minute. It will look curdled at this point, but don’t worry – it will become smooth cake batter at the end.
- Add in the dry ingredients all at once and turn the mixer to low speed. Mix until just combined, then slowly pour in the milk. Continue to mix on low speed until just combined, about 30 seconds. Scrape down the sides and bottom of the bowl and give it a few stirs with a whisk to make sure there are no lumps. The batter will be slightly thick.
- Pour the batter evenly into the prepared cake pans. Dollop the blackberry purèe by the spoonful on top of each cake and use a butter knife to swirl it into the batter, then bake for 30-35 minutes. They're done when they spring back to the touch and a toothpick inserted into the middle comes out clean. Let the cakes cool in the pan for five minutes before turning them out onto a wire rack for an additional few hours of cooling. Make sure they're entirely room temperature before applying any frosting.
Make the Baked Crisp Topping
- Preheat the oven to 350 degrees and line a cookie sheet with parchment paper. Add all of the ingredients except for the butter into the bowl of a stand mixer fitted with the paddle attachment. Mix together on low to combine, then add in the softened butter. Continue mixing on low until the mixture begins forming pea-sized clusters.
- Spread the mixture evenly onto the parchment-lined cookie sheet, then bake for 5 minutes. Stir the topping around a bit, then bake for another 5 minutes until it begins to turn golden brown. Let the crumble topping cool completely to room temperature, then store in an airtight container until you’re ready to assemble the cake.
Make the Blackberry Buttercream
- In the bowl of a stand mixer fitted with the paddle attachment, cream the butter on medium-high until it’s creamy and light in color, about 5 minutes. Turn the mixer to low and add the powdered sugar a few cups at a time, scraping down the bowl and paddle after each addition and making sure each cup is fully incorporated before adding the next one.
- Add the vanilla, blackberry purèe, and salt and mix on low for another 1-2 minutes, or until fully incorporated.
Assembly
- Once the blackberry cakes are completely cooled, level them to your desired height. Add a swipe of blackberry buttercream onto a cardboard cake circle and place the first layer on top. Add a layer of blackberry buttercream as filling, then sprinkle on about 1/4 Cup of baked crisp topping before adding the next layer on top. Repeat the filling and stacking process with the final cake layer. Crumb coat the cake with blackberry buttercream, then place it in the refrigerator for at least 30 minutes to let the buttercream set firm.
- Create a smooth buttercream finish with blackberry buttercream, then press baked crisp topping onto the bottom third of the cake. Use Wilton Tip 4B to pipe swirls with blackberry buttercream around the top edge of the cake (you may need to thicken the buttercream consistency for this part). Top each buttercream swirl with a fresh blackberry and sprinkle more baked crisp topping on top.
Notes
- The blackberry purèe can be made ahead and stored in an airtight container in the refrigerator for up to two days. Bring it back to room temperature before using it in the cake and buttercream recipes.
- The blackberry cake can be baked ahead and stored at room temperature, wrapped in plastic wrap, for up to two days. Alternatively you can store the cakes in the freezer for up to two months.
- The baked crisp topping can be stored in an airtight container in the refrigerator for up to two weeks.
- The blackberry buttercream can be made ahead and stored in an airtight container in the refrigerator for up to two weeks. When you’re ready to use it, bring it back to room temperature and re-mix in your stand mixer to bring it back to smooth buttercream consistency.
Did you make this blackberry crisp cake? I want to know how it went! Let me know in the comments below and feel free to tag @sugarandsparrowco on Instagram to show me. I love to see what you create with my recipes!

Love your recipes! Will Swiss meringue buttercream work as well as American buttercream in this recipe?
Hi Suzanne! You could absolutely use Swiss meringue buttercream for this cake! I don’t know how you’d make it blackberry flavored without adding a ton of liquid since I haven’t tried that before so I would search for a blackberry SMBC recipe and use that. Otherwise I have this vanilla Swiss meringue buttercream: https://sugarandsparrow.com/swiss-meringue-buttercream/
Hello,
Hope you’re doing well. I just made this cake today with blueberries and had some questions. It was getting quite golden and wasn’t done after 35 minutes. The toothpick eventually came out clean, though later when I leveled it, the center seemed quite mushy. The rest of the cake was done. Should I have baked it longer with foil on top? Or is this usual with the berries? I also wanted to ask if it’s still recommended to level the cakes if the tops are already flat.
Thank you! I really enjoyed the cake, it was delicious.
Hi Mia! A few questions and ideas. 1) What kind of oven do you have (conventional or convection)? My recipes are written for conventional ovens and there are adjustments that need to be made if you’re using a convection or fan-assisted oven. 2) If you are using a conventional oven, I recommend checking to see that the inside of your oven is the temp it says on the display. You can use an oven thermometer for this, and more often than not ovens are hotter or colder than what the display reads. 3) I’ve never tried this with blueberries, although I’d assume it would work just fine. From what you described it sounds like there was too much liquid in the blueberry swirl. That would make the center mushy (and even collapse). I would make sure that you really reduce the liquid by 1/3 in the first part of the recipe.
I hope all of that is helpful! I’d love to help you get to the bottom of this!
If you put fresh berries in between the layers, will it keep well if made the day before and stored in the fridge?
Hi Kristina! You can totally put fresh berries in between the layers and it will store wonderfully a day ahead. Enjoy!
Would this recipe work if I used blackberry jam purchased from the store instead of making the puree? Thanks.
Hi Rachel! I think that would totally work (and yum!). Let me know if you try it, that sounds amazing!
Whitney, do you think this recipe would still maintain all the same zazz if I used raspberries in lieu of blackberries?
It’s definitely worth a try! That sounds really tasty!