• Cake
  • Frosting
  • YouTube
  • My Favorite Tools
  • Nav Social Icons

  • Skip to primary navigation
  • Skip to main content
  • Skip to primary sidebar
  • Skip to footer
  • Recipes
    • Cake
    • Cupcakes
    • Frosting
    • Ice Cream
    • Vegan
  • Cake Basics
  • Tutorials
  • Blog
  • About
  • Mobile Menu Widgets

    Connect

    Search

Sugar & Sparrow logo in script font

Sugar & Sparrow

Lifestyle and Cake from Portland Oregon

  • Cake Basics
  • Recipes
    • Cake
    • Cupcakes
    • Cookies & Bars
    • Filling
    • Frosting
    • Ice Cream
    • No-Bake
    • Small Batch
    • Vegan
  • Tutorials
  • Book
  • Blog
  • About

Chocolate Geometric Shapes Tutorial

June 22, 2018 · In: Featured, Recipes, Tutorials

I wouldn’t consider myself a chocolatier per se, but I am a big fan of making simple geometric chocolate shapes (mainly circles and triangles) to top my cakes and cupcakes with. It all started when I saw the chocolate shard trend take off on Instagram and it made me wonder how hard it could be. The good news is, it’s pretty darn easy if you’ve got a plan and some good tempered chocolate to start with.

This tutorial works with white, milk, or dark chocolate. If you’re feeling fancy, you can decorate the shapes with Edible Art Paint, sprinkles, or get crazy with your white chocolate colors. The sky is the limit with these things. Here’s a little video I whipped up to show you: 

You Will Need:

  • 1 cup (183g) of white, milk, or dark chocolate chips
  • A microwave
  • Parchment paper
  • Sharp knife and/or circular cookie cutters
  • Color gels (for white chocolate, optional)
  • Pretty things to decorate with like sprinkles or Edible Art Paint (optional)

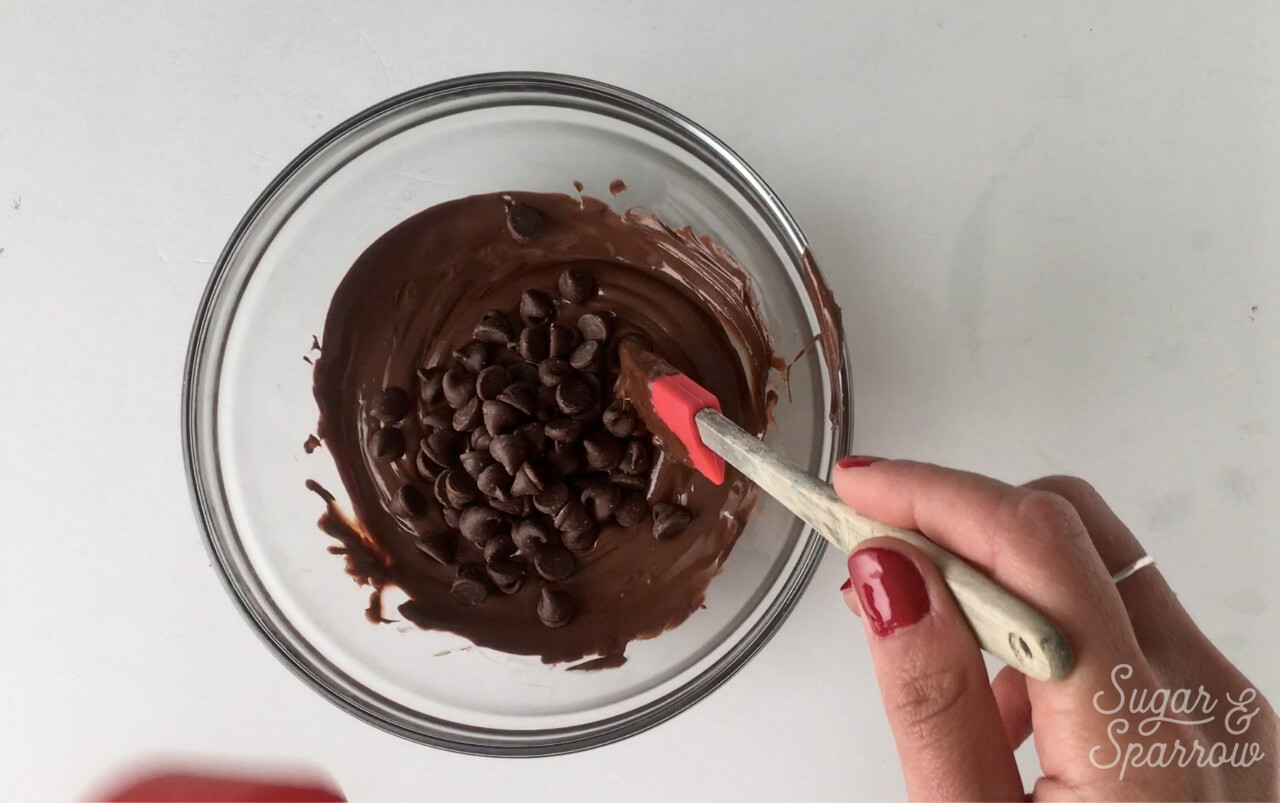
Step 1: Temper Your Chocolate

Pour the chocolate chips into a heatproof bowl and reserve ¼ of the chips. These will be the “seed” that you’ll add in after the rest of the chocolate is melted to temper it. Microwave the bowl of chocolate (sans seed) in 30 second increments, stirring after each interval. Once the chocolate is melted (mine usually is after two intervals), add the reserved chocolate seed into the bowl and stir until uniform in consistency.

how to temper milk chocolate

If you’re using food color gels with white chocolate, this would be the time to start coloring before moving on to the next step.  

Step 2: Pour The Chocolate

With parchment paper on a flat surface (I use a cookie sheet), pour the chocolate out and work it around with your spatula. You’ll want to make it about ¼ inch in depth and as smooth as possible.

how to make chocolate shapes by Sugar and Sparrow

If you’re using sprinkles or something sprinkle-like to decorate, this would be the time to do it. Let the chocolate rest for about 15-20 minutes, or until semi-set before moving on to step 3.

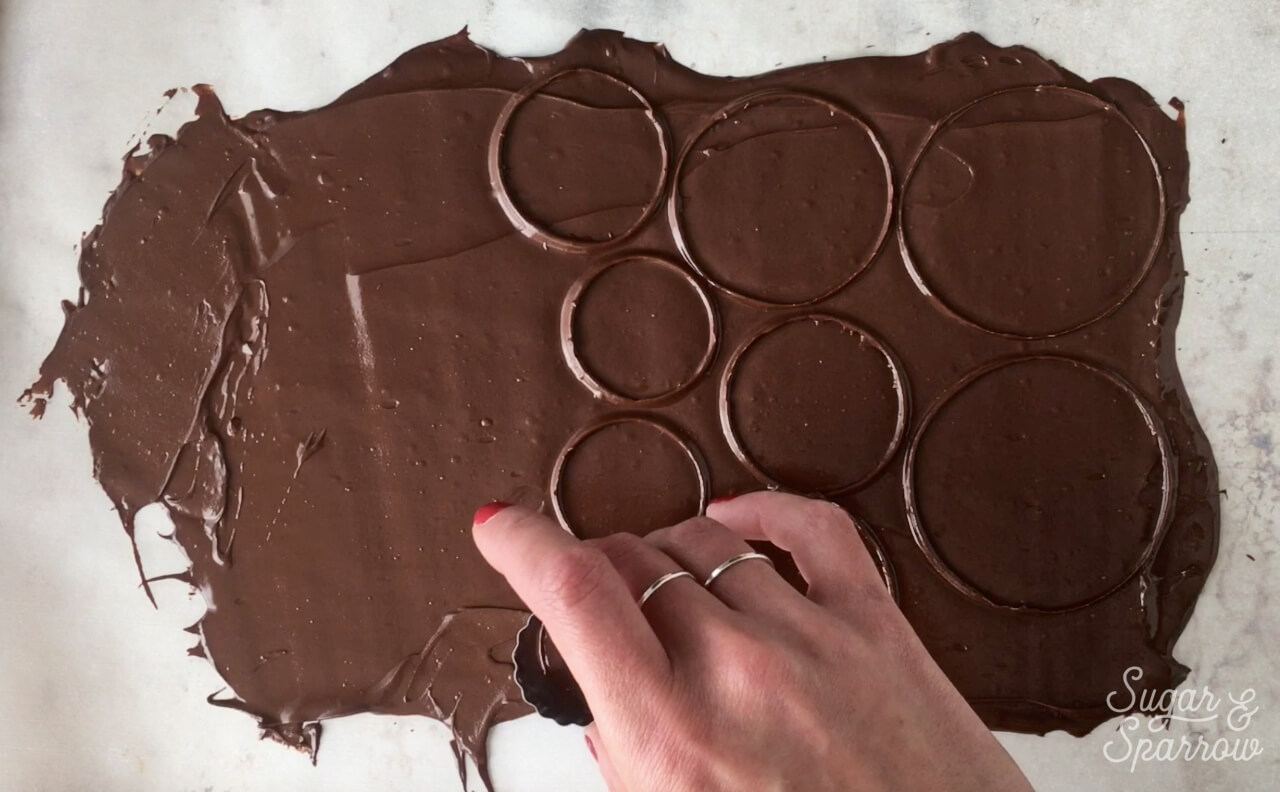
Step 3: Score The Chocolate

When the chocolate is semi-set (as in still soft, but not melty), use cookie cutters and/or a sharp knife to score the chocolate shapes. This basically gives you a good template to use and also helps you prepare the chocolate to make the final cuts easier.

how to score chocolate with cookie cutters

When the chocolate is scored, place it inside the refrigerator to set for another 10-15 minutes.

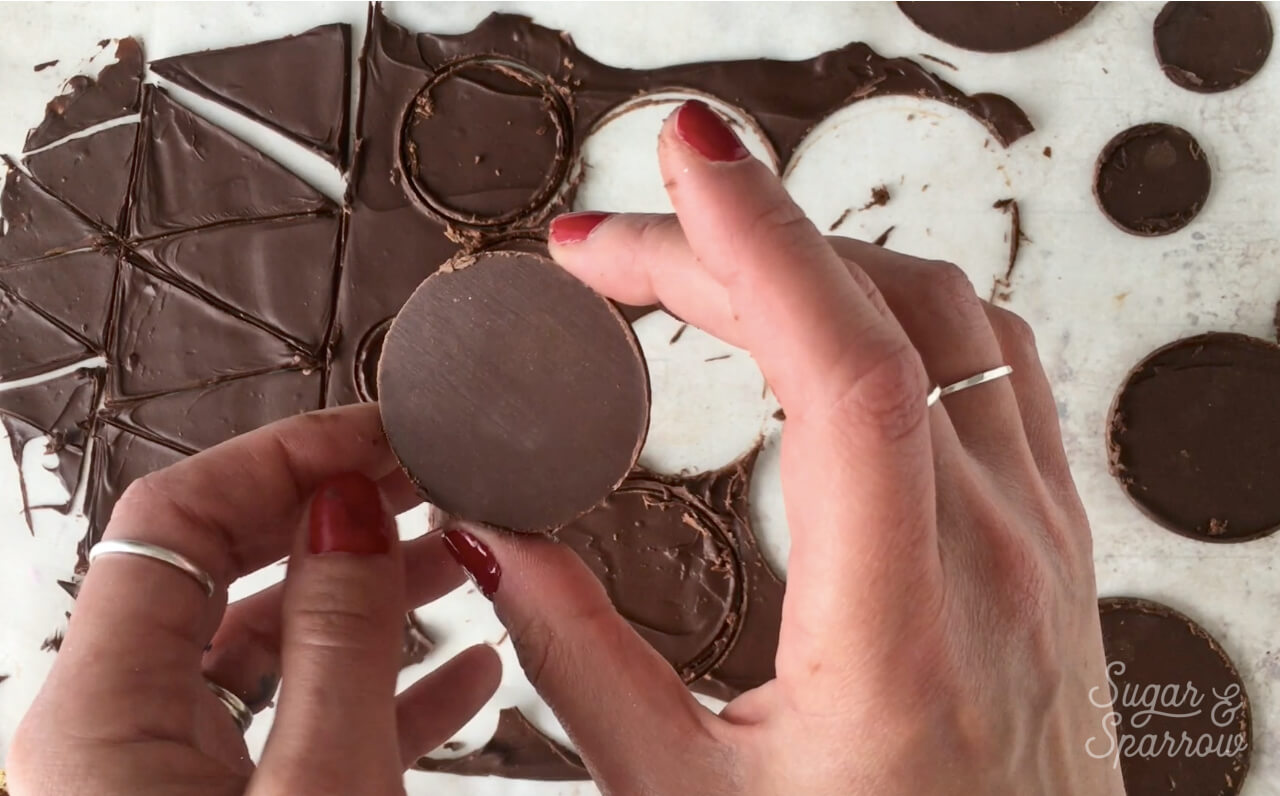
Step 4: Make The Final Cuts

Remove the chocolate from the refrigerator and use your knife and cutters to retrace the areas you’ve scored. It helps to do this step with clean cookie cutters/knife (if you have remaining chocolate on them from the scoring session you won’t get as clean of a cut).

how to make chocolate disks

If the chocolate is being stubborn during this step, it also helps to heat your utensils under hot water and dry them before doing the final cuts.

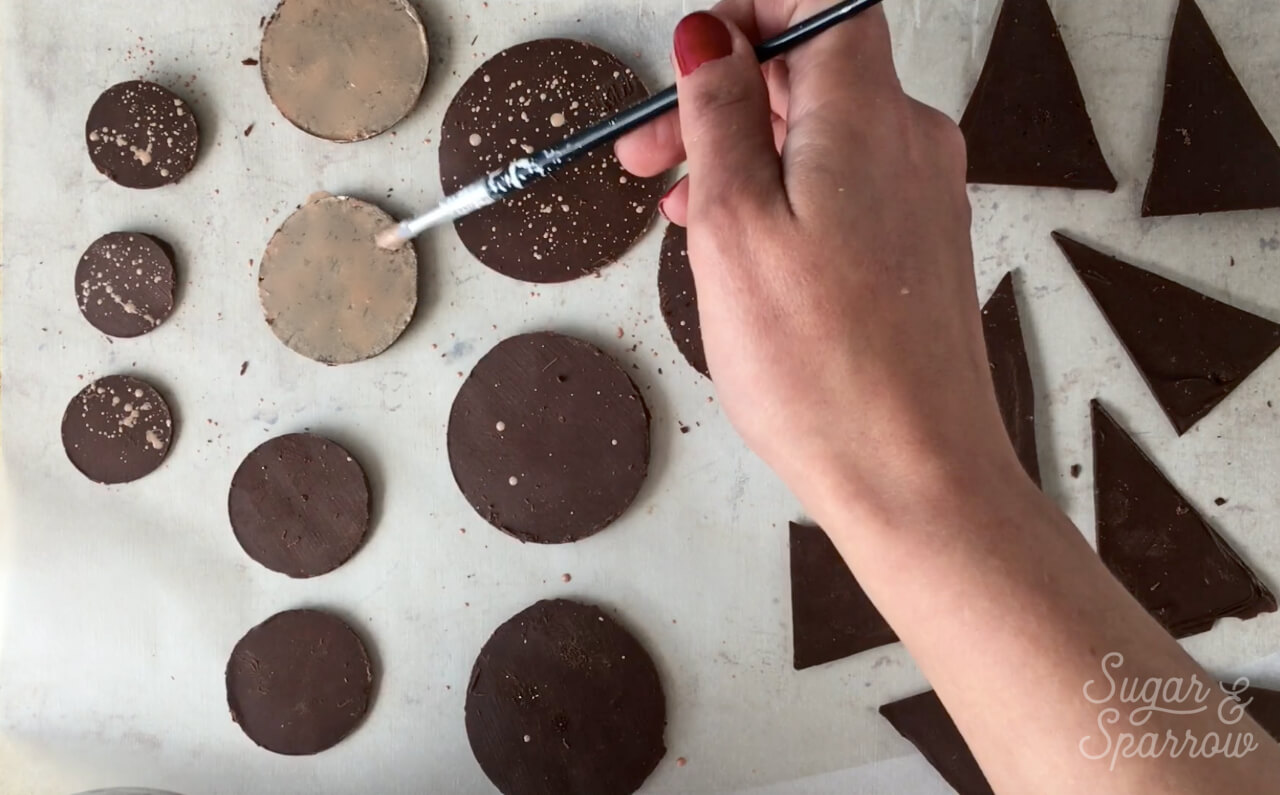
Step 5: Decorate With Edible Art Paint (optional)

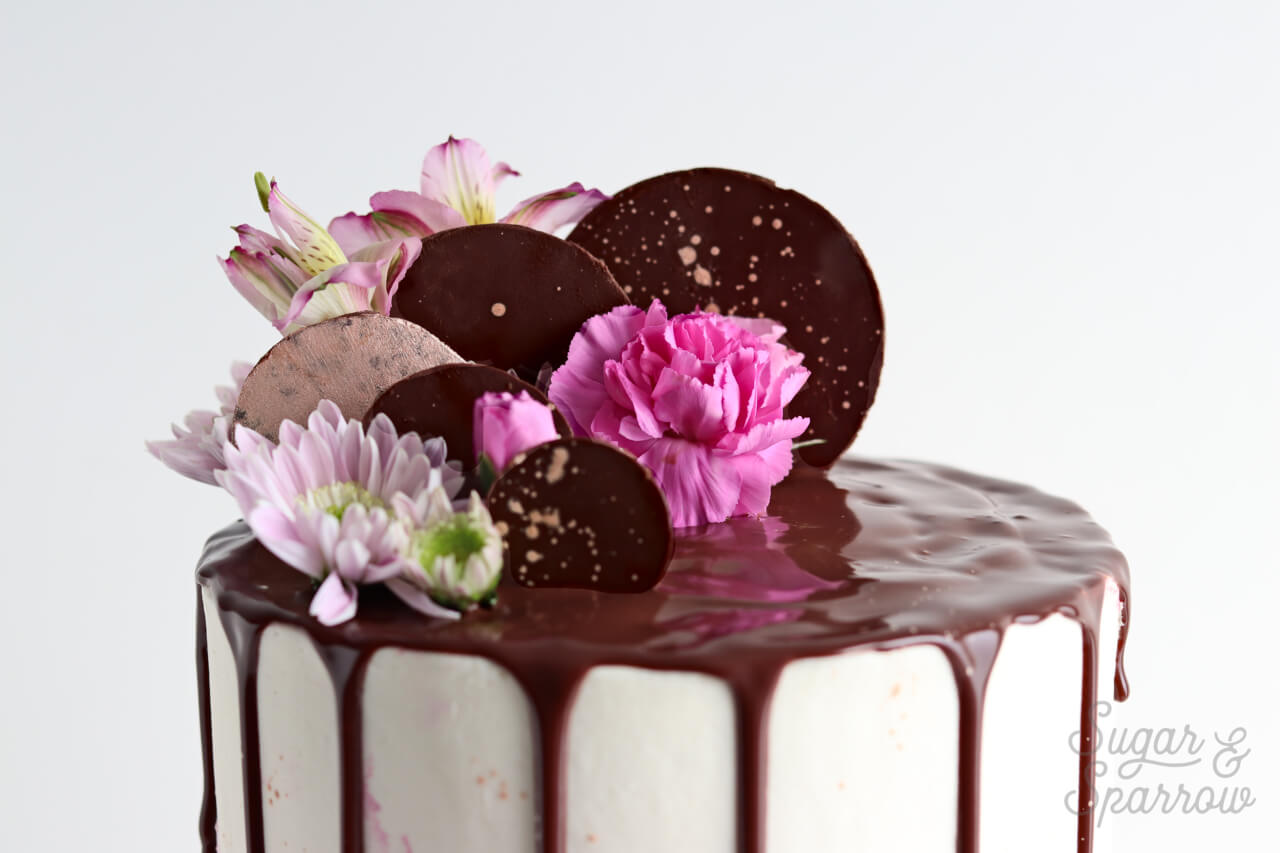
If you’re decorating your chocolate with something like Edible Art Paint, go ahead and paint away at this point. In my milk chocolate video, I’ve used a metallic rose gold paint to splatter and decorate.

decorating chocolate with metallic Edible Art Paint

Just make sure your chocolate shapes are fully dry before moving on to the cake decorating process.

Step 6: Assemble

Once your chocolate shapes are to your liking, it’s time to use them on a cake or cupcakes! Simply stick them into the top of the buttercream on your cake or cupcakes and be amazed. Here are a few of my favorite looks:

These chocolate disks with rose gold finish:

decorating cake with chocolate shapes

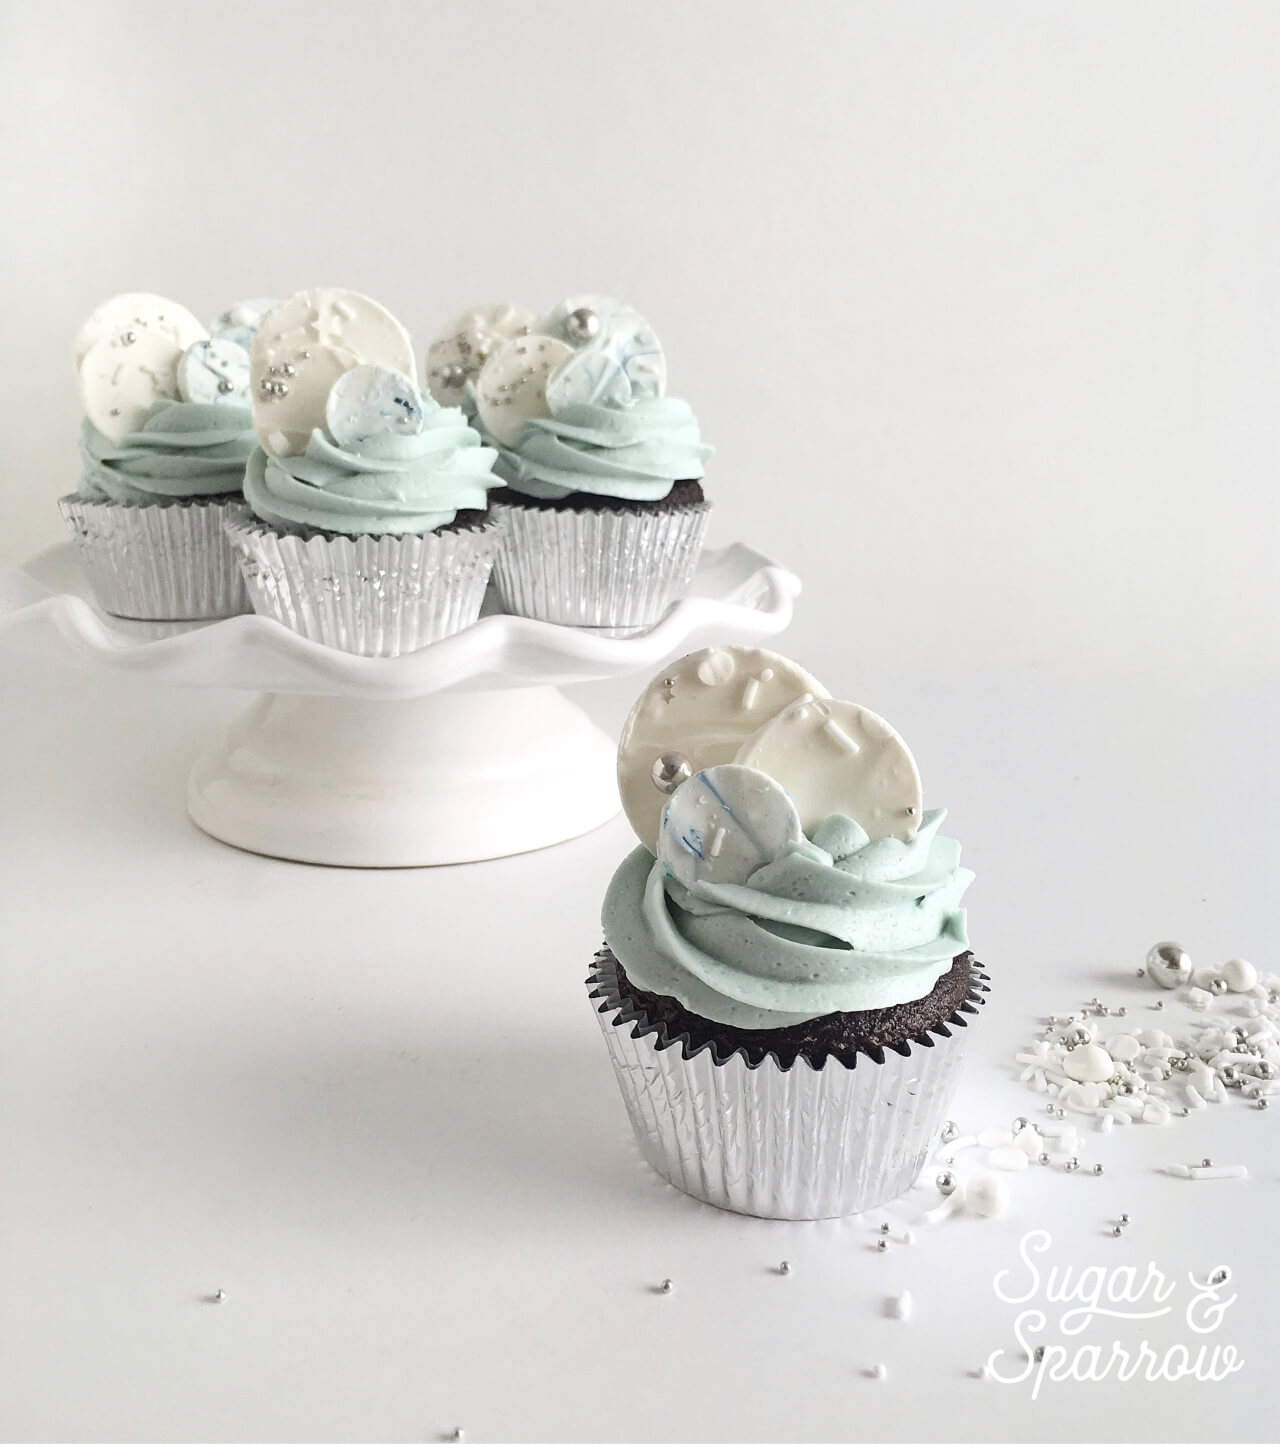
And mini white chocolate disks for cupcakes (I’ve created a marble finish here by using a toothpick to swirl blue food color gel through the melted white chocolate once I poured it onto parchment, then sprinkled them before scoring).

chocolate disk tutorial by sugar and sparrow

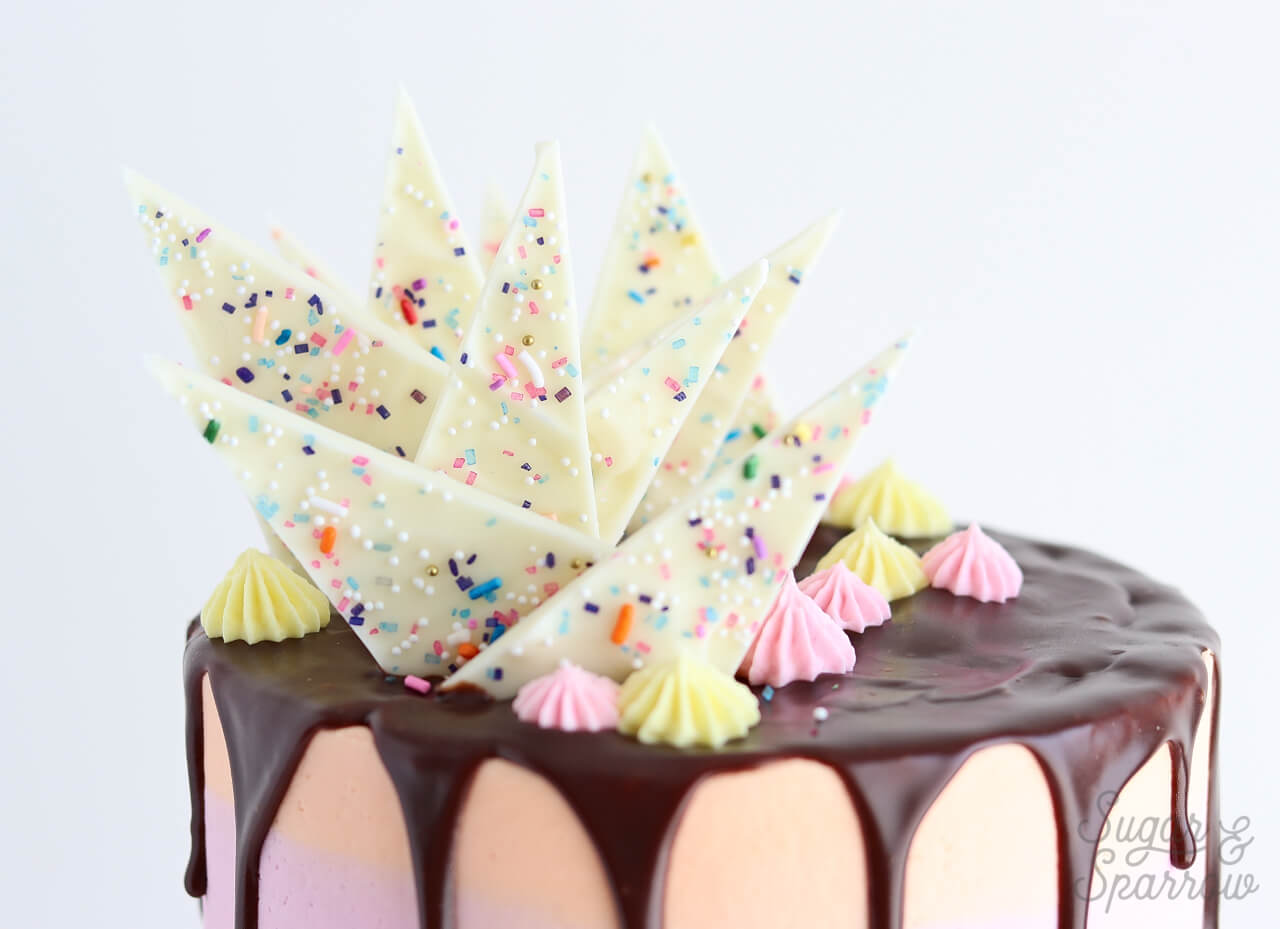
These white chocolate triangles that I sprinkled before scoring:

white chocolate shards tutorial

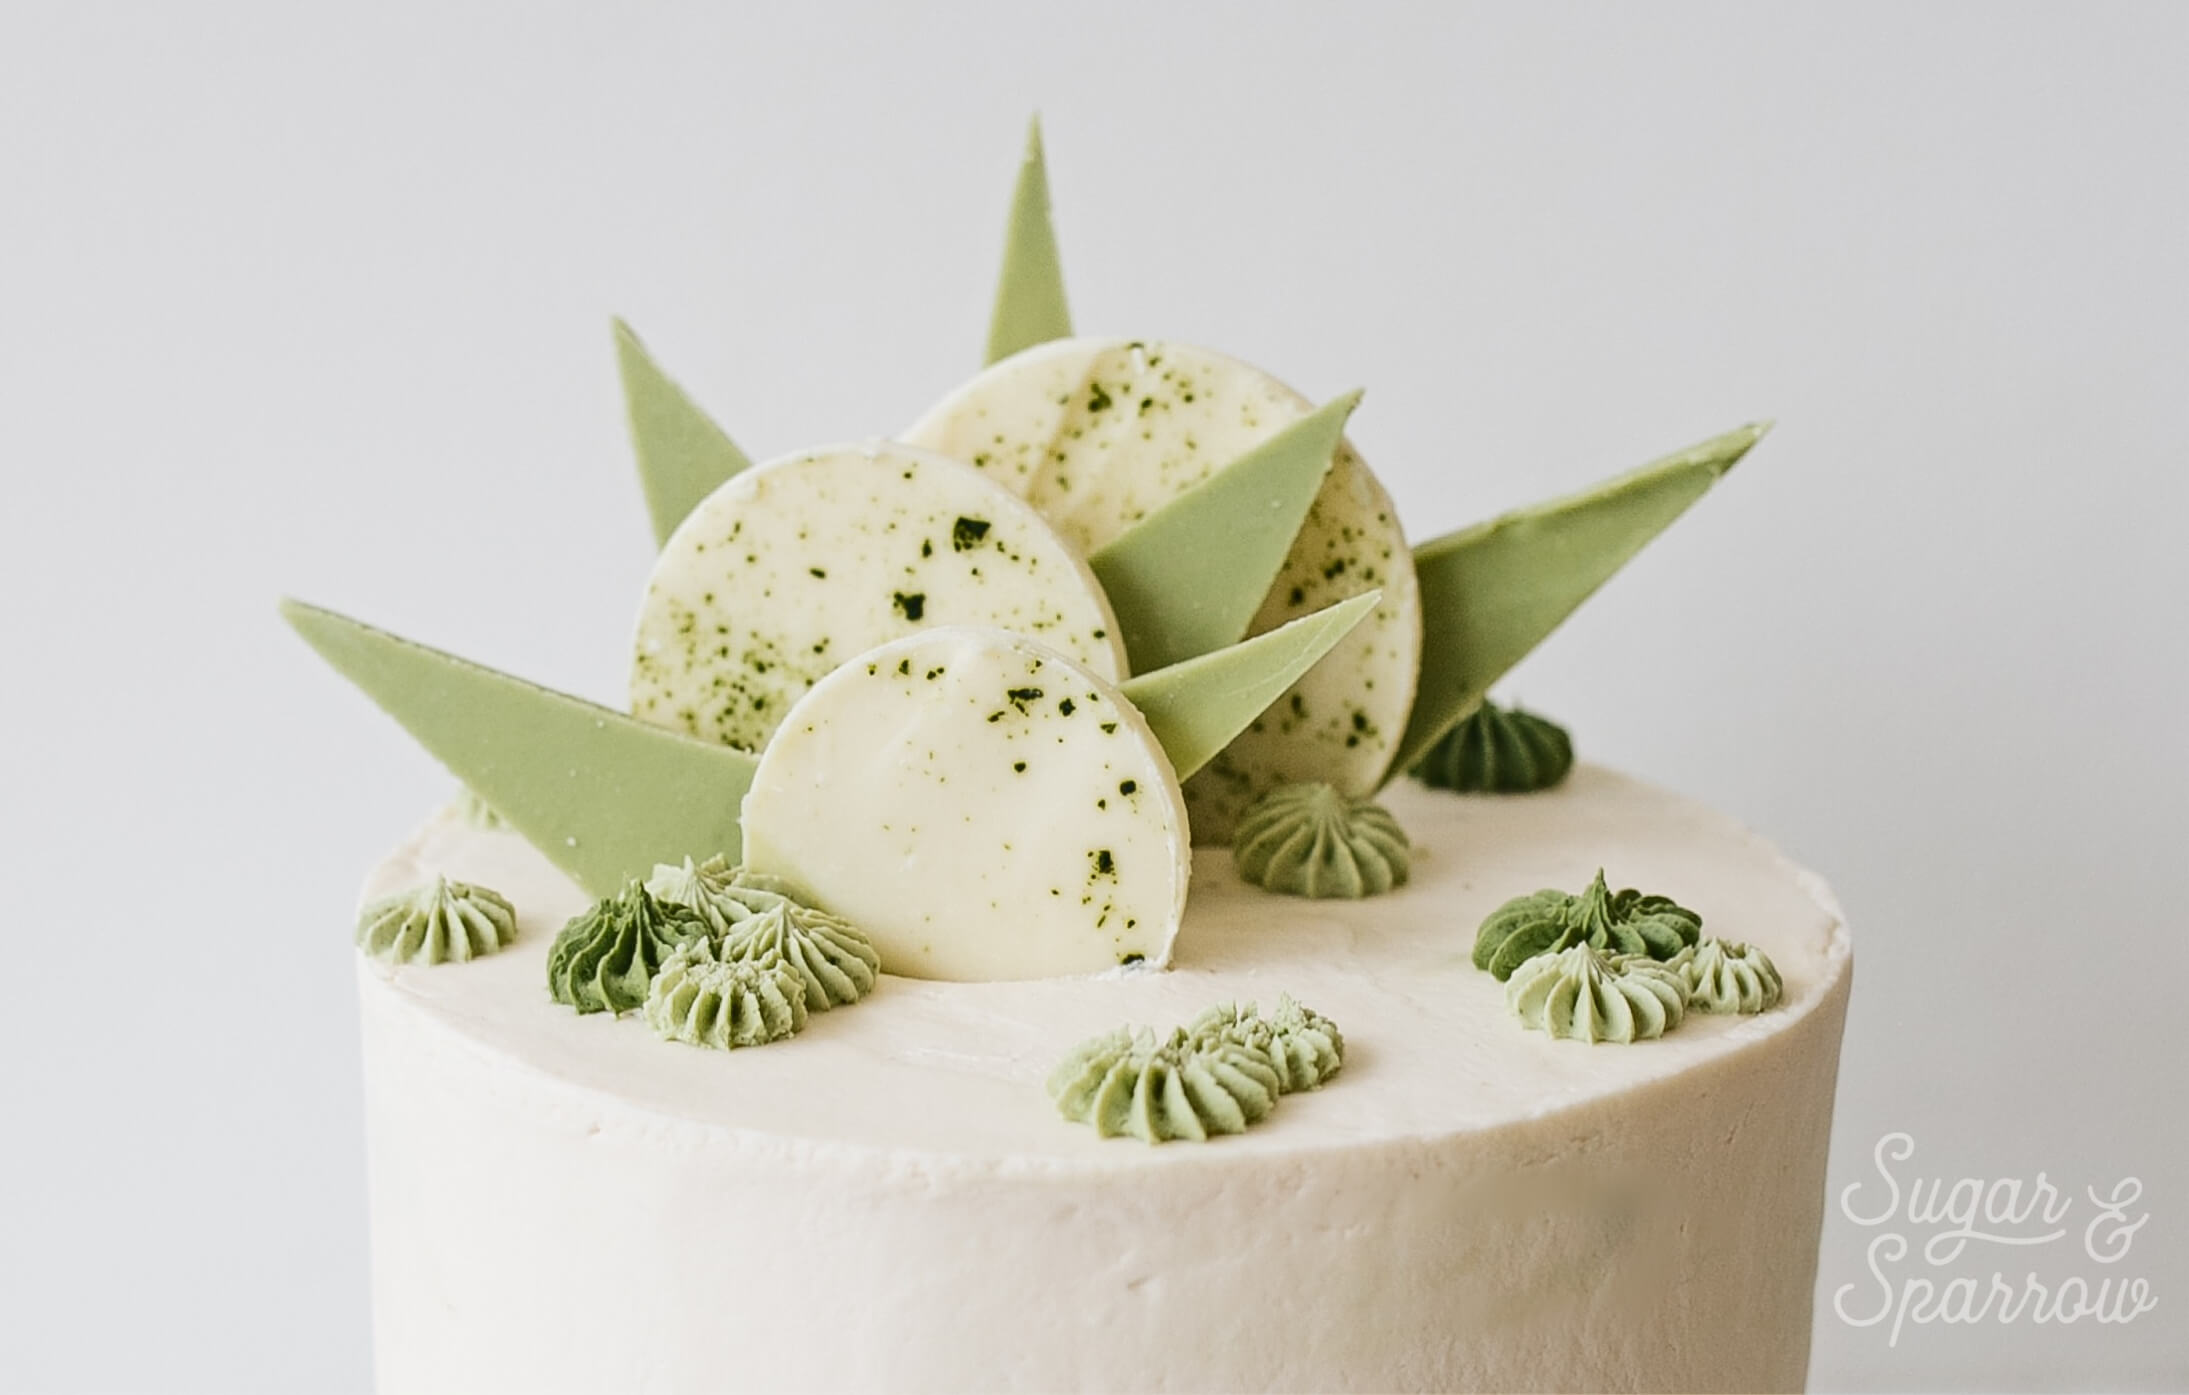
The white chocolate geometric shapes I infused and splattered with Matcha Powder for the Matcha Cake recipe:

white chocolate matcha cake by sugar and sparrow

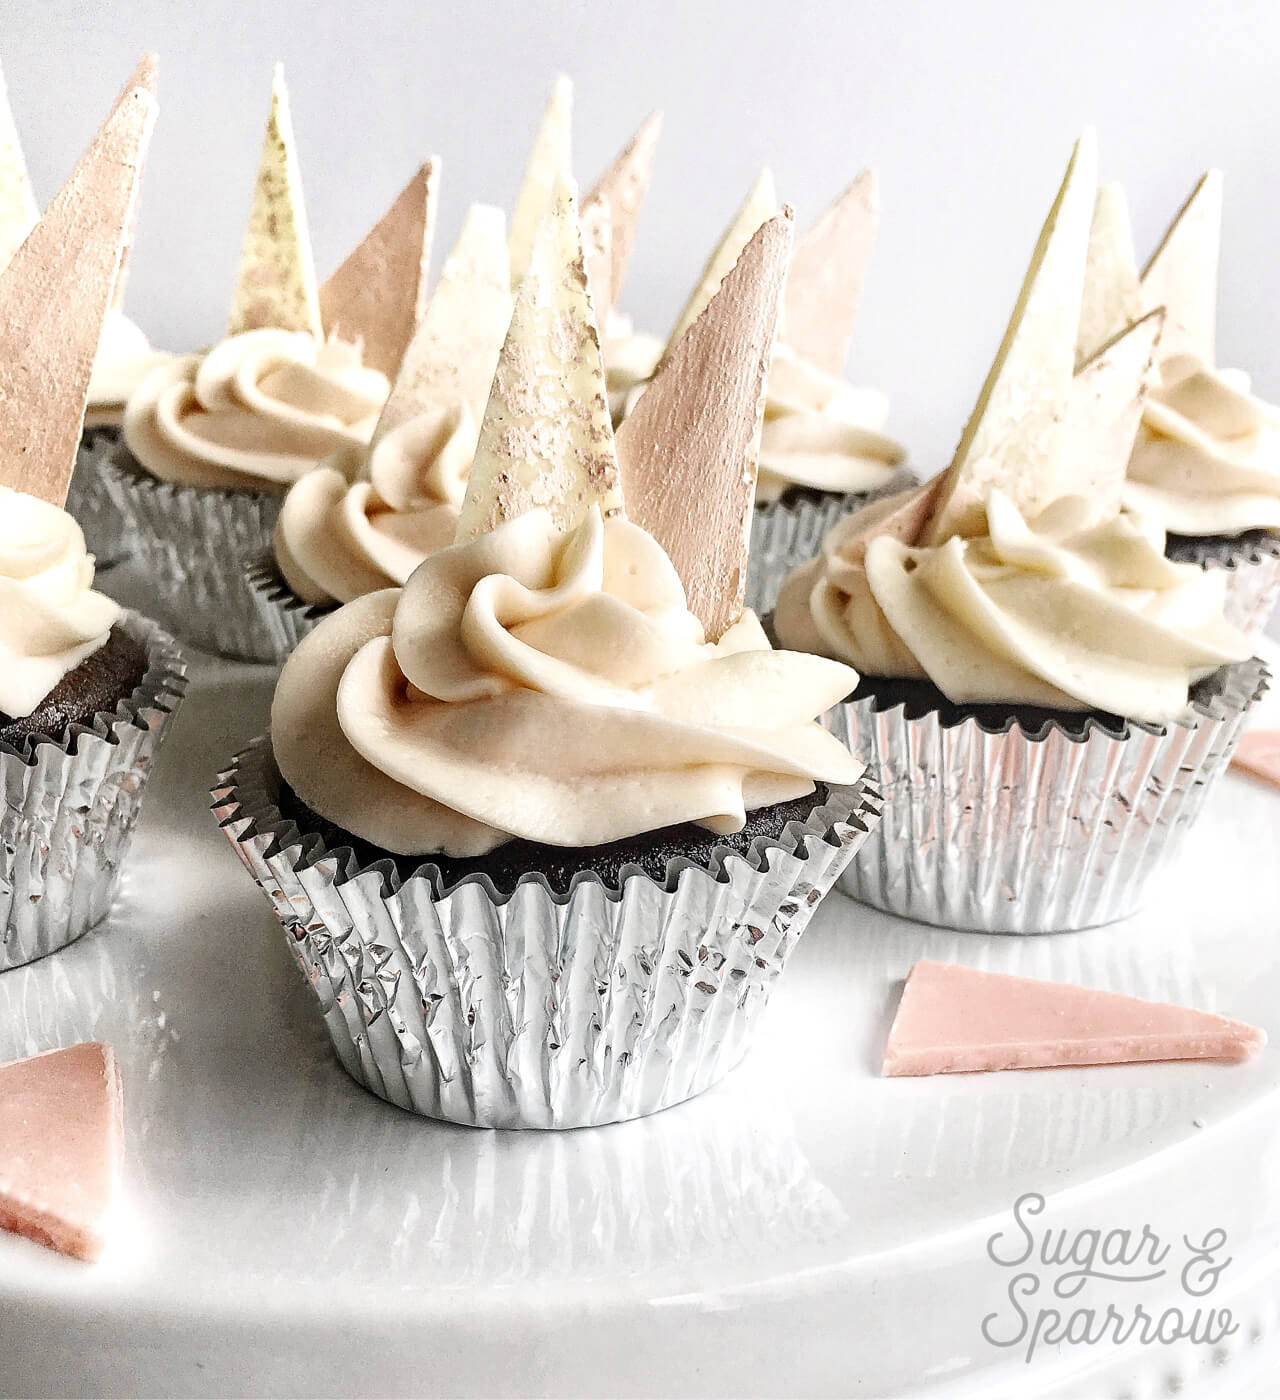
These mini white chocolate triangles that I used to top some cupcakes for a rose gold birthday (painted and splattered with Rose Gold Edible Art Paint):

how to paint chocolate metallic edible art paint

You can make these chocolate shapes ahead of time and store them in an airtight container in the refrigerator (or a cool, dark space) for up to a week. If a white film develops on the surface, fear not! You can always add some sheen back by rubbing a little coconut oil over the shapes.

There’s still so much I want to learn about chocolate, because it seems like a pretty amazing medium for making all sorts of dessert decor. Someday I’d love to master some 3D chocolate designs, like a sphere. When I step into the third dimension of chocolate work, you will definitely be hearing about it! Until then, if you want to see more of what inspires me, follow along on Pinterest!

By: Whitney · In: Featured, Recipes, Tutorials · Tagged: cake, cake decorating, chocolate, chocolate disks, chocolate shapes, chocolate shards, edible art paint, milk chocolate, temper chocolate, white chocolate

you’ll also love

the best vanilla cupcakes recipeThe Perfect Vanilla Cupcake Recipe
pumpkin layer cake recipe by sugar and sparrowPerfect Pumpkin Layer Cake Recipe
oreo cookies and cream cakeOreo Layer Cake Recipe

Join the List

Stay up to date & receive the latest posts in your inbox.

Reader Interactions

Comments

  1. Sarah says

    July 8, 2018 at 2:38 am

    Awesome! After the shapes have been cut out, can the scraps of tempered chocolate be “reused” again for more shapes? Or used in baked goods?
    Also, would you be up for a caramelized white chocolate tutorial?

    Reply
    • Whitney says

      July 8, 2018 at 9:39 pm

      Yes! The scraps can totally be saved in an airtight container or ziplock bag, then re-melted at a later date to create more shapes or used in other baking projects. And I’ve never caramelized white chocolate before but I’ll take a look at what it takes. Sounds delicious!!

      Reply

Leave a Reply Cancel reply

Your email address will not be published. Required fields are marked *

Recipe Rating


Next Post >

Piped Stripe Buttercream Cake Tutorial

Primary Sidebar

Welcome to Sugar & Sparrow

Welcome to Sugar & Sparrow

Helping you whip up pretty desserts with confidence and creativity. And hopefully sharing a few laughs with you along the way!

Learn More

Connect

let’s bake!

Get my very best recipes, baking tips, and decorating tutorials sent to your inbox

Featured Posts

road trip from portland to san francisco

Portland To San Francisco Road Trip

conversation heart cakes by sugar and sparrow

Mini Conversation Heart Cakes Tutorial

maternity photoshoot portland rose gardens

A Magical Maternity Photoshoot in the Rose Gardens

Search

Archives

Follow Along

@sugarandsparrowco

ORANGE POPPYSEED CAKE 🍊this cake is unbelievabl ORANGE POPPYSEED CAKE 🍊this cake is unbelievably delicious with whipped mascarpone frosting!! The cake layers are soft and moist, packed with fresh citrus flavor, and has the satisfying crunch of poppy seeds in every bite. The mascarpone frosting keeps it light and refreshing and I love that it comes together in just about 5 minutes with minimal effort. A fancy cake that’s secretly simple!

Grab the recipe link in my bio or find it at https://sugarandsparrow.com/orange-poppyseed-cake-with-mascarpone-frosting/

#poppyseedcake #layercake #mascarpone #whippedcreamfrosting #cakedecorating
VANILLA SHEET CAKE (recipe below) 🥳 this cake i VANILLA SHEET CAKE (recipe below) 🥳 this cake is packed with vanilla flavor, SO soft and fluffy, fun to decorate, and ideal for feeding a crowd. It makes me so nostalgic for my childhood birthday cakes!! 
 
Full recipe (w/ frosting!) at https://sugarandsparrow.com/vanilla-sheet-cake-recipe/
 
INGREDIENTS: 
2 1/2 Cups (265g) sifted cake flour
2 tsp baking powder 
1/2 tsp baking soda 
1 tsp salt 
3/4 Cup (170g) unsalted butter, room temp 
1 3/4 Cup (340g) granulated sugar 
3 large eggs, room temp 
1/2 Cup (120g) sour cream, room temp
1 Tbsp pure vanilla extract 
1 Cup (240ml) whole milk, room temp
 
INSTRUCTIONS: 
1. Preheat the oven to 325°F. Grease and line a 9×13 baking dish. 
2. Add the sifted cake flour, baking powder, baking soda, and salt into a medium bowl and whisk to combine. Set aside. 
3. In the bowl of your stand mixer fitted with the paddle attachment (or with a hand mixer and large bowl), beat the butter on high speed for two minutes until creamy. Add the sugar and continue to beat on high speed until light and fluffy, about 2 minutes. Scrape down the bowl and paddle as needed. Add the eggs one at a time, mixing for about 10-15 seconds after each addition. Add the vanilla and sour cream and mix for one minute on high speed. 
4. Turn the mixer off and add the dry ingredients all at once. Mix on low speed until just combined, then add the milk in a steady stream and mix until just incorporated. 
5. Pour the batter into the prepared baking dish and bake for 30-35 minutes, or until the cake springs back to the touch and a toothpick inserted into the middle comes out clean. Let the cake cool in the baking dish until room temperature, then frost with vanilla buttercream. 
 
#vanillacake #sheetcake #birthdaycake #vanilla #cakedecorating
LEMON CREAM CHEESE BUTTERCREAM 🍋 if you love th LEMON CREAM CHEESE BUTTERCREAM 🍋 if you love the tang of cream cheese frosting, you’re going to be obsessed with this lemon variation!! It’s light and refreshing, tangy and complex, and perfect consistency for cake decorating. I particularly love it on my lemon blueberry cake and lemon cupcakes 💛 

INGREDIENTS:
1/2 Cup (113g) unsalted butter, room temp
8 Oz (226g) full-fat brick-style cream cheese, room temp
4 Cups (480g) powdered sugar
1 1/2 tsp lemon juice
Pinch of salt, or to taste

INSTRUCTIONS:
1. In the bowl of a stand mixer fitted with the paddle attachment, beat the butter and cream cheese together on medium-high speed until light and creamy (no lumps), about 5 minutes, scraping down the bowl and paddle as needed.
2. Add the powdered sugar a few cups at a time and mix on low speed until combined, scraping down the bowl and paddle between additions. Add the lemon juice and salt and continue mixing on low speed until fully combined and smooth.
⁣
Full recipe + cake pairing suggestions linked in my bio and at https://sugarandsparrow.com/lemon-cream-cheese-buttercream/
⁣
#lemoncake #creamcheesefrosting #cakedecorating #buttercream #lemon
LEMON BLUEBERRY CAKE 🍋🫐 so soft and fluffy, LEMON BLUEBERRY CAKE 🍋🫐 so soft and fluffy, packed with zesty lemon flavor, blueberries in every bite, and absolutely scrumptious with lemon cream cheese buttercream. It’s Spring in cake form and I saw someone pair these cake layers with actual cheesecake filling last week and now I NEED TO TRY IT 💛 
⁣
Full recipe linked in my bio or at https://sugarandsparrow.com/lemon-blueberry-layer-cake/ 
⁣
#lemonblueberrycake #lemoncake #lemonblueberry #creamcheesefrosting #cakedecorating
Finally cracked the code on this marbled strawberr Finally cracked the code on this marbled strawberry no-bake cheesecake!! 🍓it’s a classic tangy no-bake cheesecake marbled with strawberry reduction on top of a buttery graham cracker crust. The key is mixing some of the cheesecake filling with the jammy strawberry reduction before swirling the two flavors together, then refrigerate overnight and the filling is velvety and mousse-like with the perfect pops of strawberry flavor.

Recipe is linked in my bio + at https://sugarandsparrow.com/no-bake-marbled-strawberry-cheesecake/

#nobakecheesecake #strawberrycheesecake #strawberry #cakedecorating #nobakedessert

Footer

On the Blog

  • Cake Basics
  • Recipes
  • Tutorials

Info

  • About
  • Privacy Policy & Disclosure

stay in the know

Copyright © 2026 · Theme by Sugar & Sparrow