When I first started baking cupcakes, frosting them was as simple as using a butter knife to heap the buttercream on top. Sure, you can do some cool stuff with a butter knife (can you really?), but the right piping tips and techniques make all the difference when it comes to decorating cupcakes that look uniform, professional, and sometimes too pretty to eat. My very first piping tip was the ultra-versatile Wilton 1M, and it’s still one of my go-to’s for creating buttercream designs on cupcakes. Today I’m going to talk about four of my favorite piping tips for decorating cupcakes, the 1M tip included, and 10 easy (and eye-catching!) looks you can create with them.
Here’s a little video I whipped up to show you all of the different looks you can create in minutes. Take a look for inspiration, then I’ll show you the step-by-step.
Disclaimer: this post does contain some affiliate links, meaning I may receive a small commission if you click them and purchase items I’ve recommended. Clicking and purchasing from these links won’t cost you any extra money, but they do help to keep Sugar & Sparrow up and running. Thank you for your support!
You Will Need:
- Baked cupcakes
- Medium consistency buttercream in any color
- Piping bags
- Wilton Tips: 1M, 4B, 104, and/or 1A
- Small icing spatula
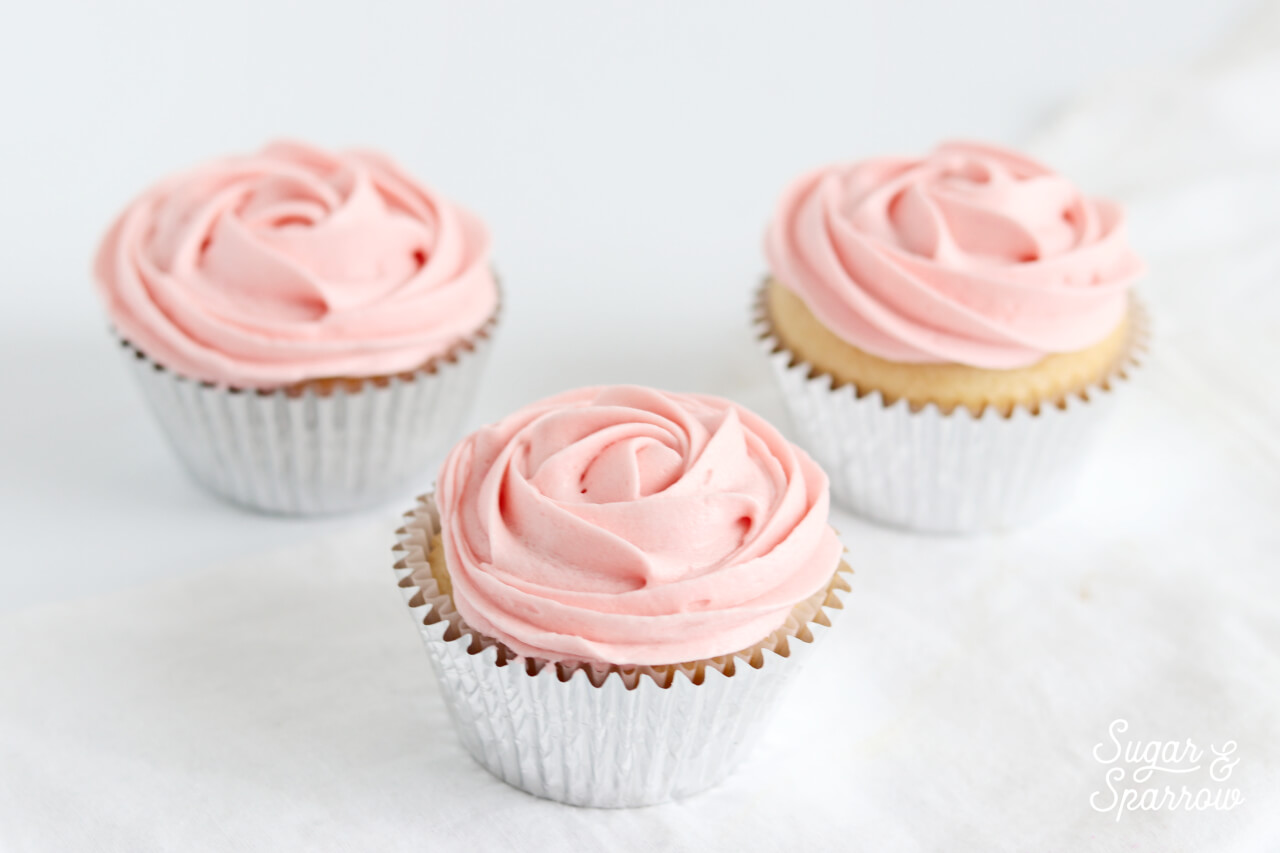
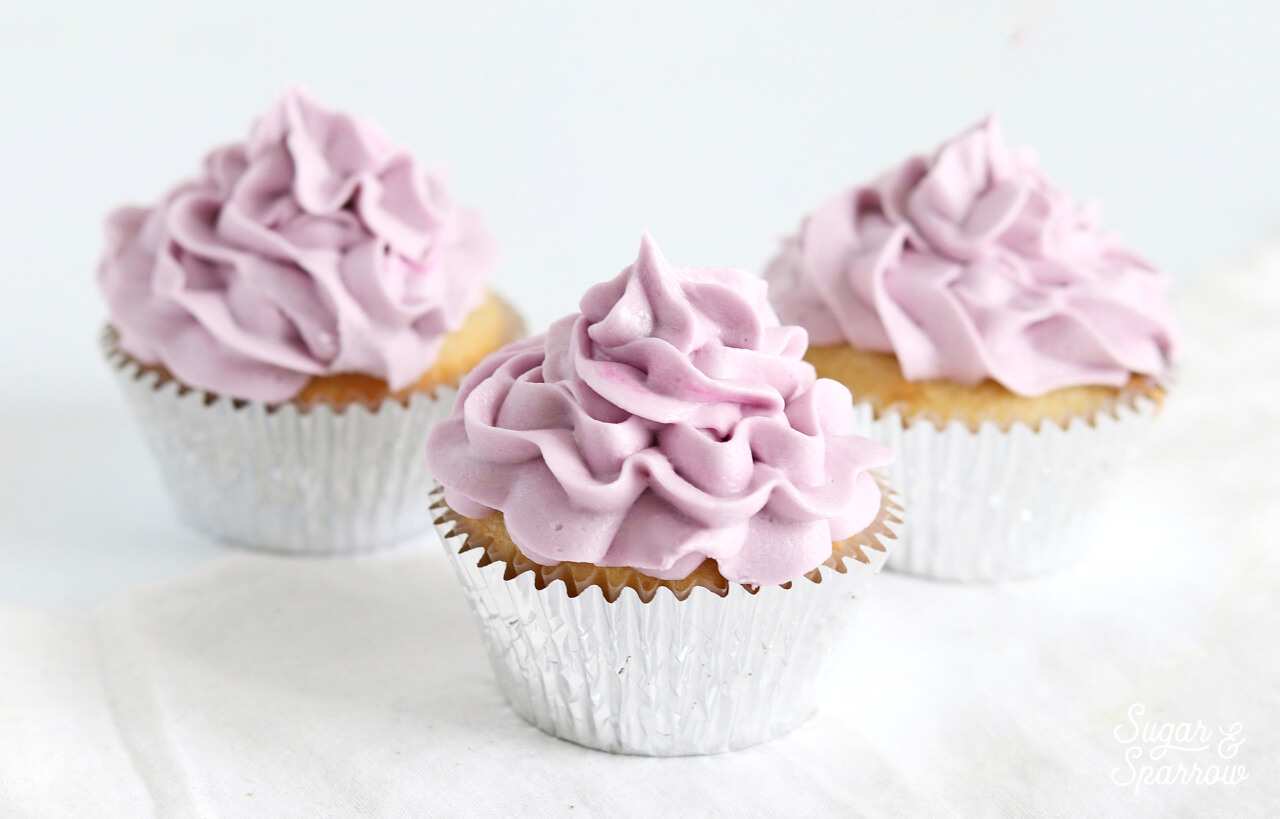
Rosette
Using tip 1M (you could alternatively use 2D to get a similar look), pipe a swirl starting in the center of the cupcake and ending on the outer edge.

This one is so classic and totally ends up looking like a little buttercream garden rose.
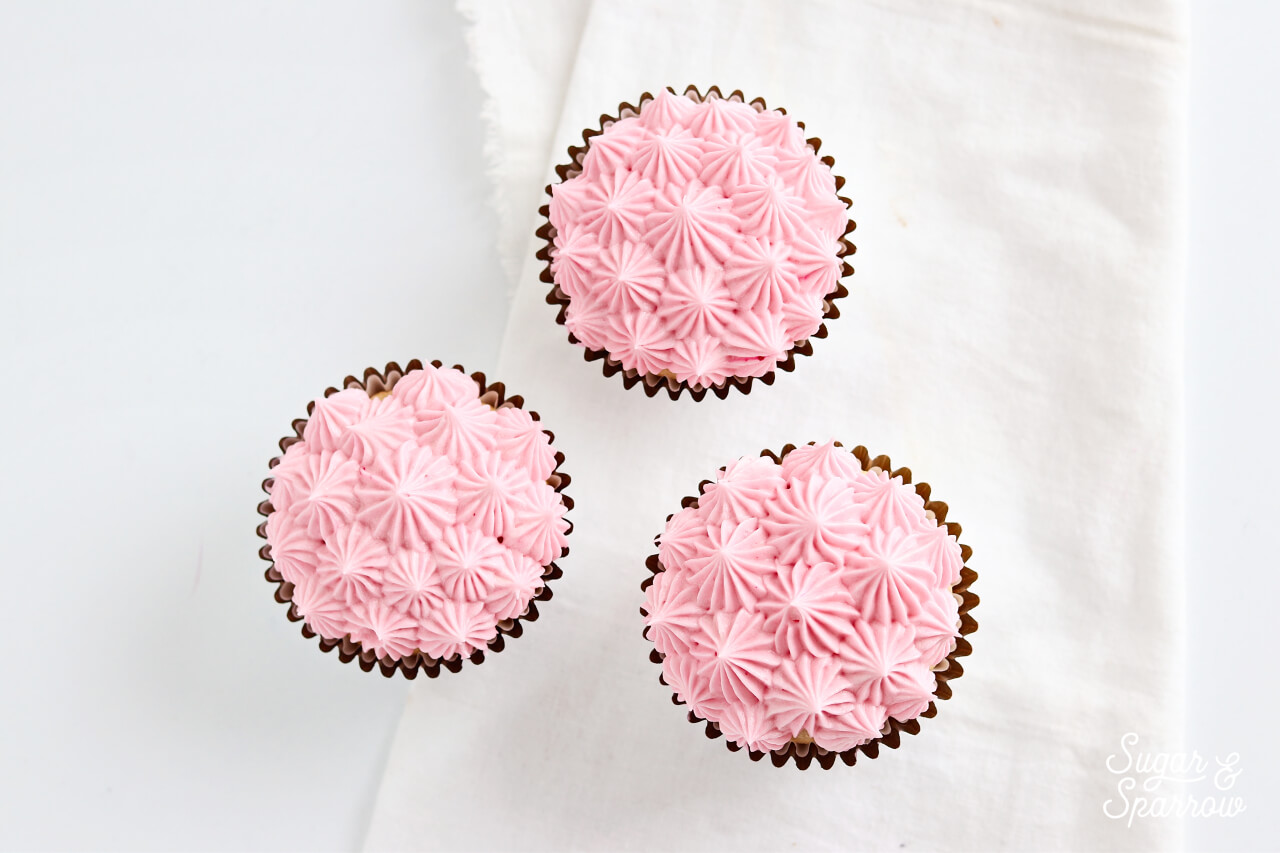
Open Stars
Using tip 4B, pipe open stars over the surface of the cupcake.

This is my all-time favorite design, and I often use a few different colors with this technique. It never fails to impress.
Basic Swirl
Using tip 1M, pipe a swirl starting on the outer edge and building upon each turn until you build a little mountain of a swirl. It should end up looking like a soft serve ice cream cone.

This was the very first technique I learned and it’s still such a timeless look.

Open Star Swirl
Using tip 4B, pipe a swirl starting on the outer edge and ending in the center. It looks best when you build upon each turn to create a swirly little buttercream mountain.

This look can be further enhanced with a few pretty sprinkles on top.

Pom Pom
Holding tip 104 vertically with the skinny end pointed upward, pipe a few squiggles in a swirl in the very center on the cupcake. Continue to add ruffley piping in a circular pattern around the center swirl until you reach the edge.

This is a very similar technique to buttercream carnations, and it ends up looking like a pretty little pom pom that looks great in any color!
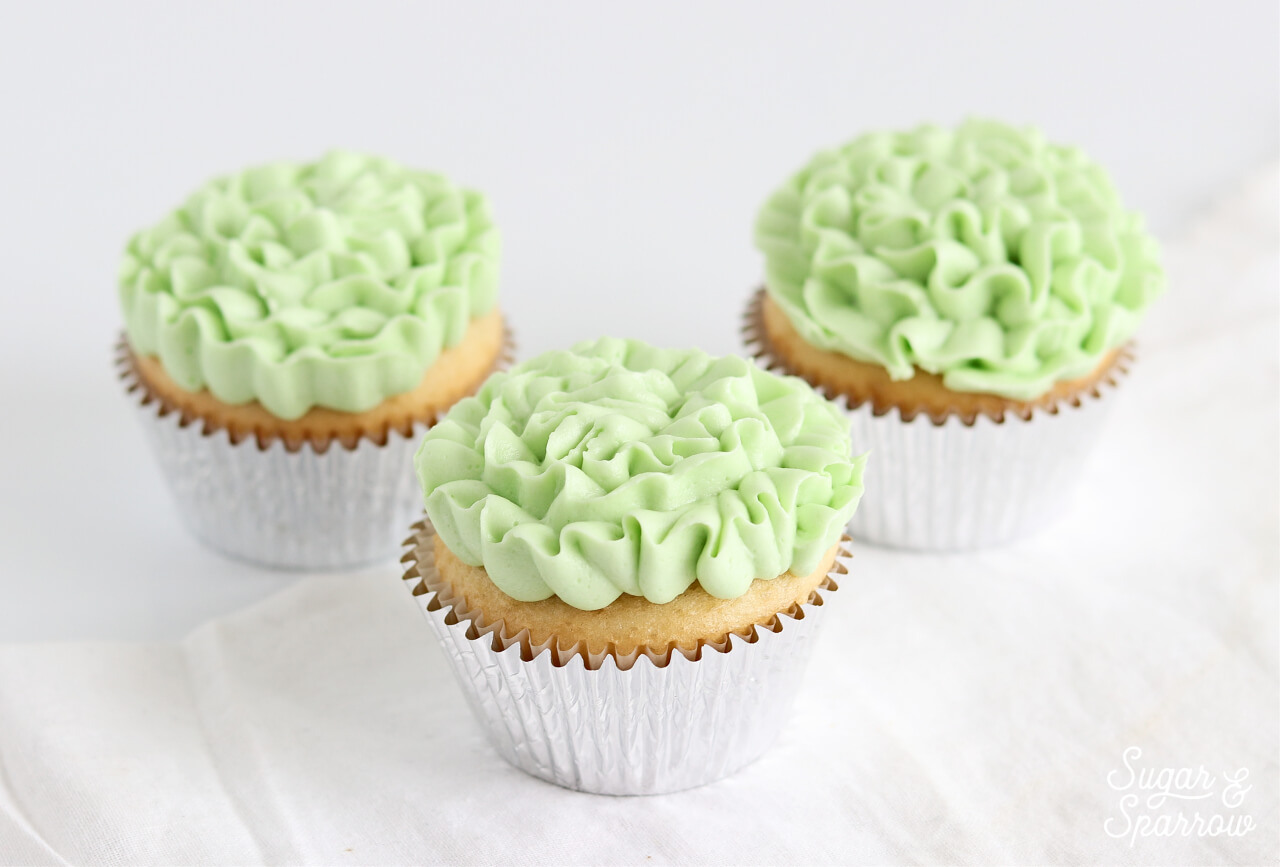
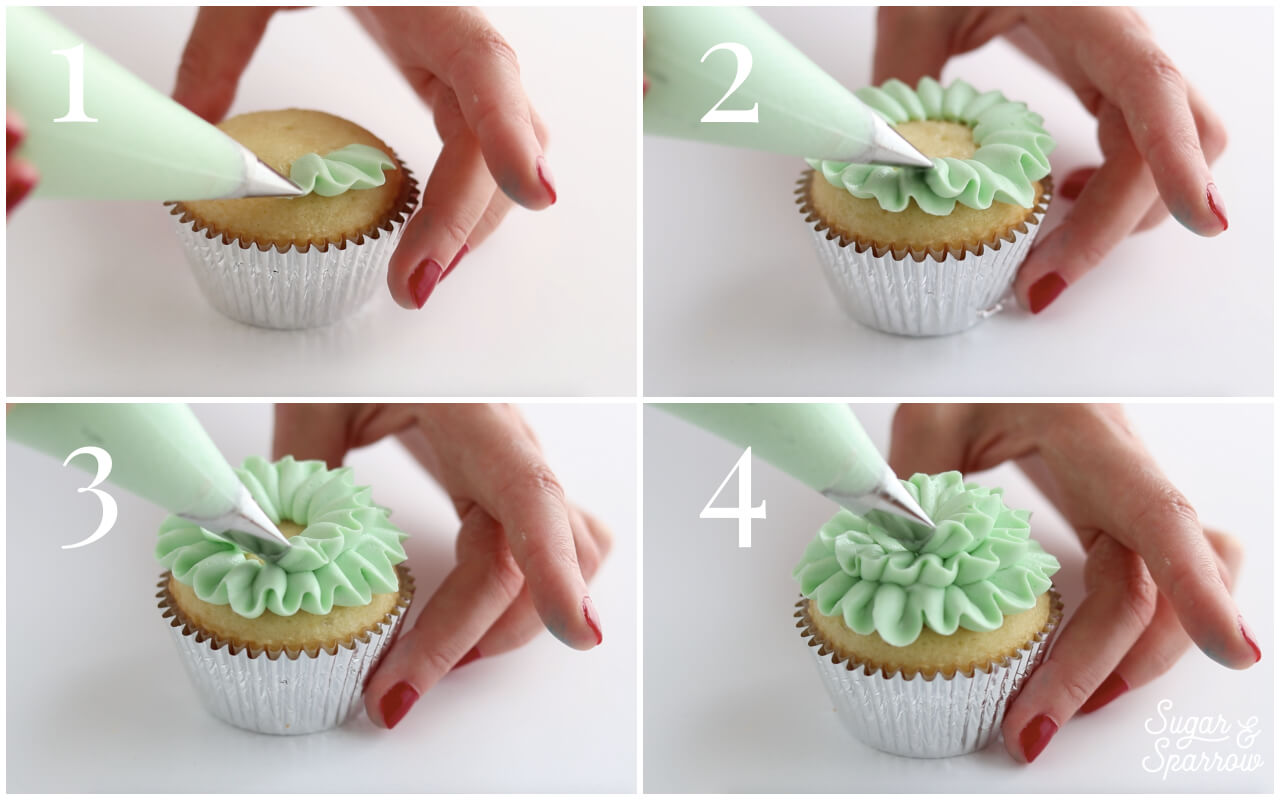
Ruffles
Holding tip 104 flat against the cupcake with the thinner edge pointed outward and the larger edge pointing to the center of the cupcake, pipe a row of ruffles around the outer edge by moving the tip slightly up and down. For the next set of ruffles, hold the tip at a 45 degree angle and pipe the next row so that it stands a little bit taller. For the final and innermost set of ruffles, hold the tip at more of a 75 degree angle so they stand taller than the previous set.
This look is really amazing when you use different colors for each row, especially in an ombrè color scheme.

Spatula Swirl
Using a small icing spatula, place a dollop of buttercream on top of the cupcake and work it around until you’ve got an even bulb of buttercream, then use the spatula to create a swirl in the center as you slowly rotate the cupcake.

This one doesn’t involve a piping tip, but it’s such a classic look that many renowned bakeries still use on the daily.

Rounded Spikes
Using tip 1A, pipe dots all over the surface of the cupcakes. Easy as that!

When I brought all of these cupcakes over to a friend’s house, this was the one all the kids were pining over.

Round Tip Swirl
Using tip 1A, pipe a swirl starting on the outer edge and building until you get to the center.

This one is super simple and can be always be classed up with some pretty sprinkles.

Ruffled Swirl
Using tip 1M, pipe a swirl starting on the outer edge and working your way to the center, only move your hand back and forth to create a ruffled look as you pipe and build upon your swirl.

It’s amazing how a simple move of your hand as you pipe can create such different results than a basic swirl.
The right piping tips and techniques make all the difference when it comes to creating flawless cupcakes. These are definitely the easiest looks to create, but they’re still some of my go-to’s when it comes to cupcake decorating.

Which one is your favorite look? Let me know in the comments below!


Thank you so much for sharing your knowledge! I ordered your book today and I can’t wait for it to get here! I notice that no matter which piping tip I use for my piping, it always leave a collapsed look where I end it and lift my piping tip from the buttercream. Especially the 1m. The overall look is nice, but I have to hide the flaw of where I ended by placing some sprinkles in that area. Any advice? Thank you!
Hi Brandy! Yay – I’m so excited for you to get my book! As far as the piping tip situation, it sounds like the buttercream is perhaps a little too thin in consistency if it’s collapsing in that area. What kind of buttercream are you using? Here’s a blog post I wrote all about buttercream consistency that can help you troubleshoot: https://sugarandsparrow.com/buttercream-consistency/
Thanks so much for the wonderful ideas! I was able to make and decorate some beautiful cupcakes (for the first time) for my great grandma’s birthday.
That’s amazing, Liberty! I’m so happy you were able to make your great grandma’s cupcakes. That’s so sweet!
I like the classic garden rose one. All of them are beautiful, though. You are very talented!