• Cake
  • Frosting
  • YouTube
  • My Favorite Tools
  • Nav Social Icons

  • Skip to primary navigation
  • Skip to main content
  • Skip to primary sidebar
  • Skip to footer
  • Recipes
    • Cake
    • Cupcakes
    • Frosting
    • Ice Cream
    • Vegan
  • Cake Basics
  • Tutorials
  • Blog
  • About
  • Mobile Menu Widgets

    Connect

    Search

Sugar & Sparrow logo in script font

Sugar & Sparrow

Lifestyle and Cake from Portland Oregon

  • Cake Basics
  • Recipes
    • Cake
    • Cupcakes
    • Cookies & Bars
    • Filling
    • Frosting
    • Ice Cream
    • No-Bake
    • Small Batch
    • Vegan
  • Tutorials
  • Book
  • Blog
  • About

Easy Homemade Dulce de Leche Recipe

May 20, 2023 · In: Featured, Recipes

Jump to Recipe

A dear friend recently took a trip to Argentina and brought me back the cutest little jar of dulce de leche as a gift. I had never tasted dulce de leche before, so I was eager to sample it. Holy moly. It is just as delicious as I imagined it to be! Similar to caramel, but a lot smoother and creamier. Just the right amount of sweet without being over the top. It was instantly inspiring! 

homemade dulce de leche recipe

Shortly after my first dulce de leche tasting, I wanted to see how I could replicate the flavor and quickly learned that there’s a super easy way to make it using just one ingredient: sweetened condensed milk. Must be too good to be true, right? In this case, no! In my humble opinion, this dulce de leche is so delicious it honestly stands a chance against the real deal. I did a side by side tasting just to make sure and the homemade stuff is a hit!

dulce de leche recipe using sweetened condensed milk
easy dulce de leche recipe homemade

What is Dulce de Leche?

The origin story of dulce de leche is a bit hazy, but many claim that it was first made by accident in Argentina when a maid forgot about a pot of milk and sugar boiling on the stove. When she returned to the kitchen, the concoction had turned into the thick brown sweetness we call dulce de leche today. Its name translates to “sweet milk” in Spanish. 

dulce de leche recipe from scratch

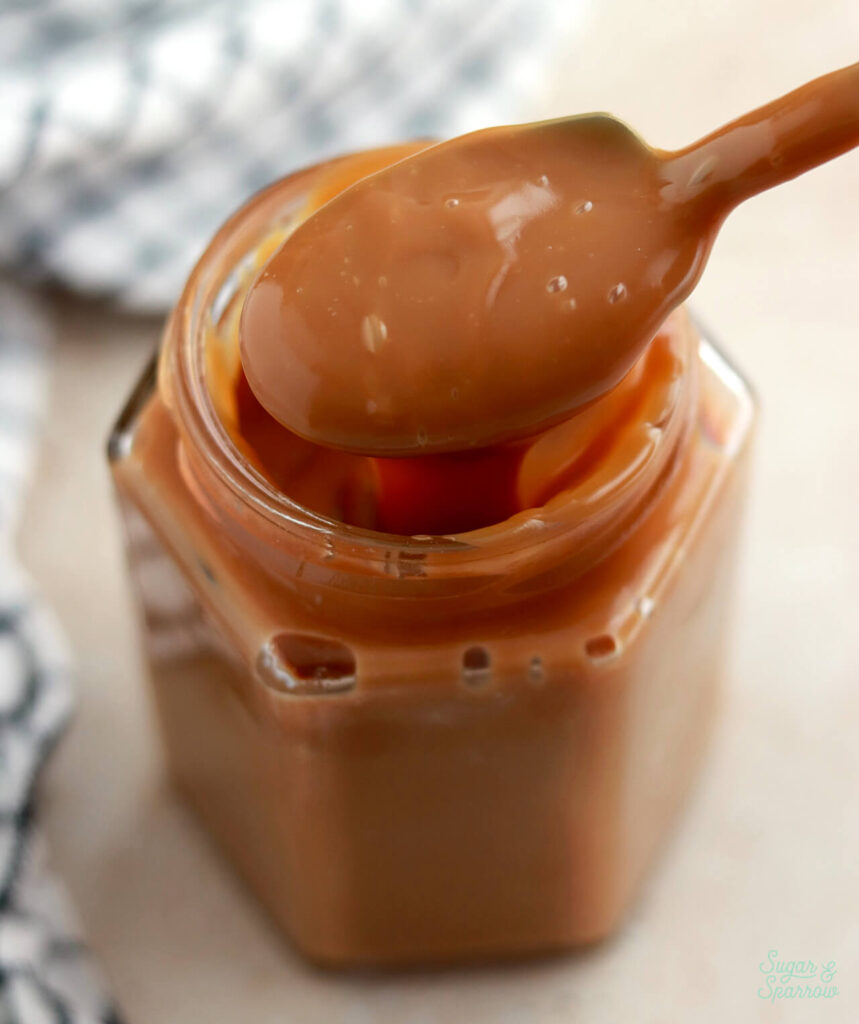
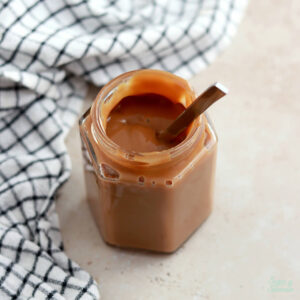
I always thought that dulce de leche was some sort of caramel just because it looks so much like it. It actually tastes a little nuttier and a lot creamier, with subtle notes of toffee and butterscotch. While caramel uses a process that involves the caramelization of sugar (hence the name), dulce de leche uses a process that slowly cooks milk and sugar together until it thickens and turns brown in color. If you want to get super sciency, the chemical reaction that happens when heating the milk and sugar together to make dulce de leche is called the Maillard reaction – a complex series of chemical reactions that happen when proteins (milk) and sugars (in this case both the milk and sugar) are combined while heated. The result is that nice caramel brown color you see in dulce de leche, as well as the formation of complex flavors and aromas. 

Tips for This Homemade Dulce de Leche Recipe

There are a few different methods of making dulce de leche at home but the one described in this recipe is my go-to. It’s fairly hands-off, only requires one ingredient, and works like a charm every time! You’ll basically be placing a can (or as many cans as you’d like) in a large pot, submerging under an inch of water, and simmering for 2 ½ – 3 hours. Here are tips for total success:

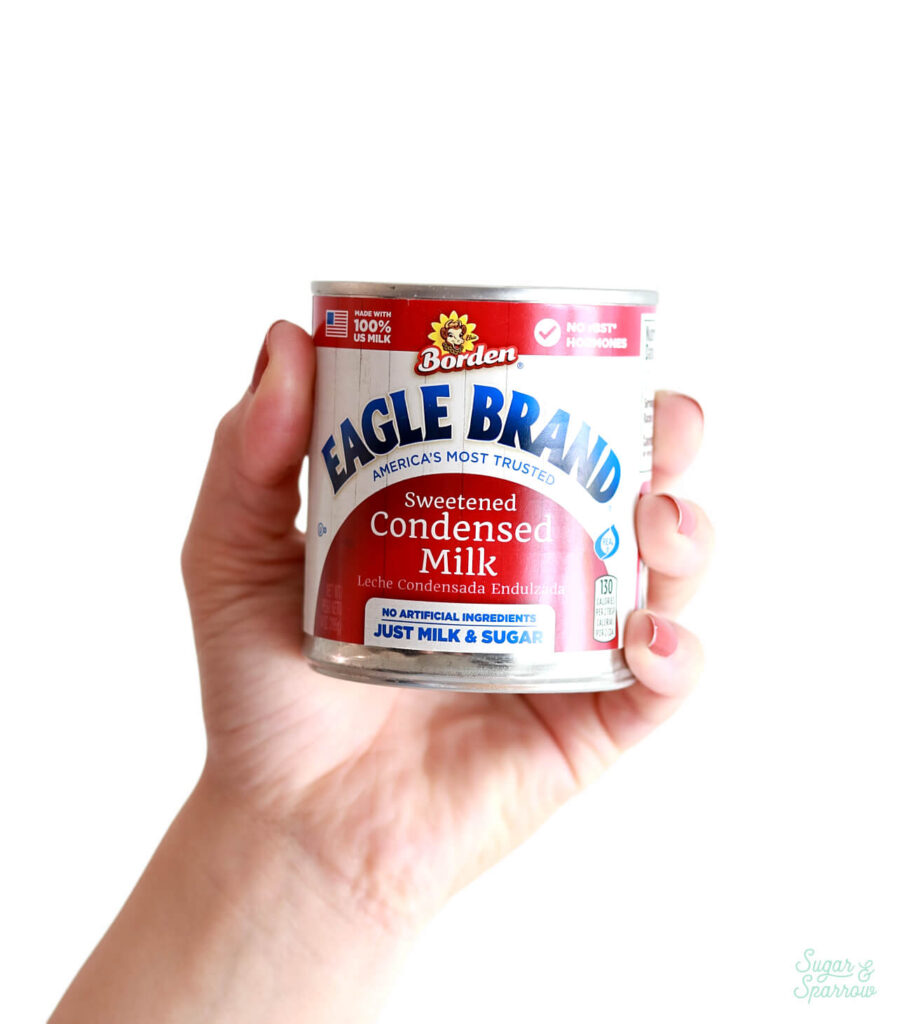
  • Use cans of sweetened condensed milk that don’t have the pull tab top. Those are prone to bursting under the pressure of the water. If those are all you can find, you can transfer the sweetened condensed milk into a mason jar with an airtight lid and proceed from there.  
  • Fully remove the label from the can and use a little bit of Goo Gone or white vinegar to get rid of the sticker residue. 
  • Check on the water level a few times during the simmering process. You’ll want to maintain about an inch of water above the top of the cans, so you’ll need to add a little more water every now and then. 
  • Simmering for 2 ½ hours will yield a beautiful dulce de leche, but if you want even more amplified flavor, simmer closer to the 3 hour mark. 
dulce de leche recipe easy

How to Use Homemade Dulce de Leche 

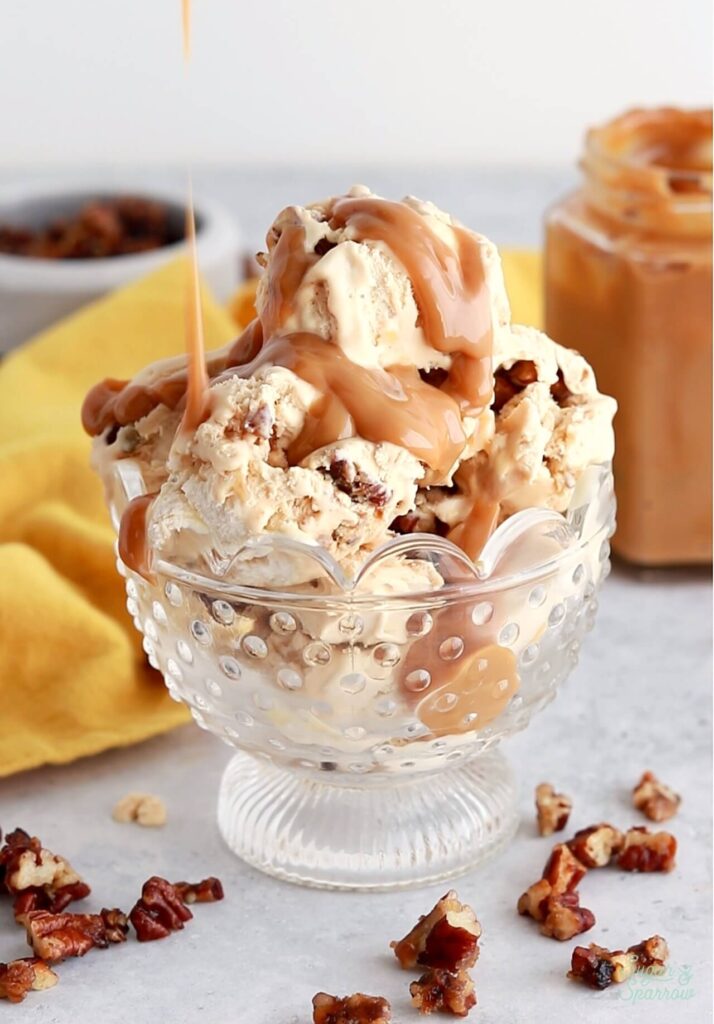
There are so many possibilities for dulce de leche! You can use it as a cake or pie filling, drizzle it on ice cream and baked goods, and even stir it into your coffee. I recently made this dulce de leche ice cream recipe that I’m obsessed with. I’m also hoping to incorporate dulce de leche into a cake recipe at some point. Stay tuned for that and feel free to get creative in the meantime! 

no churn dulce de leche ice cream recipe

How to Store Homemade Dulce de Leche 

You can store unopened cans of homemade dulce de leche for up to 3 months in your pantry. Once you open the can, you’ll need to store it in an airtight container in the refrigerator for up to 2 weeks.  

easy dulce de leche recipe by sugar and sparrow

Easy Dulce de Leche

Homemade dulce de leche that uses just one ingredient: sweetened condensed milk. It's delightfully easy to make, incredibly delicious, and pairs perfectly with ice cream, baked goods, coffee, and more!
Print Recipe Pin Recipe
Prep Time:5 minutes mins
Cook Time:3 hours hrs
Servings: 14 Oz (1 3/4 Cups)

Ingredients

  • 1 14oz can sweetened condensed milk

Instructions

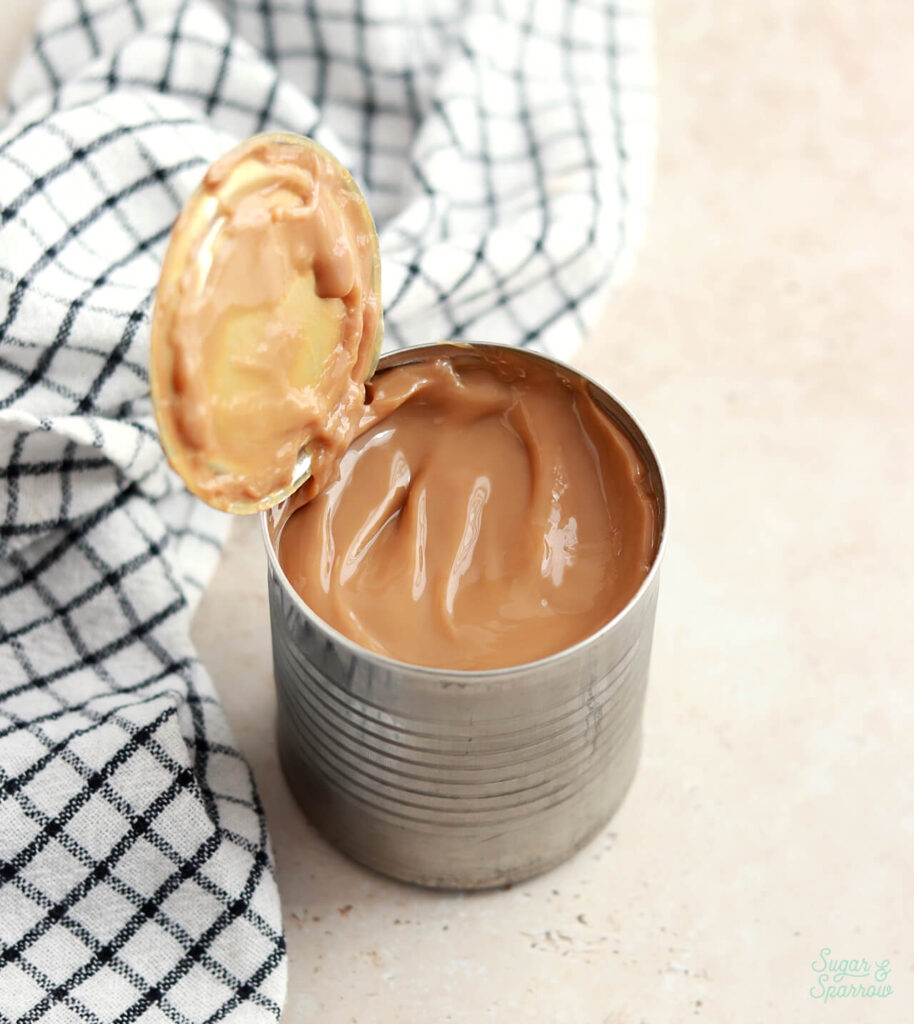
  • Remove the label and glue residue from the can of sweetened condensed milk, then place into a large pot. Fill the pot with water until the can is submerged under at least 1 inch of water.
  • Place the pot on the stove and bring to a boil over medium-high heat, then reduce the heat to low and allow to simmer for 2 1/2 to 3 hours, monitoring the water level periodically to endure there is still 1 inch of water above the can.
  • Carefully remove the can from the pot using tongs and hand protection (it will be extremely hot to the touch). Allow the can to cool for 20-30 minutes before opening and enjoying. You may need to give it a few whisks to incorporate any lumps.

Notes

Make Ahead Tips: 
  1. Store unopened cans of dulce de leche at room temperature for up to 3 months
  2. Once opened, store dulce de leche in an airtight container in the refrigerator for up to 2 weeks. 

Did you make this homemade dulce de leche? I want to know how it went and what you used it for! Let me know in the comments below and feel free to tag @sugarandsparrowco on Instagram to show me!

By: Whitney · In: Featured, Recipes · Tagged: dulce de leche, dulce de leche recipe, sweetened condensed milk

you’ll also love

no churn dulce de leche ice cream recipe by sugar and sparrowNo Churn Dulce de Leche Ice Cream
melting candle cupcakes tutorialSpooky Melting Candle Cupcakes
brown butter cream cheese frosting recipe for cakes and cupcakesBrown Butter Cream Cheese Frosting

Join the List

Stay up to date & receive the latest posts in your inbox.

Reader Interactions

Comments

  1. Pippa says

    January 13, 2026 at 8:35 am

    This recipe reminds me of a childhood treat. My mum would simmer a tin of condensed milk for 4 hrs. (Be careful, it explodes if water runs dry) After 4 hrs, leave to cool and refrigerate overnight. Next day. Open both ends of tin with tin opener and push out the cooked milk. Slice thinly and serve with whatever you like, cream, ice cream, fruit etc.

    Reply

Leave a Reply Cancel reply

Your email address will not be published. Required fields are marked *

Recipe Rating


Next Post >

Woven Tapestry Cake Tutorial

Primary Sidebar

Welcome to Sugar & Sparrow

Welcome to Sugar & Sparrow

Helping you whip up pretty desserts with confidence and creativity. And hopefully sharing a few laughs with you along the way!

Learn More

Connect

let’s bake!

Get my very best recipes, baking tips, and decorating tutorials sent to your inbox

Featured Posts

peppermint mocha cake recipe by sugar and sparrow

Peppermint Mocha Cake Recipe

black velvet cupcake recipe by sugar and sparrow

Black Velvet Cupcakes

strawberry crunch ice cream cake recipe

Strawberry Shortcake Ice Cream Cake

Search

Archives

Follow Along

@sugarandsparrowco

LEMON CUPCAKES 🍋 after about a dozen recipe tes LEMON CUPCAKES 🍋 after about a dozen recipe tests, this one is everything I could want in a lemon cupcake! Fluffy-yet-moist, bursting with natural lemon flavor, and absolutely irresistible topped with lemon cream cheese buttercream. 

Full recipe (with frosting) linked in my bio + at https://sugarandsparrow.com/homemade-lemon-cupcakes/

INGREDIENTS:
1 Cup (132g) all-purpose flour
1 tsp baking powder
1/4 tsp salt
1/4 Cup (60ml) whole milk, room temperature
3 Tbsp (45ml) lemon juice from 1 medium lemon
3/4 Cup (150g) granulated sugar
3 Tbsp (42g) unsalted butter, room temperature
2 Tbsp (30ml) vegetable oil
2 large eggs, room temperature
1 tsp pure vanilla extract

INSTRUCTIONS:
1. Preheat the oven to 350ºF (177ºF) and line a standard cupcake pan with 12 paper liners.
2. In a large bowl, whisk together the flour, baking powder, and salt. Set aside. 
3. In the bowl of a stand mixer fitted with the paddle attachment (or with a hand mixer and large bowl), add the lemon zest to the sugar and mix on low speed until fragrant and well combined, about 1 minute. Meanwhile, combine the lemon juice with the milk and set aside. 
4. Add the butter to the lemon-sugar mixture and cream on medium speed until and combined, about 2 minutes. Add the vegetable oil and beat until light and creamy, about 3 minutes. Scrape down the bowl and paddle as needed.
5. Mix in the eggs one at a time on low speed, then add the vanilla and turn the mixer to medium speed for one minute.
6. Turn the mixer off and add the flour mixture all at once. Mix on low speed until just combined, then slowly pour in the lemon-milk mixture. Mix until just combined, about 30 seconds.
7. Divide the batter equally between the liners and bake for 14-18 min. Cool, then top with frosting of your choice (link in bio for lemon cream cheese frosting)�
#lemoncupcakes #creamcheesefrosting #lemon #cupcakes #cupcakedecorating
April in my kitchen 🌸 I published 5 NEW recipes April in my kitchen 🌸 I published 5 NEW recipes on my site, baked my Oreo cupcake recipe for a fundraiser and found it was just as delicious as I remember, and filmed/photographed 3 recipes that will be on my blog in May (Lemon Cupcakes, Lemon Cream Cheese Buttercream, and No-Bake Marbled Strawberry Cheesecake) 🥰 

Comment “APRIL” to get all the available recipes and stay tuned for more! 

#bakersofinstagram #springbaking #cakedecorating #cupcakes #bakinglove
SHEET PAN COOKIE CAKE 🍪 slice it warm for a fud SHEET PAN COOKIE CAKE 🍪 slice it warm for a fudgy chocolate chip cookie OR let it settle into a moist and chewy cookie cake that’s perfect for decorating! My fave vanilla buttercream + sprinkles turn this giant chocolate chip cookie into the perfect birthday cake alternative at the end 🥳
⁣
Full recipe + decorating ideas at https://sugarandsparrow.com/sheet-pan-chocolate-chip-cookie-cake/
⁣
INGREDIENTS⁣
1 Cup (226g) unsalted butter, melted⁣
1 1/3 Cups (267g) packed light or dark brown sugar⁣
1/2 Cup (100g) granulated sugar⁣
3 large eggs⁣
1 Tbsp pure vanilla extract⁣
1 tsp baking soda⁣
1 tsp cornstarch⁣
1/2 tsp salt⁣
3 Cups (398g) all purpose flour⁣
2 Cups (350g) semi-sweet chocolate chips⁣
⁣
INSTRUCTIONS⁣
1. Preheat the oven to 350ºF (177ºC). Grease and line a 13×18 inch sheet pan.⁣
2. In a large bowl, add the brown sugar and granulated sugar. Melt the butter in the microwave and pour it over the top of the sugars. Whisk together until uniform. Add the eggs and vanilla, then continue whisking until uniform. Whisk in the baking soda, cornstarch, and salt.⁣
3. Add the flour and use a silicone spatula to fold it in until smooth cookie dough forms. Reserve 1/2 Cup of the chocolate chips and set them aside, then fold the remaining 1 1/2 Cups of chocolate chips into the cookie dough.⁣
4. Place the chocolate chip cookie dough onto the prepared sheet pan and use an offset spatula to spread it all the way to the edges in an even layer.⁣
5. Bake the cookie cake for 14-16 minutes, until it looks golden brown on the edges and set. 
6. Enjoy warm or let it cool and decorate with vanilla buttercream and sprinkles! ⁣
⁣
#cookiecake #chocolatechipcookies #sheetcake #birthdaycake #cakedecorating
STRAWBERRY CUPCAKES 🍓based on my beloved strawb STRAWBERRY CUPCAKES 🍓based on my beloved strawberry layer cake recipe, this cupcake version is just as moist yet fluffy and bursting with natural strawberry flavor! Between the mix of fresh strawberries in the cupcakes + freeze-dried strawberries in the frosting, the flavor is out of this world 🚀

Full recipe link in my bio (with strawberry buttercream) + at https://sugarandsparrow.com/strawberry-cupcakes/

STRAWBERRY CUPCAKES
Yield: 14 cupcakes

INGREDIENTS:
5 oz (143g) fresh or frozen strawberries
1/3 Cup (80ml) whole milk, room temp
1 1/2 Cups (158g) sifted cake flour
1 tsp baking powder
1/4 tsp baking soda
1/2 tsp salt
6 Tbsp (85g) unsalted butter, room temp
1 Cup (200g) granulated sugar
2 large eggs, room temp
3 Tbsp (45g) sour cream, room temp
1 tsp vanilla extract
1 drop pink food coloring (optional)

INSTRUCTIONS: 
1. Puree the strawberries using a food processor (you’ll have about 1/2 cup of puree), then place into a saucepan over medium-low heat. Bring to a simmer, then cook for 10-15 min, stirring occasionally, until you have 1/4 cup. Refrigerate until room temp.
2. Preheat oven to 350ºF (177ºC) and line a standard cupcake pan with liners.
3. Whisk together the sifted cake flour, baking powder, baking soda, and salt and set aside.
4. In a stand mixer w/ paddle attachment (or hand mixer + large bowl), whip the butter on high for 2 min. Add sugar and beat for 2 min, until light and fluffy. Turn the mixer to low and add the eggs one at a time, then add the vanilla and sour cream, turn the mixer to high and beat for 1 min. Meanwhile, whisk together the strawberry puree, whole milk, and food coloring (if using).
5. Turn the mixer off and add all of the dry ingredients at once. Mix on low until just combined, then add the strawberry milk mixture until just combined, about 30 seconds.
6. Fill the cupcake liners 2/3 full and bake for 14-18 minutes. Cool completely before topping with strawberry buttercream (full recipe linked above). 

#strawberrycupcakes #strawberrycake #pinkcupcakes #strawberry #cupcakes
COFFEE BUTTERCREAM (recipe below)☕️ this frost COFFEE BUTTERCREAM (recipe below)☕️ this frosting has AMAZING coffee flavor, is so easy to decorate cakes with, and pairs beautifully with so many flavors (chocolate, vanilla, or any cake flavor you’d want to turn into a latte). 

All my cake pairing suggestions are linked in my bio or at https://sugarandsparrow.com/coffee-buttercream-recipe/ 

COFFEE BUTTERCREAM⁣
Yield: 2.5 Cups⁣

INGREDIENTS⁣
1 1/2 tsp instant coffee or espresso powder⁣
1 1/2 Tbsp whole milk, room temperature⁣
1 Cup (226g) unsalted butter, room temperature⁣
3 1/2 Cups (420g) powdered sugar⁣
2 tsp pure vanilla extract⁣
Pinch of salt⁣

INSTRUCTIONS⁣
1. Combine the instant espresso/coffee with the whole milk and set aside. In the bowl of a stand mixer, beat the butter on high until creamy and smooth (about 5 minutes), scraping down the bowl and paddle a few times in between.⁣
2. Turn the mixer to low and add the powdered sugar a few cups at a time, scraping down the bowl and paddle between intervals. Add the vanilla, the coffee/espresso milk mixture, and salt. Mix on low until fully incorporated, about one minute.⁣

#coffeebuttercream #buttercream #frosting #coffeecake

Footer

On the Blog

  • Cake Basics
  • Recipes
  • Tutorials

Info

  • About
  • Privacy Policy & Disclosure

stay in the know

Copyright © 2026 · Theme by Sugar & Sparrow