• Cake
  • Frosting
  • YouTube
  • My Favorite Tools
  • Nav Social Icons

  • Skip to primary navigation
  • Skip to main content
  • Skip to primary sidebar
  • Skip to footer
  • Recipes
    • Cake
    • Cupcakes
    • Frosting
    • Ice Cream
    • Vegan
  • Cake Basics
  • Tutorials
  • Blog
  • About
  • Mobile Menu Widgets

    Connect

    Search

Sugar & Sparrow logo in script font

Sugar & Sparrow

Lifestyle and Cake from Portland Oregon

  • Cake Basics
  • Recipes
    • Cake
    • Cupcakes
    • Cookies & Bars
    • Filling
    • Frosting
    • Ice Cream
    • No-Bake
    • Small Batch
    • Vegan
  • Tutorials
  • Book
  • Blog
  • About

Gingerbread Layer Cake Recipe

December 16, 2018 · In: Cake, Featured, Holiday, Recipes, Seasonal

Jump to Recipe

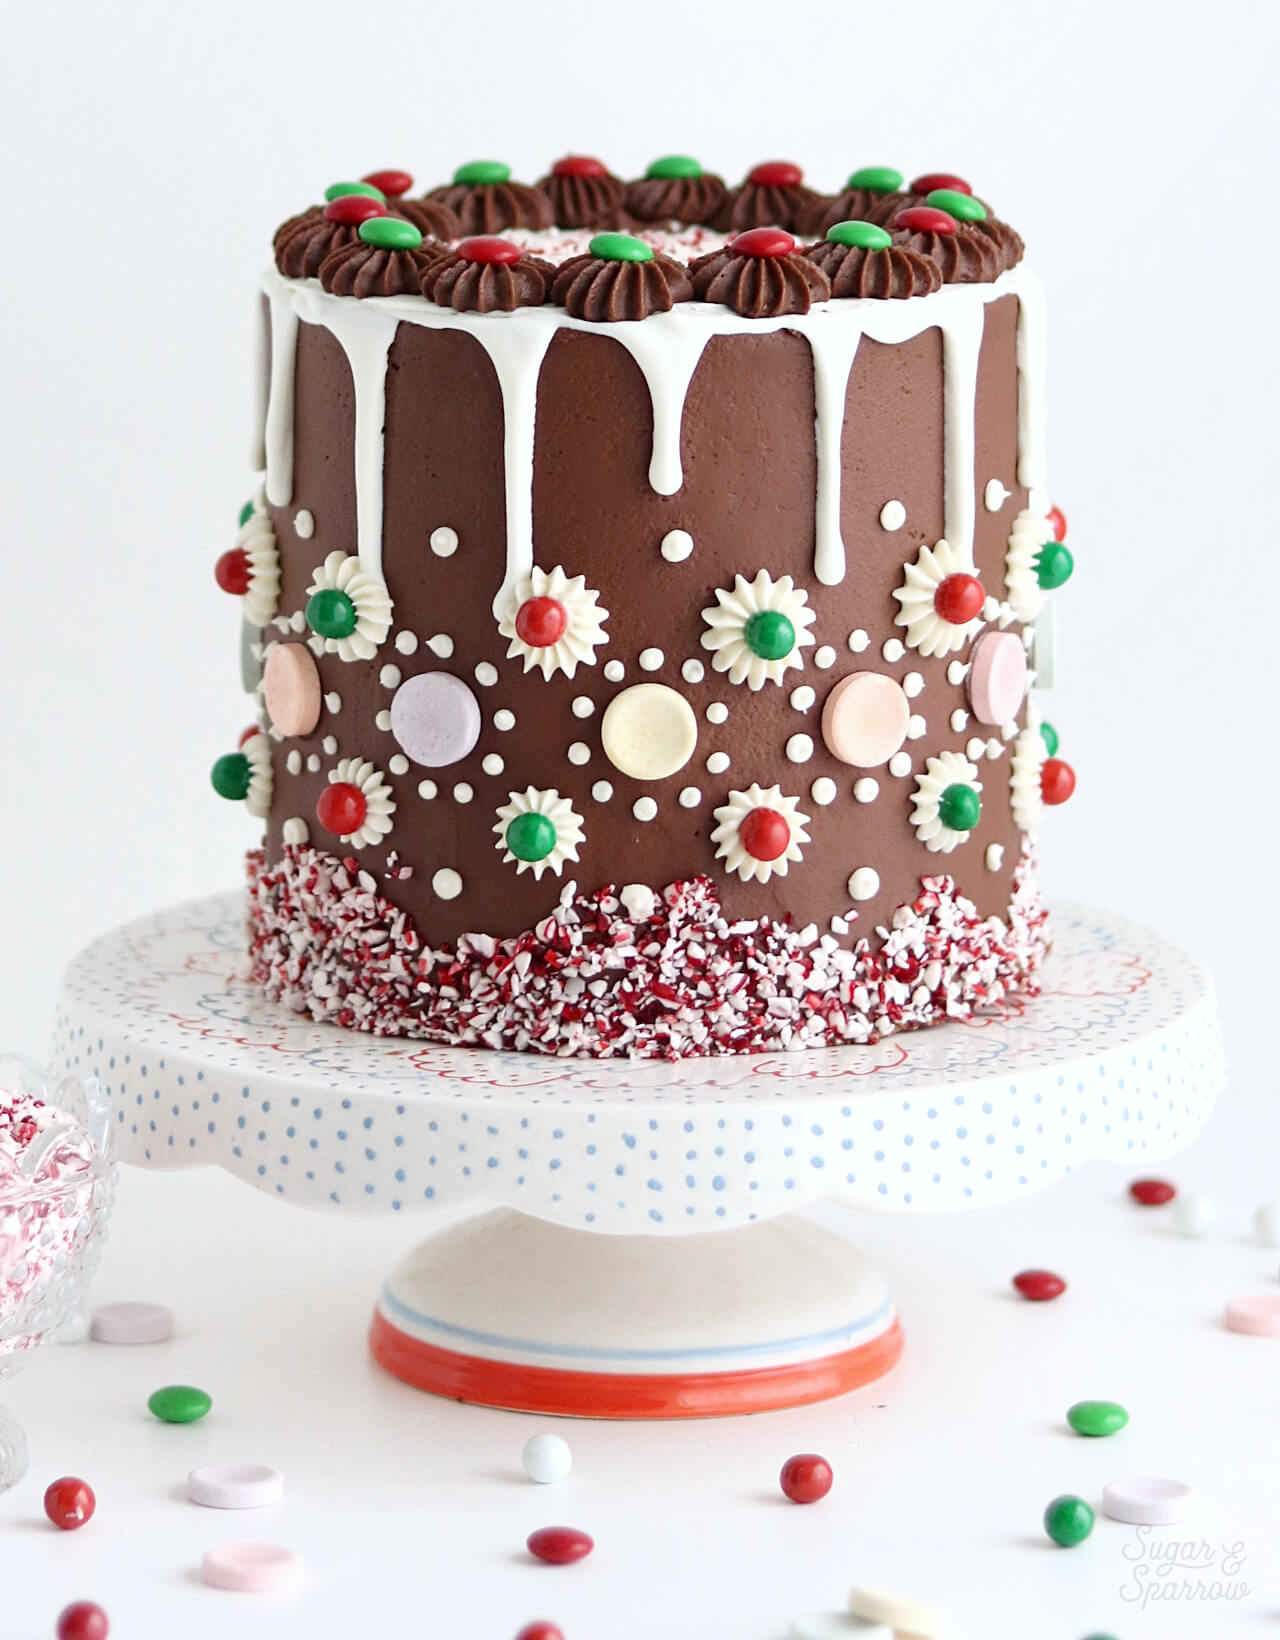
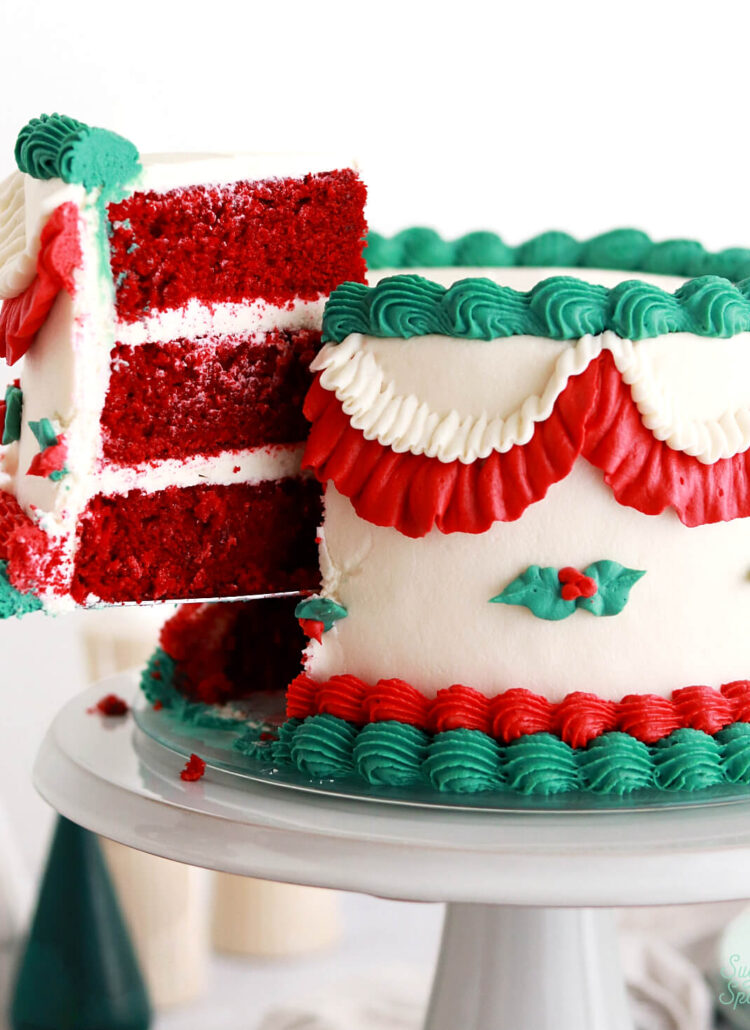
There’s something about using buttercream to glue candy onto gingerbread that evokes whimsy and creativity, no matter what age you are. It’s one of my favorite Holiday traditions, and although it’s a whole lot of fun to decorate a gingerbread house, I find that they end up being more for displaying than eating. Maybe it’s because in order to get a solid structure, you’ve got to make sure the gingerbread is rock hard, or maybe it’s because you’re just so proud of your creation that it’s too pretty to eat. Either way, I wanted to pair the fun of creative candy placement with a gingerbread cake that actually tastes good enough to eat! Behold:

gingerbread cake by sugar and sparrow

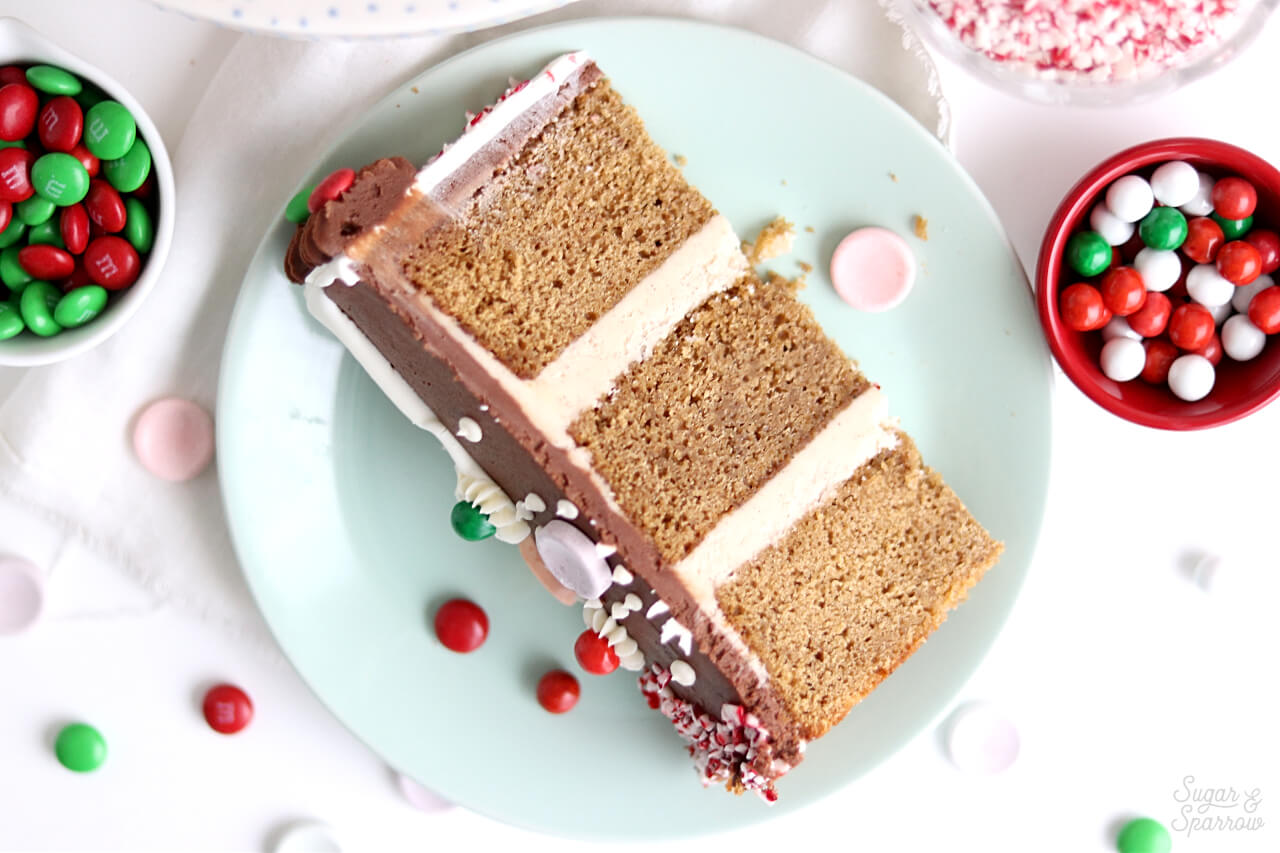
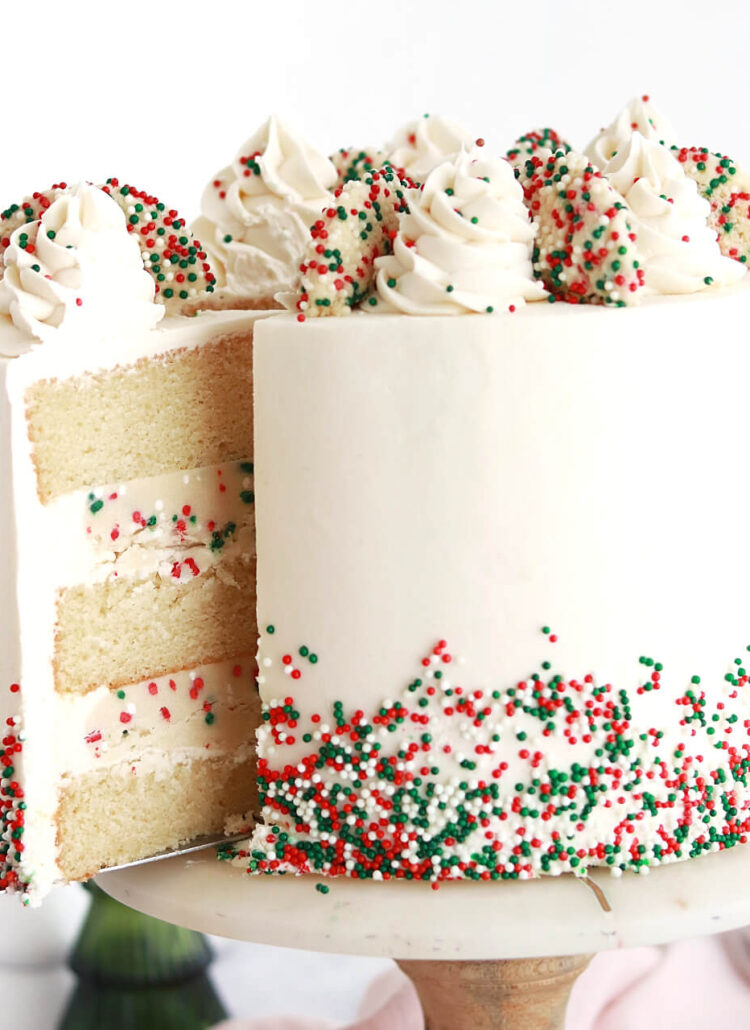
So much fun, right? I actually made a similar gingerbread cake last year, but decided to revamp it this year to focus more on tweaking the flavors. Last year, my cake was a little too dense and molasses-y, and did not pair super well with the rich chocolate ganache it was covered in. So this year I made a few changes to amplify flavor and create a gingerbread cake that’s moist and delicious, tastefully spiced, and so easy to whip up!

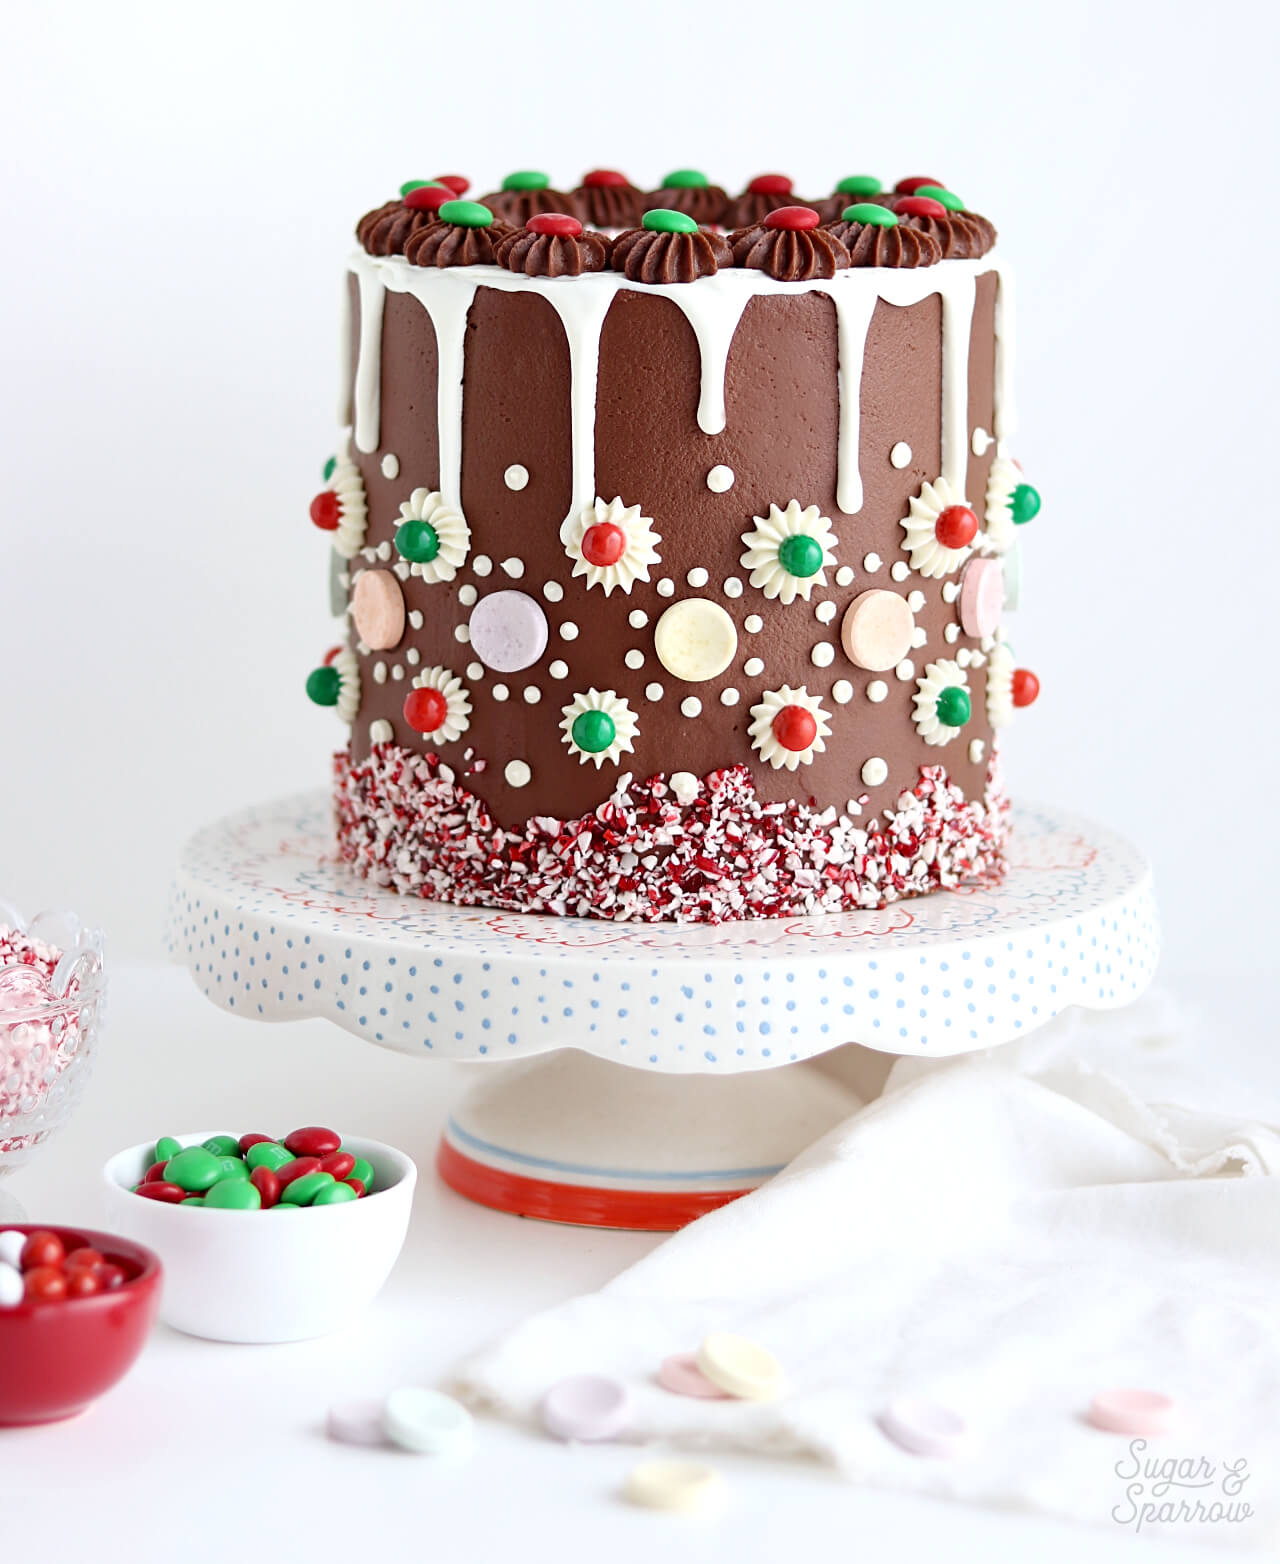
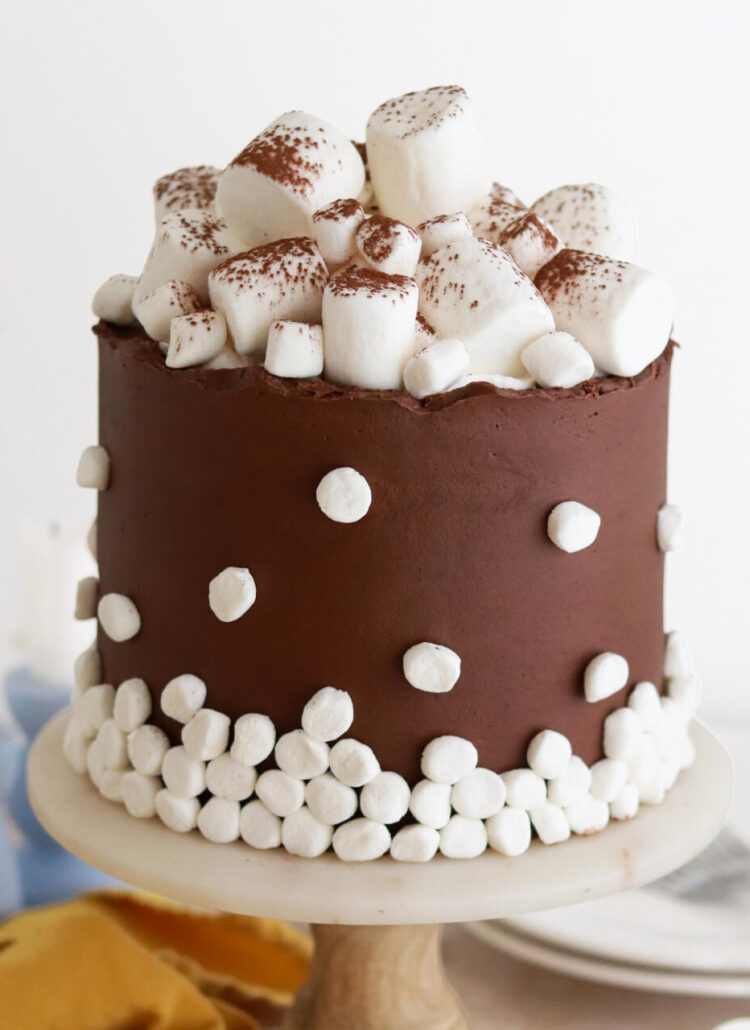
I decided to pair the gingerbread cake with a cinnamon-vanilla buttercream filling to really bring out the flavor in the cake. I chose chocolate buttercream for the finish because it actually makes the cake look like gingerbread, so when decorated with candy and white chocolate ganache, it has more of a striking resemblance to the gingerbread house creations we know and love. Thankfully, the chocolate buttercream actually pairs so well with the cake and filling flavors, so you’ve got a Holiday cake that looks too pretty to eat but actually tastes good! A win win in my book.  

gingerbread cake with chocolate buttercream
gingerbread cake with spiced vanilla buttercream

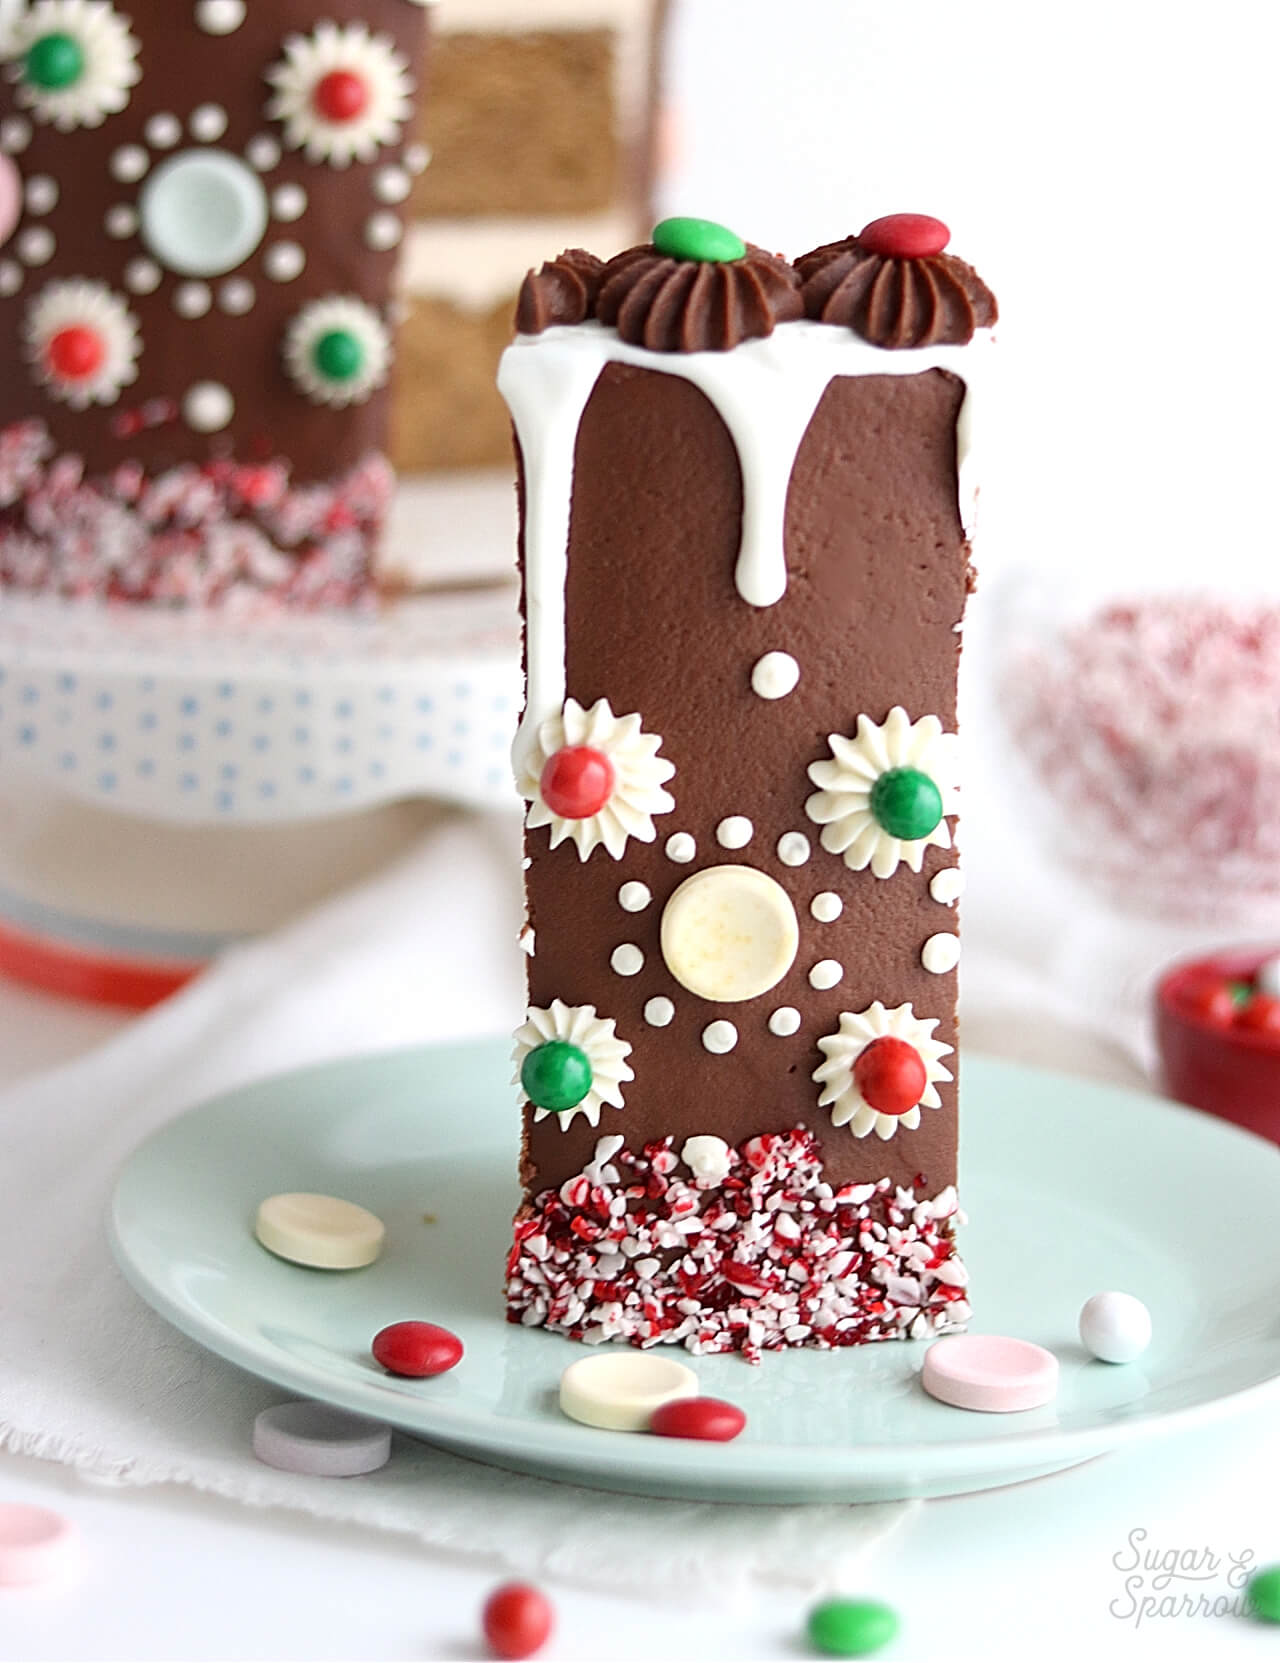
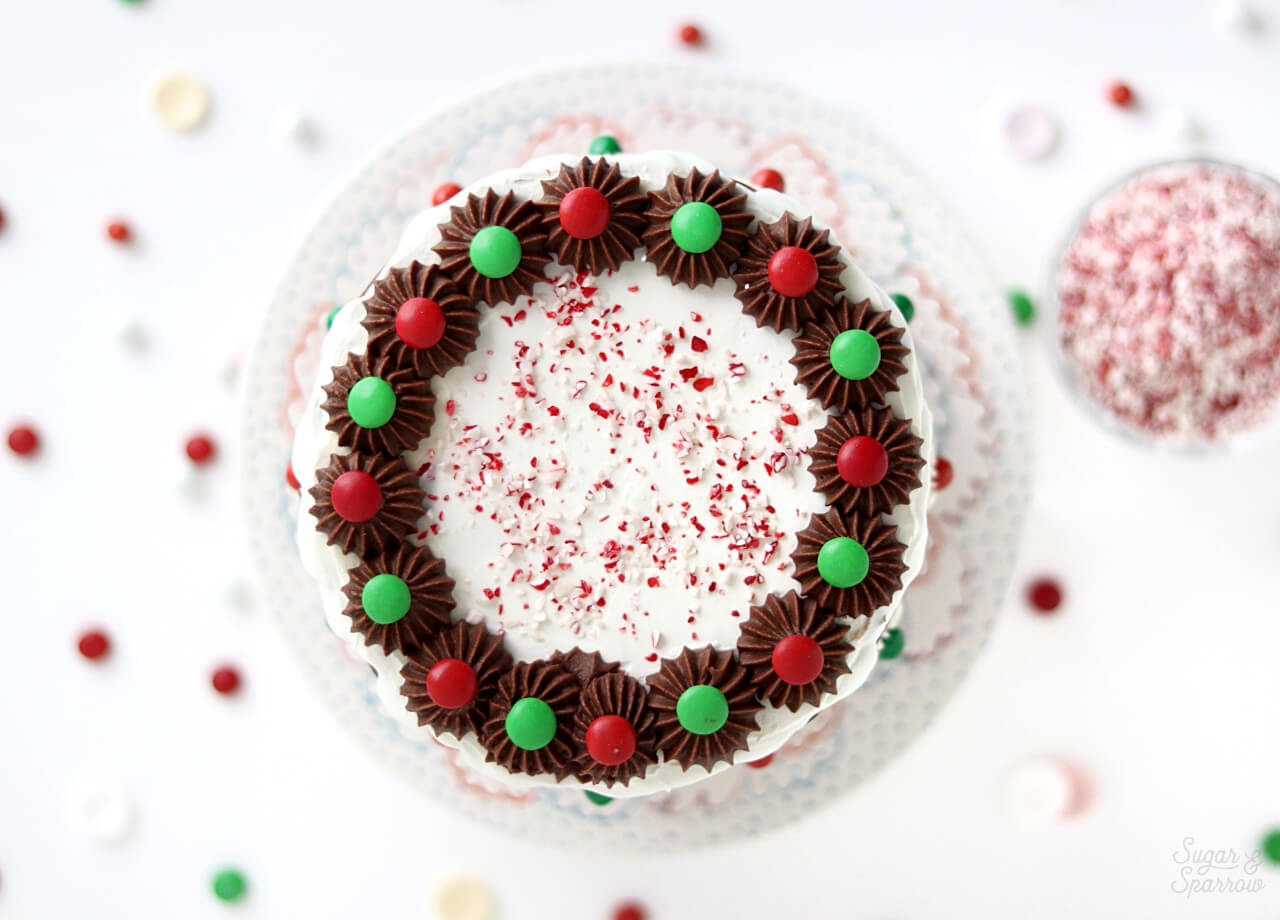
For decorating this cake, all you need is your favorite Christmas candy, a half batch of vanilla buttercream, some pretty piping tips, and imagination that’s fueled by Holiday spirit! I love Wilton tip 4B (the open star tip) for whimsical finish work like this, and I’ve also used Wilton tip 3 to pipe some small dots. The white chocolate ganache drip is totally optional, but it reminds me of the royal icing that’s used to glue gingerbread structures together, so I added one for looks. It’s got such a light flavor that it doesn’t clash with all the rest of the flavors going on. I’ve got the recipe here just in case you want to add one yourself!

gingerbread cake recipe by sugar and sparrow
gingerbread decorating techniques

Here’s a quick video to demonstrate the decorating techniques I’ve used to create this gingerbread cake: 

Since the design of this cake is meant to be a bit childlike and fun, decorating it would be such a fun project to do with little ones! Just an idea for your long Holiday weekend as an alternative to the traditional gingerbread house. Whatever you decide to do design-wise, I think these flavors make the perfect Christmassy dessert to celebrate the season!

gingerbread cake recipe by sugar and sparrow

Gingerbread Layer Cake Recipe

A Holiday classic: layers of moist and flavorful gingerbread cake filled with spiced vanilla buttercream, topped with chocolate buttercream and Christmas candy. 
Print Recipe Pin Recipe

Ingredients

Gingerbread Cake

  • 3 3/4 cups (400g) cake flour, sifted before measuring
  • 1 Tbsp baking powder
  • 3/4 tsp baking soda
  • 1 1/2 tsp kosher salt
  • 2 tsp ground ginger
  • 2 tsp ground cinnamon
  • 1 tsp ground cloves
  • 1 1/8 cup (254g) unsalted butter, room temperature
  • 1 1/2 cup (310g) granulated white sugar
  • 1/2 cup (95g) packed brown sugar
  • 5 eggs, room temperature
  • 1 Tbsp vanilla extract
  • 1/2 cup (118ml) molasses
  • 1 1/2 cup (355ml) full fat buttermilk* see notes for diy recipe

Cinnamon Vanilla Buttercream Filling

  • 1 cup (226g) unsalted butter, room temperature
  • 3 1/2 cups (420g) powdered sugar
  • 2 tsp ground cinnamon
  • 2 tsp vanilla extract
  • 2 Tbsp whole milk, room temperature
  • 1/4 tsp kosher salt

Chocolate Buttercream Frosting

  • 1 1/2 cups (339g) unsalted butter, room temperature
  • 5 cups (600g) powdered sugar
  • 3/4 cup (63g) natural, unsweetened cocoa powder
  • 4 Tbsp (60ml) whole milk, room temperature
  • 1 Tbsp vanilla extract
  • 1/4 tsp kosher salt

Instructions

Make The Gingerbread Cake

  • Preheat the oven to 350°F. Prepare three 8-inch or four 6-inch cake pans by spraying the sides with a cooking spray (Baker's Joy is my favorite) and a wax paper circle fitted to the bottom of the pan. Alternatively, you can grease and lightly flour the pans. 
  • Sift the cake flour and then measure by spooning and leveling it in your measuring cup. Add the cake flour, baking powder, baking soda, salt, ginger, cinnamon, and cloves into a bowl and whisk to combine. Set aside.
  • In the bowl of your stand mixer (a handheld mixer works fine too!), cream the butter for on high for two minutes until it’s light and fluffy. Add in white and brown sugars and beat on medium-high for another two minutes, scraping down the bowl and paddle as needed. Add the eggs one at a time, mixing thoroughly after each addition. Add vanilla and molasses and mix for one minute on high, scraping down the bowl and paddle once more. 
  • With the mixer on low speed, add in the dry ingredients and mix until just combined. Add the buttermilk and mix until just incorporated. Scrape down the sides and bottom of the bowl and give it a few stirs to make sure there are no lumps. Batter will be slightly thick, but pourable.
  • Pour batter into prepared cake pans (no more than 2/3 of the way full) and bake for 35-40 minutes. They’re done when they spring back to the touch and a toothpick inserted into the middle comes out clean. Let the cakes cool in the pan for five minutes before turning them out onto a wire rack for an additional few hours of cooling. Make sure they’re entirely room temperature before applying any frosting.

Make The Cinnamon Vanilla Buttercream

  • In a large bowl, whisk together powdered sugar and cinnamon. Set aside. Cream butter on med-high until light and fluffy (about 5 minutes), scraping down bowl and paddle a few times in between. Add powdered sugar/cinnamon mixture a few cups at a time, scraping down bowl and paddle between intervals. Mix on medium until fully incorporated.
  • Turn mixer to low and add vanilla and milk. Mix on medium for two minutes. Scrape down bowl and paddle and add salt. Mix for another minute on medium until incorporated.

Make The Chocolate Buttercream

  • In a stand mixer fitted with a paddle attachment, whip butter on medium speed until creamy and light in color, about four minutes. Scrape down the bowl and paddle and add the powdered sugar, cocoa powder, milk, salt, and vanilla extract. Increase the speed to medium-high and beat for two minutes.

Assembly

  • Fill and crumb coat the room temperature cake layers with Cinnamon Vanilla Buttercream and chill for 20 minutes in the refrigerator. Frost the final coat of the cake with Chocolate Buttercream and chill for another 30 minutes. Decorate by adding a white chocolate ganache drip (optional) and adhering candy to the cake with Vanilla Buttercream. Alternatively you can adhere the candy with Chocolate Buttercream or Cinnamon Vanilla Buttercream.

Notes

*Homemade Buttermilk Recipe: if you can’t find full fat buttermilk at your local store, you can easily make it yourself by adding 4 tsp white vinegar to a jar and pouring 1 cup of whole milk over the top. Give it a few whisks and let it sit for 15 minutes before using or placing in an airtight container in the refrigerator until ready to use.  
Make Ahead Tips: The Gingerbread Cake can be made ahead and stored at room temperature, wrapped in plastic, for up to one day. Alternatively, you can tightly wrap the cake layers and place them in the freezer for up to two months before thawing and using.
The buttercream recipes can be made ahead and stored in airtight containers at room temperature for up to one day. Alternatively, you can store them in the refrigerator for up to two weeks before bringing back to room temperature and re-whipping with your stand mixer to bring them back to the correct consistency.

What are you planning on making for your Holiday dessert table this year? I really hope you get a chance to make this cake! If you love the flavor of spicy gingerbread + the soft, fluffy texture of cake, this recipe is a real Christmas treat. Let me know if you make it by tagging me on Instagram or letting me know in the comments! Happy Holidays! 

By: Whitney · In: Cake, Featured, Holiday, Recipes, Seasonal · Tagged: chocolate buttercream, christmas cake, christmas dessert, gingerbread, gingerbread cake, gingerbread layer cake, holiday cake, spiced buttercream

you’ll also love

hot cocoa cake recipe with homemade marshmallow fillingHot Cocoa Cake with Homemade Marshmallow Filling
christmas sugar cookie dough cake recipeChristmas Sugar Cookie Dough Cake
vintage christmas red velvet cake by sugar and sparrowVintage Christmas Red Velvet Cake

Join the List

Stay up to date & receive the latest posts in your inbox.

Reader Interactions

Leave a Reply Cancel reply

Your email address will not be published. Required fields are marked *

Recipe Rating


Next Post >

How To Cover A Cake In Sprinkles

Primary Sidebar

Welcome to Sugar & Sparrow

Welcome to Sugar & Sparrow

Helping you whip up pretty desserts with confidence and creativity. And hopefully sharing a few laughs with you along the way!

Learn More

Connect

let’s bake!

Get my very best recipes, baking tips, and decorating tutorials sent to your inbox

Featured Posts

Funfetti Cupcakes Recipe

lemon cake with cream cheese buttercream

Lemon Cake With Lemon Cream Cheese Buttercream

small batch raspberry chocolate cake recipe by sugar and sparrow

Small Batch Raspberry Chocolate Cake

Search

Archives

Follow Along

@sugarandsparrowco

Everything I baked in June☀️I was so motivated to Everything I baked in June☀️I was so motivated to bake this month (summer flavors had me INSPIRED!) and could barely keep up with myself but I ended up publishing 7 new recipes on my website + finalized 5 more that will be up ASAP! 

Comment “JUNE” to get all the recipes that are available now:

-Cookie Dough Ice Cream Cake
-Rocky Road Cupcakes (w/ homemade marshmallow creme filling!)
-Blackberry Lavender Cake
-Homemade Blackberry Filling
-Whipped Cream Cheese Frosting
-Strawberry Shortcake Cookie Bars
-Berries & Cream Sheet Cake

https://sugarandsparrow.com/everything-i-baked-in-june
 
#cake #bakersofinstagram #baking #bakinglove #cakedecorating
WHIPPED CREAM CHEESE FROSTING ☁️ this easy 4-ingre WHIPPED CREAM CHEESE FROSTING ☁️ this easy 4-ingredient whipped cream frosting is deliciously light, comes together SO easily, and is stabilized with cream cheese to make it the perfect thick consistency for filling and frosting cakes and cupcakes!! It’s so good with my strawberry shortcake sheet cake and berries & cream cake and I have a feeling I’m going to be whipping it up for many more summer cakes😍

Full recipe with cake pairing suggestions at https://sugarandsparrow.com/whipped-cream-cheese-frosting/ 

INGREDIENTS 
1 Cup (8oz, 226g) full-fat brick-style cream cheese, cold
1 Cup (120g) powdered sugar
1 tsp pure vanilla extract
2 1/2 Cups (600ml) heavy whipping cream, cold

INSTRUCTIONS
1. Chill the bowl of your stand mixer (or the large bowl you’ll be using with your hand mixer) into the refrigerator for 20 minutes.
2. Into the cold mixing bowl, add the cream cheese and beat on medium speed with the whisk attachment until creamy, 2 min. Add the powdered sugar and mix on low speed until mostly incorporated, then turn the mixer to medium-high speed and mix for 1 min.
3. Add the vanilla extract, then turn the mixer to medium-high speed and slowly pour in the heavy whipping cream (down the side of the bowl so it doesn’t fly everywhere). Once all the cream is added, continue mixing on medium-high for just about 30 seconds longer, keeping a close eye on the mixing bowl to watch it thicken. It should come together into a thick, silky frosting consistency at this point, where you can dip the whisk into the frosting and it holds a slight peak when you hold it upright.
4. Use the frosting immediately to decorate cakes and/or cupcakes for best results!

#whippedcreamfrosting #creamcheesefrosting #cakedecorating #whippedcream #frosting
TOP 10 4TH OF JULY DESSERTS 🎆 These are just a few TOP 10 4TH OF JULY DESSERTS 🎆 These are just a few of my favorite summer dessert recipes that will disappear at any Fourth of July celebration.

Comment “JULY” and I’ll send you all 20+ of my favorite 4th of July dessert ideas – naturally red white and blue desserts like my berries and cream cake, easy no-bake desserts, no-churn ice cream, strawberry shortcake inspired recipes, and all the treats that will go FAST at any barbecue.

https://sugarandsparrow.com/4th-of-july-desserts/

#fourthofjuly #4thofjuly #summerdessert #partycake #dessertideas
STRAWBERRY SHORTCAKE COOKIE BARS 🍓my hot take: str STRAWBERRY SHORTCAKE COOKIE BARS 🍓my hot take: strawberry shortcake toppings on a buttery, soft sugar cookie base is WAY BETTER than traditional strawberry shortcake. I topped my favorite sugar cookie bar recipe with silky whipped cream cheese frosting + homemade strawberry sauce and now I’m ruined 😵

Full recipe is linked in my bio + at https://sugarandsparrow.com/strawberry-shortcake-cookie-bars/ 

SOFT SUGAR COOKIE BARS
2 Cups + 2 Tbsp (283g) all purpose flour
1 tsp baking powder
1/2 tsp baking soda
1/2 tsp salt
3/4 Cup (170g) unsalted butter, room temp
1 Cup (200g) granulated sugar
1 large egg
1 large egg yolk
1 1/2 tsp pure vanilla extract

1. Preheat the oven to 350ºF (177ºC). Grease and line an 8-inch square baking pan with parchment paper, leaving a slight overhang for easy release.
2. Whisk together the flour, baking powder, baking soda, and salt. Set aside.
3. Using a stand mixer with the paddle attachment (or hand mixer) cream together the butter and sugar on high speed until pale and fluffy, 2-3 min.
4. Turn the mixer to medium and add the egg, egg yolk, and vanilla. Mix until combined, then add the flour mixture and mix on low speed until a uniform cookie dough forms.
5. Press the cookie dough into the prepared pan in an even layer, all the way to the edges. Bake for 18-20 minutes, until the edges are just starting to brown. 
6. Cool the sugar cookie bars in the pan for 30 minutes, then transfer to a wire rack to cool completely. Top with whipped cream cheese frosting and strawberry sauce (full recipe linked in my bio!)

#strawberryshortcake #strawberries #whippedcreamfrosting #cookiebars #sugarcookies
BLACK FOREST CAKE 🍒 this is my favorite thing to m BLACK FOREST CAKE 🍒 this is my favorite thing to make during cherry season! My version is decadent chocolate cake soaked with homemade cherry syrup, fresh cherry filling, and whipped cream frosting. Top it with a chocolate ganache drip if you want to go the extra mile! 

Full recipe + decorating tutorial is linked in my bio + at https://sugarandsparrow.com/black-forest-cake-recipe/

PS I’m working on a sheet cake version of this recipe that’s even easier! Stay tuned.

#blackforestcake #cherrycake #chocolatecake #cherries #cakedecorating

Footer

On the Blog

  • Cake Basics
  • Recipes
  • Tutorials

Info

  • About
  • Privacy Policy & Disclosure

stay in the know

Copyright © 2026 · Theme by Sugar & Sparrow