• Cake
  • Frosting
  • YouTube
  • My Favorite Tools
  • Nav Social Icons

  • Skip to primary navigation
  • Skip to main content
  • Skip to primary sidebar
  • Skip to footer
  • Recipes
    • Cake
    • Cupcakes
    • Frosting
    • Ice Cream
    • Vegan
  • Cake Basics
  • Tutorials
  • Blog
  • About
  • Mobile Menu Widgets

    Connect

    Search

Sugar & Sparrow logo in script font

Sugar & Sparrow

Lifestyle and Cake from Portland Oregon

  • Cake Basics
  • Recipes
    • Cake
    • Cupcakes
    • Cookies & Bars
    • Filling
    • Frosting
    • Ice Cream
    • No-Bake
    • Small Batch
    • Vegan
  • Tutorials
  • Book
  • Blog
  • About

How To Make Mini Christmas Tree Cakes

December 4, 2019 · In: Featured, Holiday, Seasonal, Tutorials

Some people love to decorate gingerbread houses for the Holidays, but I think these mini Christmas tree cakes are such a fun alternative! Not only are they quicker and easier to assemble than a gingerbread house, they double as the perfect, edible Holiday centerpiece for your dessert table. Whether you’re throwing a Holiday party this year or you just want a festive project that’s fun for all ages, these mini Christmas tree cakes are a hit!

3d christmas tree cake tutorial
christmas tree cakes tutorial

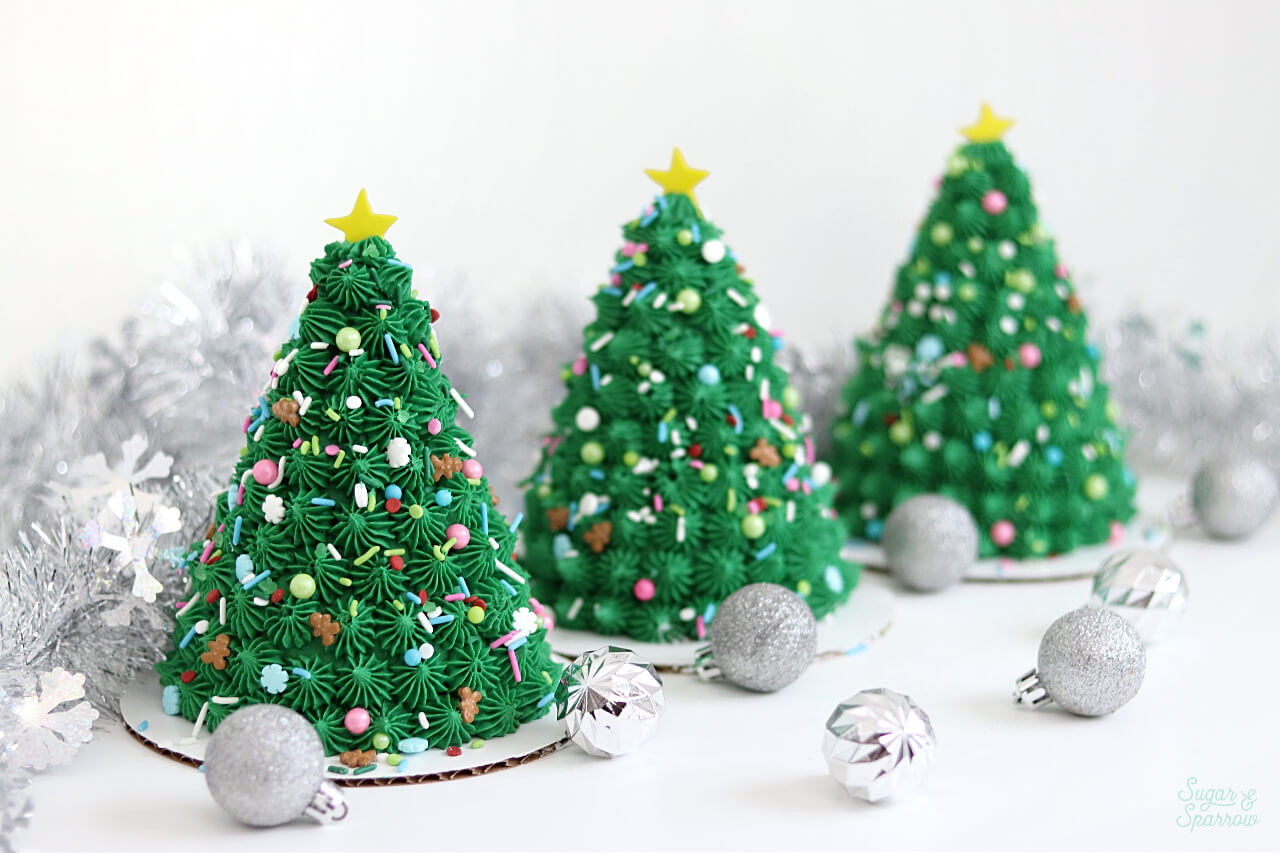
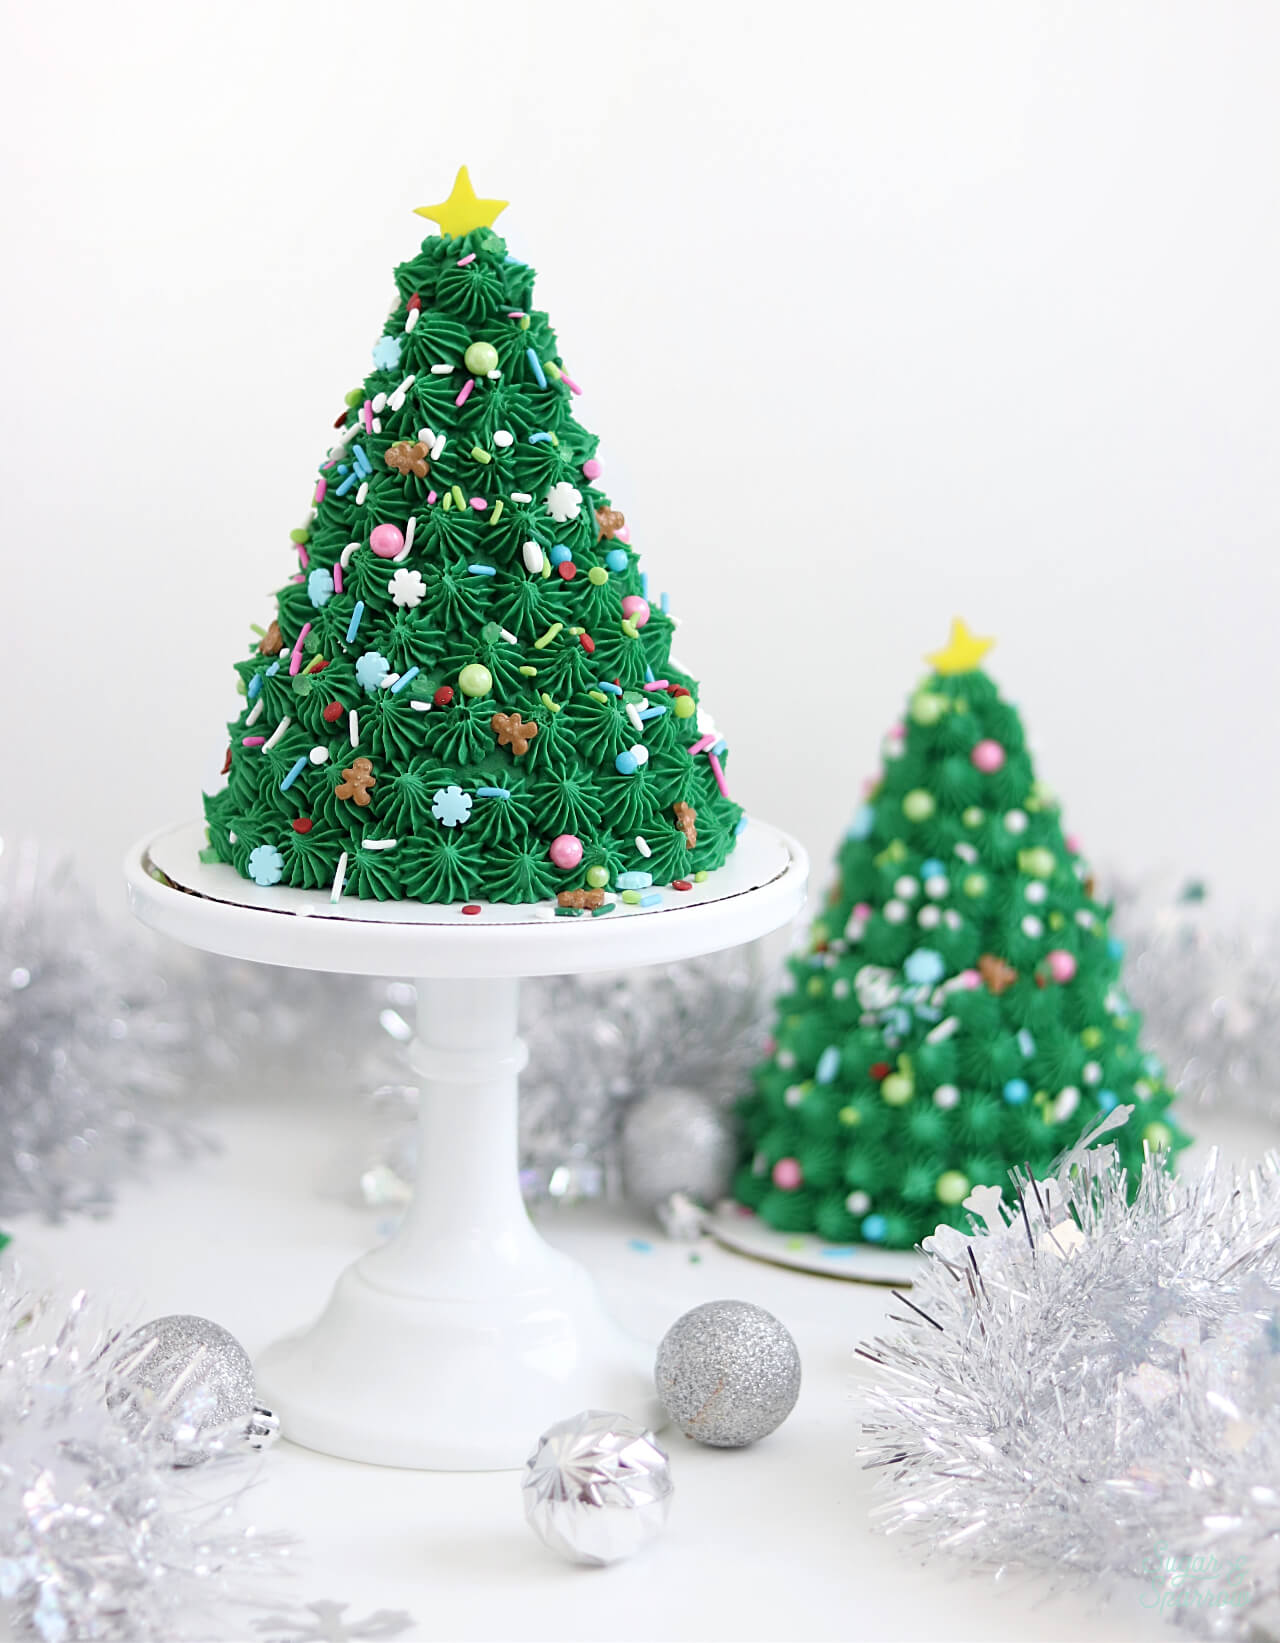
I created a huge 3D Christmas Tree Cake last year, and this year it was even more fun making mini versions. Especially since JOANN has such a great assortment of Holiday sprinkles right now. I was so dazzled by the festive sprinkles in their cake decorating aisle that it was hard to choose just one! They all look so great together on these mini Christmas trees. Just look at those tiny gingerbread men and snowflakes!

UPDATE 2025: JOANN has (sadly!!) gone out of business, so I have slightly changed these product links.

Christmas tree cake by sugar and sparrow

Underneath all those pretty sprinkles are four layers of cake ranging from 4 inches in diameter to ½ inch. When you stack them on top of one another they end up looking like tiny wedding cakes before you frost them up into a Christmas tree shape! From there, all that’s left to do is use your favorite piping tip to add some details and then decorate to your heart’s desire. You can get really creative with how you decorate these cuties and it’s the perfect project to do with little ones! 

Here’s a quick video of the process before you read all about how to make these mini Christmas tree cakes below:

If you’re into cake decorating videos like this one, be sure to check out my YouTube channel! I’m always adding fun tutorial and recipe videos there, and if you click the Subscribe button you’ll never miss a new one.

You Will Need

  • 8 baked 4-inch cake layers
  • Circular cookie cutter set
  • 2 batches of vanilla buttercream
  • Green food color gel
  • Piping bags
  • Small icing spatula 
  • Wilton Tip 4B
  • Christmas sprinkles of your choice
  • Gumpaste or fondant star 
  • 4 inch cardboard cake circles

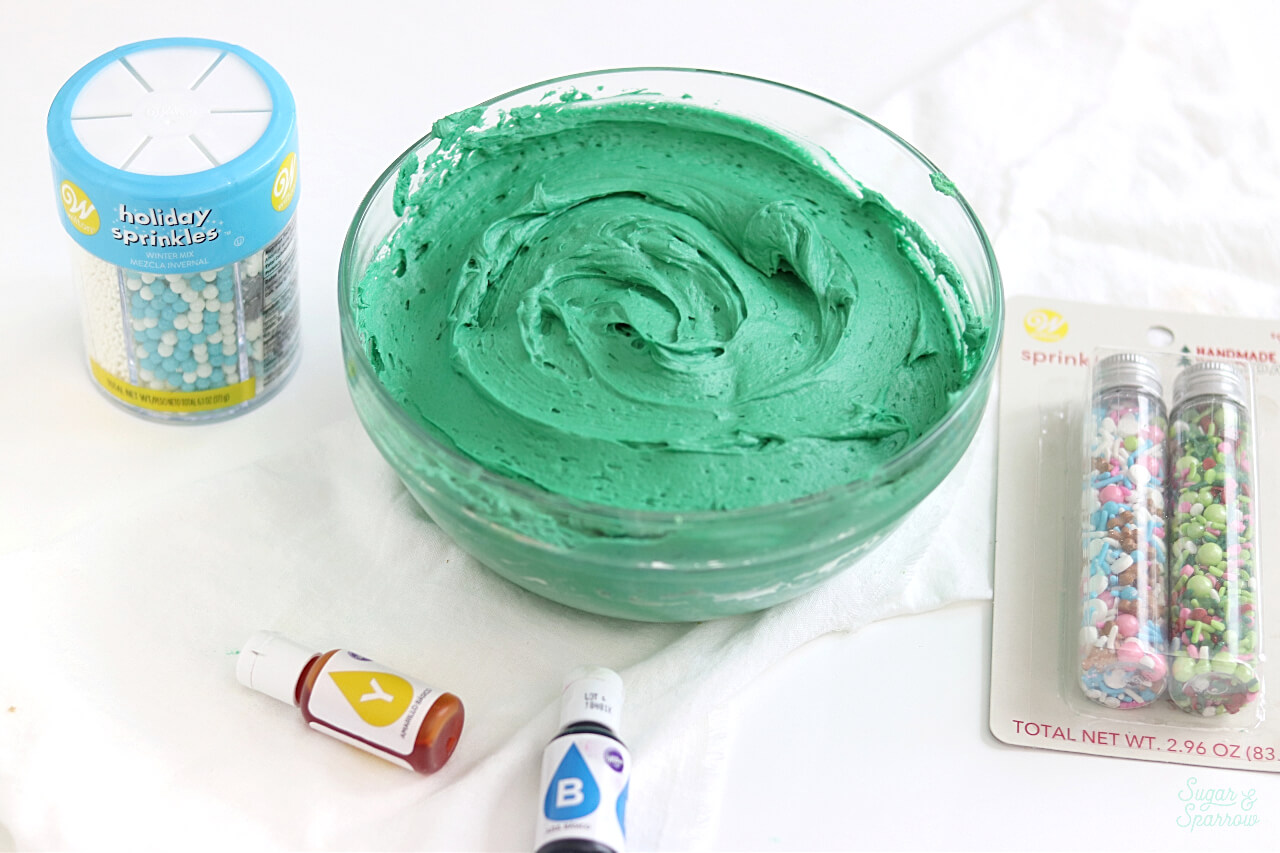
Step 1: Color the Buttercream

First thing’s first. We’ll need to color that big batch of buttercream. Note that you can use any color (or combination of colors!) you want for these mini Christmas trees. I went with a classic shade of green that I custom mixed with yellow and blue food color gel.

how to color buttercream

I think these mini Christmas trees would end up looking amazing in some non-classic colors as well. I’m dying to try them in a vibrant pink or bright white! 

Step 2: Cut out the Cake Layers

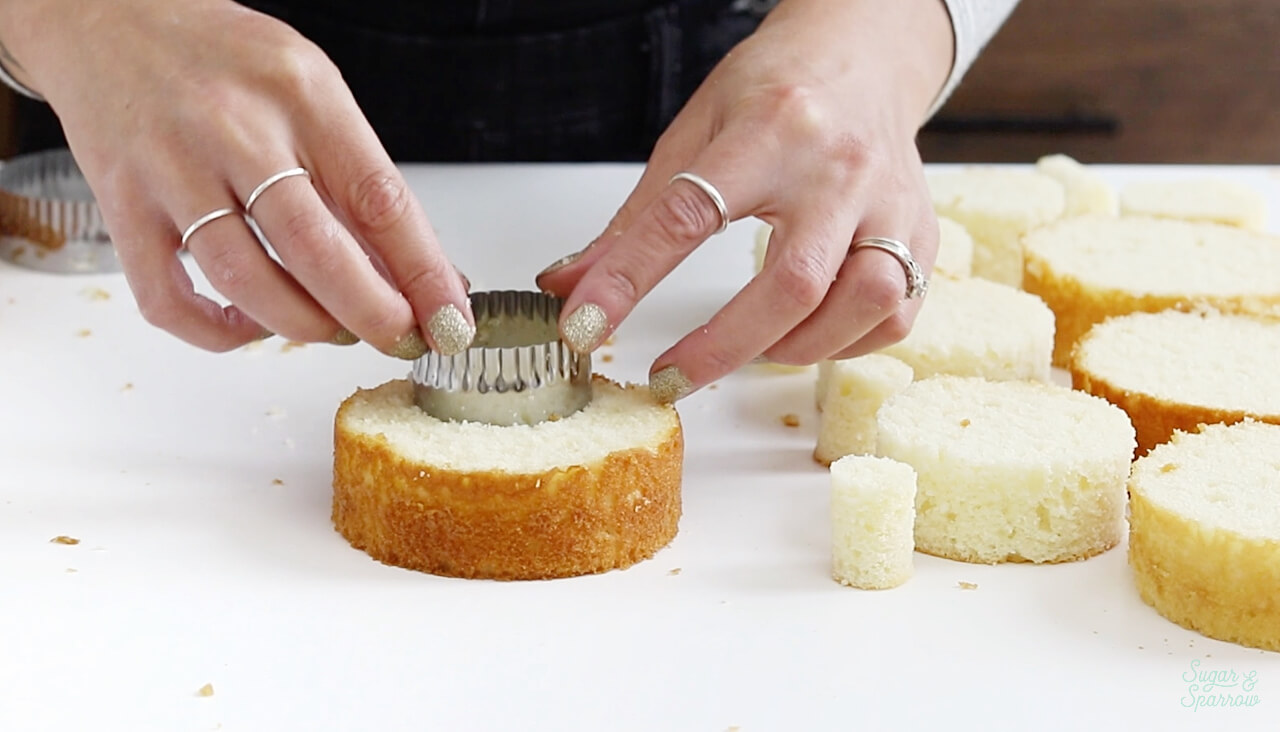
Next, it’s time to make all the different sized layers for stacking. Keep three of the 4-inch cake layers as-is, then use the circular cookie cutters to cut out smaller circles from the remaining layers.

four inch cake layers

You’ll need three sets of each size since this tutorial ends up making three total mini Christmas trees, and it’s best to map out where you’ll be cutting each cake layer before you start. I used the 3 inch, 2 inch, and ½ inch circular cutters to create three sets of each size.

how to cut out cake layers with circle cookie cutters

Check out this video to see how I planned out where to cut each layer! 

Step 3: Fill and Stack the Cake Layers

Now that you have four different sized layers per mini Christmas tree, it’s time to fill and stack them. Fill a piping bag with buttercream, snip off a ½ inch opening, and place a small dot onto a 4 inch cardboard cake circle, then place the 4 inch cake layer on top. Add a thin layer of buttercream and place the next smallest layer on top. Continue the process until you’ve got what looks like a mini version of a tiered wedding cake (so cute!).

how to build 3d christmas tree cakes

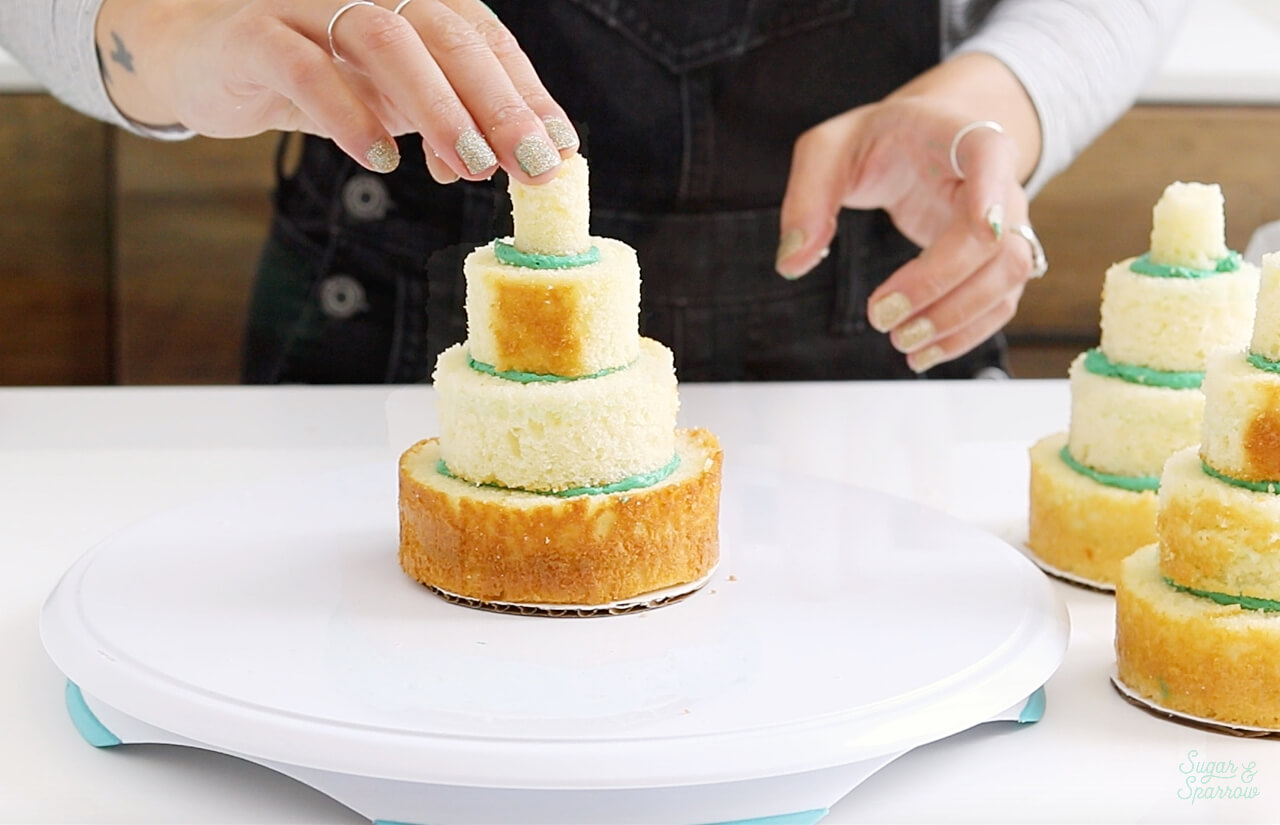
Repeat this step three times, or per amount of mini Christmas trees you’re making.

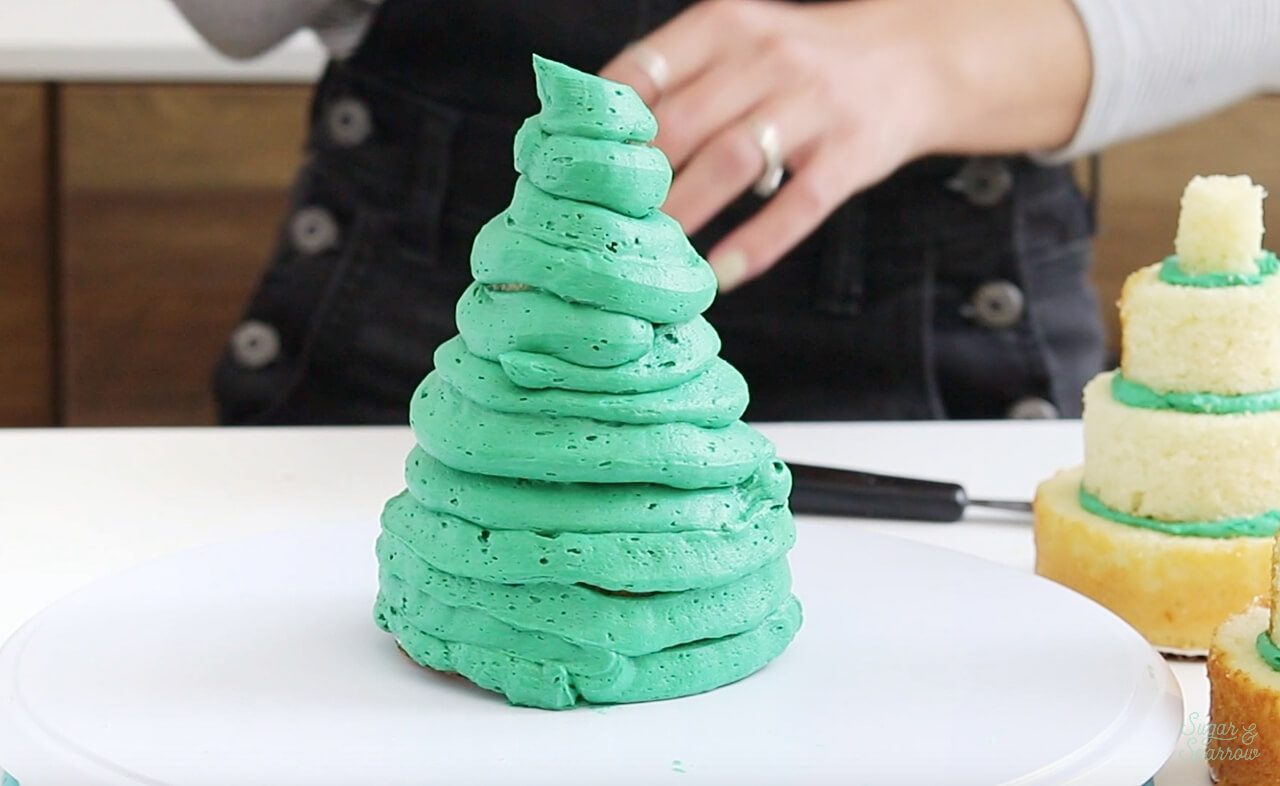
Step 4: Ice and Shape the Mini Christmas Trees

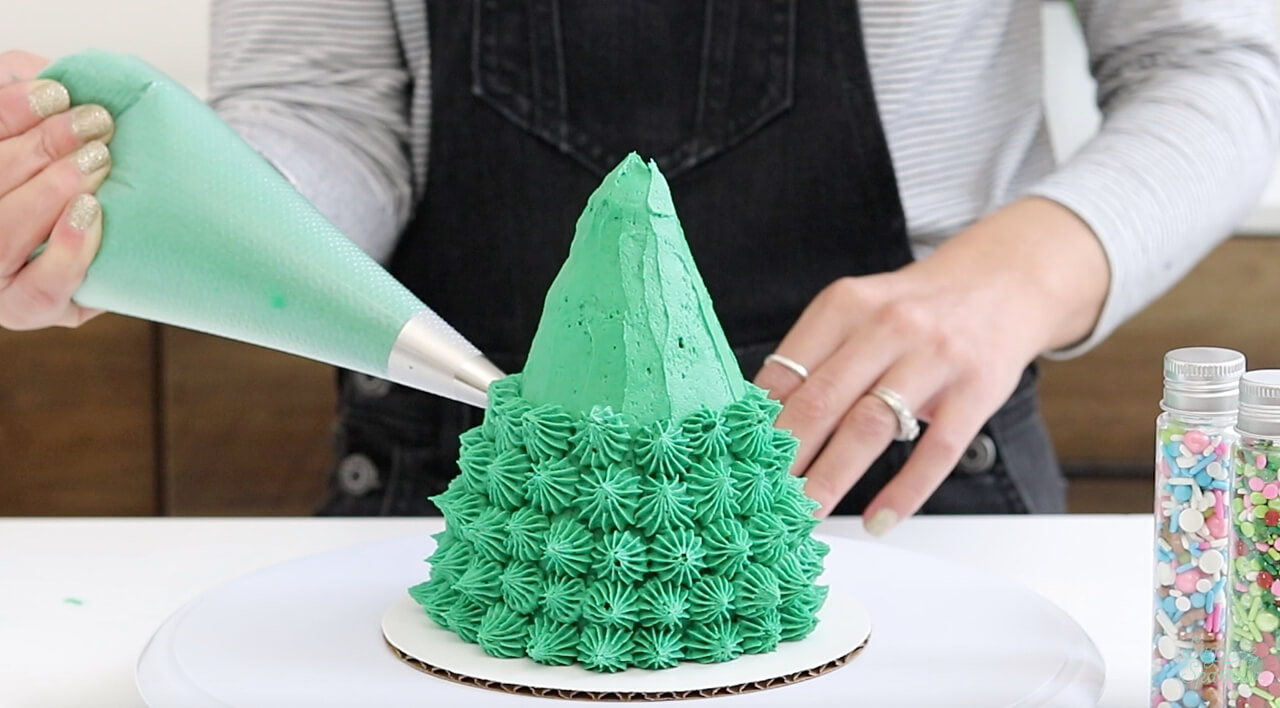
With your first mini Christmas tree on a cake turntable, use the same piping bag from Step 3 to pipe buttercream all around the cake.

holiday cake tutorial

Then, use a small icing spatula to shape the cake into a tree (aka cone) shape.

buttercream christmas tree cakes

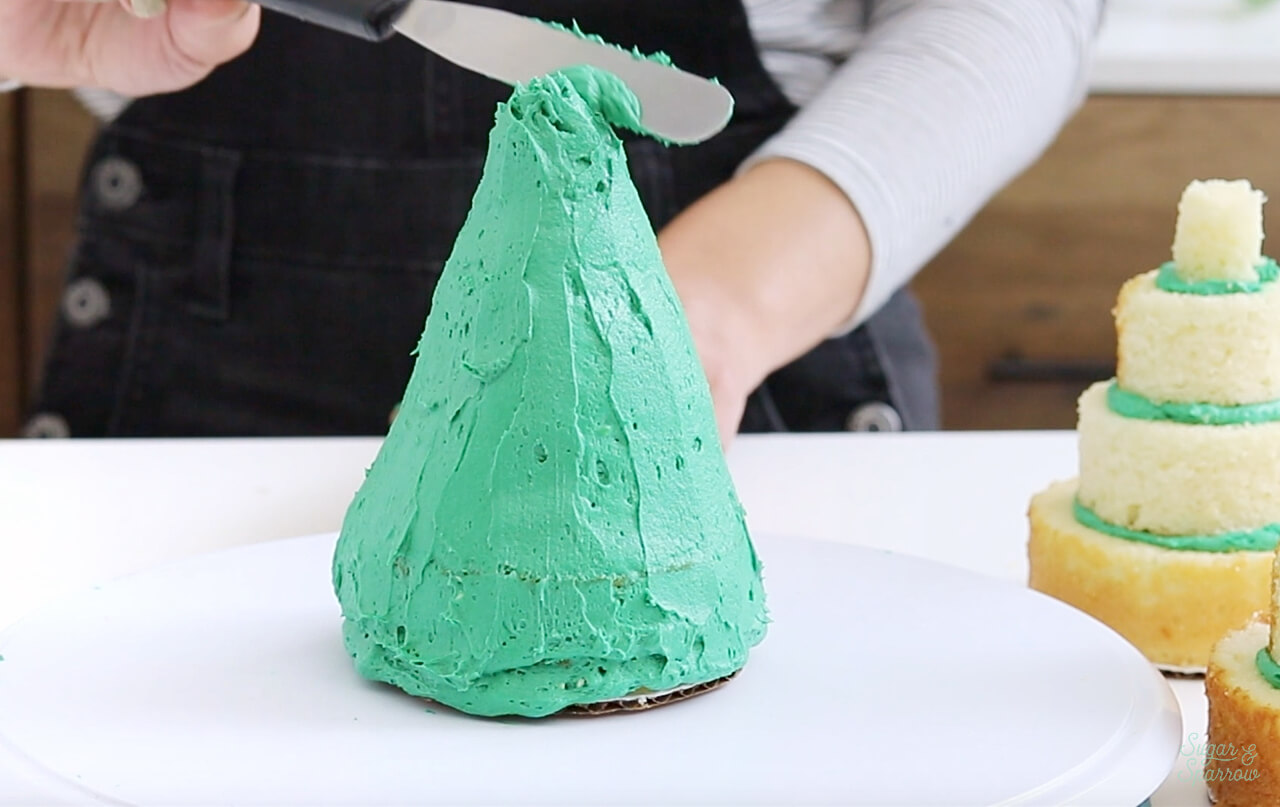
Repeat until you’ve got three mini Christmas trees shaped, then pop them all into the refrigerator for about 20 minutes to let the buttercream set up. 

Step 5: Pipe the Details

Fit a piping bag with your favorite piping tip and fill it with more buttercream. I ended up using Wilton Tip 4B because I love how easy it is to create stunning texture. Starting at the bottom of the tree and working your way up, pipe open stars in even lines until the entire tree is covered with them.

how to decorate buttercream christmas tree
piping buttercream with wilton tip 4b

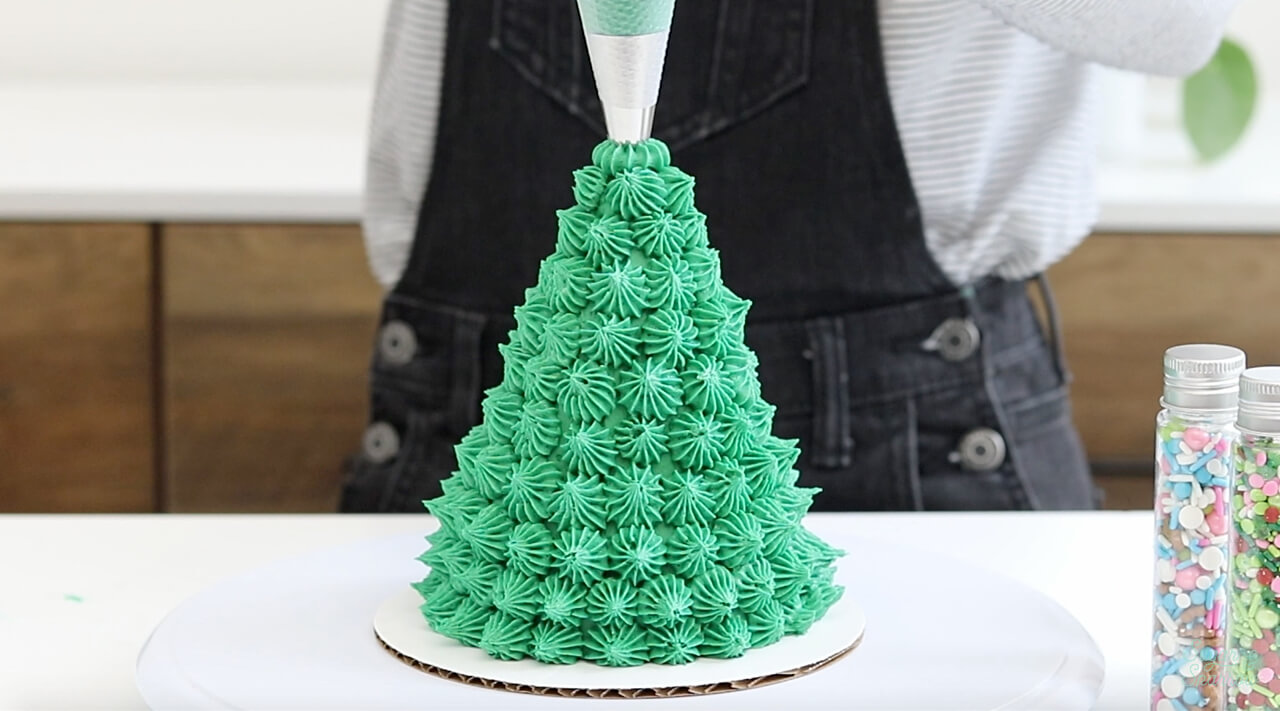
Although I’m using Wilton Tip 4B to pipe the details on my mini Christmas trees, I think they would also look amazing with Wilton Tip 352 (leaf tip), Tip 233 (grass tip), or really any piping tip that you can create fun texture with. 

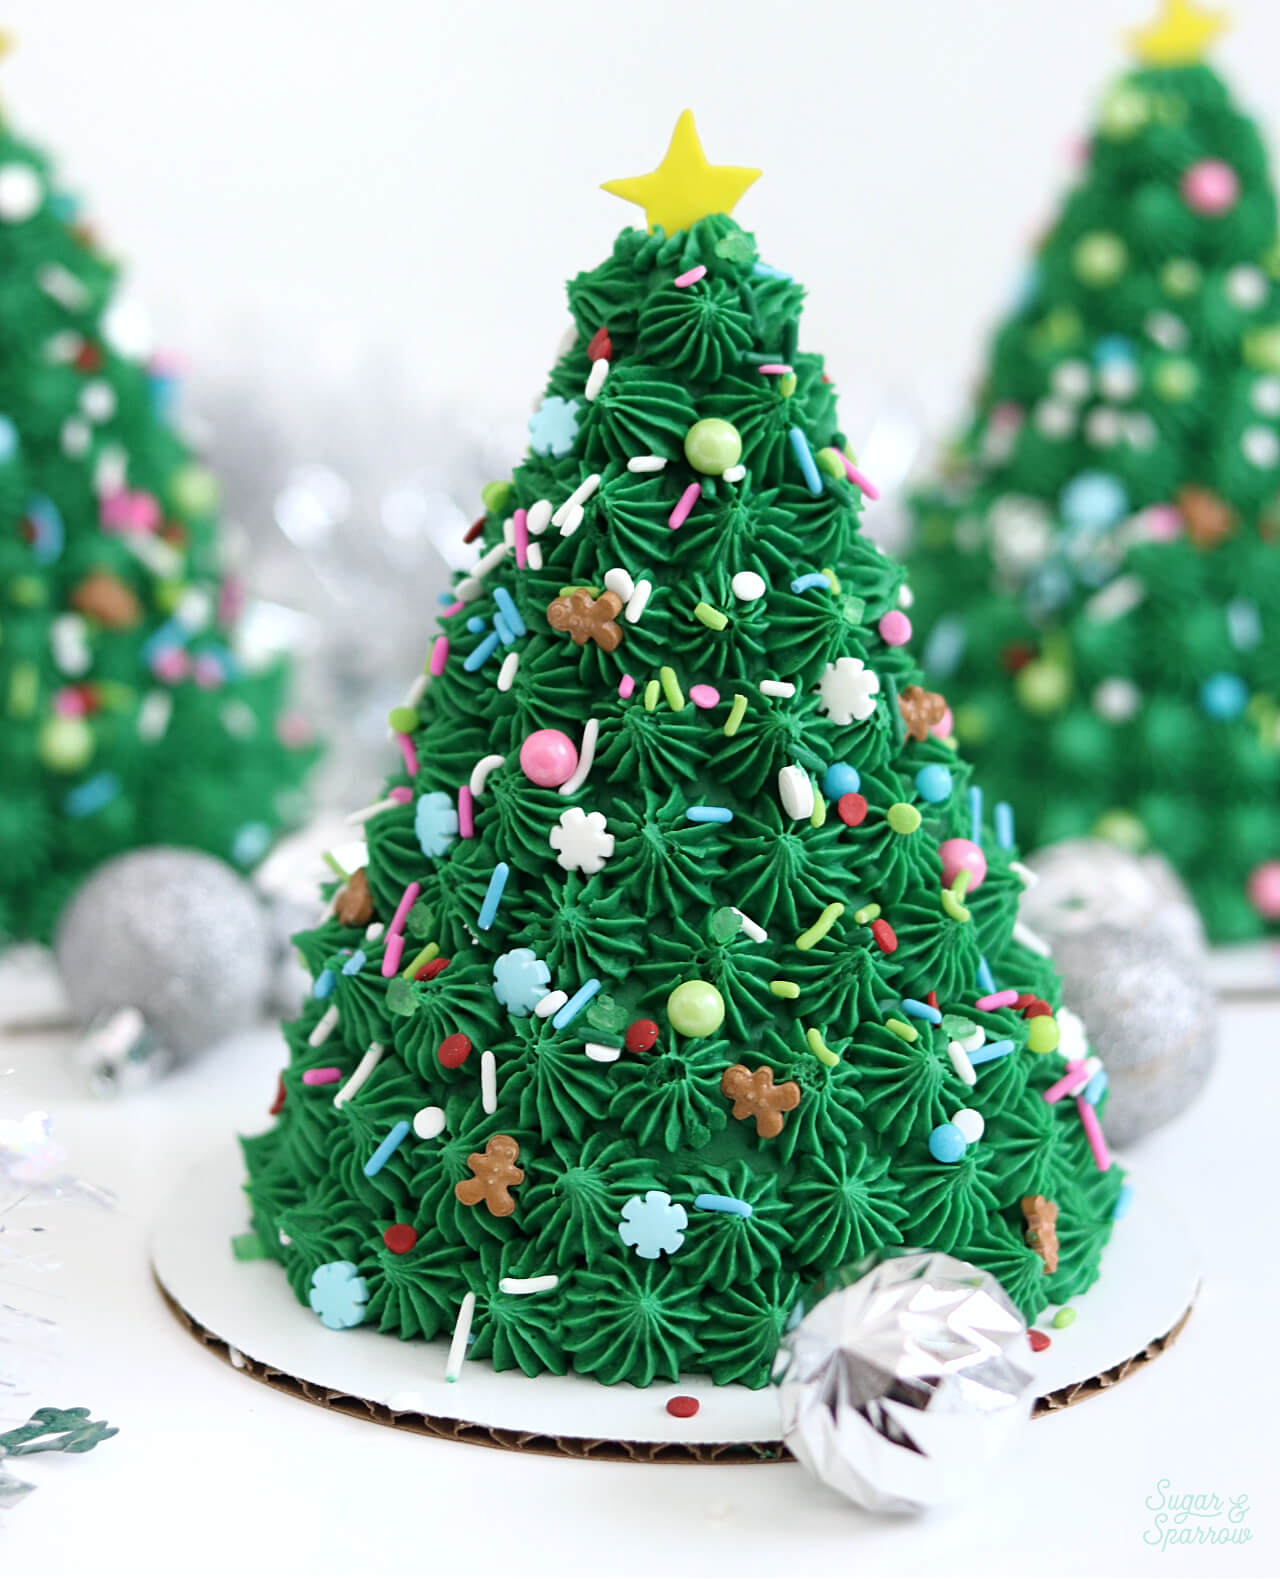
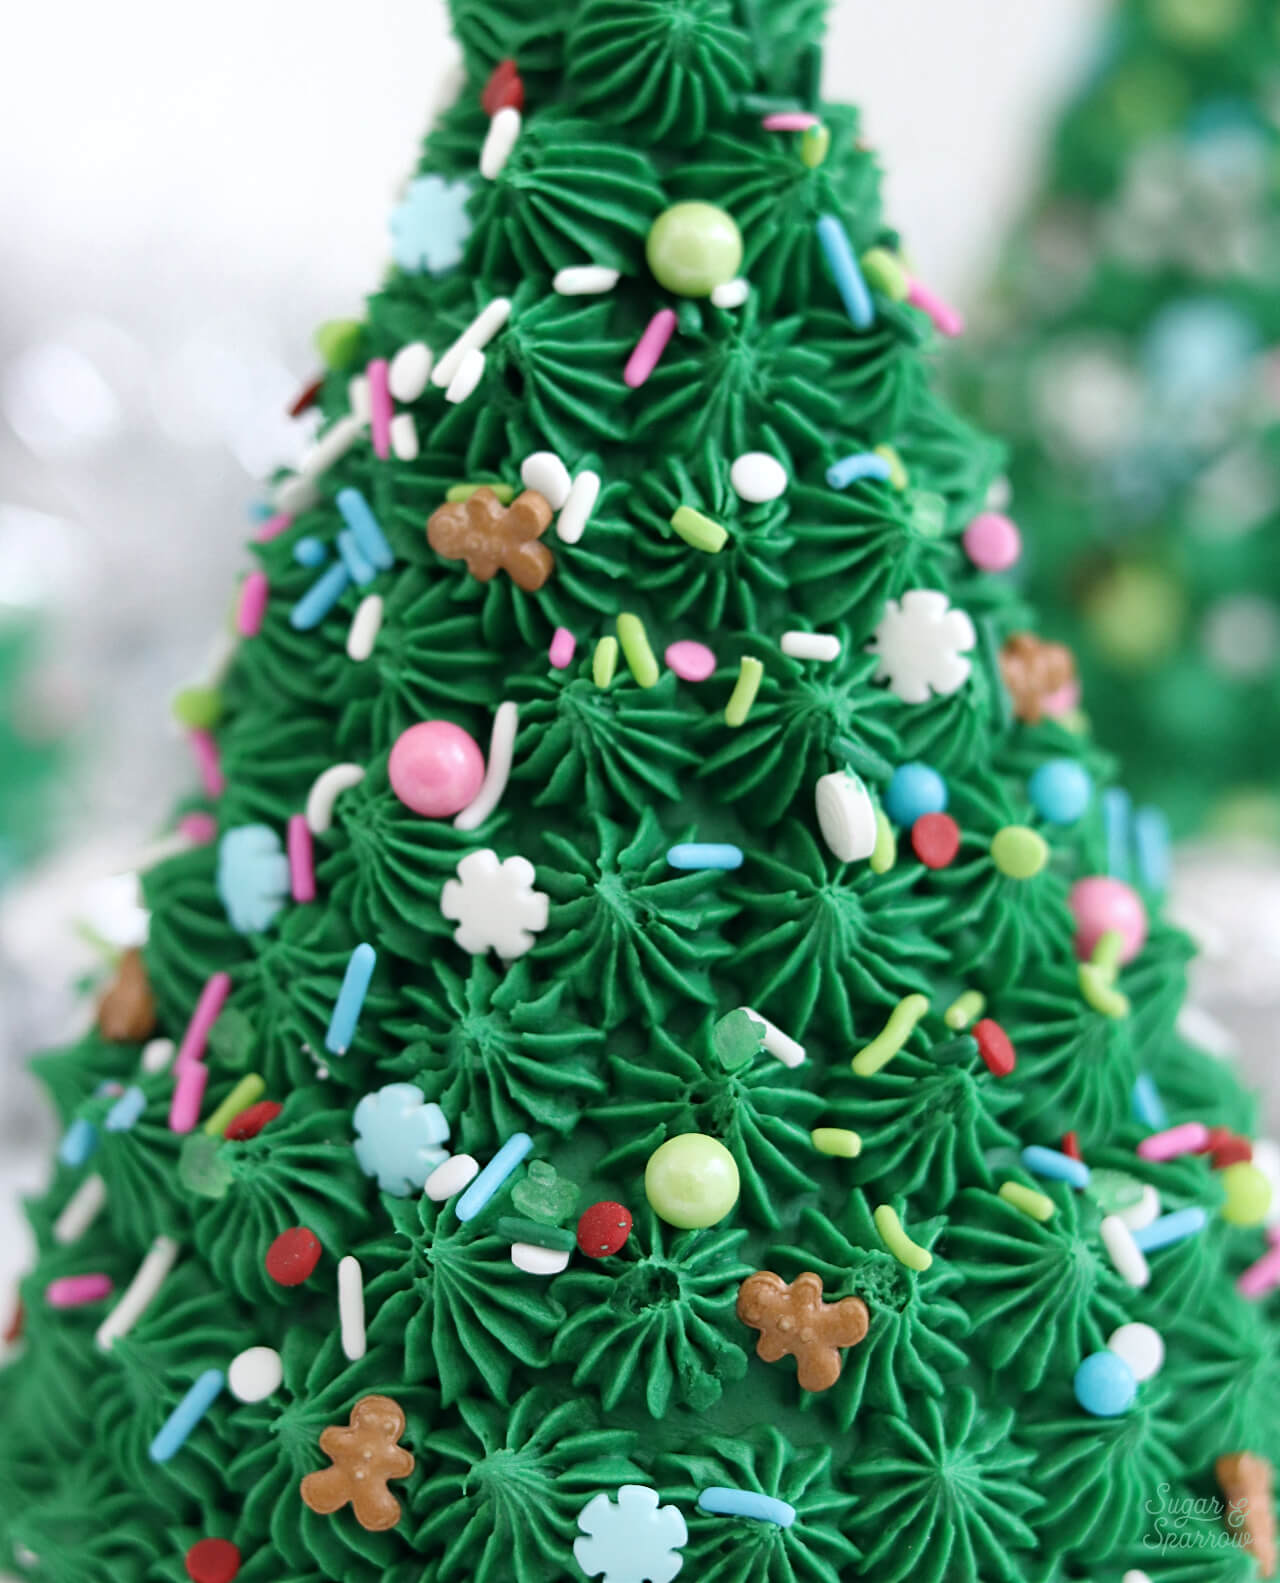
Step 6: Decorate with Holiday Sprinkles 

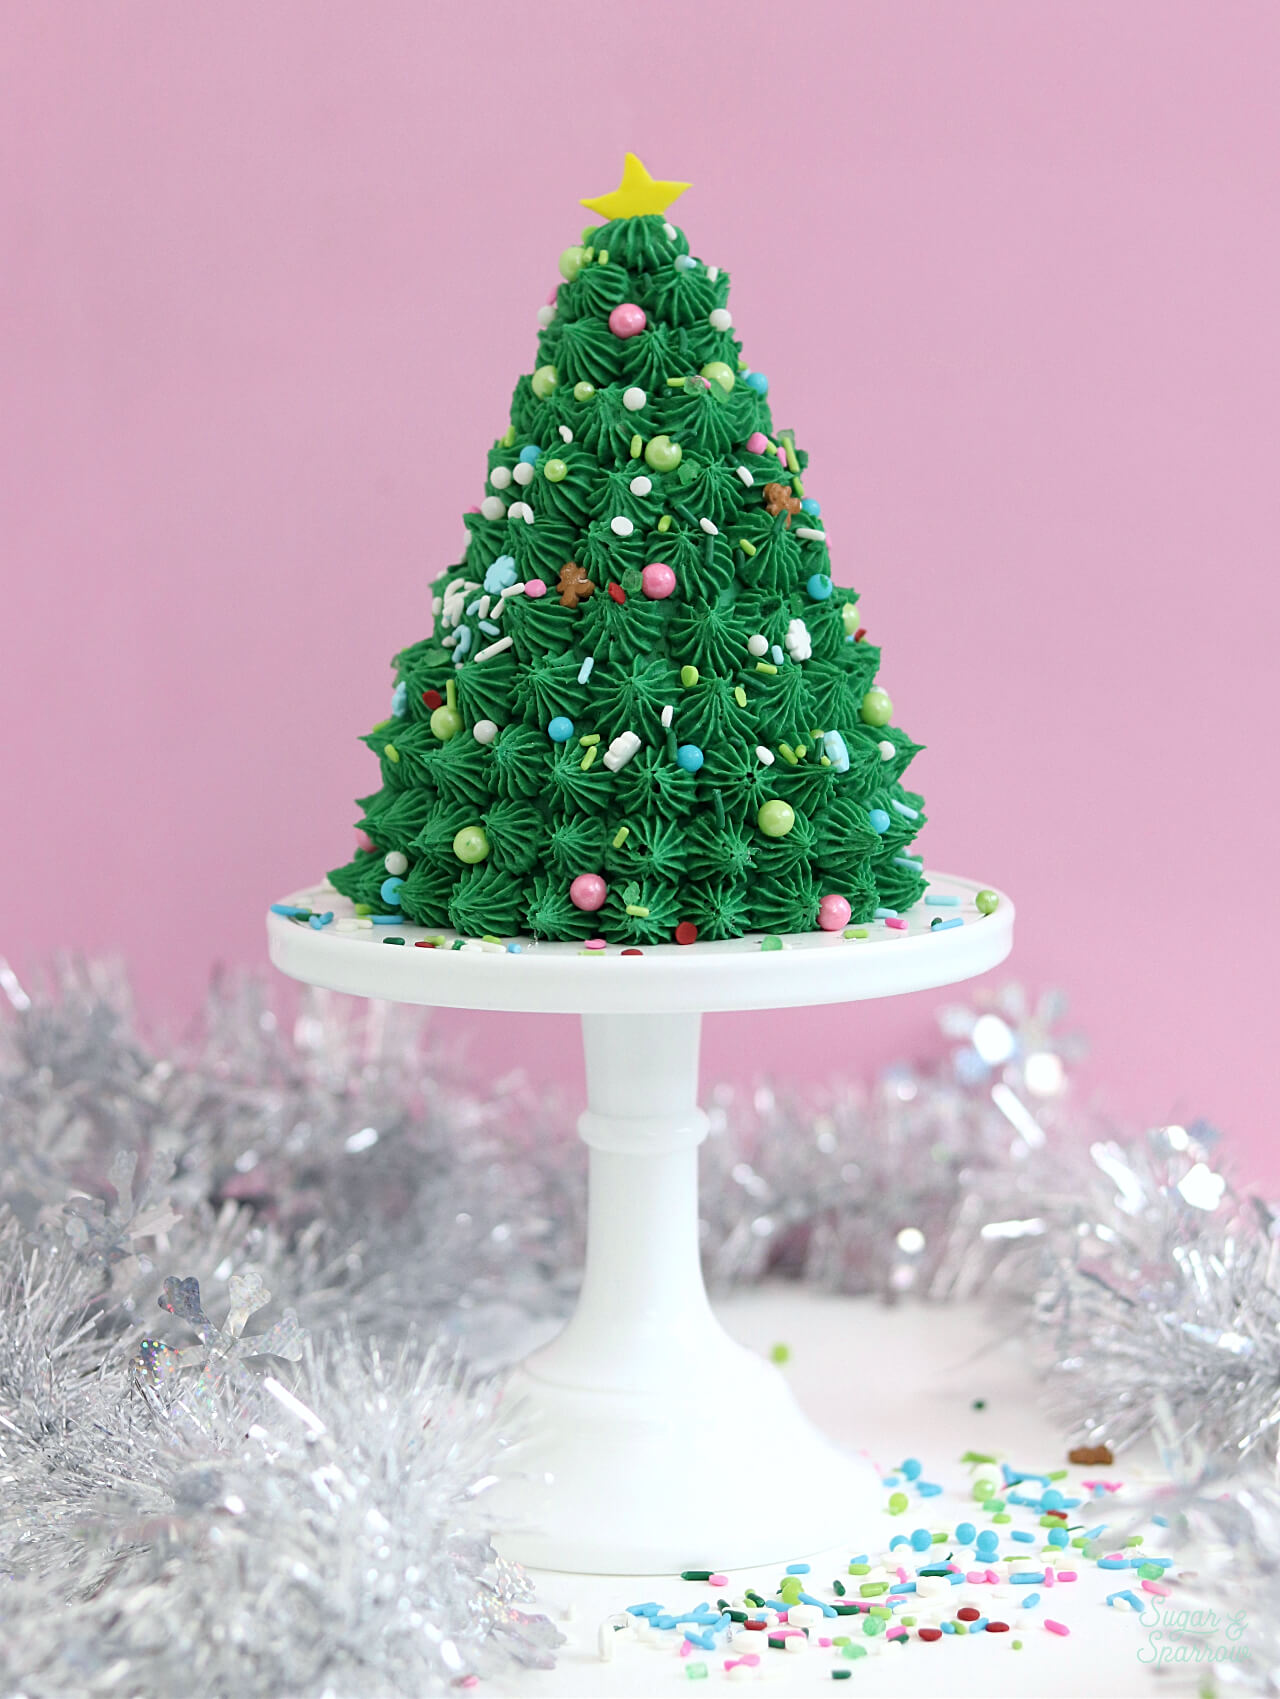
Finally, add generous amounts of Christmas sprinkles to each mini tree.

wilton holiday sprinkles on christmas tree cake

When you’re finished sprinkling, add a star to the top of each mini Christmas tree. For these, I tinted some gumpaste yellow, rolled it out thin, and cut out each star with a small star cutter. After about 24 hours it’s totally dry to the touch and ready for topping your trees!

how to decorate christmas tree cakes

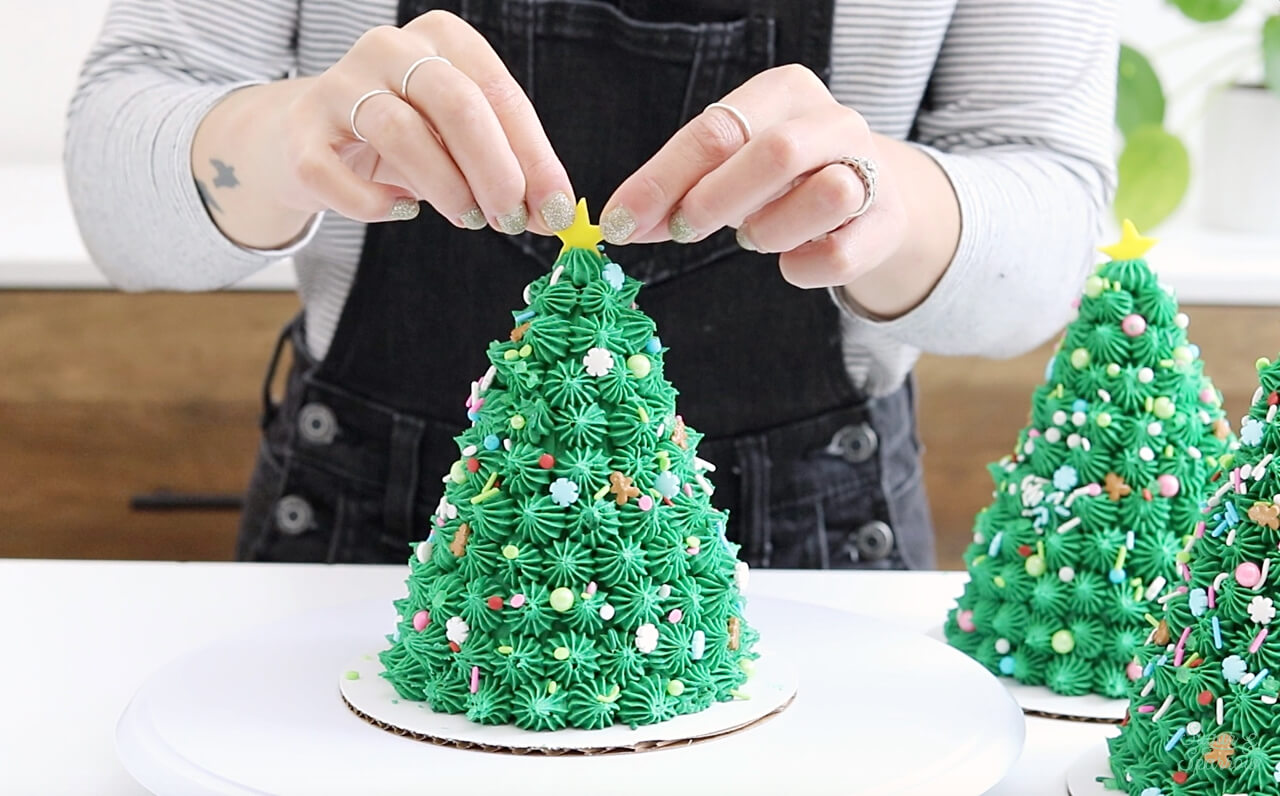
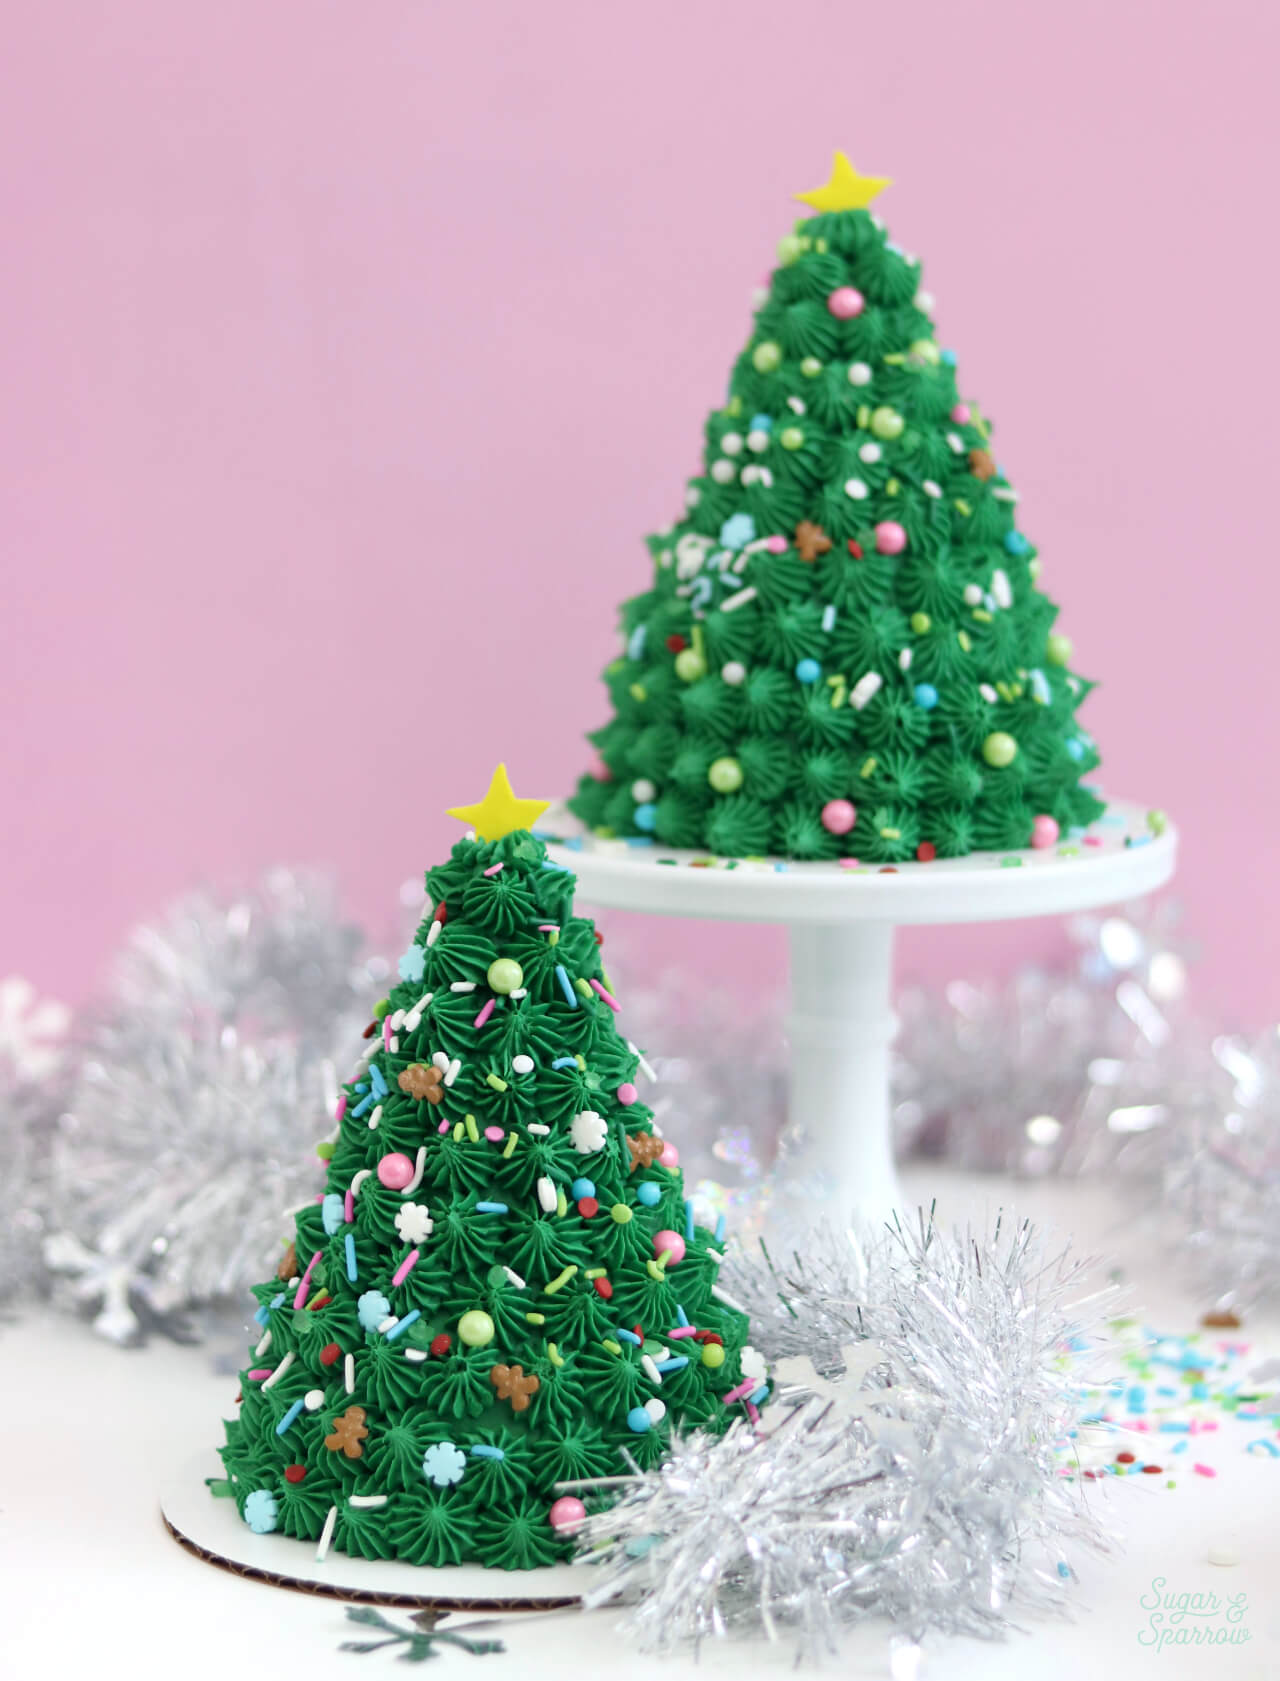
Pretty cute, right? Such a fun Holiday project whether it’s for adorning your dessert table or creating some festive memories with the family!

christmas party cake tutorial
christmas tree party cake tutorial

Disclaimer: I was compensated by JOANN for my work of creating this project, styling, filming, photographing, and writing about their products. As always, all opinions are honest and my own. Thank you for supporting brands that support Sugar & Sparrow.

By: Whitney · In: Featured, Holiday, Seasonal, Tutorials · Tagged: 3d christmas tree cake, cake decorating, cake tutorial, christmas cake, christmas party cake, christmas tree cake, holiday cake, holiday cake ideas, holiday party cake, JOANN, mini christmas tree cake, sprinkles, wilton tip 4b

you’ll also love

the best vanilla cupcakes recipeThe Perfect Vanilla Cupcake Recipe
pumpkin layer cake recipe by sugar and sparrowPerfect Pumpkin Layer Cake Recipe
oreo cookies and cream cakeOreo Layer Cake Recipe

Join the List

Stay up to date & receive the latest posts in your inbox.

Reader Interactions

Comments

  1. Lynn says

    December 15, 2025 at 4:50 am

    How tall is this cake when finished? I’m considering making this a smash cake for my grandson. Thank you!

    Reply
    • Whitney says

      December 15, 2025 at 12:06 pm

      Hi Lynn! This cake ends up being about 4 inches tall. It would be a great smash cake option!

      Reply
  2. BABS says

    November 25, 2023 at 5:12 pm

    Where did you purchase your cutters, I used the 3 inch, 2 inch, and ½ inch circular cutters to create three sets of each size, as I have searched the internet and cannot find any in those exact dimensions. I want to make this cake for Christmas, and need assistance in finding the correct cutters.
    Kind regards,
    BABS

    Reply
    • Whitney says

      December 9, 2023 at 7:22 pm

      Hi Babs! I used cutters from this Wilton set: https://amzn.to/46QQrca

      Reply
  3. Kate says

    December 19, 2021 at 10:56 pm

    How many people will each cake serve?

    Reply
    • Whitney says

      December 22, 2021 at 11:30 am

      Hi Kate! Each cake should serve 3-4 people depending on how big you cut the slices.

      Reply
  4. Kelly says

    December 14, 2021 at 10:42 pm

    How long do you bake your 4 inch cakes, and did you fill the pans abut 3/4 full? Does your basic cake recipe make enough batter for 8 layers? I can’t wait to try these!

    Reply
    • Whitney says

      December 15, 2021 at 12:48 pm

      Hi Kelly! You can bake any of my cake recipes as 4 inch cakes and my vanilla cake recipe (https://sugarandsparrow.com/vanilla-cake-recipe/) should yield enough batter 8 layers. Fill the pans no more than 2/3 full and bake at 350 for 25 minutes. Enjoy!

      Reply
  5. Sarah Davies says

    December 7, 2021 at 7:52 am

    I love these trees can’t wait to have a try just adorable

    Reply
    • Whitney says

      December 7, 2021 at 10:48 am

      Yay, Sarah! I hope you get a chance to make one! If you do, I hope you’ll join me in this Holiday Bake Along so I can see how you decorate! https://sugarandsparrow.com/holiday-bake-along/

      Reply
  6. Cindy says

    December 5, 2021 at 1:02 pm

    Beautiful trees! Do you use american buttercream or Swiss meringue buttercream?

    Reply
    • Whitney says

      December 6, 2021 at 12:13 pm

      Hi Cindy! I use American Buttercream (this recipe: https://sugarandsparrow.com/vanilla-buttercream-recipe/) but they’ll work with Swiss Meringue.

      Reply
  7. Jade says

    December 2, 2021 at 10:48 am

    Hello! How many cake boxes did you use for one of the trees?

    Reply
    • Whitney says

      December 6, 2021 at 12:16 pm

      Hi Jade! Each tree will fit in a box this size: https://amzn.to/3y2ldiE

      Reply
  8. SM says

    November 22, 2021 at 7:54 pm

    I just need to let you know that I am blown away by your creativity and so inspired to take on these projects. Your website is one of the very best and your passion shines through. My family celebrations have been enriched by my versions of your creations. My kids love to practice their buttercream piping skills with my left over icing….family traditions are being created as is a love for making home made masterpieces. And, you have helped me to finally kindle a long lost love for cake decorating.

    Thank you and I can’t wait to see what you come up with next!

    Reply
    • Whitney says

      November 24, 2021 at 10:00 pm

      Oh my goodness, thank you so much for the kind words! It makes my day to hear that the whole family is making memories in the kitchen and I’m cheering you on in that cake decorating! Thanks for taking the time to let me know 🙂 it’s so encouraging

      Reply

Leave a Reply Cancel reply

Your email address will not be published. Required fields are marked *

Recipe Rating


Next Post >

Buttercream Knitted Sweater Cake Tutorial

Primary Sidebar

Welcome to Sugar & Sparrow

Welcome to Sugar & Sparrow

Helping you whip up pretty desserts with confidence and creativity. And hopefully sharing a few laughs with you along the way!

Learn More

Connect

let’s bake!

Get my very best recipes, baking tips, and decorating tutorials sent to your inbox

Featured Posts

halloween witch cauldron cake by sugar and sparrow

Halloween Witch Cauldron Cake

no-churn cookie dough ice cream cake recipe by sugar and sparrow

The BEST Cookie Dough Ice Cream Cake

24 fall baking recipes

38+ Fall Baking Recipes

Search

Archives

Follow Along

@sugarandsparrowco

FUNFETTI SHEET CAKE 🥳 the most celebratory flavor FUNFETTI SHEET CAKE 🥳 the most celebratory flavor of all and so perfect for a crowd. It’s extra soft and moist vanilla cake speckled with rainbow sprinkles + captures that box mix texture but it’s 100% homemade and EASY! Top it with vanilla buttercream and rainbow sprinkles for the perfect party cake 🎉
 
Full recipe (w/ frosting) at the link in my bio or at https://sugarandsparrow.com/funfetti-sheet-cake/ 

INGREDIENTS 
2 1/2 Cups (265g) sifted cake flour 
2 tsp baking powder 
1/2 tsp baking soda 
1 tsp salt 
3/4 Cup (170g) unsalted butter, room temp 
1 3/4 Cup (340g) granulated white sugar 
3 large eggs, room temp 
1/2 Cup (120g) sour cream, room temp 
1 Tbsp pure vanilla extract 
1 Cup (240ml) whole milk, room temp 
1/3 Cup (60g) rainbow sprinkles, coated in 1 tsp flour 
 
INSTRUCTIONS 
1. Preheat the oven to 325°F (163ºC). Grease and line a 9×13 baking pan. 
2. In a medium bowl, whisk together the sifted cake flour, baking powder, baking soda, and salt. Set aside.  
3. In the bowl of your stand mixer fitted with the paddle attachment (or with a large bowl and hand mixer), beat the butter and sugar on medium-high speed until light and fluffy, 4 min. Add the eggs one at a time, then add the vanilla and sour cream and mix for one minute on high speed. 
4. Turn the mixer off and add the dry ingredients all at once. Mix on low speed until just combined, then add the milk and mix until just incorporated.  
5. Coat the rainbow sprinkles in 1 teaspoon of flour, then gently fold them into the cake batter. Pour the batter into the prepared baking pan and bake for 30-35 minutes, or until the cake springs back to the touch and a toothpick inserted into the middle comes out clean. Let the cake cool in the baking dish until room temperature, then decorate with vanilla buttercream + rainbow sprinkles (full recipe link in bio!) 
 
#funfetti #funfetticake #sheetcake #cake #birthdaycake
COOKIE DOUGH ICE CREAM CAKE 🍪🍦this is the birthday COOKIE DOUGH ICE CREAM CAKE 🍪🍦this is the birthday cake of my DREAMS and I’m so excited to share the recipe with you!! It’s chocolate and vanilla no-churn ice creams with homemade cookie dough chunks in every bite, swirled together and set on a delicious Oreo cookie crust 😍 easy, perfectly sliceable, and ideal for making ahead! I’m already dreaming about when I can make it again ✨

Get the recipe link in my bio + at https://sugarandsparrow.com/chocolate-chip-cookie-dough-ice-cream-cake/

#birthdaycake #icecreamcake #cakedecorating #nochurnicecream #icecreamlover
My kitchen in May 💛 some of these recipes had me f My kitchen in May 💛 some of these recipes had me feeling CRAZY with how many tests they took 🤪 but in the end I am so happy with these ones I got to hit the publish button on + I made my DREAM birthday cake that I can’t wait to share ASAP!!

Comment “MAY” to get all the recipes that are available now:

-Strawberry Shortcake Sheet Cake
-Lemon Cupcakes
-Lemon Cream Cheese Buttercream
-Orange Poppyseed Cake
-Whipped Mascarpone Frosting
-No-Bake Marbled Strawberry Cheesecake
-Chocolate Chip Cookie Cake

https://sugarandsparrow.com/everything-i-baked-in-may
 
#dessert #bakersofinstagram #baking #bakinglove #dessertlovers
CLASSIC BIRTHDAY CAKE 🥳 yellow cake with chocolate CLASSIC BIRTHDAY CAKE 🥳 yellow cake with chocolate frosting makes me so nostalgic for my childhood birthdays + my homemade version captures that moist and fluffy texture of box mix, but it’s 100% HOMEMADE! Pair it with chocolate frosting + lots of rainbow sprinkles and make it to celebrate someone special 💛
  
Full recipe (with chocolate frosting) is linked in my bio or at https://sugarandsparrow.com/yellow-cake-recipe/
  
INGREDIENTS  
2 Cups (210g) sifted cake flour  
1 1/2 tsp baking powder  
1/2 tsp baking soda  
1/2 tsp salt  
1/2 Cup (113g) unsalted butter, room temp  
3 Tbsp (45ml) vegetable oil  
1 1/3 Cups (267g) granulated sugar  
2 large eggs, room temp  
2 large egg yolks, room temp  
1/3 Cup (80g) sour cream, room temp  
2 tsp pure vanilla extract  
3/4 Cup (180ml) whole milk, room temp  
  
INSTRUCTIONS  
1. Preheat the oven to 350°F (177°C). Grease and line three 6-inch or two 8-inch cake pans.  
2. In a medium bowl, add the sifted cake flour, baking powder, baking soda and salt. Whisk together and set aside.  
3. In the bowl of your stand mixer fitted with the paddle attachment (or with a handheld mixer and large bowl), beat the butter on high speed until it’s creamy, 2 min. Add the vegetable oil and sugar, then continue to mix on medium-high until pale and fluffy, 2 min. Add the eggs and egg yolks one at a time, mixing on low speed for 10-15 seconds after each addition. Add the vanilla and sour cream and turn the mixer to high speed for 1 min.   
4. Turn the mixer off and add the dry ingredients all at once. Mix on low speed until the ingredients just start to combine, then add the milk in a steady stream and continue mixing until incorporated, about 30 seconds.   
5. Pour the batter evenly into the prepared cake pans and bake for 28-32 minutes. Let the cakes cool, then fill and frost with chocolate buttercream (full recipe linked in my bio!)
  
#birthdaycake #yellowcake #cakedecorating #chocolatecake #cakelover
S’MORES ICEBOX CAKE 🔥 Every bit as gooey and decad S’MORES ICEBOX CAKE 🔥 Every bit as gooey and decadent as it seems and I am blown away at how EASY this recipe is! It’s layers of graham crackers, chocolate ganache, and homemade marshmallow creme, piled high in a loaf pan and refrigerated overnight. The graham crackers soften into a cake-like texture and transform this dessert into the easiest s’mores cake ever.  
 
Recipe linked in my bio and at https://sugarandsparrow.com/smores-icebox-cake/
 
#smorescake #iceboxcake #nobake #smores #cakedecorating

Footer

On the Blog

  • Cake Basics
  • Recipes
  • Tutorials

Info

  • About
  • Privacy Policy & Disclosure

stay in the know

Copyright © 2026 · Theme by Sugar & Sparrow