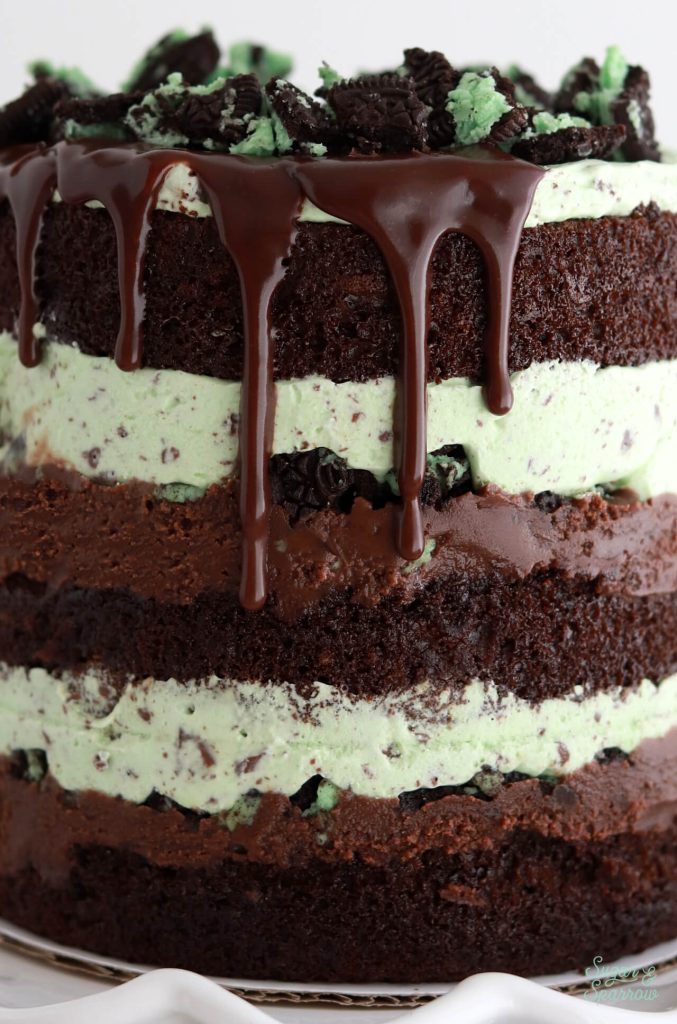
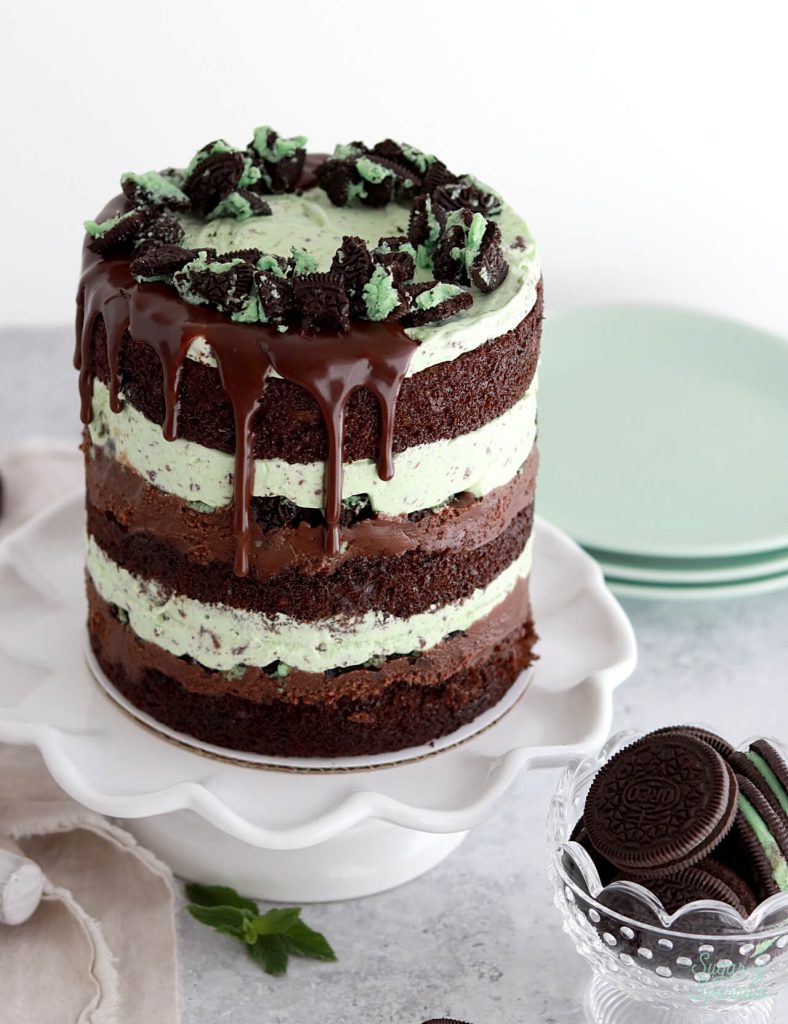
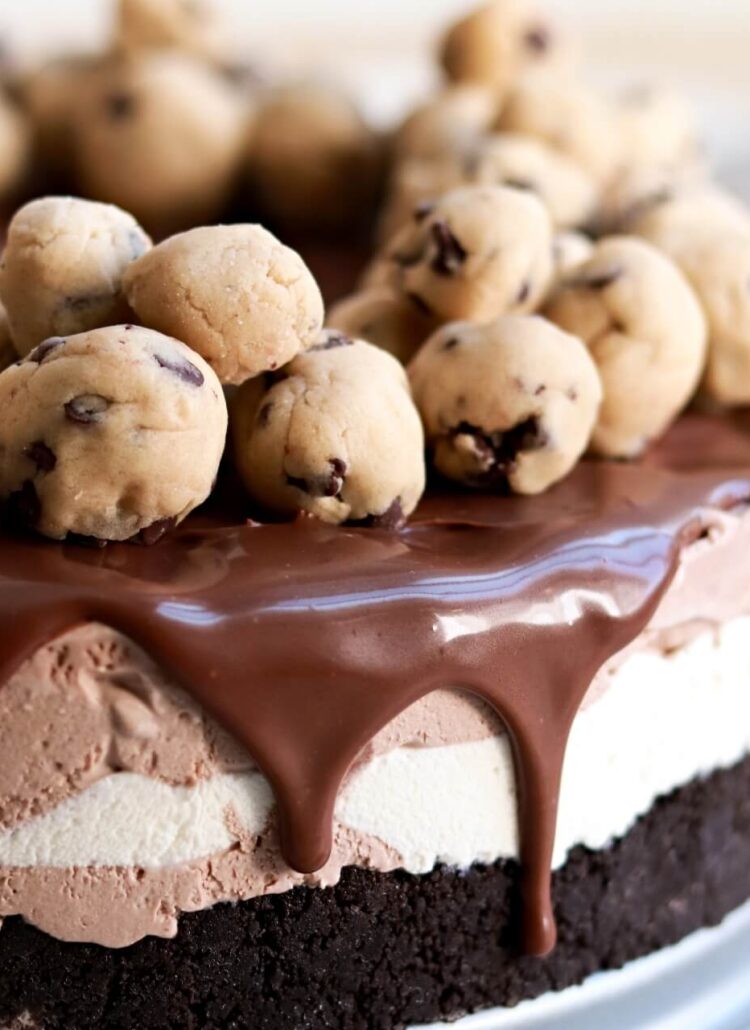
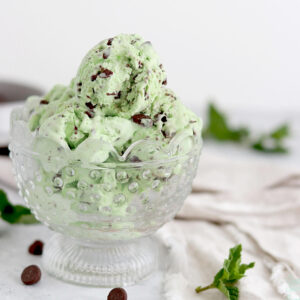
Ever since the first time I made this no-churn mint chocolate chip ice cream, I have been dreaming about using it to make an ice cream cake. Not just any old ice cream cake though, something with gorgeous layers, intriguing textures, and complimentary flavors throughout. So I got to work making layers of fudgy chocolate cake, hot fudge sauce, crumbled mint Oreos, and creamy (super easy!) mint chocolate chip ice cream. I can say with assurance that this is the best ice cream cake I’ve ever had and now I can’t stop thinking about more ice cream cake flavor combinations to try!


There are four elements you’ll be layering with this ice cream cake, but it doesn’t make it a complicated recipe. You can prepare most of the elements ahead and the assembled cake will last in the freezer for up to two months (if you can even go that long without digging in). That makes it the perfect make-ahead cake for any kind of celebration. And aside from the optional hot fudge drip, this ice cream cake doesn’t even require cake decorating skills. All of the elements are layered in an acetate collar to keep them precise, so it’s pretty much guaranteed to turn out beautiful without much effort.
This mint chocolate chip ice cream cake kicks off with my favorite one-bowl chocolate cake. It’s rich and decadent, fudgy and moist, and truly everything a chocolate cake should be. The best part about this recipe is that it’s quick to throw together. In my opinion, it’s the closest to box-mix-level-easy as you can get with a from-scratch recipe.
Next up is the hot fudge sauce, which I used as both a filling and a drip. It has the perfect fudge flavor and while it’s very thin at first (like, so thin I had a hard time believing it would work), it thickens significantly as it cools. I stored mine in a mason jar and let it cool in the refrigerator until it was room temperature and perfectly thick for layering. One thing to note is that the addition of light corn syrup is optional – this ingredient simply helps the hot fudge layer stay soft when chilled instead of becoming super firm. For that reason I like to add it, but it won’t be a big deal if you don’t.
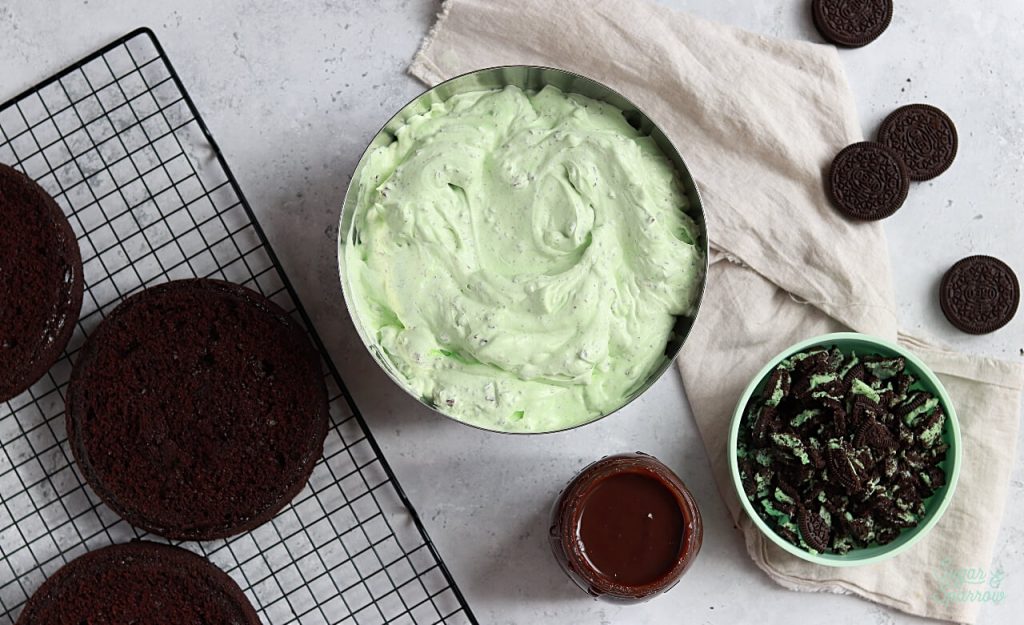
Aside from crushing up some mint Oreos for adding on top of the fudge filling, all that’s left to do is make the no-churn mint chocolate chip ice cream. It literally takes less than 10 minutes to toss together and makes perfect ice cream every single time. My friend who is obsessed with making ice cream in an ice cream maker tried some of my mint chocolate chip ice cream and couldn’t believe it was a no-churn recipe since the texture and flavor was so spot on. I thought that was pretty flattering.
If you’ve never built a cake inside an acetate collar before, be sure to check out this blog post. You’ll only need the acetate, a springform pan, and a few pieces of scotch tape. There are detailed assembly instructions after the recipe portion of the post, so you can follow those to make the acetate collar before you start layering. It’s incredibly easy with the right materials.
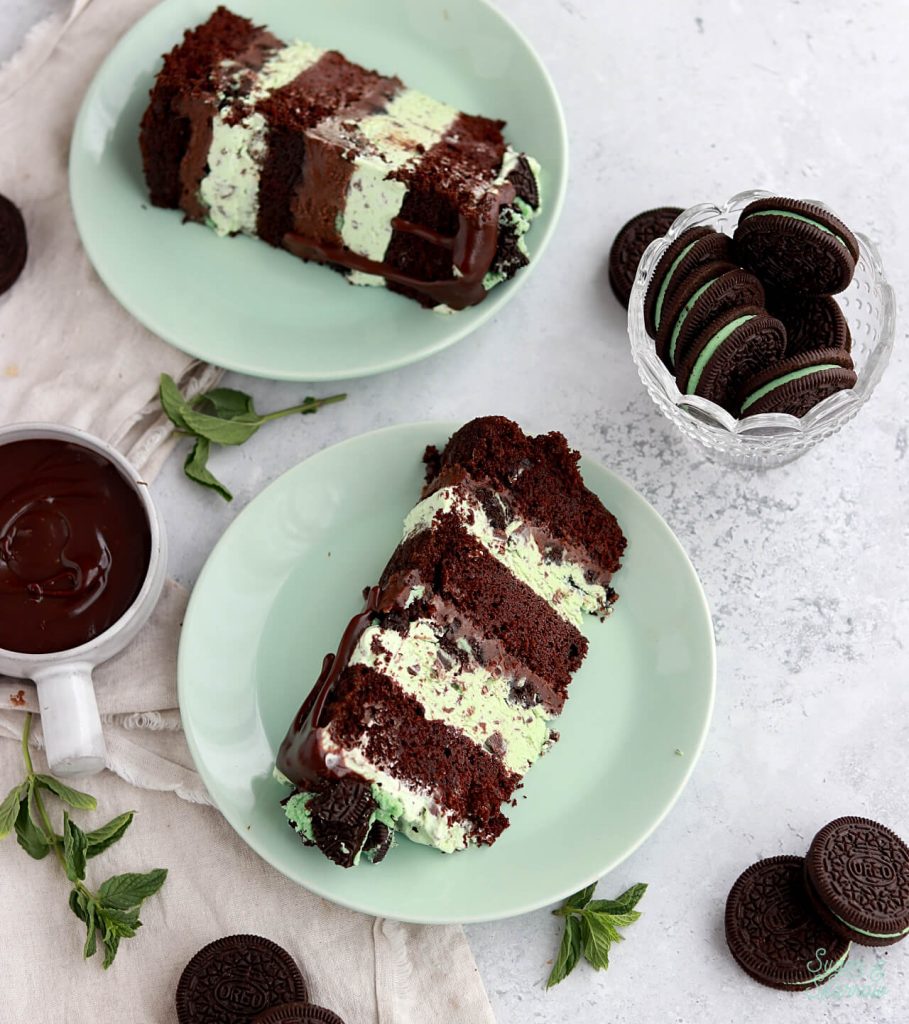
After you build the cake, you’ll freeze it for at least 6 hours to let the ice cream set, at which point you can continue storing it or serve it up. If you want to add the hot fudge drip, simply reheat the hot fudge in 10-second intervals in the microwave until it’s perfect drip consistency and drip away. Top it with more crushed mint Oreos to finish off the look and I promise, all who love mint chocolate will marvel. You won’t have any leftovers with this one!

Mint Chocolate Chip Ice Cream Cake
Equipment
- 6-inch springform pan
- acetate sheets
Ingredients
Chocolate Cake
- 1 1/3 Cups (177g) all purpose flour
- 1 1/4 Cups (250g) granulated sugar
- 1/2 Cup (45g) unsweetened natural cocoa powder
- 1 1/4 tsp baking soda
- 1/2 tsp baking powder
- 1/2 tsp salt
- 1/3 Cup (80ml) vegetable oil
- 1 large egg, room temperature
- 1 tsp pure vanilla extract
- 2/3 Cup (160ml) full-fat buttermilk*, room temperature DIY recipe in notes
- 2/3 Cup (160ml) hot coffee or hot water
Hot Fudge Filling
- 1 Cup (240ml) heavy whipping cream
- 1/4 Cup (60ml) light corn syrup**
- 1/2 Cup (100g) granulated sugar
- 1/2 Cup (113g) unsalted butter
- 1 tsp pure vanilla extract
- 1/4 tsp salt
- 6 Oz (175g) semi-sweet chocolate chips
- 1/4 Cup (22g) unsweetened natural cocoa powder
No-Churn Mint Chocolate Chip Ice Cream
- 1 Cup heavy whipping cream, cold
- 7 Oz (199g) sweetened condensed milk
- 1/2 tsp peppermint extract
- 1-2 drops green food color gel, optional
- 1/2 Cup (92g) semi-sweet or dark chocolate, chopped
Additional Filling/Topping
- 20 mint Oreo cookies, chopped
Instructions
Make the Chocolate Cake
- Preheat the oven to 350ºF/177ºC and prepare three 6-inch cake pans by spraying the sides with cooking spray and fitting the bottoms with a wax paper or parchment cake circle.
- Place all of the dry ingredients into the bowl of a stand mixer and stir on low for 30 seconds to fully combine them. Add the vegetable oil, eggs, vanilla, and buttermilk and mix on low until just combined. With the mixer still on low, add the hot water in a slow stream, then turn the mixer to medium and beat until smooth, about 2 minutes. The batter will be very thin.
- Pour into prepared cake pans no more than 2/3 full and bake for 20-24 minutes, until a toothpick inserted comes out clean. Let cool for five minutes in the pan before removing the layers and allowing them to cool completely on a wire rack.
Make the Hot Fudge Filling
- In a medium saucepan over medium heat, combine the heavy whipping cream, corn syrup, sugar, salt, butter, and vanilla. Whisk constantly until the butter is fully melted and the mixture begins to simmer.
- Reduce heat to medium-low and add the chocolate chips. Stir until melted.
- Whisk in the cocoa powder and continue to cook on low until fully incorporated and glossy, about 1 minute.
- Place the hot fudge into an airtight container and store in the refrigerator until room temperature, 20-30 minutes. It will thicken significantly as it cools.
Make the Mint Chocolate Chip Ice Cream
- Wait to make this element until right before you're ready to assemble the cake. Place a large metal or glass bowl into the refrigerator for at least 20 minutes to chill before you get started.
- Add the heavy whipping cream into the chilled bowl, then whip it with a hand mixer on high speed until stiff peaks form, 2-3 minutes. You can alternatively use a stand mixer with the whisk attachment for this part.
- In a separate small bowl, whisk together the sweetened condensed milk, peppermint extract, and green food coloring until combined. Gently fold the sweetened condensed milk mixture into the heavy whipping cream with a rubber spatula, then fold in the chopped chocolate.
Assembly
- Once the chocolate cake layers are cooled completely, level them to about 1/2 to 3/4 inch tall. Place a 6-inch cardboard cake circle into the bottom of a springform pan, then place the first cake layer on top. Wrap a sheet of acetate around the cake layer and tape it together once it's the same diameter as the cake layer. Here are more detailed instructions on how to prepare the acetate collar.
- Add about 1/2 Cup of hot fudge filling onto the top of the cake layer and smooth it down until it reaches the acetate. Sprinkle a layer of crushed mint Oreos on top of the fudge. Place the mint chocolate chip ice cream into a piping bag, snip off 1/2 inch opening at the end, and pipe a layer of ice cream on top of the mint Oreos. Add the next cake layer on top and gently press it down to flatten the layers beneath.
- Repeat the layer of fudge filling, crushed mint Oreos, and mint chocolate chip ice cream before placing the final cake layer on top. Pipe another thin layer of mint chocolate chip ice cream on top of the final cake layer and smooth it down.
- Freeze the ice cream cake for at least 6 hours. When you're ready to serve it, remove the cake from the springform pan and unwrap the acetate. If you'd like to add a hot fudge drip, gently re-heat the remaining hot fudge in the microwave in 10 second intervals, stirring after each one, until it becomes drip consistency. Then create a decorative half drip on top of the cake.
Notes
- The chocolate cake layers can be made ahead and stored at room temperature, covered tightly in plastic wrap, for up to two days. Alternatively, you can cover with plastic wrap and store in the freezer for up to two months before thawing to room temperature.
- The hot fudge can be made ahead and stored in an airtight container in the refrigerator for up to two weeks. When you’re ready to use it, gently reheat it in the microwave in 10 second intervals until spreadable.
- The mint chocolate chip ice cream must be made right before assembling the cake and cannot be made ahead.
- The assembled cake or leftovers can be stored in the freezer, wrapped in acetate or plastic wrap, for up to two months.
Did you make this mint chocolate chip ice cream cake recipe? I want to know what you think! Tell me about it in the comments below and feel free to tag @sugarandsparrowco on Instagram to show me. I love to see what you create with my recipes!


I’m getting fired up to make this very soon, and have a few questions.
• Is the ice cream piped onto the cake before any chilling?
•. How tall is the finished cake, using 6” cakes, as specified?
•. Is the cake ready to cut and serve immediately after removing the acetate wrap and applying the fudge drip?
Hi Sharon! To answer your questions: 1) The ice cream is piped onto the cooled cake layers before freezing the cake, 2) If I remember correctly, the cake ends up being about 6 inches tall, 3) yes, you can cut and serve the cake immediately after applying the drip. The ice cream is pretty soft even when frozen. Enjoy!
I made this for my husband’s birthday this past weekend and it was GOOD! The chocolate cake was light, moist and delicious, the mint Oreos and fudge – YUM! I admit that I cheated and used store-bought mint chip ice cream and let it thaw before piping it. We didn’t have a 6″ springform pan so we improvised with a bigger one and crumpled up some foil to make it work. It was my first time using acetate and it wasn’t as hard as I thought. Can’t wait to try more of your recipes!
How can I substitute for the acetate sheets? Could I use parchment paper?
Hi there! Yes, you can absolutely use parchment paper!
Loved this recipe and so did my family! The hot fudge is wonderful and decadent, whole thing is delicious together. I wanted a smaller cake, so I cut the cake and fudge recipes in half and used a single 8 inch pan. That worked really well. I did a good layer of fudge in the middle and had a little left for a drip. I left the ice cream recipe whole because I didn’t mind having extra! But I ended up using most of it anyway so almost half of the whole thing was ice cream. No one around me carries acetate so I actually made a collar by folding over a long strip of aluminum foil a few times and taping it together around the cake, which actually worked quite well in a pinch. I accidentally didn’t whip my whipped cream enough so my ice cream mixture was loose and definitely not pipe-able! I was afraid it would set too hard but poured it inside my foil collar on the cake anyway and it actually came out great. Looked very pretty when done and as I said tasted amazing! Thanks for the great recipe. I’m glad it worked out so well despite my changes, hacks and foibles lol
I’m so happy this recipe was a hit, Michelle! I love knowing that aluminum foil works well as a collar! Thanks for sharing your tips and hacks 🙂
I made this cake for my daughter’s 30th birthday party. Usually we purchase a mint chocolate chip ice cream cake from Baskin Robbins. I didn’t have a 6″ cake pan nor a 6″ springform pan so I doubled the recipe and used two regular springform pans. I split the two baked cakes and used 3 of the 4 layers. I was also missing the acetate paper so I used parchment, that didn’t work out to well but the cake was still beautiful and so yummy! This chocolate cake recipe is one of my favorites! The ice cream and fudge sauce were also delicious.
Yay, Jeannette! I’m so happy that this cake was a hit for your daughter’s birthday! It’s one of my favorites!
Made this exactly as written – it was easy to come together, looked picture perfect because of the acetate method, and most importantly, it was SO delicious! I love a recipe where you can make the different elements in advance (besides the ice cream for this one). The no-churn ice cream has the perfect texture and just the right amount of mint flavor. The cake was really easy to slice and it held up well in the freezer a week in advance of cutting. I found that leaving the sliced layers out about 10 minutes before digging in helped bring out more of the chocolate-y flavor of the cake. Thank you for the great recipe!
Yay, Nina! I’m so happy this recipe was a hit!
Thank you for the recipe! I’m not an experienced baker at all and I’ve never made ice cream, and I can confirm this is actually really easy! My only problem: I followed the recipe exactly but only got 2 6-inch layers of cake out of it and had to use the ice cream very sparingly to get some on every layer. I’d say I needed at least double the amount of ice cream and 1/3 more cake batter. I went pretty light on the fudge too as I was worried I wouldn’t have enough left over for the drip. I’m not sure why this happened as I followed amounts to the T. Any suggestions? Overall wonderful and easy recipe — even for a complete novice!
Yay, Erica! I’m so happy this recipe was a hit!! When I make this recipe, I am able to divide the cake batter between three 6-inch cake pans (the pans end up filling about 1/3 full) and end up with three short cake layers. Next time for the hot fudge, you can reserve about 1/3 Cup for the drip before you start assembling the cake, this way you’ll be able to freely divide the remaining hot fudge when you assemble. The hot fudge recipe makes about 2 1/2 cups total, which ends up being plenty for the layers and the drip. If you’d like more ice cream, you can make this mint chocolate chip ice cream recipe and have double the amount: https://sugarandsparrow.com/no-churn-mint-chocolate-chip-ice-cream/ hope all of that helps for next time and I’m so glad you loved this cake as much as I do!