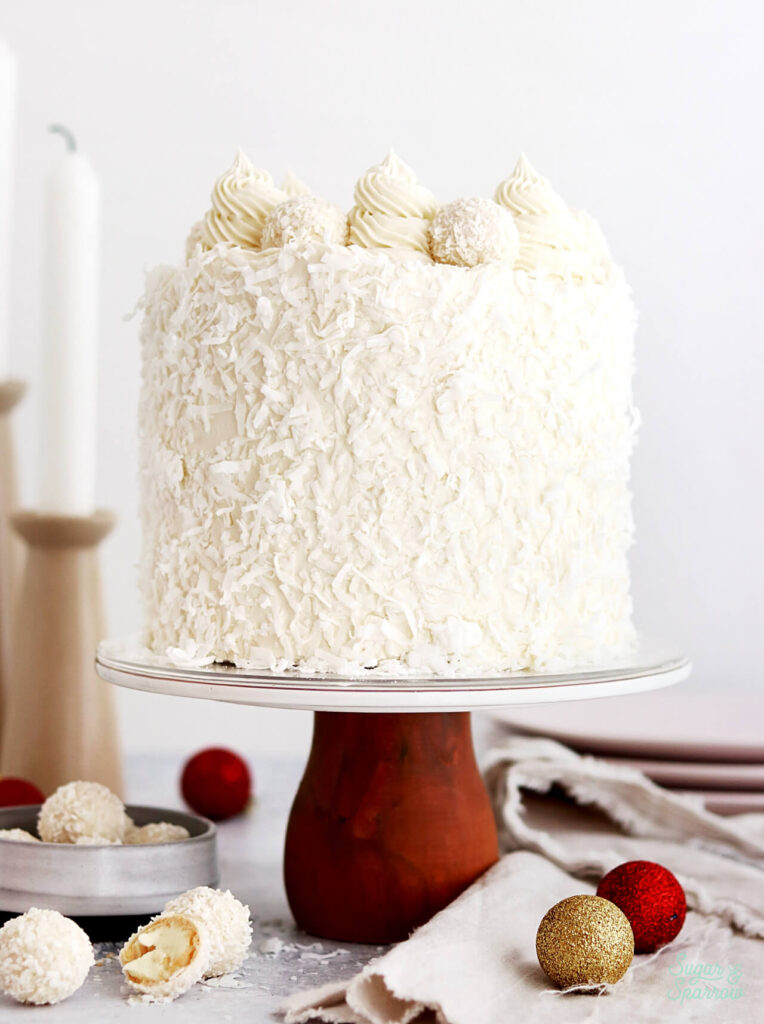
I’ve been dreaming about making a Rafaello cake for awhile now, and the holiday season seemed like the ideal time to give it a go. After all, they do look like cute little snowballs. If you’ve never tasted a Rafaello before, it’s basically the best coconut-almond candy ever – a crispy coconut covered wafer shell, gooey milk cream center, and a white almond inside. They’re delicious, and the perfect inspiration for a layer cake.
This Rafaello cake starts with delicious almond cake layers. It’s basically my favorite vanilla cake recipe, but with almond extract being the dominant flavor component. The recipe uses cake flour and egg whites to create a light, fluffy crumb, but also uses sour cream to add lots of moisture. The result is packed with almond flavor and just divine.
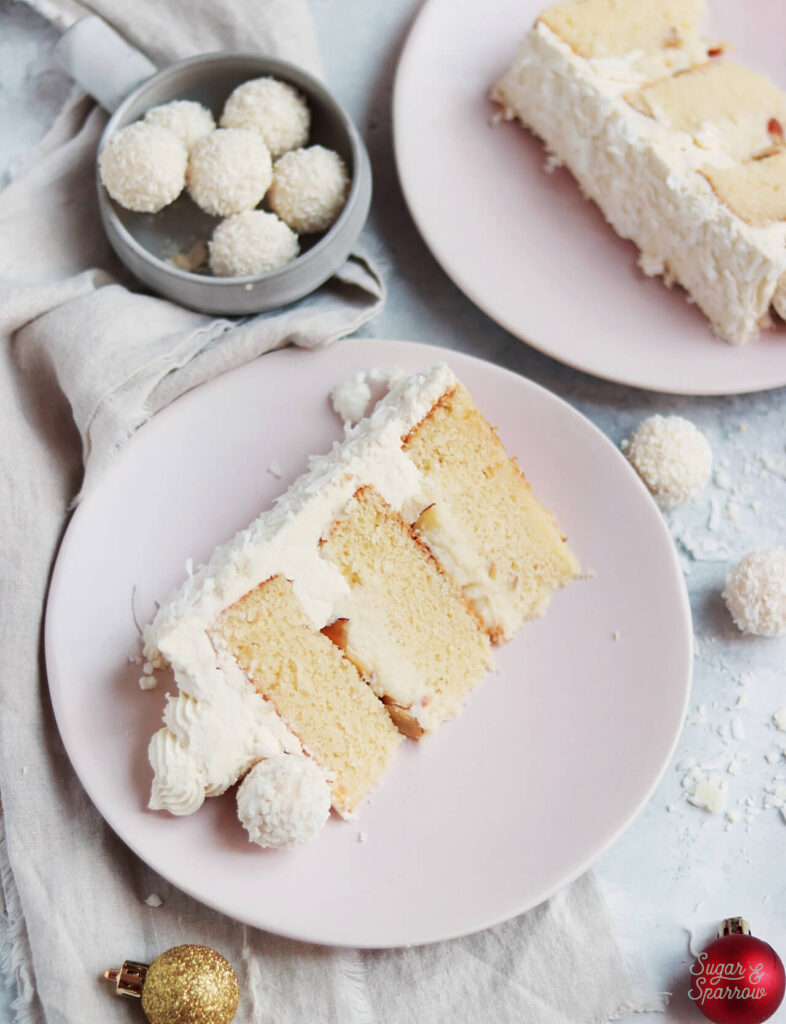
For the filling, I decided to make a coconut pastry cream to mimic the experience of biting into the gooey center of a Rafaello. This involves cooking canned coconut milk, some thickening agents, and a little bit of sugar until it turns into a custard-like consistency. If you’ve never made pastry cream before, it’s not nearly as hard as it sounds. Be sure to read through the recipe before you start cooking and you’ll be just fine. I topped the coconut cream filling between each cake layer with toasted almonds to add a little more almond flavor and crunch – wholly inspired by the almond center of a Rafaello.

I decided to use my white chocolate buttercream recipe as a base for the frosting and added coconut extract to create a coconut-white chocolate flavor. While here technically isn’t white chocolate in a Rafaello, somehow it tastes like there is, so I thought it would be the perfect way to tie things together. I do not regret my decision one bit. All together, this cake tastes just like a Rafaello and has all the textures you’d want in a Rafaello-inspired cake.
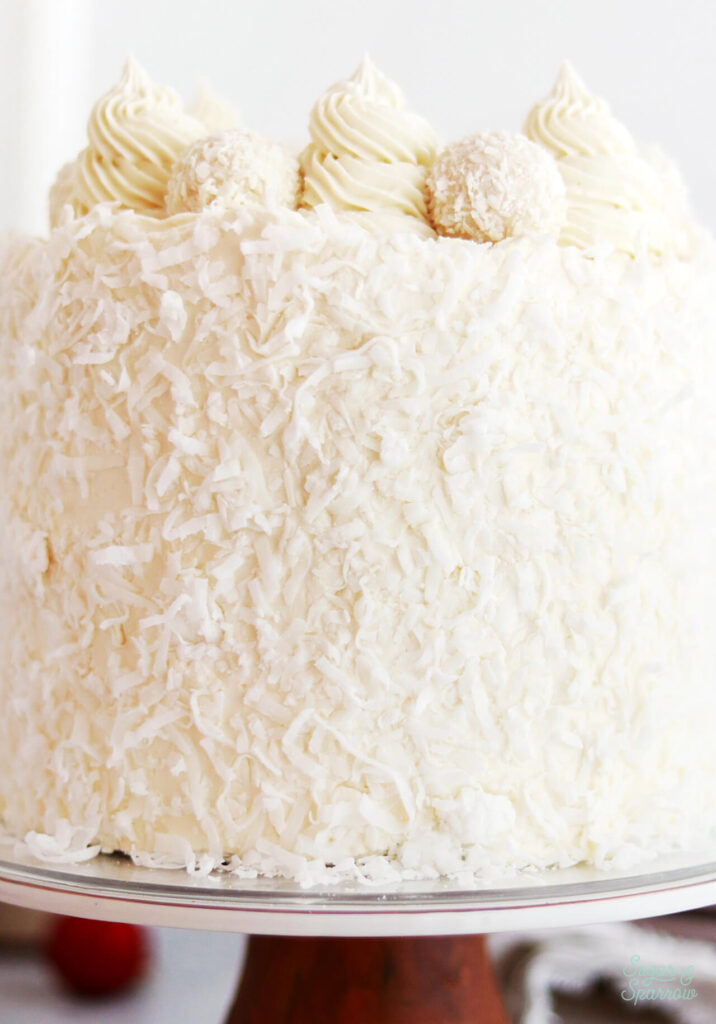
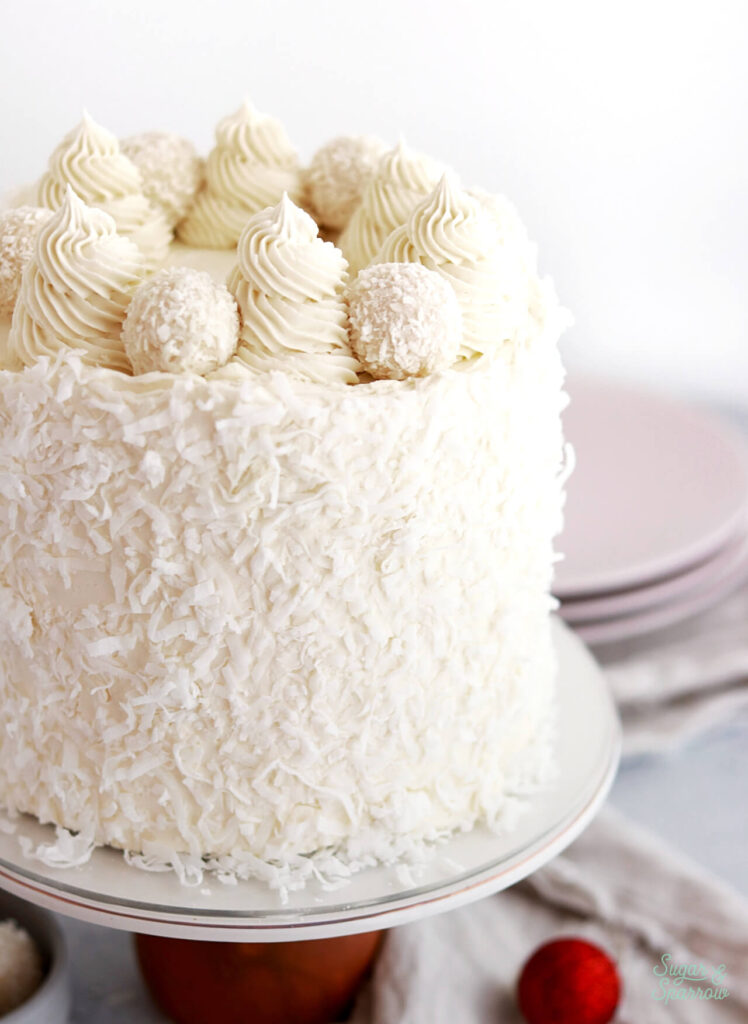
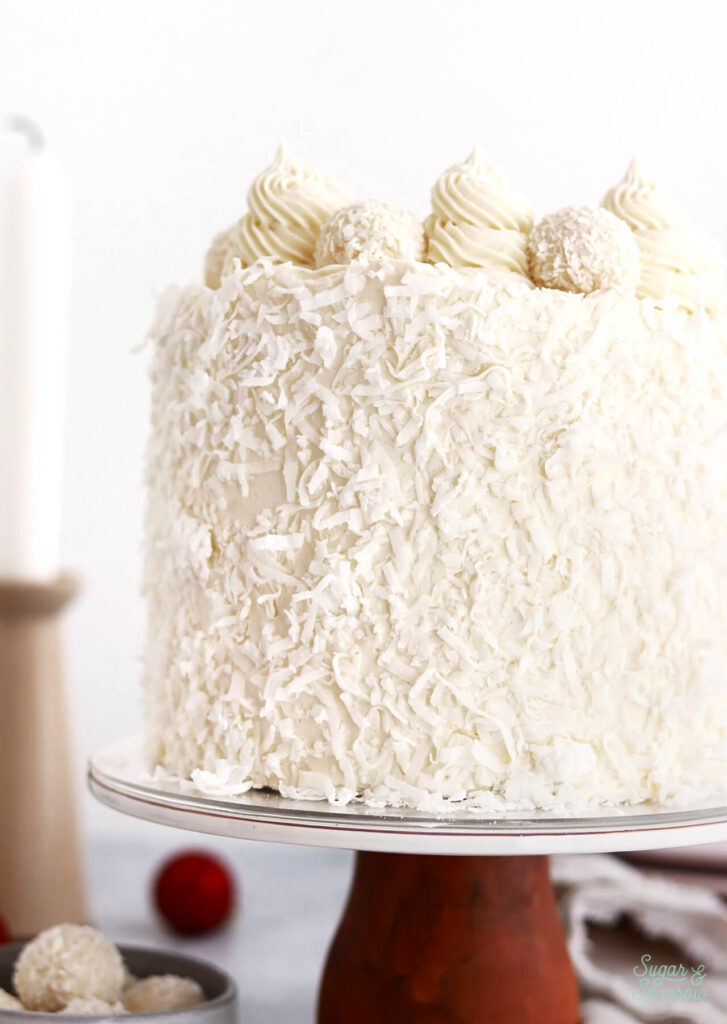
In true Rafaello fashion, I ended up rolling the cake in shredded coconut to give it amazing texture and extra coconut flavor. I topped the cake with white chocolate coconut buttercream swirls and placed a Rafaello truffle in between each one. Wilton Tip 4B was my go to for the swirls on this one, but any piping tip you love for swirls will do.
I ended up sending this Rafaello cake to work with my husband and it was a major hit! He kept texting me updates and comments he heard from his coworkers and it totally made my day. I love how this cake turned out and it’s so amazing to hear when people love a recipe as much as I do. Whether you’re already a fan of Rafaellos or you love coconut-almond flavored desserts, I hope this cake is a major hit with you too.

Rafaello Cake
Ingredients
Coconut Cream Filling
- 1 Cup (240ml) full-fat canned coconut milk, divided
- 1/4 tsp pure vanilla extract
- 2 Tbsp cornstarch
- 3 Tbsp granulated sugar
- 1 large egg yolk
Almond Cake
- 2 3/4 Cups (290g) sifted cake flour* DIY recipe in notes
- 2 tsp baking powder
- 1/2 tsp baking soda
- 1 tsp salt
- 3/4 Cup (170g) unsalted butter, room temperature
- 1 1/2 Cups (300g) granulated sugar
- 2 large eggs + 2 large egg whites
- 1/2 Cup (120g) sour cream, room temperature
- 2 tsp almond extract
- 1 tsp pure vanilla extract
- 1 Cup (240ml) whole milk, room temperature
White Chocolate Coconut Buttercream
- 12 Oz (340g) white chocolate chips
- 2 Cups (452g) unsalted butter, room temperature
- 3 Cups (360g) powdered sugar
- 2 tsp pure vanilla extract
- 2 tsp coconut extract
- 1/4 tsp salt
Additional Fillings & Toppings
- 4 Tbsp slivered almonds, toasted** see notes for toasting instructions
- 6 Rafaello truffles
- 1 1/2 Cups shredded sweetened coconut
Instructions
Make the Coconut Cream Filling
- Place 3/4 Cup (180ml) of the coconut milk and the vanilla into a medium saucepan. Stirring often, cook over high heat until it begins to simmer. Remove from heat.
- In a medium metal or glass bowl, whisk together the remaining 1/4 Cup (60ml) of coconut milk, egg yolk, sugar, and cornstarch.
- Whisking vigorously, slowly pour the simmered coconut milk mixture over the egg mixture. Whisk until fully combined, then pour the whole mixture back into the saucepan and cook over high heat (still whisking constantly) until it thickens and begins to boil.
- Pass through a strainer and into an airtight container. Cool to room temperature, then place in the refrigerator a couple hours to set. It will become a custard-like consistency when set.
Make the Almond Cake
- Preheat the oven to 350°F. Prepare three 6-inch or two 8-inch cake pans by spraying the sides with a cooking spray (Baker's Joy is my favorite) and fitting a parchment paper circle to the bottom of the pan.
- Add the sifted cake flour, baking powder, baking soda, and salt into a bowl and whisk to combine. Set aside.
- In the bowl of your stand mixer (a handheld mixer works fine too!), beat the butter on high for two minutes until it's light and creamy. Add in the sugar and continue to mix on medium-high for another two minutes. Turn the mixer to low and add the eggs and egg whites, one at a time, mixing until just combined and scraping down the bowl and paddle as needed. Add the almond extract, vanilla extract and sour cream, turn the mixer to high, and beat for one full minute. It will look curdled at this point, but don’t worry – it will become smooth cake batter at the end.
- Add in the dry ingredients all at once and turn the mixer to low speed. Mix until just combined, then slowly pour in the milk. Continue to mix on low speed until just combined, about 30 seconds. Scrape down the sides and bottom of the bowl and give it a few stirs with a whisk to make sure there are no lumps. The batter will be slightly thick.
- Pour the batter evenly into the prepared cake pans and bake for 30-35 minutes. They're done when they spring back to the touch and a toothpick inserted into the middle comes out clean. Let the cakes cool in the pan for five minutes before turning them out onto a wire rack for an additional few hours of cooling. Make sure they're entirely room temperature before applying any frosting.
Make the White Chocolate Coconut Buttercream
- Melt the white chocolate chips in the microwave in 30 second intervals, stirring after each one until there are no lumps. Set aside to cool slightly. Alternatively, you can use a double boiler to melt the white chocolate.
- In the bowl of a stand mixer fitted with a paddle attachment, beat the butter on high until creamy and light in color, about 5 minutes. Turn the mixer to low, add the powdered sugar, and mix until well combined. Scrape down the bowl and paddle. Give the melted white chocolate a few stirs and test the temperature. It should be slightly warm, but not hot enough to melt the butter (if it is, wait a few more minutes). If it's any cooler, you'll end up white chocolate bits in the buttercream, so you may need to pop it back into the microwave for a few more seconds to warm it back up. When it seems just right, add it in.
- Turn the mixer to medium speed and beat for 2 minutes, until the mixture is smooth. Add the vanilla extract, coconut extract, and salt and mix on low for another minute, until fully combined.
Assembly
- Once the almond cakes are completely cooled, level them to your desired height. Add a swipe of white chocolate coconut frosting onto a cardboard cake circle and place the first cake layer on top. Pipe a circle of white chocolate coconut buttercream around the edge. Fill in the center with a thin layer of more white chocolate coconut buttercream, then add half of the coconut cream filling. Smooth it down until it reaches the top of the buttercream circle height-wise, then sprinkle half of the toasted almonds on top. Here's a detailed tutorial on this filling method.
- Repeat the filling and stacking process with the final cake layer. Crumb coat the cake with white chocolate coconut buttercream, then place it in the refrigerator for at least 30 minutes to let the buttercream set firm.
- To create the look pictured, frost the cake with white chocolate coconut buttercream and smooth it until the sides are level. I kept the top edge of the buttercream raw instead of swiping it inward like I usually do. You can either add the shredded coconut to the sides of the cake at this point (while the frosting is still wet) or follow the instructions for rolling the cake below.
- To roll the cake in coconut: Place the frosted cake into the refrigerator for another 30 minutes to let the buttercream firm up. Meanwhile, place the shredded coconut onto a cookie sheet. When the buttercream on the cake is firm, place another cardboard cake circle that's slightly smaller than the diameter of your cake onto the top of your cake (you can always trim one down if you don't have a smaller size on hand). Use this technique to release the cake from the turntable. Place one hand underneath your cake and one hand on top of the cake (the cardboard cake circles will make it easy to handle), then roll the cake through the shredded coconut to cover the sides.
- Once the sides of the cake are covered in coconut, place the remaining white chocolate coconut buttercream into a piping bag fitted with Wilton Tip 4B. Pipe swirls on top of the cake, leaving about a 1-inch space between each. Place the Rafaello truffles in between each swirl.
Notes
- The coconut cream filling can be made ahead and stored in an airtight container in the refrigerator for up to 5 days.
- The almond cake layers can be baked, cooled, wrapped in plastic wrap, and left out at room temperature up to two days ahead of decorating. Unfrosted cake layers can be wrapped tightly in plastic wrap and stored in the freezer for up to two months before thawing and frosting.
- The white chocolate coconut buttercream can be made ahead and stored in an airtight container at room temperature for one day. Alternatively, you can store it in an airtight container in the refrigerator for up to two weeks. When you’re ready to use it, bring it back to room temperature and re-whip with your stand mixer to bring it back to piping/frosting consistency.
- The almonds can be toasted ahead and stored in an airtight container at room temperature for up to two weeks.
I hope this Rafaello cake is everything you wished it would be! Let me know what you think in the comments below and feel free to tag @sugarandsparrowco on Instagram if you post a pic! I love to see what you create.


Hi Rozella, would it be ok to use white chocolate bars instead of the chips for the frosting? Thank you.
Hi Diana! Yes, you can use white chocolate bars. Just be sure to chop them up until the pieces are about the size of chips. Enjoy!
Is it possible to use a handmixer for all the steps instead of a stand mixer fitted with a paddle attachment?
Hi Hannah! Yes, absolutely. Just follow the timing and speeds listed in the recipe 🙂 enjoy!
What can I do if white chocolate bits end up in buttercream? Should I put it through a sieve?
Hi Rozella! A few white chocolate bits should be okay, but if there are a lot you can place part of the buttercream into a microwave safe bowl and microwave it for about 10 seconds, until it liquifies and is slightly warm. Then, mix it into your buttercream on low speed and give it a few minutes to blend together. Repeat if necessary. This should help melt some of those white chocolate pieces and make the frosting more smooth.
Hi Whitney,
The coconut filling separated when I passed it through the strainer. Like the oil from the coconut milk has separated from the filling. What should I do?
Thank you!
Hi Vivian! I’ve never had that happen before but after a bit of Googling it apparently can happen when custards are overcooked. Still, you should be able to rescue the custard with either an immersion blender or sometimes even by whisking it vigorously. Were you able to bring it back together?