• Cake
  • Frosting
  • YouTube
  • My Favorite Tools
  • Nav Social Icons

  • Skip to primary navigation
  • Skip to main content
  • Skip to primary sidebar
  • Skip to footer
  • Recipes
    • Cake
    • Cupcakes
    • Frosting
    • Ice Cream
    • Vegan
  • Cake Basics
  • Tutorials
  • Blog
  • About
  • Mobile Menu Widgets

    Connect

    Search

Sugar & Sparrow logo in script font

Sugar & Sparrow

Lifestyle and Cake from Portland Oregon

  • Cake Basics
  • Recipes
    • Cake
    • Cupcakes
    • Cookies & Bars
    • Filling
    • Frosting
    • Ice Cream
    • No-Bake
    • Small Batch
    • Vegan
  • Tutorials
  • Book
  • Blog
  • About

Spatula Painted Cupcakes Tutorial

December 26, 2018 · In: Featured, Tutorials

Decorating with the spatula painted technique has proven to be one of my very favorite ways to add color and texture to cakes. It’s one of the easiest techniques ever, and I’ve found it to be really therapeutic to put on a great album, mix up a fun buttercream color palette, and swipe away. Since it’s such great art therapy, I was pondering other ways to incorporate the technique into cake decorating when I realized – why not try it on cupcakes? I tested it out over the weekend and am so in love with how they turned out!
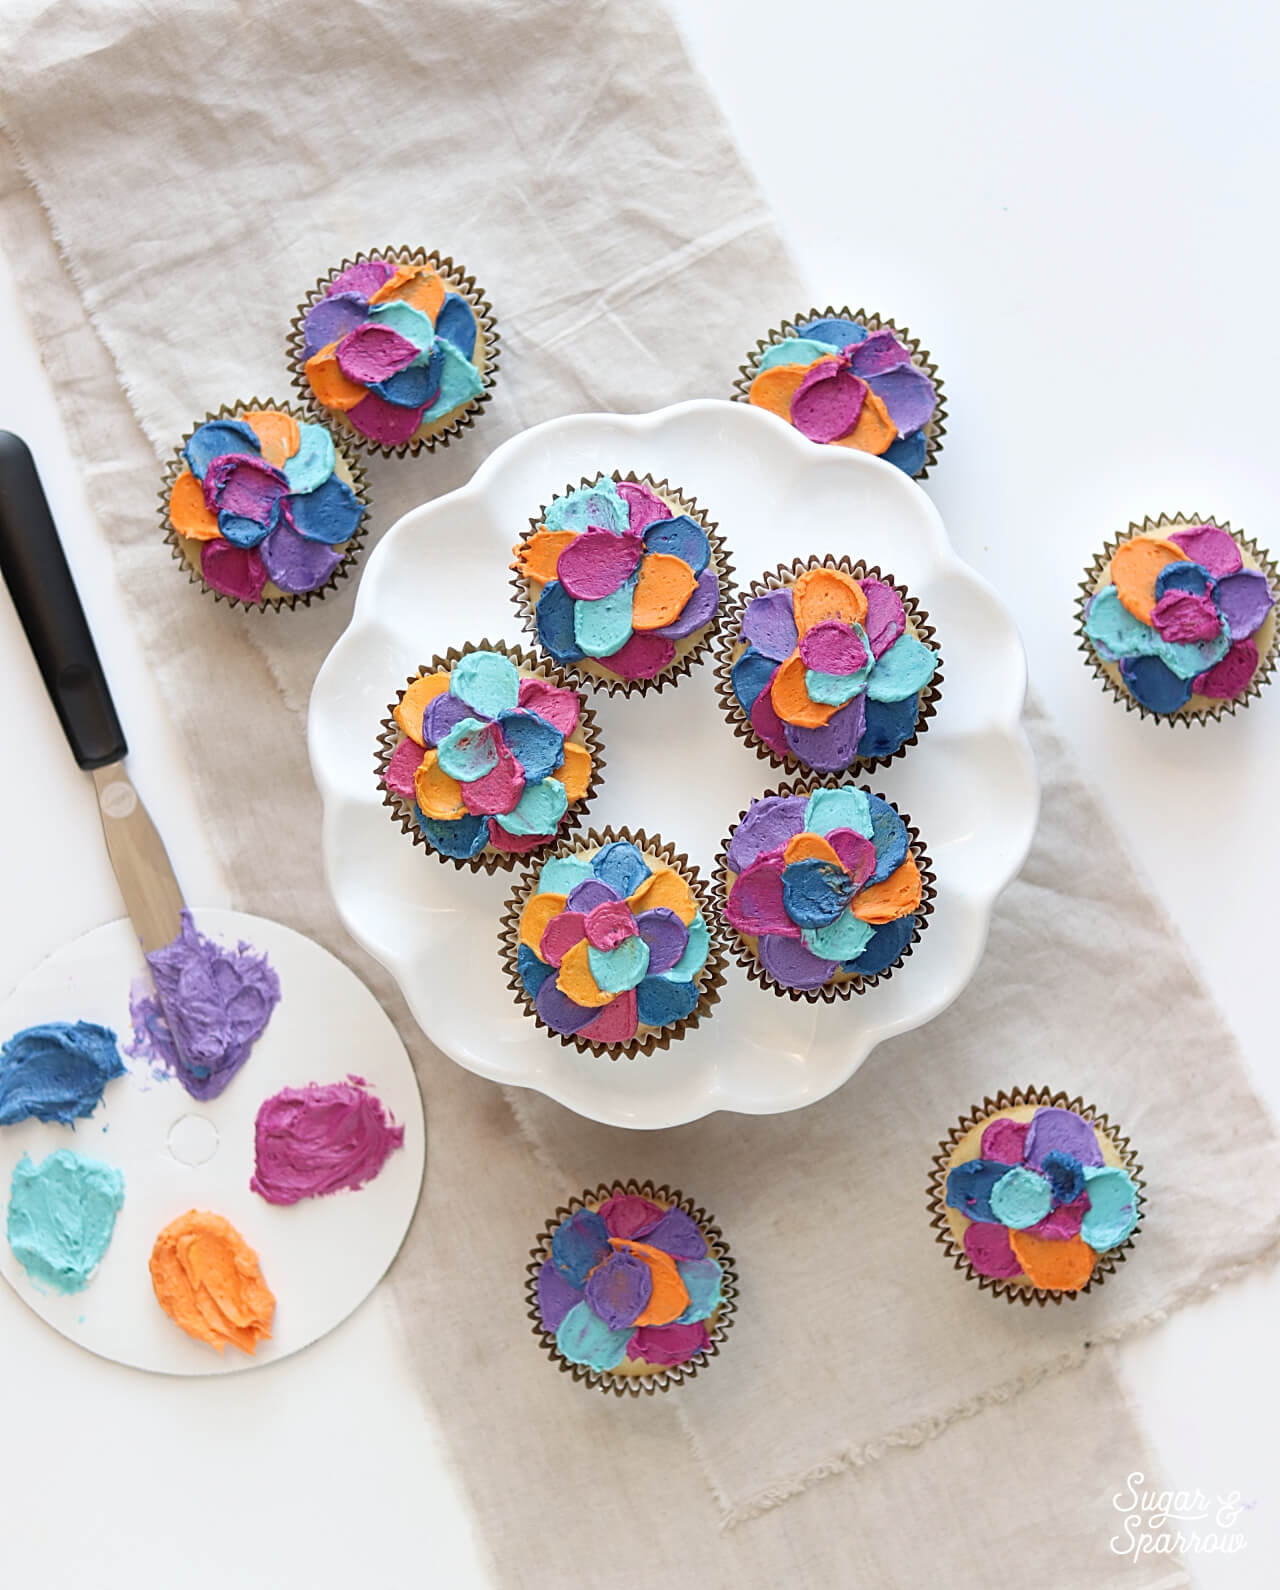
cupcake decorating techniques by sugar and sparrow

The thing that I love the most about the spatula painted technique is that you literally can’t mess up. It makes my urge to be a perfectionist melt away, and all that’s left to do is have fun and be creative (a magical place to be!). If you’re bored of topping cupcakes with buttercream swirls and rosettes, this is 100% the easiest way to add some creativity and change up your look. It works in any color palette you could think of, so pick your favorites and swipe away! Here’s how to get the look:

You Will Need:

  • Baked cupcakes
  • One batch of vanilla buttercream (or other light colored buttercream)
  • Icing color gels of your choosing
  • Bowls and spoons for color mixing
  • A small icing spatula
  • Paper towels

Step 1: Mix Up Your Buttercream Color Palette

Divide your buttercream into separate bowls (one bowl per color you’re mixing). For this specific color palette I’ve gone with five different colors, which I feel is the perfect number. Add your color gels and mix away!

buttercream color palette americolor

The colors I used for these are all Americolor: Navy, Turqouise, Orange, Fuschia, and Regal Purple. I love this brand of gels because the colors are so concentrated, you don’t need to add much to get rich colors.

Step 2: Swipe The Edges Of The Cupcakes

Dip your small icing spatula into the first color and make one swipe inward from the edge of the cupcake to the middle. Make another swipe with that same color on a different edge of the cupcake.
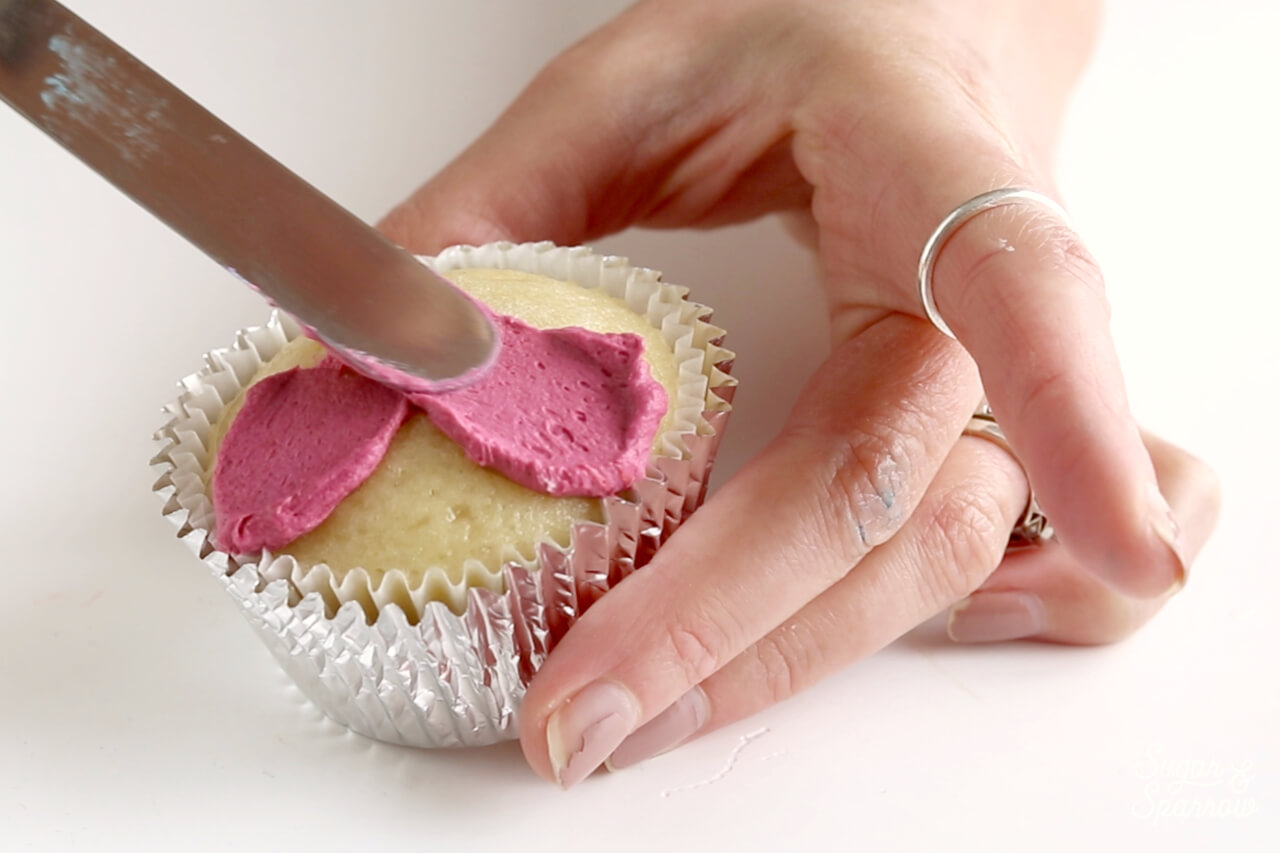
paint cupcakes with buttercream

It’s good to have some paper towels handy for this part, because you’ll need to wipe the spatula clean before dipping it into another color. Repeat swiping the edges with all the different colors until you’ve got all of the edges covered. Just make sure you don’t place two of the same colored swipes next to one another.

how to spatula paint with buttercream

spatula painted buttercream

Step 3: Swipe The Middle Of The Cupcakes

Repeat the same process of swiping inward to cover the middle of the cupcake. These last few swipes should just cover where the buttercream starts to thin from the previous edge swipes.

how to paint with buttercream

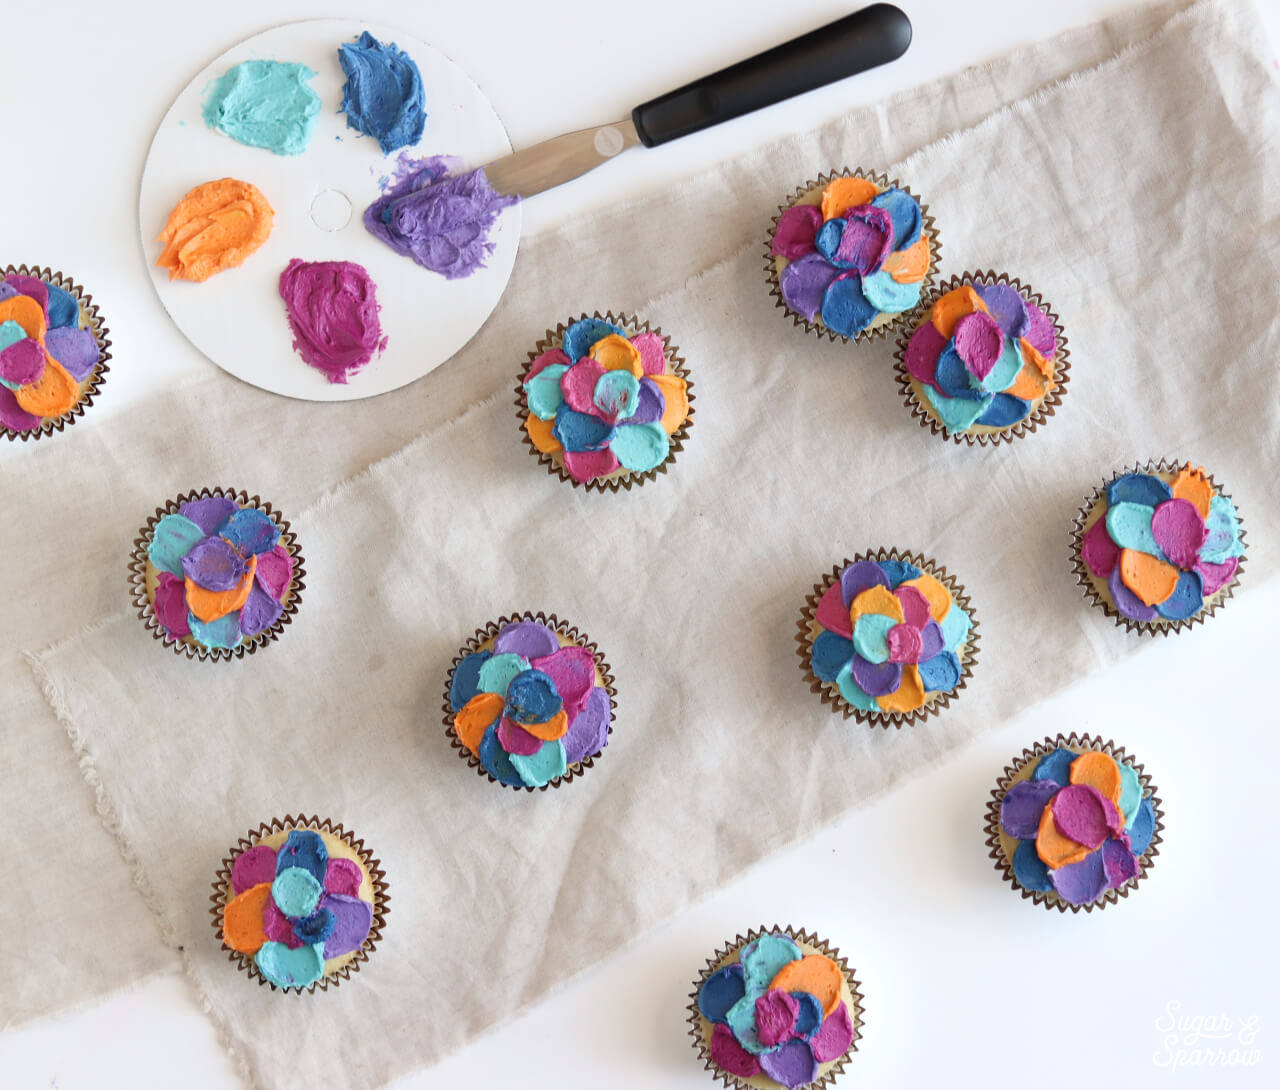
You really can’t go wrong with this technique, so get as creative as you want to be! The cool thing about these cupcakes is that no two are exactly alike. It makes for such a fun painterly look that is sure to add color to any occasion.
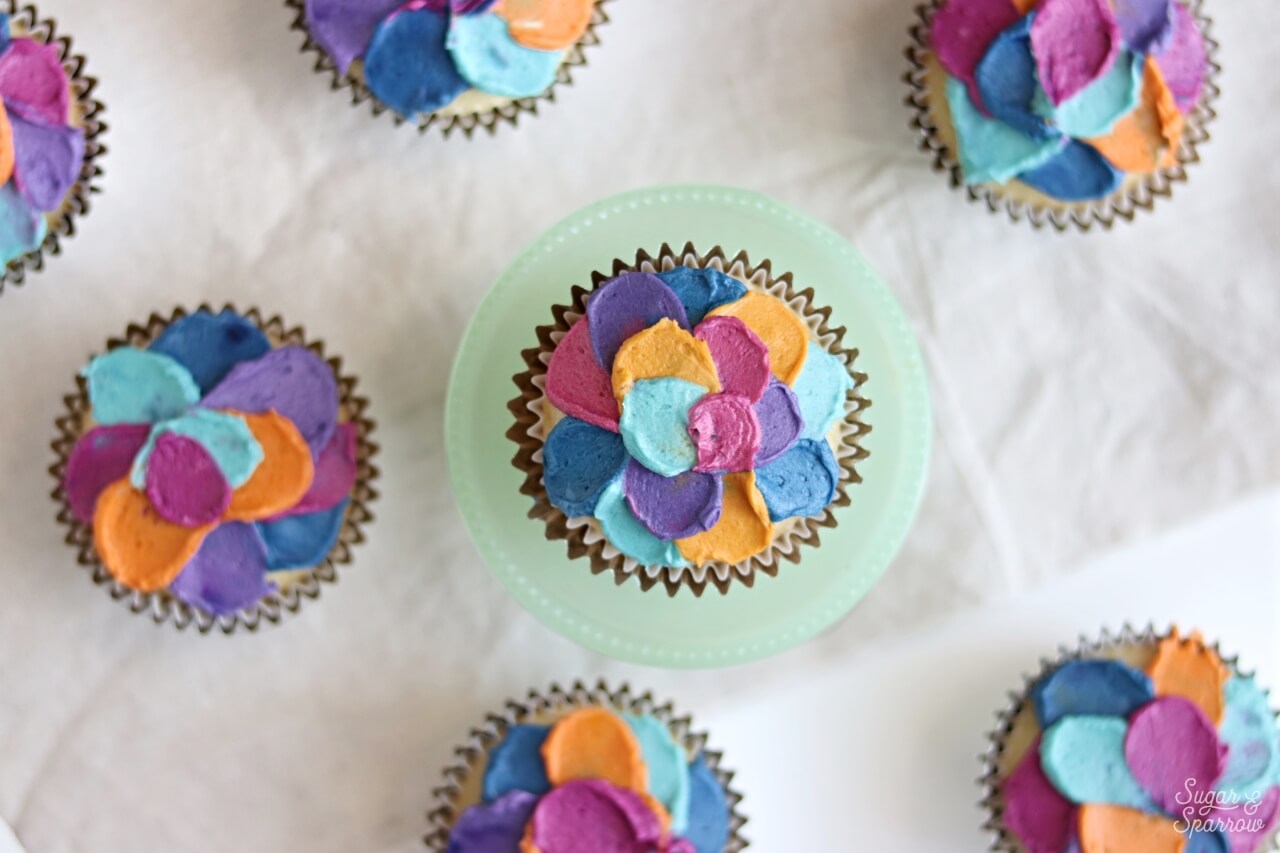
spatula painted cake by sugar and sparrow

colorful cupcakes by sugar and sparrow

Did you try this spatula painted look on your cupcakes? I want to know what color palette you ended up with! Let me know in the comments or by tagging me on Instagram. I love to see your creations!

Disclaimer: this post does contain some affiliate links, meaning I may receive a small commission if you click them and purchase items I’ve recommended. Using these links won’t cost you any extra money, but they do help to keep Sugar & Sparrow up and running. Thank you for your support!


By: Whitney · In: Featured, Tutorials · Tagged: americolor, buttercream, cake decorating, cake tutorial, coloring buttercream, cupcake decorating, cupcakes, icing spatula, spatula painted buttercream, spatula painted cake, spatula painted cupcakes, vanilla buttercream recipe

you’ll also love

the best vanilla cupcakes recipeThe Perfect Vanilla Cupcake Recipe
pumpkin layer cake recipe by sugar and sparrowPerfect Pumpkin Layer Cake Recipe
oreo cookies and cream cakeOreo Layer Cake Recipe

Join the List

Stay up to date & receive the latest posts in your inbox.

Reader Interactions

Leave a Reply Cancel reply

Your email address will not be published. Required fields are marked *

Recipe Rating


Next Post >

How To Make A Christmas Tree Cake

Primary Sidebar

Welcome to Sugar & Sparrow

Welcome to Sugar & Sparrow

Helping you whip up pretty desserts with confidence and creativity. And hopefully sharing a few laughs with you along the way!

Learn More

Connect

let’s bake!

Get my very best recipes, baking tips, and decorating tutorials sent to your inbox

Featured Posts

vanilla oreo cake with cookies and cream buttercream

Cookies & Cream Cake (Vanilla Oreo Cake)

lemon cream cheese buttercream for cakes and cupcakes

Lemon Cream Cheese Buttercream

vegan chocolate cake recipe by sugar and sparrow

Vegan Chocolate Cake Recipe

Search

Archives

Follow Along

@sugarandsparrowco

PEACHES AND CREAM CAKE 🍑 I have not been able to s PEACHES AND CREAM CAKE 🍑 I have not been able to stop thinking about how tender this cake is (even when chilled!) + every bite has the most refreshing, creamy peach flavor 🙌🏼 it’s layers of extra soft vanilla cake, homemade peach syrup, brown sugar peach filling, and cloud-like whipped cream frosting. Best use of your late summer peaches imo!

Comment “PEACH CAKE” and I’ll send the recipe straight to you 💌 or find the recipe at https://sugarandsparrow.com/peaches-and-cream-cake/

#peachesandcream #peachcake #whippedcreamcake #peaches #cakedecorating
OREO CAKE 🖤 with black cocoa powder in those moist OREO CAKE 🖤 with black cocoa powder in those moist chocolate cake layers (same main ingredient in Oreo cookie shells!) + cookies and cream buttercream, the flavor profile of this cake is so spot on!! Make this for the Oreo lover in your life 😍
  
Get the recipe at https://sugarandsparrow.com/oreo-cake-recipe/
  
#cookiesandcream #oreocake #oreo #blackvelvet #chocolatecake 
EASY FUDGE BROWNIE ICE CREAM 🤎 (recipe below) the EASY FUDGE BROWNIE ICE CREAM 🤎 (recipe below) the easiest no-churn chocolate ice cream with gooey brownies + ribbons of fudge in every bite!! Even if you’ve never made ice cream before, you’ll be amazed at how easy this is to make without an ice cream maker 

🍦Full recipe at https://sugarandsparrow.com/no-churn-fudge-brownie-ice-cream/ + more no-churn ice cream recipes linked in my bio 

INGREDIENTS
2 cups (480ml) heavy whipping cream, cold
3/4 cup (4oz, 135g) semi-sweet chocolate chips
14 oz sweetened condensed milk
1/3 cup (30g) cocoa powder 
1 tsp vanilla
pinch of salt
2 cups brownie chunks (store bought or homemade) 
6 oz hot fudge sauce

INSTRUCTIONS
1. In a large chilled bowl, beat the heavy whipping cream with a hand mixer (or stand mixer w/ whisk attachment) until stiff peaks form, about 2-4 minutes. Place into refrigerator.
2. Heat the chocolate chips in the microwave in 30-second increments, stirring after each one, until melted and smooth.
3. In a separate medium bowl, whisk together the sweetened condensed milk and melted chocolate, then whisk in the cocoa powder, vanilla, and salt. 
4. Fold 1 cup of the whipped cream into the chocolate condensed milk mixture. Then, pour the chocolate mixture into the remaining whipped cream and fold together until combined. Fold in the brownie chunks. 
5. Scoop large spoonfuls of the brownie ice cream mixture into a loaf pan along with a few smaller spoonfuls of the hot fudge sauce. Use a wooden skewer or butter knife to swirl the hot fudge and create ribbons as you go. Continue adding and swirling until all of it is in the loaf pan.
6. Press the reserved brownies into the top of the ice cream, then cover with plastic wrap or aluminum foil. Freeze for 6-8 hours, after which the ice cream should be semi-firm, scoop-able, and ready to enjoy!

#nochurnicecream #brownieicecream #chocolateicecream #nobake #icecreamlover
KEY LIME PIE CAKE 💚 everything I love about key li KEY LIME PIE CAKE 💚 everything I love about key lime pie, in layer cake form! It’s soft key lime cake filled with homemade key lime curd and buttery graham cracker crumble, frosted with tangy key lime buttercream. The IDEAL summer cake and it honestly might be better than the pie if you ask me 🙃

Get the full recipe link in my bio or at https://sugarandsparrow.com/key-lime-pie-cake/ 

#keylimepie #keylimecake #keylime #cakedecorating #layercake
LEMON RASPBERRY CAKE 🍋♥️ this cake has the dreamie LEMON RASPBERRY CAKE 🍋♥️ this cake has the dreamiest layers: soft and zesty lemon cake with raspberries baked into every bite, thick homemade raspberry filling, and lemon raspberry buttercream with the prettiest natural color 😍 
 
✨recipe linked in my bio or at https://sugarandsparrow.com/lemon-raspberry-layer-cake/
 
#lemonraspberry #lemoncake #raspberrycake #pinkcake #layercake

Footer

On the Blog

  • Cake Basics
  • Recipes
  • Tutorials

Info

  • About
  • Privacy Policy & Disclosure

stay in the know

Copyright © 2026 · Theme by Sugar & Sparrow
