Knowing how to make number cake toppers is a skill that has come in handy over and over again. They’re so essential for birthday cakes and important anniversaries, and I even recently whipped them up to ring in 2020 (Happy New Year, by the way)! They only take about 20 minutes from start to finish, which is totally ideal for those times you need a last minute cake topper that looks super professional and fun. They’re pretty much guaranteed to add a little more joy to your cakes!
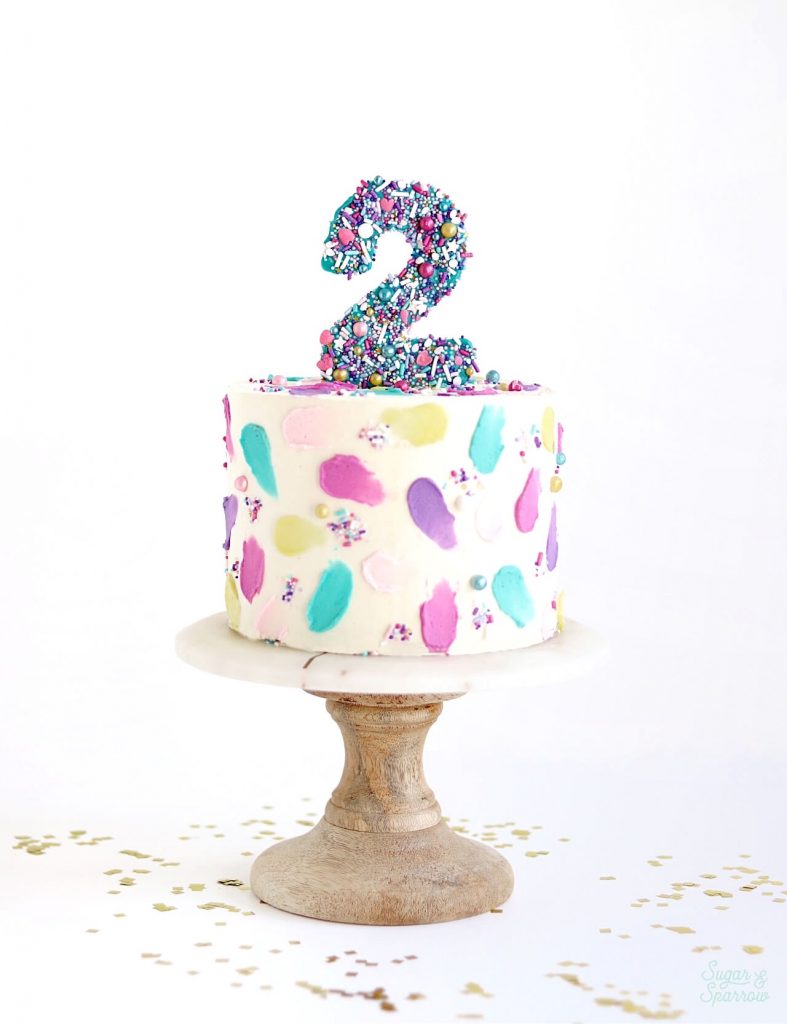
I used Wilton Candy Melts as the foundation for these colorful number cake toppers, but you could also use any tempered chocolate as a base and the process would be the same. The best part is that you can use this tutorial to create numbers (or letters) in any font you want! Just print out your favorite numerical look onto printer paper, lay a piece of wax paper over the top, and pipe the Candy Melts or chocolate on top. Cover with your favorite sprinkles and you’re good to go!

Here’s a quick video I whipped up to show you how to make these sprinkled-covered numbers in just a few easy steps. Give it a watch before you read all about how to make them below:
If you have yet to check out my YouTube Channel, go give it a look! There are tons of video tutorials to help you learn, and I’m working on adding more recipes to the mix. Be sure to subscribe so you don’t miss a thing!
You Will Need:
- Printed number templates
- Wax paper
- Piping bag
- Wilton Candy Melts
- Bamboo Skewers
- Your favorite sprinkles (I used these “Hey Sugar” sprinkles by Sprinkle Pop)
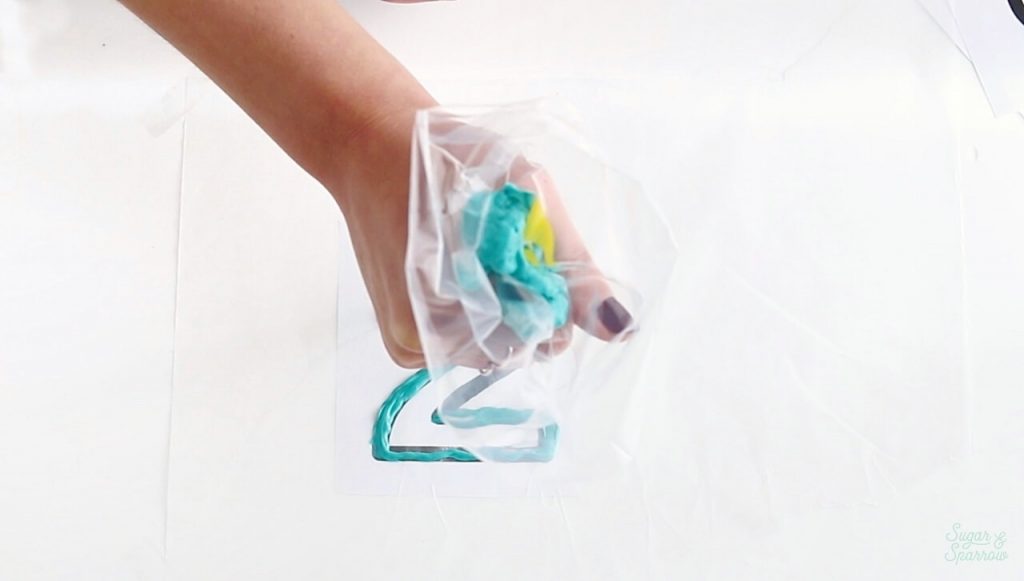
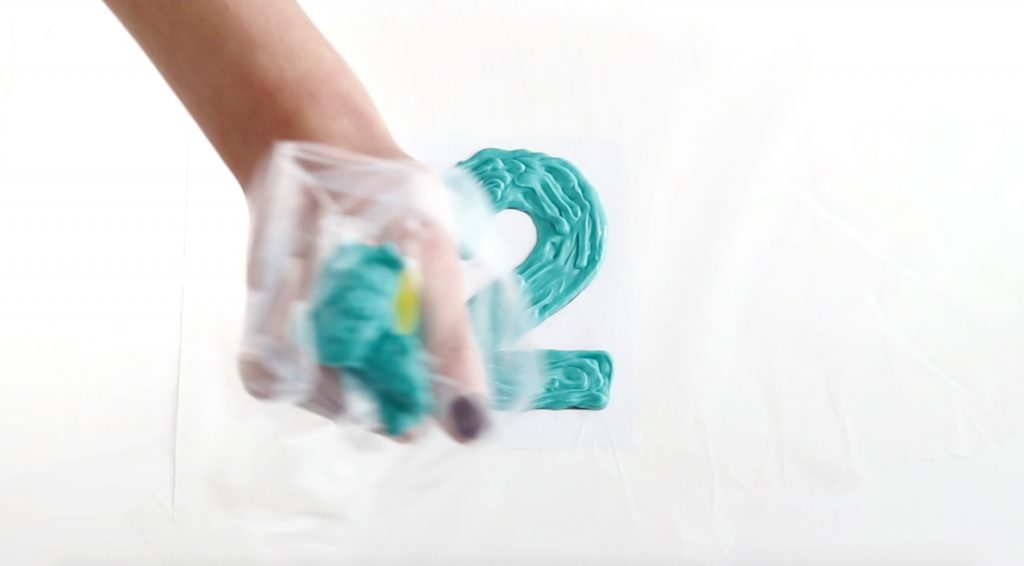
Step 1: Pipe the Number with Candy Melts
Melt the Wilton Candy Melts according to the package instructions, then place them into a piping bag and snip off a small (about ⅛ inch) opening.

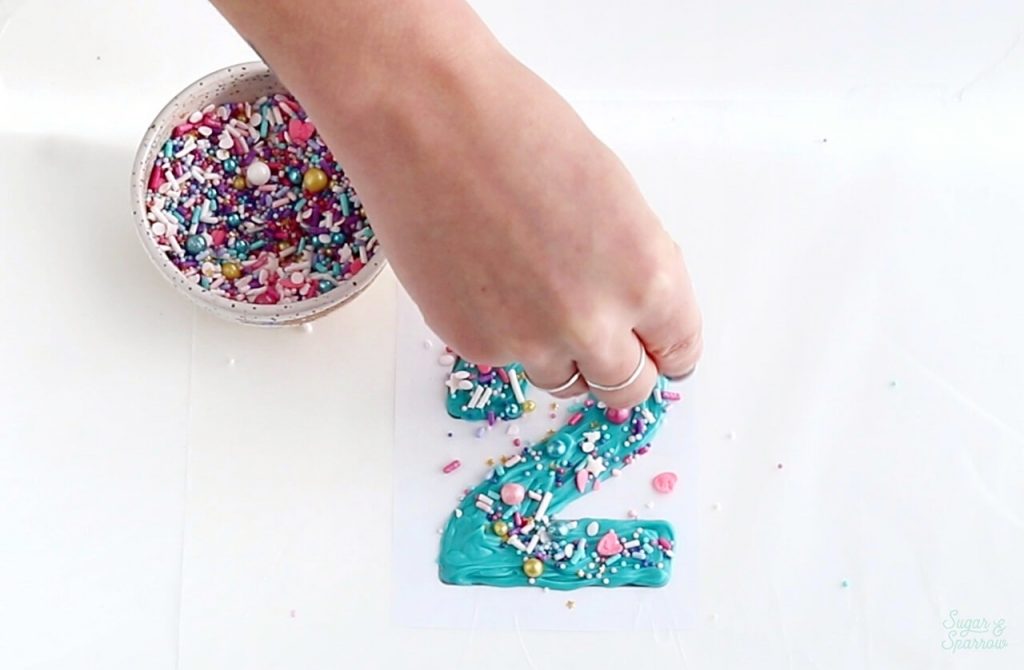
Place your printed number template (face up) onto a flat surface and cover it with a sheet of wax paper. Then, pipe the outline of your number with the melted Candy Melts and fill in the center.
Step 2: Cover with Your Favorite Sprinkles
While the Candy Melts are still wet, generously add the sprinkles to cover the entire surface, gently pressing them into the number without spreading the Candy Melts outside of the lines.
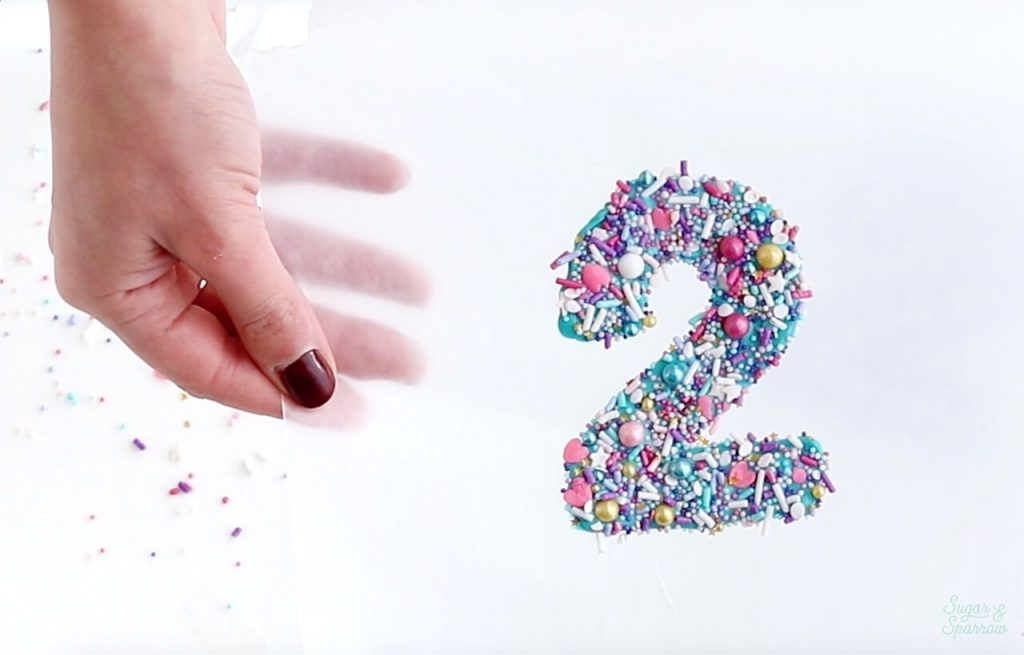
When the surface is perfectly sprinkled, place the number into the refrigerator and let it set up for about 10 minutes.
Step 3: Turn it Into a Cake Topper
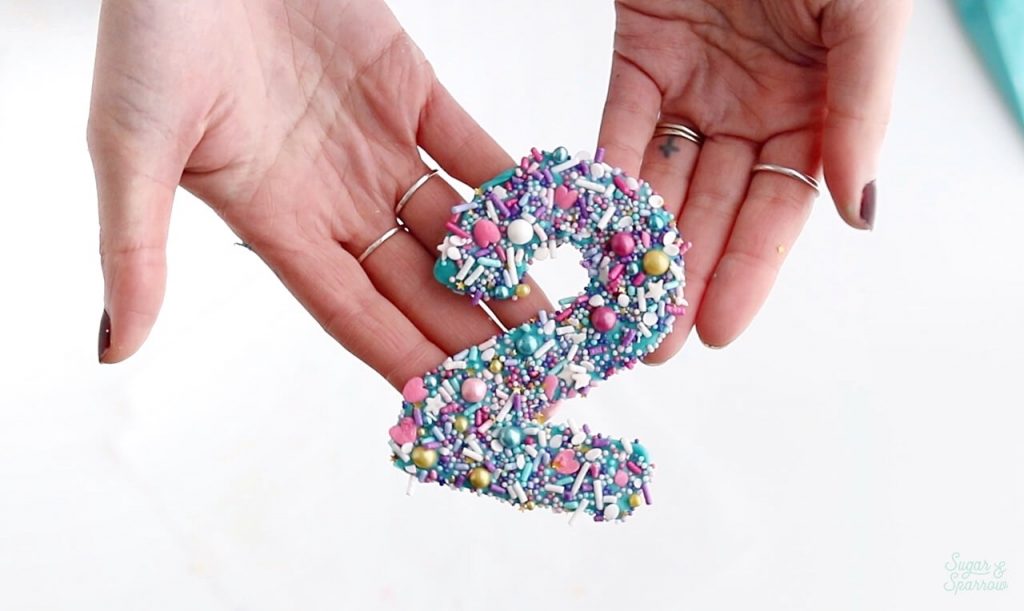
After the sprinkled number is set, remove it from the wax paper backing and place it face down. Place a bamboo skewer onto the back and cover it with more melted Candy Melts.

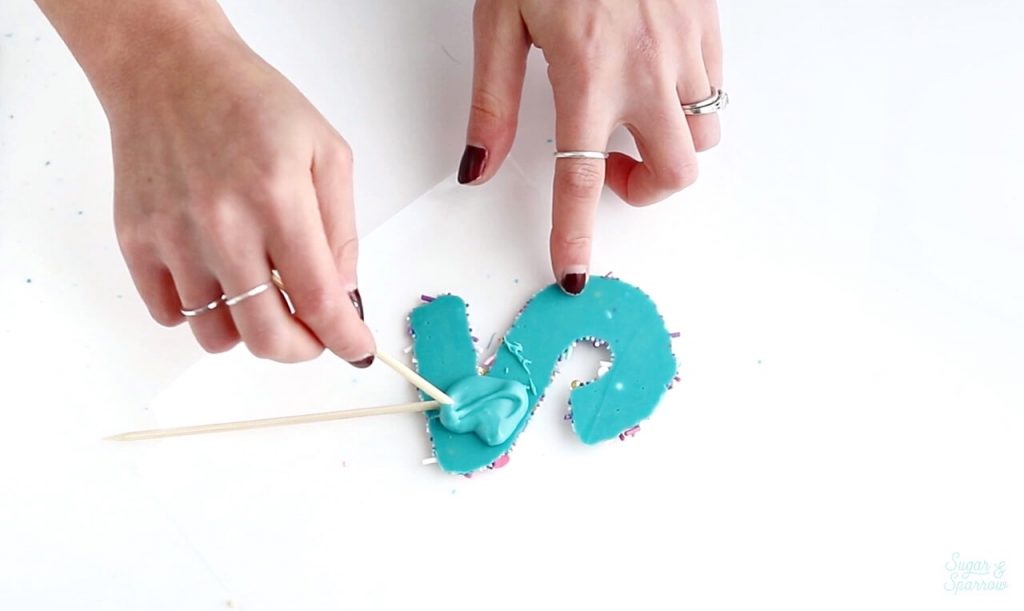
Return the sprinkle number (with the bamboo skewer attached) to the refrigerator and allow it to set up for 10 more minutes.

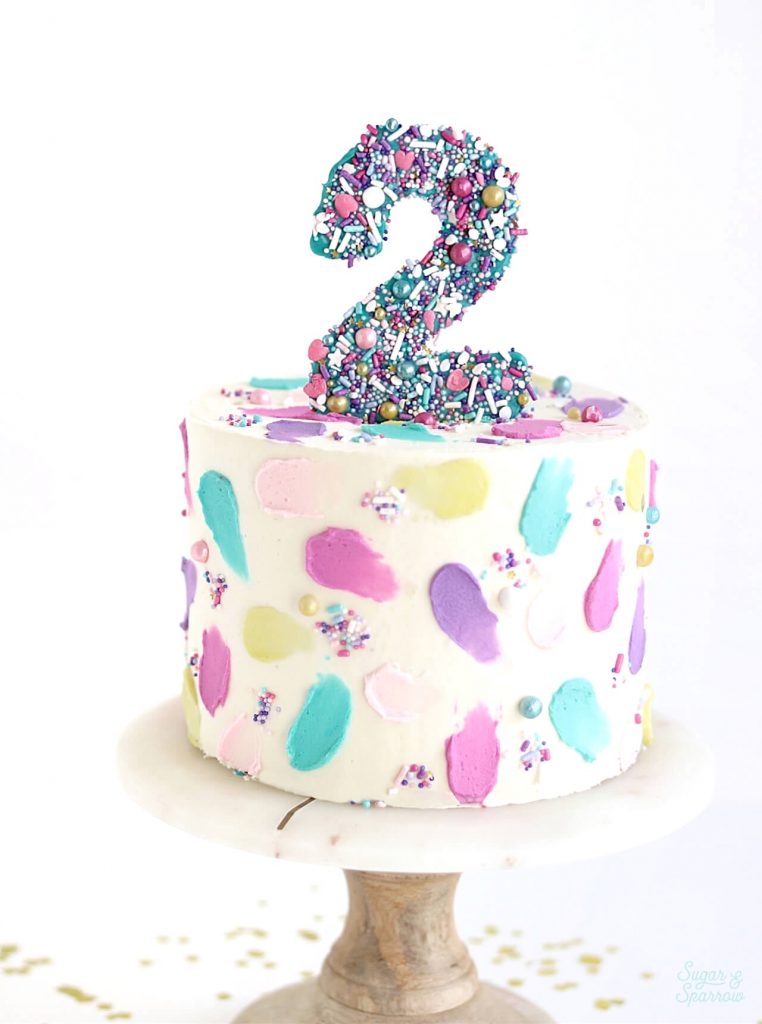
And there you have it, a fun and festive sprinkled number topper:
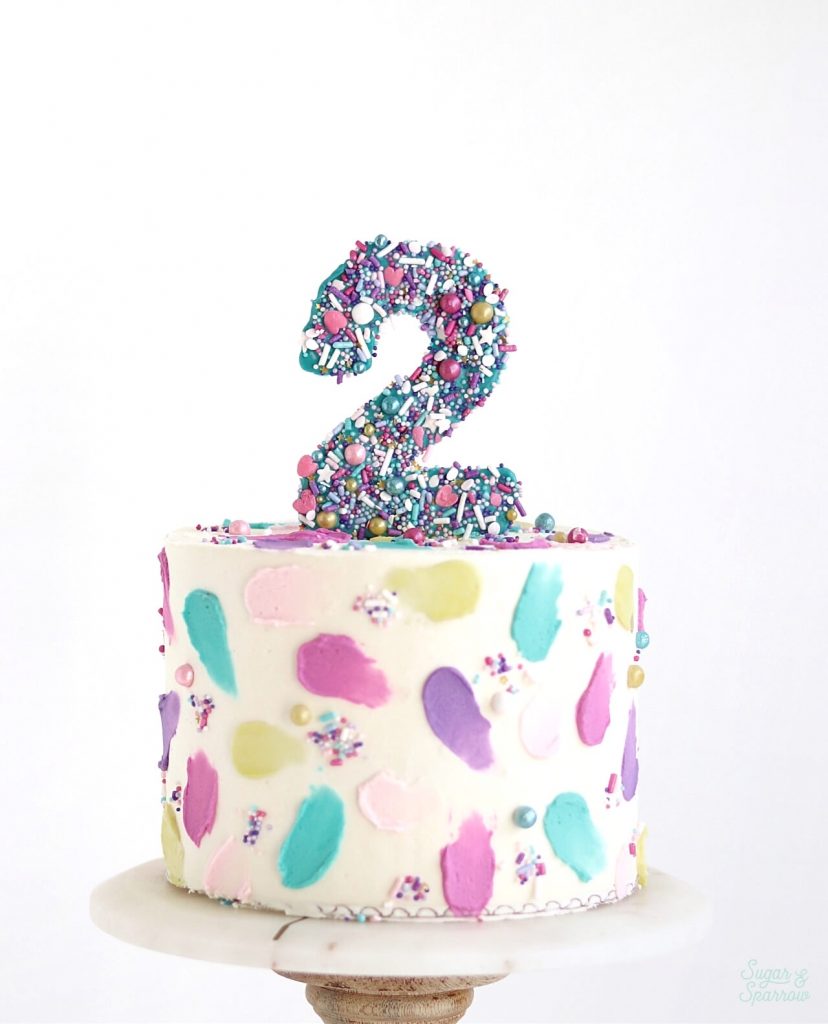
These sprinkled number cake toppers are so perfect for topping cakes and totally edible (minus the skewer, of course). And you can even use these same steps to create letter cake toppers in any font you want! Definitely a skill you’re gonna want to have in your back pocket for any cake that needs a custom cake topper like these. Happy cake topper making, people!

Did you make these number cake toppers? I want to know how it went! Let me know in the comments below or feel free to tag @sugarandsparrowco on Instagram to show me. I love to see what you’re up to in the kitchen!


Thanks for this great tutorial on a quick, easy and CUTE decoration. I’ve just made one to put on my daughter’s cake in a few days and it looks great!
How far in advance could I make this? I also saw you have a recipe for a similar topper made out of gum paste. Is one better than the other? Thanks! Excited to try this for my daughter’s 4th birthday
Hi Elizabeth! You can make this several weeks in advance. Store it at room temperature in an airtight container or in the refrigerator if it’s particularly warm in your kitchen environment.
Hi there! Where can I find number templates to use for this? I need the number 1, but don’t know what size or how big to get the template. Sorry for asking such a silly question! Any help is greatly appreciated! Thank you so very much in advance. 🙂
Hi Deanna! I just made my own template using a web app called BeFunky but you could also use Google Sheets or MS Word to type out the number 1 and print it out to use as a template.
Hi there,
Can I freeze the number topper after it’s complete for a couple of weeks?
Hi Jane! It should work to store the number topper in an airtight container in the freezer or refrigerator for a few weeks, or store it however you would normally store a chocolate bar!
Hey! I love this topper and I want to make one for my son’s first birthday…. however, we have a lot of food allergies in our close family, specifically dairy in this case. Do you have alternative suggestions besides candy melts? I have a great dairy free buttercream frosting I use (family decided they like the dairy free one better than regular!)
Hi Sienna! The reason I chose Candy Melts for this tutorial is because they firm up enough to become a topper. You could try with buttercream and refrigerate it to make it firm, but since I’ve never used that medium before I’m not sure how it will turn out.
Hey Whitney! I have tried a few times now to make these and I keep failing. The chocolate spreads as soon as I put the sprinkles on. I’ve tried waiting a little longer to let the chocolate firm up a bit, but I’m still having the same issue. Any thoughts?
Hi Allie! What kind of chocolate are you using? I’ve only tried this technique with Candy Melts and melted semi-sweet chocolate chips and didn’t get too much spreading on the edges. It sounds like what you’re using is a bit thin if it’s spreading far enough to ruin the shape.
Late to the party but I love this idea! How many inches should the template number or letters be? Thanks for all the help!
The template can be any size! This one was about 3.5 inches tall and went on top of a triple layer 6 inch cake.
I can’t wait to make this for my daughter’s cake! Quick question- will they melt with cake candles lit around it?
Hi Lindi! So excited for you to make this topper for your daughter! It will not melt with candles around it (unless the flames are touching it of course).
Hi! I’m making a cake topper for a party this weekend (with four letters) and I’m concerned about the candy melt letters melting when the cake is being transported (it’s going to be about 80 deg F). Do you think that would be an issue? My other idea was sugar cookies but the candy melts would def be easier and quicker, so that’s my preference! Thanks!
Hi Mary! Unless they’re in the direct sun for a really long time, the candy melts should be pretty stable as cake toppers. I would keep them in the refrigerator until the last minute just to be safe, but they should be good!
How do you get the sprinkles in clusters on the sides of the cake?
There is definitely a trick to the sprinkle clusters: Spread the sprinkles out on a flat surface, press your fingertip onto the sprinkles, then gently touch your sprinkle-covered fingertip to the cake. If you find that the sprinkles aren’t adhering to your fingertip, you can always touch your fingertip onto a damp paper towel before pressing it into the sprinkles.
Hi Whitney, I am really enjoying your blog. Its teaching me a lot of things. I dont know much about baking and still learning so i just want to find out if the candy melts come in different colors or if you added something to make it blue.
Hi Norah! So happy you found my blog and it’s helping you learn 🙂 Wilton Candy Melts come in all sorts of different colors, so I always buy whichever color I need instead of adding anything to color it.
I could not be more excited about this because I’m about to make your froot loop cake for my baby’s first birthday and wanted to do an edible cake topper. Do you think this might work with crumbled Froot Loops instead of sprinkles? Thank you for your wonderful tutorials!!
Hi Carolyn, this will totally work with crumbled froot loops! That is a brilliant idea 🙂