Ever since I picked up this set of cake combs from my local JOANN, I have been absolutely obsessed with making striped buttercream cakes. Before cake combs became part of my life, I was getting the striped buttercream look using piping bags, but my hands aren’t the steadiest so I’d always end up with stripes that were uneven and a bit wonky. Being the perfectionist I am, I’ve been loving how these cake combs do all the hard work of creating perfectly spaced stripes for me! And after a few rounds with them, I’ve learned all the secrets of ensuring flawless buttercream stripes, every time.
UPDATE 2025: JOANN has (sadly!!) gone out of business, so I have slightly changed these product links.
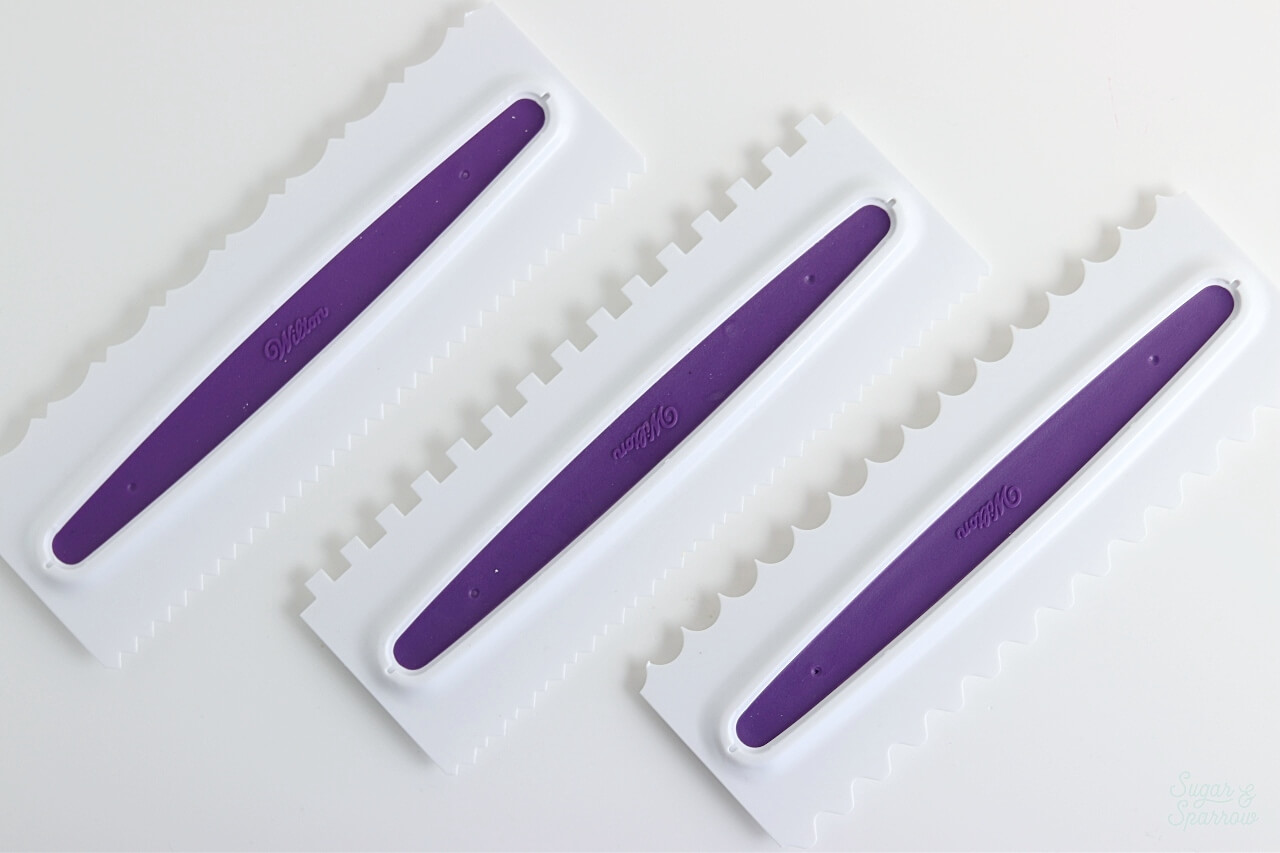
This Cake Comb set comes with three combs that are double sided, meaning you can get six different looks in one little set. You can use any of these combs on your buttercream finish to get a cool, textured look that’s picture-perfect. For this tutorial in particular, the comb with the square cutouts is exactly what you need for stripes. As you drag it through your buttercream, those little squares will carve out ridges that can be filled with any color you want, then smoothed all together for a flawless striped finish.
Here’s a quick video of the process, and I’ll share everything you need to know about creating striped cakes from start to finish below. Be sure to read all of the tips in each section, because there are a few hacks I’ve learned along the way:
If you love tutorial videos like this one, be sure to check out my YouTube channel! I’ve got a growing collection of cake recipes, decorating tutorials, and Cake Basics over there. Hit the subscribe button on my page so you never miss a new video.
You Will Need:
- A 6-inch cake that’s been crumb coated and chilled
- 2 batches of vanilla buttercream
- Cake turntable
- Icing Smoother
- Angled Spatula
- Square toothed cake comb
- Food color gels of your choice
- Piping bags
Step 1: Frost And Smooth The Cake
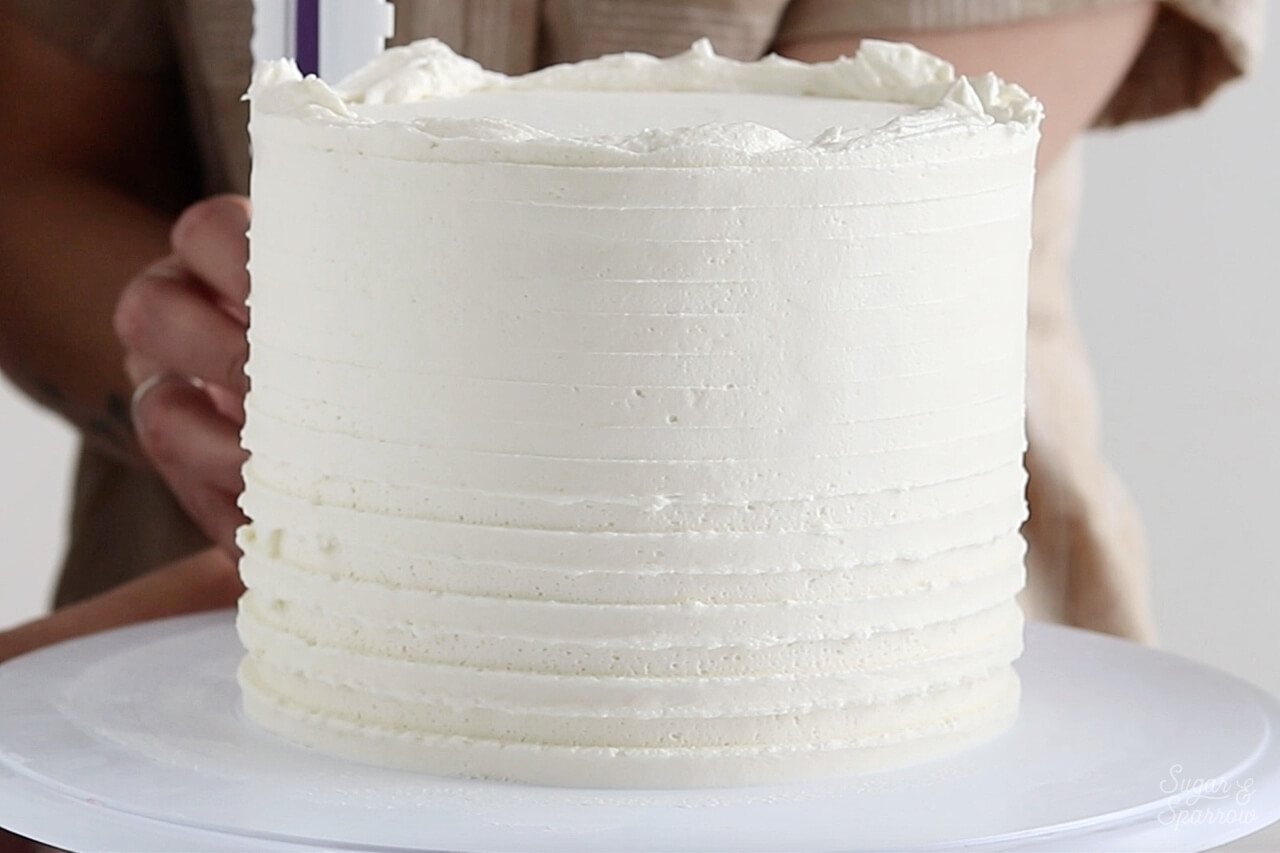
With your crumb coated cake on the turntable, frost a layer of buttercream onto the top of the cake and smooth it with your angled spatula. Then, add a thick layer of buttercream to the sides of the cake and use your icing scraper to smooth it until the sides are even.
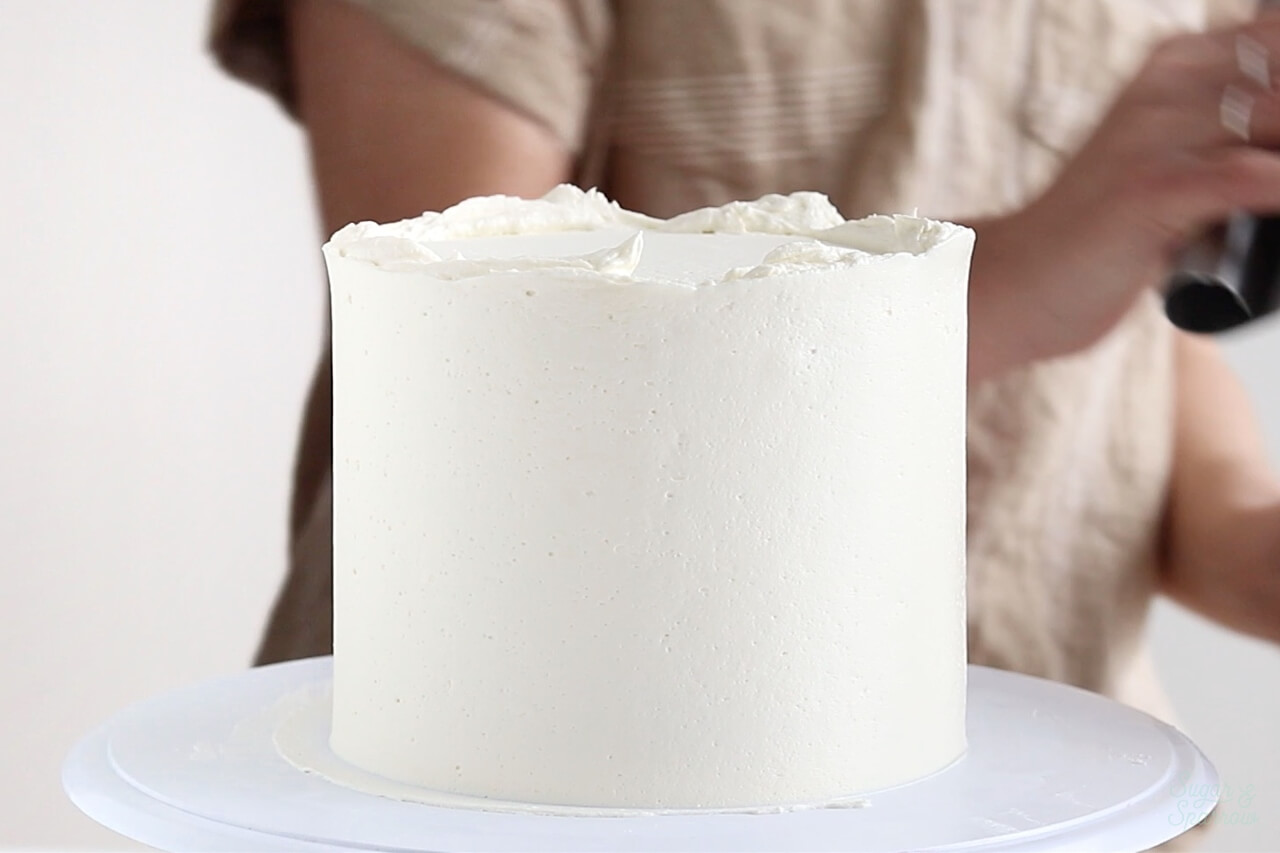
The layer of frosting on the sides of the cake should be thick and deep enough for your cake comb to pass through and create ridges, about ¼ inch or more. Don’t worry about creating the sharp edges on the top of the cake just yet, only focus on getting those sides nice and smooth.
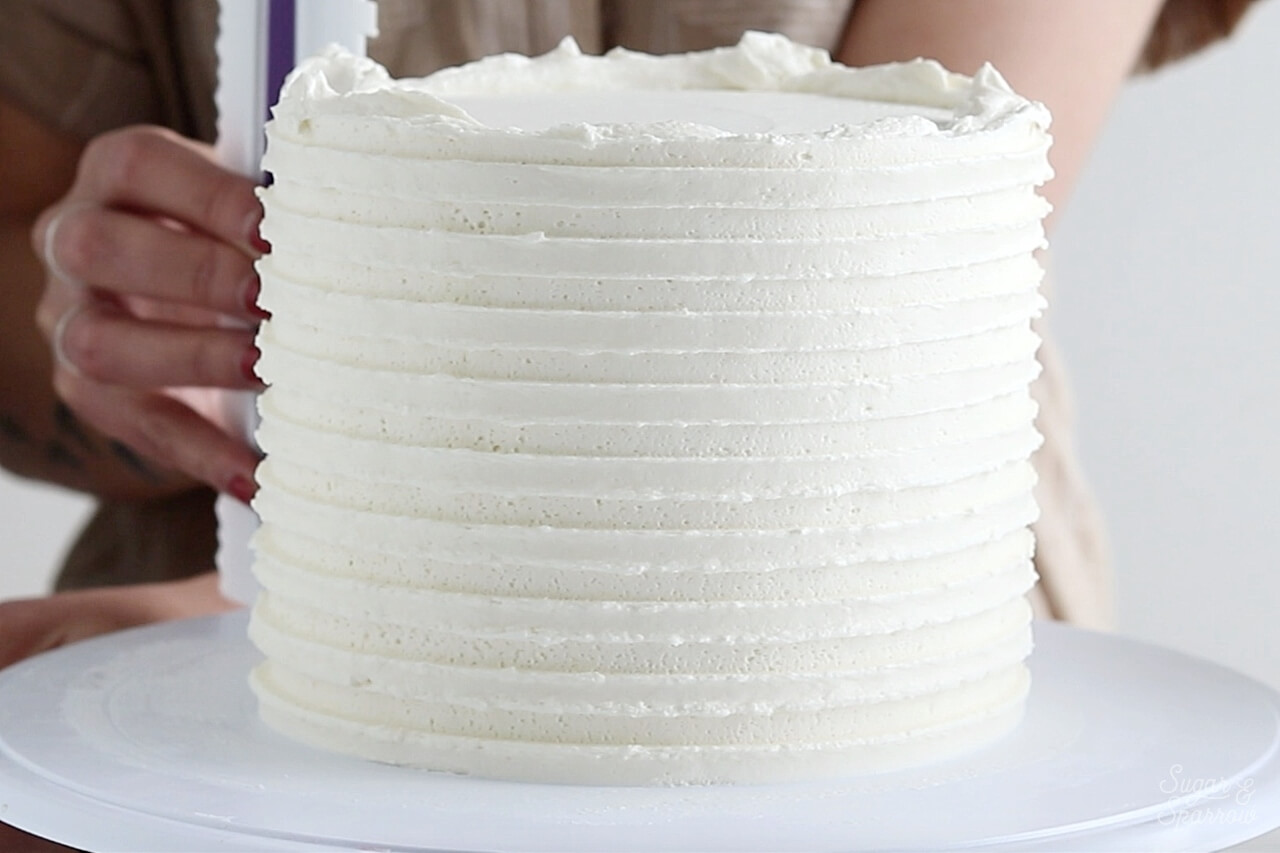
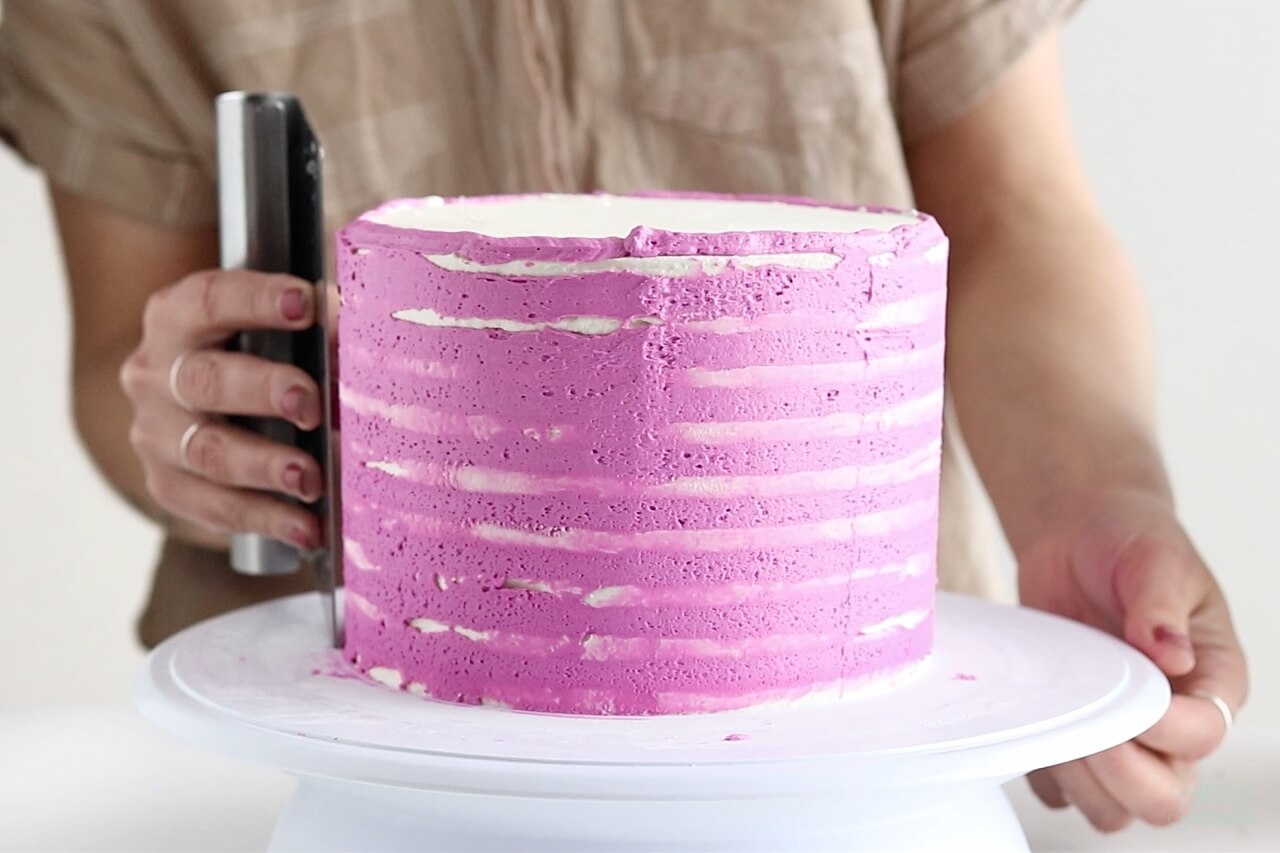
Step 2: Create Ridges With The Cake Comb
Next, hold the square toothed cake comb next to the cake at about a 45 degree angle towards you and gently turn the turntable. You’ll want to gradually create these ridges, so be sure to only apply a tiny amount of pressure at first. Each time you go around the cake, clean your cake comb completely by holding it under running water and drying it. You want it to be free of any buttercream bits to create perfect ridges.

If you find that there are holes or gaps in some of the ridges, fill them in with buttercream and go over them again with the cake comb. Also, if your ridges are tearing when you pass over the buttercream with the cake comb, it most likely means that your buttercream is too stiff. Luckily there’s an easy fix! Simply add a little bit of room temperature milk to your buttercream and mix it with your mixer for a thinner-consistency buttercream. Then, add the buttercream wherever your ridges have ripped and smooth them over with the cake comb.
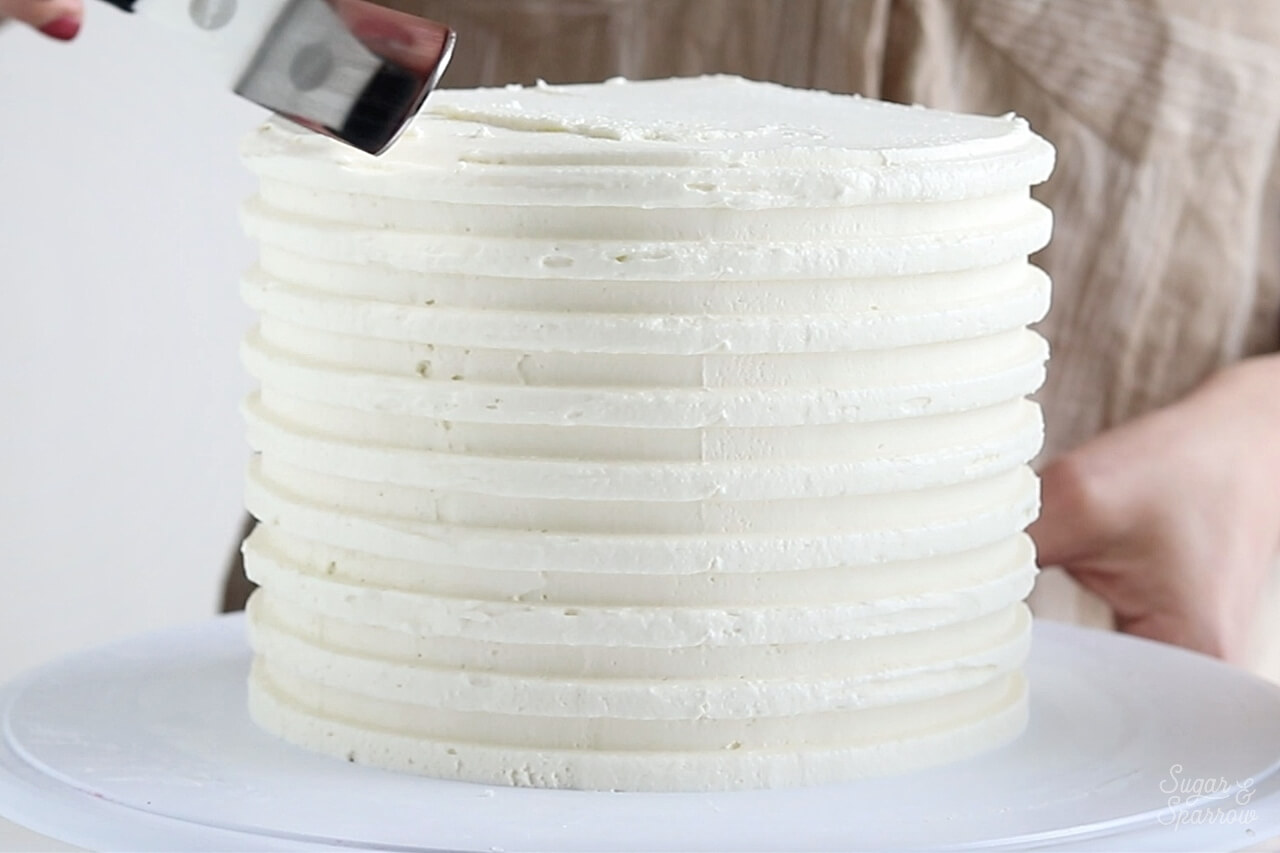
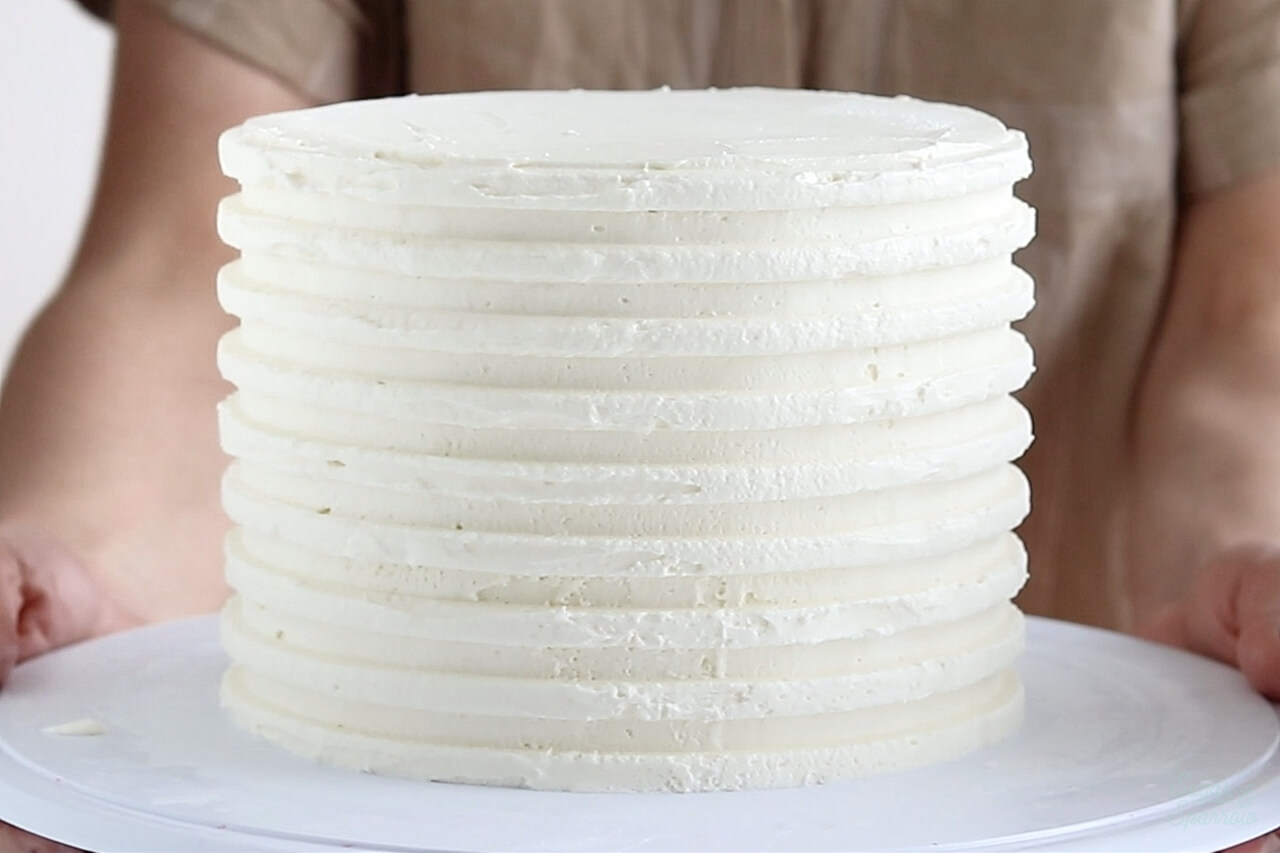
Keep going around the cake until your ridges are more than ⅛ inch deep. Once you’ve reached the ideal depth, use your angled spatula to create sharp edges on the top of your cake. Swipe the buttercream from the outer edges toward the center of the cake until those edges look sharp and the top of the cake looks smooth and even.
Step 3: Chill For 30 Minutes
This step is critical to creating evenly spaced buttercream stripes, because if you skip this step and the buttercream is too soft, the stripes can spread and look uneven. Simply pop the cake in the refrigerator and chill the buttercream for at least 30 minutes, until it’s firm to the touch.
Step 4: Fill The Ridges With Color
Add your favorite food color gel to the remaining buttercream and mix it up. I used the Wilton Color Right Food Coloring System from JOANN to mix up this deep fuchsia color (using the pink and blue colors). Add the colored buttercream into a piping bag and snip off about ¼ inch opening on the end. With your chilled cake on the turntable, pipe the colored buttercream into the ridges.

It’s best to overfill the ridges rather than underfill them – you want to make sure that the colored buttercream reaches every space within the ridge.
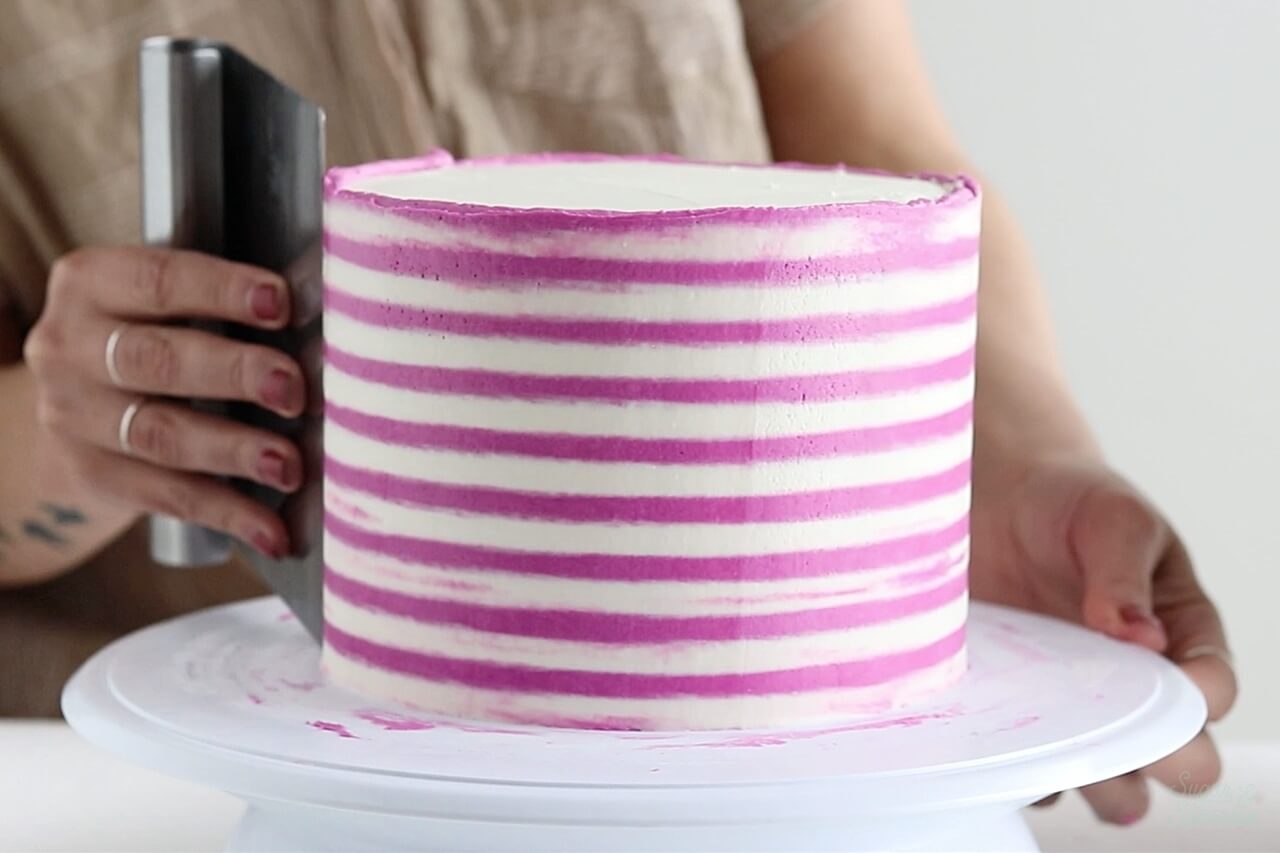
Step 5: Smooth The Stripes
Finally, use a clean icing smoother to go around the cake several times and remove the excess colored buttercream. You’ll want to clean the icing smoother every time you go around the cake to ensure that you’re removing as much of the colored buttercream as you can.
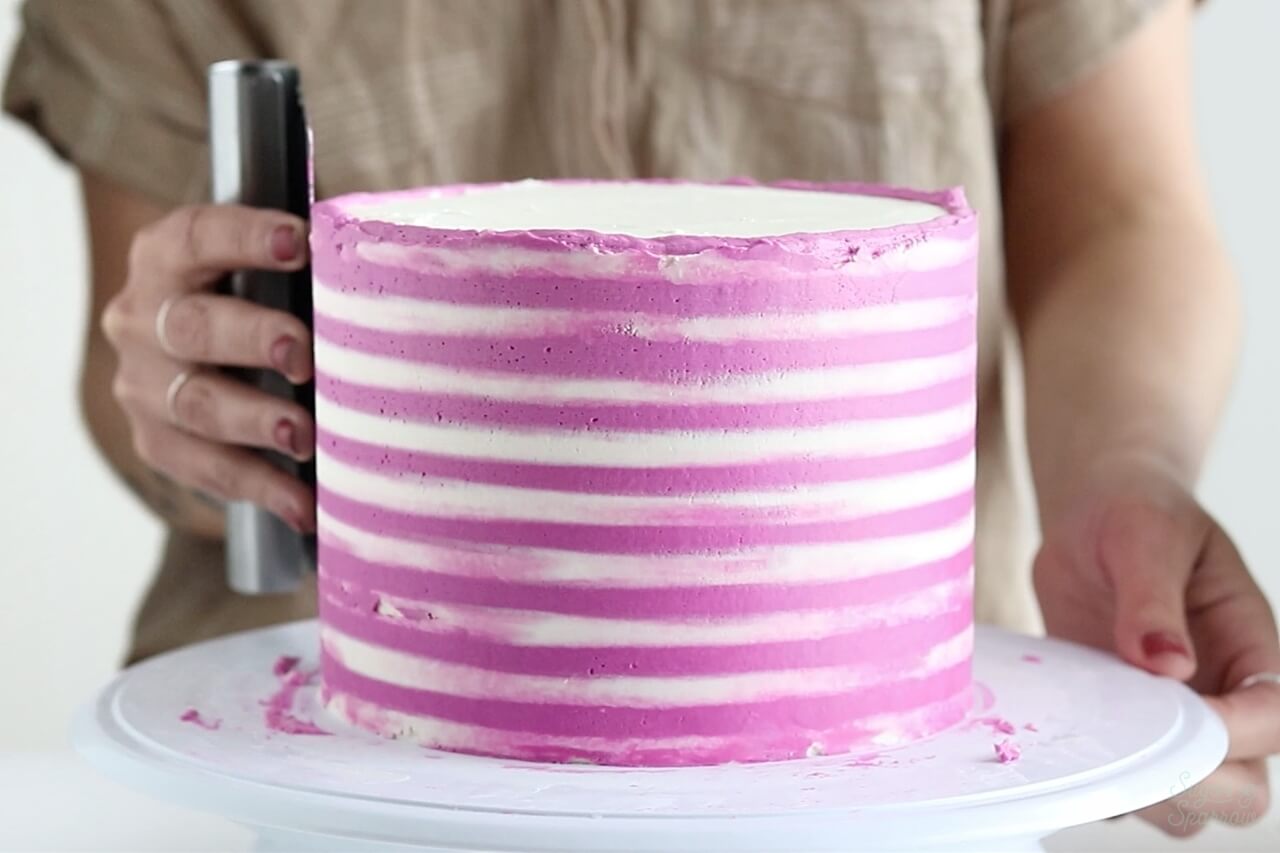
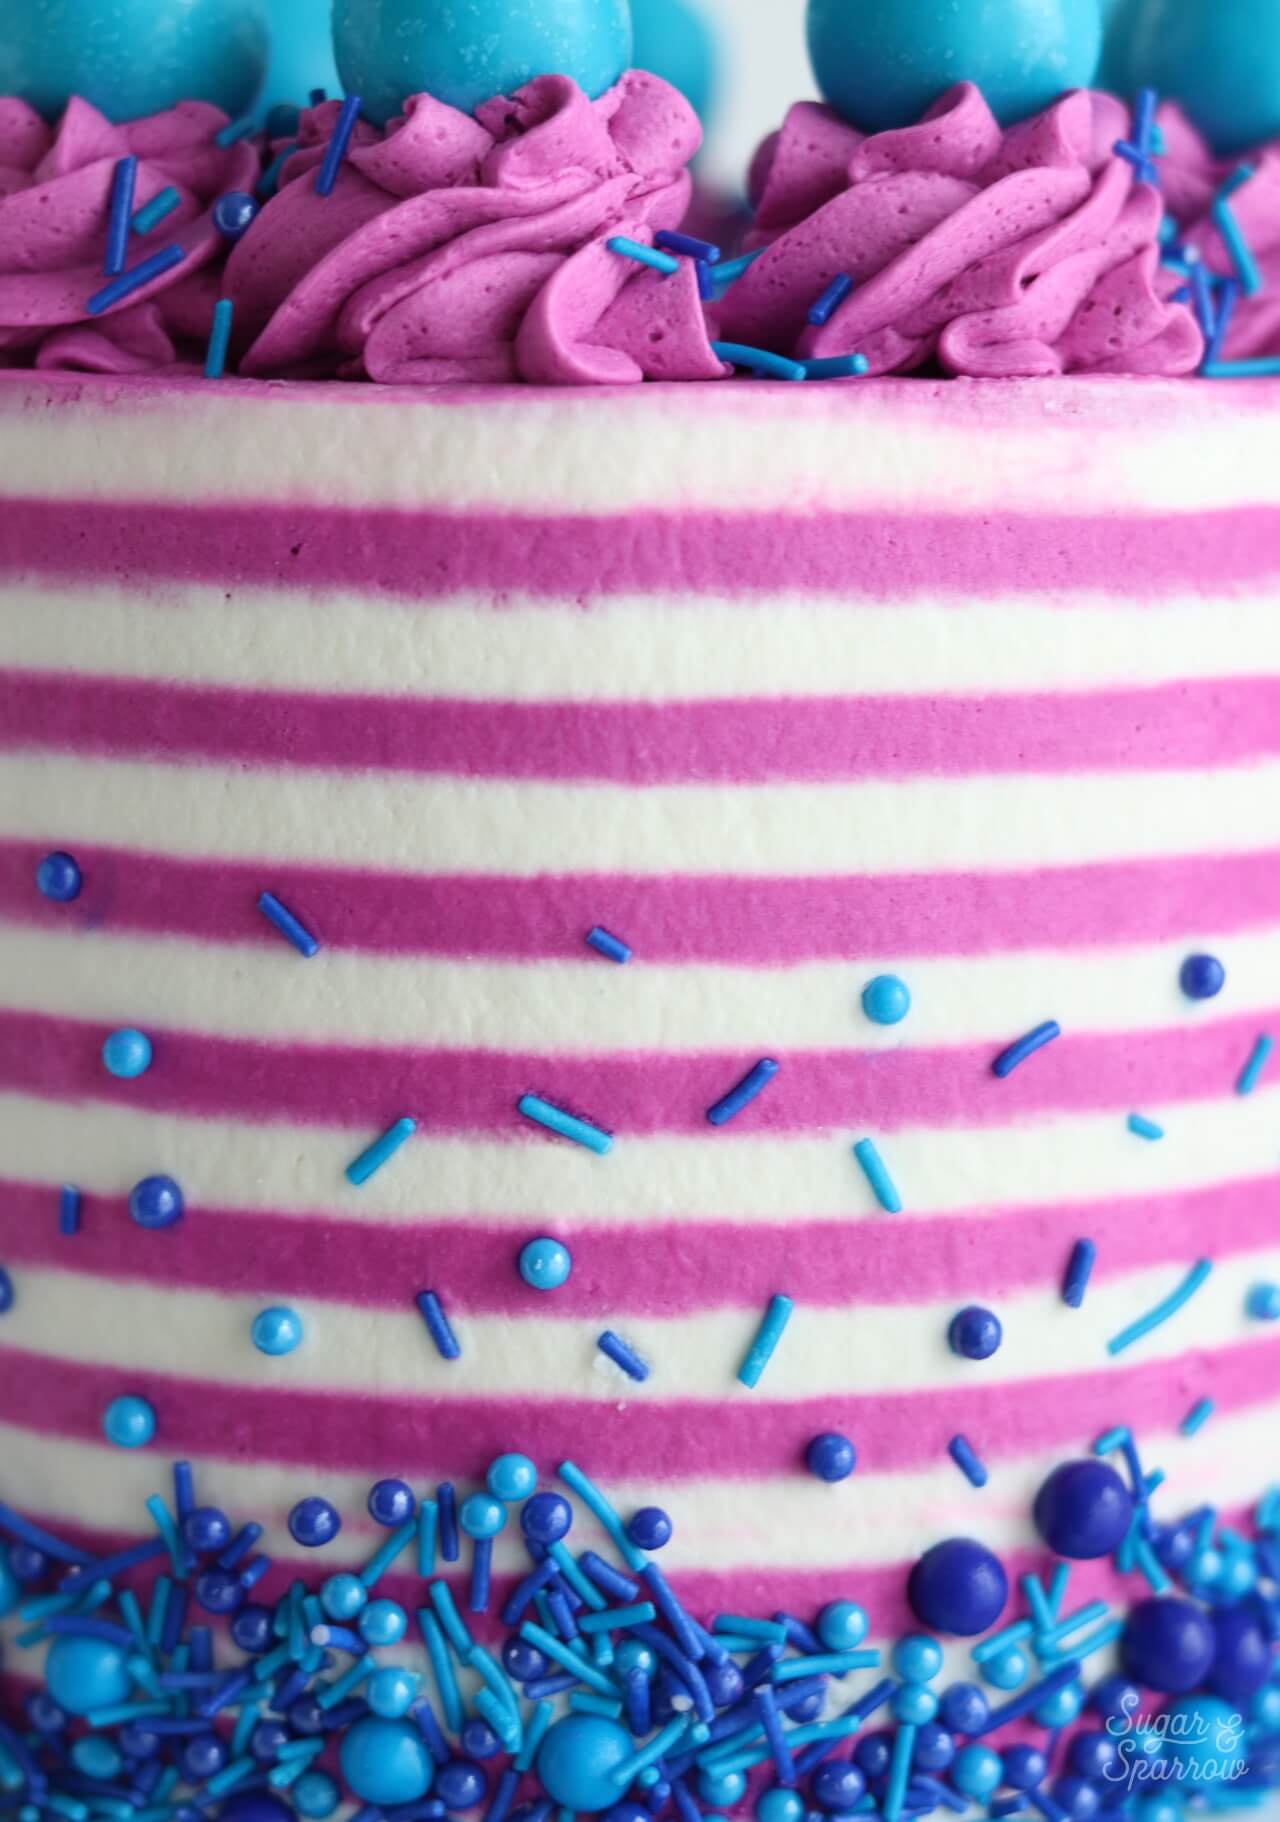
This step requires a bit of patience, but as you carefully smooth and remove excess buttercream, you’ll see those perfect stripes start to peek through. Continue this process until all of the excess buttercream has been removed and those stripes look perfect!

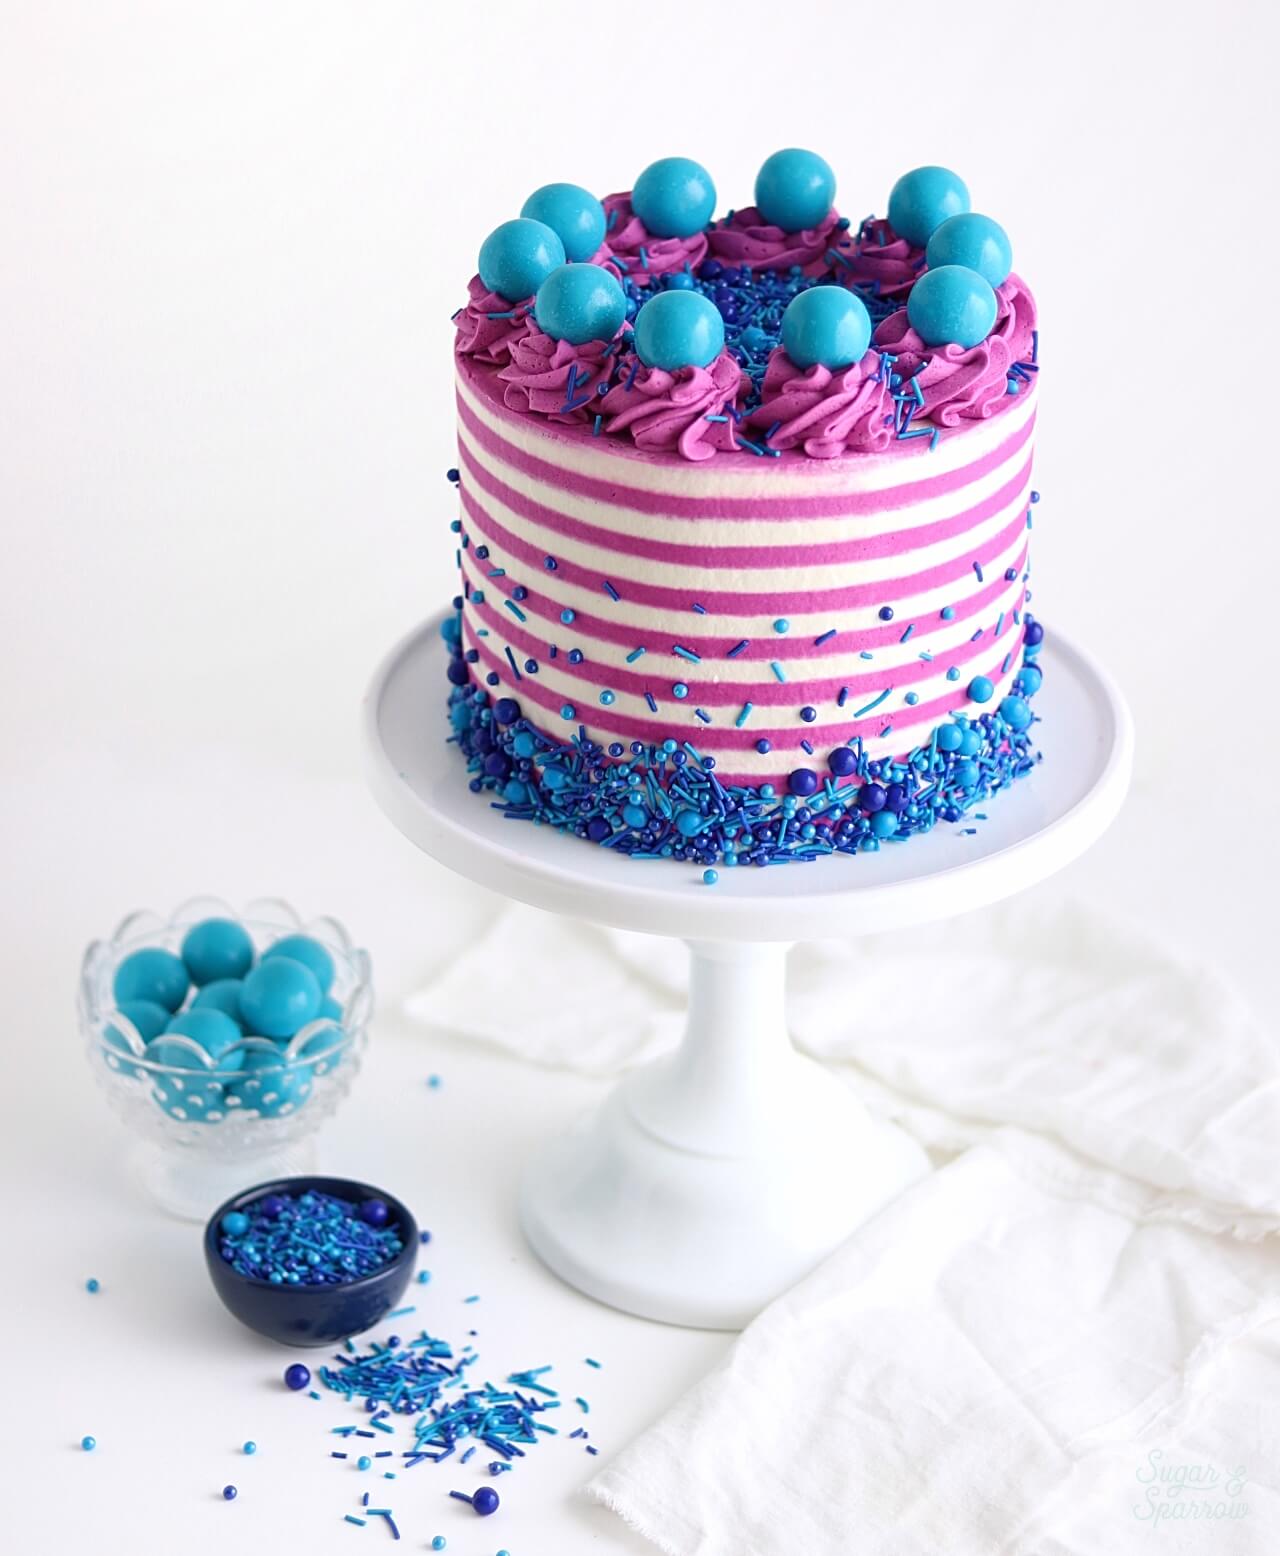
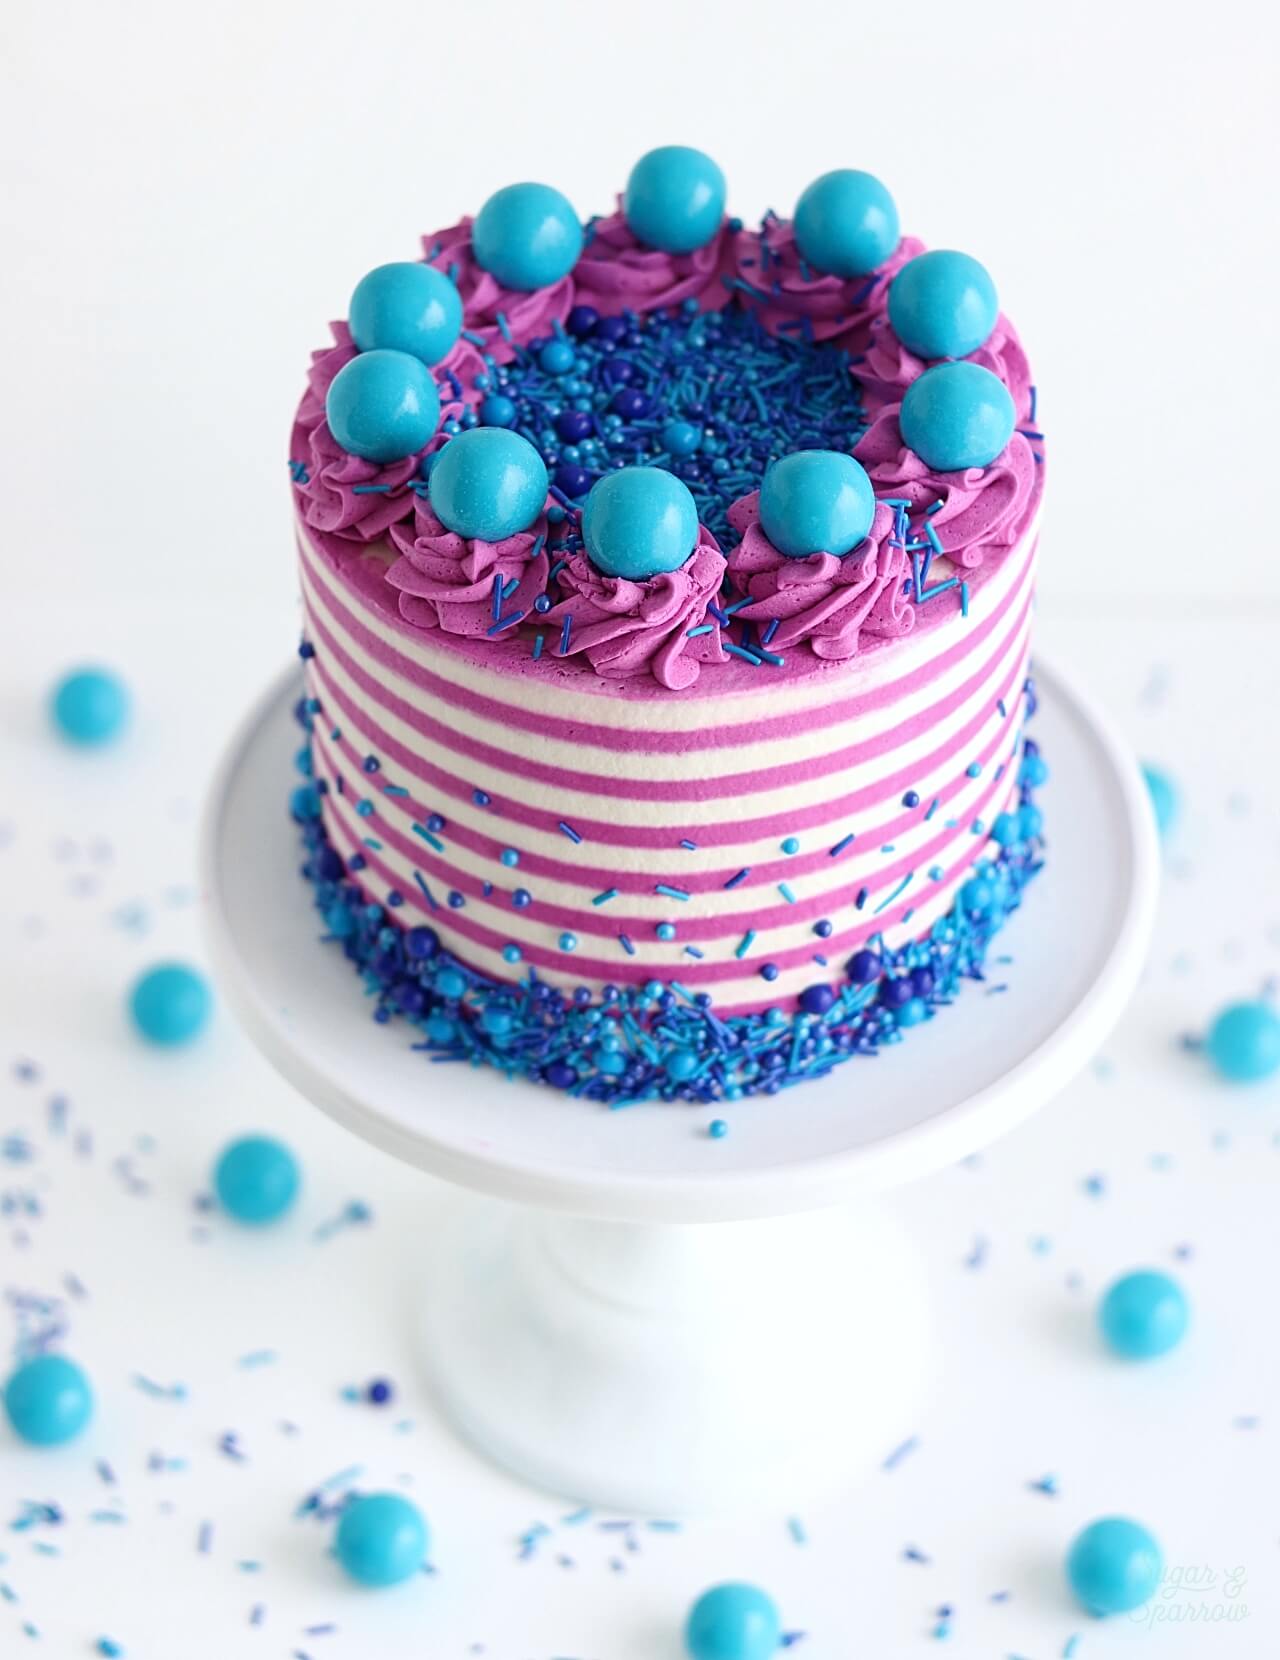
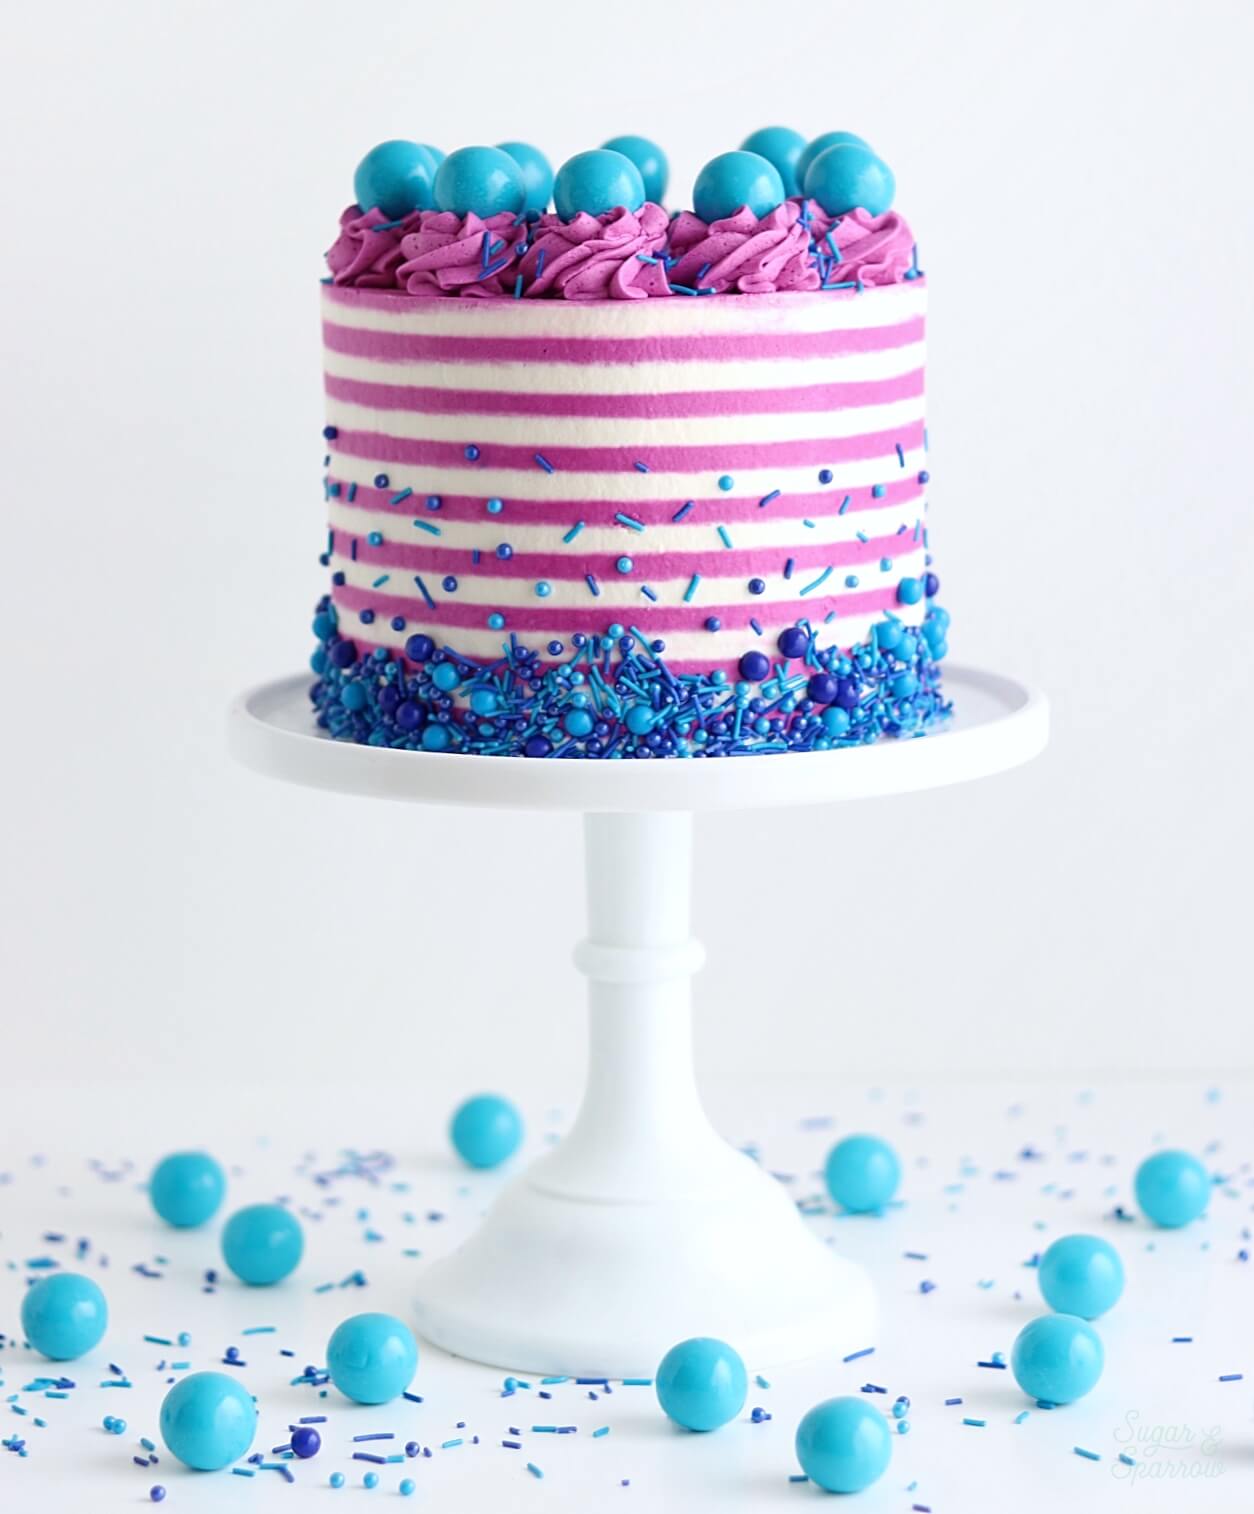
From here, you can continue decorating the cake if you wish. To get this look, I added some blue sprinkles (similar), a buttercream border using Wilton Tip 1M, and turquoise gumballs.

Disclaimer: I was compensated by JOANN for my work of creating this project, styling, filming, photographing, and writing about their products. As always, all opinions are honest and my own. Thank you for supporting brands that support Sugar & Sparrow.


Hello, really love your colour scheme! Just wondered if you have an idea of the rough quantity of coloured butter icing needed for the stripes and swirls on top? I will need to use a bit more white icing to cover my cake, as my tin size is slightly bigger, but that would leave me a little short on the amount I have left to colour. Thanks so much for sharing your recipe.
Hi Clara! You’d need about 2 Cups of buttercream for the stripes + swirls on top (that’s for a 6 inch cake). Hope that helps!
That’s great, thank you so much for the advice.
Hi, I have a question. This was my first attempt at a striped cake and I’m a home baker so fairly experienced. My bottom colored stripes disappeared and even after I re-piped the dark areas they would disappear again. Am I scraping to hard? Any help is appreciated.
Thanks!
Hi Kimberlee! If the stripes disappeared when scraping it means you either didn’t make the groove deep enough on that part of the cake, under-filled the groove with the colored buttercream, or scraped too deep on just that part of the cake. Perfect stripes take a lot of patience and many go-arounds with a gentle, even touch. It also helps to heat the scraper slightly toward the end with a little hot water (dry it before scraping). Hope that helps for next time!
Thanks for this. I have been looking and this is the only tutorial I’ve found! I see lots of people doing it, but no explanation. Thank you!!
Yay, Leigh! So happy to help!
Hi! Can you freeze your cake with the candy/sprinkles?
Thanks!
Hi Anne-Marie! I have never personally frozen a cake before, but I have seen it done with sprinkles. I would do a little research on how to freeze a cake to see for sure though.
How did you get the pink color smear out of some of the white stripes? I noticed when you used the scraper some of the white stripes had slight pink smears. How did you get it out?
Hi Nati! My camera actually stopped recording before I was finished (so frustrating!!). I just kept smoothing the buttercream until the pink smears were gone is all. Hope you get a chance to try this!
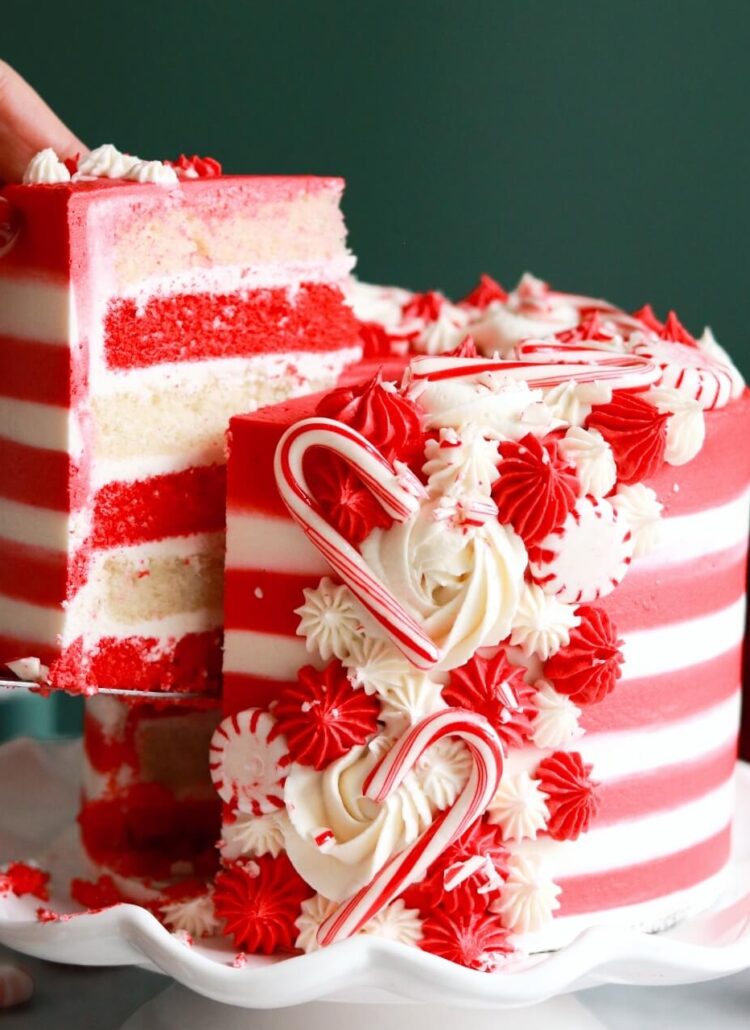
Sorry, I actually have one more question. Would you recommend doing my crumb coat in my red base colour, or should I do it in white?
As long as you refrigerate the cake for at least 20 min after crumb coating, it won’t matter what color you use since it will be set and covered up entirely with your final finish. So whichever color is easiest for your workflow!
I’m so excited to try to make this cake this weekend… How many layers is your 6-in cake? Yours is so beautiful!
Thanks so much, Amy! The cake pictured is three 6-inch layers. Excited for you to make this cake!
How can I get the buttercream consistency right . How much liquid should I add to loosen it up for comb. My recipe is 4 sticks of butter 2 pound of sugar, a teaspoon of vanilla and 3 table spoons of milk . How much more milk should I add to get the comb to run smooth
Hi Ashlee! You could either add 3 more teaspoons of vanilla + 1 more Tablespoon of milk OR 2 more Tablespoons of milk. If it needs to be thinner after that you can add more room temperature milk about 1 tsp at a time until the desired consistency is reached. Hope that helps!
Hi. I need to do a red base on the cake and have blue stripes but I’m worried that the red and blue will “blend” together and give me purple. Have you ever done stripes with a non-white base?
Hi Lindsey! Yes, I’ve done yellow and black before and was worried about the same thing (colors blending) but as long as you follow the instructions on chilling the cake after creating the grooves you shouldn’t have to worry about colors blending at all!
Amazing. Thank you so much (and thank you for such a quick response) 🙂
what if the width on the striped one?
Hi Macy, the width of the stripes on the cake pictured are 1/4 inch.
Will I have to worry about the colors blending if I frost the night before needed? I am doing white and black.
Hi McKayla! Not at all. Once the stripes have been created they won’t bleed into one another or start to blend. In other words, the cake finish will stay as-is once you’re finished frosting.
What is the blue decorations on bottom of cake ? Thanks
Hi Patrick! The blue decorations on the bottom of the cake are these sprinkles: https://amzn.to/2KIMnUD
Looks so good! I’m wondering if this will come out nice with dark blue and grey
Thanks so much, Valory! I think this technique would look amazing with dark blue and grey!
You make it look so easy, and I’m crazy about that blue sprinkles blend! This is a really cool technique.
Aw thanks, Anna! It took lots of practice to figure out these tips, so hopefully they make it easy for you too! 🙂 and YES! Those blue sprinkles were the perfect contrast for this color scheme.
Awesome tips!!! I need to practice stripes more but I feel more confident after this! Thanks Whitney! Super cute cake too as usual 🙂
Yay, Lyndsay!! So happy you’re finding these tips helpful and can’t wait to see your stripey cakes in the future!!
Right now it looks like Movable Type is the best blogging platform
out there right now. (from what I’ve read) Is that what you’re using on your blog?
Hi Manuel! I’m using WordPress for my site.