• Cake
  • Frosting
  • YouTube
  • My Favorite Tools
  • Nav Social Icons

  • Skip to primary navigation
  • Skip to main content
  • Skip to primary sidebar
  • Skip to footer
  • Recipes
    • Cake
    • Cupcakes
    • Frosting
    • Ice Cream
    • Vegan
  • Cake Basics
  • Tutorials
  • Blog
  • About
  • Mobile Menu Widgets

    Connect

    Search

Sugar & Sparrow logo in script font

Sugar & Sparrow

Lifestyle and Cake from Portland Oregon

  • Cake Basics
  • Recipes
    • Cake
    • Cupcakes
    • Cookies & Bars
    • Filling
    • Frosting
    • Ice Cream
    • No-Bake
    • Small Batch
    • Vegan
  • Tutorials
  • Book
  • Blog
  • About

Unicorn Party Cake Tutorial

April 3, 2019 · In: Featured, Tutorials

Unicorns are arguably the best mythical creatures of all. It’s no wonder that they became a major trend in the cake and party planning world! You’ve probably seen plenty of unicorn cakes in your social media feeds, the most popular look being the ones where the entire cake looks like a unicorn head. I thought I’d switch it up a little bit with this one, especially because I got my hands on a bottle of this Unicorn sprinkle mix by SprinklePop! They’d look amazing on any cake design, but I really love how they enhance the magical colors and textures going on in this unicorn cake:

unicorn cake tutorial
Unicorn Sprinkles by Sprinklepop on cake

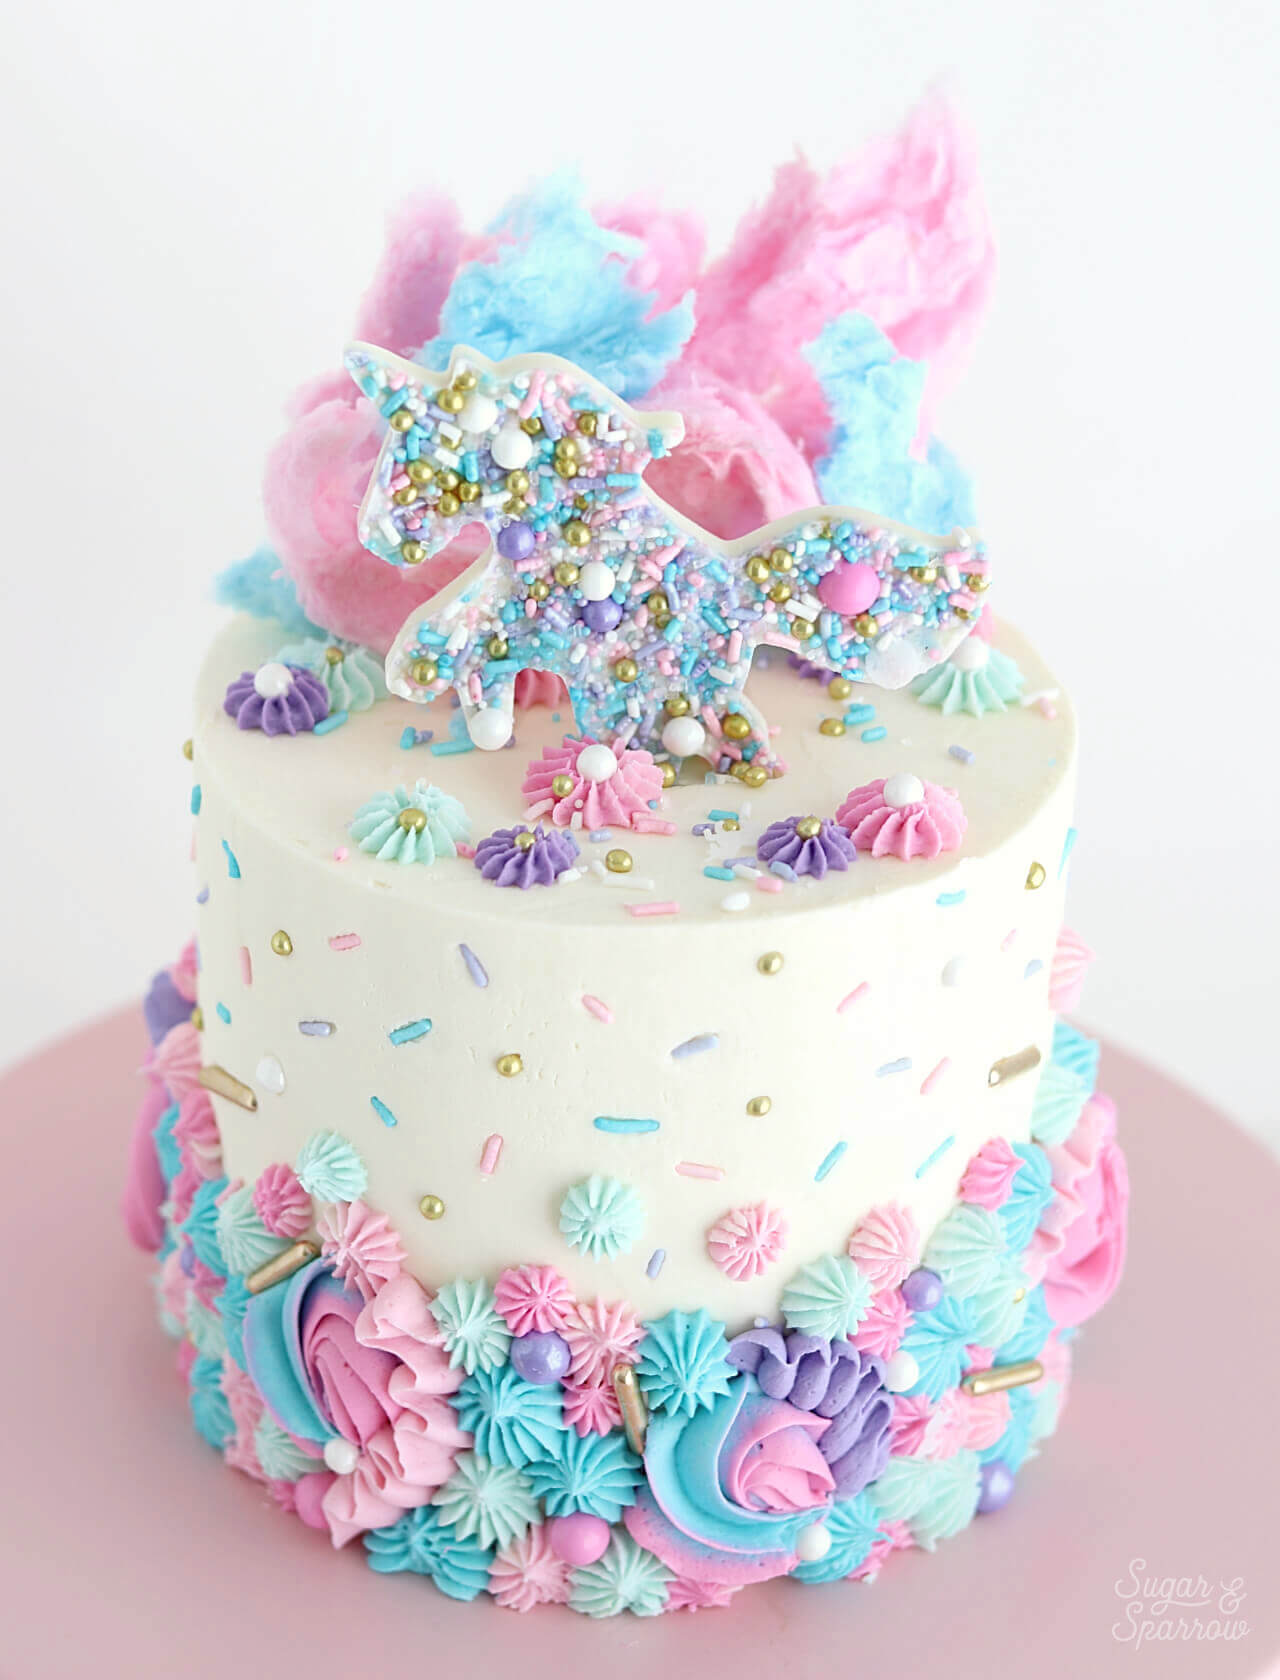
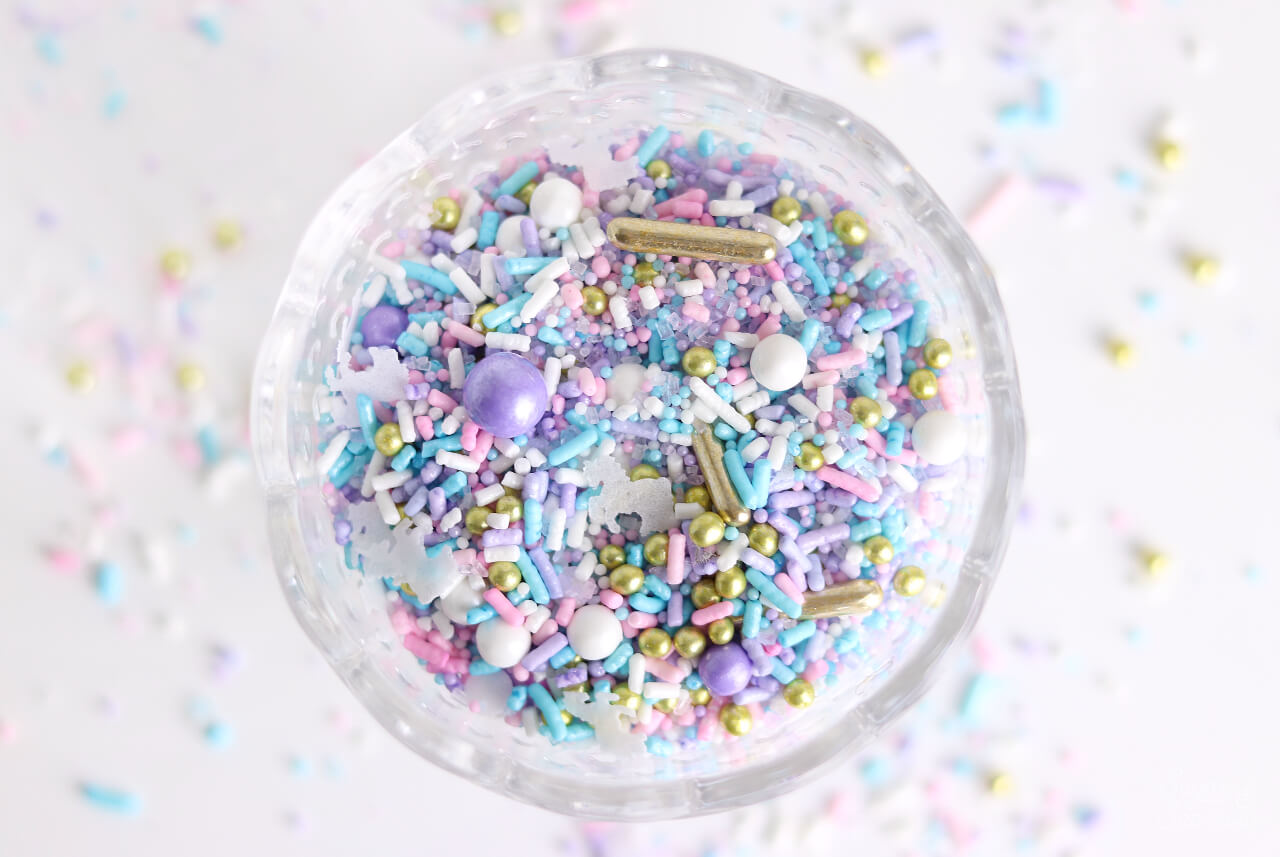
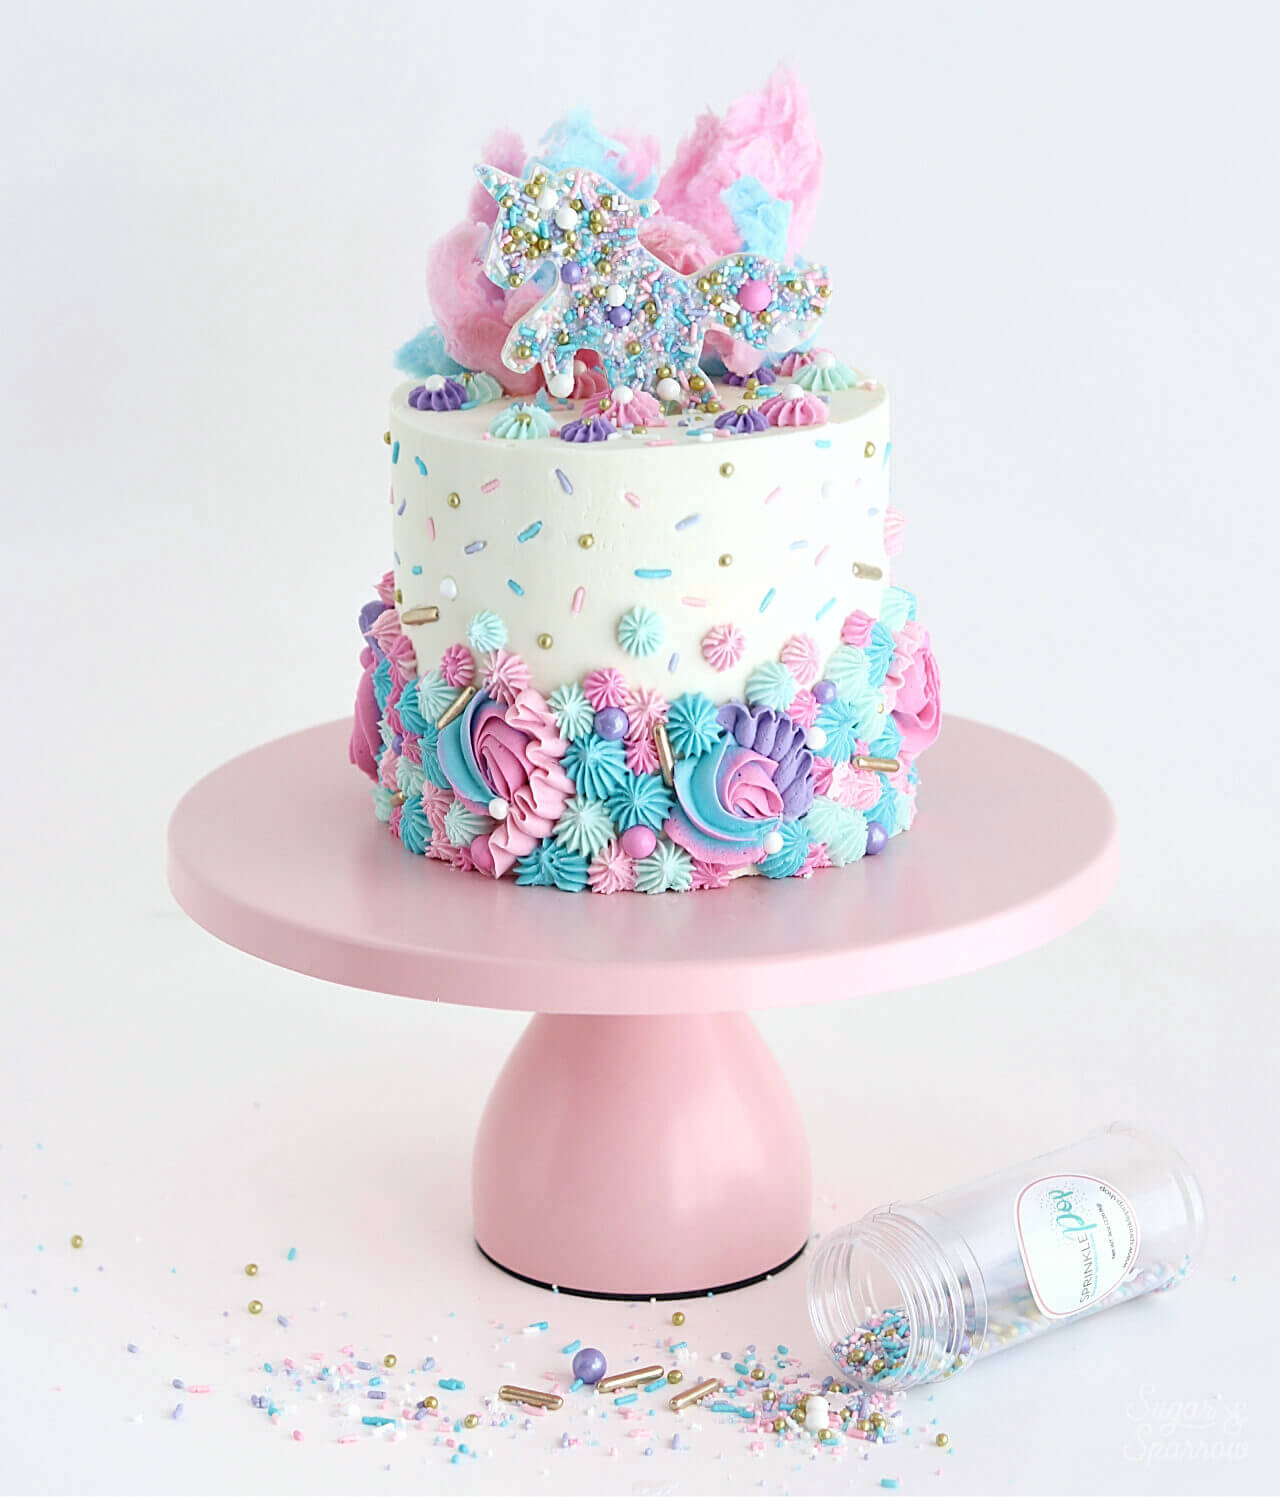
The Unicorn sprinkle mix is made up of the most beautiful textures and colors. It’s a blend of pastel pinks, purples, and blues, mixed with gold metallic accents and tiny wafer paper unicorns. In other words, pure magic in a bottle! I was so obsessed with the color palette of the sprinkles that I decided to theme the entire cake around it. Just look at those pretty colors and the cute wafer paper unicorns!

Unicorn sprinkle mix by SprinklePop

This cake is perfect for any unicorn lover and is actually quite simple to create. It all starts with a smooth frosted buttercream cake and some easy piping. I used three of my favorite piping tips to get the look (listed below) and then pressed the Unicorn sprinkles onto the smooth part of the cake in a floating sprinkle design. And finally, I topped it with a sprinkle-covered white chocolate unicorn that I created using a unicorn shaped cookie cutter and a few wisps of pink and blue cotton candy for good measure. I’m pretty over the moon with how it turned out!

Every detailed instruction for how to make this unicorn-inspired cake is in the tutorial below, but I also made a video to show you the process! Take a look:

You Will Need:

  • A frosted buttercream cake
  • 1 batch of vanilla buttercream frosting
  • 8oz bottle of Unicorn Sprinkles
  • Wilton Tips 1M, 104, and 4B
  • Piping bags
  • Icing color gels of your choice
  • ½ cup white chocolate chips
  • Wax paper
  • A unicorn-shaped cookie cutter
  • ½ tsp coconut oil
  • Cotton candy

Step 1: Make The Unicorn Cake Topper

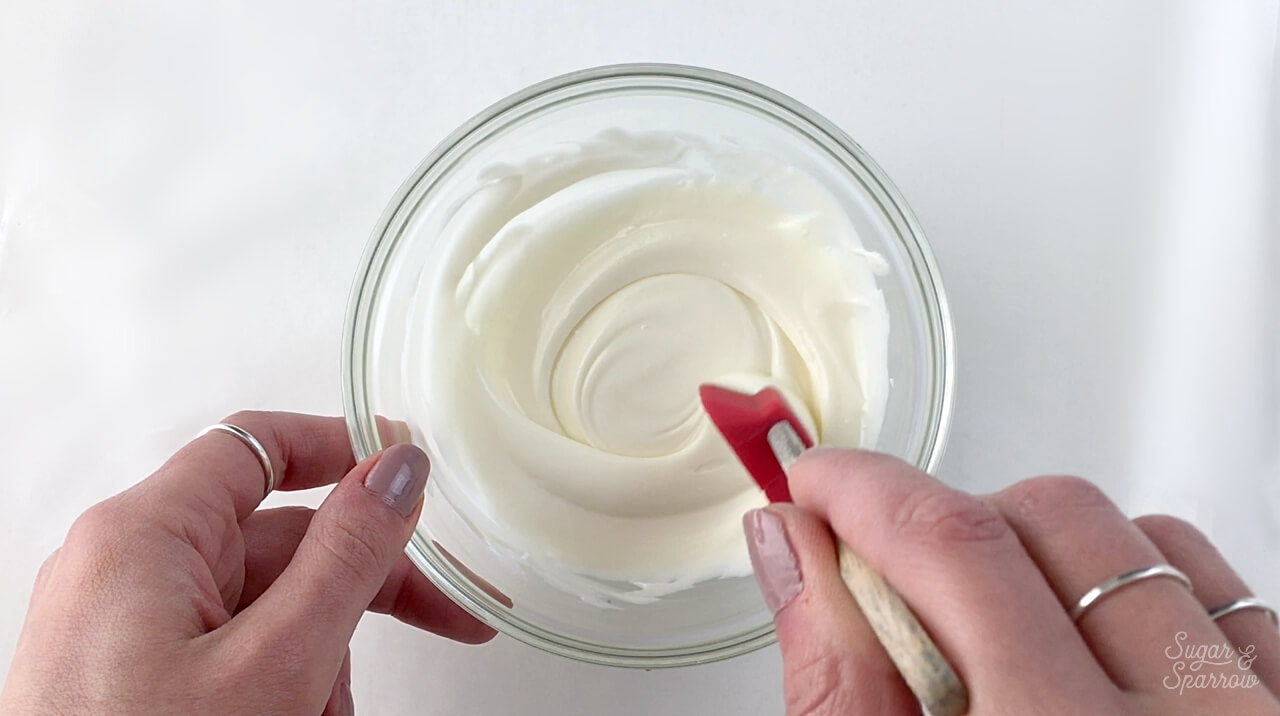
To make the unicorn cake topper, spread out a small sheet of wax paper onto a moveable flat surface (like a cookie sheet). Add the white chocolate chips to a microwave-safe bowl, then reserve about ⅛ cup of them and set aside. These reserved chips will act as a “seed” to help temper the melted chocolate. Microwave the white chocolate chips sans “seed” in 30 second increments until melted, stirring after each interval, then toss in the reserved chips and stir until everything is fully melted.

how to temper white chocolate

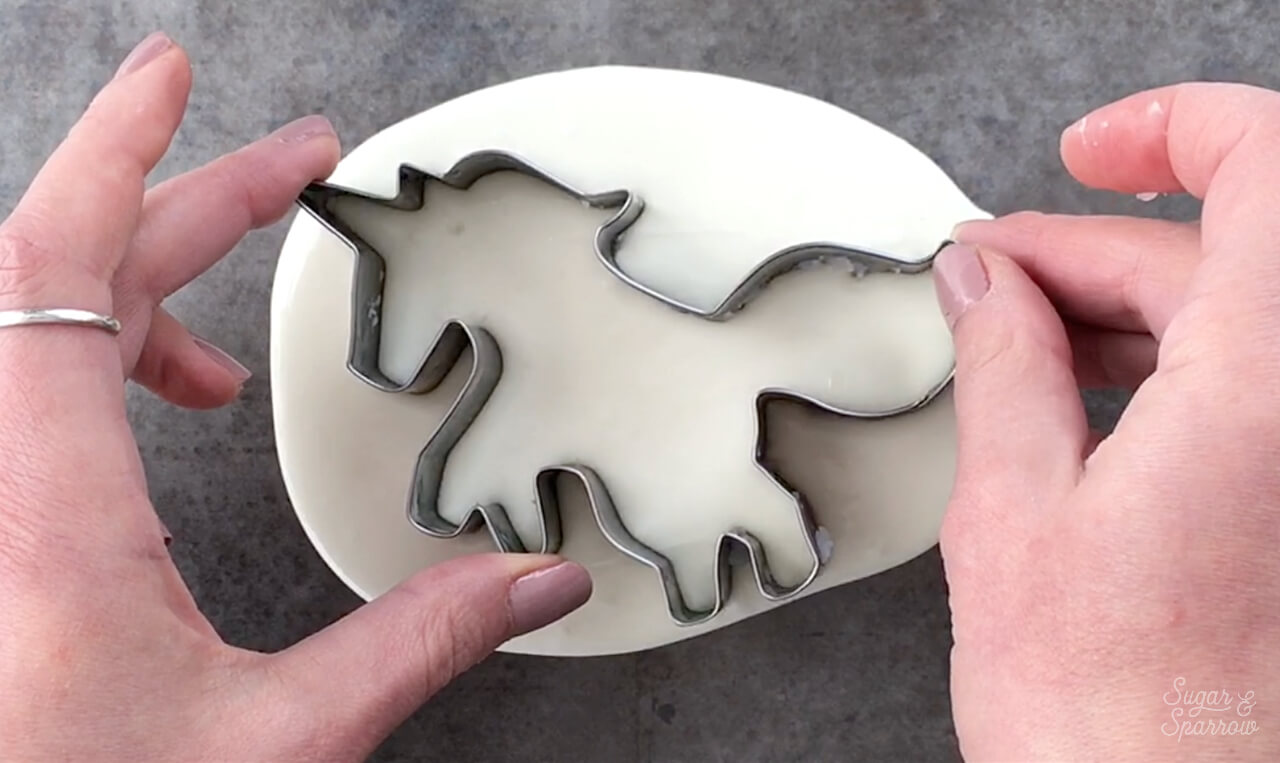
Spread the melted white chocolate onto the wax paper about ¼ inch thick. Smooth the coconut oil onto the edges and crevices of the unicorn-shaped cookie cutter (helps with easy release once the white chocolate is set), then press the cookie cutter into the melted white chocolate.

How to use cookie cutters to make white chocolate shapes

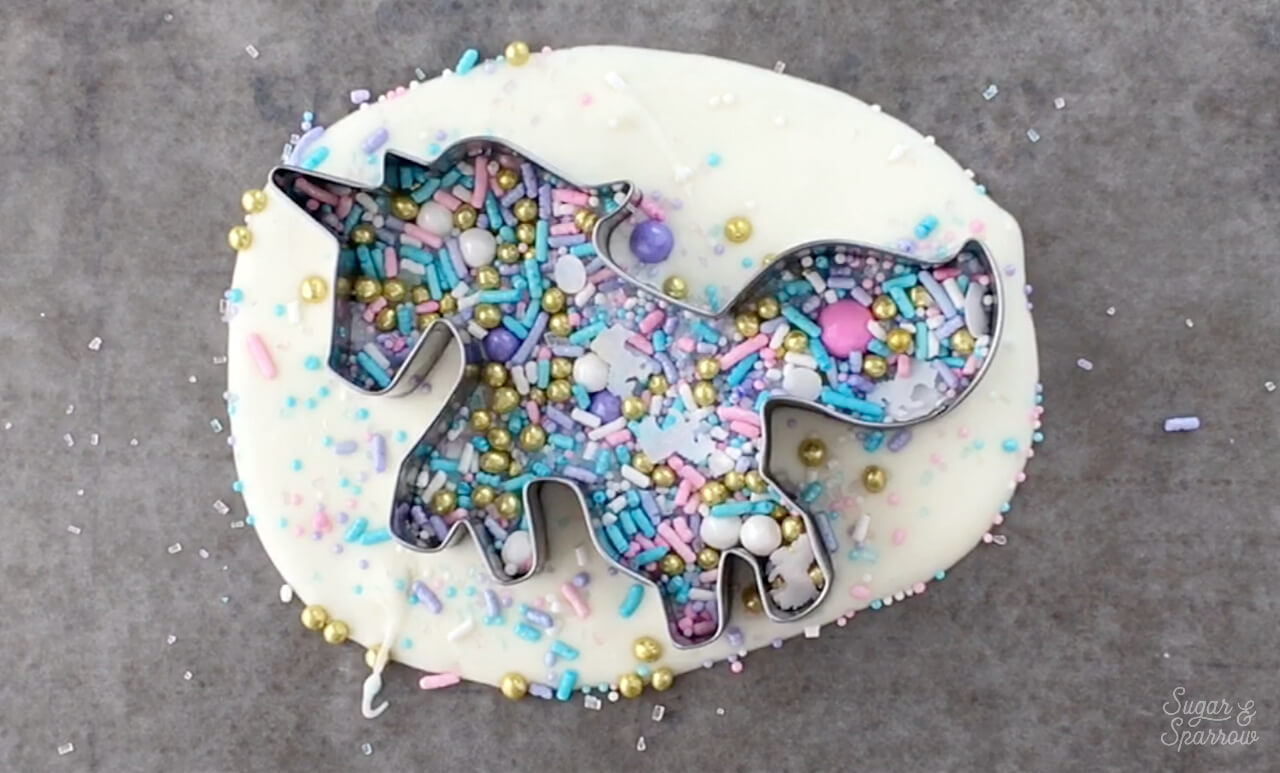
While the chocolate is still wet, add Unicorn sprinkles to cover the entire area within the unicorn cookie cutter and gently press them in. Refrigerate the sprinkle-covered white chocolate unicorn for 10 minutes, or until firm to the touch.

diy unicorn cake topper

Carefully remove the excess white chocolate from the edges of the cookie cutter, then release the center from the mold.

Step 2: Mix Up a Buttercream Color Palette

Divide the buttercream into a few separate bowls for color mixing. I ended up making five different colors for my palette. First, I used a mix of Americolor Electric Pink and Electric Purple to create a dark pink, then created a light pink by mixing that with white buttercream. Next, I used Americolor Sky Blue to create the light and darker blue shades. And finally, I used Americolor Regal Purple to create the purple tone.

Buttercream color palette for unicorn cake

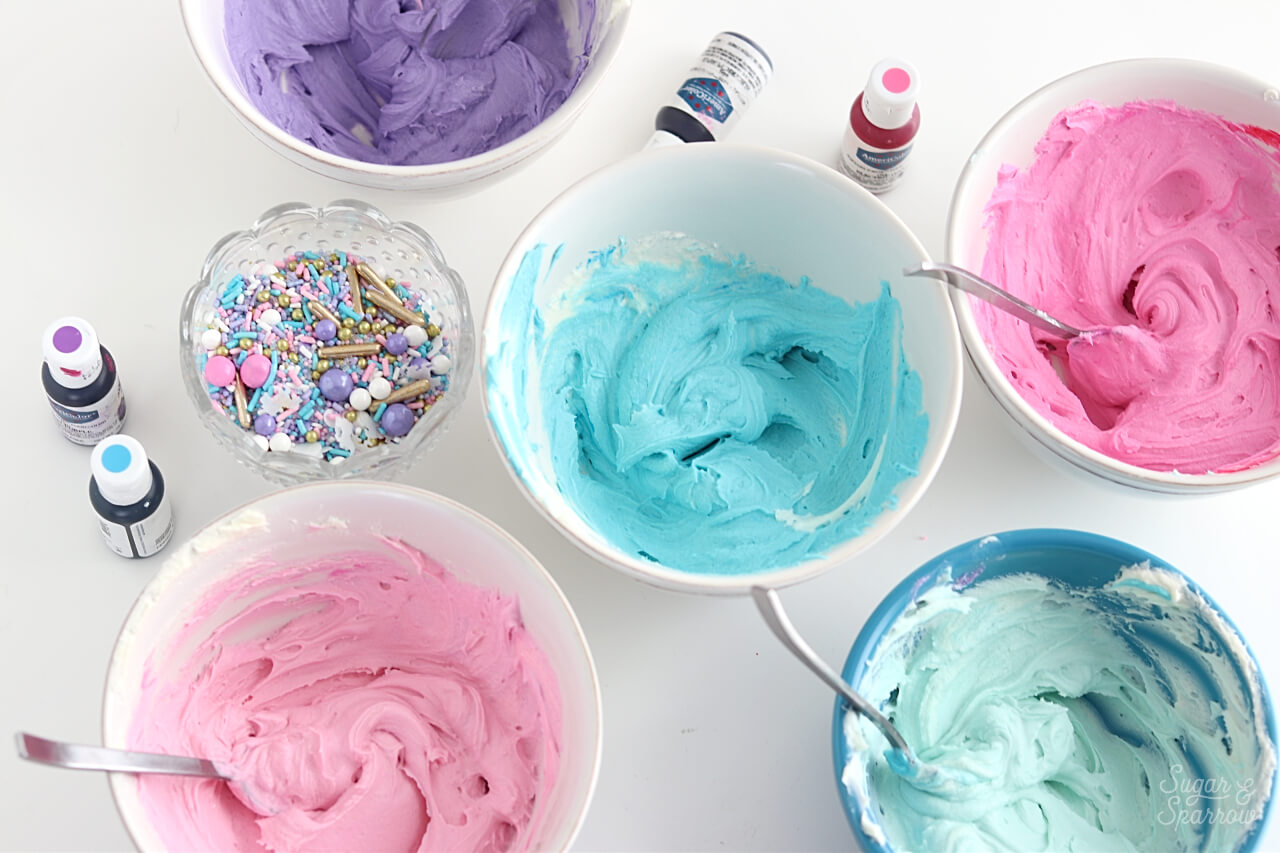
Feel free to use whatever colors you’d like for your color palette! I’m sure the Unicorn sprinkle mix would look gorgeous with any pastel tones.

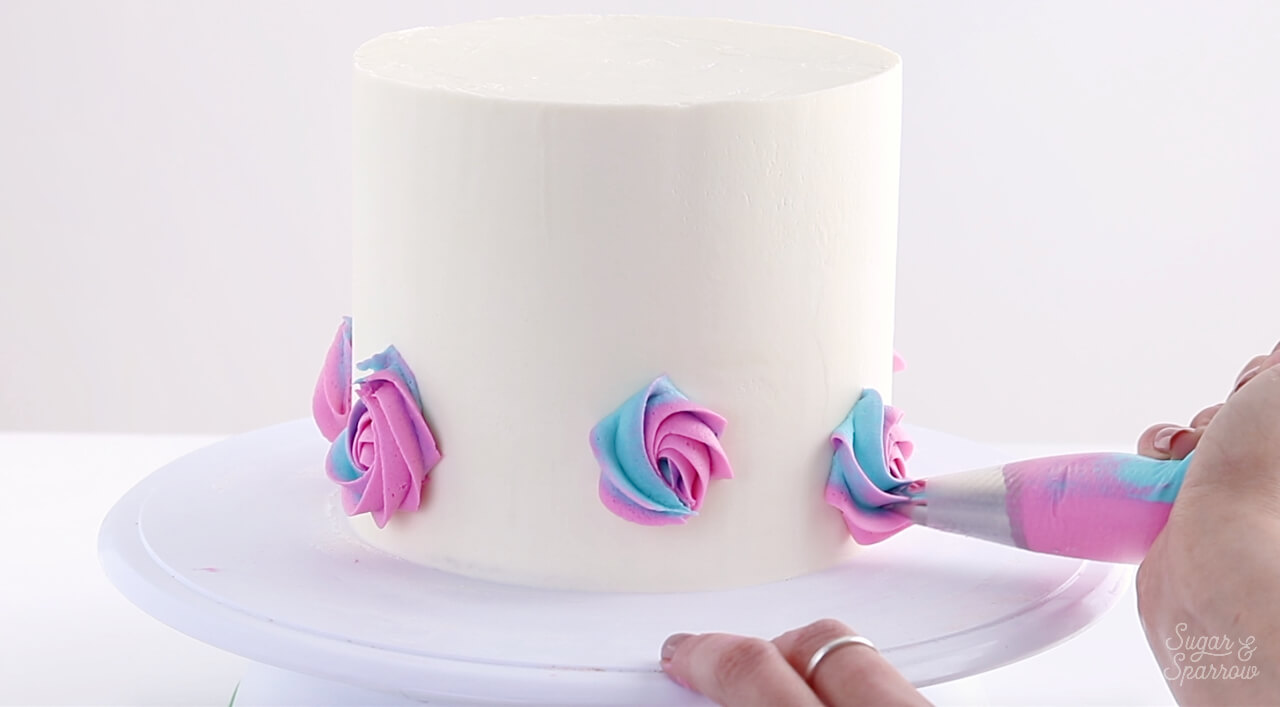
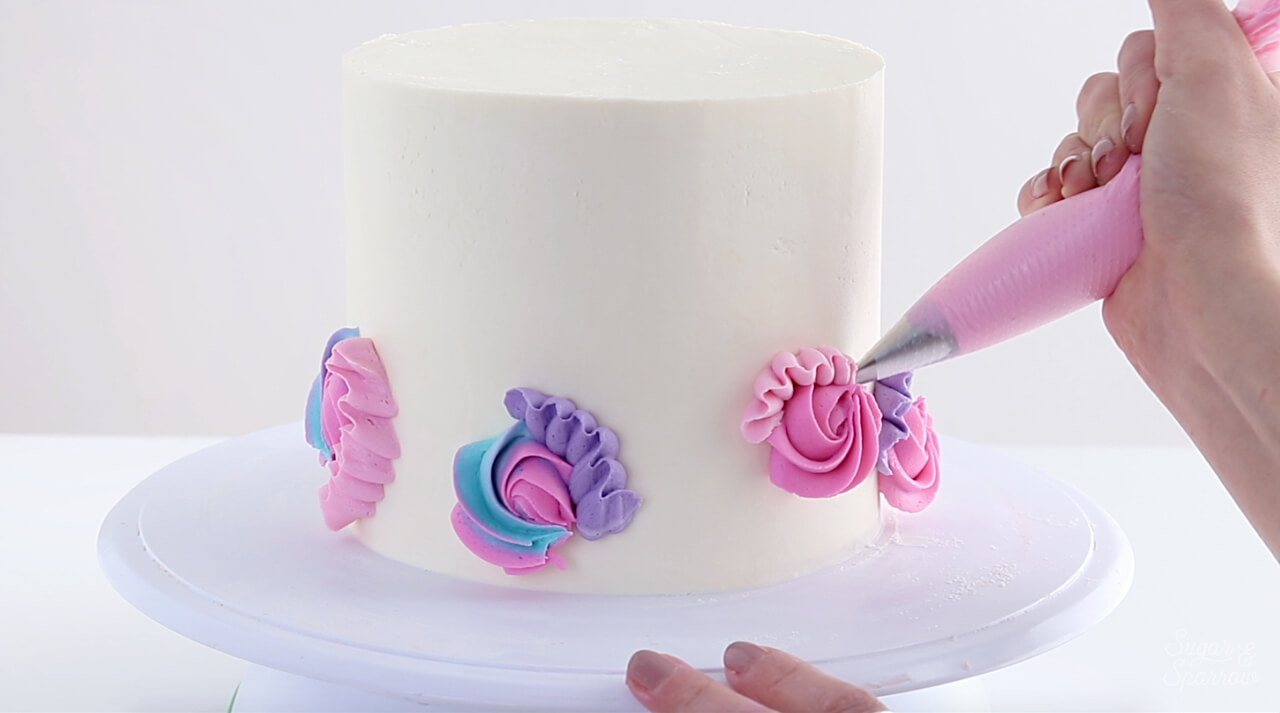
Step 3: Pipe the Bottom of the Cake

Prepare a few piping bags by fitting them with Wilton tip 1M, 4B, and 104, then filling them with your colored buttercream. Any of your favorite piping tips will do for this part, but here’s how to recreate the look. First, pipe rosettes with Wilton tip 1M:

how to pipe buttercream rosettes with Wilton Tip 1m

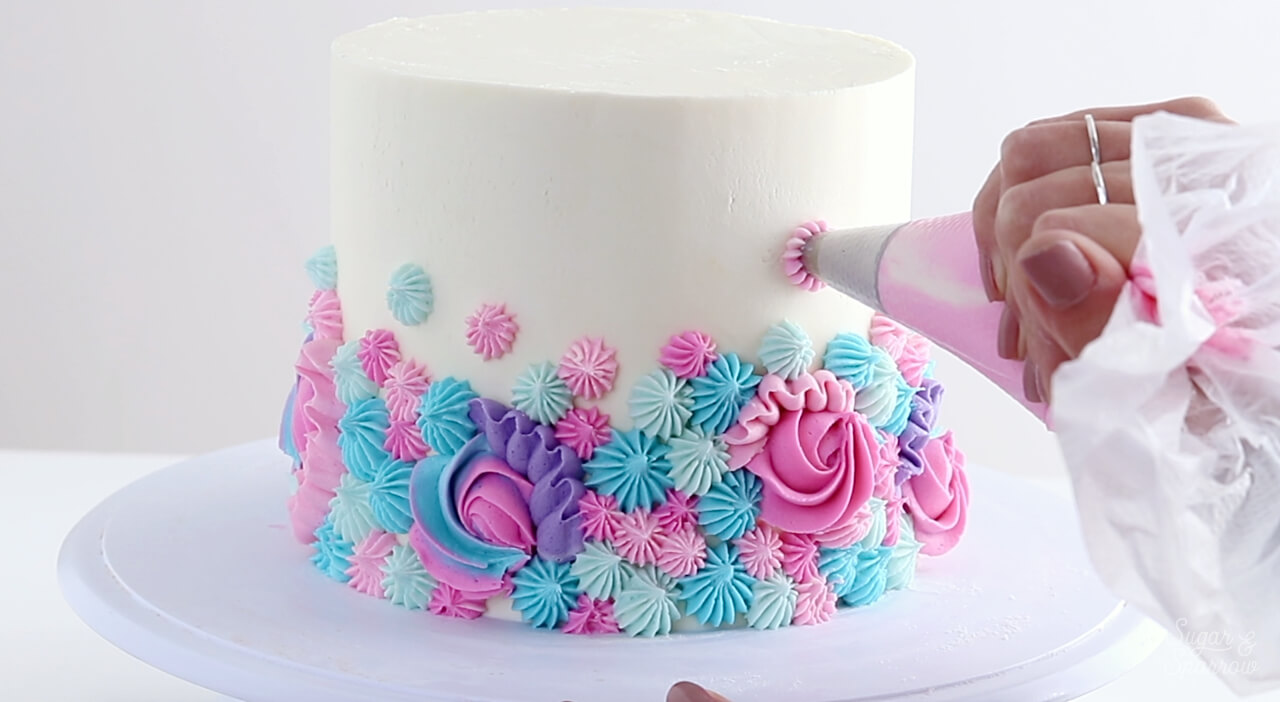
Next, pipe ruffles to accent the edges of the rosettes using Wilton tip 104:

how to pipe buttercream ruffles with wilton tip 104

And finally, fill in the empty spaces with open stars in a few different colors using Wilton tip 4B:

how to pipe buttercream stars with Wilton tip 4B

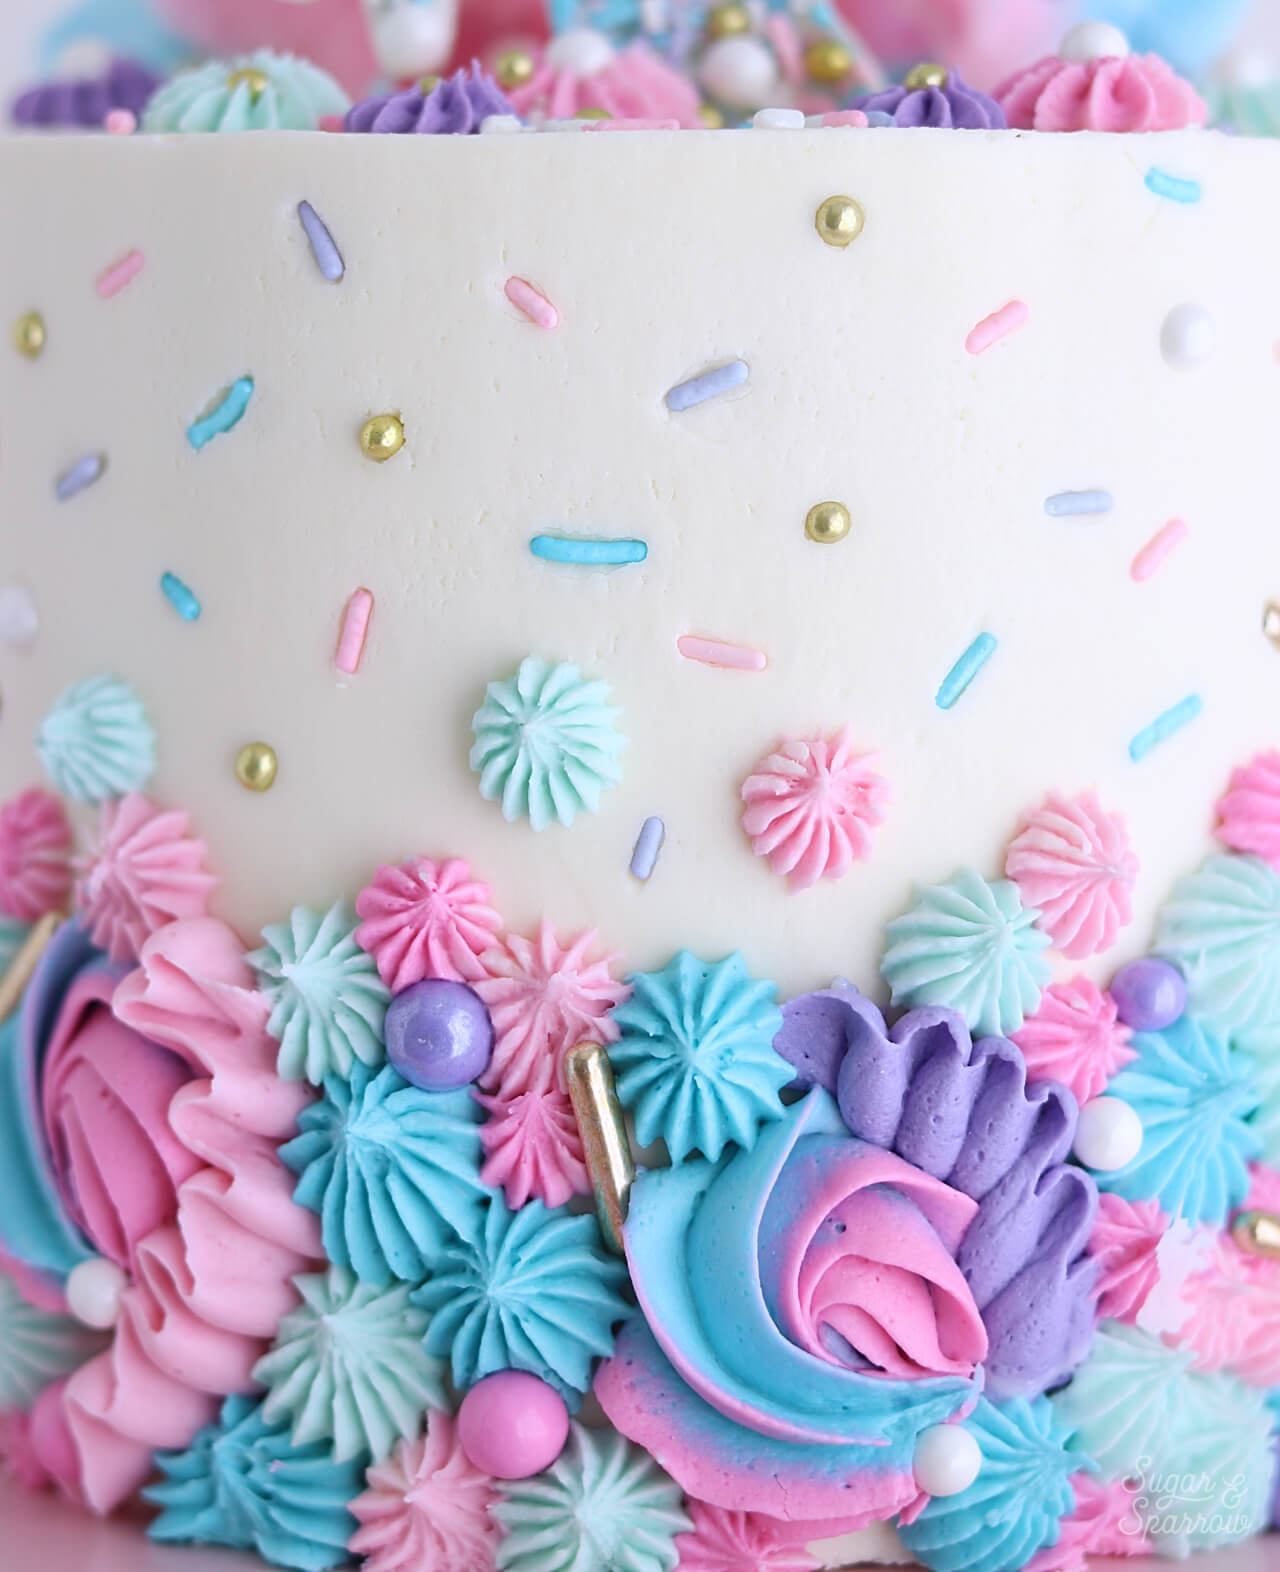
Step 4: Add the Floating Sprinkles

One by one, add sprinkles to the smooth part of the buttercream cake in a floating pattern. You can either use tweezers for this part, or press a sprinkle onto the tip of your finger and gently press it into the buttercream.

how to add sprinkles to a cake

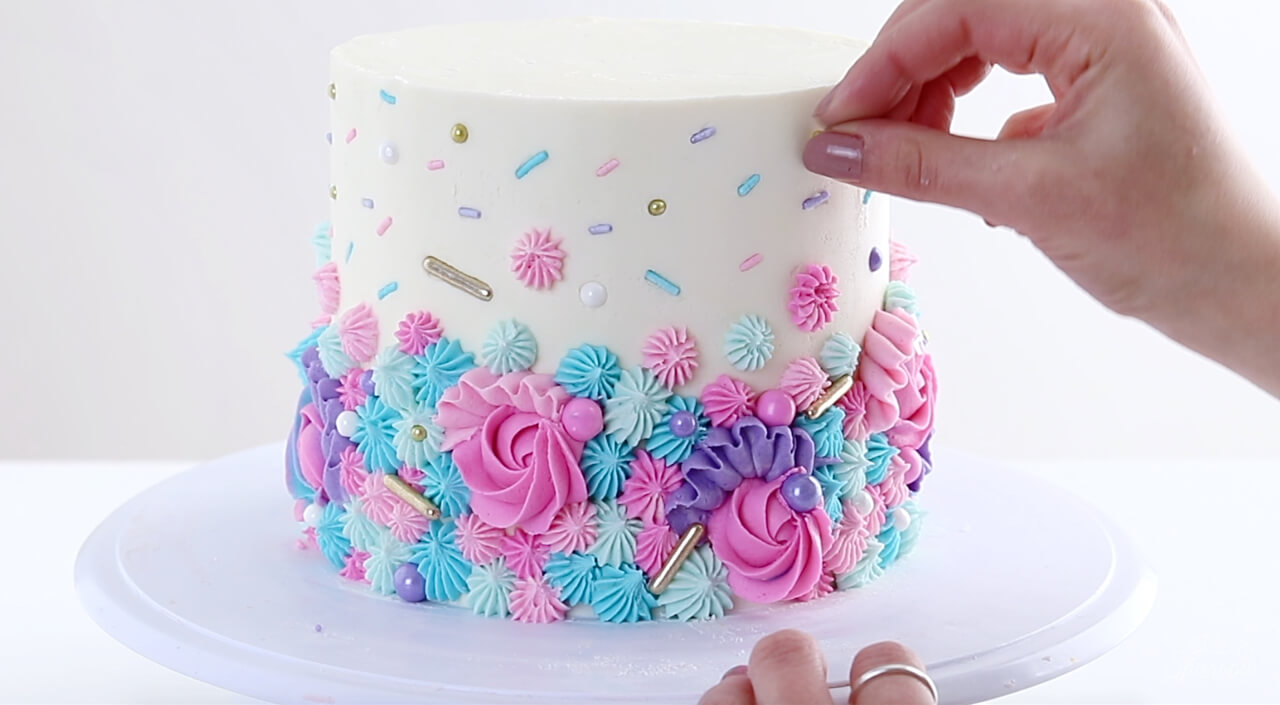
Repeat until you’ve covered the top half of the cake with floating Unicorn sprinkles.

Step 5: Top the Cake

To complete the cake design, stick the legs of your sprinkle-covered unicorn into the top of the cake, then add some cotton candy as a backdrop. Just remember to add the cotton candy within an hour or two of serving the cake, because it’ll start to melt if you put it in the fridge.

As a final finishing touch, I also used Wilton tip 4B to pipe some open stars around the unicorn in a random pattern, then sprinkled some more Unicorn sprinkles (because more is more, people!).

And there you have it! A unicorn-inspired cake perfect for any magical occasion.

Unicorn cake with sprinkles and cotton candy

Is there a unicorn party in your future? Let me know if you end up making this cake by leaving a comment below! You can also tag me on Instagram so I can see what you’re caking. It gives me all the feels!

By: Whitney · In: Featured, Tutorials · Tagged: cake decorating, cake tutorial, cake with sprinkles, diy cake topper, party cake ideas, sprinklepop, unicorn cake, unicorn cake topper, unicorn party cake, unicorn party ideas, unicorn sprinkles, wilton tip 104, wilton tip 1m, wilton tip 4b

you’ll also love

the best vanilla cupcakes recipeThe Perfect Vanilla Cupcake Recipe
pumpkin layer cake recipe by sugar and sparrowPerfect Pumpkin Layer Cake Recipe
oreo cookies and cream cakeOreo Layer Cake Recipe

Join the List

Stay up to date & receive the latest posts in your inbox.

Reader Interactions

Comments

  1. Ava Lise says

    September 2, 2024 at 12:37 pm

    I just wish wish wish I could bake like this

    Reply
  2. Kirsten says

    June 30, 2022 at 12:31 am

    This looks so fun! I want to try it! I have piped cupcakes like this but I am worried it will be really hard to do it on the side?? Any tips, or am I over thinking it? 🙂

    Reply
    • Whitney says

      June 30, 2022 at 2:36 pm

      Hi Kirsten! It’s not hard to pipe on the side of the cake, but it can be nerve wracking if you haven’t done it before. You’ll use the same piping techniques you used for your cupcakes, only you’ll be holding the bag more horizontally than vertical. My biggest advice would be to make sure your buttercream consistency is thickened for piping so that the details don’t droop. Here’s more info on that: https://sugarandsparrow.com/buttercream-consistency/

      Reply
  3. Santosh Sahani says

    April 29, 2022 at 8:47 am

    On a scale from 1 to 10, you’re an 11. I really appreciate, you written well and helpful blog for those regarding cakes. Looking forward for more!!

    Reply
    • Whitney says

      April 29, 2022 at 8:29 pm

      Thank you so much, Santosh!! That made my day 🙂 Happy you’re finding my blog helpful!

      Reply
  4. box of cake says

    August 8, 2021 at 10:55 pm

    I really appreciate, you written well and helpful blog for those regarding cakes. I will follow and share these cake related blogs.In this blog cakes’ pictures are looking very awesome.

    Reply
    • Whitney says

      August 10, 2021 at 11:01 am

      Thanks so much!

      Reply
  5. Yasodhaa says

    January 15, 2020 at 8:26 pm

    Hi! I’m going to attempt this. Was just wondering how long the white choc topper lasts outside of the fridge? I made another white choc topper last weekend (probably half the thickness of yours) and it only lasted about 15 mins out of the fridge. We’re in the middle of summer where I live. Thanks in advance!

    Reply
    • Whitney says

      January 16, 2020 at 9:43 am

      Hi Yasodhaa! Wow, it must be really hot where you live. White chocolate has a melting point of about 86-90ºF (or 30-32ºC), so it all depends on the temperature of your environment, whether or not the cake will be in the direct sun, etc. That being said, if you’re concerned about the temperature and the chocolate melting, I would consider making the cake topper out of gumpaste or fondant. You can still wet the surface of gumpaste or fondant and add sprinkles to achieve relatively the same look, but the topper won’t melt. Hope that helps!

      Reply
      • Yasodhaa says

        January 17, 2020 at 2:23 pm

        Thank you! I’ll do a practice run with the chocolate first and see how I go

        Reply
  6. Misty Coykendall says

    January 13, 2020 at 11:26 pm

    Thank you so much!! If I can pull even part of this off my daughter will be so excited!! Do you have a certain cake recipe you use?

    Reply
    • Whitney says

      January 14, 2020 at 7:22 pm

      I love using my vanilla cake recipe and my chocolate cake recipe for cakes like this. My vanilla cake recipe is here: https://sugarandsparrow.com/vanilla-cake-recipe/ (and you can turn it into a funfetti cake by adding about 3/4 cup of sprinkles coated in 1 Tbsp flour). My chocolate cake recipe is here: https://sugarandsparrow.com/chocolate-cake-recipe/

      Reply
  7. Misty Coykendall says

    January 11, 2020 at 4:38 pm

    How big are the cake pans you used and how many layers?

    Reply
    • Whitney says

      January 13, 2020 at 9:31 am

      Hi Misty! For this cake I used three 6-inch layers and here’s a link to the cake pans I have: https://amzn.to/2tYVCK9

      Reply
  8. Allison says

    November 8, 2019 at 4:39 pm

    I’m throwing a unicorn Birthday party for my little girl’s 7th birthday in January. I already had a plan for her cake, but now I’m switching things up and incorporating design elements from your cake as well. Just ordered the sprinkles, and I need to order those beautiful colors. Thanks so much!

    Reply
    • Whitney says

      November 11, 2019 at 1:33 pm

      Yay, Allison! Excited for you to incorporate some of these design elements to make an epic unicorn cake for your daughter. Cheering you on!

      Reply
  9. Lesa Stacey says

    July 14, 2019 at 10:50 am

    I am going to be making this next week for my daughter’s birthday. Perfect for a preteen who loves Unicorns but don’t want a “childish” cake.

    Reply
    • Whitney says

      July 15, 2019 at 10:30 am

      Yay, Lesa! This design is going to be perfect!

      Reply
      • Lesa Stacey says

        July 25, 2019 at 6:49 pm

        Well here it is… https://www.instagram.com/p/B0L60J0hK09/?igshid=14ftvziy62g8y

        Reply
        • Whitney says

          July 26, 2019 at 3:16 pm

          Oh my goodness, Lesa!! It turned out gorgeous!! Thanks so much for sharing that with me <3

          Reply
  10. Bukky says

    April 3, 2019 at 9:21 pm

    Lovely, thanks for sharing. Will try this

    Reply
    • Whitney says

      April 4, 2019 at 9:49 am

      Yay, Bukky! Let me know when you do!

      Reply

Leave a Reply Cancel reply

Your email address will not be published. Required fields are marked *

Recipe Rating


Next Post >

Amalfi Dècor Cake Stand Giveaway!

Primary Sidebar

Welcome to Sugar & Sparrow

Welcome to Sugar & Sparrow

Helping you whip up pretty desserts with confidence and creativity. And hopefully sharing a few laughs with you along the way!

Learn More

Connect

let’s bake!

Get my very best recipes, baking tips, and decorating tutorials sent to your inbox

Featured Posts

diy animals in party hats cake toppers

DIY Party Animal Cake Toppers

smooth buttercream cake tutorial

How To Frost A Cake With Smooth Buttercream

easy cookie cake for birthday

Sheet Pan Chocolate Chip Cookie Cake

Search

Archives

Follow Along

@sugarandsparrowco

STRAWBERRY SHORTCAKE SHEET CAKE 🍓aka classic st STRAWBERRY SHORTCAKE SHEET CAKE 🍓aka classic strawberry shortcake toppings on a fluffy vanilla sheet cake and ideal for a crowd! It’s my favorite bakery-style white cake that’s so soft and moist, topped with silky whipped cream cheese frosting and thick homemade strawberry sauce. So easy to throw together with simple ingredients + a total showstopper ✨

Grab the recipe link in my bio or find it at https://sugarandsparrow.com/strawberry-shortcake-sheet-cake/ 

#strawberrycake #strawberryshortcake #sheetcake #whippedcreamfrosting #cakedecorating
ORANGE POPPYSEED CAKE 🍊this cake is unbelievabl ORANGE POPPYSEED CAKE 🍊this cake is unbelievably delicious with whipped mascarpone frosting!! The cake layers are soft and moist, packed with fresh citrus flavor, and has the satisfying crunch of poppy seeds in every bite. The mascarpone frosting keeps it light and refreshing and I love that it comes together in just about 5 minutes with minimal effort. A fancy cake that’s secretly simple!

Grab the recipe link in my bio or find it at https://sugarandsparrow.com/orange-poppyseed-cake-with-mascarpone-frosting/

#poppyseedcake #layercake #mascarpone #whippedcreamfrosting #cakedecorating
VANILLA SHEET CAKE (recipe below) 🥳 this cake i VANILLA SHEET CAKE (recipe below) 🥳 this cake is packed with vanilla flavor, SO soft and fluffy, fun to decorate, and ideal for feeding a crowd. It makes me so nostalgic for my childhood birthday cakes!! 
 
Full recipe (w/ frosting!) at https://sugarandsparrow.com/vanilla-sheet-cake-recipe/
 
INGREDIENTS: 
2 1/2 Cups (265g) sifted cake flour
2 tsp baking powder 
1/2 tsp baking soda 
1 tsp salt 
3/4 Cup (170g) unsalted butter, room temp 
1 3/4 Cup (340g) granulated sugar 
3 large eggs, room temp 
1/2 Cup (120g) sour cream, room temp
1 Tbsp pure vanilla extract 
1 Cup (240ml) whole milk, room temp
 
INSTRUCTIONS: 
1. Preheat the oven to 325°F. Grease and line a 9×13 baking dish. 
2. Add the sifted cake flour, baking powder, baking soda, and salt into a medium bowl and whisk to combine. Set aside. 
3. In the bowl of your stand mixer fitted with the paddle attachment (or with a hand mixer and large bowl), beat the butter on high speed for two minutes until creamy. Add the sugar and continue to beat on high speed until light and fluffy, about 2 minutes. Scrape down the bowl and paddle as needed. Add the eggs one at a time, mixing for about 10-15 seconds after each addition. Add the vanilla and sour cream and mix for one minute on high speed. 
4. Turn the mixer off and add the dry ingredients all at once. Mix on low speed until just combined, then add the milk in a steady stream and mix until just incorporated. 
5. Pour the batter into the prepared baking dish and bake for 30-35 minutes, or until the cake springs back to the touch and a toothpick inserted into the middle comes out clean. Let the cake cool in the baking dish until room temperature, then frost with vanilla buttercream. 
 
#vanillacake #sheetcake #birthdaycake #vanilla #cakedecorating
LEMON CREAM CHEESE BUTTERCREAM 🍋 if you love th LEMON CREAM CHEESE BUTTERCREAM 🍋 if you love the tang of cream cheese frosting, you’re going to be obsessed with this lemon variation!! It’s light and refreshing, tangy and complex, and perfect consistency for cake decorating. I particularly love it on my lemon blueberry cake and lemon cupcakes 💛 

INGREDIENTS:
1/2 Cup (113g) unsalted butter, room temp
8 Oz (226g) full-fat brick-style cream cheese, room temp
4 Cups (480g) powdered sugar
1 1/2 tsp lemon juice
Pinch of salt, or to taste

INSTRUCTIONS:
1. In the bowl of a stand mixer fitted with the paddle attachment, beat the butter and cream cheese together on medium-high speed until light and creamy (no lumps), about 5 minutes, scraping down the bowl and paddle as needed.
2. Add the powdered sugar a few cups at a time and mix on low speed until combined, scraping down the bowl and paddle between additions. Add the lemon juice and salt and continue mixing on low speed until fully combined and smooth.
⁣
Full recipe + cake pairing suggestions linked in my bio and at https://sugarandsparrow.com/lemon-cream-cheese-buttercream/
⁣
#lemoncake #creamcheesefrosting #cakedecorating #buttercream #lemon
LEMON BLUEBERRY CAKE 🍋🫐 so soft and fluffy, LEMON BLUEBERRY CAKE 🍋🫐 so soft and fluffy, packed with zesty lemon flavor, blueberries in every bite, and absolutely scrumptious with lemon cream cheese buttercream. It’s Spring in cake form and I saw someone pair these cake layers with actual cheesecake filling last week and now I NEED TO TRY IT 💛 
⁣
Full recipe linked in my bio or at https://sugarandsparrow.com/lemon-blueberry-layer-cake/ 
⁣
#lemonblueberrycake #lemoncake #lemonblueberry #creamcheesefrosting #cakedecorating

Footer

On the Blog

  • Cake Basics
  • Recipes
  • Tutorials

Info

  • About
  • Privacy Policy & Disclosure

stay in the know

Copyright © 2026 · Theme by Sugar & Sparrow