• Cake
  • Frosting
  • YouTube
  • My Favorite Tools
  • Nav Social Icons

  • Skip to primary navigation
  • Skip to main content
  • Skip to primary sidebar
  • Skip to footer
  • Recipes
    • Cake
    • Cupcakes
    • Frosting
    • Ice Cream
    • Vegan
  • Cake Basics
  • Tutorials
  • Blog
  • About
  • Mobile Menu Widgets

    Connect

    Search

Sugar & Sparrow logo in script font

Sugar & Sparrow

Lifestyle and Cake from Portland Oregon

  • Cake Basics
  • Recipes
    • Cake
    • Cupcakes
    • Cookies & Bars
    • Filling
    • Frosting
    • Ice Cream
    • No-Bake
    • Small Batch
    • Vegan
  • Tutorials
  • Book
  • Blog
  • About

Watercolor Cake Tutorial

June 24, 2021 · In: Featured, Tutorials

I’ve always been inspired by painterly textures when it comes to my cakes, and although watercolor buttercream has been around for quite some time, it hasn’t gotten old in my eyes. It works in all sorts of color palettes and is so freeing to create because you really can’t go wrong. I do the technique a little differently because I tend to like bigger blobs of color in my watercolor finish, so I wanted to whip up a quick tutorial to show you my way. 

watercolor cake tutorial by sugar and sparrow

Watercolor buttercream is the perfect base for all sorts of cake designs, whether you want something simple or elegant. The cakes shown below are actually the same cake decorated two different ways! And as far as buttercream types go, any kind of buttercream that you can tint to your desired colors will work with this tutorial (I’m using my favorite Vanilla Buttercream Recipe).

watercolor buttercream cake tutorial
watercolor cake by sugar and sparrow

Most of the watercolor buttercream tutorials out there show you adding all of the colors at once and then smoothing them all together. With this technique, I find that the result ends up being more streaky in nature than I like. So, I usually start out with that technique and then go on to add and smooth the colors one by one to better control the outcome. All of this is shown in the video below, so give it a watch before you move on to the written tutorial below:

If you’re into cake decorating tutorials like this one, head on over to my YouTube Channel. You’ll find all sorts of cake decorating tutorials, recipes, and my entire Cake Basics series in video format. I’m always adding new videos there, so be sure to hit the subscribe button so you’ll always be the first to know about a new one. 

You Will Need

  • A cake that’s been crumb coated and chilled (mine is a three layer 6 inch cake, but any size will do)
  • 1.5 batches of vanilla buttercream
  • Food color gels of your choice (mine are varying amounts of AmeriColor Fuchsia and Orange)
  • Bowls and spoons for color mixing
  • Angled spatula
  • Icing smoother
  • Cake turntable

Step 1: Frost the Cake with a Base Color

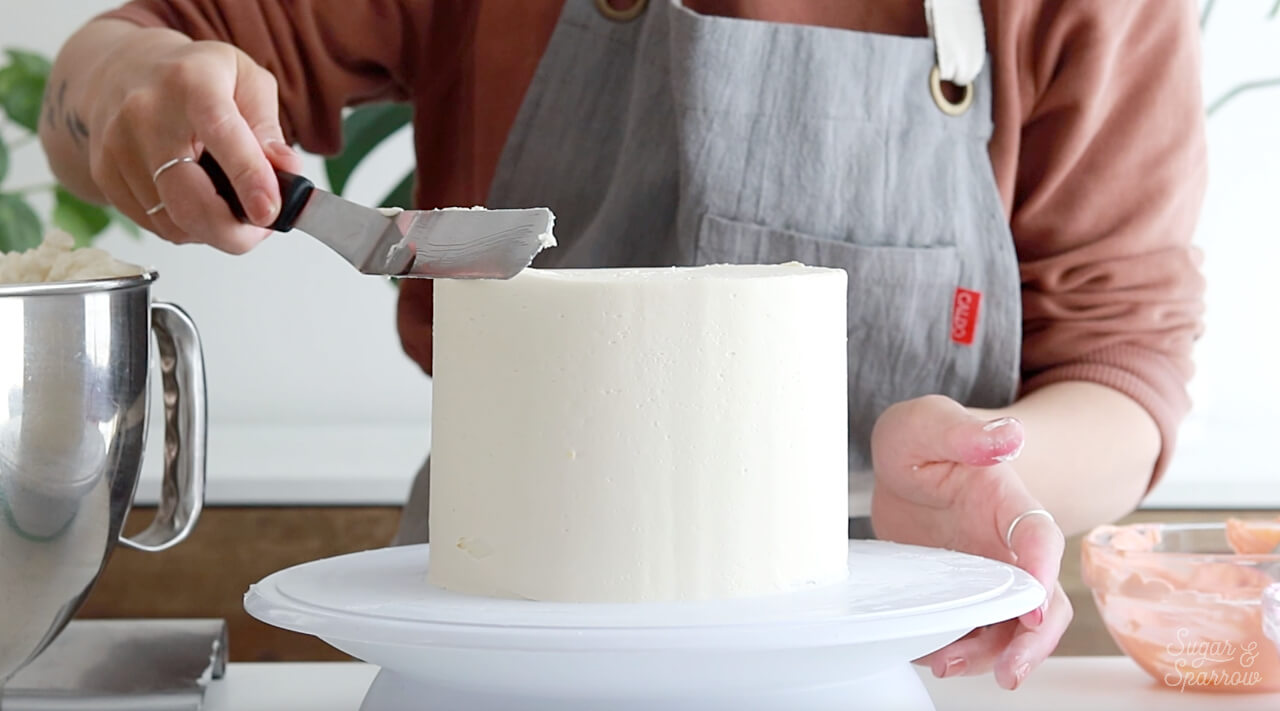
First, frost the cake. You don’t need to worry about getting it super smooth this go round, but you will want to make sure it’s nice and level to serve as a base for the colors that will go on top. With your chilled and crumb coated cake on the turntable, add some buttercream to the top and smooth it down with your angled spatula until it’s level and reaches beyond the edges of the cake. 

how to frost a cake with buttercream

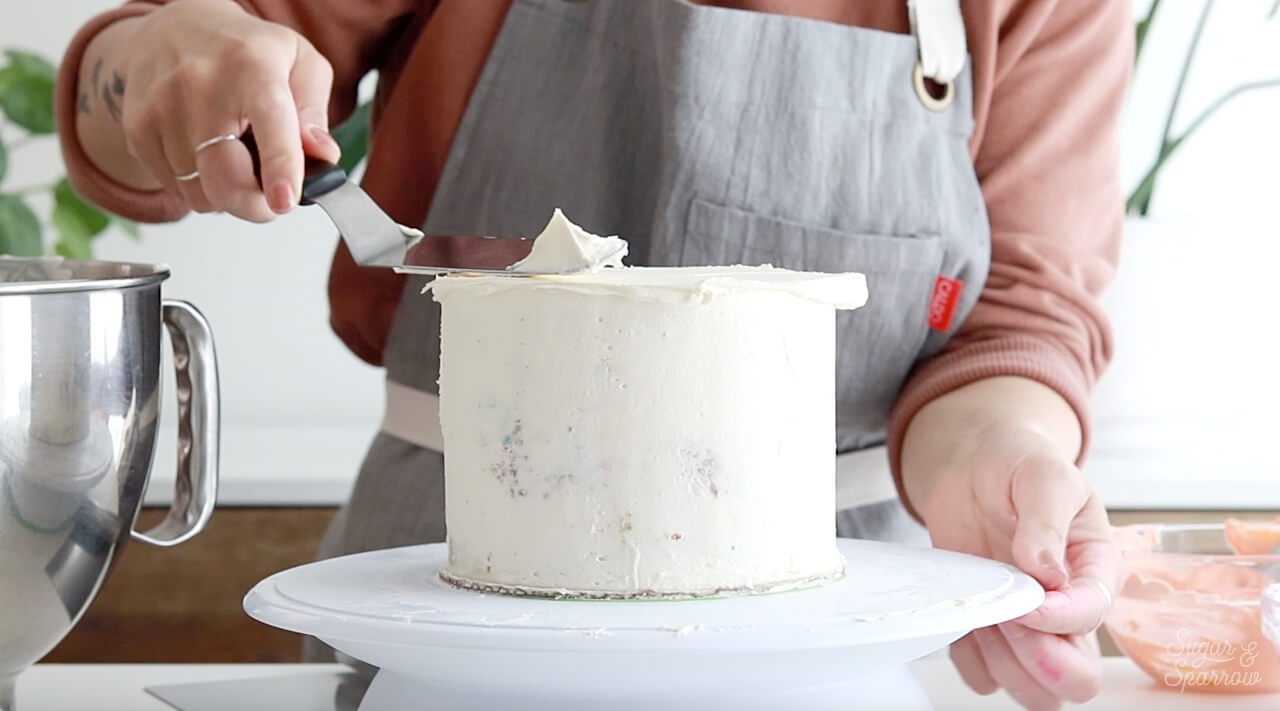
Next, add a thin layer of buttercream to the sides of the cake and smooth it with your icing smoother as you turn the cake on the turntable. 

how to frost a cake
best icing smoother for buttercream cake

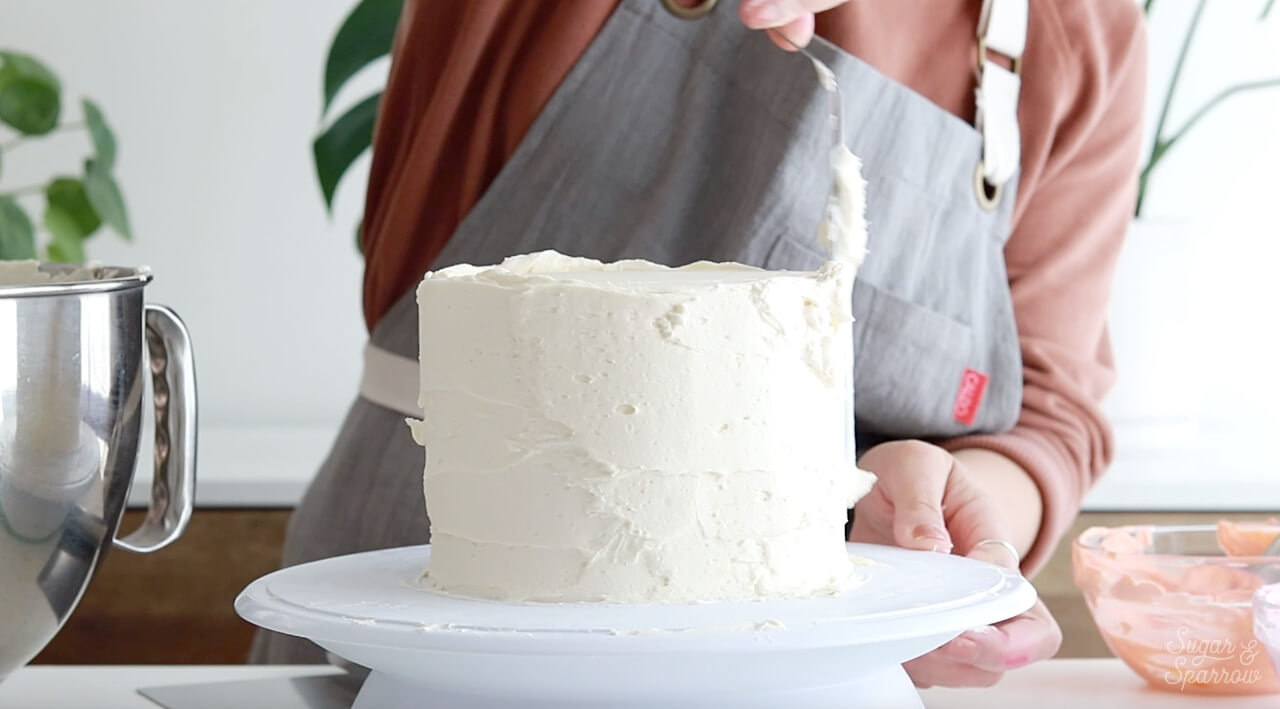
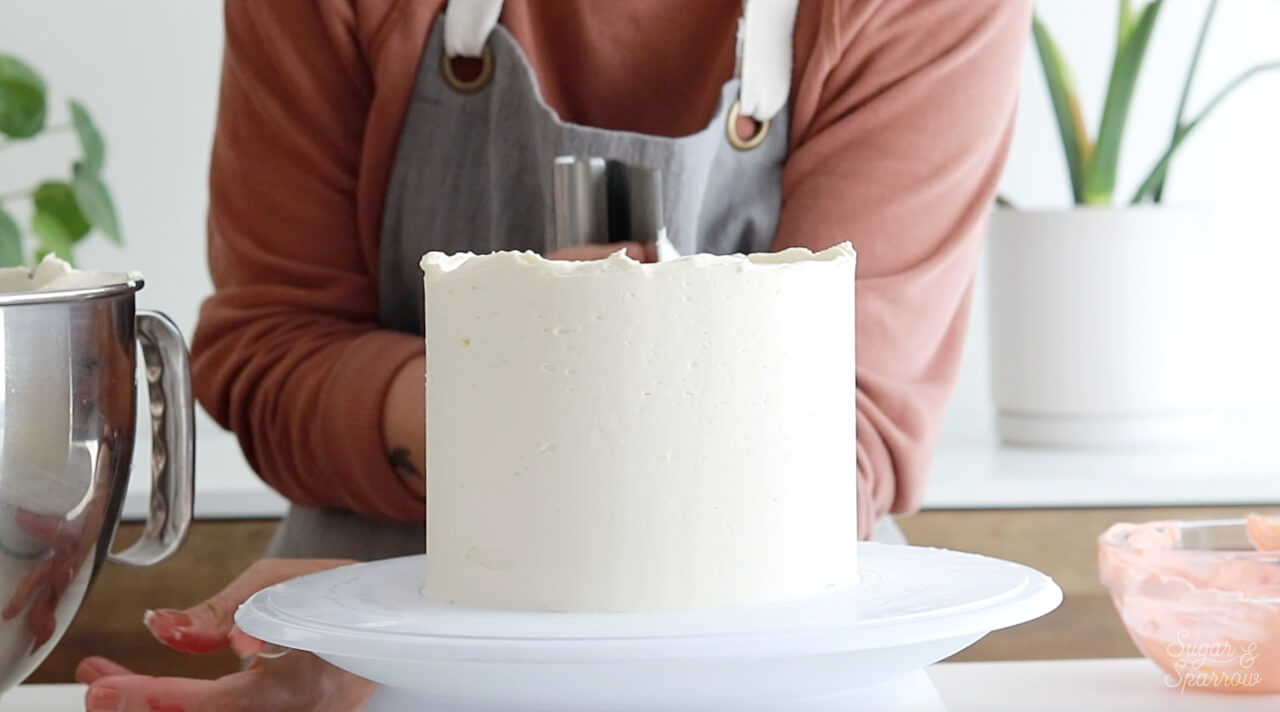
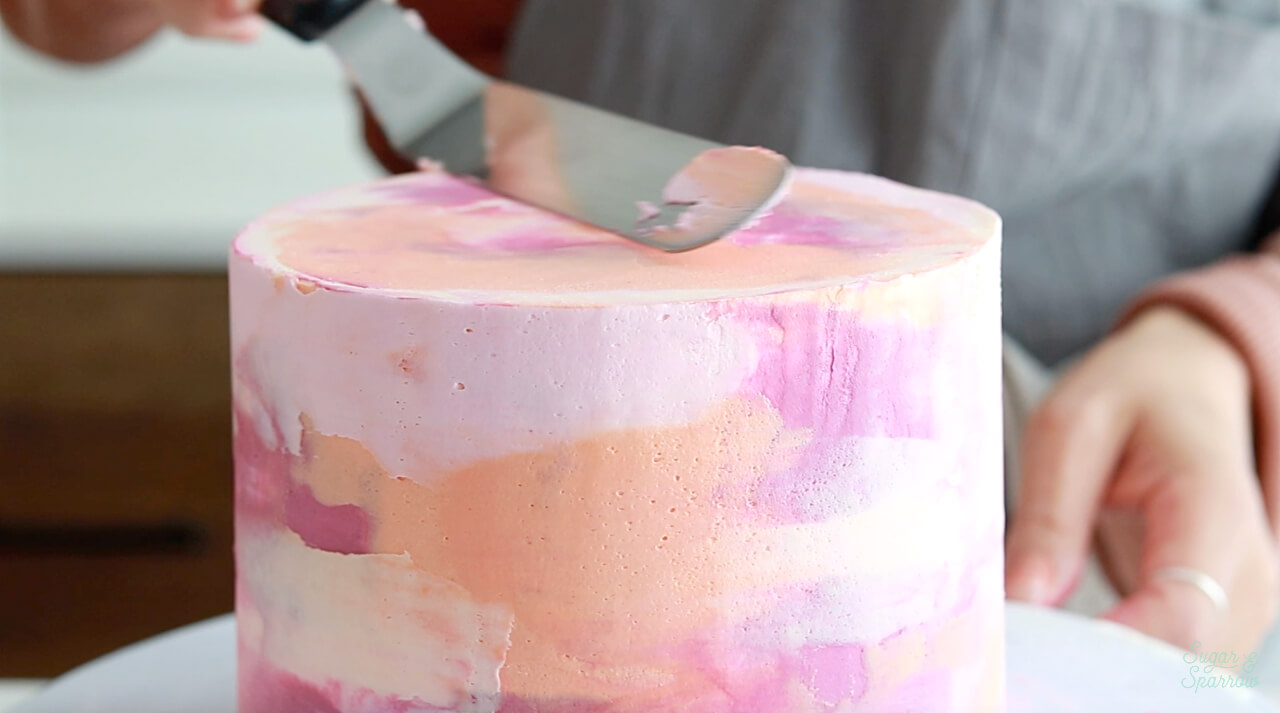
When the sides are level and smooth, you should have a little crown of buttercream that has formed along the top edge. Use your angled spatula to swipe that buttercream toward the top center of the cake to create sharp edges all around.

how to get sharp buttercream edges on cake

If you want to improve your cake frosting skills, check out this guide that shows everything you need to know about creating a smooth buttercream finish. 

Step 2: Color the Buttercream

Divide the excess buttercream into bowls, one for each color you’re planning on mixing. Add your desired amounts of food color gel to each bowl and mix it up until you’ve got the color palette you’re imagining. 

buttercream colors by sugar and sparrow

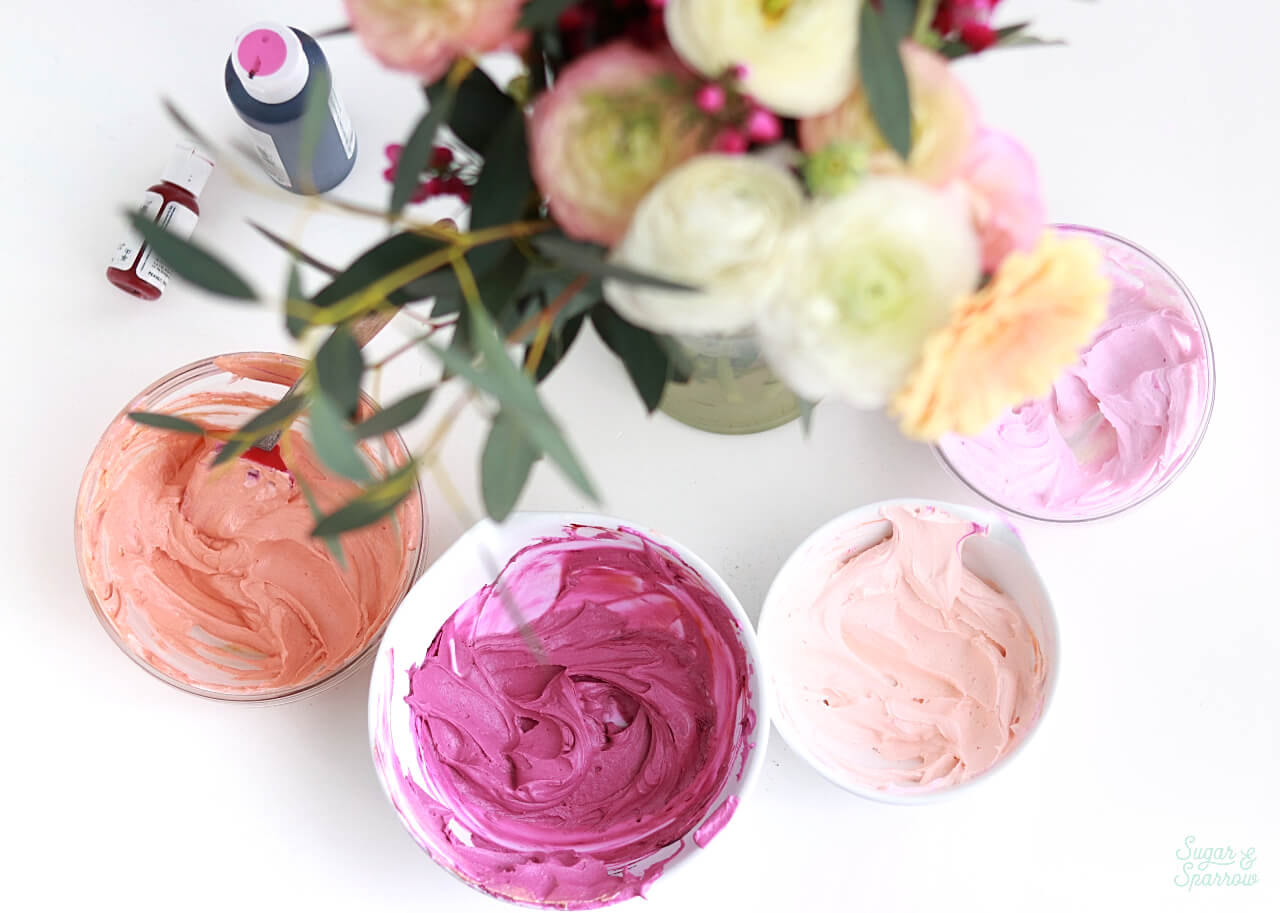
I mixed up four different colors using AmeriColor Fuchsia and Orange. The lighter pink is just a tiny amount of AmeriColor Fuchsia, while the darker pink is a little more of that added. I did the same with the Orange color – added a tiny amount for the light orange and more for the dark orange. If you want to learn more about buttercream color mixing, here is a post on how to get the colors you’re going for.  

Step 3: Add and Smooth the Colors

I start off the traditional watercolor buttercream way by adding all of the colors at once and then smoothing them with my icing smoother.

how to make a watercolor cake
watercolor cake techniques
watercolor cake how to

With this technique, the colors end up being pretty streaky, but make a good base for the next step where we’ll add more color and definition.

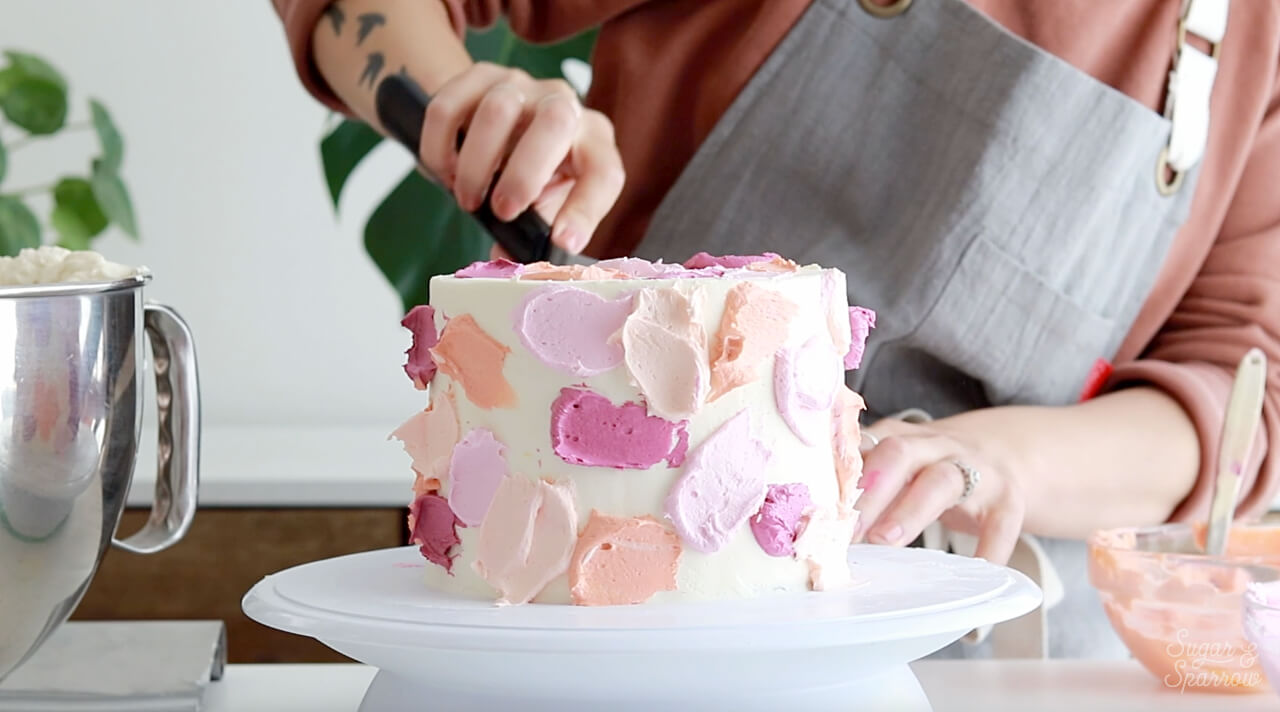
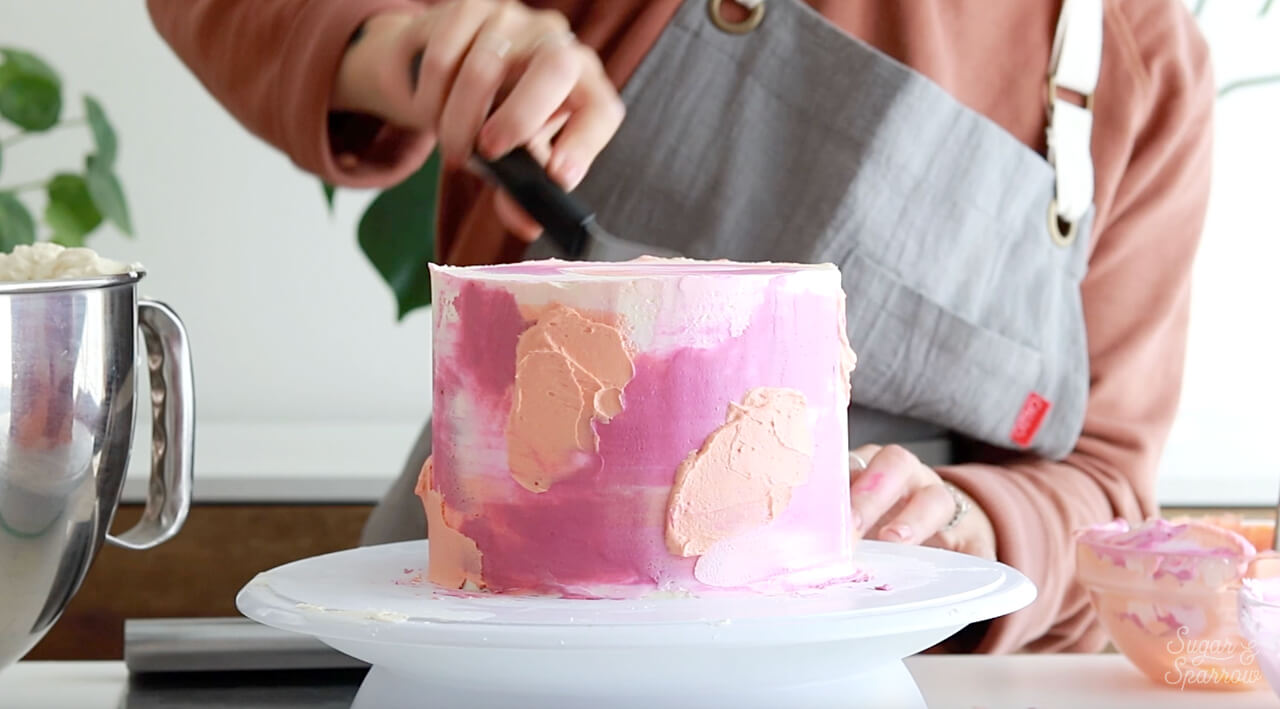
Step 4: Add More Colors One by One

To turn this streaky watercolor cake into a masterpiece, we’ll need to add the colors one by one. I like to add big blobs of one color (I started here with the dark fuchsia on top of those streaks), and smooth it all down before moving onto the next.

painted watercolor cake tutorial
pink watercolor cake tutorial

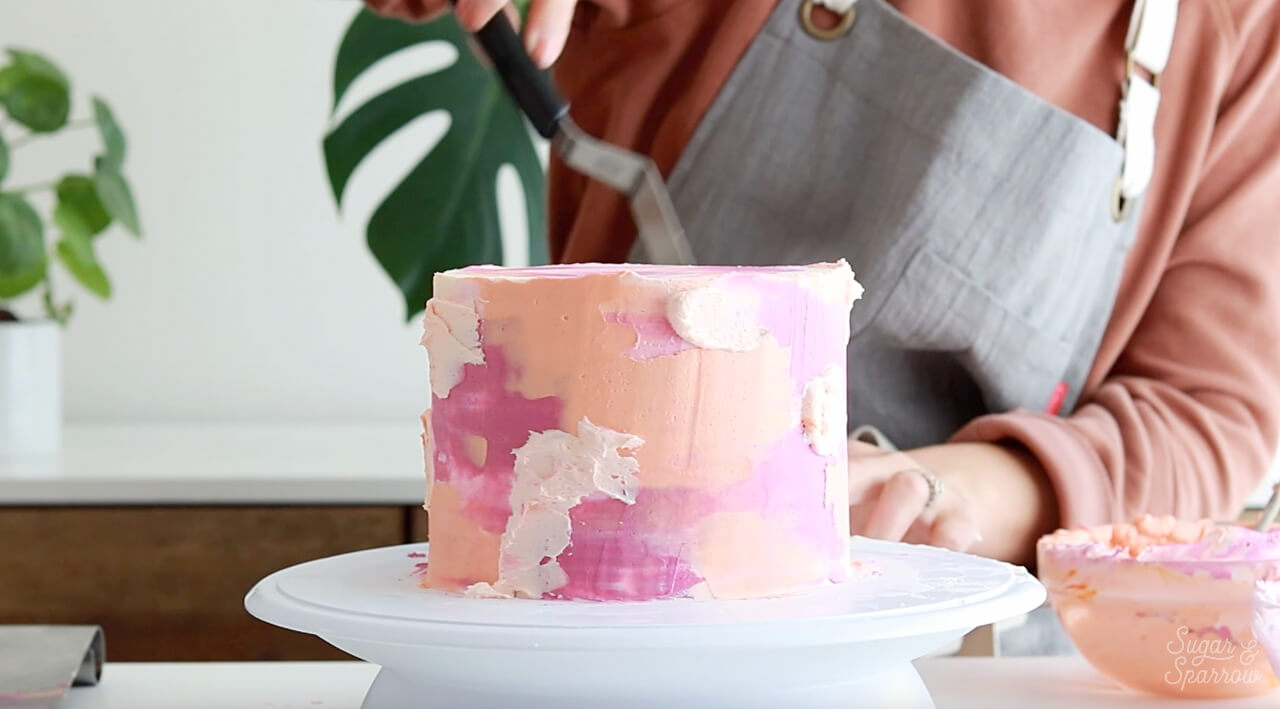
After smoothing down the dark fuchsia, I moved on to adding big blobs of dark orange wherever I felt like, then smoothed those colors down. Don’t even worry about mixing colors on top of one another here – blending those colors is what makes the finish look like a watercolor masterpiece.

painted buttercream watercolor cake tutorial
how to make buttercream watercolor cake

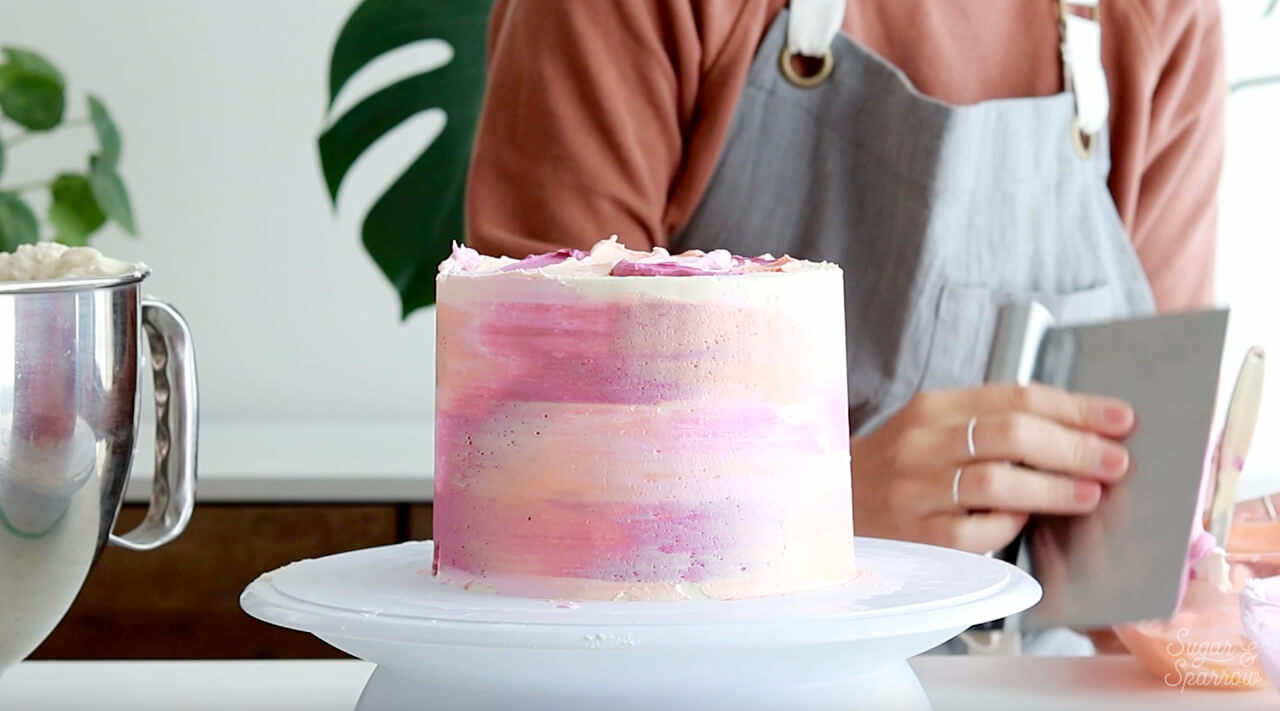
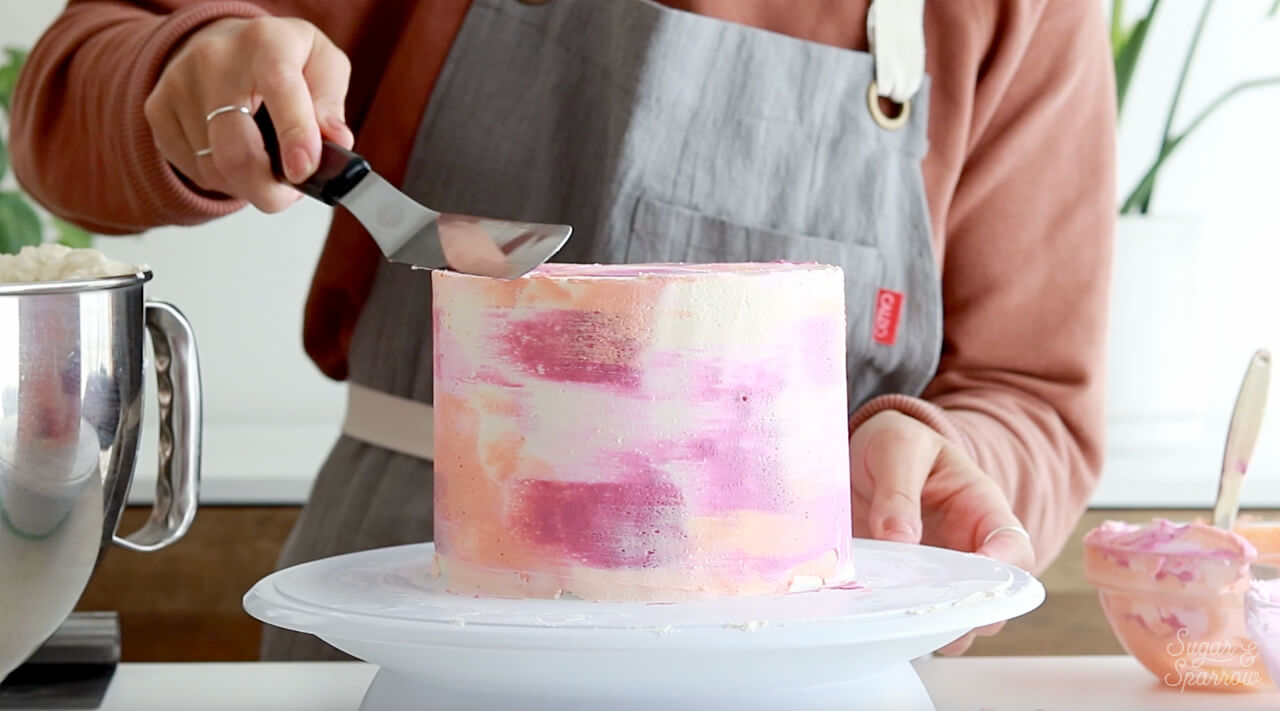
 Next, I added the light orange and smoothed it down, followed by the light pink. 

how to paint with buttercream
smooth buttercream watercolor cake tutorial
watercolor cake decorating tutorial
how to make a cake look watercolored

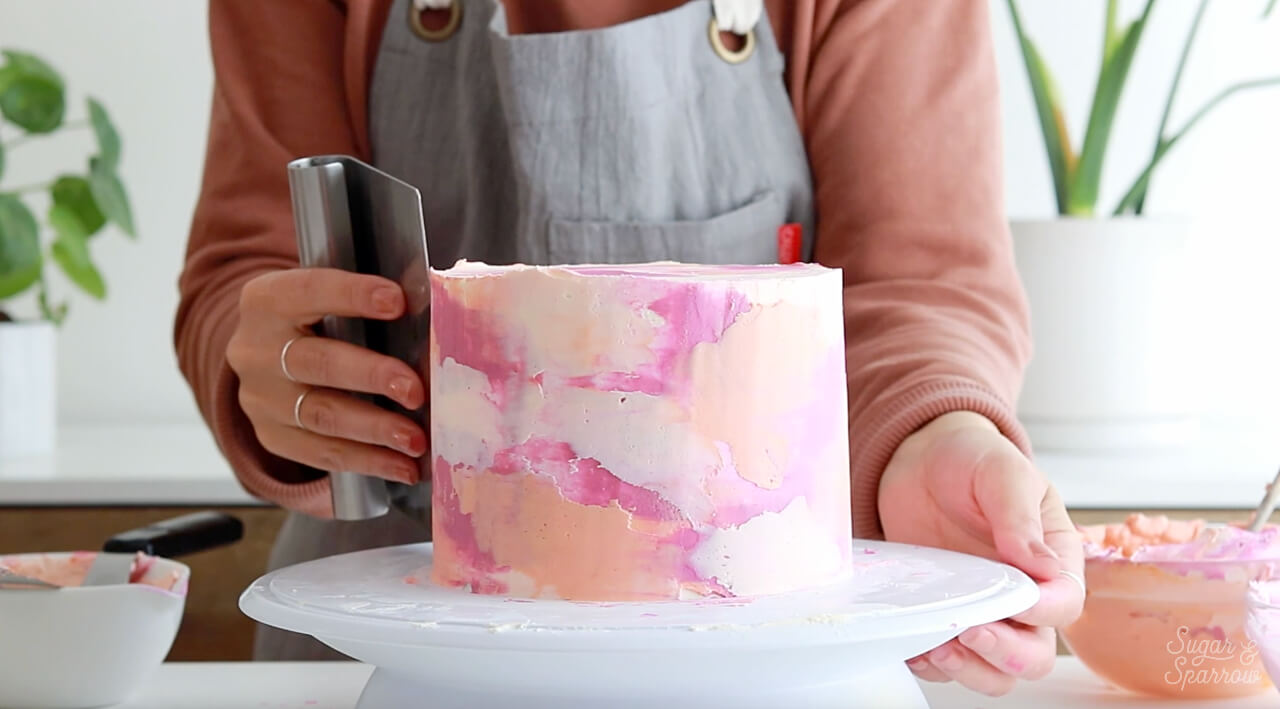
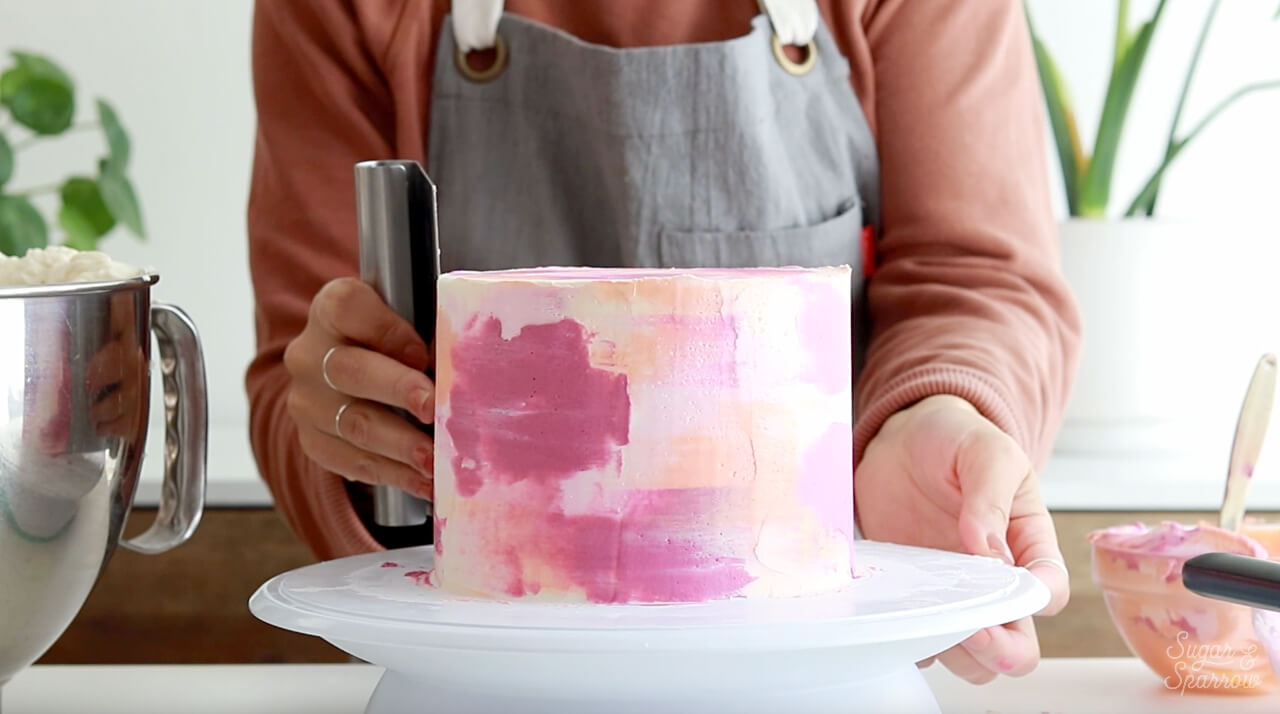
You can continue adding and smoothing colors until it looks just right. 

how to make a watercolor cake with buttercream
watercolor cake decorating tutorial by sugar and sparrow

Step 5: Continue Decorating (Optional)

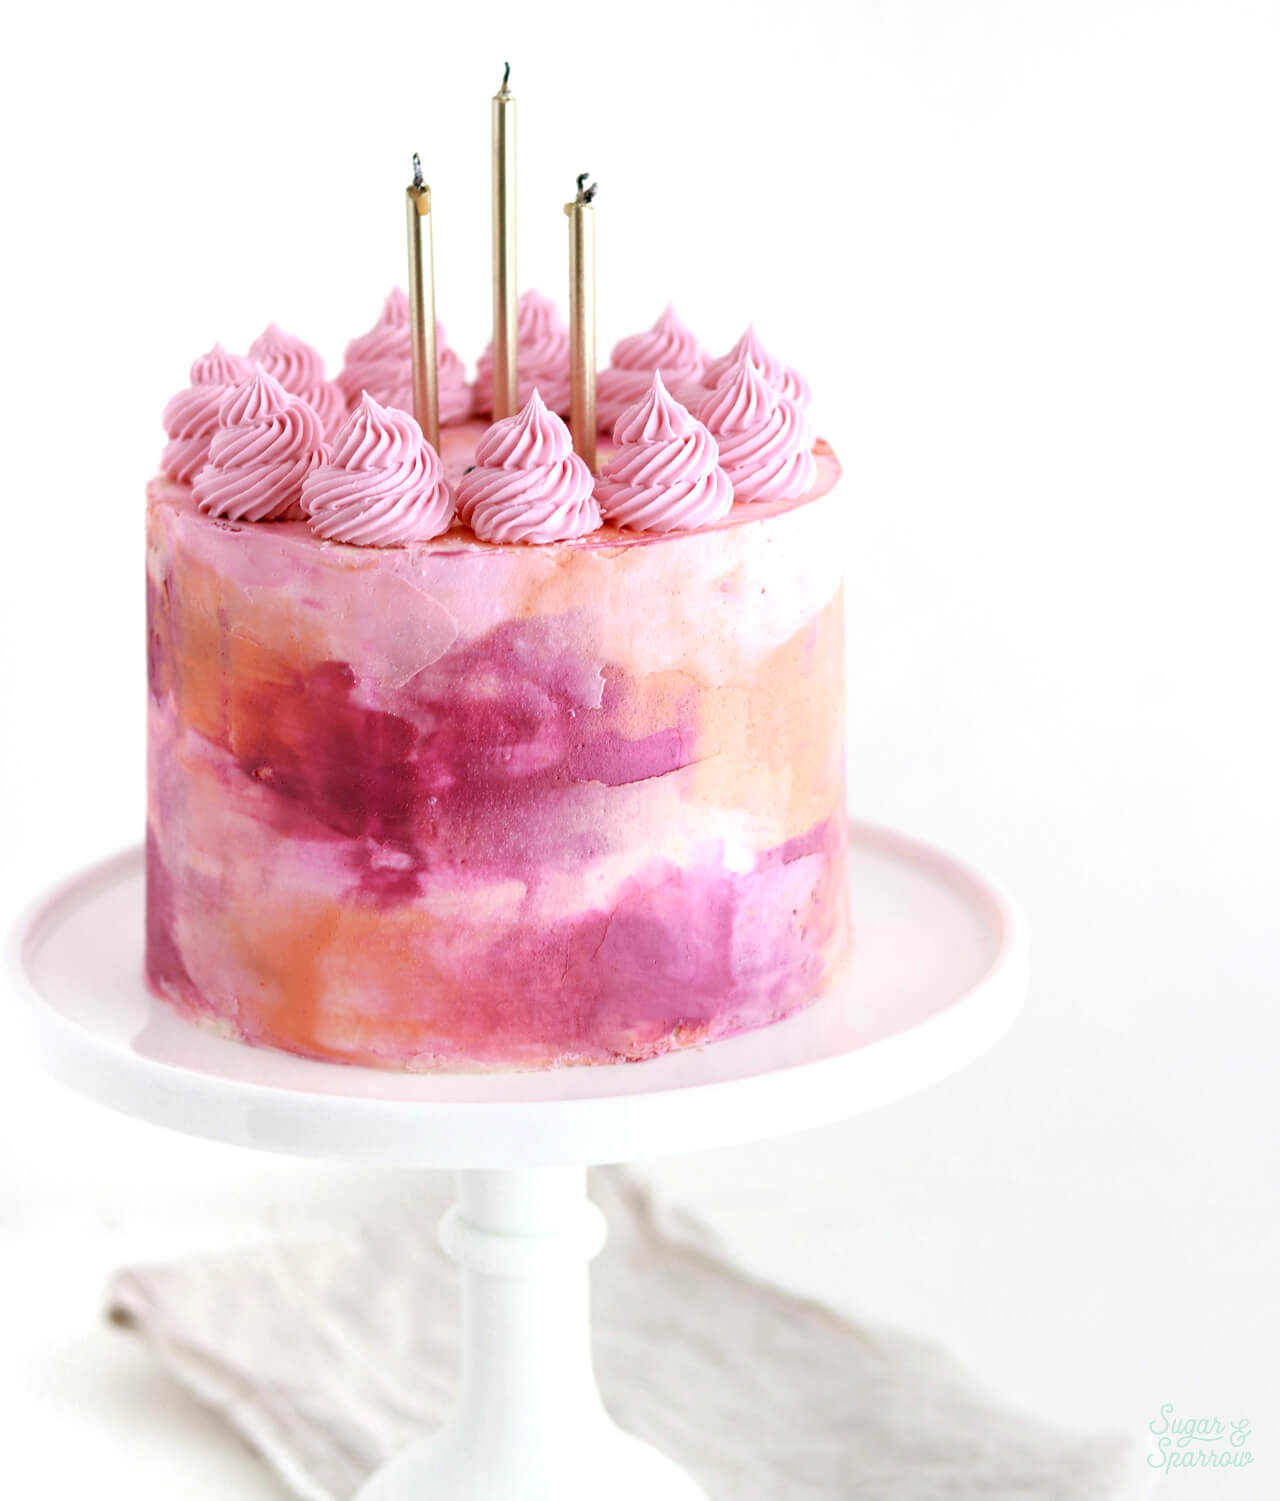
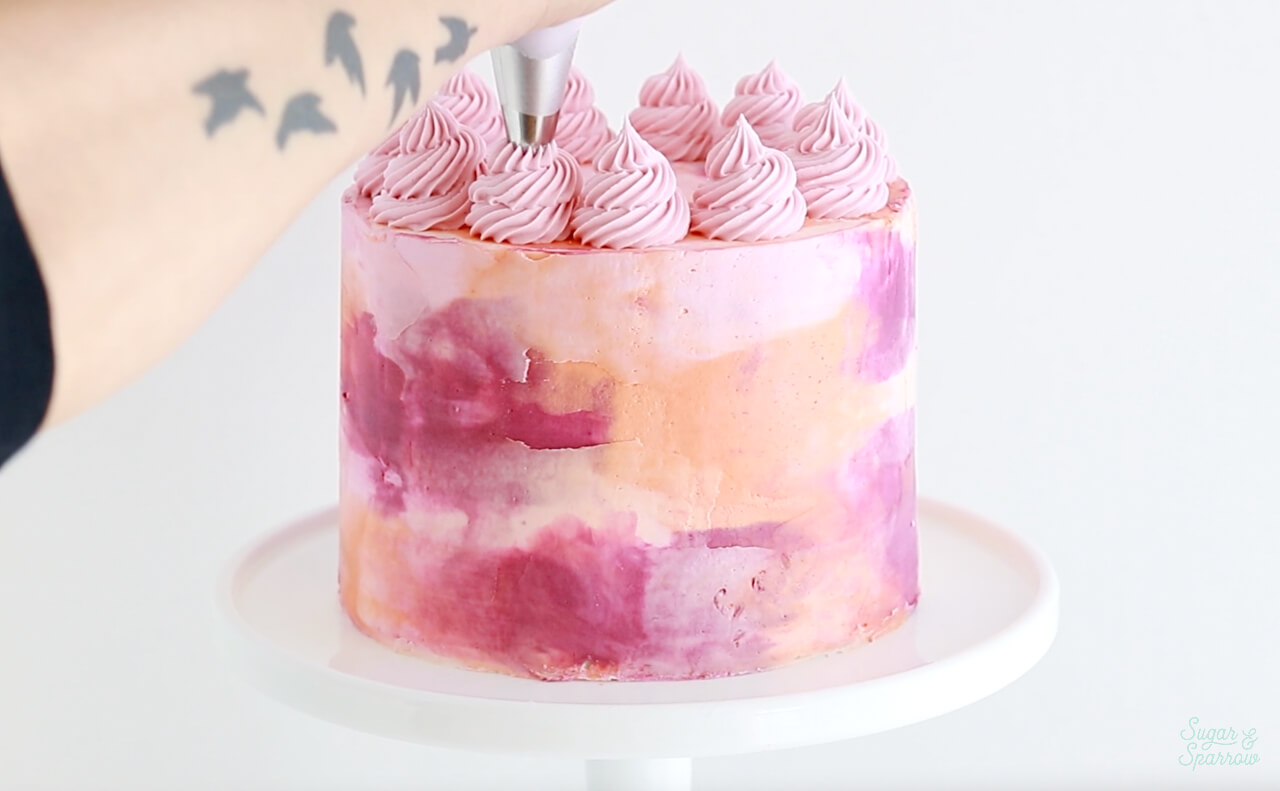
From here, you can keep on decorating the cake however you want! This watercolor base is perfect as-is or with some simple piping on top (as shown below using Wilton Tip 4B).

watercolor cake tutorial by sugar and sparrow

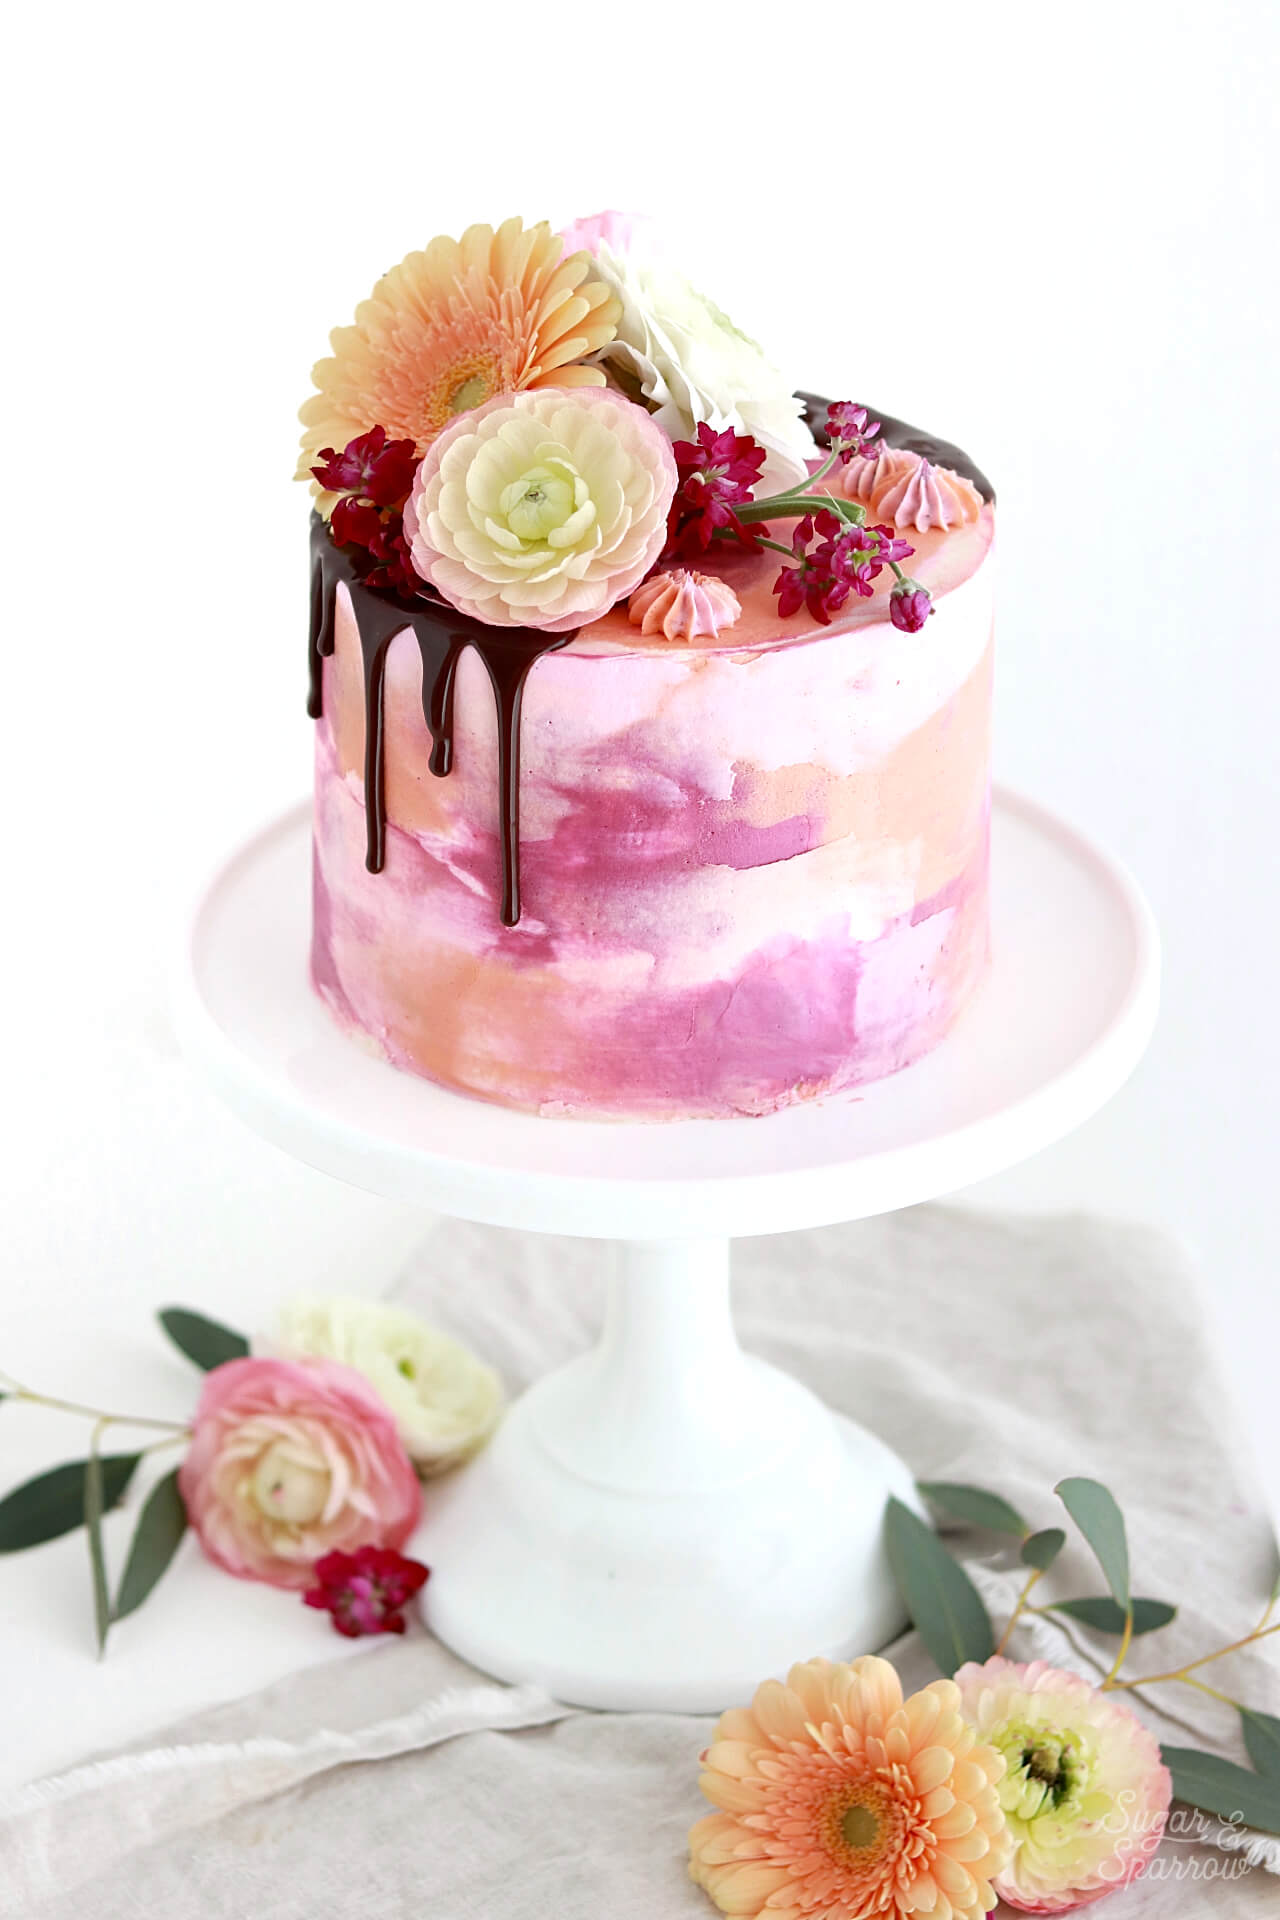
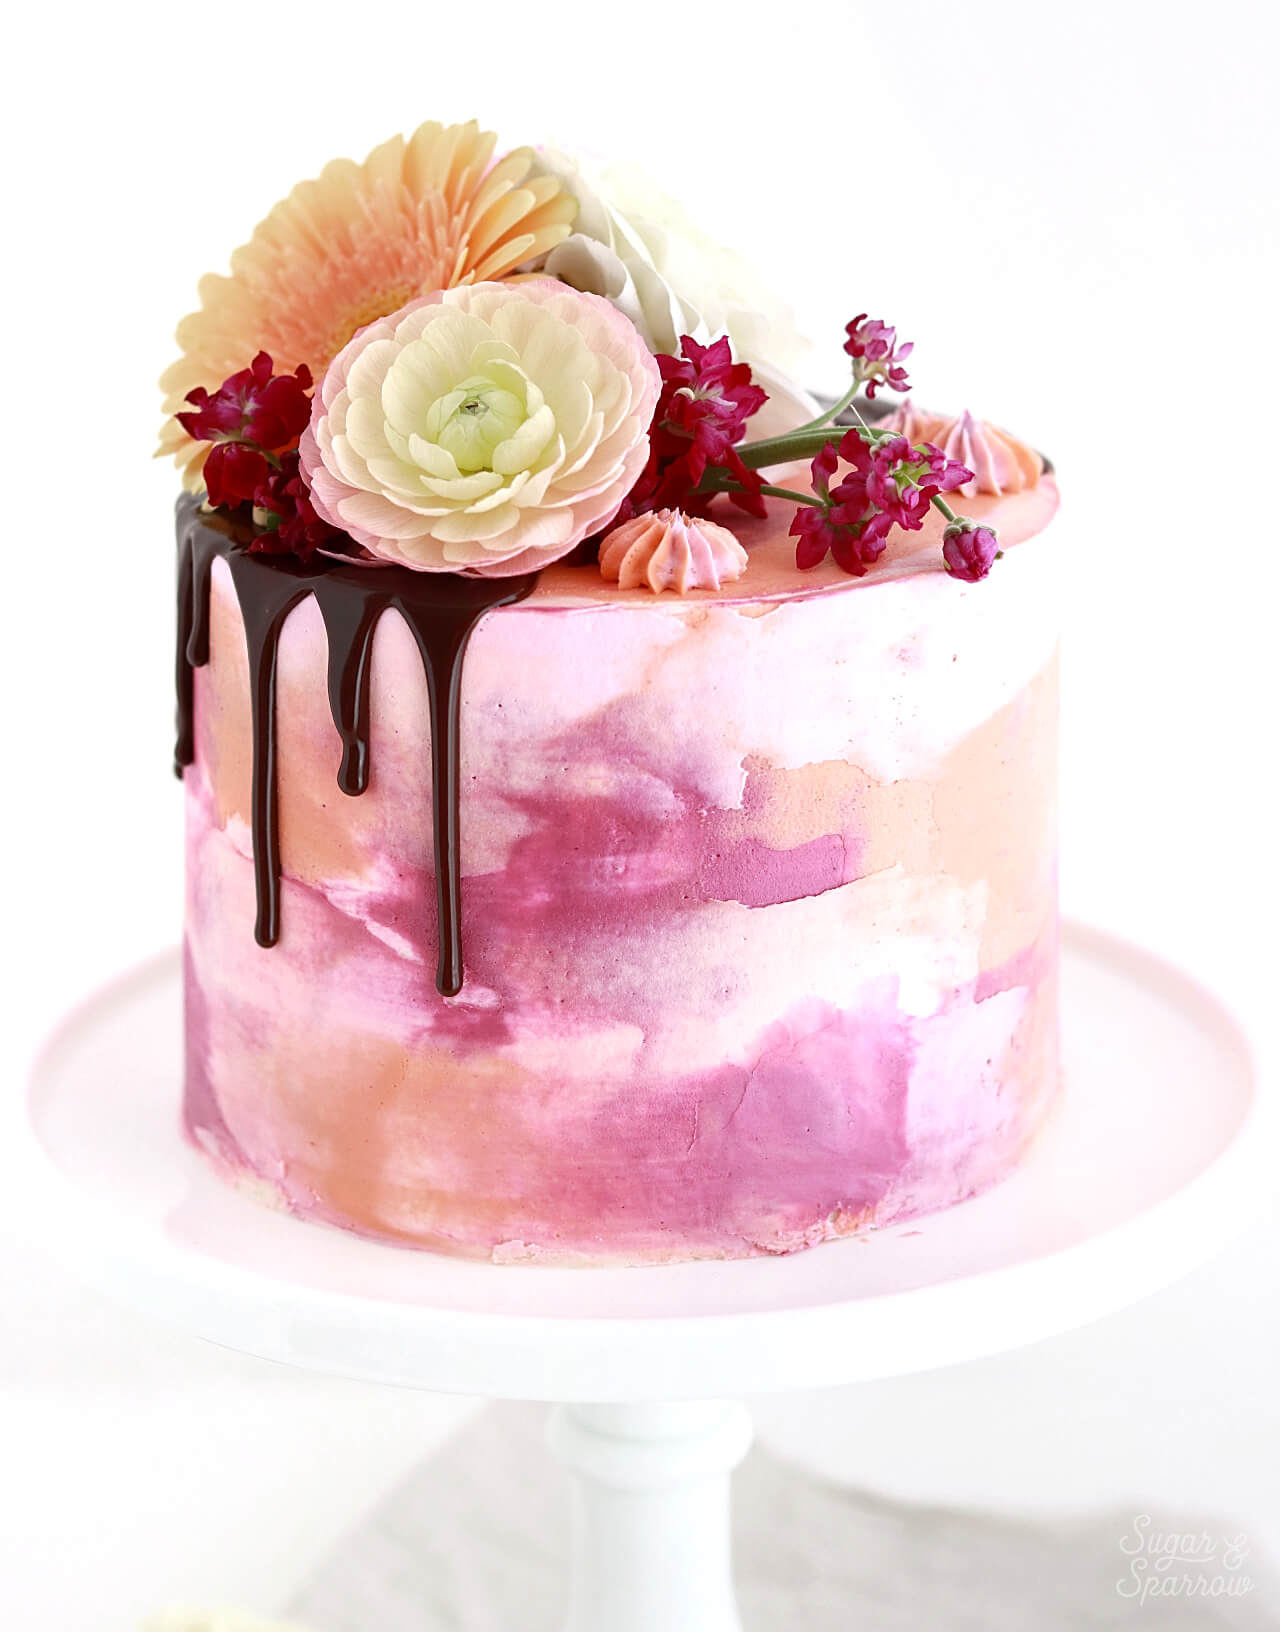
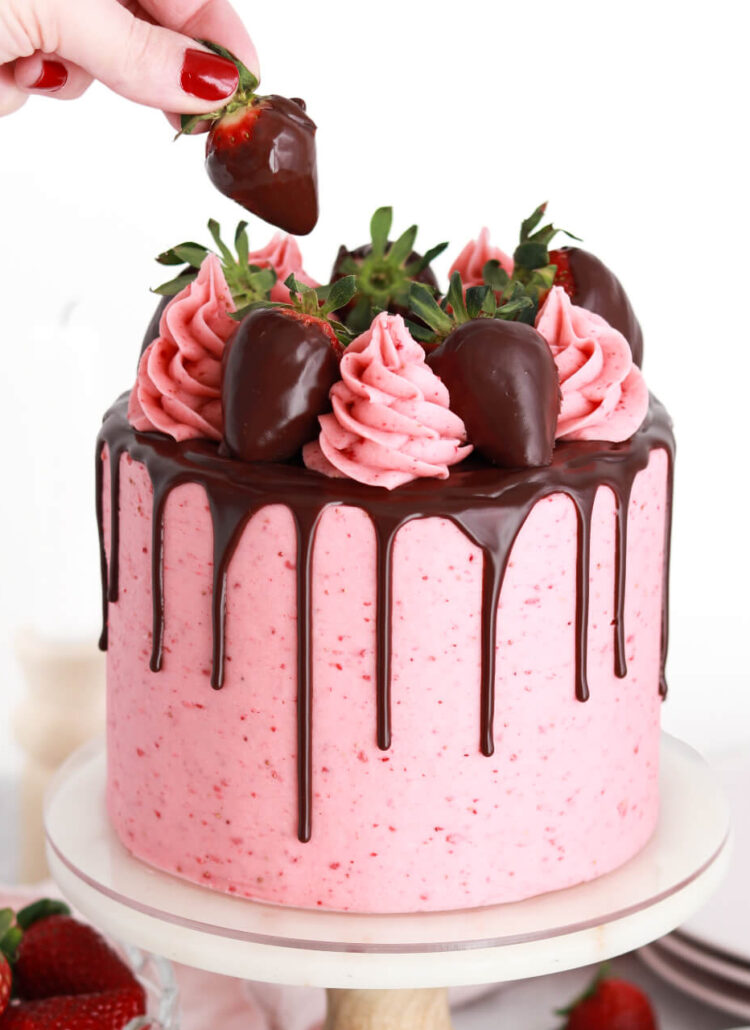
Or you can go more elegant and add a chocolate ganache drip and some fresh flowers like I did here: 

watercolor cake with drip and flowers

It’s all up to you! This watercolor look can be dressed up or dressed down depending on what you want to do. 

watercolor cake tutorial with buttercream

Did you make this watercolor cake? I want to know how it went and what colors you used! Let me know in the comments below and feel free to tag @sugarandsparrowco on Instagram to show me. I love to see what you create!

By: Whitney · In: Featured, Tutorials · Tagged: cake decorating, cake decorating tutorial, painted cake, party cake, pink cake, pink watercolor cake, watercolor buttercream, watercolor buttercream tutorial, watercolor cake, watercolor cake tutorial, wilton tip 4b

you’ll also love

the best vanilla cupcakes recipeThe Perfect Vanilla Cupcake Recipe
chocolate strawberry cake recipe by sugar and sparrowChocolate Covered Strawberry Cake
pumpkin layer cake recipe by sugar and sparrowPerfect Pumpkin Layer Cake Recipe

Join the List

Stay up to date & receive the latest posts in your inbox.

Reader Interactions

Comments

  1. Jay says

    July 10, 2023 at 7:31 am

    Any insights into how to achieve these colors using Wilton color drops?

    Reply
    • Whitney says

      July 10, 2023 at 10:19 pm

      Hi Jay! I don’t have specific recipes for these colors, but I did write a blog post about how to make/replicate custom colors: https://sugarandsparrow.com/how-to-color-frosting/

      Reply
  2. LEEANNE S PEIRCE says

    April 28, 2023 at 5:12 pm

    I decided to try to make a mottled cake for my granddaughter’s birthday. It was rather daunting but your video and instructions were so helpful. Thanks very much. I am quite happy with the outcome and she was thrilled.

    Reply
    • Whitney says

      May 1, 2023 at 8:15 am

      Yay, Leeanne! I’m so happy to hear that the cake was a success!

      Reply

Leave a Reply Cancel reply

Your email address will not be published. Required fields are marked *

Recipe Rating


Next Post >

DIY Food Photography Backgrounds with Contact Paper

Primary Sidebar

Welcome to Sugar & Sparrow

Welcome to Sugar & Sparrow

Helping you whip up pretty desserts with confidence and creativity. And hopefully sharing a few laughs with you along the way!

Learn More

Connect

let’s bake!

Get my very best recipes, baking tips, and decorating tutorials sent to your inbox

Featured Posts

sugared cranberry cupcakes for the holidays

Sugared Cranberry Cupcakes with White Chocolate Buttercream

monster shag cake by sugar and sparrow

Monster Shag Cake Tutorial

strawberry crunch ice cream cake recipe

Strawberry Shortcake Ice Cream Cake

Search

Archives

Follow Along

@sugarandsparrowco

Everything I baked in June☀️I was so motivated to Everything I baked in June☀️I was so motivated to bake this month (summer flavors had me INSPIRED!) and could barely keep up with myself but I ended up publishing 7 new recipes on my website + finalized 5 more that will be up ASAP! 

Comment “JUNE” to get all the recipes that are available now:

-Cookie Dough Ice Cream Cake
-Rocky Road Cupcakes (w/ homemade marshmallow creme filling!)
-Blackberry Lavender Cake
-Homemade Blackberry Filling
-Whipped Cream Cheese Frosting
-Strawberry Shortcake Cookie Bars
-Berries & Cream Sheet Cake

https://sugarandsparrow.com/everything-i-baked-in-june
 
#cake #bakersofinstagram #baking #bakinglove #cakedecorating
WHIPPED CREAM CHEESE FROSTING ☁️ this easy 4-ingre WHIPPED CREAM CHEESE FROSTING ☁️ this easy 4-ingredient whipped cream frosting is deliciously light, comes together SO easily, and is stabilized with cream cheese to make it the perfect thick consistency for filling and frosting cakes and cupcakes!! It’s so good with my strawberry shortcake sheet cake and berries & cream cake and I have a feeling I’m going to be whipping it up for many more summer cakes😍

Full recipe with cake pairing suggestions at https://sugarandsparrow.com/whipped-cream-cheese-frosting/ 

INGREDIENTS 
1 Cup (8oz, 226g) full-fat brick-style cream cheese, cold
1 Cup (120g) powdered sugar
1 tsp pure vanilla extract
2 1/2 Cups (600ml) heavy whipping cream, cold

INSTRUCTIONS
1. Chill the bowl of your stand mixer (or the large bowl you’ll be using with your hand mixer) into the refrigerator for 20 minutes.
2. Into the cold mixing bowl, add the cream cheese and beat on medium speed with the whisk attachment until creamy, 2 min. Add the powdered sugar and mix on low speed until mostly incorporated, then turn the mixer to medium-high speed and mix for 1 min.
3. Add the vanilla extract, then turn the mixer to medium-high speed and slowly pour in the heavy whipping cream (down the side of the bowl so it doesn’t fly everywhere). Once all the cream is added, continue mixing on medium-high for just about 30 seconds longer, keeping a close eye on the mixing bowl to watch it thicken. It should come together into a thick, silky frosting consistency at this point, where you can dip the whisk into the frosting and it holds a slight peak when you hold it upright.
4. Use the frosting immediately to decorate cakes and/or cupcakes for best results!

#whippedcreamfrosting #creamcheesefrosting #cakedecorating #whippedcream #frosting
TOP 10 4TH OF JULY DESSERTS 🎆 These are just a few TOP 10 4TH OF JULY DESSERTS 🎆 These are just a few of my favorite summer dessert recipes that will disappear at any Fourth of July celebration.

Comment “JULY” and I’ll send you all 20+ of my favorite 4th of July dessert ideas – naturally red white and blue desserts like my berries and cream cake, easy no-bake desserts, no-churn ice cream, strawberry shortcake inspired recipes, and all the treats that will go FAST at any barbecue.

https://sugarandsparrow.com/4th-of-july-desserts/

#fourthofjuly #4thofjuly #summerdessert #partycake #dessertideas
STRAWBERRY SHORTCAKE COOKIE BARS 🍓my hot take: str STRAWBERRY SHORTCAKE COOKIE BARS 🍓my hot take: strawberry shortcake toppings on a buttery, soft sugar cookie base is WAY BETTER than traditional strawberry shortcake. I topped my favorite sugar cookie bar recipe with silky whipped cream cheese frosting + homemade strawberry sauce and now I’m ruined 😵

Full recipe is linked in my bio + at https://sugarandsparrow.com/strawberry-shortcake-cookie-bars/ 

SOFT SUGAR COOKIE BARS
2 Cups + 2 Tbsp (283g) all purpose flour
1 tsp baking powder
1/2 tsp baking soda
1/2 tsp salt
3/4 Cup (170g) unsalted butter, room temp
1 Cup (200g) granulated sugar
1 large egg
1 large egg yolk
1 1/2 tsp pure vanilla extract

1. Preheat the oven to 350ºF (177ºC). Grease and line an 8-inch square baking pan with parchment paper, leaving a slight overhang for easy release.
2. Whisk together the flour, baking powder, baking soda, and salt. Set aside.
3. Using a stand mixer with the paddle attachment (or hand mixer) cream together the butter and sugar on high speed until pale and fluffy, 2-3 min.
4. Turn the mixer to medium and add the egg, egg yolk, and vanilla. Mix until combined, then add the flour mixture and mix on low speed until a uniform cookie dough forms.
5. Press the cookie dough into the prepared pan in an even layer, all the way to the edges. Bake for 18-20 minutes, until the edges are just starting to brown. 
6. Cool the sugar cookie bars in the pan for 30 minutes, then transfer to a wire rack to cool completely. Top with whipped cream cheese frosting and strawberry sauce (full recipe linked in my bio!)

#strawberryshortcake #strawberries #whippedcreamfrosting #cookiebars #sugarcookies
BLACK FOREST CAKE 🍒 this is my favorite thing to m BLACK FOREST CAKE 🍒 this is my favorite thing to make during cherry season! My version is decadent chocolate cake soaked with homemade cherry syrup, fresh cherry filling, and whipped cream frosting. Top it with a chocolate ganache drip if you want to go the extra mile! 

Full recipe + decorating tutorial is linked in my bio + at https://sugarandsparrow.com/black-forest-cake-recipe/

PS I’m working on a sheet cake version of this recipe that’s even easier! Stay tuned.

#blackforestcake #cherrycake #chocolatecake #cherries #cakedecorating

Footer

On the Blog

  • Cake Basics
  • Recipes
  • Tutorials

Info

  • About
  • Privacy Policy & Disclosure

stay in the know

Copyright © 2026 · Theme by Sugar & Sparrow