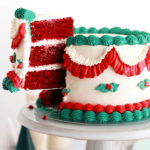
Vintage Christmas Red Velvet Cake
The iconic crimson red layer cake that's perfectly moist and fluffy, decorated in a beautiful vintage Christmas design with cream cheese buttercream. The most festive red velvet cake ever!
Servings 15 slices
Ingredients
Red Velvet Cake
- 2 Cups (212g) sifted cake flour* DIY recipe in notes
- 3 Tbsp natural unsweetened cocoa powder
- 1 tsp baking soda
- 1/2 tsp salt
- 1/2 Cup (113g) unsalted butter, room temperature
- 1 1/2 Cups (300g) white granulated sugar
- 1/2 Cup (120ml) vegetable oil
- 2 large eggs, room temperature
- 2 tsp pure vanilla extract
- 2 tsp distilled white vinegar
- 2 tsp red food color gel*
- 1 Cup (240ml) buttermilk, room temperature* DIY recipe in notes
Cream Cheese Buttercream
- 1 Cup (226g) unsalted butter, room temperature
- 16 Oz cream cheese, room temperature brick-style, not the spreadable kind
- 8 Cups (960g) powdered sugar
- 1/4 Cup (32g) cornstarch* optional
- 1 Tbsp pure vanilla extract
- 1/2 tsp salt, or to taste
- 5-10 drops red food color gel (optional)
- 5-10 drops green food color gel (optional)
Instructions
Make the Red Velvet Cake
- Preheat the oven to 350ºF and prepare three 6-inch or two 8-inch cake pans by spraying the sides with cooking spray and placing a wax or parchment paper circle into the bottom of each one.
- Add the sifted cake flour into a medium sized bowl and add the cocoa powder, baking soda, and salt. Whisk together and set aside.
- Cream the butter on high for two minutes, then add the vegetable oil and sugar. Cream together on medium-high until light and fluffy, about 2 minutes. Scrape down the bowl and paddle. Turn the mixer to low and add the eggs one at a time. Once the eggs are incorporated, add the vanilla and white vinegar and mix on low for another 30 seconds. Scrape down the bowl and paddle once more.
- Mix the red food color gel into the buttermilk. With the mixer on low speed, alternate adding the flour mixture and buttermilk in three additions, beginning and ending with the flour mixture. Mix only until the ingredients start to come together, then whisk the batter by hand a few times to make sure there are no large lumps.
- Pour the batter into prepared cake pans (no more than 2/3 full) and bake for 30-35 minutes, until a toothpick inserted comes out with just a few moist crumbs. Let the cakes cool in the pan for five minutes before carefully removing them and placing the cakes on a wire rack or cookie sheet. Allow the cakes to cool completely before assembling and frosting.
Make the Cream Cheese Buttercream
- In a large bowl, whisk together the sifted powdered sugar and cornstarch, if using.
- In the bowl of a stand mixer fitted with the paddle attachment, cream the butter and cream cheese on high until light, fluffy, and uniform (no lumps), about five minutes.
- Turn the mixer to low and add the powdered sugar and cornstarch mixture a few cups at a time, mixing thoroughly after each addition. Add the vanilla and salt, mixing on low for another 30 seconds. Reserve the food color gel for the decorating tutorial below, if using.
Assembly
- Once the Red Velvet Cakes are cooled throughout, level and torte the layers to your desired height. Fill and stack the cake with Cream Cheese Buttercream. Crumb coat the cake and place it into the refrigerator for at least 30 minutes to let the crumb coat firm up before frosting with a final layer of Cream Cheese Buttercream.
Notes
*DIY Cake Flour: To make your own cake flour, spoon and level one cup of all-purpose flour and remove 2 Tbsp. Add 2 Tbsp of cornstarch. Repeat per the amount of cake flour you need, then sift the flour and cornstarch mixture 4 times (don’t skip that step!). After sifting, spoon and level to re-measure the amount of cake flour you need.
*Red Food Coloring: I recommend using any brand of red food coloring that is concentrated and flavorless. In the past I have used AmeriColor Super Red for this recipe but with the US ban on Red 3 I have since switched to Enco Naturals which doesn’t contain Red 3 or Red 40. If you are using natural food color, you may need to add up to 1 tsp more than the recipe calls for if you want a deep red.
*DIY Buttermilk Recipe: Add 1 Tbsp white vinegar into a mason jar or measuring cup. Add one cup (240ml) whole milk and let sit for at least 15 minutes before using in a recipe.
*Cornstarch: Cornstarch helps thicken the consistency of the cream cheese buttercream without adding any flavor. I highly recommend it if you’re using this frosting to pipe intricate details.
Make Ahead Tips:
- The cake layers can be made ahead and stored, wrapped in plastic wrap, at room temperature for up to two days. Alternatively, you can store the wrapped cake layers in the freezer for up to 2 months before thawing and frosting.
- The Cream Cheese Buttercream can be made ahead and stored in an airtight container in the refrigerator for up to two weeks. When you’re ready to use it, bring it back to room temperature and re-whip in your stand mixer to bring back to smooth buttercream consistency.