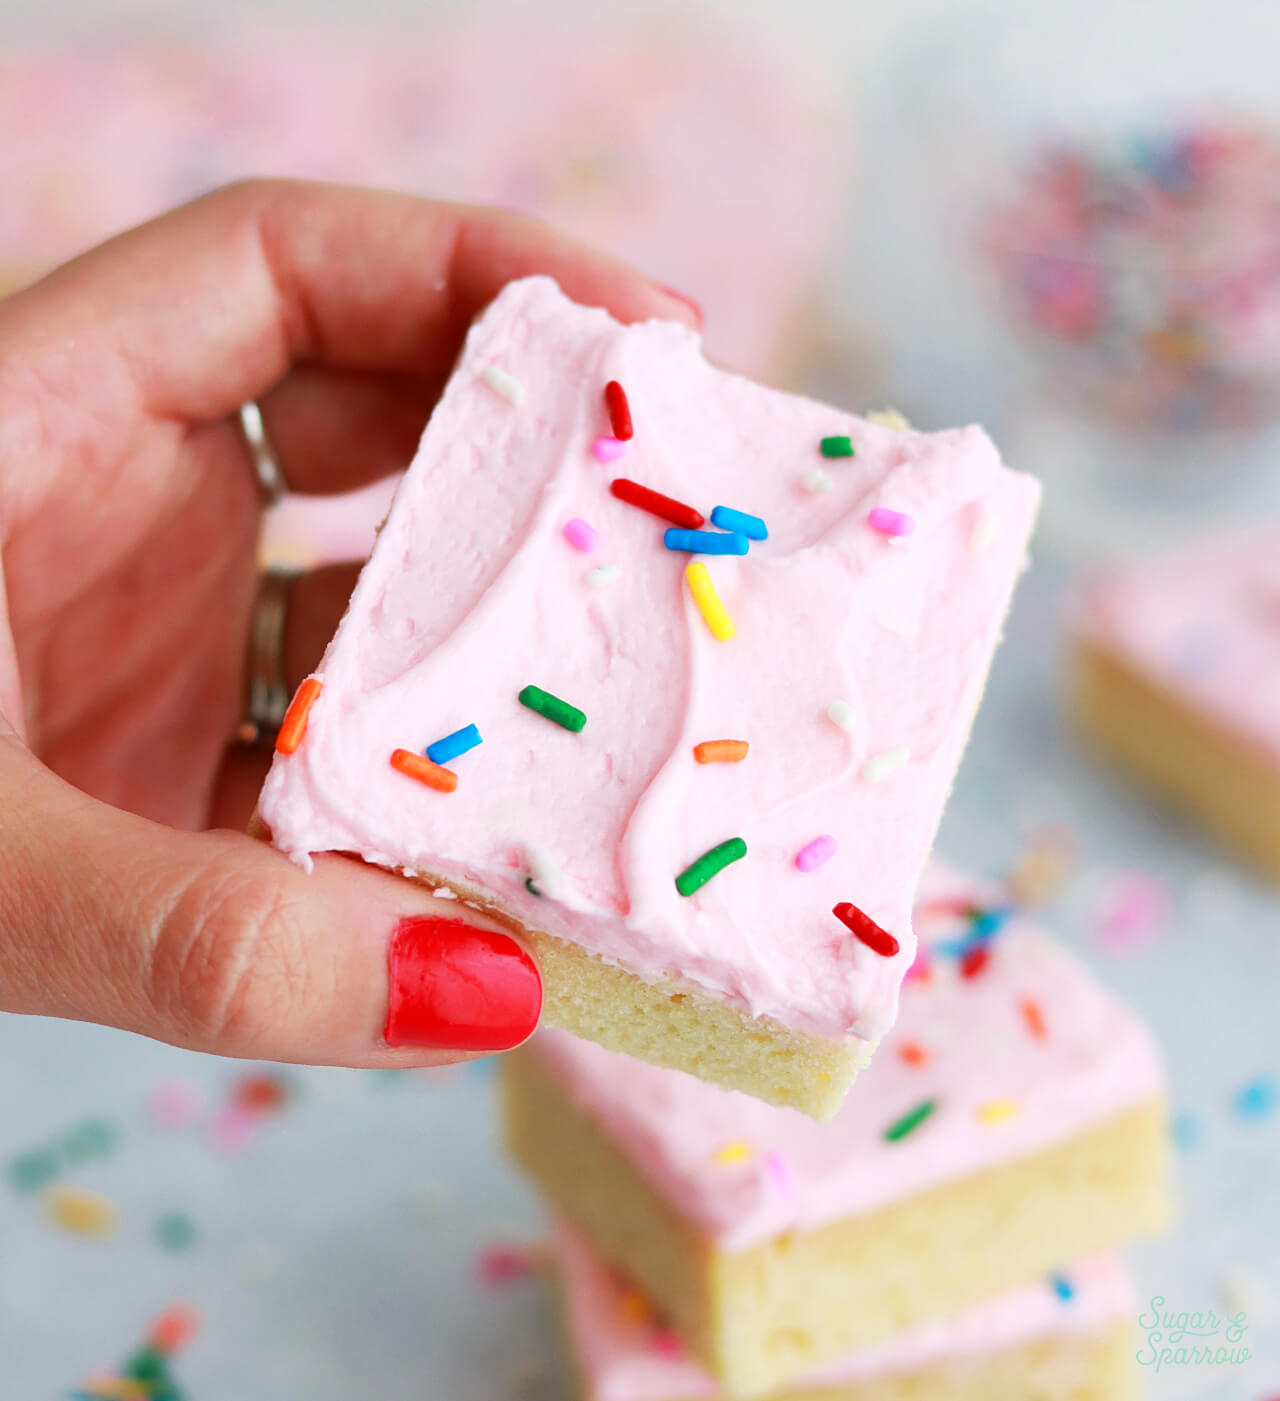
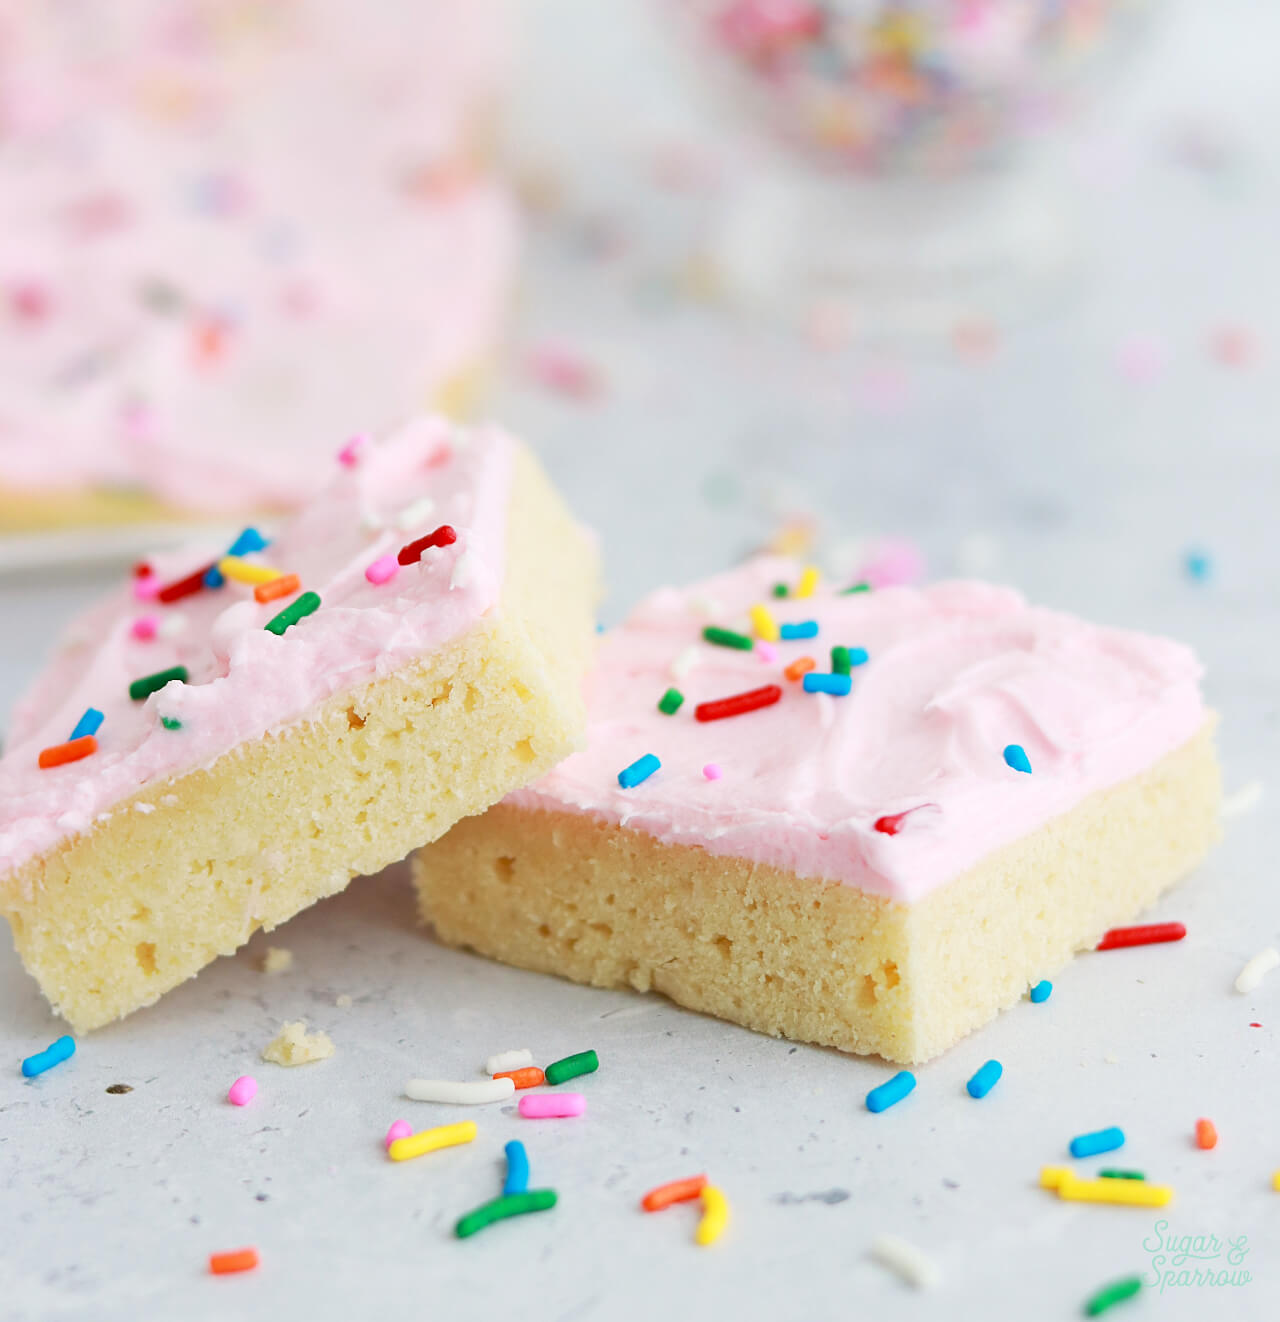
Sometimes you just need a giant frosted sugar cookie to celebrate the good things in life. These easy sheet pan sugar cookie bars are just the thing! They’re extra soft and moist, deliciously thick, and frosted with just the right amount of vanilla frosting to make them extra tasty. It reminds me of a super-sized Crumbl cookie in the best way. If you’re looking for a great birthday cake alternative or an easy dessert to feed a crowd, this recipe is it!
One reader, Colleen, says: “I made these cookies for daughters wedding. Since I had never baked for a crowd that large, I tested A LOT of recipes. This is HANDS DOWN my most requested recipe. I have shared it over and over again. Easy and delicious!” ★★★★★
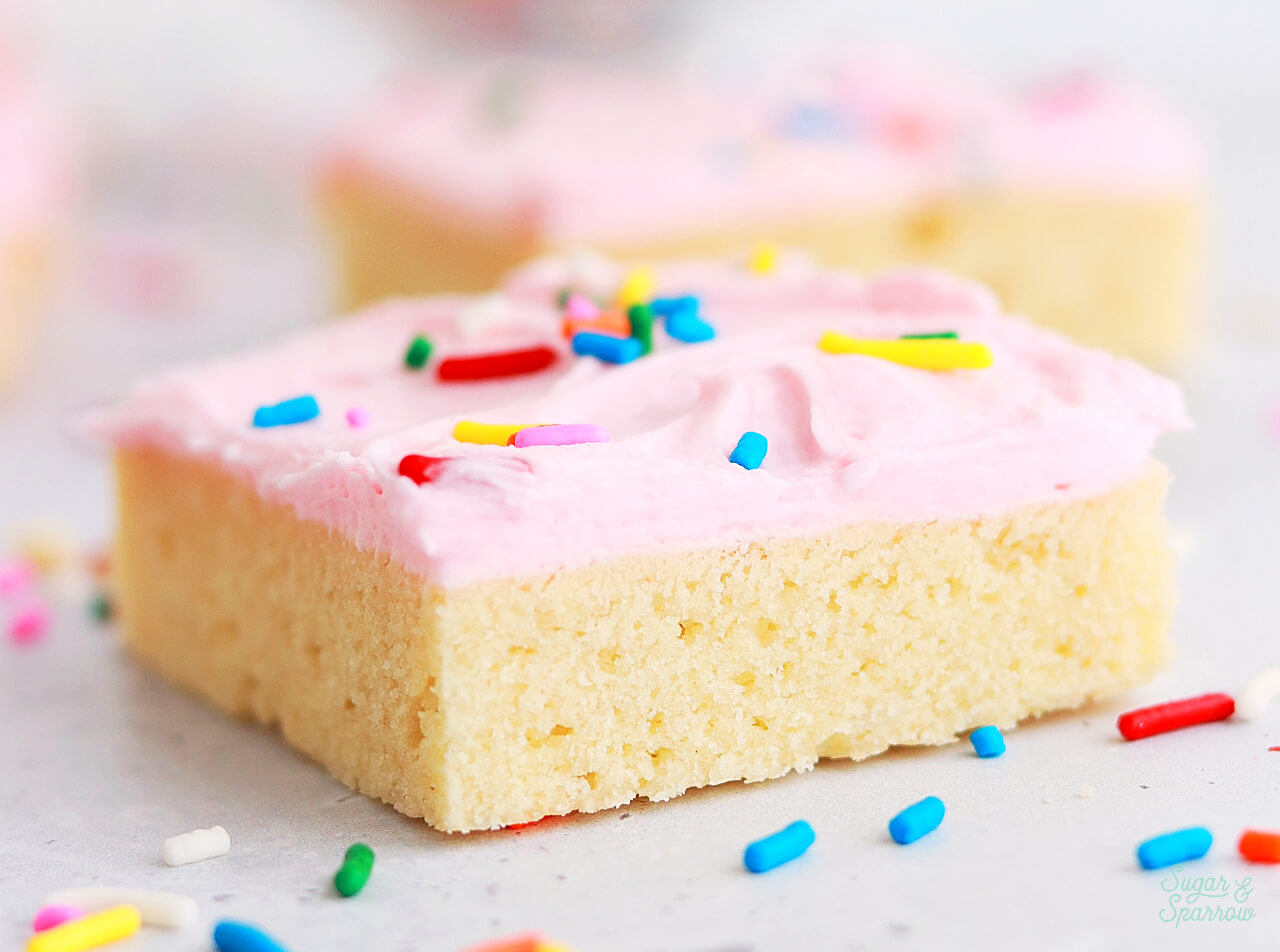
Extra Soft & Moist Sugar Cookie Bars
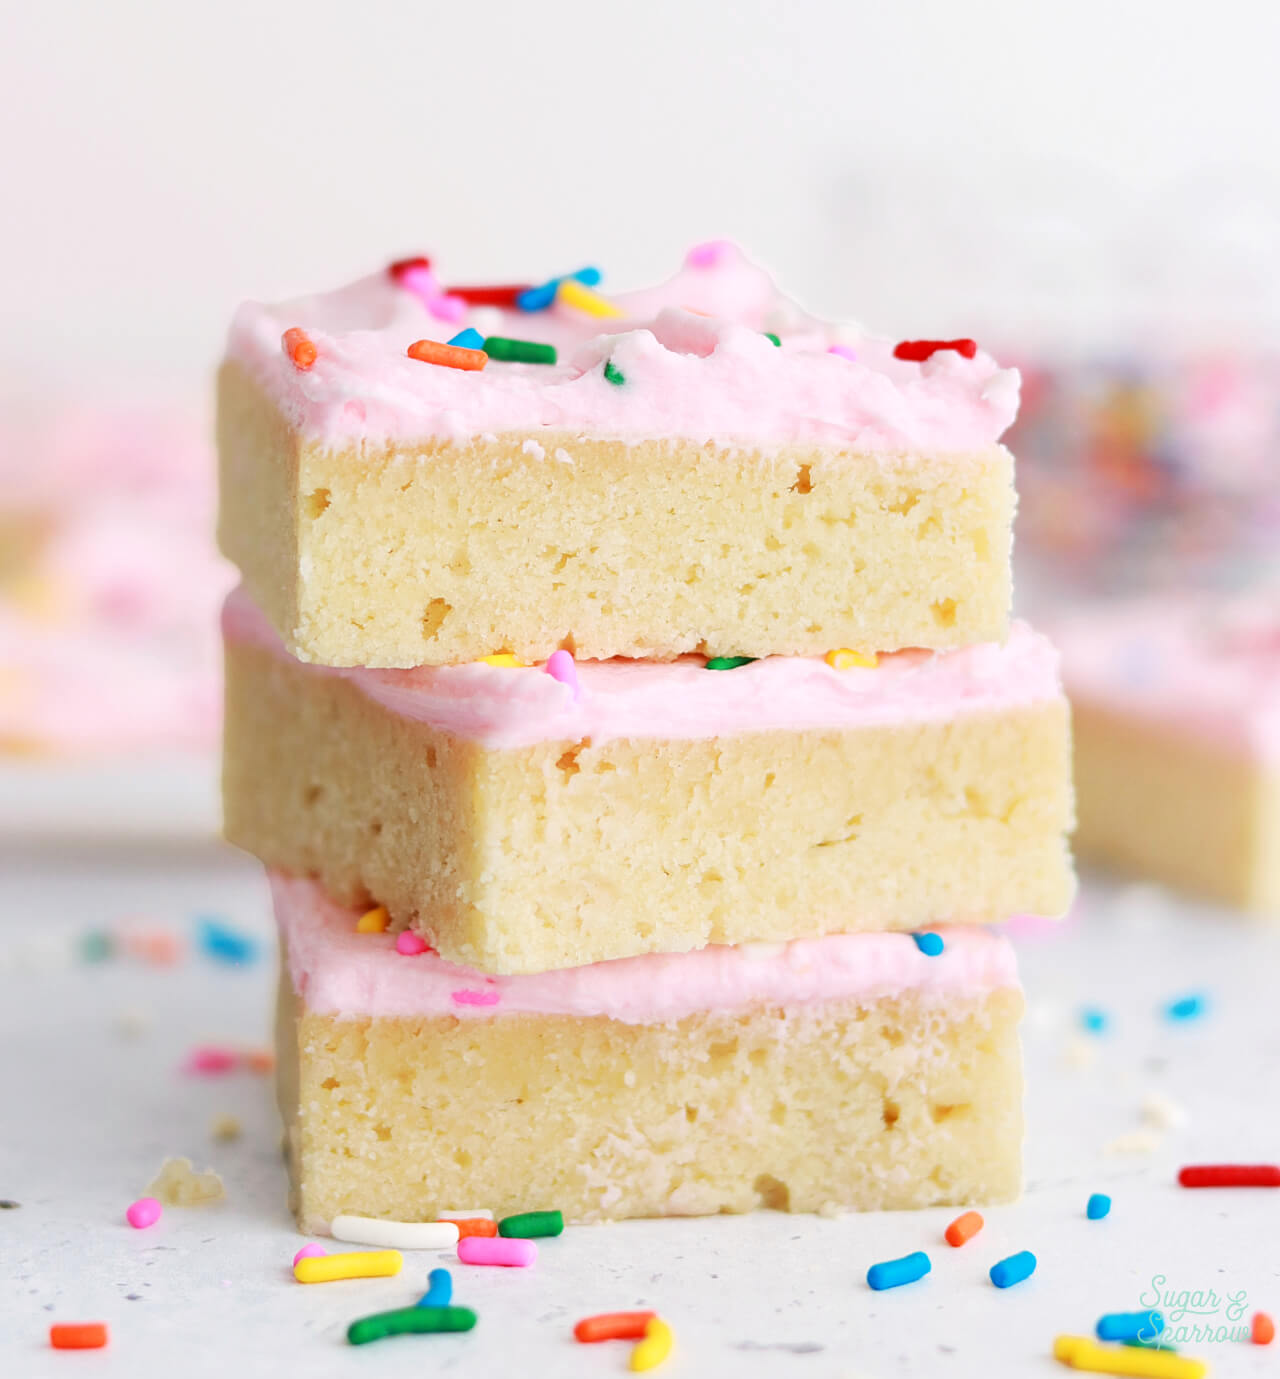
I wanted this sheet pan sugar cookie to be extremely tender and thick, yet buttery and moist like a delicious soft sugar cookie. It took a lot of recipe testing to crack the code on this, but I am so happy with this recipe! It’s tender and moist with the perfect buttery sugar cookie flavor and tastes amazing with frosting and sprinkles. My kids were going crazy for them (no surprise there) but so was I.
These frosted sugar cookie bars will be a hit any time of year for a variety of events and they’re SO easy and quick to whip up. Unlike cutout sugar cookies, this recipe doesn’t involve any chilling. Just mix up the dough, spread it into a lined baking sheet, and bake.
What Makes this Sheet Pan Sugar Cookie so Delicious?
To make the perfect sugar cookie bar texture and flavor, this recipe uses some key ingredients. Here’s what makes this recipe so special:
- Butter. A good amount of butter goes into this recipe to create that buttery soft texture. I use unsalted butter, but you can absolutely use salted butter and omit the salt in this recipe.
- Sour Cream. This is the key to making this giant sugar cookie so moist. I haven’t tried any alternatives that work as well, so if you can’t get your hands on some sour cream, I would just omit it and bake the recipe for 1-2 minutes less time. They will still be delicious.
- Cornstarch. A little cornstarch tenderizes the flour to make these sugar cookie bars extra soft.
- Vanilla + Almond Extract. I like to use both vanilla extract (an entire Tablespoon!) and a little hit of almond extract to flavor this sheet pan sugar cookie. That little bit of almond makes it taste extra special, but if you don’t like almond flavor, feel free to replace it with an equal amount of vanilla.
How to Make Frosted Sugar Cookie Bars
These sugar cookie bars are so easy to make and fun to decorate! After making the cookie dough, spread it into a half sheet pan (or halve the recipe for a 9×13 pan) and bake.
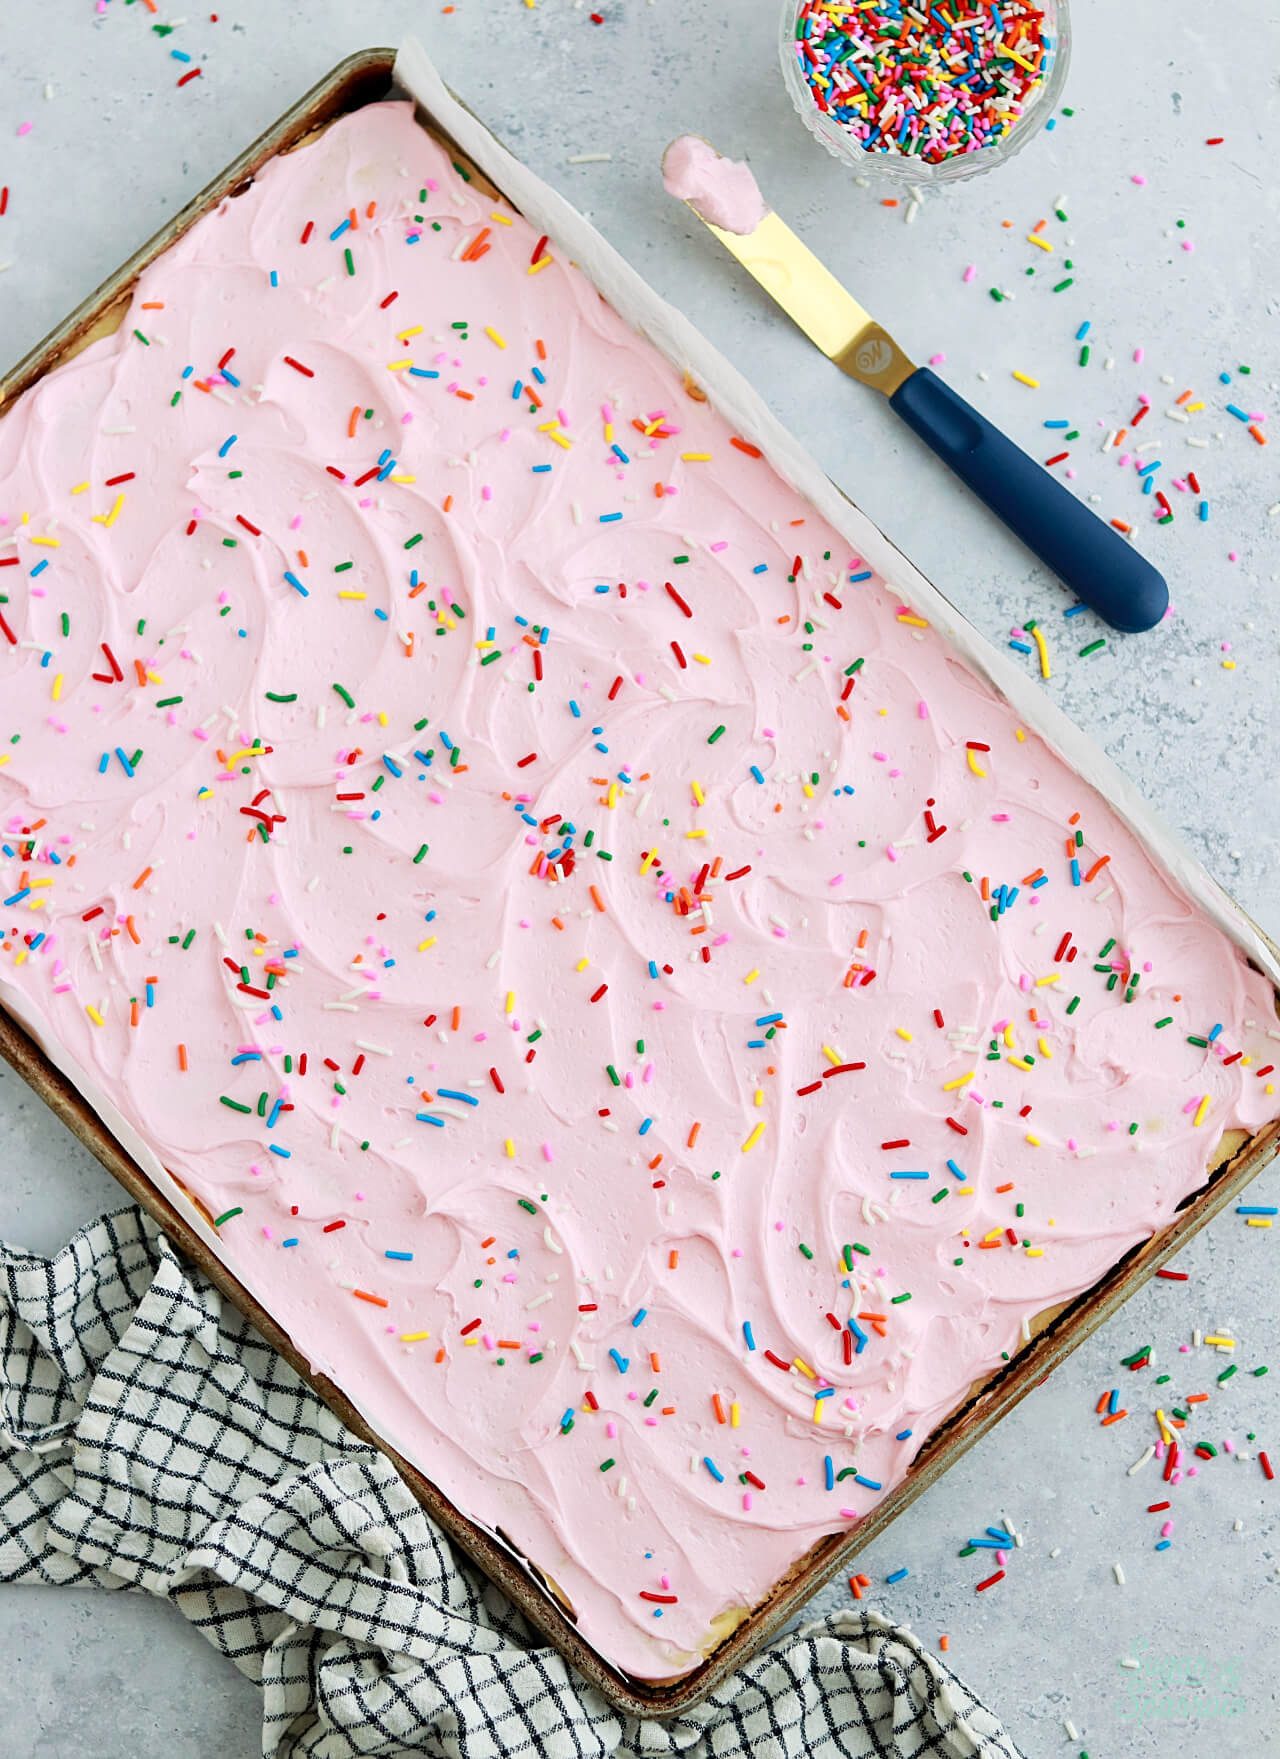
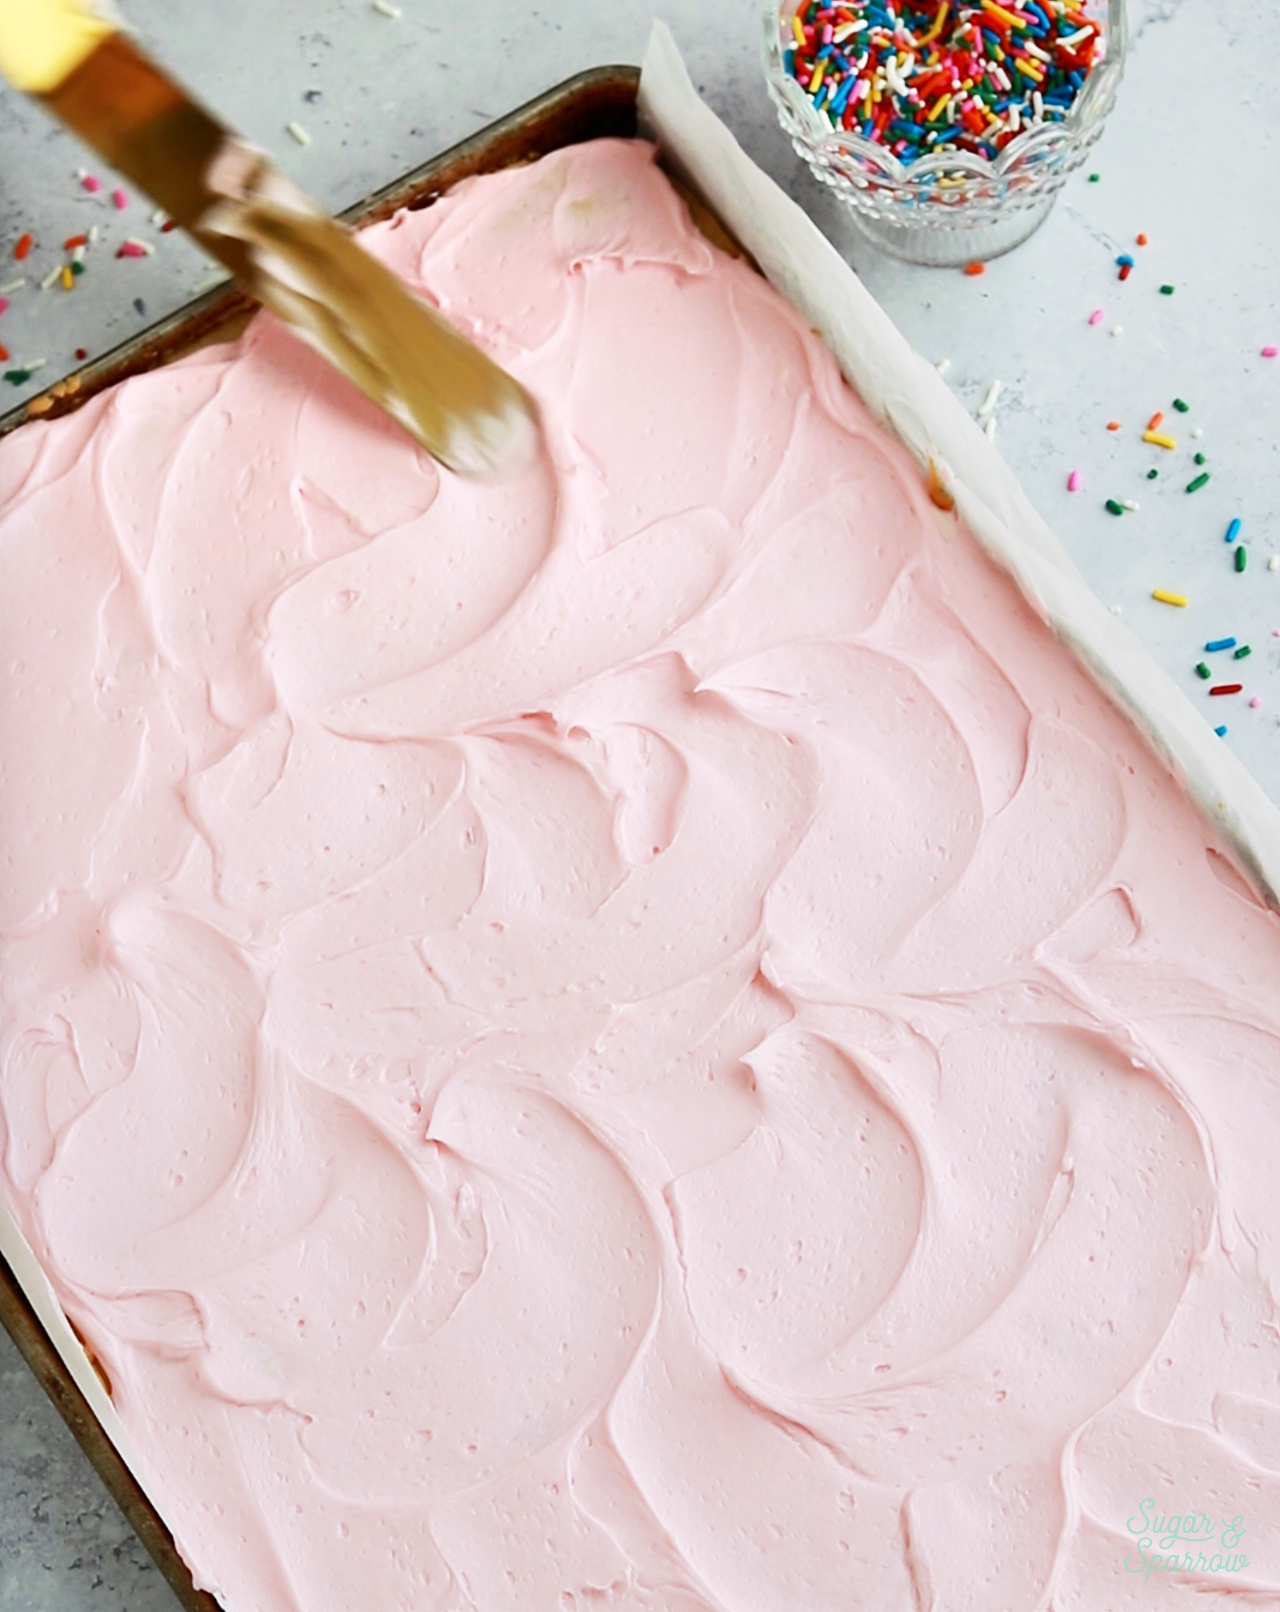
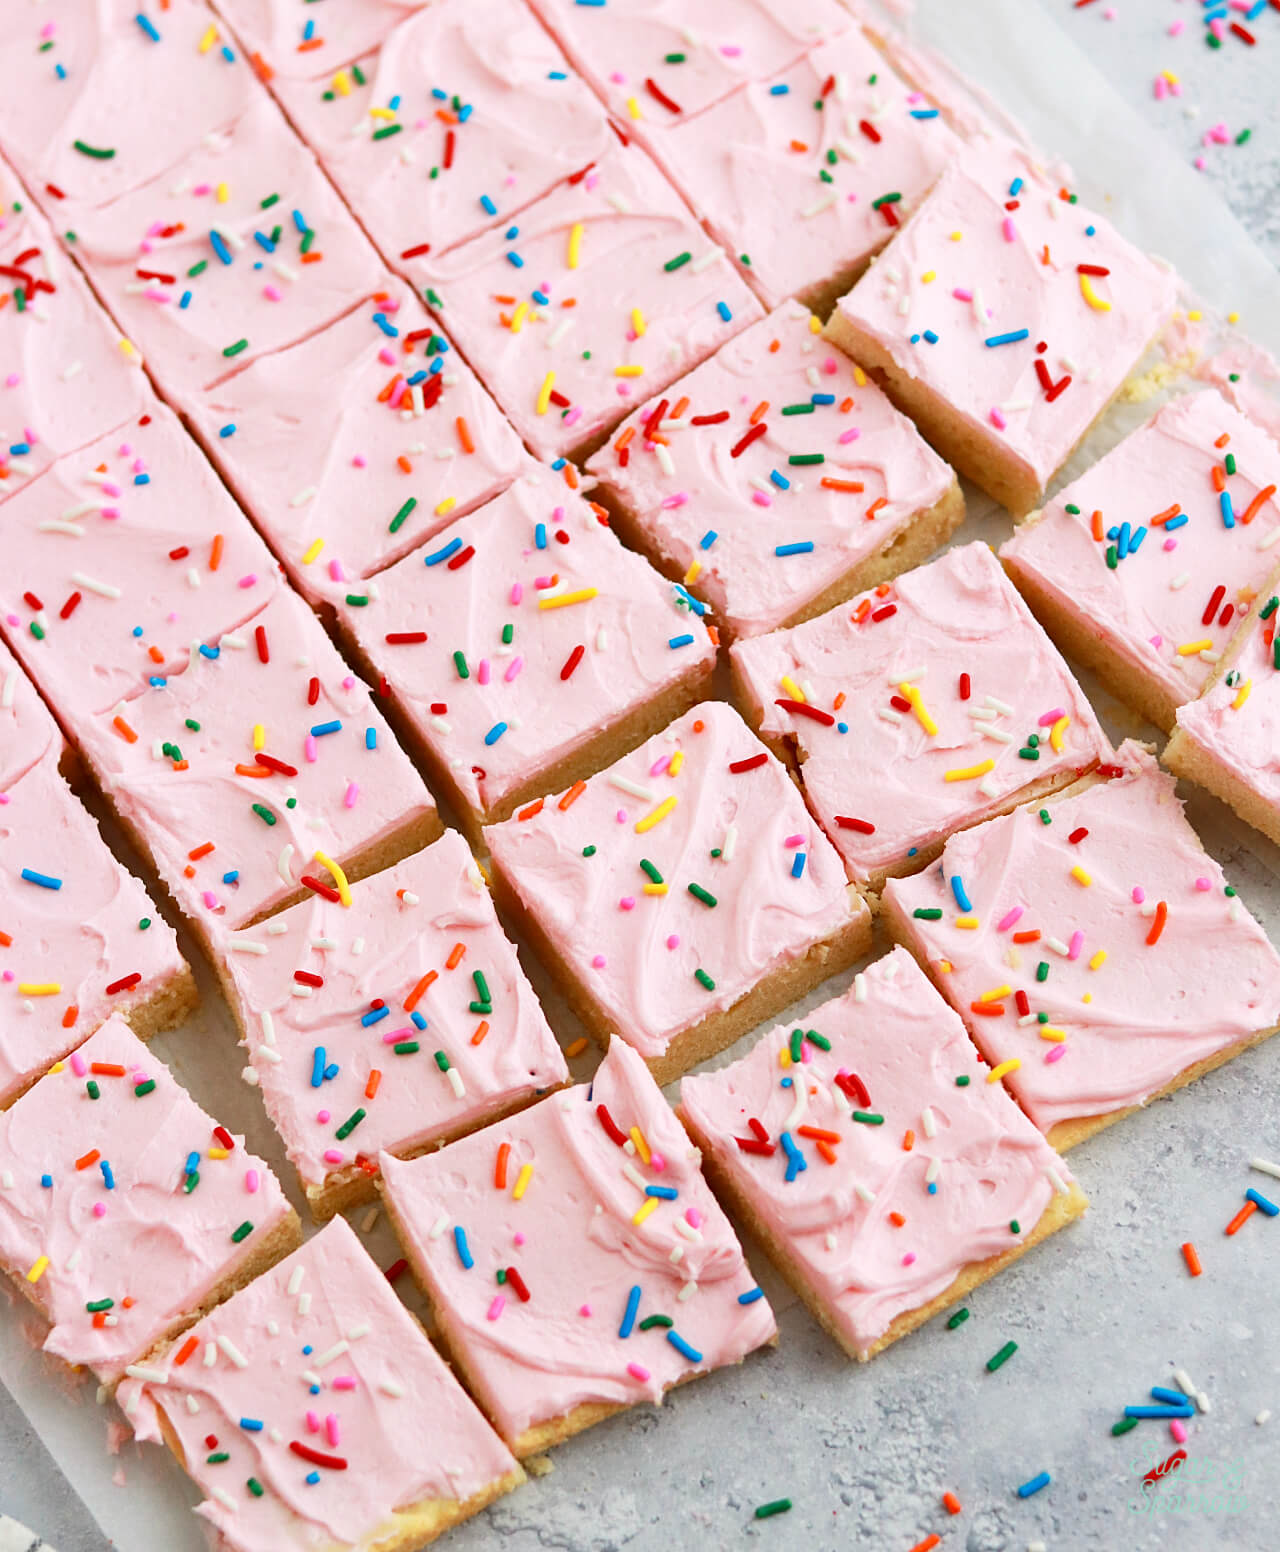
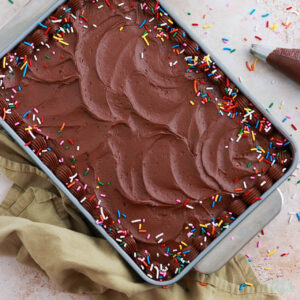
Wait until the sugar cookie is room temperature (at least two hours) before frosting it. You can get as creative with this as you want, but I just used my vanilla buttercream and a small icing spatula to frost some rustic texture. Basically lots of swoops and c-shaped movements with the spatula.
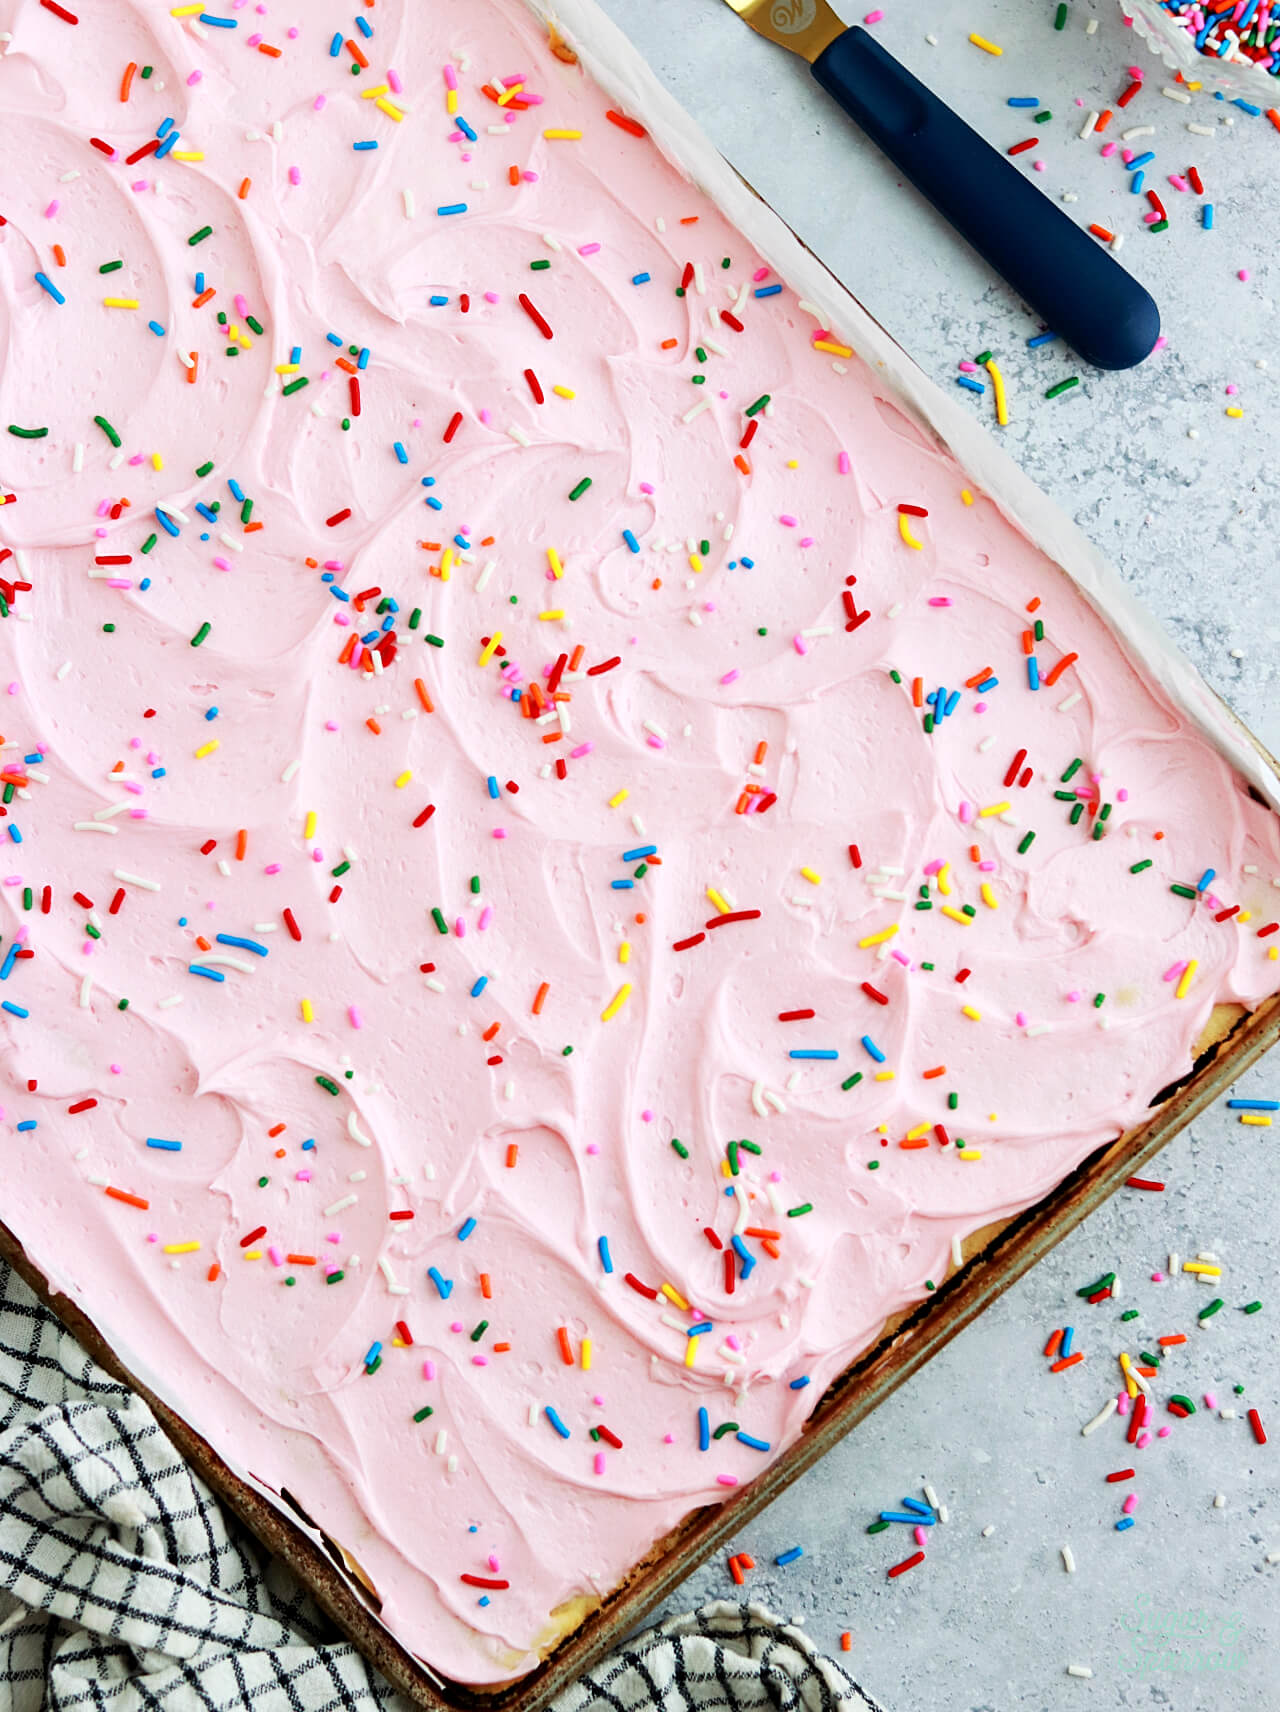
After frosting I tossed some rainbow sprinkles all over it.

This recipe makes the perfect amount of frosting to do this simple design, but if you want to add any piping I would make at least 1.5x the frosting amount shown below to have enough.
Storing & Serving Frosted Sugar Cookie Bars
If you want to bake the sheet pan sugar cookie ahead of time, you can bake it a day ahead and store it covered with plastic wrap at room temperature. You can also add the frosting a day ahead and store it at room temperature covered with plastic wrap. When you’re ready to serve, cut it into squares!
You can store the sugar cookie bars in an airtight container for up to 5 days if you have leftovers.
Can I Freeze this Sugar Cookie?
You can freeze the unfrosted sheet pan sugar cookie! You’ll want to wrap it well in plastic wrap first and store it for up to 2 months in the freezer.
Can I Make it Gluten-Free?
I haven’t tested this myself, but you can absolutely try subbing in an equal amount of GF all purpose flour. My hunch is that it will work.
Can I Make Half the Recipe?
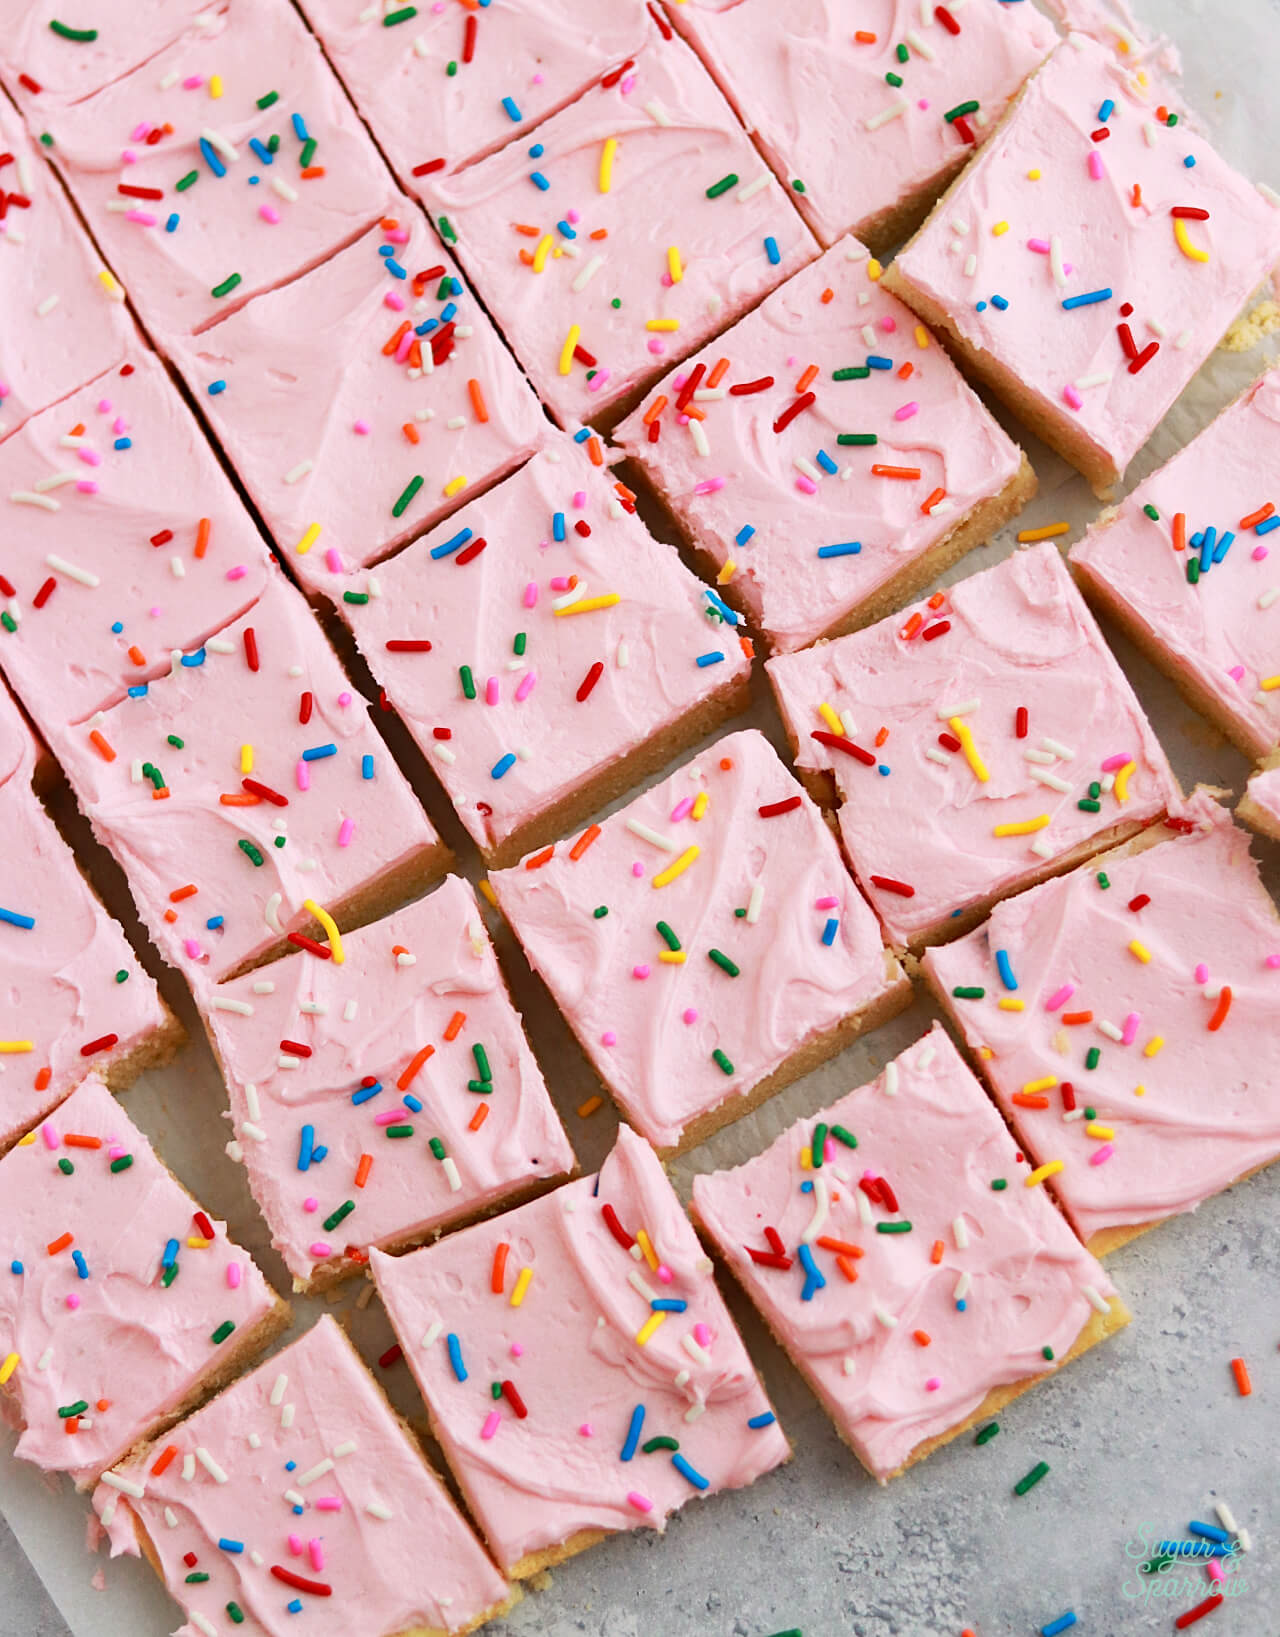
Yes! This recipe is baked in a half sheet pan (13×18 inches) and makes up to 35 bars. It’s an easy recipe to halve (just divide each ingredient below by 2) and bake in a 9×13 sheet pan or dish. It also bakes well in a 12 inch round pizza pan.
Can I Add Chocolate Chips?
Use this recipe for sheet pan chocolate chip cookie cake instead!
Sheet Pan Frosted Sugar Cookie Bars
Equipment
- 1 Half sheet pan Or halve the recipe for a 9×13 pan
Ingredients
Sheet Pan Sugar Cookie
- 4 1/2 Cups (594g) all-purpose flour
- 1 tsp baking powder
- 1 Tbsp (10g) cornstarch
- 1 tsp salt
- 1 1/2 Cups (339g) unsalted butter, room temperature
- 2 Cups (400g) granulated sugar
- 4 large eggs, room temperature
- 1 Tbsp pure vanilla extract
- 1/2 tsp almond extract*
- 1/2 Cup (120g) sour cream*, room temperature
Vanilla Buttercream
- 1 Cup (226g) unsalted butter, room temperature
- 3 1/2 Cups (420g) powdered sugar
- 2 tsp pure vanilla extract
- 2 Tbsp whole milk, room temperature
- pinch of salt, or to taste
- 1 drop pink food color gel (optional)
Garnish
- 1/3 Cup rainbow sprinkles
Instructions
Make the Sheet Pan Sugar Cookie
- Preheat the oven to 350ºF (177ºC) and line a half sheet pan* (13×18 cookie sheet) with parchment paper. Be sure to leave a slight overhang of parchment paper if you plan on lifting the cookie out of the pan for decorating.
- In a medium bowl, add the flour, baking powder, cornstarch, and salt. Whisk together to combine and set aside.
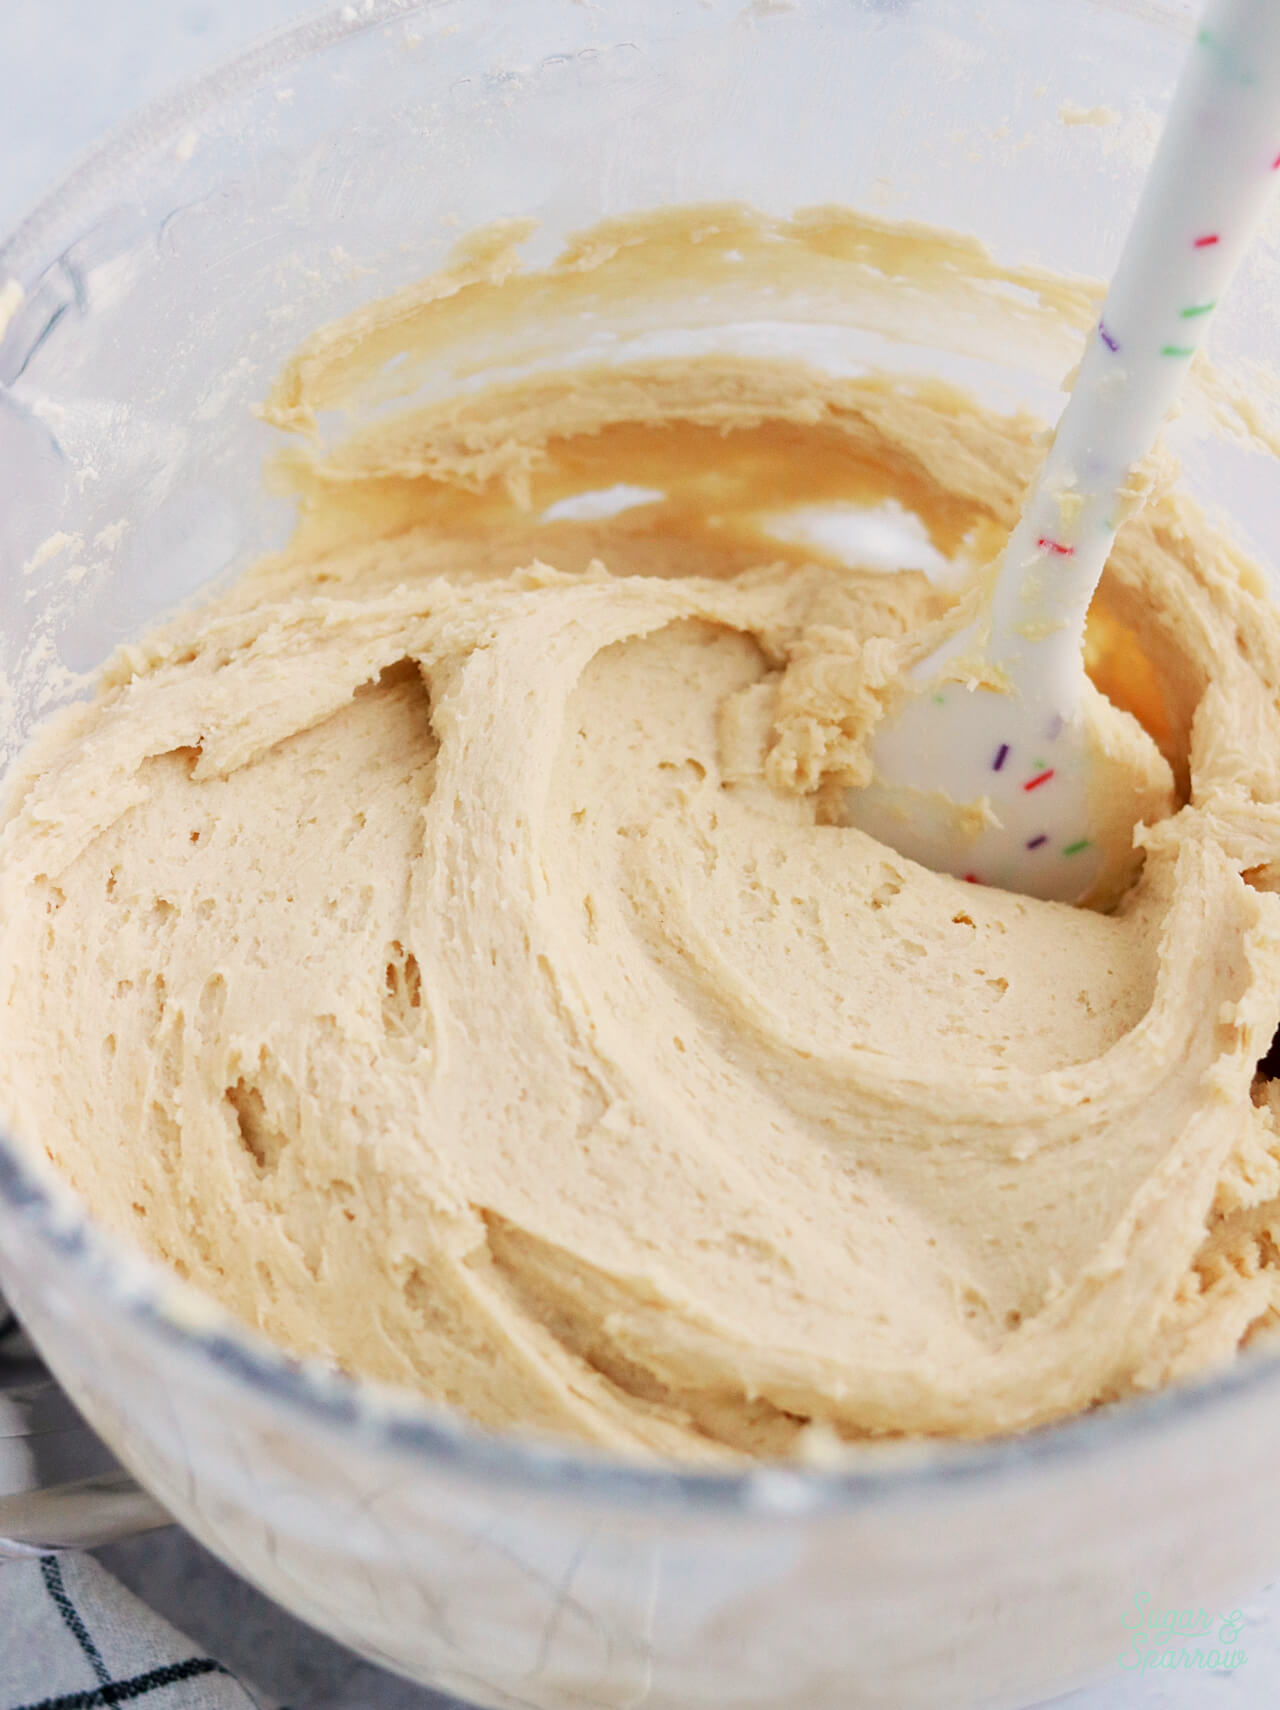
- In the bowl of your stand mixer fitted with the paddle attachment (or with a large bowl and hand mixer) cream the butter and sugar together on high speed until light and fluffy, 2-3 minutes. Add the eggs one at a time on medium speed and mix until combined.
- Mix in the vanilla, almond, and sour cream on medium speed until combined. It will look curdled at this point, but don't worry – it will come together in the next step!
- Add the flour mixture and stir on low speed until combined and smooth. The dough will be slightly sticky but spreadable.
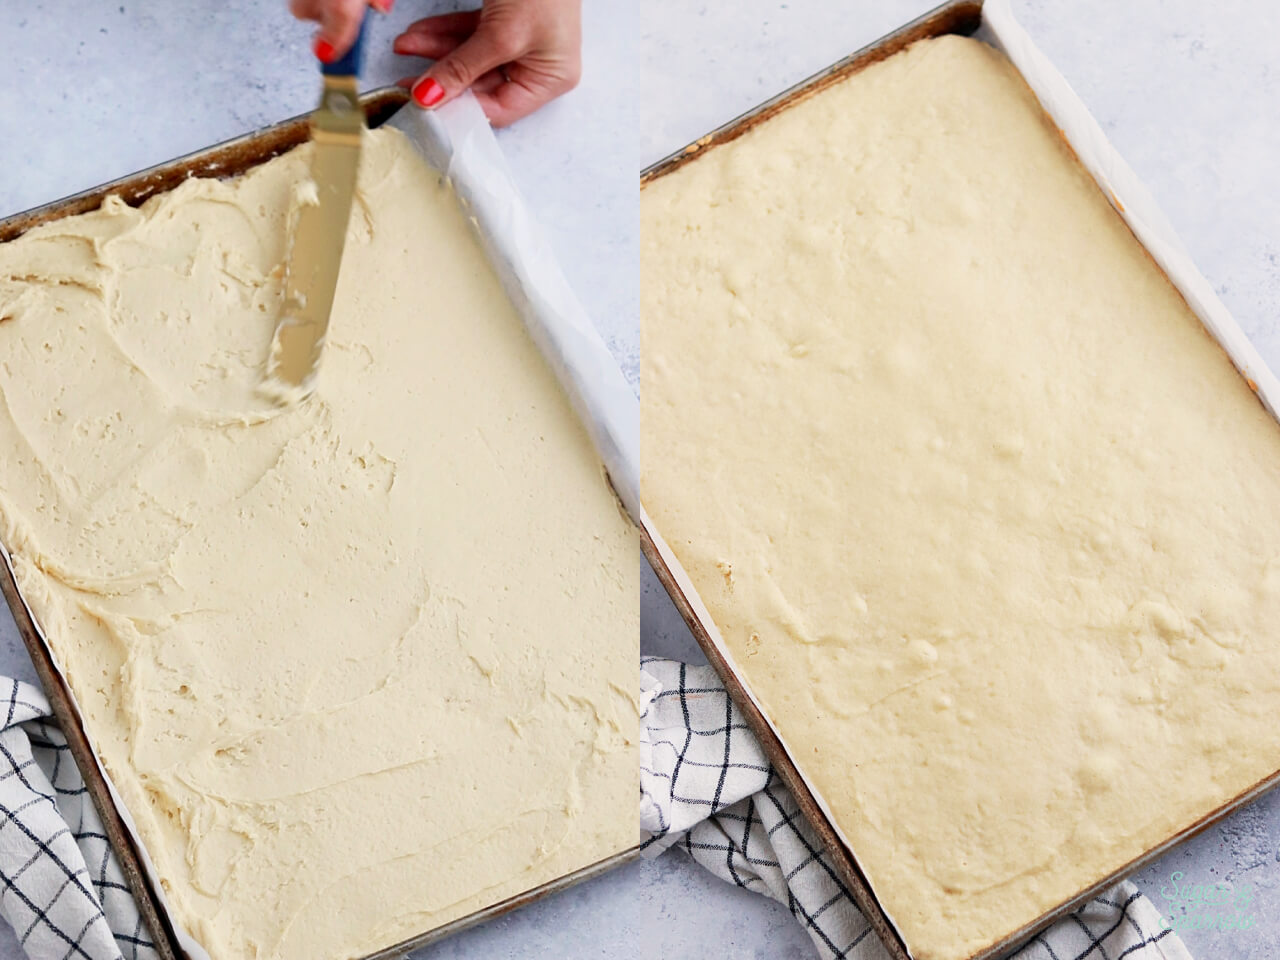
- Add the dough into your prepared sheet pan and use an angled spatula to spread it all the way to the edges in an even layer. Bake for 14-18 minutes, until the edges are just starting to brown and the center springs back slightly. It will bake a little more as it cools in the pan, and I bake mine for 15 minutes to get the perfect texture. Cool completely in the pan before decorating.
Make the Vanilla Buttercream
- Using the paddle attachment on your stand mixer (or hand mixer with a large bowl), cream the butter on medium-high until it’s creamy and light (almost white) in color. About 7 minutes.
- Turn the mixer to low speed and add the powdered sugar one cup at a time, scraping down after each addition and making sure each cup is fully incorporated before adding the next one.
- Add the vanilla, milk, and salt and mix on low speed for another minute until fully incorporated. Add the pink food coloring (if using) and mix on low speed until uniform in color.
Assembly
- If you wish, you can gently lift the sugar cookie out of the pan once cooled using the parchment paper overhang. I usually just leave mine in the pan for convenience and easy transport.
- Frost the sugar cookie with the vanilla buttercream using a small icing spatula. To create the look pictured, create rustic texture with the buttercream (basically make some swoops and c-shapes with the icing spatula) and top with rainbow sprinkles.
- When you're ready to serve, slice the giant frosted sugar cookie into bars!
Notes
- You can bake the sheet pan sugar cookie ahead and store in the pan wrapped in plastic wrap at room temperature for 1 day. If you want to freeze it, be sure to wrap it really well and freeze for up to 2 months.
- The frosted sugar cookie can be stored at room temperature covered loosely with plastic wrap for up to 1 day.
- Once sliced, the sugar cookie bars can be stored in an airtight container at room temperature for up to 5 days.
Did you make these sheet pan sugar cookie bars? I want to know how it went. Let me know in the comments below or tag @sugarandsparrowco on Instagram to show me. I love to see what you create with my recipes!
not a big fan… these came out just like a vanilla cake. based on the description, i was expecting closer to sugar cookie/ crumbl cookie texture, but this is just like eating a slice of pound cake. I even measured using a scale so I know the measurements were accurate. I am frustrated that these didn’t turn out because it is such a large scale recipe, it was quite expensive to make. i presume the majority will be tossed in the trash 🙁
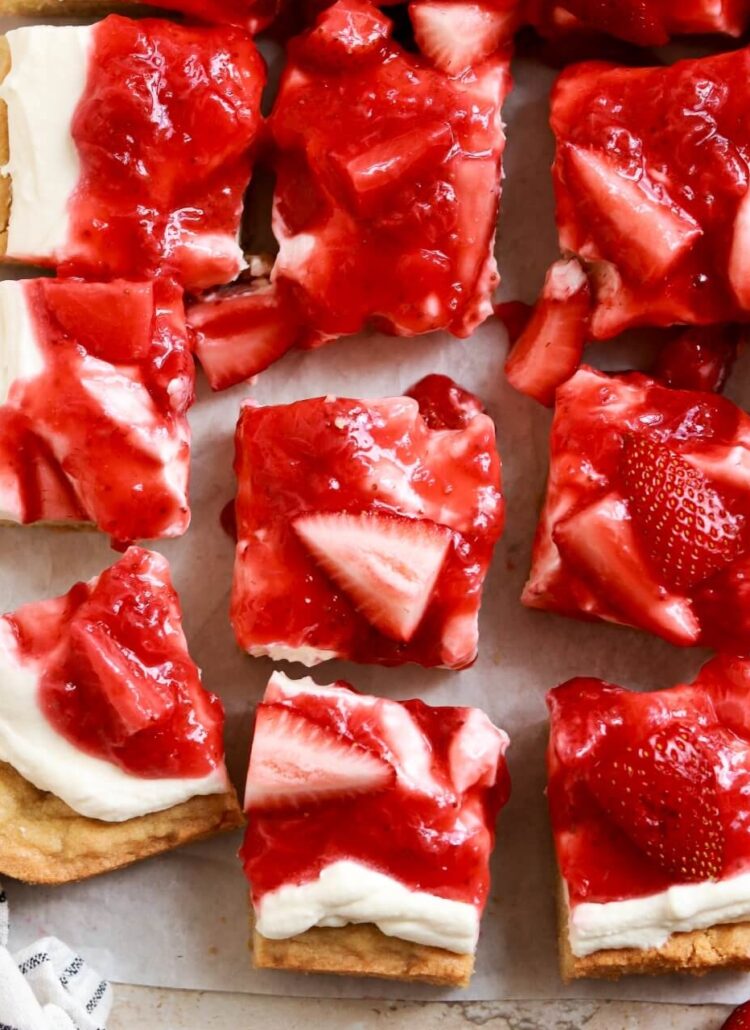
Hi there! I’m sorry the texture of these cookie bars weren’t what you were expecting. If you want a chewier sugar cookie texture, the sugar cookie bar base from this recipe is my most recent and I love the texture so much: https://sugarandsparrow.com/strawberry-shortcake-cookie-bars/ they’re a bit thicker and less cakey, made for an 8-inch square baking pan.
I made these cookies for daughters wedding. Since I had never baked for a crowd that large, I tested A LOT of recipes. This is HANDS DOWN my most requested recipe. I have shared it over and over again. Easy and delicious!
Yay, Colleen! I’m so happy this has been a repeat hit!
Made these without the frosting. Sprinkled with Halloween nonpareils instead. They were very good, but they were more like a cake than a cookie. I think I would make them without the sour cream next time as I wasn’t a huge fan of the texture.
I’ve made this recipe twice, both had great taste. First time was great, had a sugar cookie texture. Second time making it, it had more of a dense cake texture vs sugar cookie texture. What would cause this?
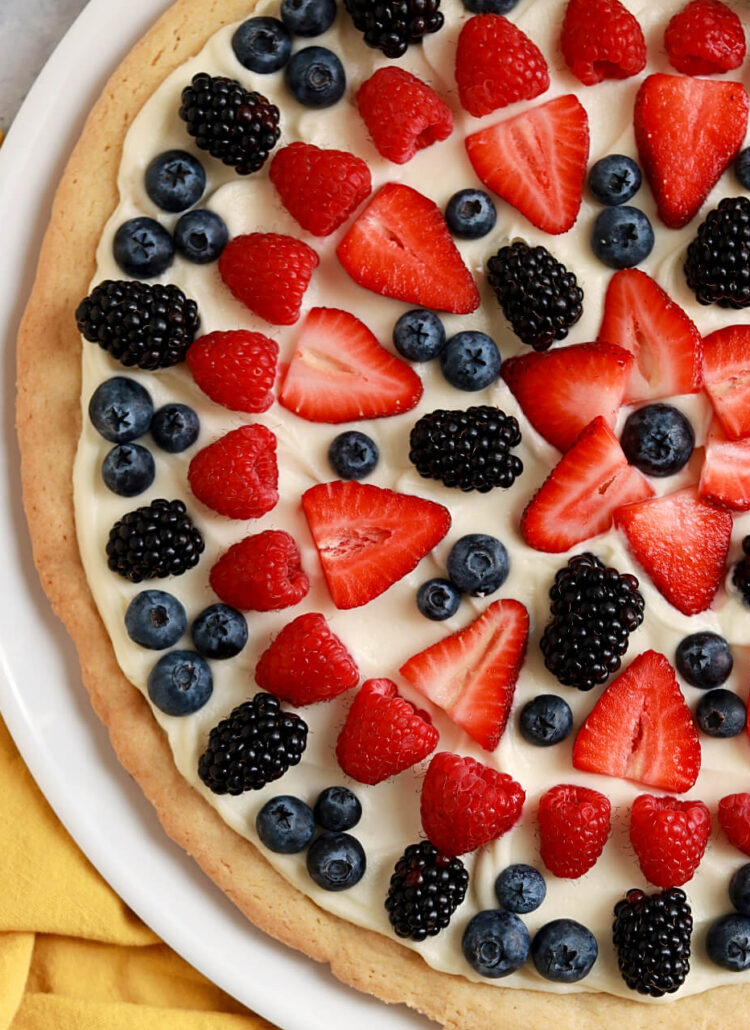
Hi Tim! I’m not sure why you’d get two different textures unless you used different ingredients, different pans, or did anything differently. Sometimes if you over-cream your butter and sugar or use butter that is too soft, that can affect the outcome. These cookie bars have more of a cakey cookie texture. If you’re looking for more of a sugar cookie base, this cookie pizza recipe will give you that: https://sugarandsparrow.com/berry-fruit-pizza-recipe/
Thank you for the response. Same ingredients, same pan as prior. Maybe the butter was warmer or I whipped the sugar butter more. Regardless it was good, just odd. It had different outcomes.
I did sub the almond for lemon extract in both. But that shouldn’t have affected the texture.
These tasted great and were easy to make. I’m bringing them to a 4th of July party, so I kept the icing white and added red, white, & blue sprinkles. They look very cute. I’m thinking that next time I make these I might do 1 tsp vanilla extract and 1 tsp almond extract in the frosting (I love the taste of almond extract!).
I’m so happy you loved this recipe, Heather!!
Just made these this morning, I halved the recipe and I had buttercream frosting, just the right amount to ice these bars!! Absolutely delicious! Will definitely be a keeper! I also used red, white and blue sprinkles in honor of the 4th of July!! Have a fun and safe him!
So happy you love this recipe, Kris! Thanks for letting me know and hope you have a great 4th!
I love this recipe! I bring treats to my kids’ school all the time and this will be perfect.
I’m a gluten free baker so I will test it and report back.
Yay, Sara! Thanks so much for being willing to test a gf version 🙂
When do you add the eggs?
Wow, great typo catch! The eggs are added after creaming together the butter and sugar.