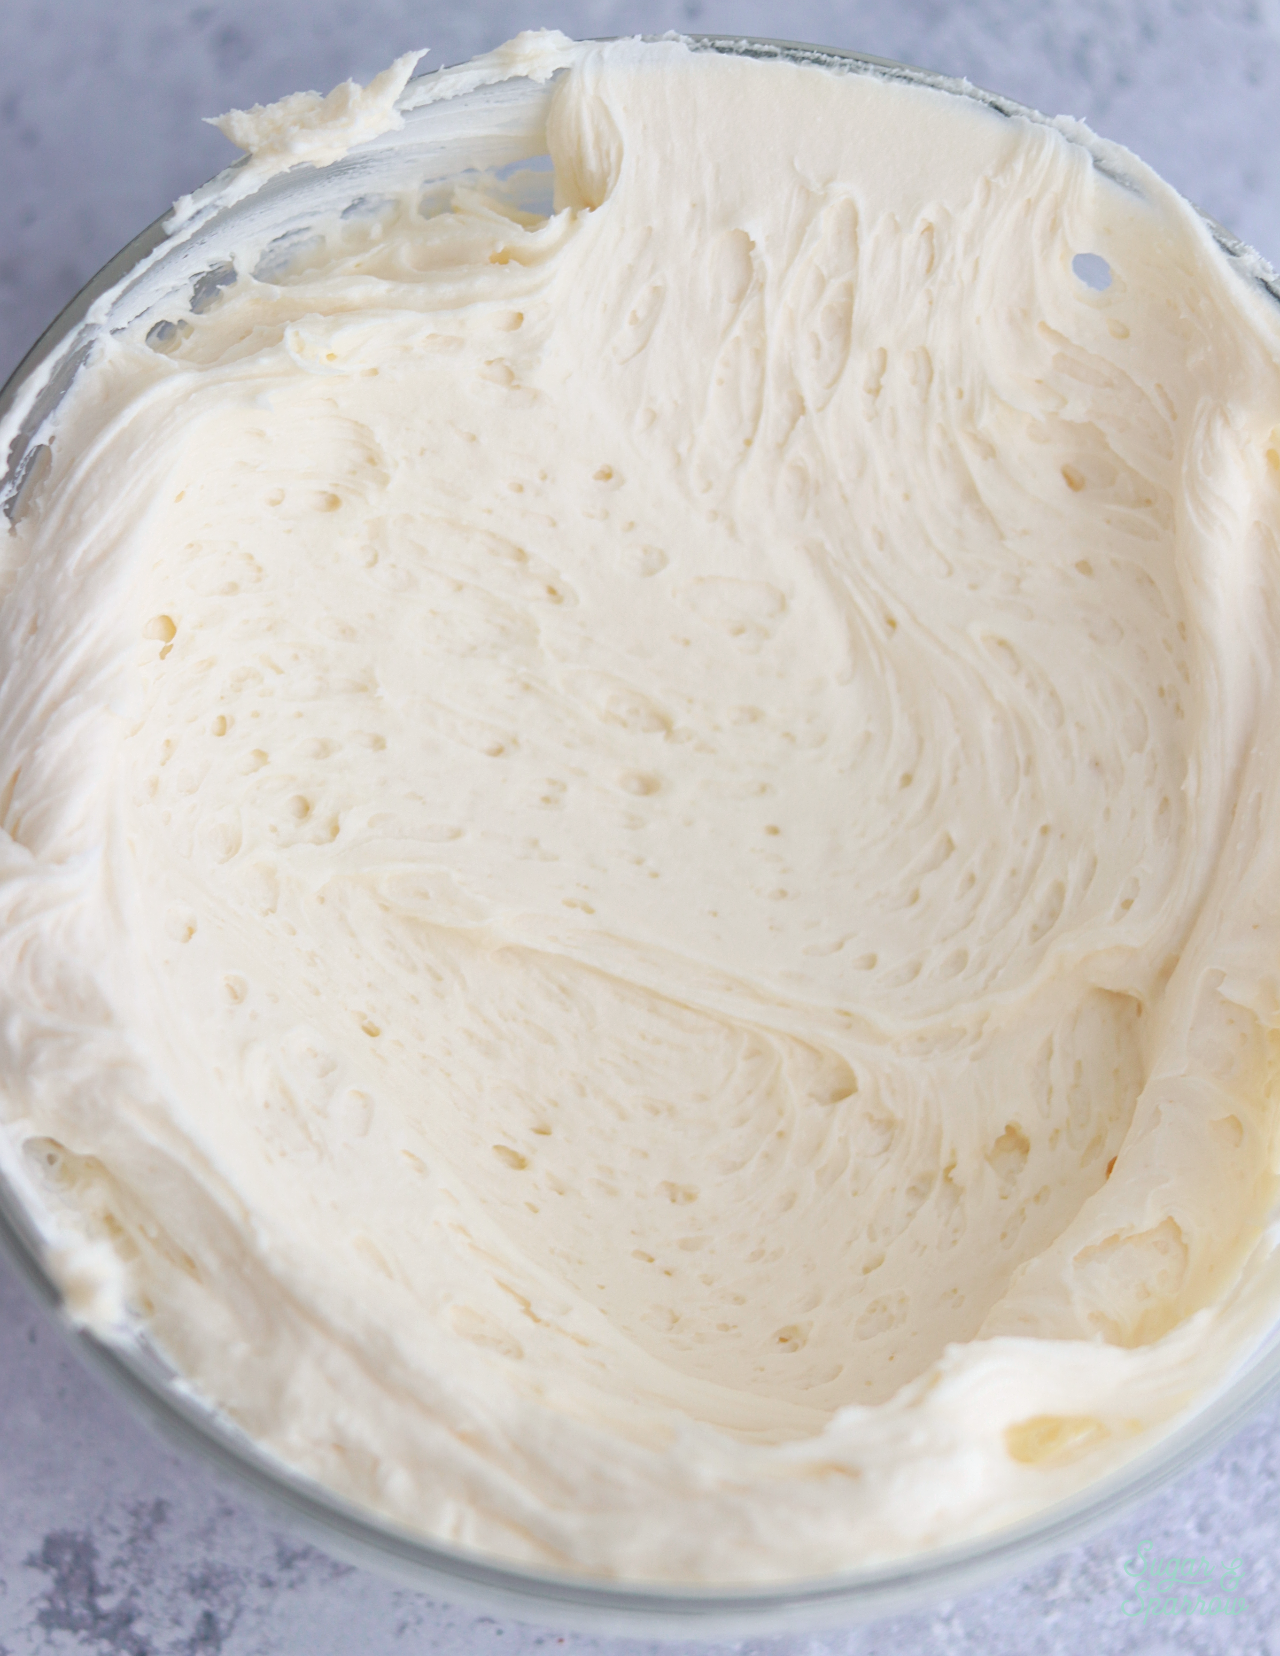
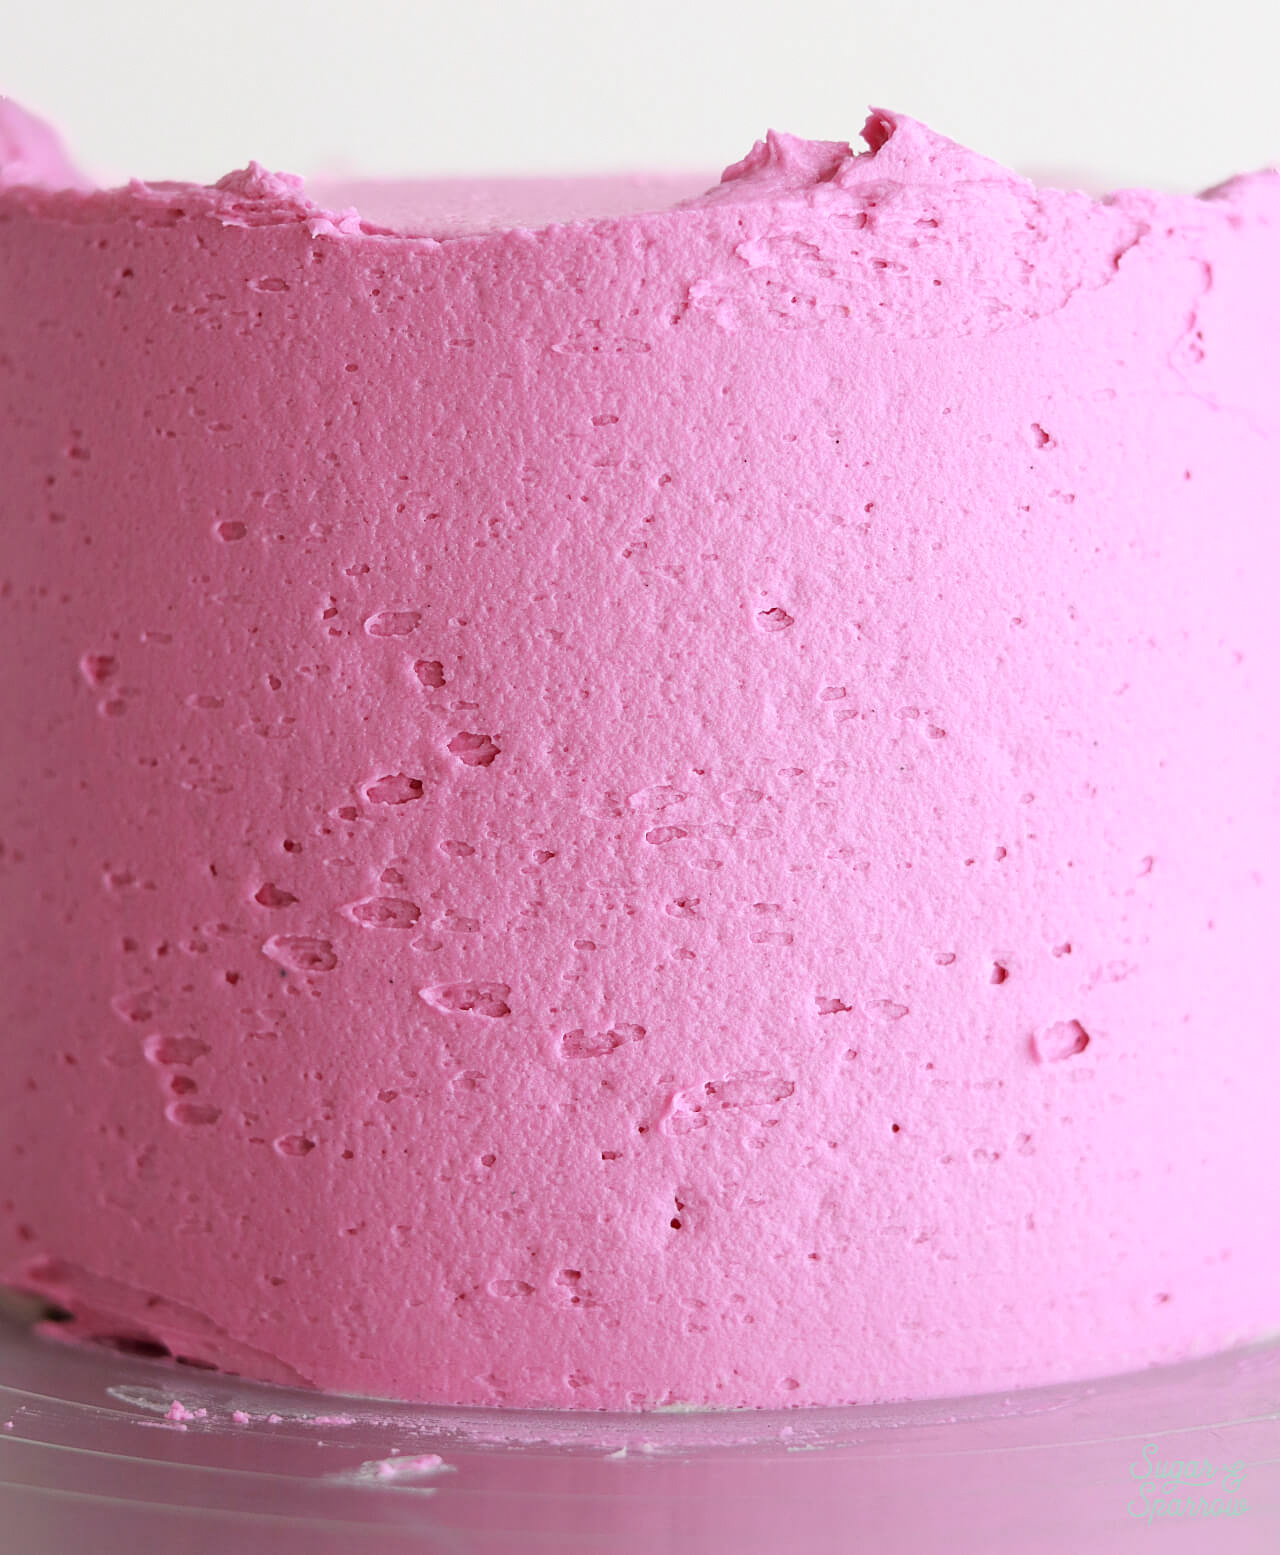
We’ve all been there – you start frosting a cake only to find that there are tons of tiny air bubbles in the buttercream finish and no matter how many times you smooth, they seem impossible to get rid of. I’m here to help you troubleshoot times like these and answer all the most common questions about air bubbles in buttercream like: Why do air bubbles happen? How do we stop them from happening? What do we do if they’re CURRENTLY HAPPENING?
My hope is that after reading this post you’re even more confident working with buttercream frosting and troubleshooting those air bubbles at every point in the cake decorating process!
Why Do Air Bubbles Form in Buttercream?
There are a few reasons why those pesky air bubbles might appear in your buttercream, most of which have to do with mixing:
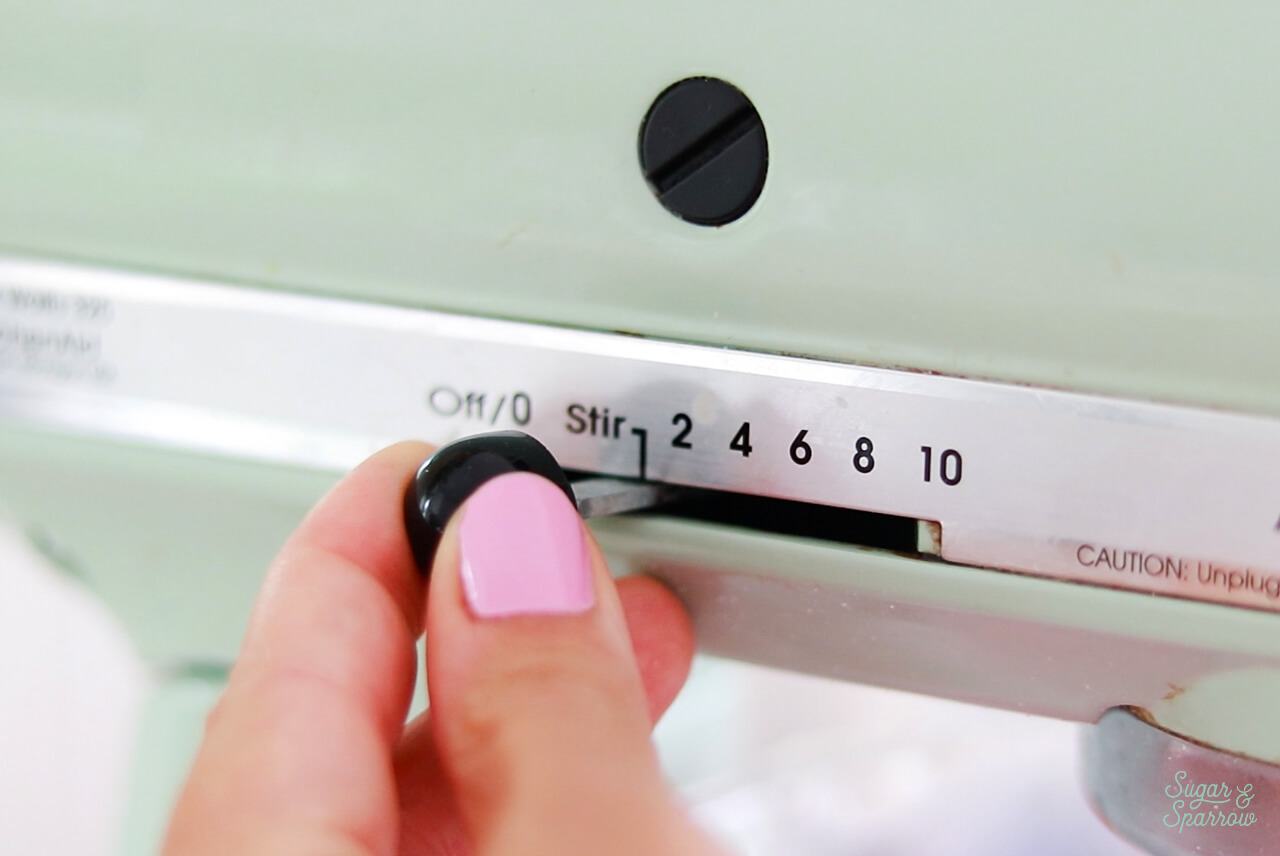
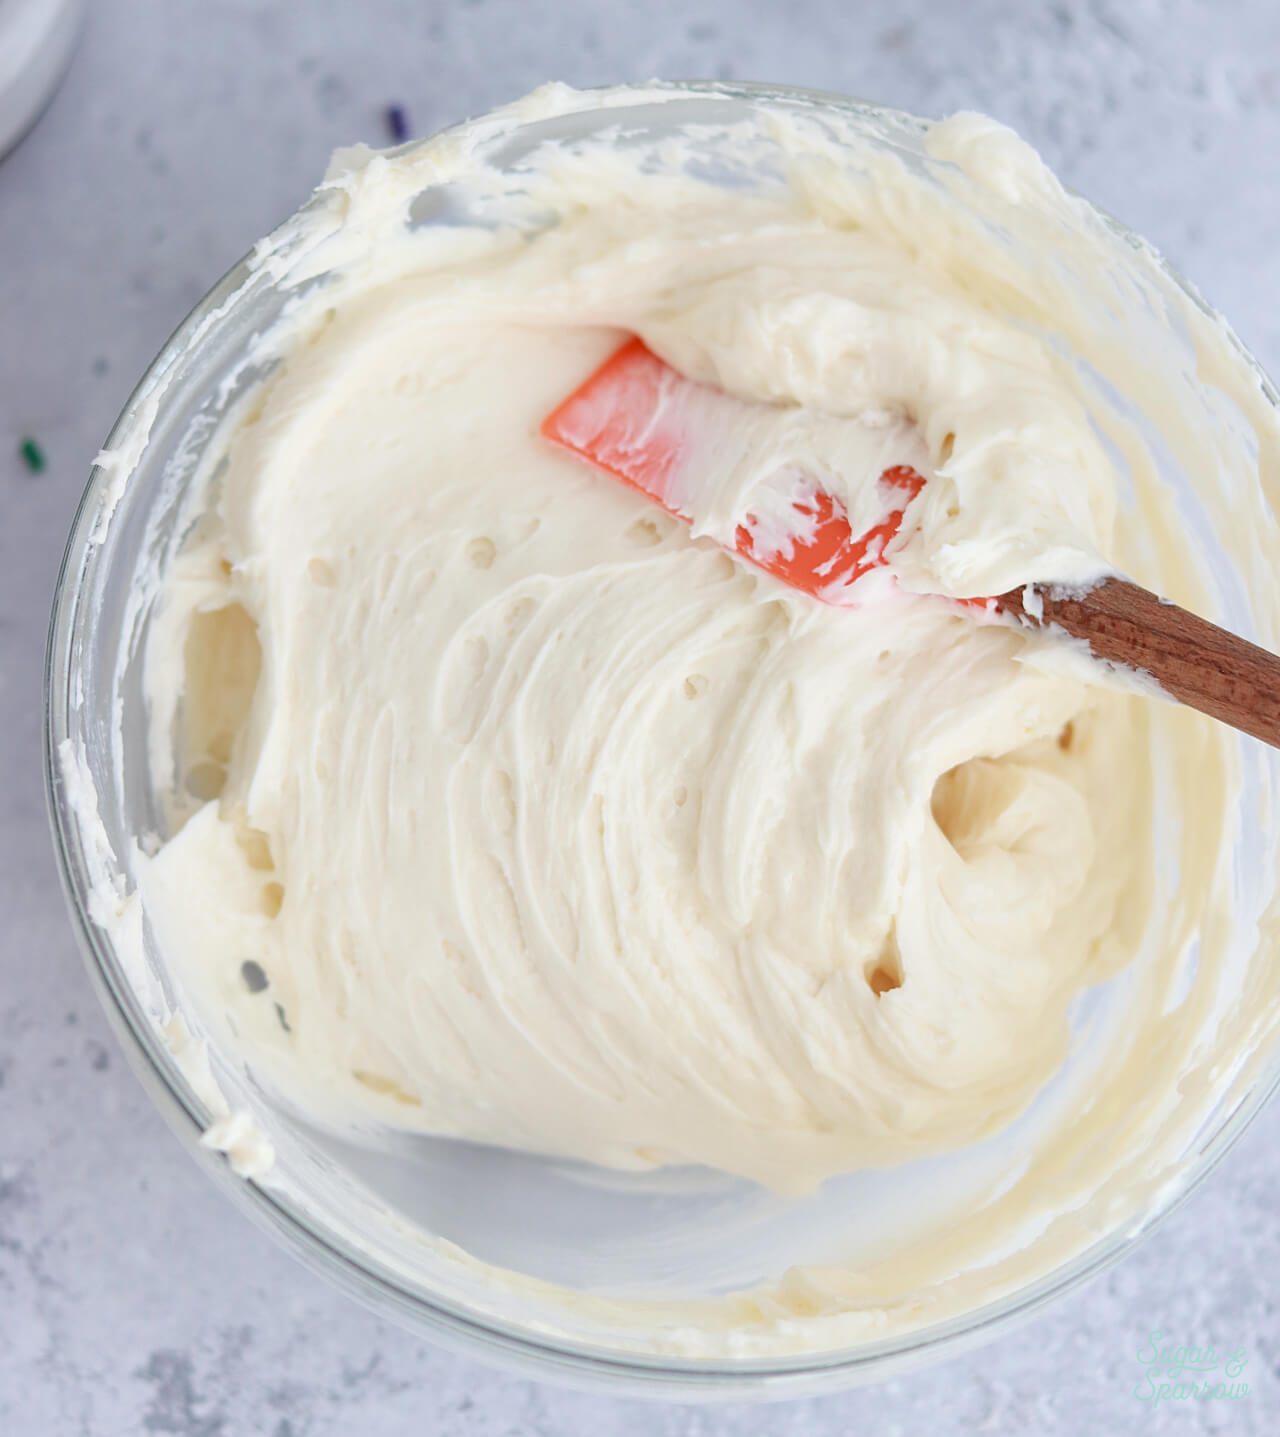
Your Mixing Speed is Too High. The first step of my vanilla buttercream recipe has you whipping the butter on high speed for several minutes to get the butter creamy and pale in color. After that step, it’s important to mix the rest of the ingredients on low speed. This is because the higher the speed of your mixer, the more air you are incorporating into your buttercream and the higher your risk for air bubbles. Low speed on a KitchenAid stand mixer means mixing on the Stir setting, or the lowest possible setting on any other kind of mixer.
A Swiss meringue buttercream recipe is a little different because the process involves keeping the mixer on high speed and medium speed nearly the entire time. But, if you do find that your SMBC has air bubbles after the final step, switching the mixer to low speed for a minute or two after the last ingredient is added should help push out the air bubbles.
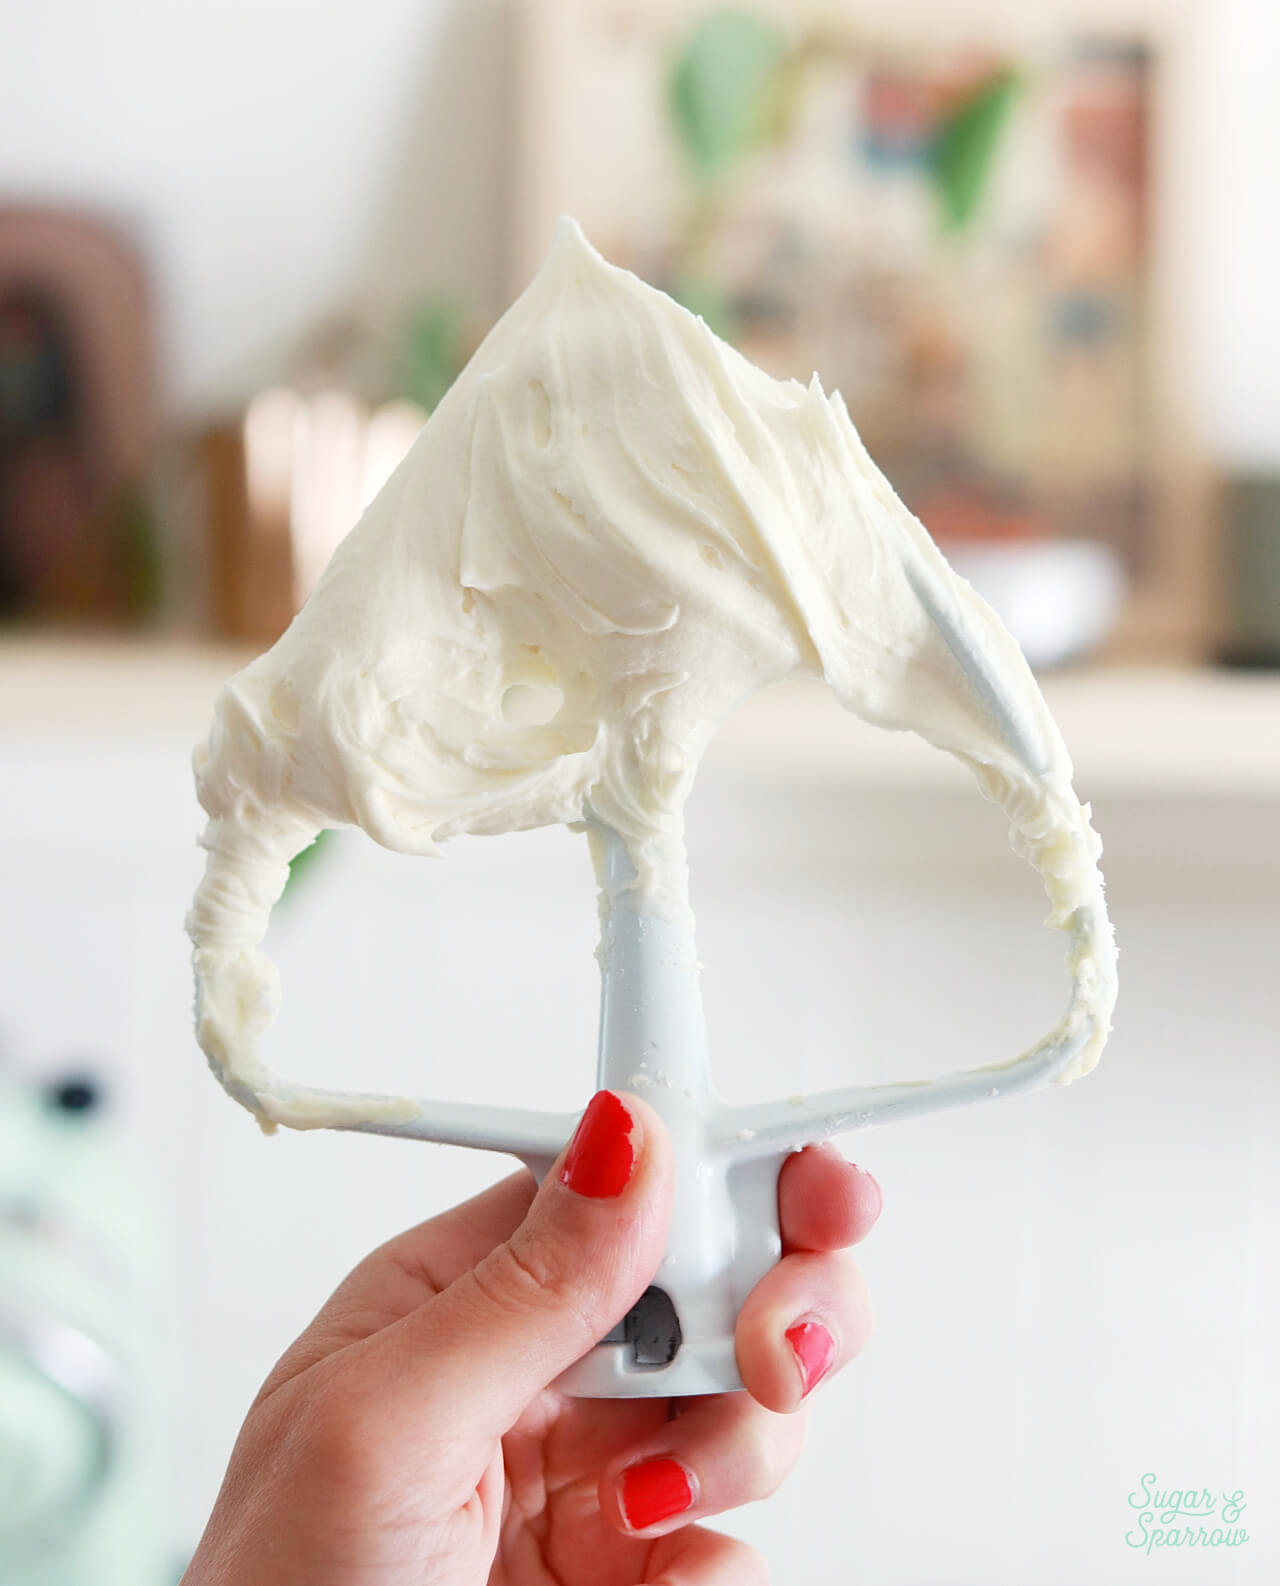
You’re Using the Wrong Mixer Attachment. The paddle attachment (also known as the flat beater attachment) is preferred for most buttercream recipes because it incorporates less air than the whisk attachment. Unless the recipe calls for a different mixer attachment, always use the paddle attachment.
You’re Over-Mixing. It’s important to allow the mixer time to incorporate all of the ingredients, but if you let the mixer run for too long (even on low speed!), more air will end up in your buttercream. A good rule of thumb is to let the mixer run just long enough to mix the ingredients cohesively and dissolve the powdered sugar, which should be no longer than 1-2 minutes at low speed after the last ingredient is added.
Temperature Differences. If you notice an air bubble forming on a decorated cake, this means that there was air trapped inside the cake that expanded and it’s looking for a way to escape. This can happen when you move a cake from a cold environment (like the refrigerator) to a drastically warmer environment. Air expands as it warms up, so if there’s a little pocket of air underneath the frosting finish or in between your cake layers, it may create an air bubble on the outside of the cake as it warms up. Some people call these “cake farts.”
How to Prevent Air Bubbles When Making Buttercream
Here are my best tips for preventing air bubbles before they start:
- Mix on Low Speed. Always mix on low speed after adding the powdered sugar in an American buttercream recipe or if you notice air bubbles in a meringue-based buttercream after adding the final ingredient.
- Use the Paddle Attachment. Unless a different attachment is specified, always use the paddle attachment on your stand mixer.
- Scrape the Bowl and Paddle Between Ingredient Additions. To ensure that your buttercream is uniform and to prevent over-mixing, scrape down the bowl and paddle between most ingredient additions. I usually scrape down the bowl and paddle between each addition of powdered sugar, then after adding the vanilla, milk, and salt.
- Check Your Buttercream Consistency. Sometimes when the buttercream is too thick, it’s more prone to air bubbles. Thinning it out with a little more milk (with an American buttercream recipe) or with a little melted buttercream (with an SMBC recipe) can help reduce the potential for air bubbles. I wrote a whole blog post about how to get the perfect buttercream consistency if you need more info.
Eliminating Air Bubbles From Already Made Buttercream
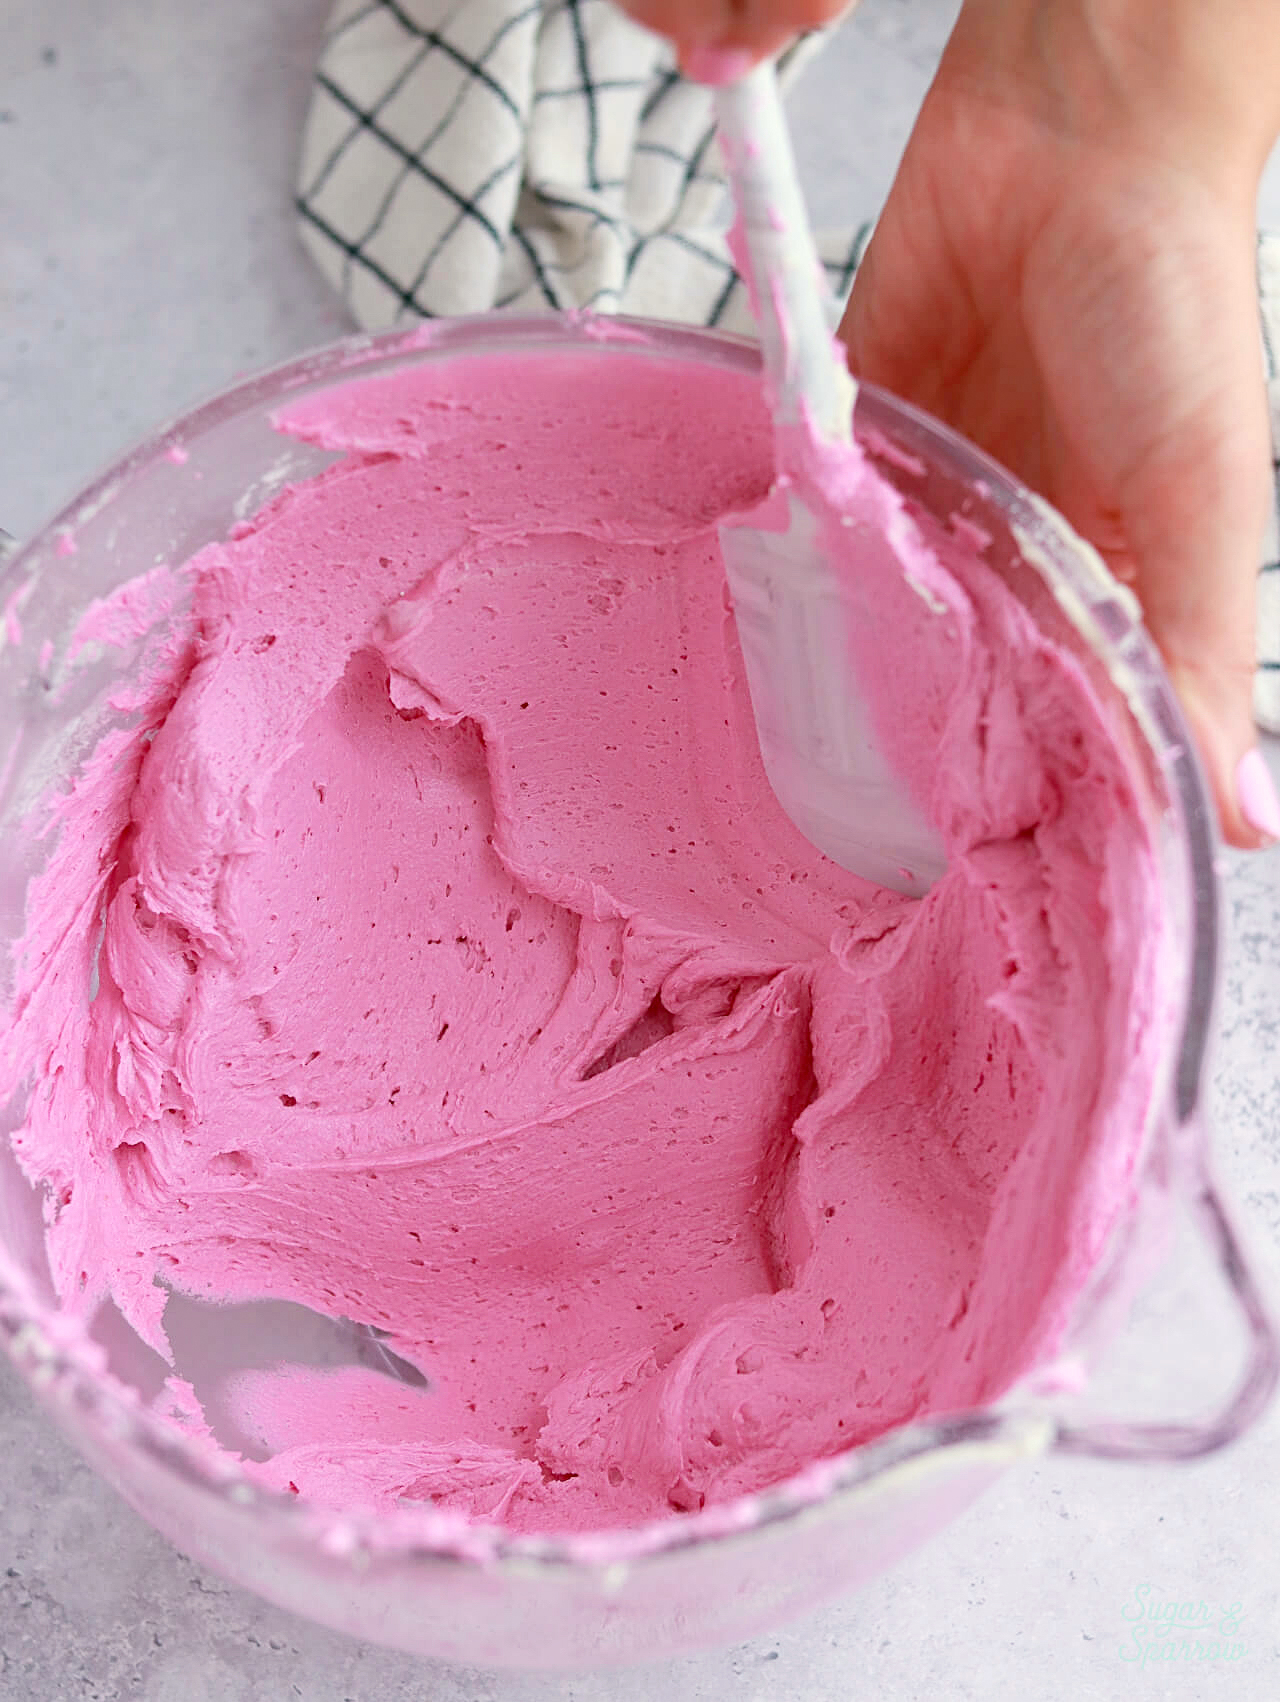
If you’ve already mixed up your buttercream frosting and notice that air bubbles have formed, there are three different ways to remove the air bubbles before you start frosting your cake. Each of these methods work with American buttercream and meringue-based buttercreams like Swiss meringue.
Method 1: The Resting Method
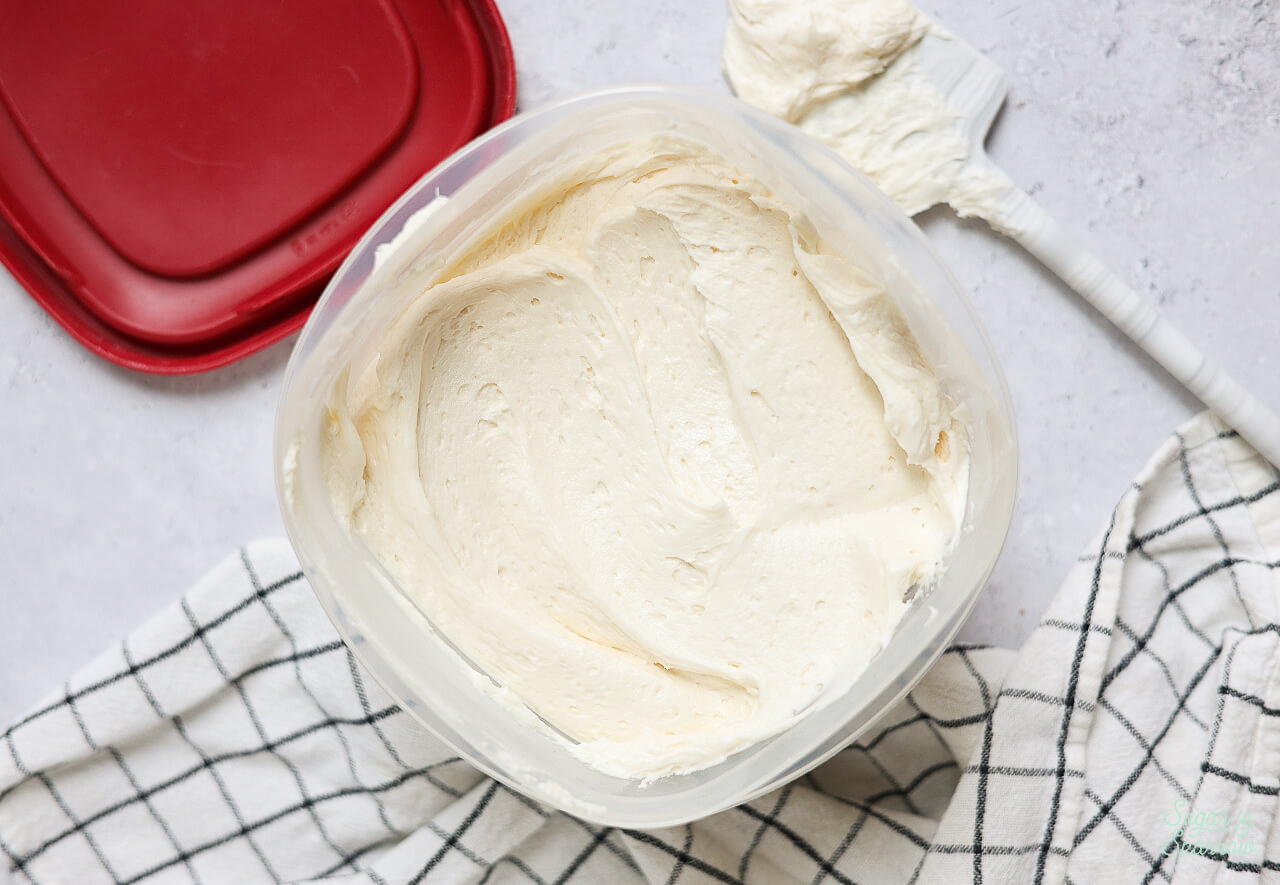
Add the air bubbly buttercream into an airtight container and let it rest for an hour or two, or overnight at room temperature. Somehow this relaxes the buttercream so that when you add it back into your stand mixer and remix at low speed, all of the air is easily pushed out of the buttercream. This works really well if you’re making buttercream ahead of time or just have the extra time to let the frosting rest.
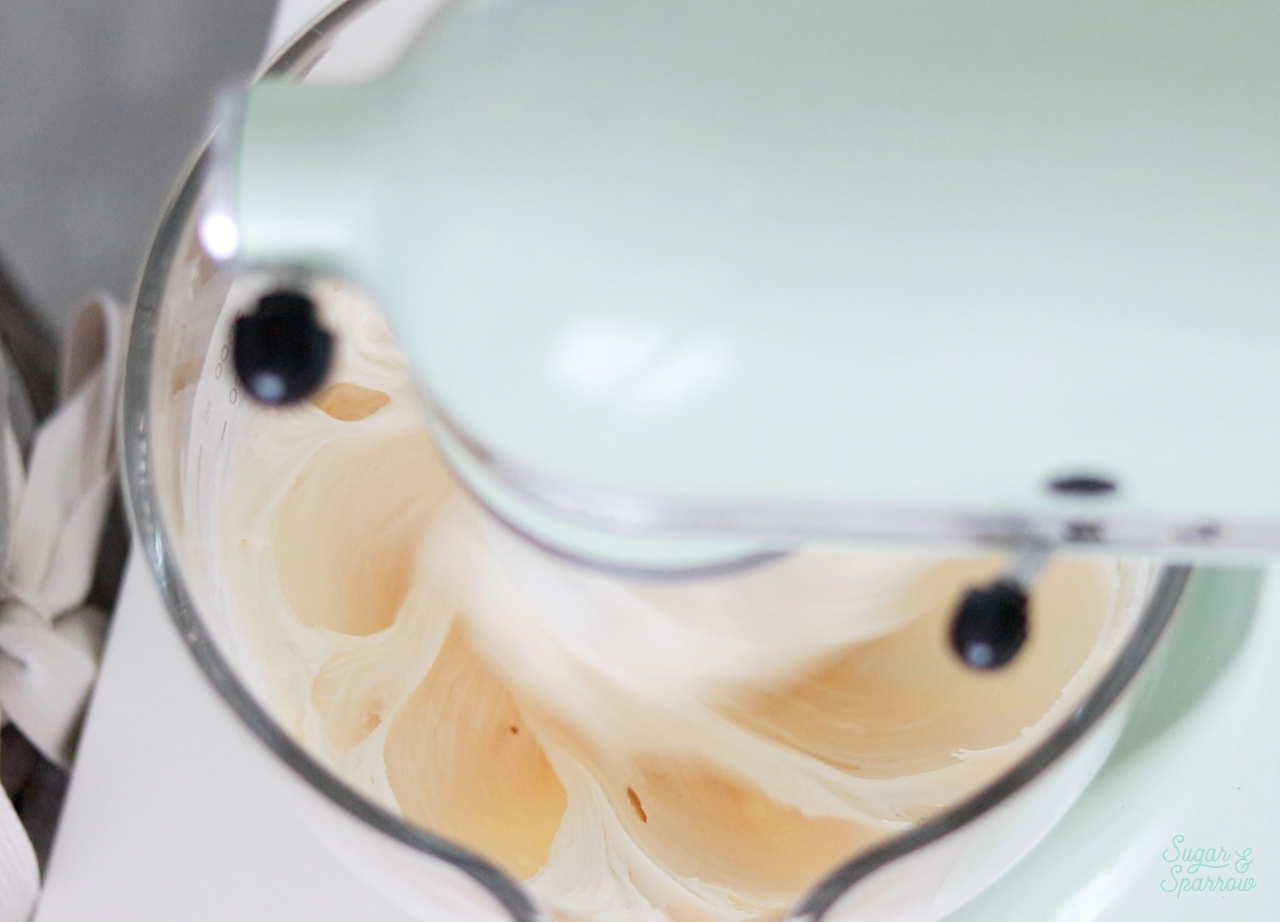
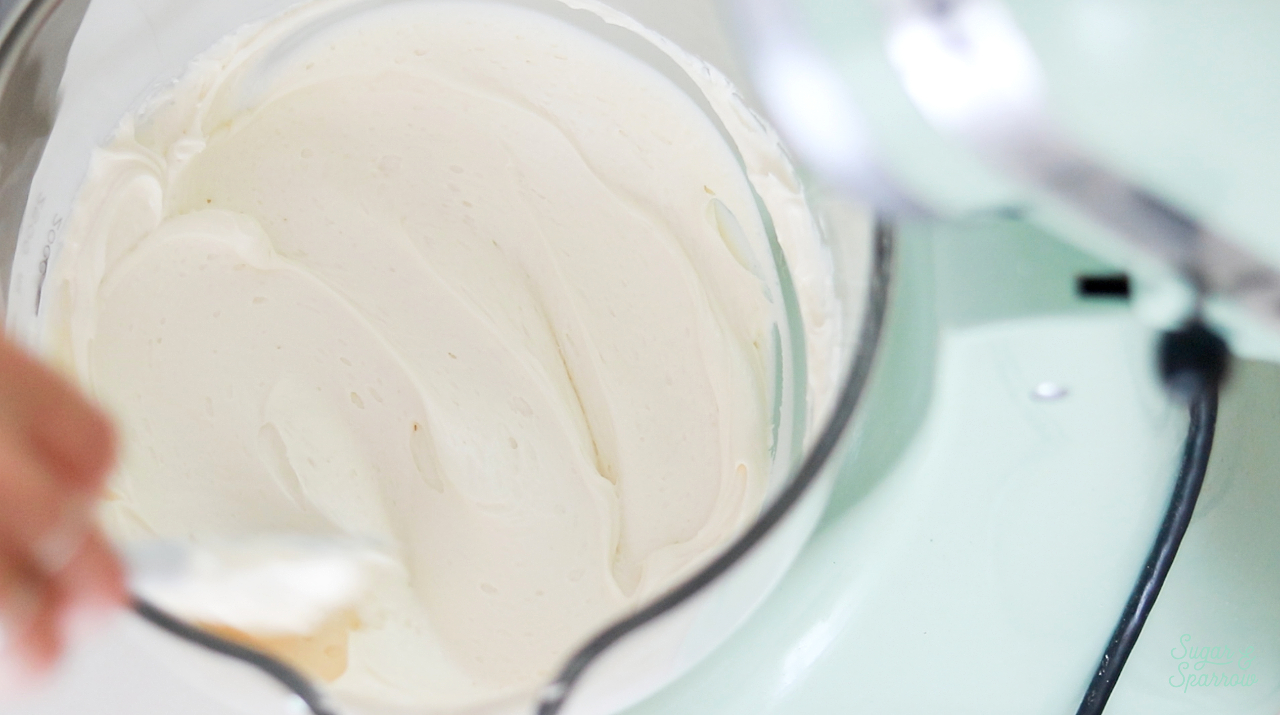
Method 2 (Preferred): The Melting Method
If you need those air bubbles gone immediately, the melting method is amazing! Simply add about ¼ Cup of the buttercream into a small microwave-safe bowl and microwave the frosting for about 5 seconds. This should leave you with buttercream that is melted, but still room temperature.
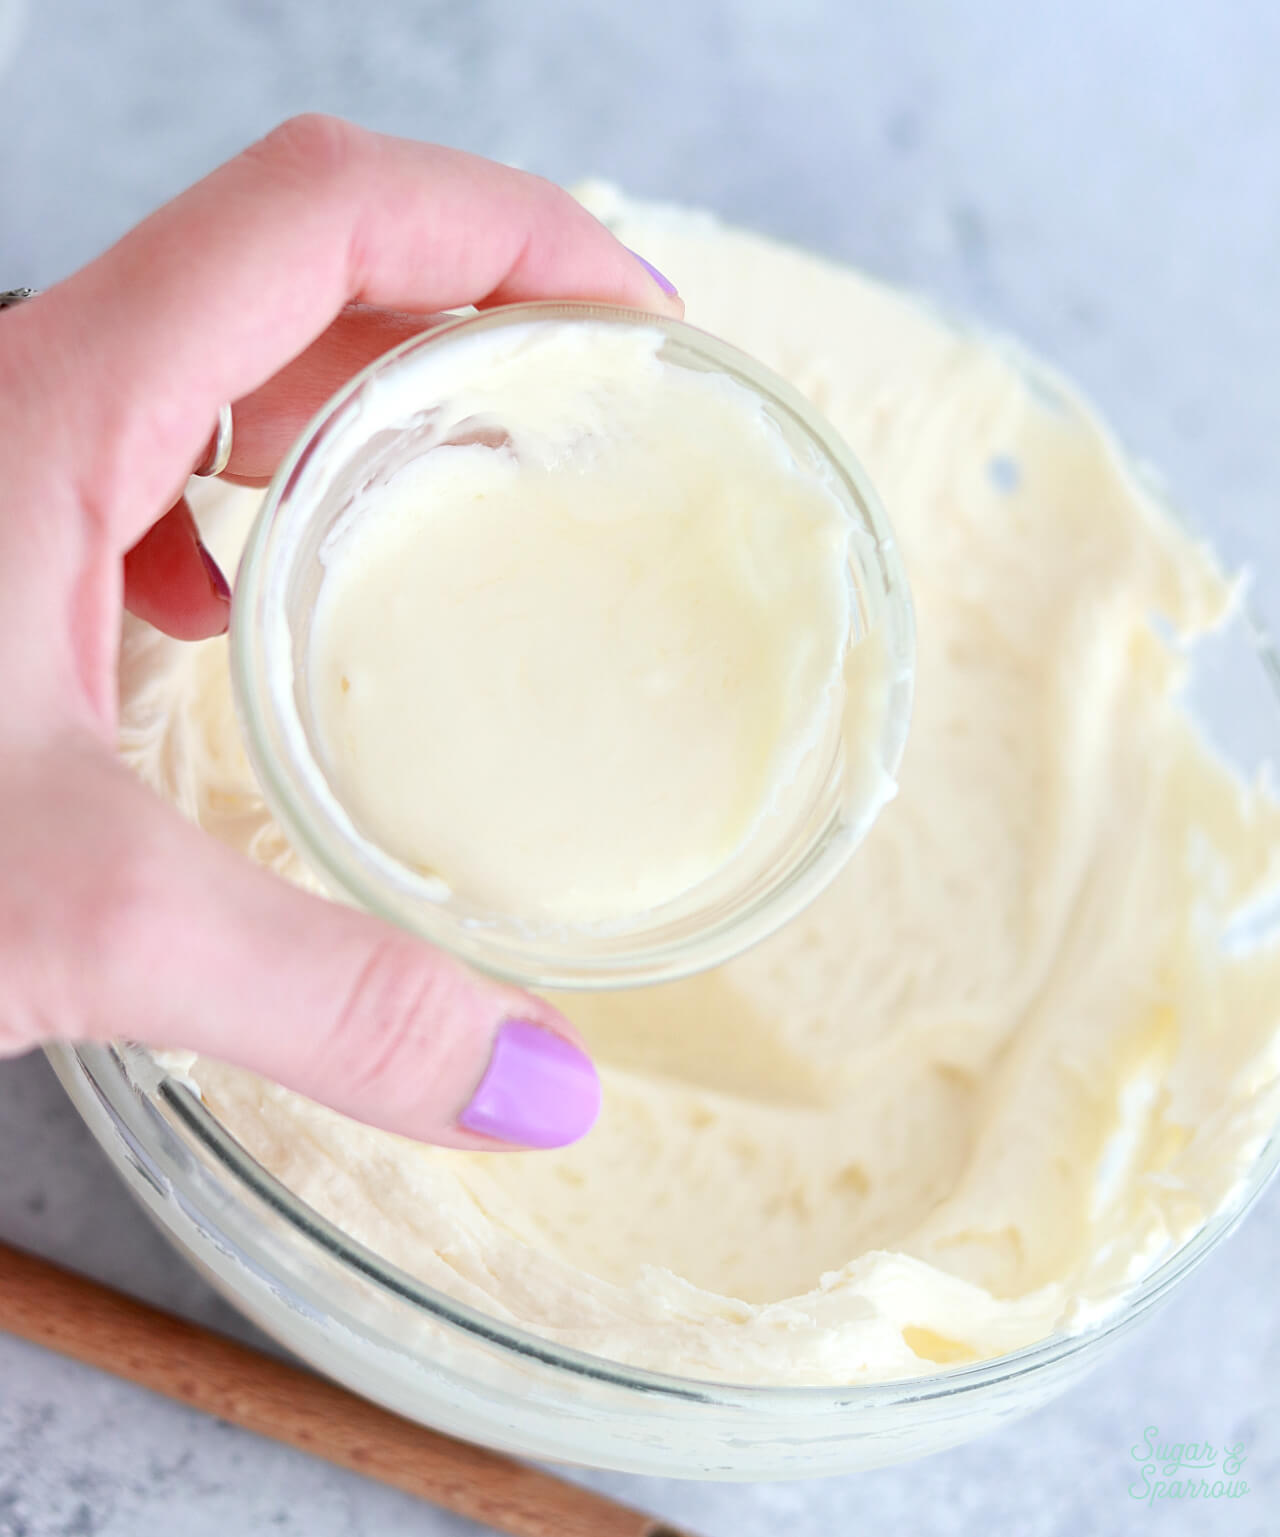
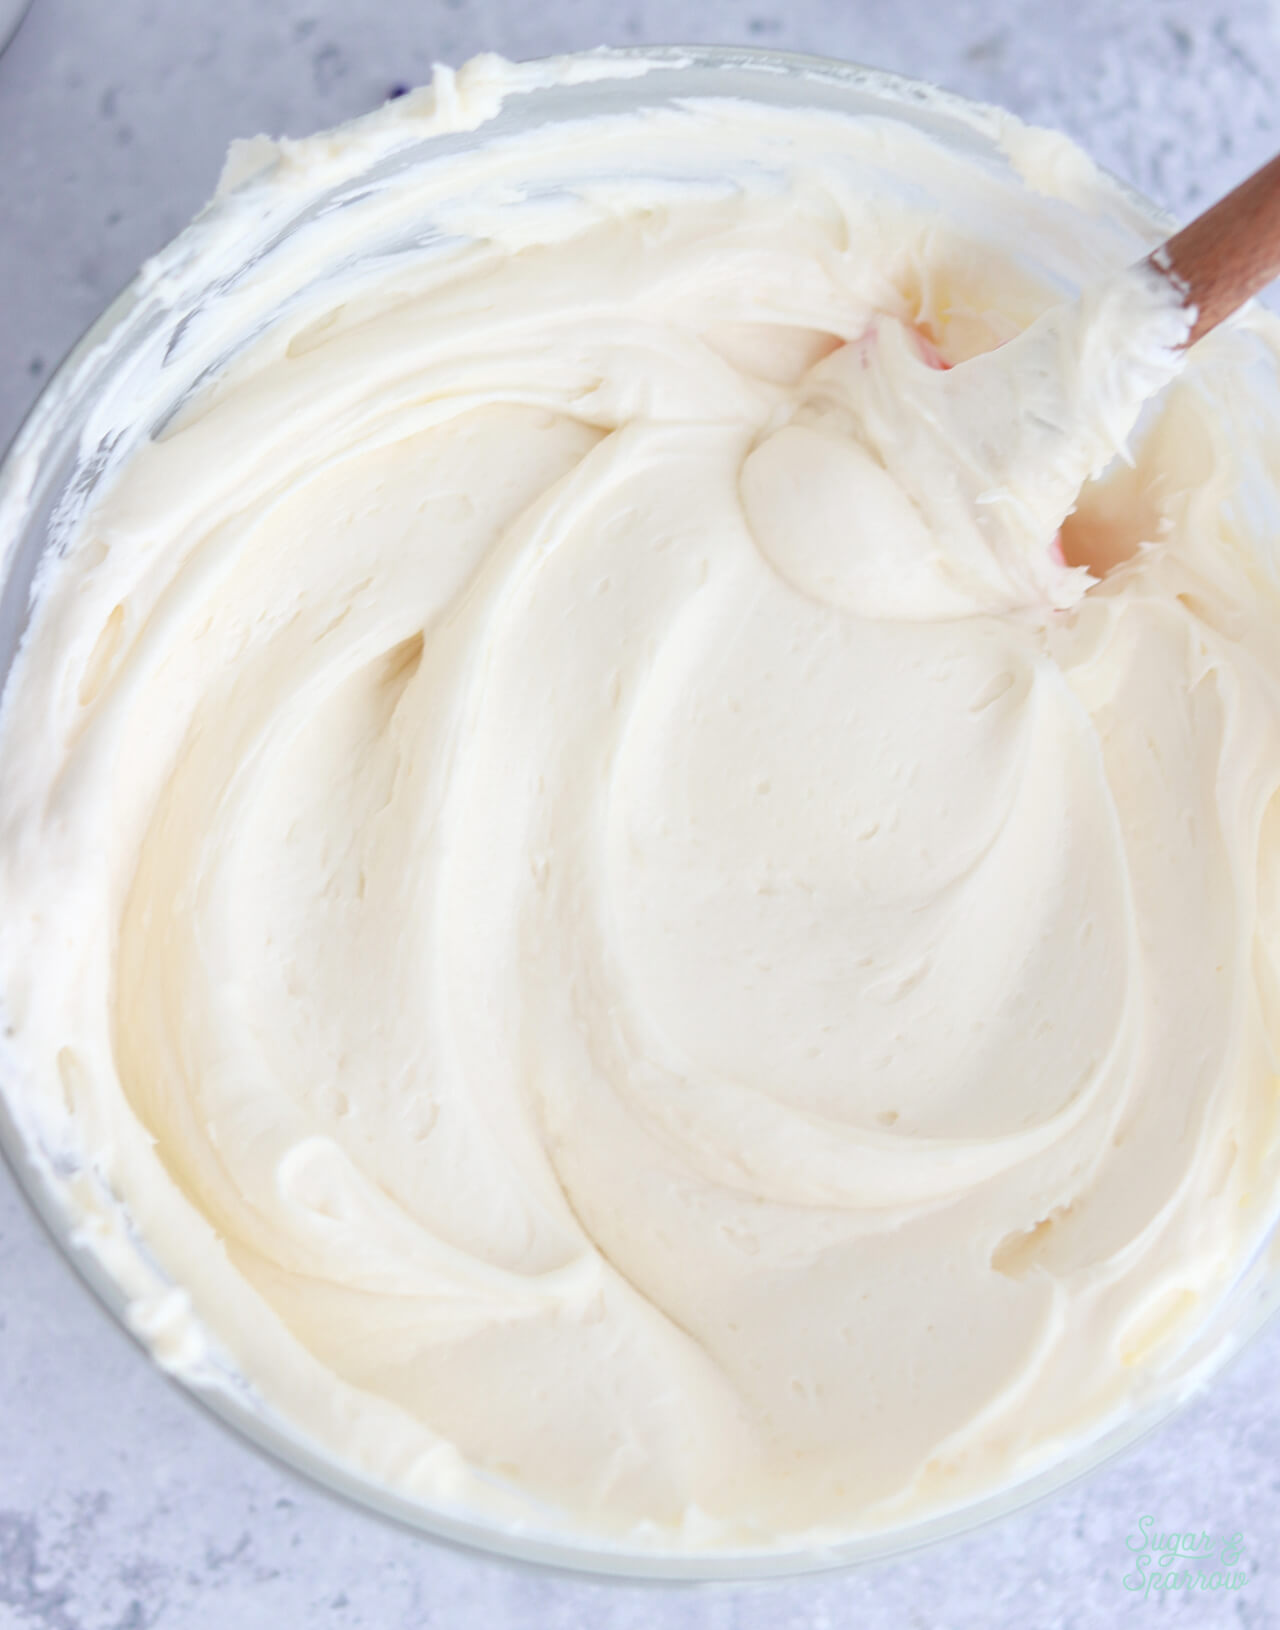
Mix the melted buttercream back into the bowl of frosting, either by hand or with a stand mixer on low speed. Repeat if needed. Much like using a gently heated icing smoother on a cake, this method irons the air bubbles out of the buttercream and creates a silky smooth texture.
Method 3: The Manual Method
If you have the arm strength, you can use a rubber spatula to press the buttercream into the sides of your mixing bowl and manually press out the air bubbles. This is a little more time consuming, but some people swear by it.
Troubleshooting Air Bubbles During or After Cake Decorating
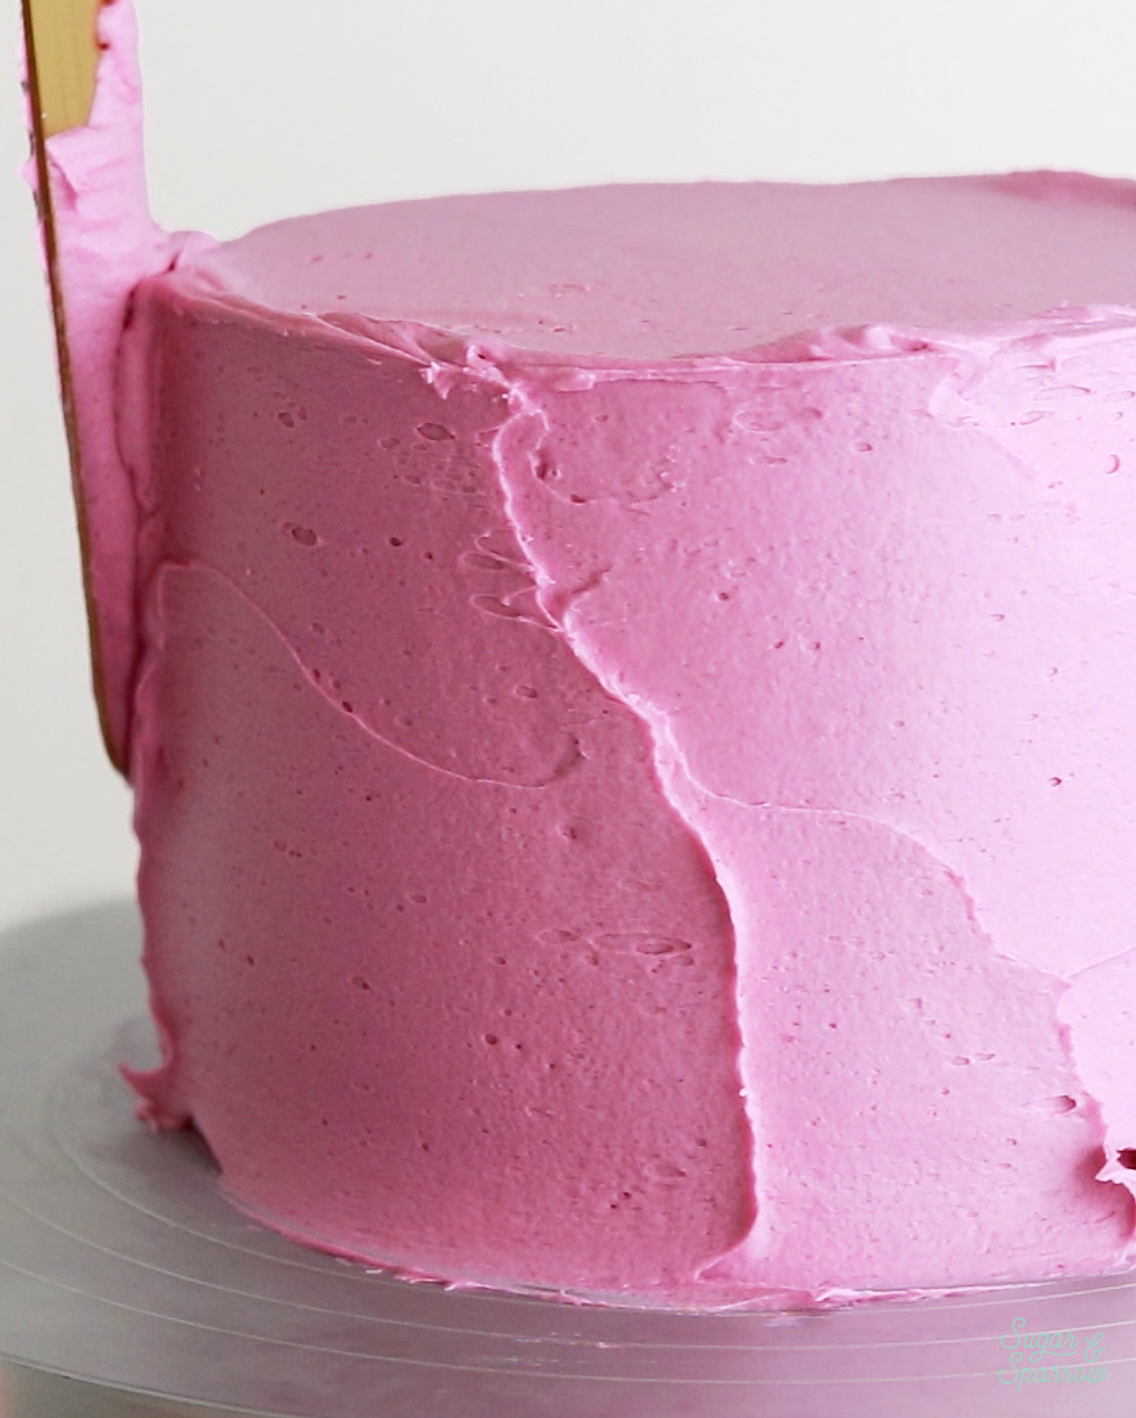
What if you didn’t notice the air bubbles until you started frosting your cake? If you notice that the frosting you’re applying to your cake is riddled with air bubbles, fear not! Simply use one of the above methods to fix the rest of your buttercream, then continue on with your cake decorating.
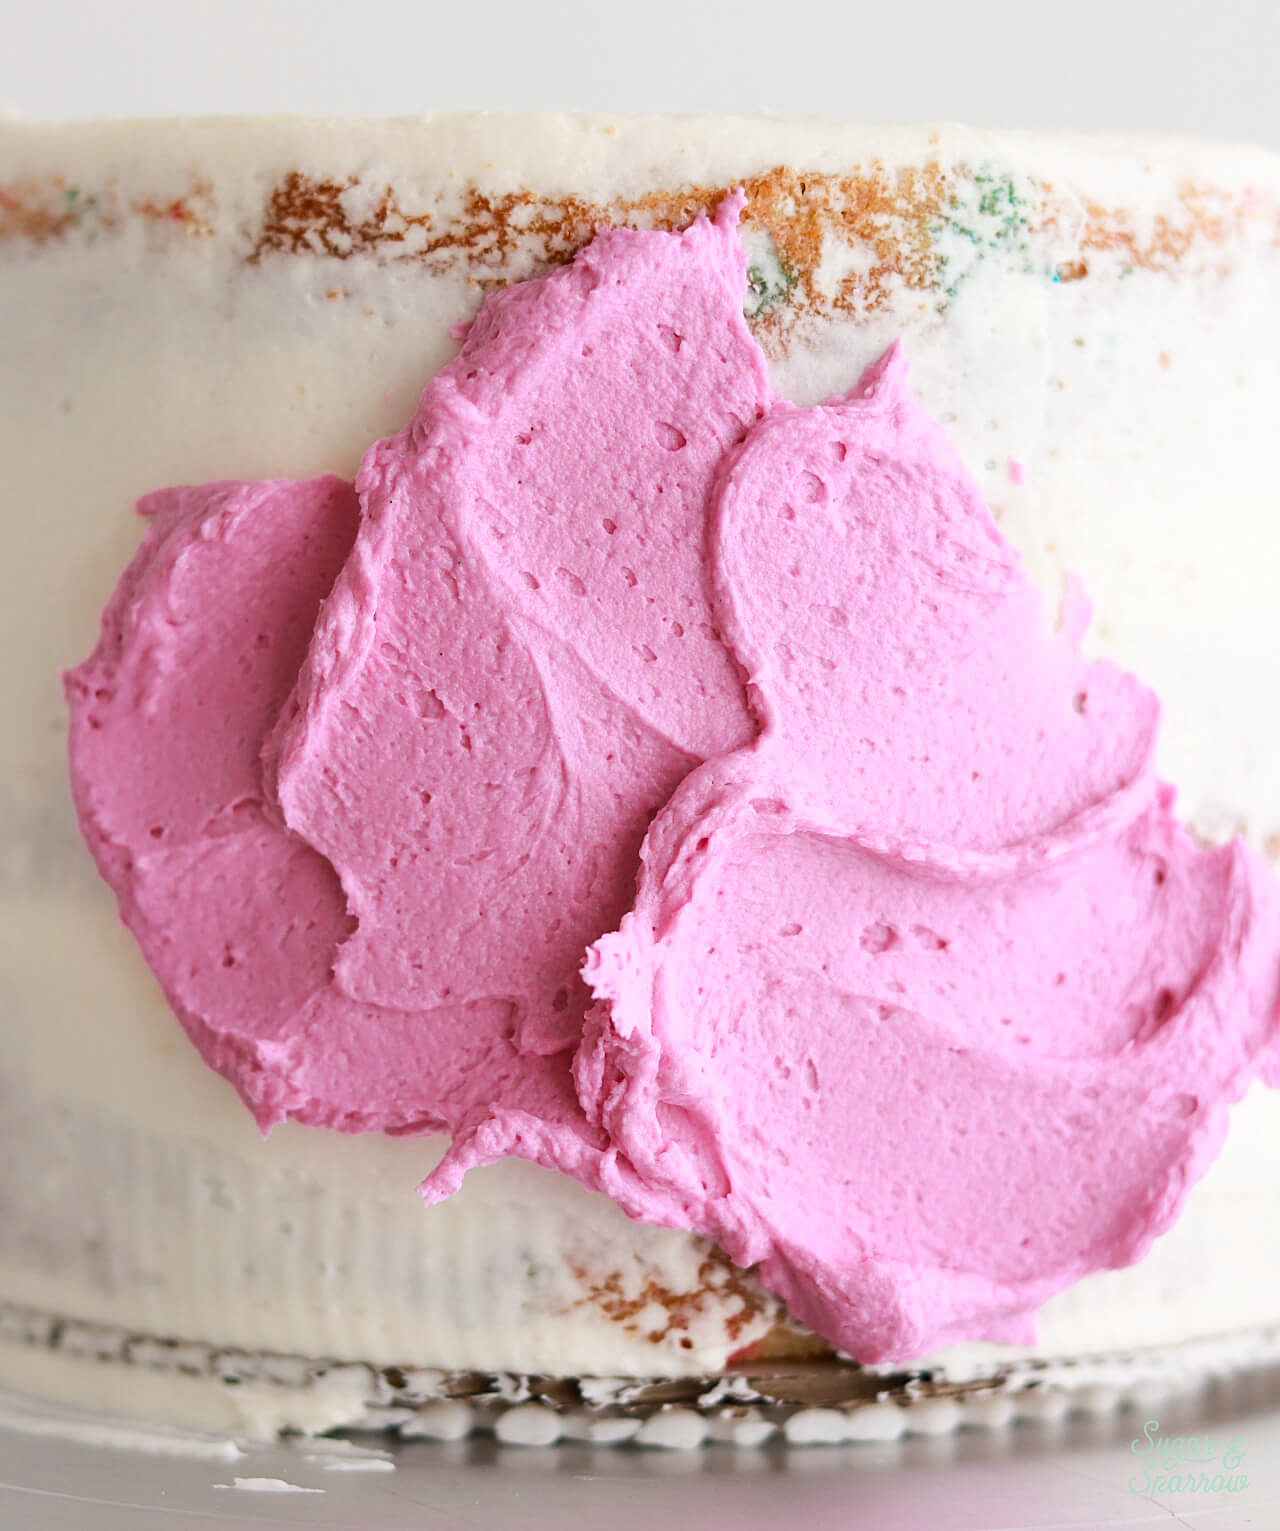
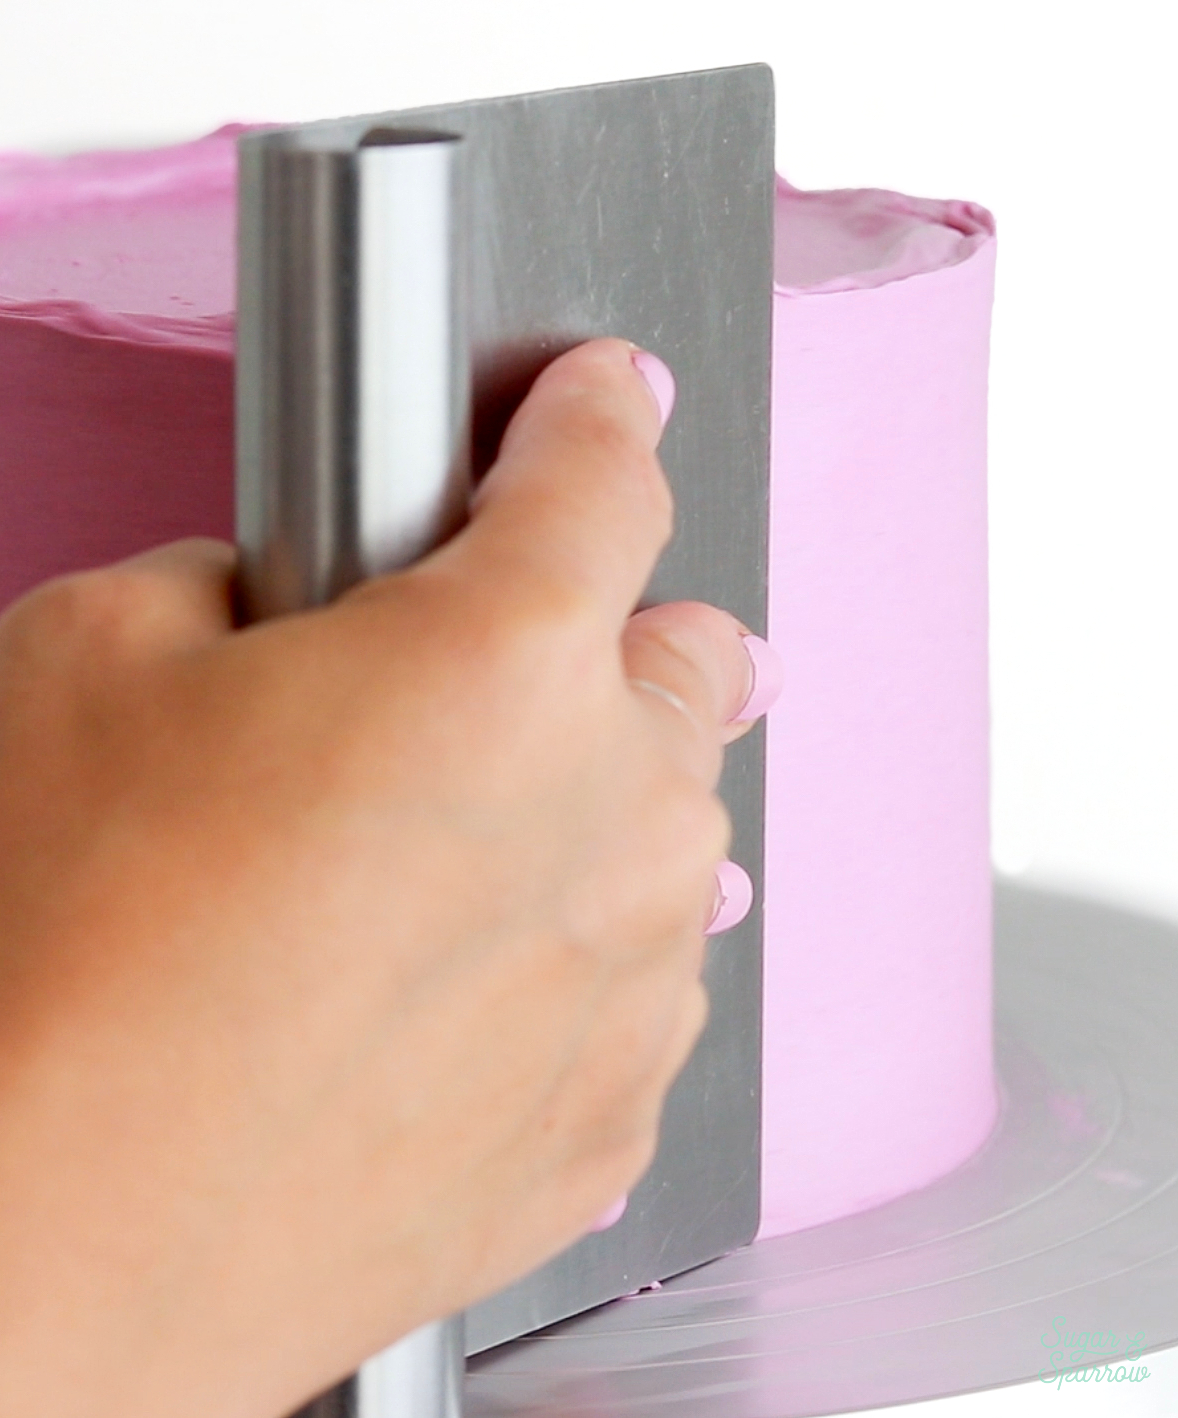
What if you didn’t notice the air bubbles until you applied a bunch of frosting and started smoothing your cake? Pop the frosted cake in the refrigerator while you fix the rest of your frosting with any of the above methods. You’ll want to refrigerate the cake until it’s firm to the touch, which takes about 15-20 minutes. When it reaches this point, continue frosting your cake with a layer of the fixed, air bubble free buttercream. The newly applied layer of frosting will fill in any holes left over from the last frosting application and give you another chance at the perfect frosting finish.
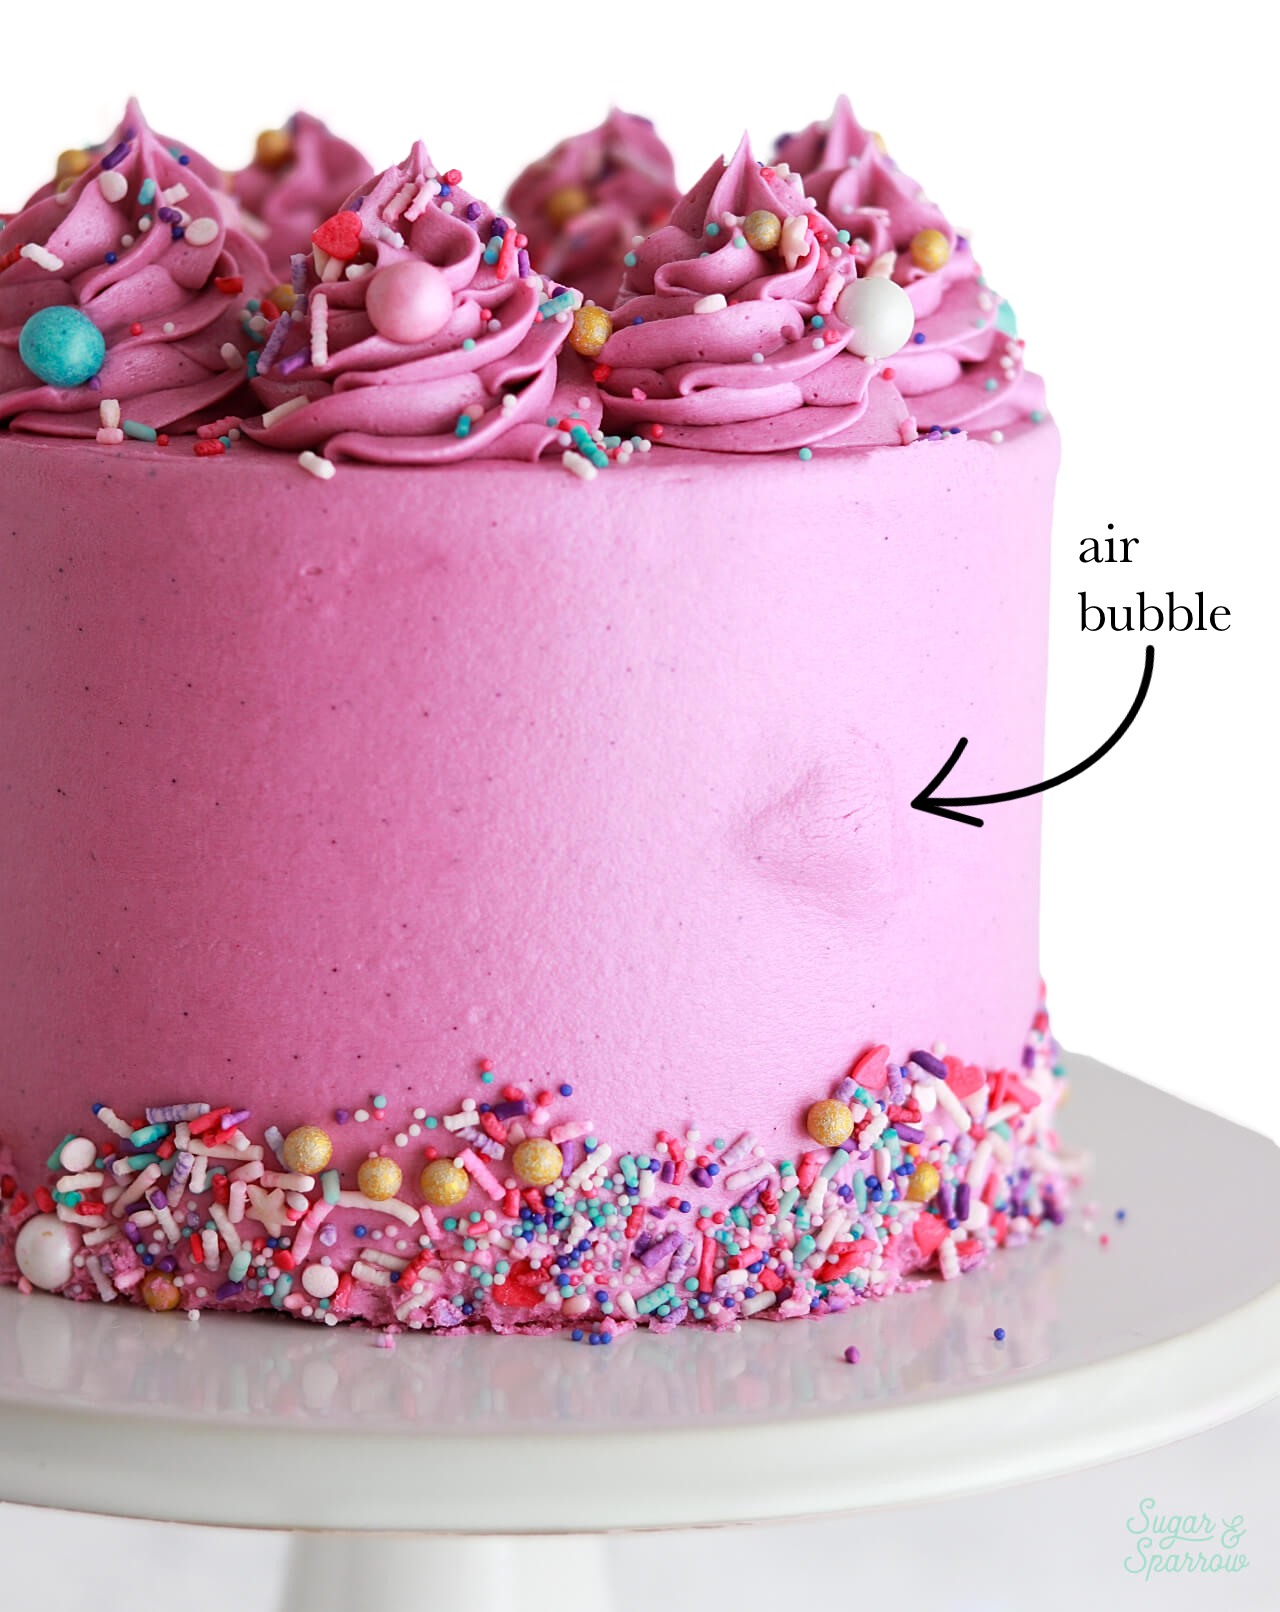
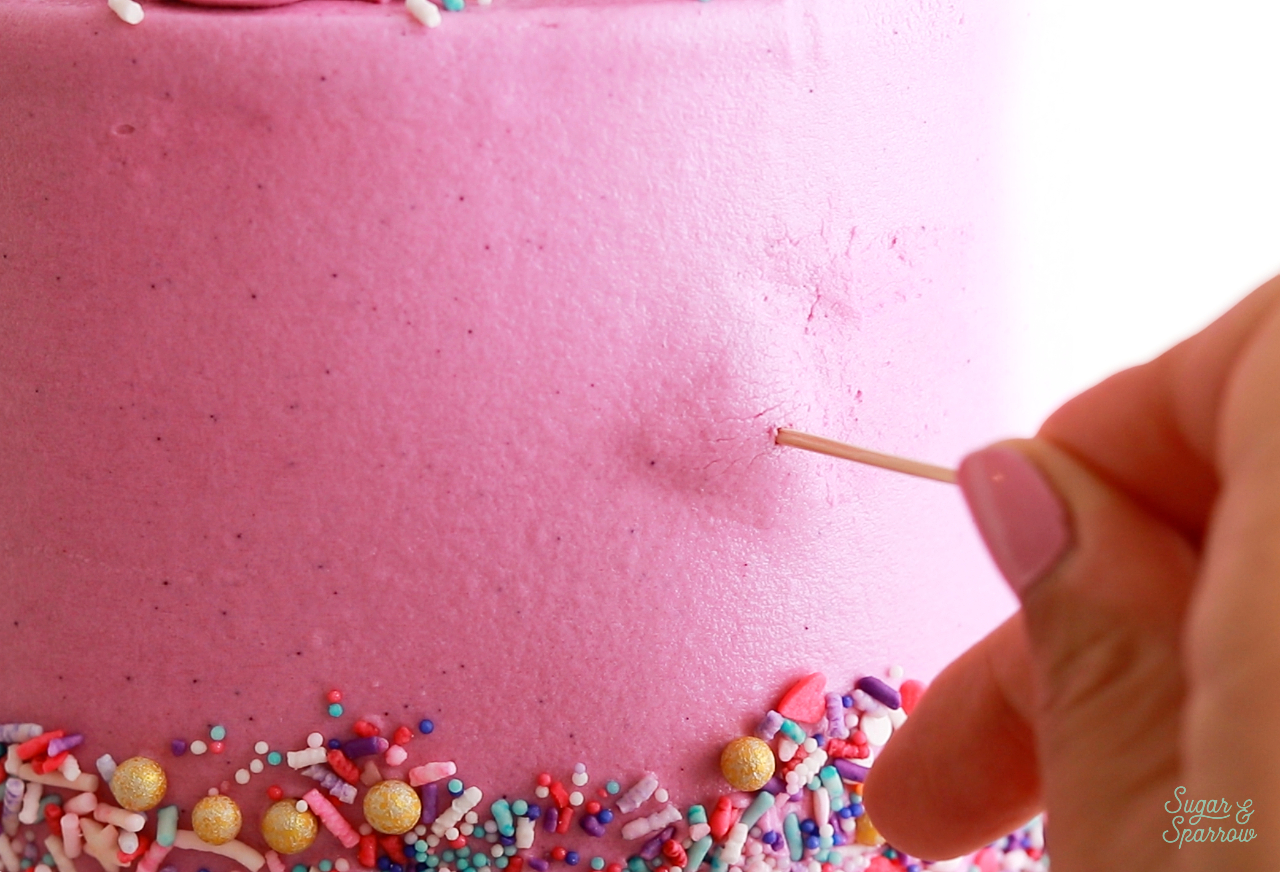
What if you spot an air bubble after the decorated cake has settled? First, know that this has happened to almost every cake decorator on the planet! Remember in the “Why Do Air Bubbles Form” section where we talked about air inside the cake expanding and looking for a place to escape? That’s what’s happening here. And it usually happens at the worst time, like when it’s on display at an event.
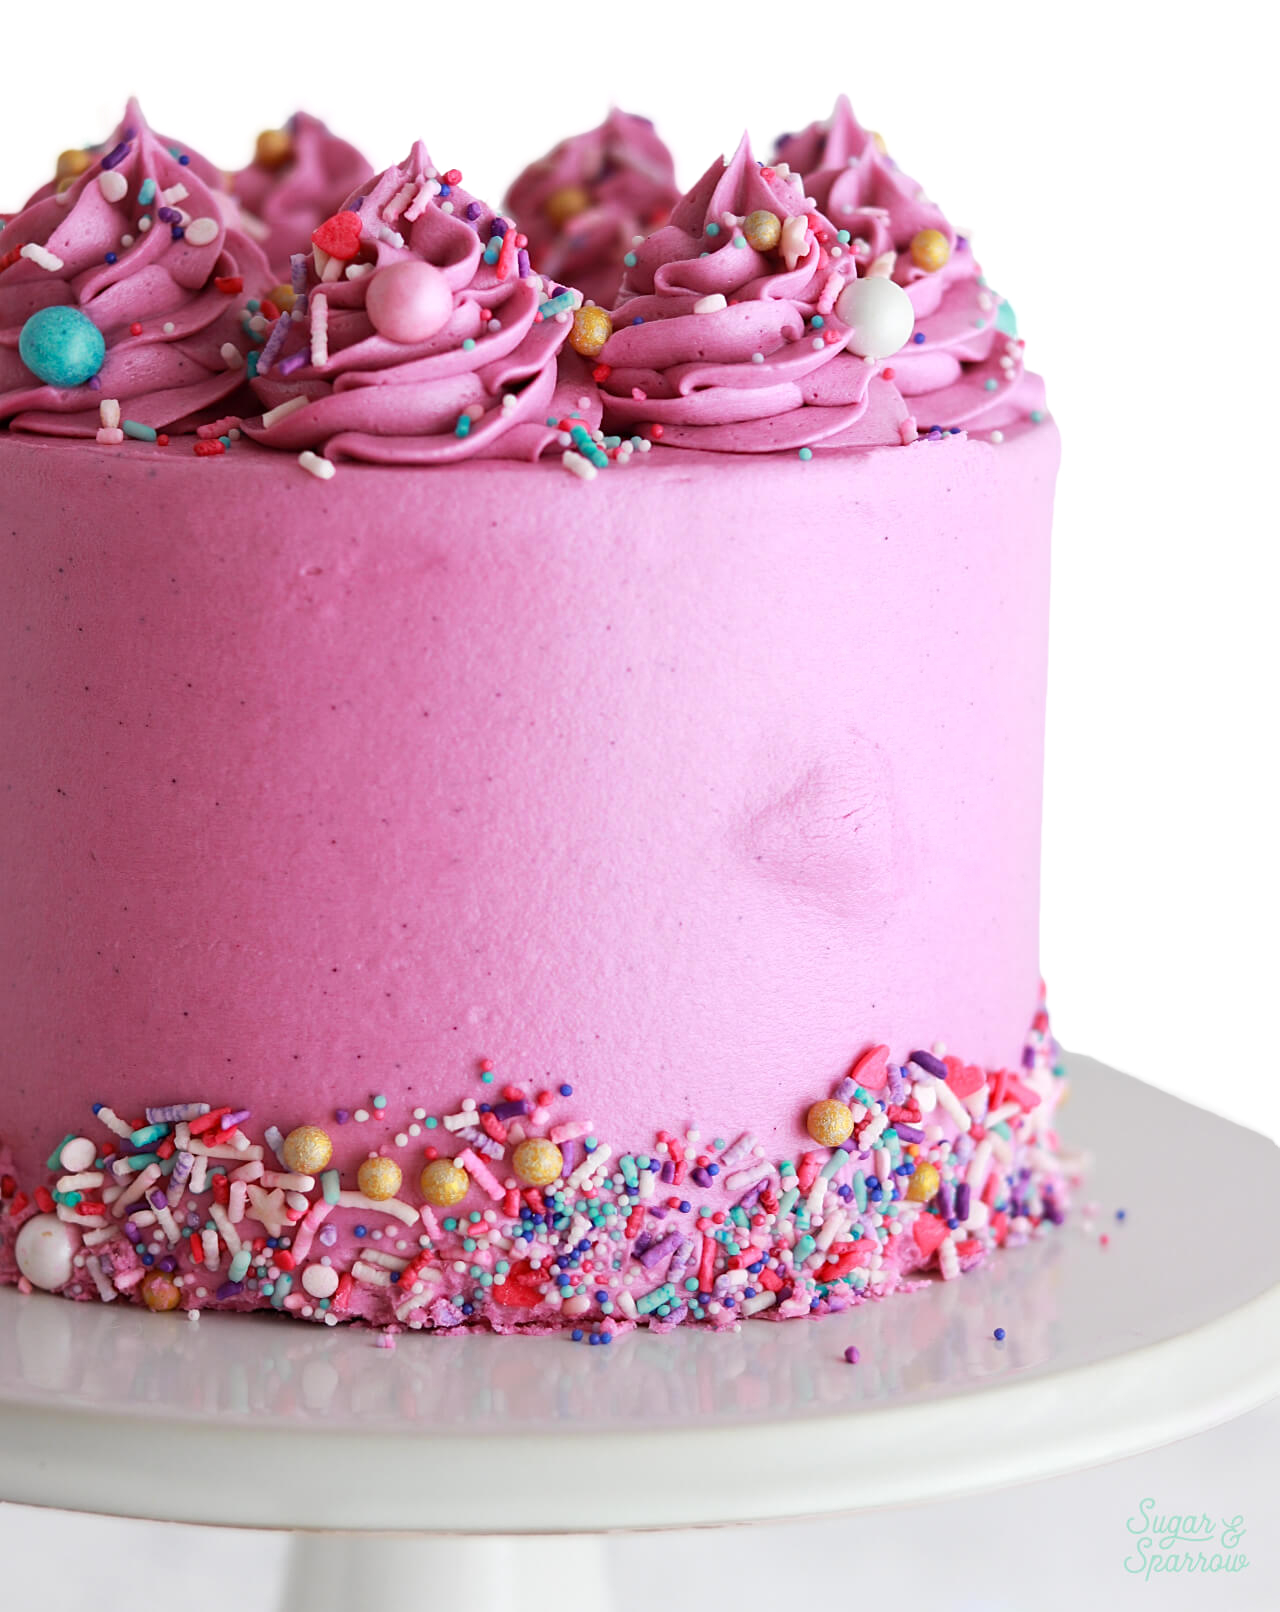
To fix it, use a toothpick or other sharp object (I’ve resorted to a fork!) to pop the air bubble, then gently smooth it out with a spatula or other flat tool.
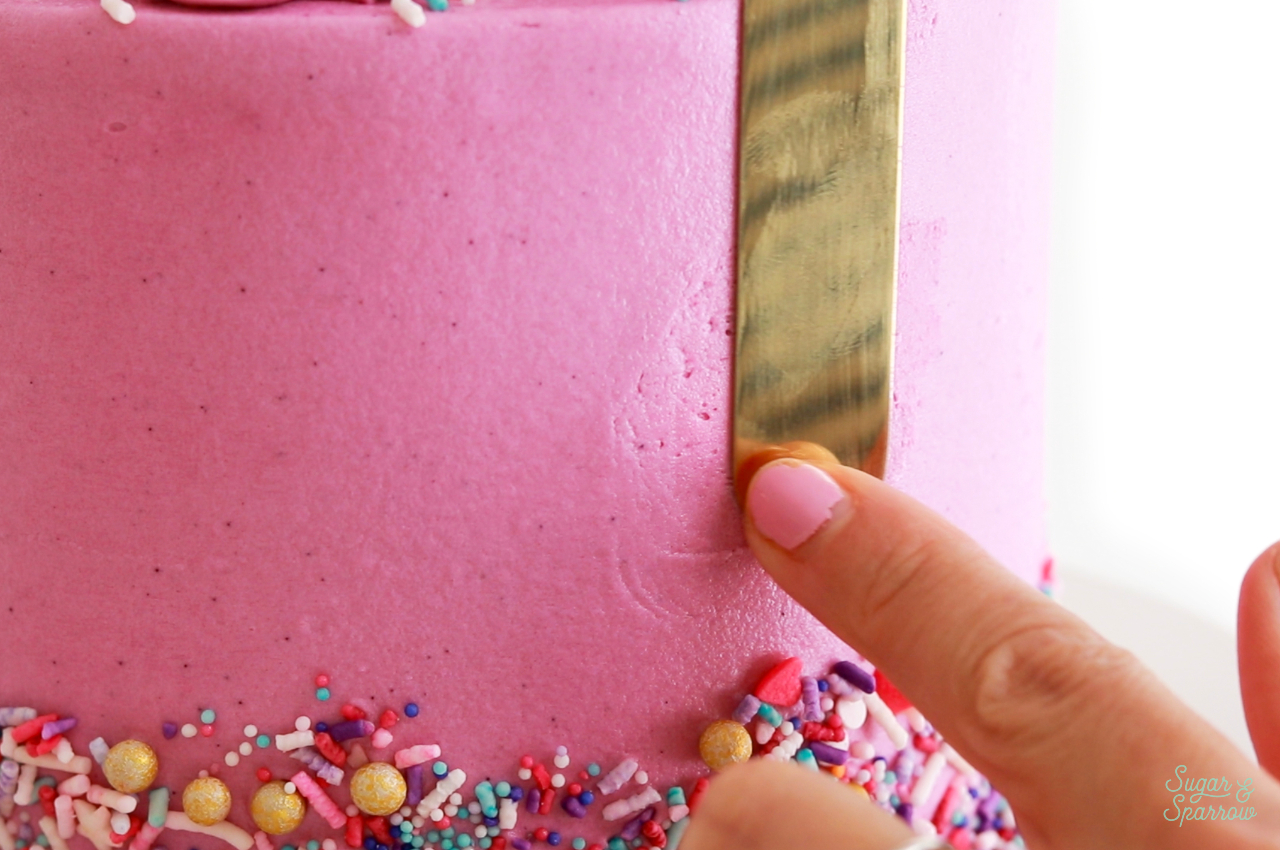
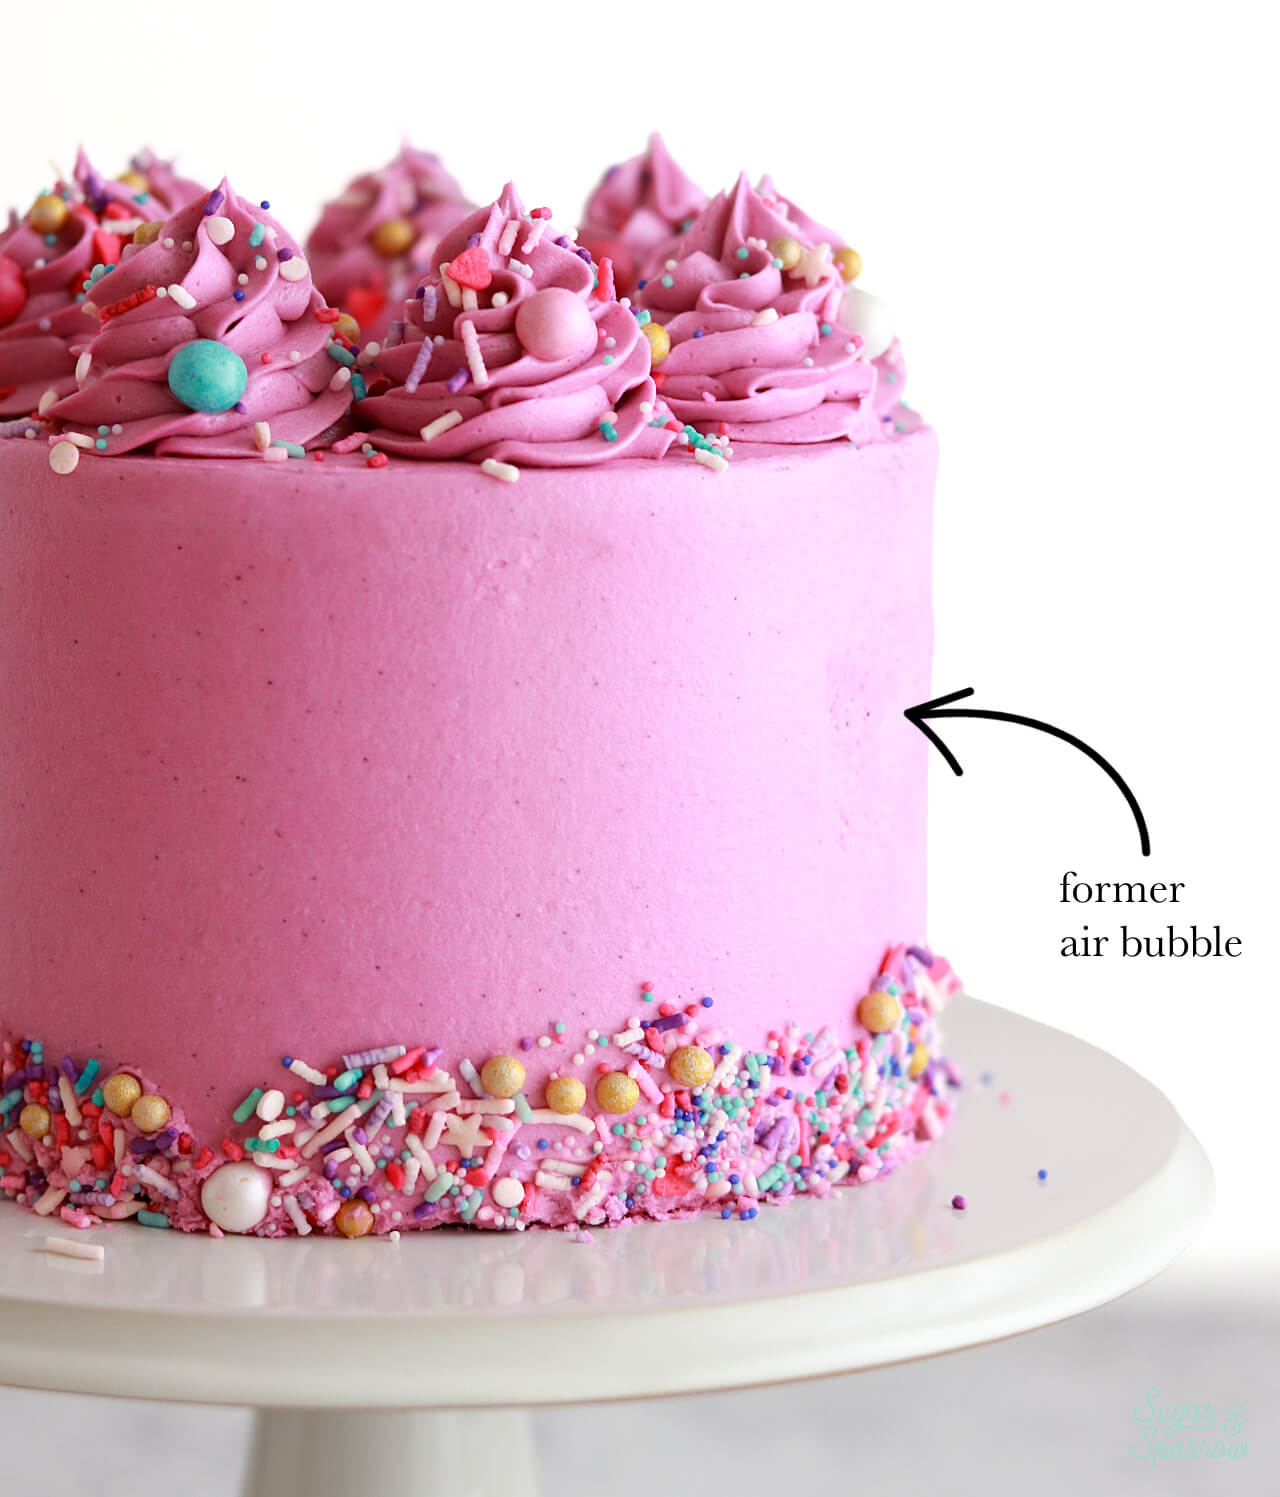
You might be left with a slight mark where the air bubble once was, but it will probably be less noticeable than the air bubble was! And if you can rotate the cake so that the former air bubble is in the back, all the better.
Bonus: How to Get a Super Smooth Buttercream Finish
Now you know the best ways to get rid of air bubbles in your frosting at every point of the cake decorating process! If you’re still struggling with achieving a smooth buttercream finish, you’ll find all my best tips in this blog post, including my favorite smooth buttercream hack!
I hope I answered all the air bubble questions you might have but if I missed anything, let me know in the comments below.


My icing color is not staying consistent once it is on the cake. It looks great in the mixing bowl, but is splotchy once the cake sits for a while. Please help!
Hi Debbie! What kind of icing color are you using and what kind of buttercream (American, Swiss Meringue, etc)? That will help me determine what’s happening there.
Thank you for all your tutorial and educational blogs and videos. I routinely read all your posts.
I’m so happy they’re helpful, Briana! Thanks for letting me know 🙂