• Cake
  • Frosting
  • YouTube
  • My Favorite Tools
  • Nav Social Icons

  • Skip to primary navigation
  • Skip to main content
  • Skip to primary sidebar
  • Skip to footer
  • Recipes
    • Cake
    • Cupcakes
    • Frosting
    • Ice Cream
    • Vegan
  • Cake Basics
  • Tutorials
  • Blog
  • About
  • Mobile Menu Widgets

    Connect

    Search

Sugar & Sparrow logo in script font

Sugar & Sparrow

Lifestyle and Cake from Portland Oregon

  • Cake Basics
  • Recipes
    • Cake
    • Cupcakes
    • Cookies & Bars
    • Filling
    • Frosting
    • Ice Cream
    • No-Bake
    • Small Batch
    • Vegan
  • Tutorials
  • Book
  • Blog
  • About

DIY Gumpaste Letter Cupcake Toppers

May 18, 2018 · In: Featured, Tutorials

The other day I got a request to make a customized letter topper for a cupcake in one of my orders. I’ll admit, I’d actually never made a monogram cupcake topper before but I’m always up for a challenge (a great and terrible quality to have, depending on the situation). Fortunately, this ended up being an incredibly easy DIY and totally customizable for whatever vibe you’re going for, from the font to the finish!

DIY monogram cupcake toppers by Sugar and Sparrow

You Will Need:

  • Gumpaste (I use this. Most craft stores with a cake decorating aisle will have it.)
  • Small rolling pin and smooth surface to roll gumpaste out
  • Crisco
  • Printed letter templates
  • Exacto knife
  • Wax paper
  • Flat toothpicks or floral wire
  • Finishing touches like sprinkles, edible glitter, Edible Art Paint, etc (optional)

Step 1: Print Out A Letter Template

In order to get the look you really want, spend some time looking through different fonts on your computer. I chose a few different fonts for this tutorial just to show you that anything is possible with a little gumpaste and an exacto knife.

DIy gumpaste letter templates

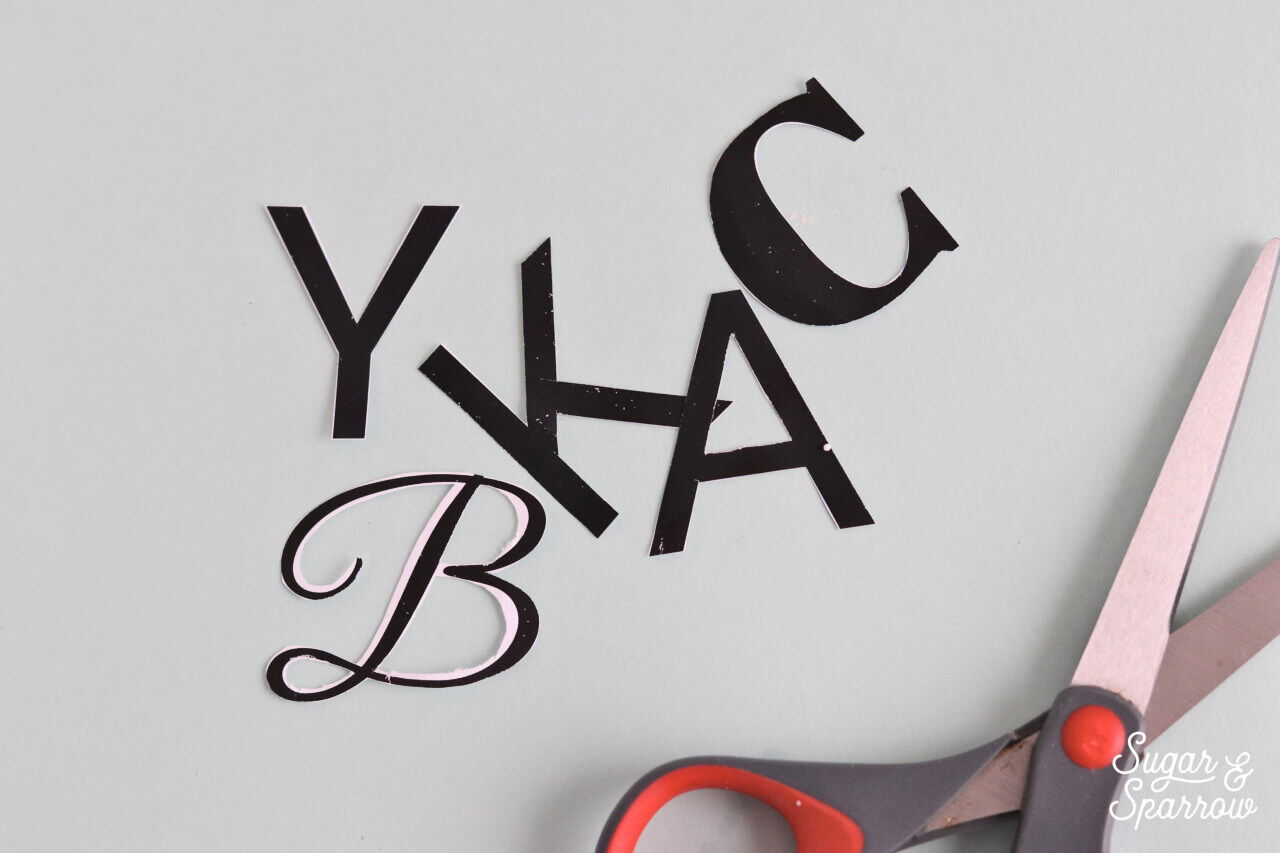
Print the letter(s) out onto paper once you’ve got a font you like and it’s sized perfectly, then carefully cut the letter out to use as a template.

Step 2: Make The Gumpaste Monogram

Roll out the gumpaste to the thickness of about ⅛ of an inch using a little crisco to keep it from sticking to your surface. Place your template over the top of the gumpaste and carefully cut around it with an exacto knife.

gumpaste letter cupcake topper tutorial

Stick toothpicks or floral wire into the bottom of the monogram and let it dry for about 15 minutes before carefully transferring it to a piece of wax paper to continue drying. The monogram should be completely dry in 24-48 hours. Flip it over halfway through the drying process so that both sides get equal drying time.

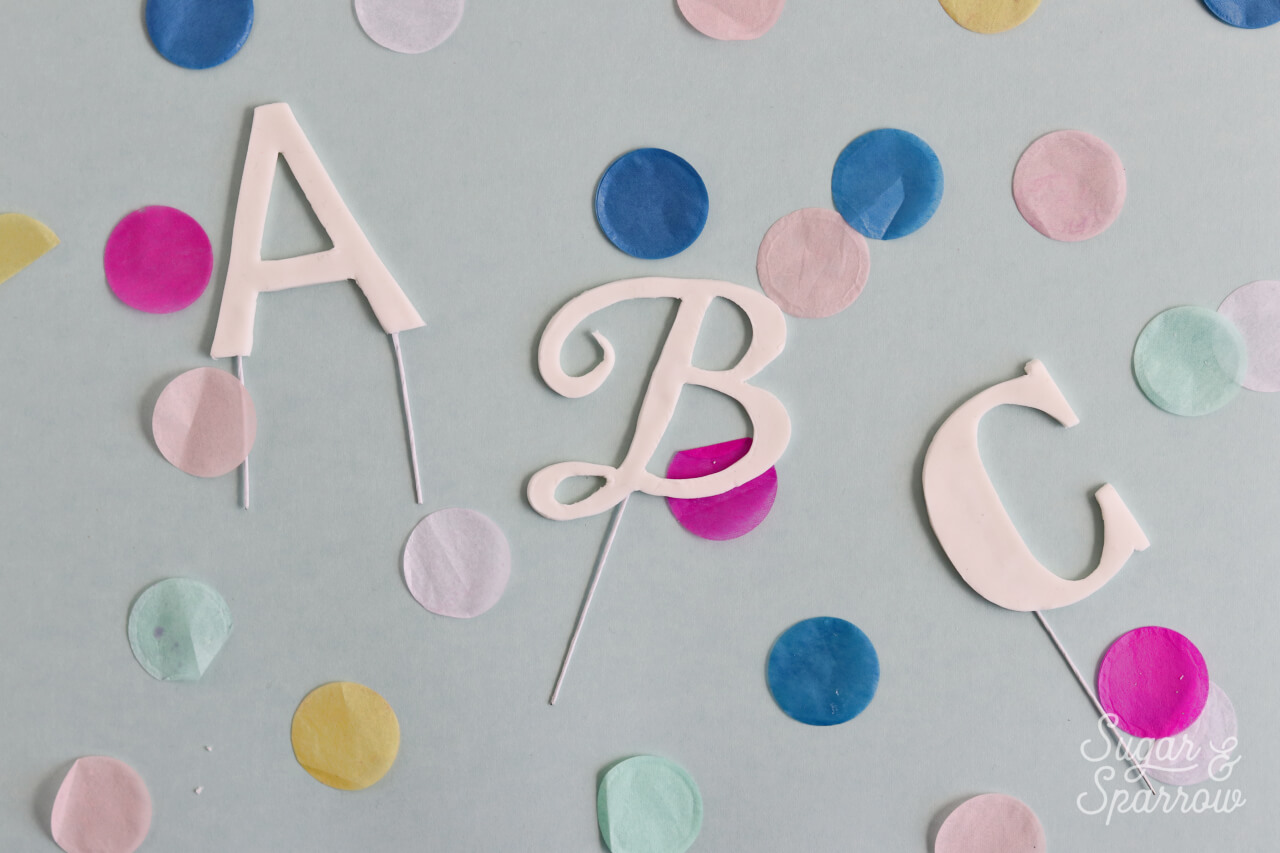
Step 3: Customize The Finish

The monograms look great in plain white, or you can color the gumpaste with food color gels before rolling it out in step 2. I’ve also found some other awesome ways to customize the finish after the drying process though:

Sprinkled Monogram Topper

Because what’s more celebratory than sprinkles?

sprinkled monogram cupcake topper by sugar and sparrow

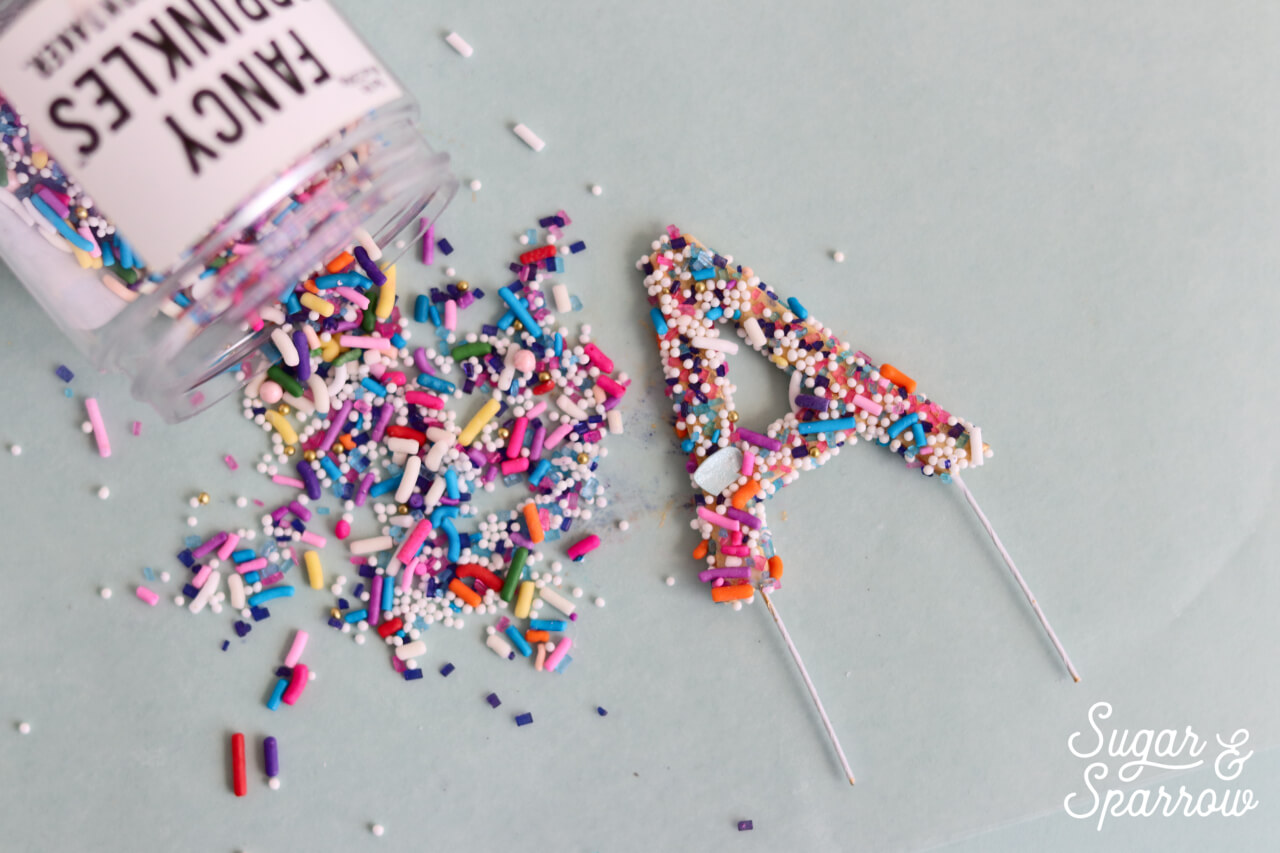
For this cupcake topper, I mixed water and gumpaste together to make a “glue” (1 Tbsp water + a small ¼ inch piece of gumpaste. Let rest for 30 minutes until gumpaste is dissolved and you have yourself a glue!), brushed it over the monogram, and stuck sprinkles all over it.

Metallic Monogram Topper

For the metallic gold look, I used Edible Art Paint in Glamorous Gold. They make a ton of different colors, both metallic and non, and I love this stuff so much for painting fondant, gumpaste, and even buttercream!

metallic letter cupcake topper DIY

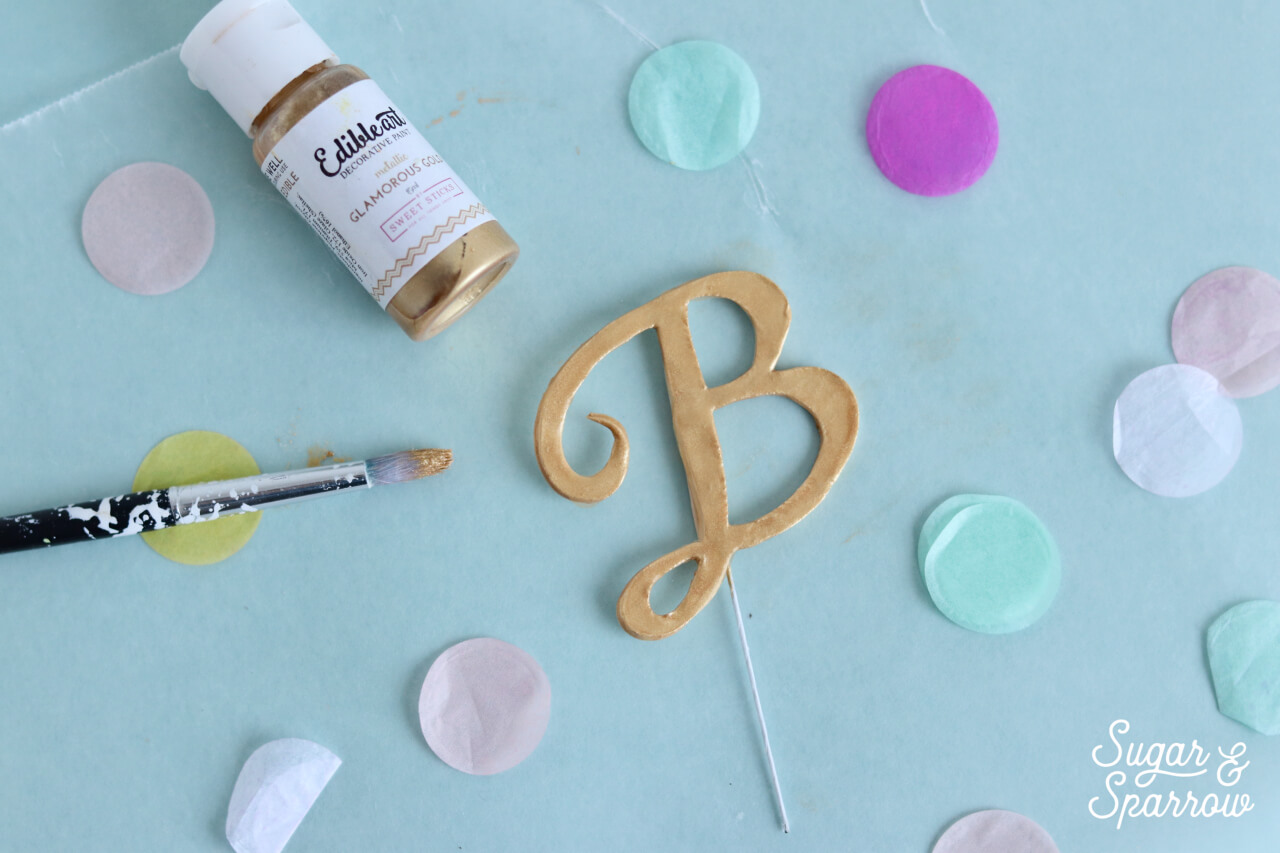
After the gumpaste monogram was completely dry, I used a small paintbrush to paint a few coats of this Edible Art Paint and get the metallic gold look.

Glitter Monogram Topper

To get this glitter finish, I brushed on some of my gumpaste “glue,” then pressed edible silver glitter over the surface of the monogram.

glitter letter topper by sugar and sparrow tutorial

The best thing about these gumpaste letters is they dry super hard in a short amount of time, so you don’t have to worry about them falling apart on you. You could use this technique to spell out an entire word for a cake topper, or keep it simple with one letter. It’s a really quick and easy way to customize a cake or cupcakes without having to scour the internet for the perfect topper!

By: Whitney · In: Featured, Tutorials · Tagged: cake topper, cupcake topper, diy, edible art paint, fondant, glitter monogram topper, gumpaste, metallic monogram topper, monogram, sprinkles, tutorial

you’ll also love

the best vanilla cupcakes recipeThe Perfect Vanilla Cupcake Recipe
sprinkle cake balls topper tutorial by sugar and sparrowSprinkle Cake Truffles
gold drip cake tutorialGold Ganache Drip Cake Tutorial

Join the List

Stay up to date & receive the latest posts in your inbox.

Reader Interactions

Comments

  1. Sarah says

    May 18, 2018 at 8:03 pm

    This is awesome! Thanks so much for the step by step tutorial 🙂

    Reply
    • Whitney says

      May 19, 2018 at 10:01 am

      Of course, Sarah! Always happy to share!

      Reply
  2. Eva says

    May 18, 2018 at 10:28 am

    Thank you for posting a tutorial o.n this, I’ve been seeing these gorgeous toppers lately and thought they were perhaps made of hardened fondant , also didn’t know that it would be easy to find edible paint! Thanks again❤️

    Reply
    • Whitney says

      May 18, 2018 at 10:31 am

      Yeah! Edible Art Paint was a wondrous discovery for me! And you can totally make these with fondant as an alternative to gumpaste, but I prefer gumpaste just because it dries quicker and sturdier. Definitely have had mishaps with fondant toppers breaking so now I swear by gumpaste haha 🙂

      Reply

Leave a Reply Cancel reply

Your email address will not be published. Required fields are marked *

Recipe Rating


Next Post >

Favorite Matcha Cake Recipe

Primary Sidebar

Welcome to Sugar & Sparrow

Welcome to Sugar & Sparrow

Helping you whip up pretty desserts with confidence and creativity. And hopefully sharing a few laughs with you along the way!

Learn More

Connect

let’s bake!

Get my very best recipes, baking tips, and decorating tutorials sent to your inbox

Featured Posts

hostess cupcake layer cake recipe

Hostess Cupcake Layer Cake

brown butter cream cheese frosting recipe for cakes and cupcakes

Brown Butter Cream Cheese Frosting

honeycomb tutorial

DIY Candy Melt Honeycomb For A Bee Cake

Search

Archives

Follow Along

@sugarandsparrowco

LEMON CUPCAKES 🍋 after about a dozen recipe tes LEMON CUPCAKES 🍋 after about a dozen recipe tests, this one is everything I could want in a lemon cupcake! Fluffy-yet-moist, bursting with natural lemon flavor, and absolutely irresistible topped with lemon cream cheese buttercream. 

Full recipe (with frosting) linked in my bio + at https://sugarandsparrow.com/homemade-lemon-cupcakes/

INGREDIENTS:
1 Cup (132g) all-purpose flour
1 tsp baking powder
1/4 tsp salt
1/4 Cup (60ml) whole milk, room temperature
3 Tbsp (45ml) lemon juice from 1 medium lemon
3/4 Cup (150g) granulated sugar
3 Tbsp (42g) unsalted butter, room temperature
2 Tbsp (30ml) vegetable oil
2 large eggs, room temperature
1 tsp pure vanilla extract

INSTRUCTIONS:
1. Preheat the oven to 350ºF (177ºF) and line a standard cupcake pan with 12 paper liners.
2. In a large bowl, whisk together the flour, baking powder, and salt. Set aside. 
3. In the bowl of a stand mixer fitted with the paddle attachment (or with a hand mixer and large bowl), add the lemon zest to the sugar and mix on low speed until fragrant and well combined, about 1 minute. Meanwhile, combine the lemon juice with the milk and set aside. 
4. Add the butter to the lemon-sugar mixture and cream on medium speed until and combined, about 2 minutes. Add the vegetable oil and beat until light and creamy, about 3 minutes. Scrape down the bowl and paddle as needed.
5. Mix in the eggs one at a time on low speed, then add the vanilla and turn the mixer to medium speed for one minute.
6. Turn the mixer off and add the flour mixture all at once. Mix on low speed until just combined, then slowly pour in the lemon-milk mixture. Mix until just combined, about 30 seconds.
7. Divide the batter equally between the liners and bake for 14-18 min. Cool, then top with frosting of your choice (link in bio for lemon cream cheese frosting)�
#lemoncupcakes #creamcheesefrosting #lemon #cupcakes #cupcakedecorating
April in my kitchen 🌸 I published 5 NEW recipes April in my kitchen 🌸 I published 5 NEW recipes on my site, baked my Oreo cupcake recipe for a fundraiser and found it was just as delicious as I remember, and filmed/photographed 3 recipes that will be on my blog in May (Lemon Cupcakes, Lemon Cream Cheese Buttercream, and No-Bake Marbled Strawberry Cheesecake) 🥰 

Comment “APRIL” to get all the available recipes and stay tuned for more! 

#bakersofinstagram #springbaking #cakedecorating #cupcakes #bakinglove
SHEET PAN COOKIE CAKE 🍪 slice it warm for a fud SHEET PAN COOKIE CAKE 🍪 slice it warm for a fudgy chocolate chip cookie OR let it settle into a moist and chewy cookie cake that’s perfect for decorating! My fave vanilla buttercream + sprinkles turn this giant chocolate chip cookie into the perfect birthday cake alternative at the end 🥳
⁣
Full recipe + decorating ideas at https://sugarandsparrow.com/sheet-pan-chocolate-chip-cookie-cake/
⁣
INGREDIENTS⁣
1 Cup (226g) unsalted butter, melted⁣
1 1/3 Cups (267g) packed light or dark brown sugar⁣
1/2 Cup (100g) granulated sugar⁣
3 large eggs⁣
1 Tbsp pure vanilla extract⁣
1 tsp baking soda⁣
1 tsp cornstarch⁣
1/2 tsp salt⁣
3 Cups (398g) all purpose flour⁣
2 Cups (350g) semi-sweet chocolate chips⁣
⁣
INSTRUCTIONS⁣
1. Preheat the oven to 350ºF (177ºC). Grease and line a 13×18 inch sheet pan.⁣
2. In a large bowl, add the brown sugar and granulated sugar. Melt the butter in the microwave and pour it over the top of the sugars. Whisk together until uniform. Add the eggs and vanilla, then continue whisking until uniform. Whisk in the baking soda, cornstarch, and salt.⁣
3. Add the flour and use a silicone spatula to fold it in until smooth cookie dough forms. Reserve 1/2 Cup of the chocolate chips and set them aside, then fold the remaining 1 1/2 Cups of chocolate chips into the cookie dough.⁣
4. Place the chocolate chip cookie dough onto the prepared sheet pan and use an offset spatula to spread it all the way to the edges in an even layer.⁣
5. Bake the cookie cake for 14-16 minutes, until it looks golden brown on the edges and set. 
6. Enjoy warm or let it cool and decorate with vanilla buttercream and sprinkles! ⁣
⁣
#cookiecake #chocolatechipcookies #sheetcake #birthdaycake #cakedecorating
STRAWBERRY CUPCAKES 🍓based on my beloved strawb STRAWBERRY CUPCAKES 🍓based on my beloved strawberry layer cake recipe, this cupcake version is just as moist yet fluffy and bursting with natural strawberry flavor! Between the mix of fresh strawberries in the cupcakes + freeze-dried strawberries in the frosting, the flavor is out of this world 🚀

Full recipe link in my bio (with strawberry buttercream) + at https://sugarandsparrow.com/strawberry-cupcakes/

STRAWBERRY CUPCAKES
Yield: 14 cupcakes

INGREDIENTS:
5 oz (143g) fresh or frozen strawberries
1/3 Cup (80ml) whole milk, room temp
1 1/2 Cups (158g) sifted cake flour
1 tsp baking powder
1/4 tsp baking soda
1/2 tsp salt
6 Tbsp (85g) unsalted butter, room temp
1 Cup (200g) granulated sugar
2 large eggs, room temp
3 Tbsp (45g) sour cream, room temp
1 tsp vanilla extract
1 drop pink food coloring (optional)

INSTRUCTIONS: 
1. Puree the strawberries using a food processor (you’ll have about 1/2 cup of puree), then place into a saucepan over medium-low heat. Bring to a simmer, then cook for 10-15 min, stirring occasionally, until you have 1/4 cup. Refrigerate until room temp.
2. Preheat oven to 350ºF (177ºC) and line a standard cupcake pan with liners.
3. Whisk together the sifted cake flour, baking powder, baking soda, and salt and set aside.
4. In a stand mixer w/ paddle attachment (or hand mixer + large bowl), whip the butter on high for 2 min. Add sugar and beat for 2 min, until light and fluffy. Turn the mixer to low and add the eggs one at a time, then add the vanilla and sour cream, turn the mixer to high and beat for 1 min. Meanwhile, whisk together the strawberry puree, whole milk, and food coloring (if using).
5. Turn the mixer off and add all of the dry ingredients at once. Mix on low until just combined, then add the strawberry milk mixture until just combined, about 30 seconds.
6. Fill the cupcake liners 2/3 full and bake for 14-18 minutes. Cool completely before topping with strawberry buttercream (full recipe linked above). 

#strawberrycupcakes #strawberrycake #pinkcupcakes #strawberry #cupcakes
COFFEE BUTTERCREAM (recipe below)☕️ this frost COFFEE BUTTERCREAM (recipe below)☕️ this frosting has AMAZING coffee flavor, is so easy to decorate cakes with, and pairs beautifully with so many flavors (chocolate, vanilla, or any cake flavor you’d want to turn into a latte). 

All my cake pairing suggestions are linked in my bio or at https://sugarandsparrow.com/coffee-buttercream-recipe/ 

COFFEE BUTTERCREAM⁣
Yield: 2.5 Cups⁣

INGREDIENTS⁣
1 1/2 tsp instant coffee or espresso powder⁣
1 1/2 Tbsp whole milk, room temperature⁣
1 Cup (226g) unsalted butter, room temperature⁣
3 1/2 Cups (420g) powdered sugar⁣
2 tsp pure vanilla extract⁣
Pinch of salt⁣

INSTRUCTIONS⁣
1. Combine the instant espresso/coffee with the whole milk and set aside. In the bowl of a stand mixer, beat the butter on high until creamy and smooth (about 5 minutes), scraping down the bowl and paddle a few times in between.⁣
2. Turn the mixer to low and add the powdered sugar a few cups at a time, scraping down the bowl and paddle between intervals. Add the vanilla, the coffee/espresso milk mixture, and salt. Mix on low until fully incorporated, about one minute.⁣

#coffeebuttercream #buttercream #frosting #coffeecake

Footer

On the Blog

  • Cake Basics
  • Recipes
  • Tutorials

Info

  • About
  • Privacy Policy & Disclosure

stay in the know

Copyright © 2026 · Theme by Sugar & Sparrow