• Cake
  • Frosting
  • YouTube
  • My Favorite Tools
  • Nav Social Icons

  • Skip to primary navigation
  • Skip to main content
  • Skip to primary sidebar
  • Skip to footer
  • Recipes
    • Cake
    • Cupcakes
    • Frosting
    • Ice Cream
    • Vegan
  • Cake Basics
  • Tutorials
  • Blog
  • About
  • Mobile Menu Widgets

    Connect

    Search

Sugar & Sparrow logo in script font

Sugar & Sparrow

Lifestyle and Cake from Portland Oregon

  • Cake Basics
  • Recipes
    • Cake
    • Cupcakes
    • Cookies & Bars
    • Filling
    • Frosting
    • Ice Cream
    • No-Bake
    • Small Batch
    • Vegan
  • Tutorials
  • Book
  • Blog
  • About

No-Churn S’mores Ice Cream

July 14, 2022 · In: Featured, Ice Cream, No-Bake, Recipes, Seasonal, Summer

Jump to Recipe

It’s finally starting to get hot here in Portland, which means less wanting to use the oven and way more ice cream cravings. Ever since I learned how to make ice cream the easy way (no-churn), my imagination has been bursting with flavor ideas that keep making their way to my must-try list. And since s’mores are one of my all time favorite flavors, it was only a matter of time before I attempted to create the iconic summer treat in ice cream form. It was so much fun to make and SO DELICIOUS. 

smores ice cream recipe

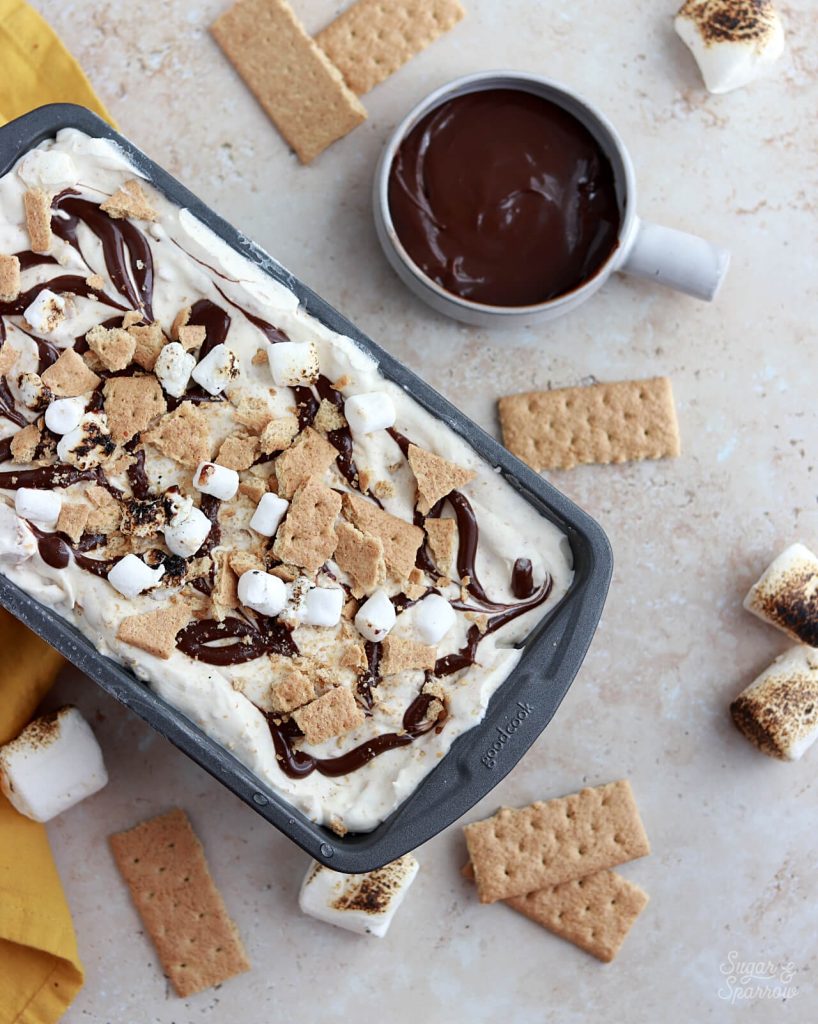
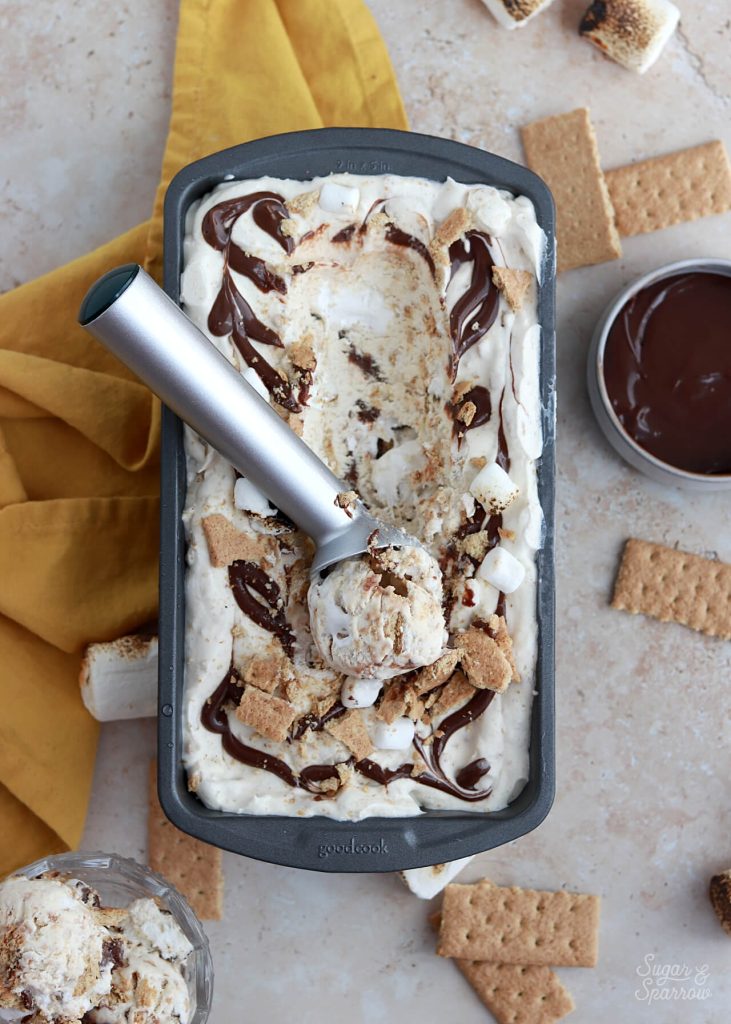
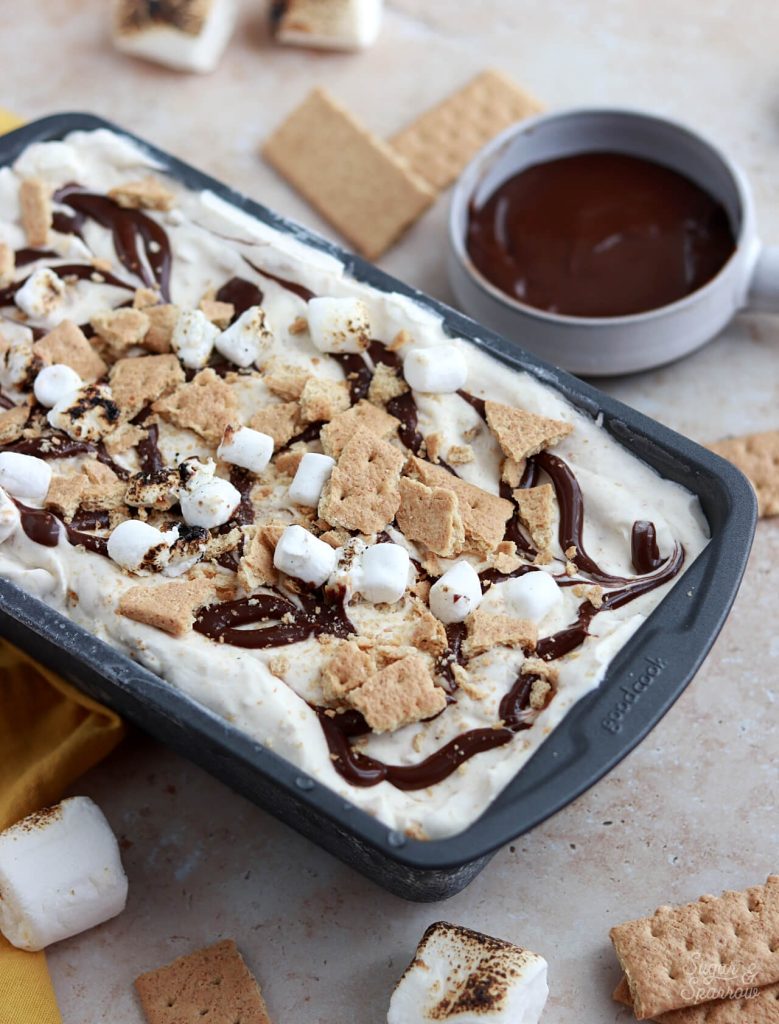
This is the ultimate no-churn s’mores ice cream recipe: a graham cracker ice cream base, toasted mini marshmallows and graham cracker chunks throughout, and ribbons of fudge and marshmallow creme. It is almost too good to share! The best part is, it’s extremely easy to toss together. Just ten minutes, a hand mixer or stand mixer with the whisk attachment, a loaf pan, and a few simple ingredients. You don’t even need an ice cream maker!

no churn smores ice cream
graham cracker chocolate marshmallow ice cream

It all starts with some heavy whipping cream that you’ll whip with a hand mixer or stand mixer with the whisk attachment until stiff peaks form. This is the base of every no-churn ice cream. To flavor it, you’ll add sweetened condensed milk, a little vanilla, and crushed graham crackers. Once you fold those together, you’ll end up with a delicious graham cracker ice cream before adding in the rest of the fixings. 

smores ice cream recipe

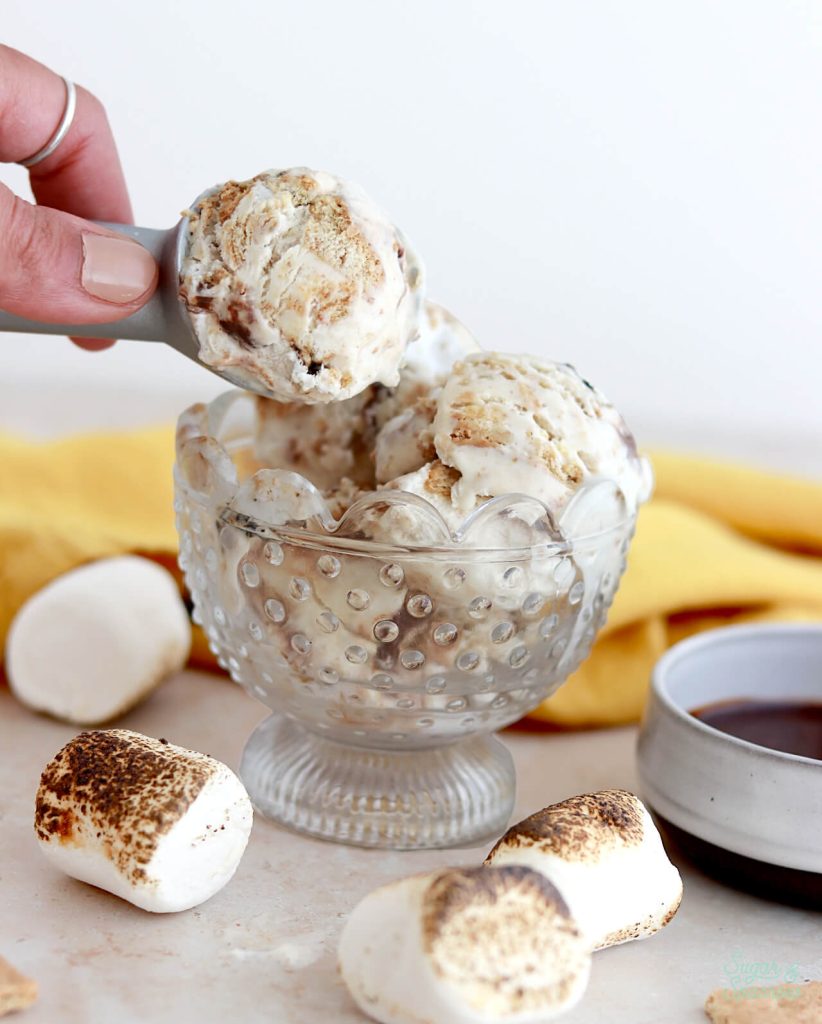
To toast the mini marshmallows, I love using my butane kitchen torch. I line a baking sheet with aluminum foil, coat it with a little baking spray, and add the marshmallows on top before torching away. Alternatively, you can use the broiler setting on your oven to toast the marshmallows. Just remember to keep an eye on them if you do – they toast very quickly under a broiler! If you like your marshmallows a little burnt, don’t even worry about it. 

no churn ice cream smores

For the fudge ribbon, I used Hershey’s hot fudge sauce, but you could use any brand that you love or make your own from scratch. If you’re looking for a good from-scratch recipe, I recommend this one from my mint chocolate chip ice cream cake recipe. It’s my favorite homemade hot fudge recipe and would taste amazing in this ice cream, but absolutely feel free to use a store bought option like I did. 

smores ice cream no churn
smores ice cream with graham crackers and toasted marshmallows

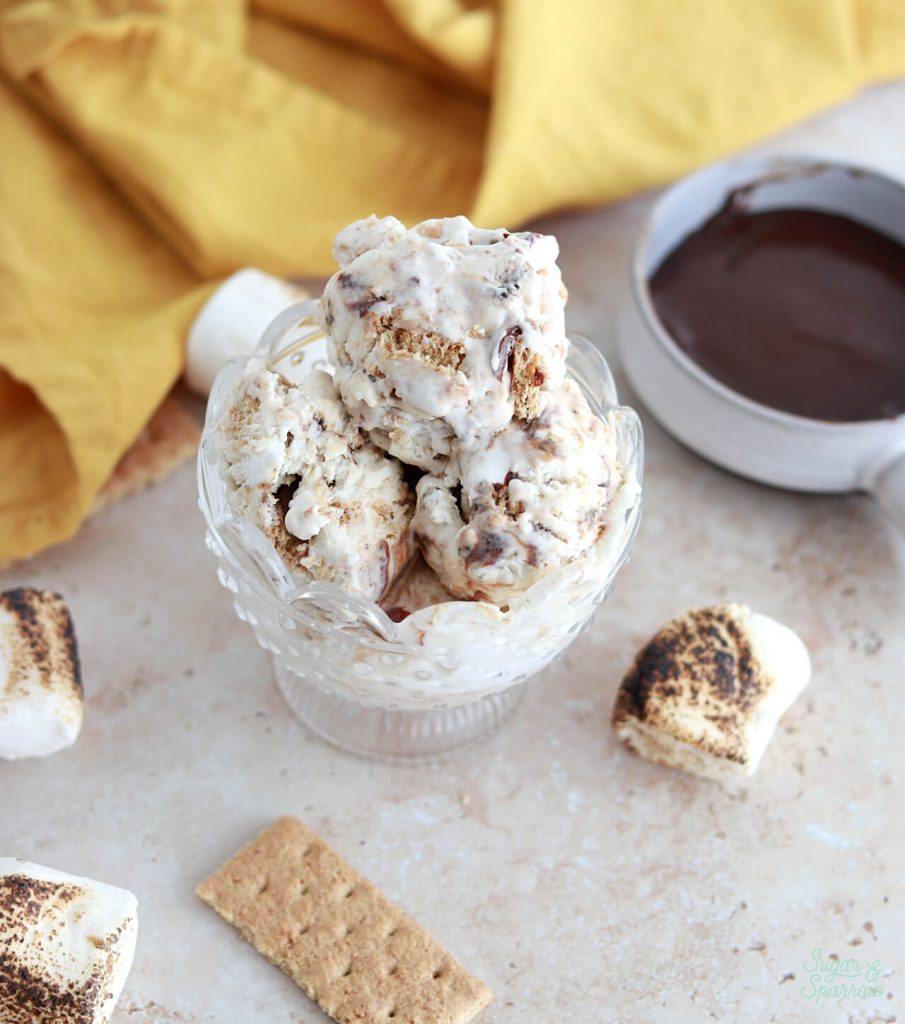
Since I am such a s’mores fanatic (see also my S’mores Cake Recipe and S’mores Cupcake Recipe), I made sure that this ice cream has s’mores components in every single bite. It is unbelievably decadent, smooth, and nostalgic. It’s my favorite ice cream I’ve made thus far and I cannot wait for you to make it and experience the magic yourself. If you’re a s’mores fan, I hope you flip out when you taste this!

No-Churn S’mores Ice Cream Recipe

5 from 1 vote
The ultimate s'mores ice cream: graham cracker infused ice cream with toasted marshmallows, graham cracker chunks, and ribbons of fudge and marshmallow creme. No ice cream maker necessary!
Print Recipe Pin Recipe
Prep Time:15 minutes mins
Freeze Time:6 hours hrs
Servings: 6 Cups (12 servings)

Ingredients

  • 1 1/2 Cups (75g) mini marshmallows, toasted
  • 9 graham crackers, divided
  • 2 Cups (480ml) heavy whipping cream
  • 14 Oz sweetened condensed milk
  • 2 tsp pure vanilla extract
  • 1/2 Cup (120ml) hot fudge sauce, cold
  • 1/4 Cup (20g) marshmallow creme

Instructions

  • Place a large metal or glass bowl into the refrigerator for at least 20 minutes to chill before you get started.
  • Toast the Marshmallows: Line a baking sheet with aluminum foil and coat it with baking spray before adding the mini marshmallows in a single layer. Use a butane torch to toast the mini marshmallows. Alternatively you can toast the marshmallows under the broiler in your oven. If you do, watch them closely to make sure they don't burn. Set the toasted marshmallows aside to cool completely.
  • Prepare the Graham Crackers: Use a food processor to finely crush half of the graham crackers (4 1/2 whole graham crackers or 9 squares). Set aside. Crumble the remaining graham crackers by hand into bite sized pieces and set aside.
  • Add the heavy whipping cream into the chilled bowl, then whip it with a hand mixer on high speed until stiff peaks form, 2-3 minutes. You can alternatively use a stand mixer with the whisk attachment for this part.
  • In a separate small bowl, whisk together the sweetened condensed milk, vanilla extract, and finely crushed graham crackers. Gently fold the sweetened condensed milk mixture into the heavy whipping cream with a rubber spatula. Reserve about 1/8 Cup of toasted marshmallows and about 1/8 Cup of crumbled graham crackers, then fold the rest of the toasted marshmallows and crumbled graham crackers into the ice cream mixture.
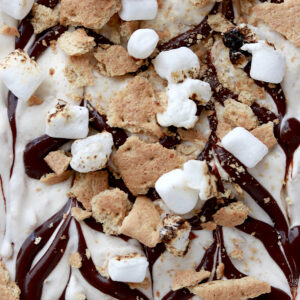
  • Pour half of the ice cream mixture into a 9x5x3 inch metal loaf pan. Add half of the hot fudge sauce and use a butter knife to swirl it around. Drop the marshmallow creme by the spoonful, 1-2 inches apart, on top of the fudge swirl. Add the rest of the graham cracker ice cream mixture on top.
  • Add the remaining hot fudge sauce on top and use a butter knife to swirl it around. Add the reserved crumbled graham crackers and toasted marshmallows, then cover with aluminum foil and freeze until solid and scoopable, 5-6 hours.

Notes

Storage tips: This s’mores ice cream is best stored in an airtight container in the freezer. It will last for several months (if you can make it last that long). 

Did you make this s’mores ice cream recipe? I want to know what you think! Tell me about it in the comments below and feel free to tag @sugarandsparrowco on Instagram to show me. I love to see what you create with my recipes!

By: Whitney · In: Featured, Ice Cream, No-Bake, Recipes, Seasonal, Summer · Tagged: ice cream recipes, no churn ice cream, no churn smores ice cream, smores, smores ice cream

you’ll also love

no churn vanilla ice cream berry crisp toppingsNo-Churn Berry Crisp Ice Cream
easy smores icebox cake recipeEasy S’mores Icebox Cake (No-Bake!)
blackberry lavender no churn ice creamNo-Churn Blackberry Lavender Ice Cream

Join the List

Stay up to date & receive the latest posts in your inbox.

Reader Interactions

Comments

  1. Shirls says

    July 26, 2022 at 4:11 pm

    Hello, I don’t like in America so wondered if marshmallow cream is the same as marshmallow fluff? Thanks so much.

    Reply
    • Whitney says

      July 26, 2022 at 9:02 pm

      Hi Shirls! Marshmallow Creme and Marshmallow Fluff are the same 🙂

      Reply
  2. Mallory says

    July 24, 2022 at 4:37 pm

    5 stars
    So quick, easy, and delicious! I made it for my husband, who loves s’mores, and he loved it! I probably should have let it freeze for longer, though, as it was still a little soft in the middle.

    Reply
    • Whitney says

      July 25, 2022 at 12:14 pm

      Yay, Mallory! I’m so happy this recipe was a hit! And yes – the ice cream sets in 6 hours but it gets even better overnight 🙂

      Reply
  3. Lauren says

    July 14, 2022 at 7:51 am

    Yummmmmmmm
    Looks amazing

    Reply
    • Whitney says

      July 14, 2022 at 12:40 pm

      Thank you friend! I hope you get a chance to make it!

      Reply

Leave a Reply Cancel reply

Your email address will not be published. Required fields are marked *

Recipe Rating


Next Post >

Lemon Lavender Cake Recipe

Primary Sidebar

Welcome to Sugar & Sparrow

Welcome to Sugar & Sparrow

Helping you whip up pretty desserts with confidence and creativity. And hopefully sharing a few laughs with you along the way!

Learn More

Connect

let’s bake!

Get my very best recipes, baking tips, and decorating tutorials sent to your inbox

Featured Posts

peppermint frosting recipe for cakes and cupcakes

Peppermint Buttercream

sugar and sparrow small batch strawberry cake

Small Batch Strawberry Cake

nutella buttercream recipe by sugar and sparrow

Nutella Buttercream Recipe

Search

Archives

Follow Along

@sugarandsparrowco

RASPBERRY CAKE FILLING (recipe below) ♥️ this RASPBERRY CAKE FILLING (recipe below) ♥️ this perfectly sweet/tart raspberry cake filling is beautifully thick, seedless, and so rewarding to make from scratch! It takes just a handful of ingredients and can be made with fresh OR frozen raspberries 🙌🏼 

Get the full recipe + cake pairing suggestions at the link in my bio or at https://sugarandsparrow.com/seedless-raspberry-cake-filling/

INGREDIENTS:
2 1/2 Cups (10oz, 315g) fresh or frozen raspberries
1/2 Cup (100g) granulated sugar
1 Tbsp lemon juice
1 tsp lemon zest
1 1/2 Tbsp (12g) cornstarch
1 1/2 Tbsp (22ml) water

INSTRUCTIONS: 
1. In a saucepan set over medium heat, add the raspberries, granulated sugar, lemon juice, and lemon zest. Cook until the mixture begins to boil, stirring occasionally. 
2. Once boiling, lower the heat and simmer for 10-15 minutes while you continue stirring occasionally. Then, remove from heat and use a fine mesh sieve to strain out the seeds over a medium bowl. After straining, you’ll be left with about 1/4 Cup of seedy pulp.
3. In a small separate bowl, combine the cornstarch and water until uniform. Return the strained raspberry filling to the saucepan (wipe it free of any remaining seeds if needed) and add the cornstarch/water mixture. Cook over medium heat until boiling, stirring constantly, then reduce to a simmer and cook for 1-3 minutes, until the filling has thickened slightly, is no longer cloudy, and coats the back of the spatula.
4. Pour into an airtight container and refrigerate for at least 4 hours and up to 1 week. It will be jello-like once set but after stirring it will become a thick, jammy consistency that’s perfect to use as a cake or cupcake filling!

#raspberrycake #cakefilling #cakedecorating #raspberries #baking
STRAWBERRY LEMON CAKE 🍓🍋 this cake is so lig STRAWBERRY LEMON CAKE 🍓🍋 this cake is so light and refreshing and bursting with all-natural flavors! It’s layers of my favorite extra fluffy lemon cake + the most delicious freeze-dried strawberry buttercream that ends up the prettiest natural pink color. I’ll never get over those little flecks of strawberry in the buttercream or the tiny chamomile flowers adding so much cheer! 

Grab the recipe at the link in my bio or at https://sugarandsparrow.com/strawberry-lemon-cake/

#strawberrylemon #lemoncake #strawberrycake #cakedecorating #strawberrybuttercream
CHOCOLATE SHEET CAKE (recipe below) 🍫 🥳 this CHOCOLATE SHEET CAKE (recipe below) 🍫 🥳 this is everything I want in a chocolate cake: rich and decadent, stick-to-your-fork fudgy, ultra-chocolatey, shareable, and EASY! Like box mix easy but from-scratch and a MUST try if you’re in need of a good chocolate cake recipe to feed a crowd👩🏽‍🍳⁣ 
 
Get the full recipe (with chocolate frosting) at the link in my bio or at https://sugarandsparrow.com/chocolate-sheet-cake/ ✨⁣ 
⁣ 
CHOCOLATE SHEET CAKE
2 Cups (265g) all purpose flour⁣ 
1 2/3 Cups (340g) white granulated sugar⁣ 
2/3 Cup (60g) unsweetened natural cocoa powder⁣ 
2 tsp baking soda⁣ 
1 tsp baking powder⁣ 
1/2 tsp kosher salt⁣ 
1/2 Cup (120ml) vegetable oil⁣ 
2 eggs, room temperature⁣ 
1 1/2 tsp pure vanilla extract⁣ 
1 Cup (240ml) full-fat buttermilk⁣ 
1 Cup (240ml) hot coffee OR hot water⁣ 
⁣ 
INSTRUCTIONS⁣ 
1. Preheat the oven to 325ºF. Grease and line a 9x13 inch cake pan. ⁣ 
2. Place all of the dry ingredients into the bowl of a stand mixer (or use a large bowl with a hand mixer) and mix on low to combine. Add the vegetable oil, eggs, vanilla, and buttermilk and mix on low until combined. With the mixer still on low, add the hot coffee or hot water in a slow stream, then turn the mixer to medium and beat until smooth, about 2 minutes. The batter will be very thin. ⁣ 
3. Pour the batter into the prepared pan and bake for 35-40 minutes, until a toothpick inserted comes out clean.⁣ Full recipe (with frosting) link in my bio.
⁣ 
#chocolatecake #chocolate #sheetcake #chocolatelover #birthdaycake
VANILLA RASPBERRY LAYER CAKE ♥️ between the na VANILLA RASPBERRY LAYER CAKE ♥️ between the naturally pink raspberry buttercream, jammy homemade raspberry filling, and soft vanilla cake layers, this is the perfect cake for Spring!! It’s has amazing, authentic raspberry flavor in every bite from fresh (or frozen) raspberries in the filling + freeze-dried raspberries in the frosting 😋

Get the full recipe link in my bio or find it at https://sugarandsparrow.com/vanilla-raspberry-layer-cake/ 

#raspberrycake #raspberries #vanillacake #cakedecorating #pinkcake
SMALL BATCH VANILLA CAKE 🎂🥳 this mini vanill SMALL BATCH VANILLA CAKE 🎂🥳 this mini vanilla cake recipe makes the PERFECT amount for 2-4 people and can be baked as a tiny 4-inch layer cake or a single layer 6-inch cake. It goes with any frosting flavor but vanilla buttercream keeps it classic for date night, a small gathering, a smash cake, or satisfying a cake craving. 
⁣
✨Full recipe (with frosting) linked in my bio + at https://sugarandsparrow.com/small-batch-vanilla-cake/ 
⁣⁣⁣⁣
SMALL BATCH VANILLA CAKE⁣⁣⁣⁣
⁣⁣⁣⁣
INGREDIENTS⁣⁣⁣⁣
3/4 Cups (79g) sifted cake flour⁣⁣⁣
1 tsp baking powder⁣⁣⁣
1/4 tsp salt⁣⁣⁣
1/4 Cup (57g) unsalted butter, room temperature⁣⁣⁣
1/2 Cup (100g) granulated sugar⁣⁣⁣
1 large egg, room temperature⁣⁣⁣
2 Tbsp (30g) sour cream, room temperature⁣⁣⁣
1 tsp pure vanilla extract⁣⁣⁣
1/3 Cup (80ml) whole milk, room temperature⁣⁣⁣
⁣⁣⁣⁣
INSTRUCTIONS ⁣⁣⁣⁣
1. Preheat the oven to 350ºF. Grease and line three 4-inch or one 6-inch cake pan.⁣⁣⁣
2. In the bowl of your stand mixer (a handheld mixer works fine too!), cream together the butter and sugar on medium-high until light and fluffy, 3 min. Turn the mixer to low and add the egg, mixing until just combined. Add the vanilla and sour cream, turn the mixer to high, and beat for 1 min. ⁣⁣⁣
3. Turn the mixer to low speed and add the dry ingredients all at once. Mix until just combined, then slowly pour in the milk. Continue to mix on low speed until just combined, about 30 seconds. ⁣⁣⁣
4. Pour the batter evenly between the prepared cake 4-inch pans (or all into one 6-inch cake pan). If using 4-inch cake pans, bake for 18-22 minutes. If using a 6-inch cake pan bake for 24-28 minutes. The cake is done when it springs back to the touch and a toothpick inserted comes out with a few moist crumbs. ⁣⁣⁣
⁣⁣⁣⁣
#vanillacake #cakes #vanilla #minicake #cakedecorating

Footer

On the Blog

  • Cake Basics
  • Recipes
  • Tutorials

Info

  • About
  • Privacy Policy & Disclosure

stay in the know

Copyright © 2026 · Theme by Sugar & Sparrow