
Yule log cake (or formally known as Bûche De Noël) is a traditional Christmas cake that’s decorated to look like a festive log. It’s always a showstopper on the holiday dessert table, and my recipe features a delicious chocolate swiss roll cake, dreamy whipped cream filling flavored with a hint of cocoa, and rich chocolate ganache frosting textured to look like tree bark. It may seem complex, but with this detailed tutorial, you’ll be able to make the perfect yule log cake regardless of your skill level. I’ve even included how to make the sugared cranberries and meringue mushrooms I used to decorate!
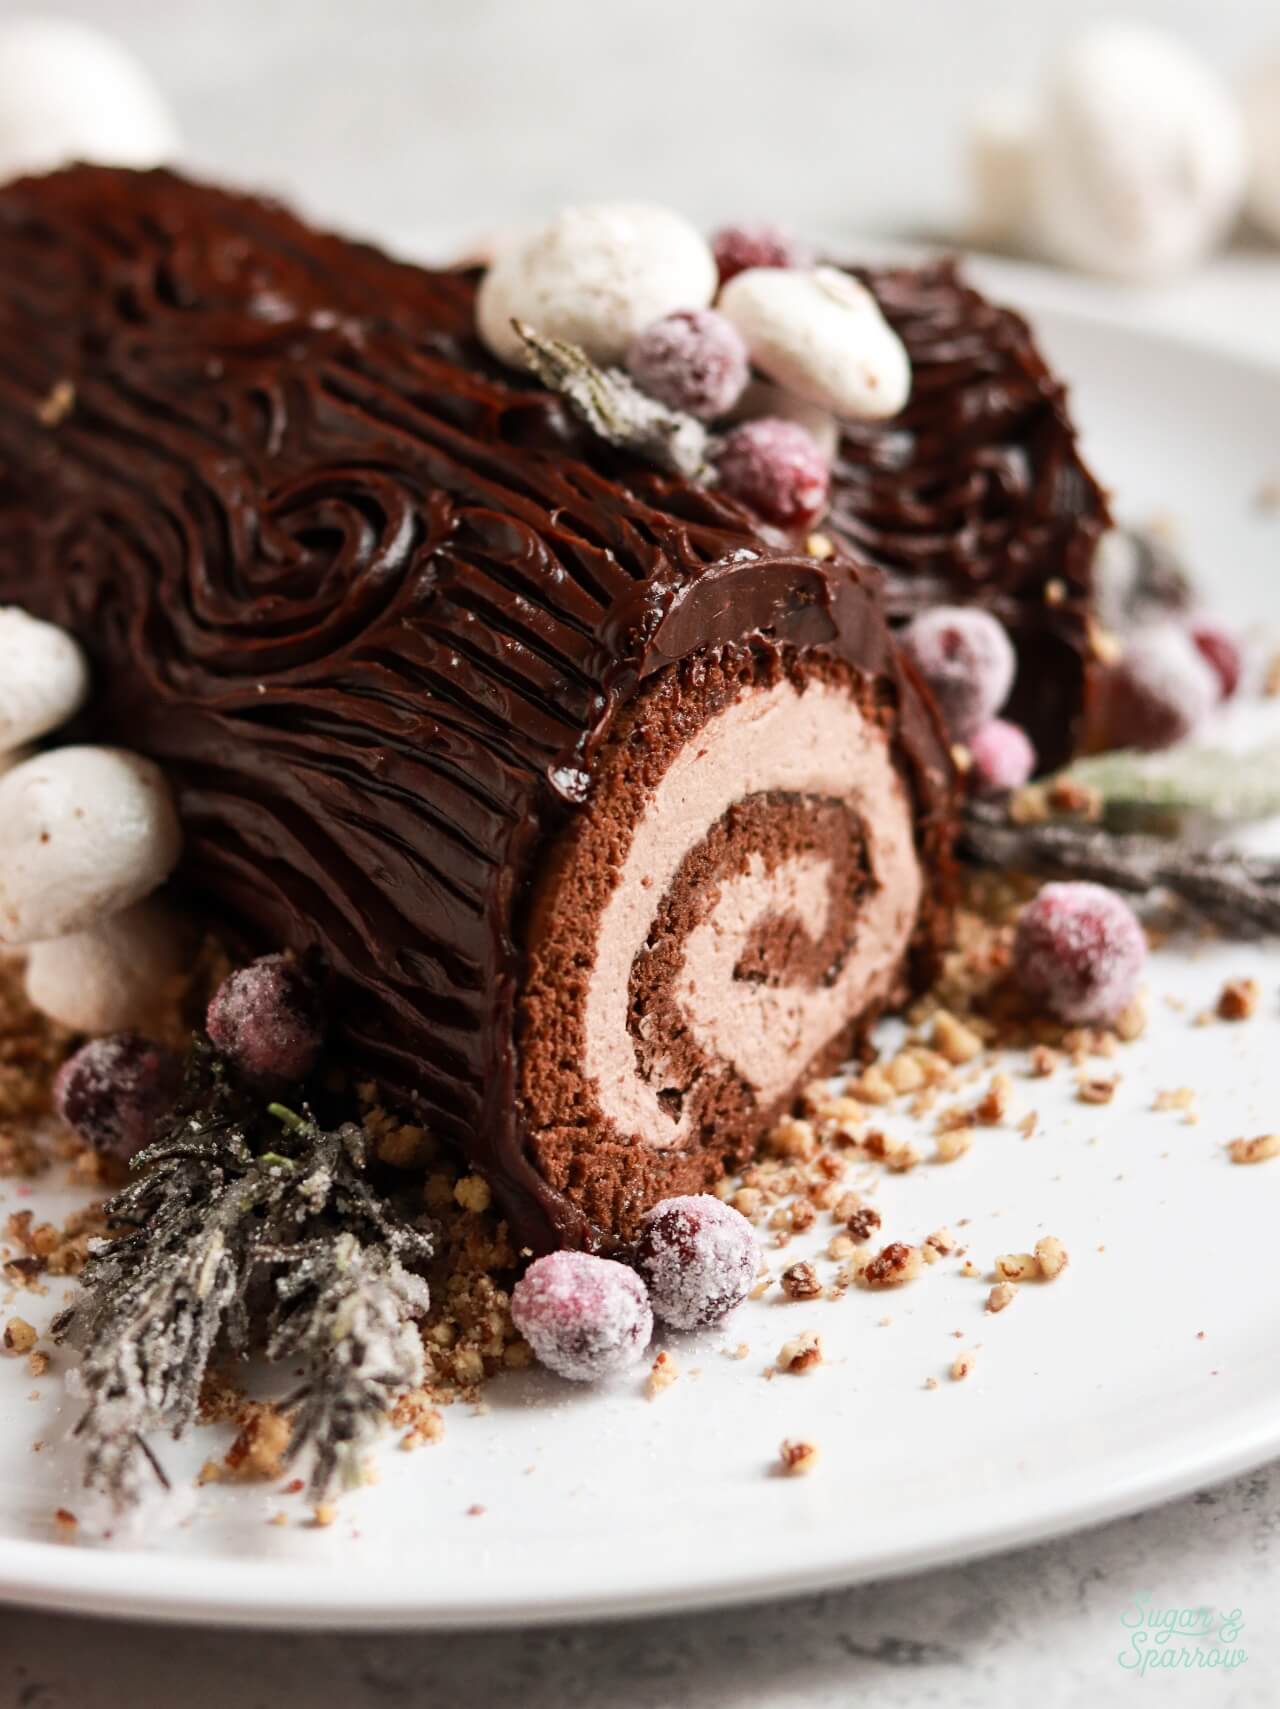
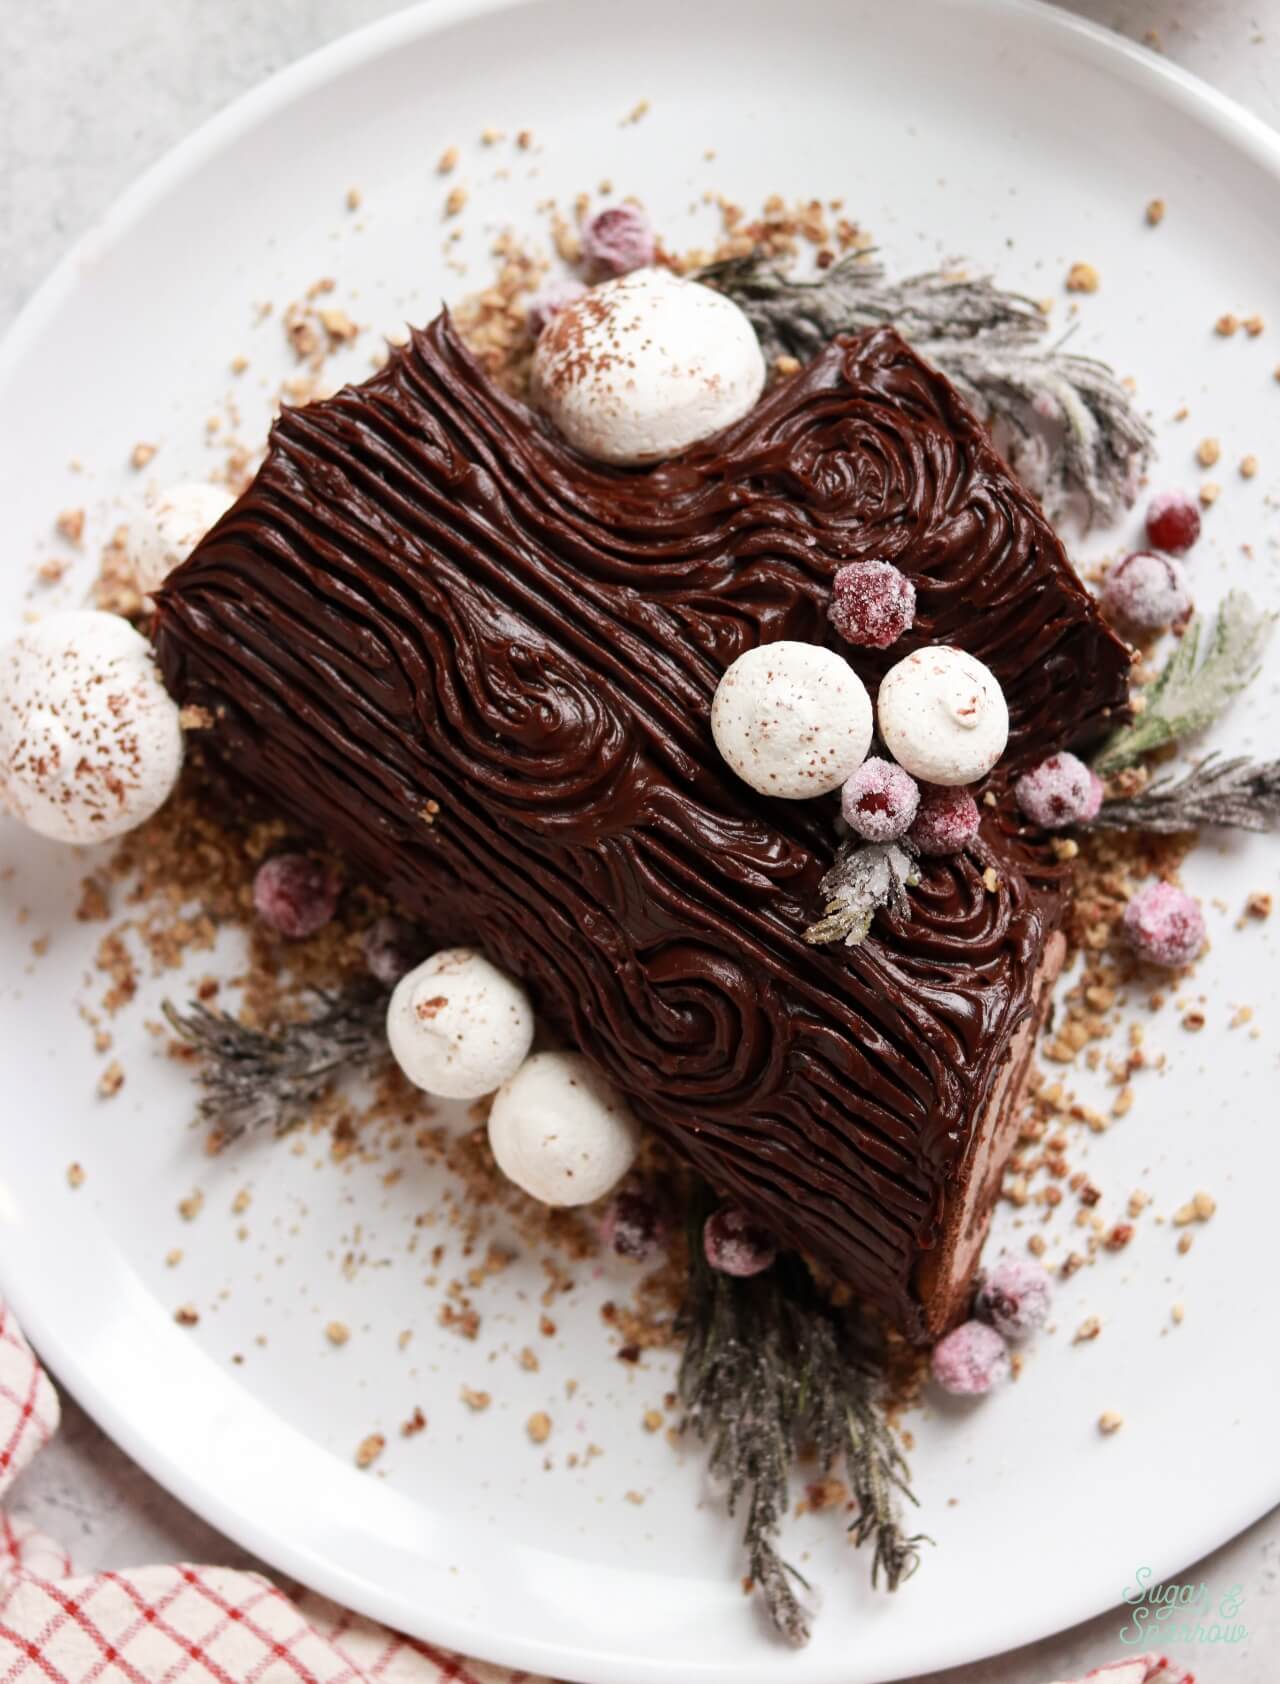
3 Things to Know About This Yule Log Cake Recipe
- It is a marathon. It will take you all day between making the decorations from scratch, baking the cake, making the filling and frosting, and decorating the yule log. That said, I recommend making some of the elements ahead of time so that it won’t feel like as much of a marathon. I have make-ahead instructions for most of the elements in the notes section of the recipe card below so you can plan everything out.
- It has been tested a TON. I lost count of how many times I tested and tweaked this recipe, but the end result is a super detailed and fail proof yule log cake recipe. The chocolate sponge is really moist and flexible, won’t crack easily, and tastes amazing with the cocoa whipped cream filling and chocolate ganache frosting.
- It is so fun to decorate. You don’t need any fancy equipment to decorate this one – the wood textures in the ganache are actually created with a fork! And once you have your sugared cranberries, rosemary, and meringue mushrooms ready it’s so fun to place them on the yule log and get creative with the presentation.
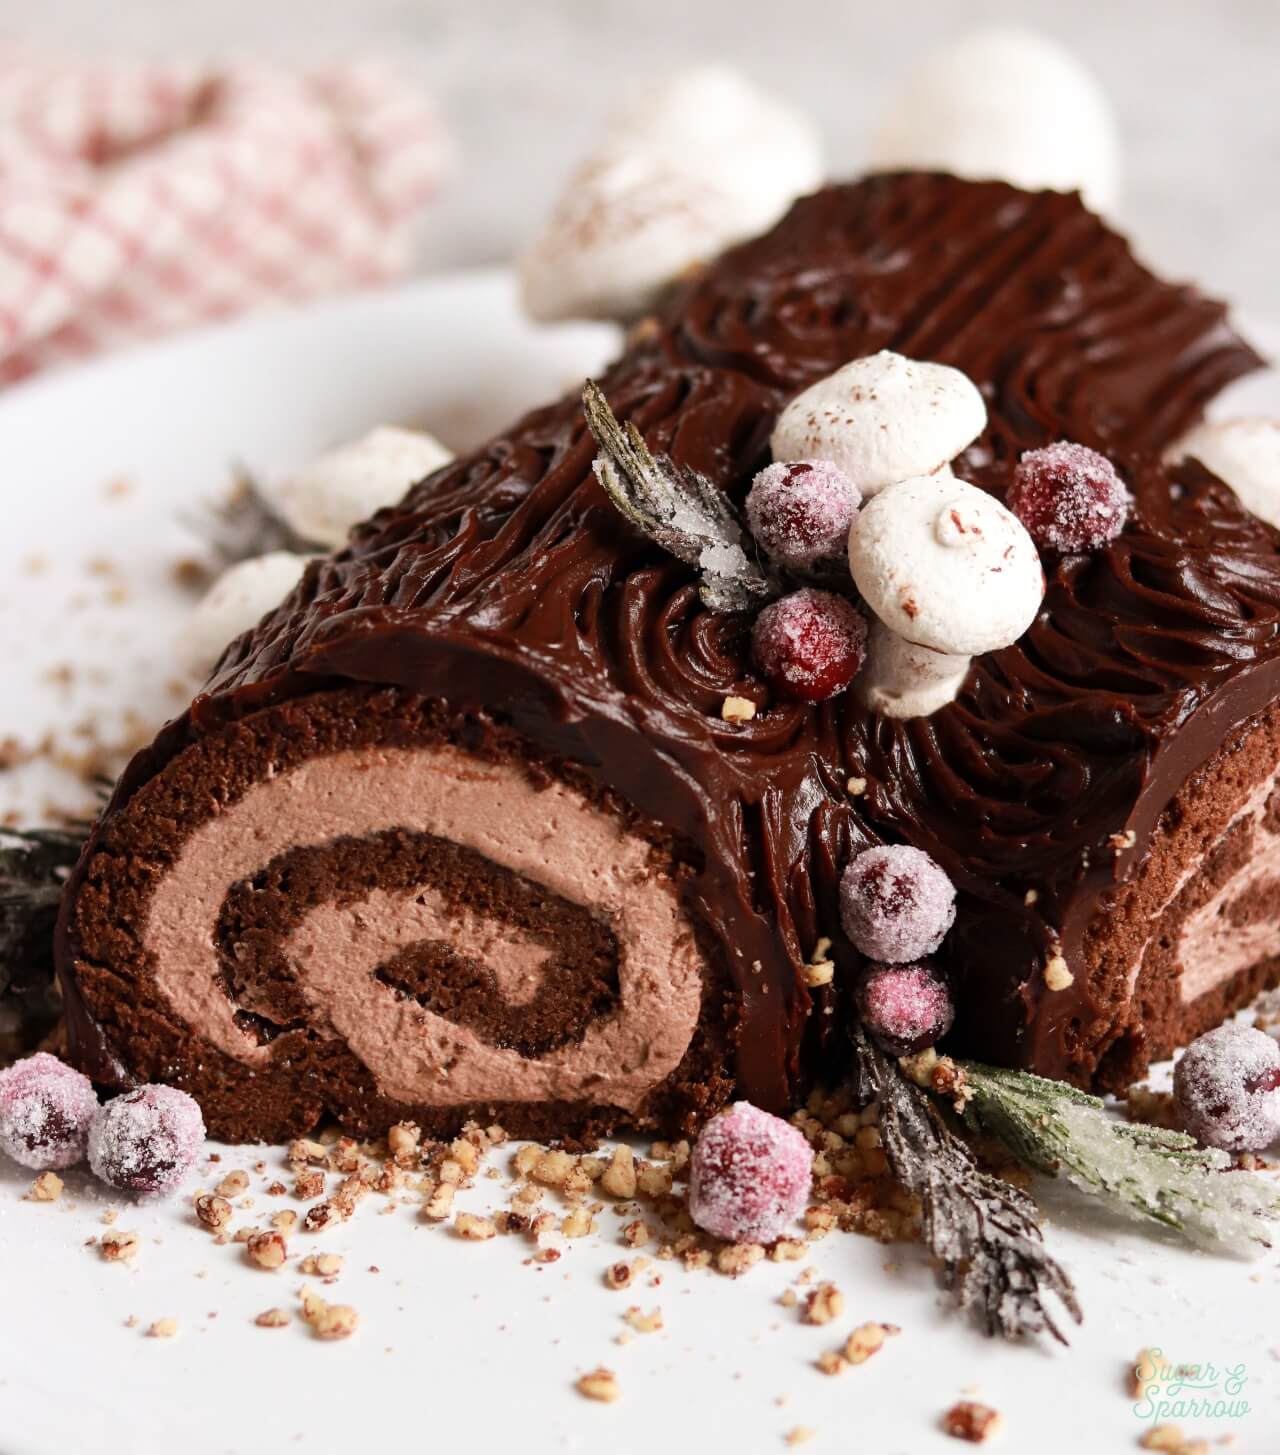
Yule Log Cake Components
There are four key components of a Bûche De Noël, and I’ll talk about each with more detail in the rest of this blog post:
- Swiss roll cake. You can technically use any swiss roll cake flavor for a yule log cake, but I decided to go with a chocolate swiss roll.
- Whipped cream filling. This simple, four-ingredient whipped cream filling is flavored with just a tiny hit of cocoa powder to keep it light. You can alternatively omit the cocoa powder if you’d rather have a vanilla whipped cream filling.
- Chocolate ganache. I use a thickened chocolate ganache to top the yule log cake, then texture it with a fork to make it look like tree bark!
- Decorations. You can keep things simple and dust the yule log with a little powdered sugar, or make it extra festive by decorating with sugared cranberries, sugared rosemary, ground pecans (for the dirt), and meringue mushrooms.
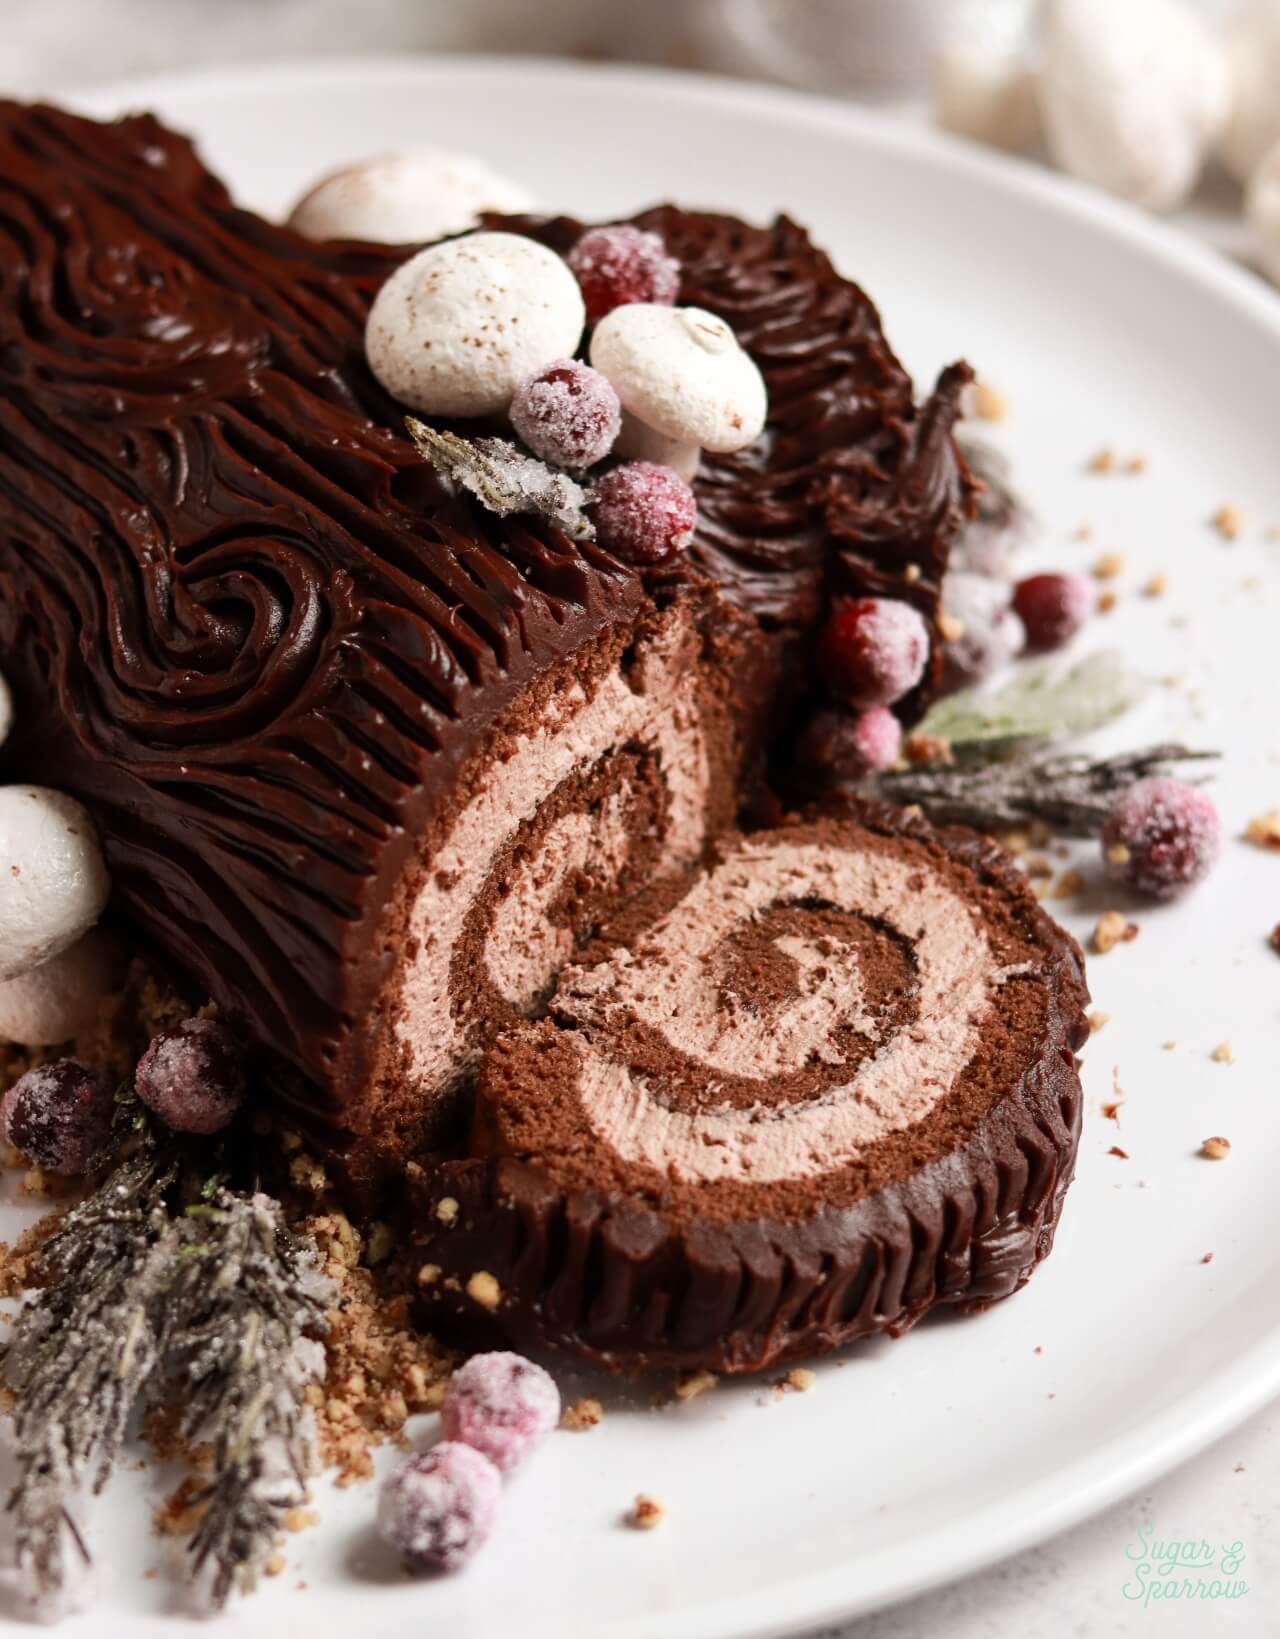
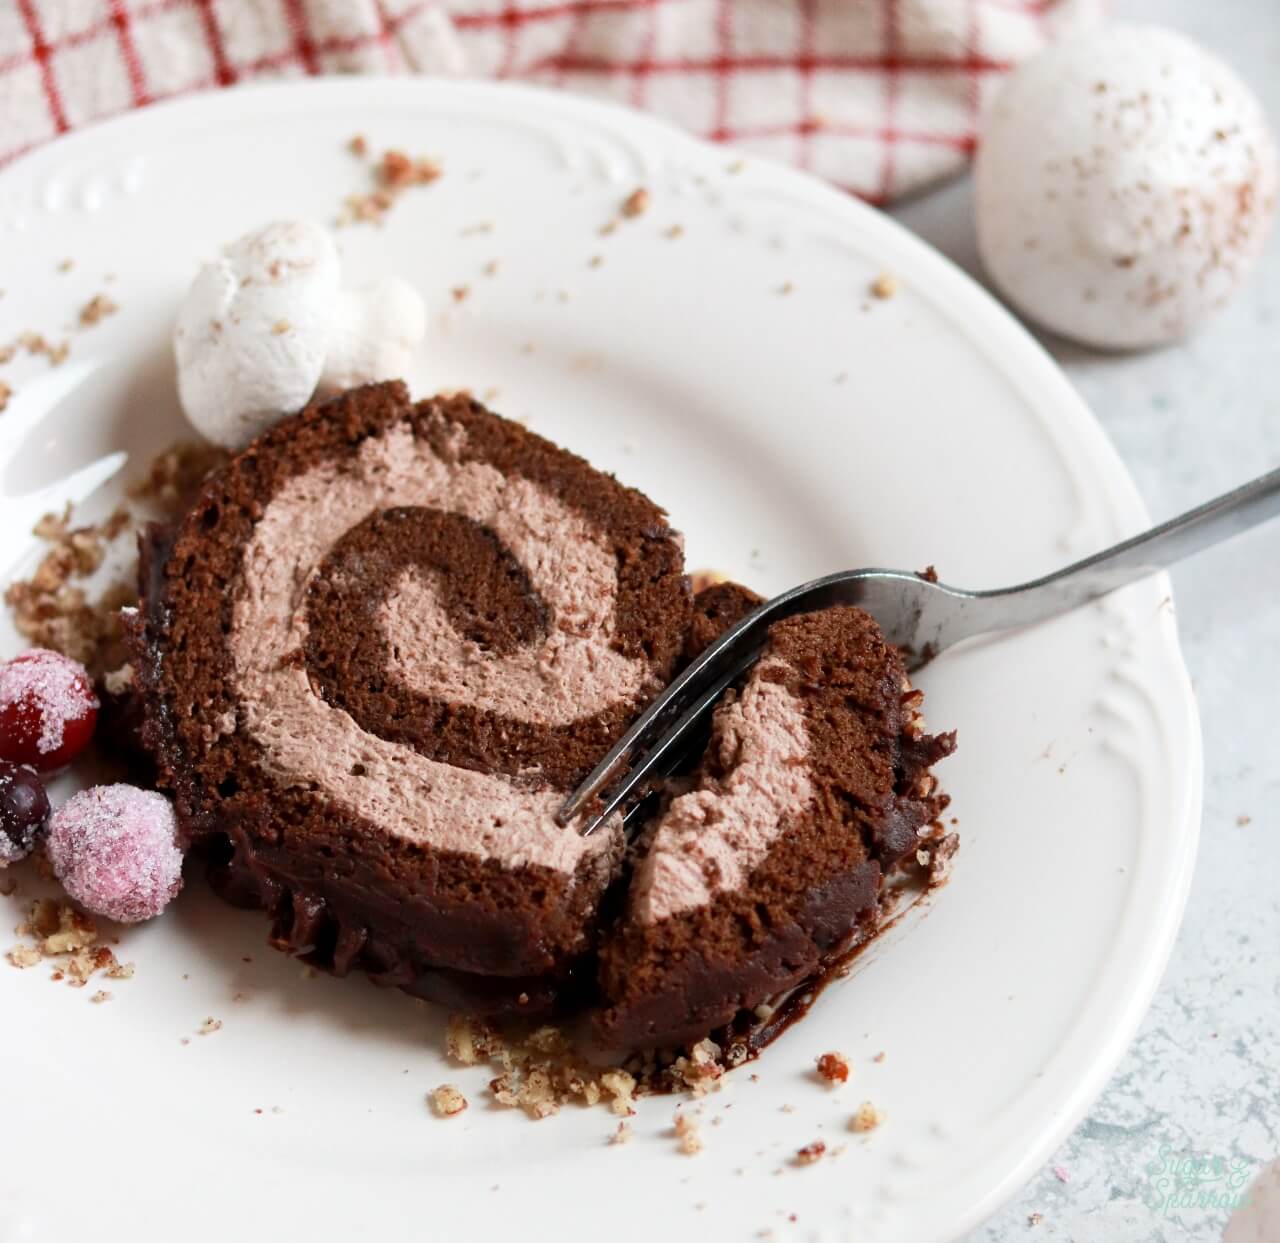
Chocolate Swiss Roll Cake
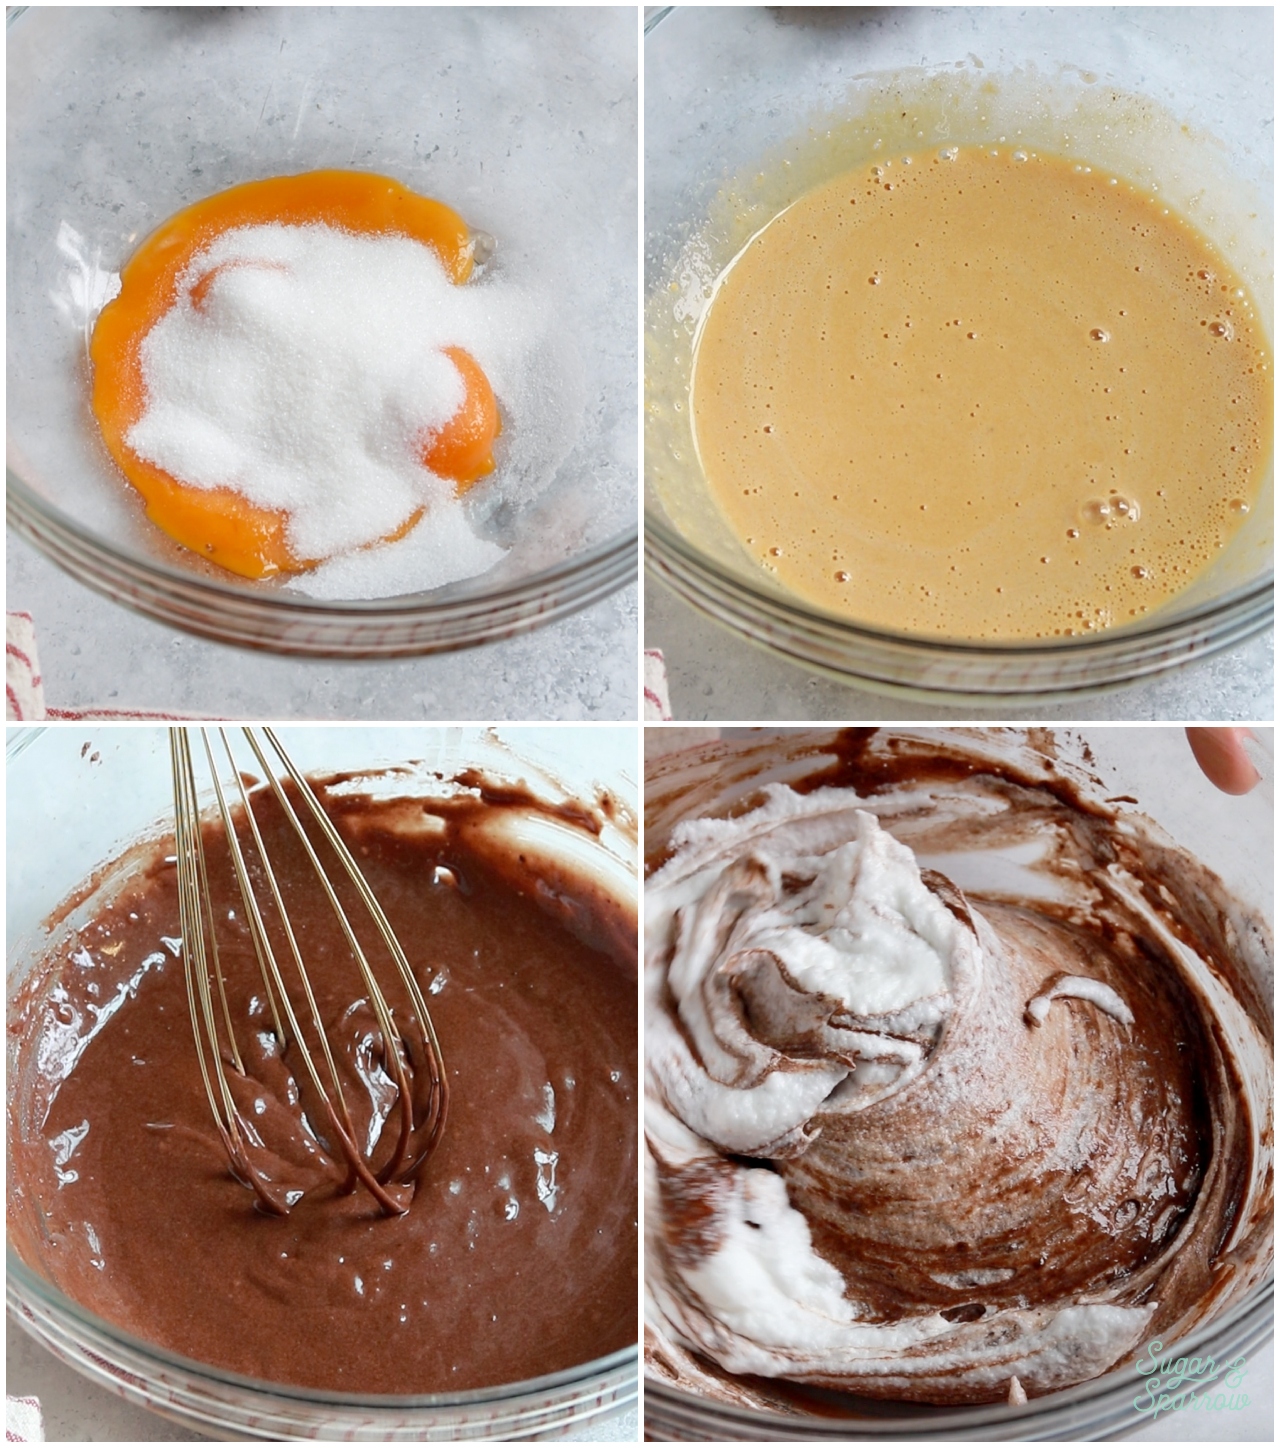
The swiss roll cake is a thin, flexible sponge cake that can be rolled up into a spiral, and I pull all the stops in this recipe to make it moist and easy to roll without cracking. As long as you read through the recipe before you start, it’s a really fun recipe to make. You’ll start by separating four eggs and whisking the egg yolks together with half of the sugar, then adding the flavorings and dry ingredients to make a chocolate paste that looks similar to brownie batter. Then, you’ll whip the egg whites and the rest of the sugar to a glossy meringue with stiff peaks and fold it into the chocolate mixture to create the cake batter.
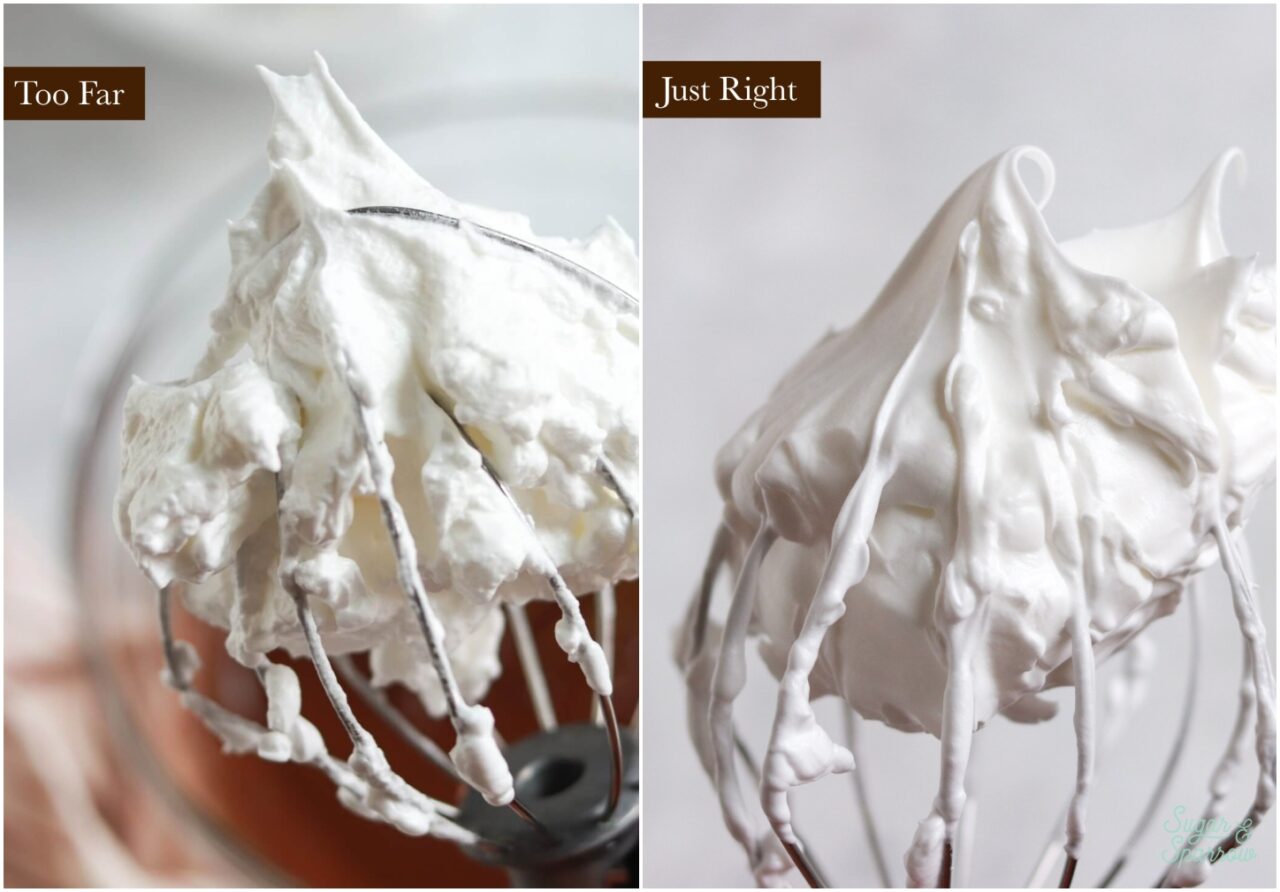
As long as you pay attention to the meringue texture and don’t go beyond stiff peaks, you’ll have the perfect swiss roll cake. But, even if you do overdo the meringue (as I have done plenty of times), it still turns out great but is slightly more prone to cracking. Here’s what the meringue should look like before folding it into the chocolate mixture vs. what it looks like when you’ve gone too far:
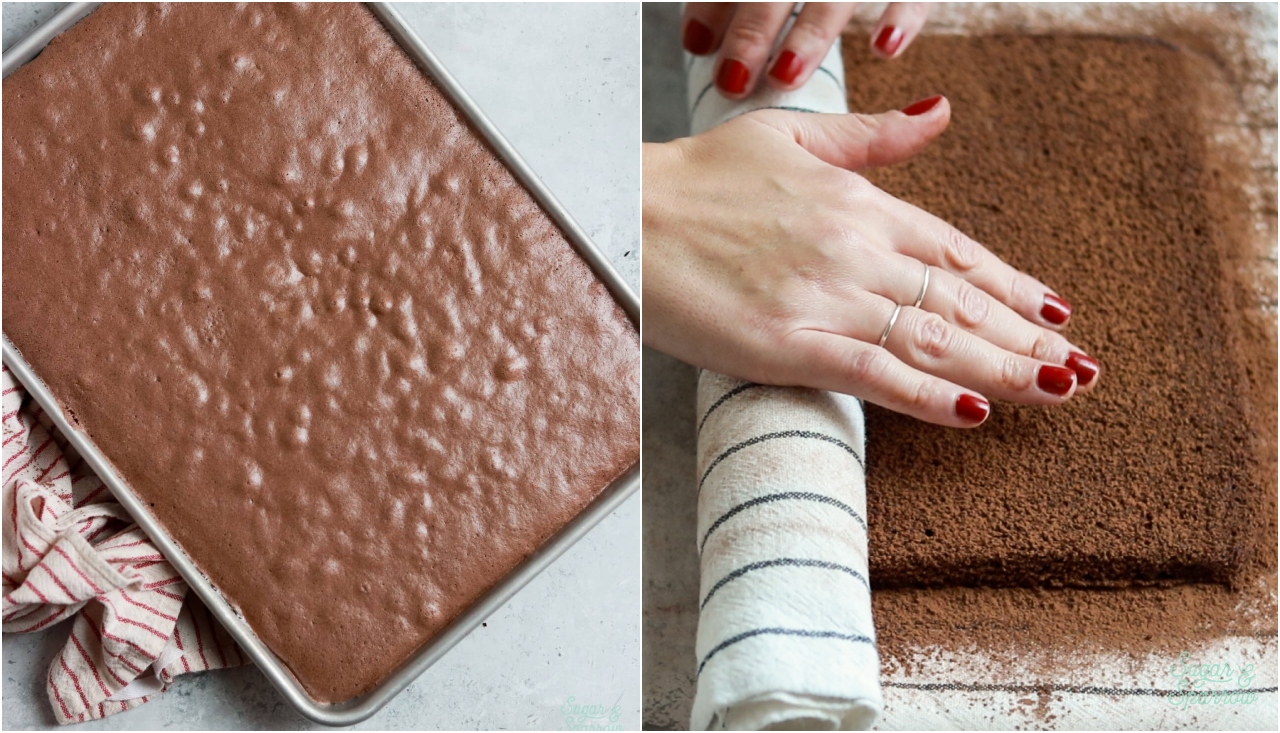
Immediately after baking the chocolate swiss roll cake in a 10×15 jelly roll pan (while it’s still hot!), you’ll need to release the cake from the pan on top of a kitchen towel or piece of parchment paper that’s been heavily dusted with powdered sugar. Then, dust the top of the cake and roll it up while it’s still hot. This trains the cake to be in a rolled position and helps prevent the cake from cracking. The cake will need to cool like that for a few hours until it’s room temperature, after which you will unroll it, add the filling, re-roll it, and decorate the yule log cake!
Chocolate Whipped Cream Filling
Made with just four ingredients, the chocolate whipped cream filling is deceptively simple to make, but somehow tastes like you went above and beyond. You essentially add all four ingredients – cold heavy whipping cream, sugar, cocoa powder, and vanilla – into the bowl of a stand mixer fitted with the whisk attachment (a hand mixer also works!) and whip it for just a couple minutes. It ends up pillowy soft with the perfect hint of cocoa and compliments the chocolate swiss roll cake beautifully!
Thick Chocolate Ganache
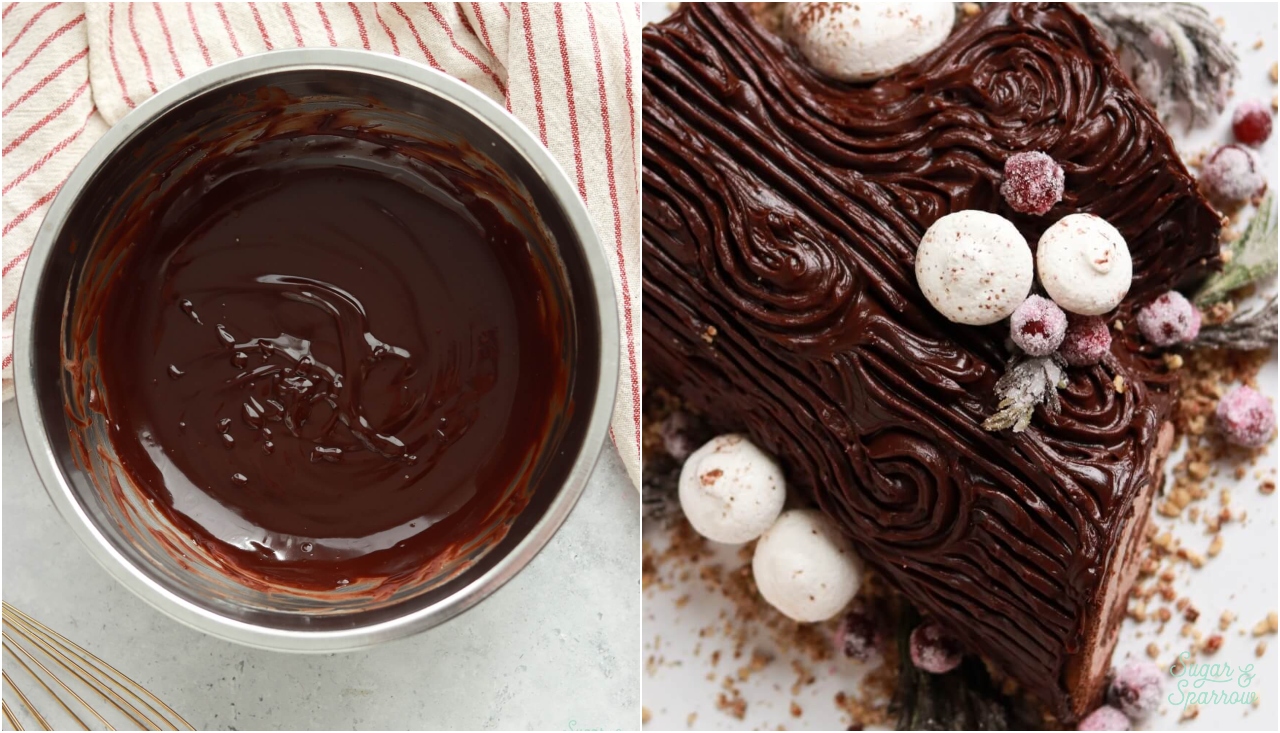
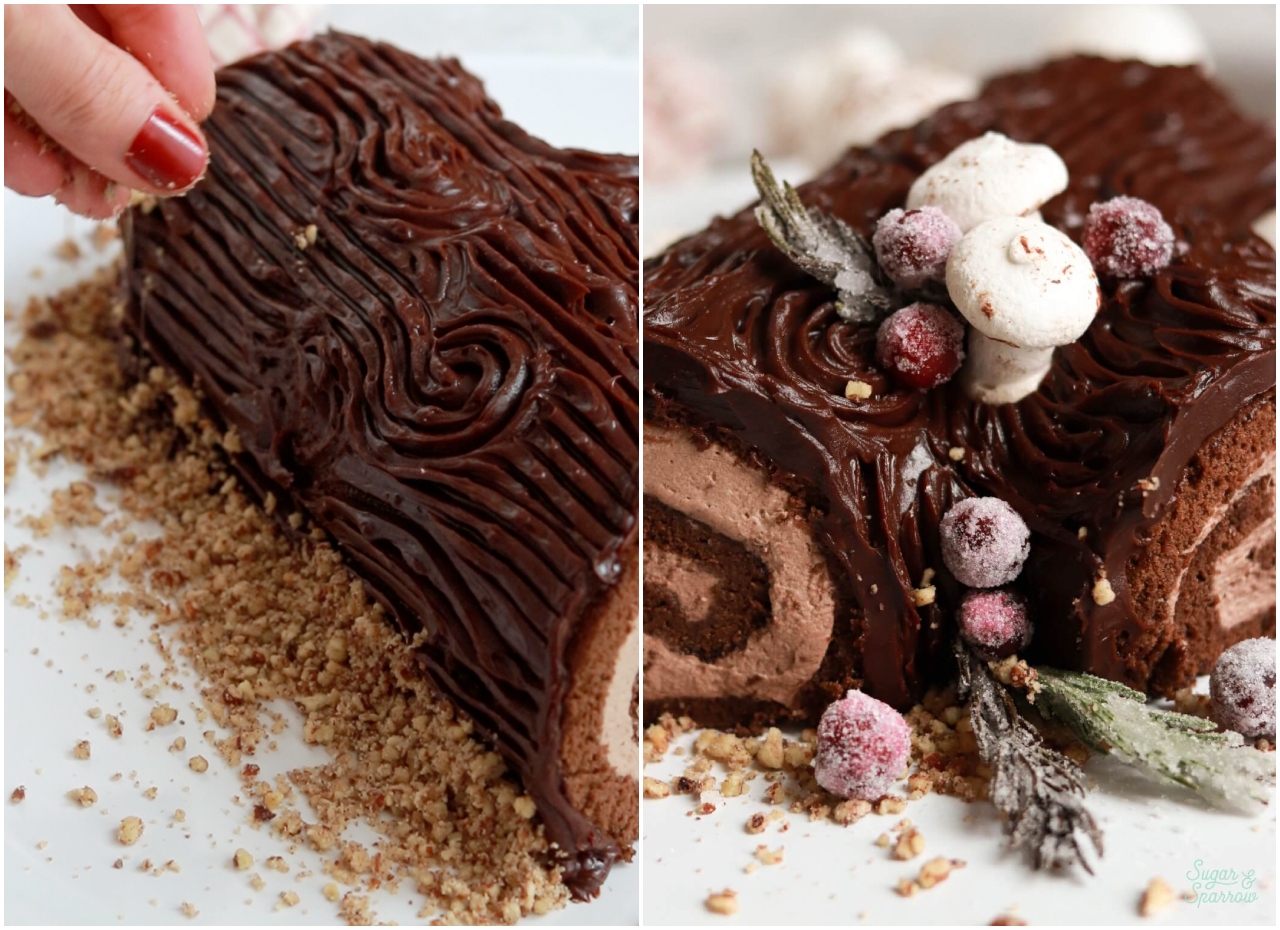
This chocolate ganache is made with just two ingredients (semi-sweet chocolate and heavy whipping cream), with slightly less cream than chocolate to create a thick frosting-like ganache. It’s made by simmering the heavy whipping cream, pouring it over the chocolate, whisking it together, and letting the ganache cool to room temperature (it thickens significantly as it cools). After cooling, it ends up beautifully decadent with rich chocolate flavor, silky smooth, and so easy to frost the Bûche De Noël with. My favorite part after adding the ganache all over the yule log is to rake a fork through it and create the wood textures!
Yule Log Cake Decorations
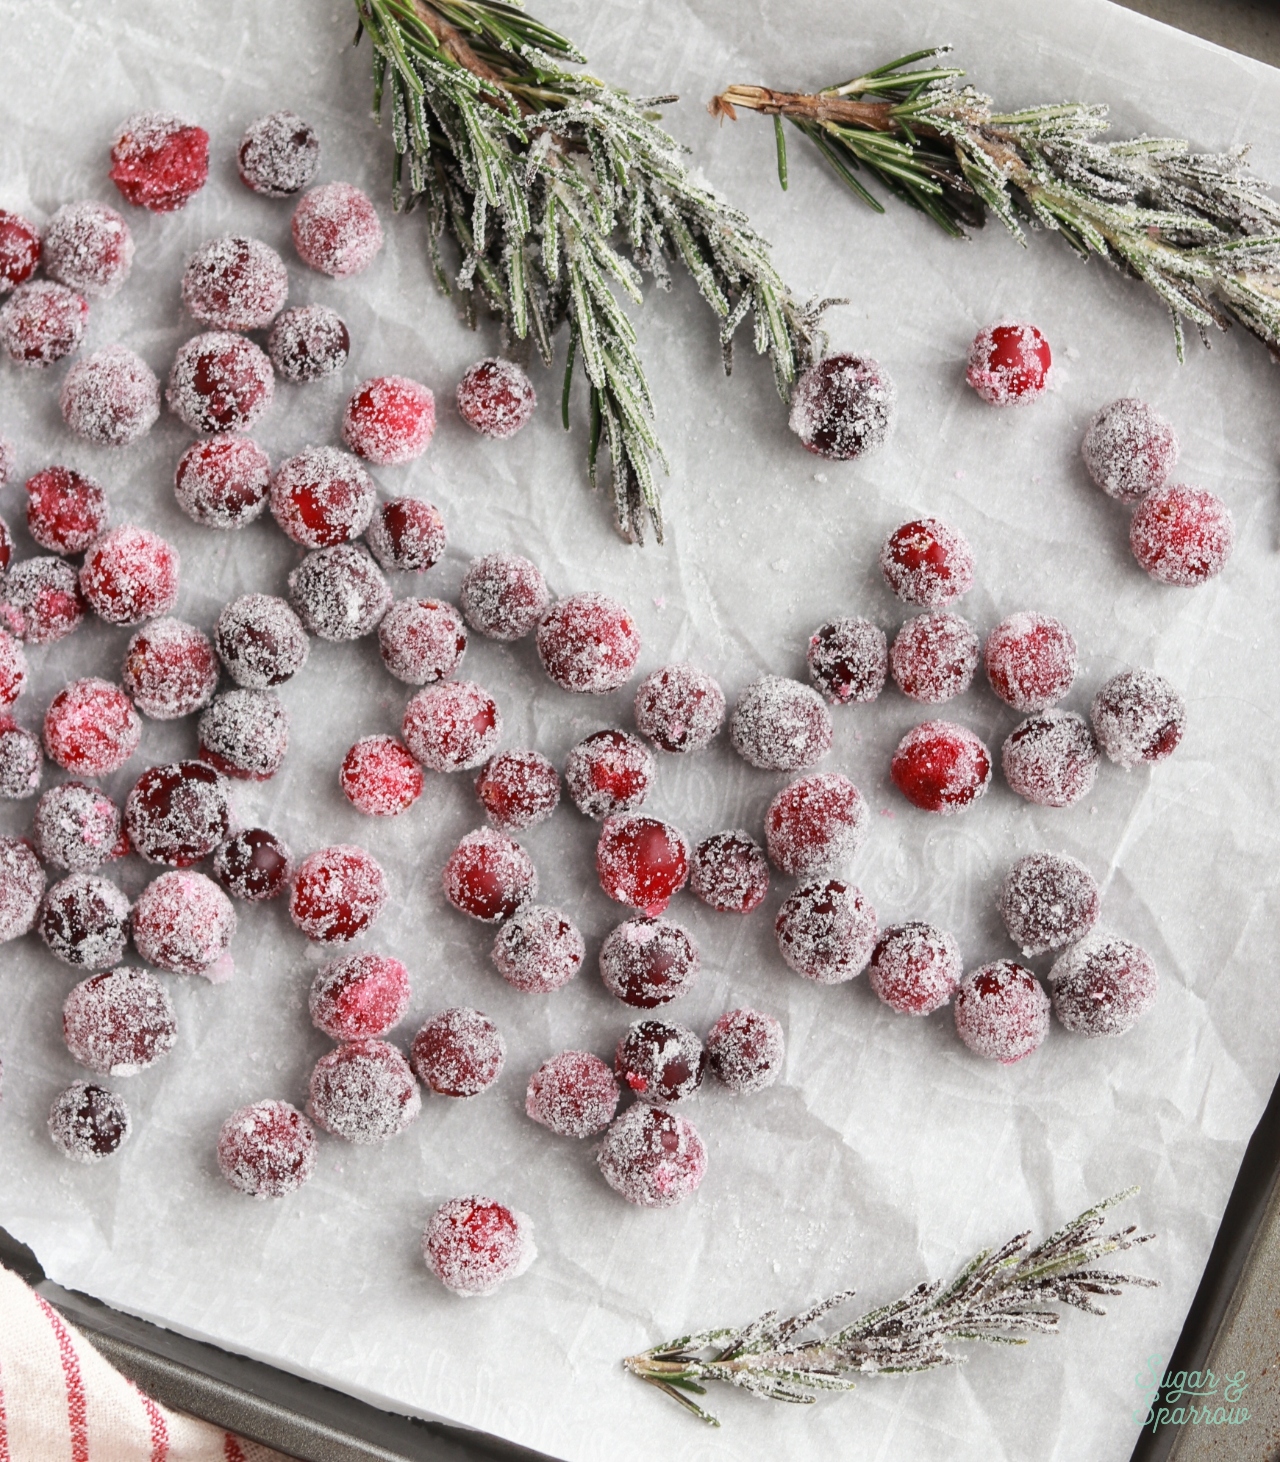
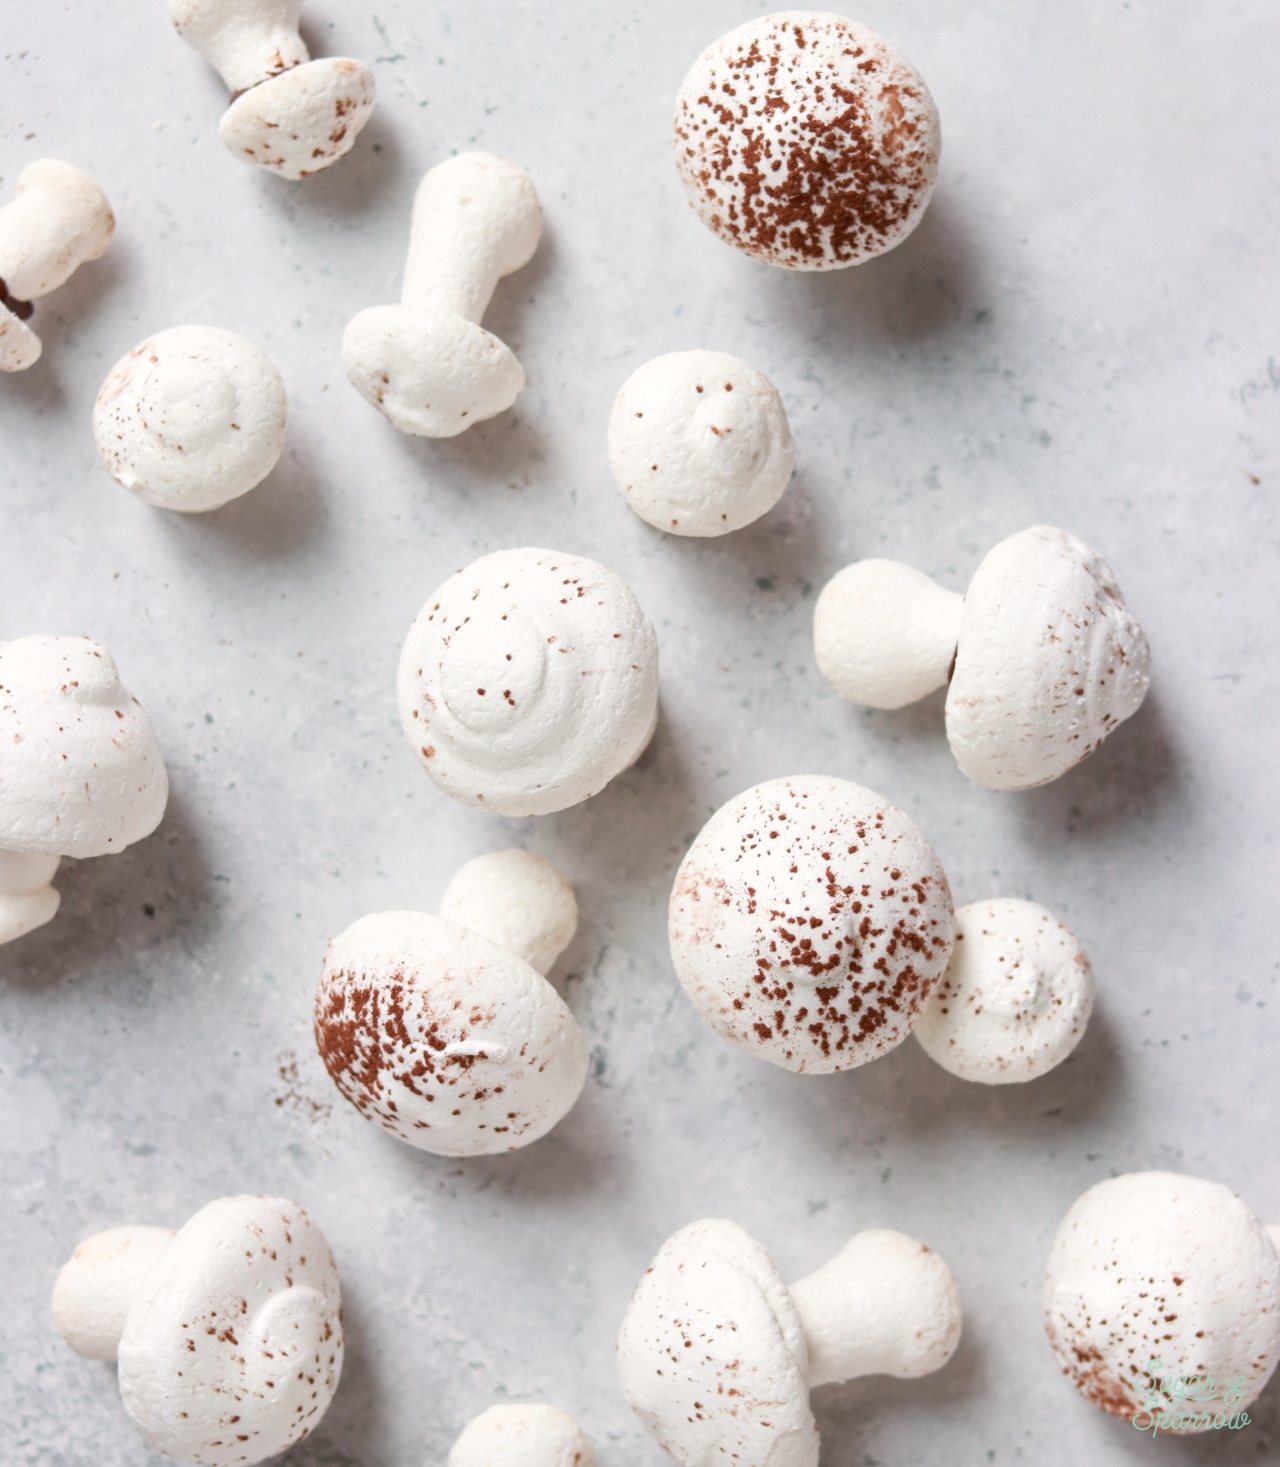
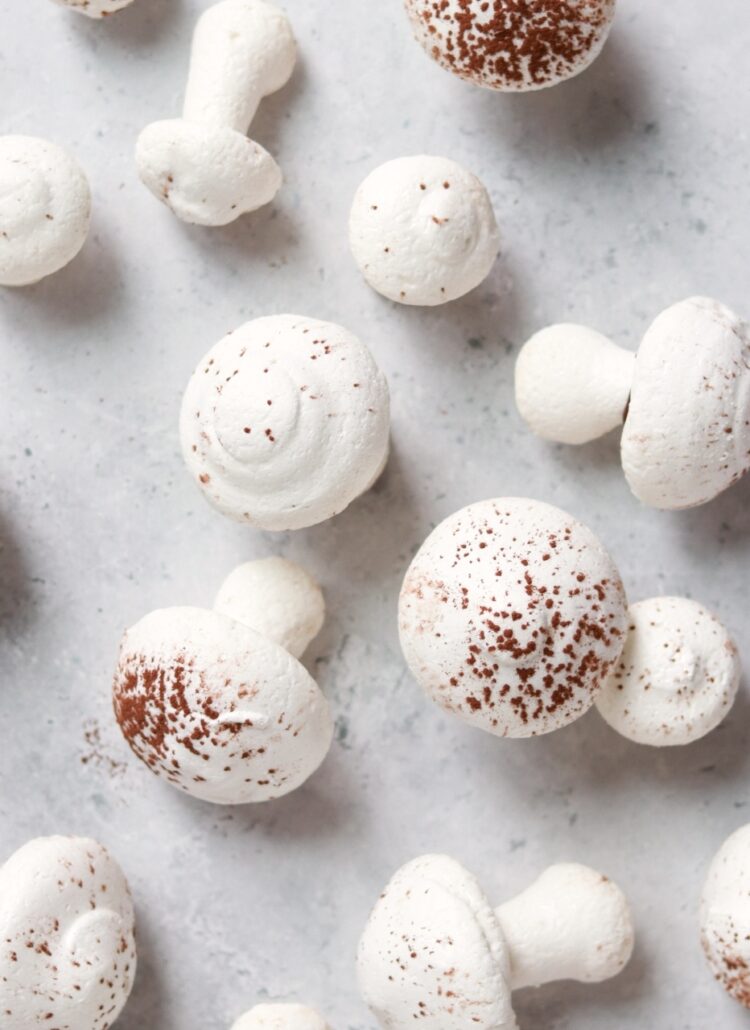
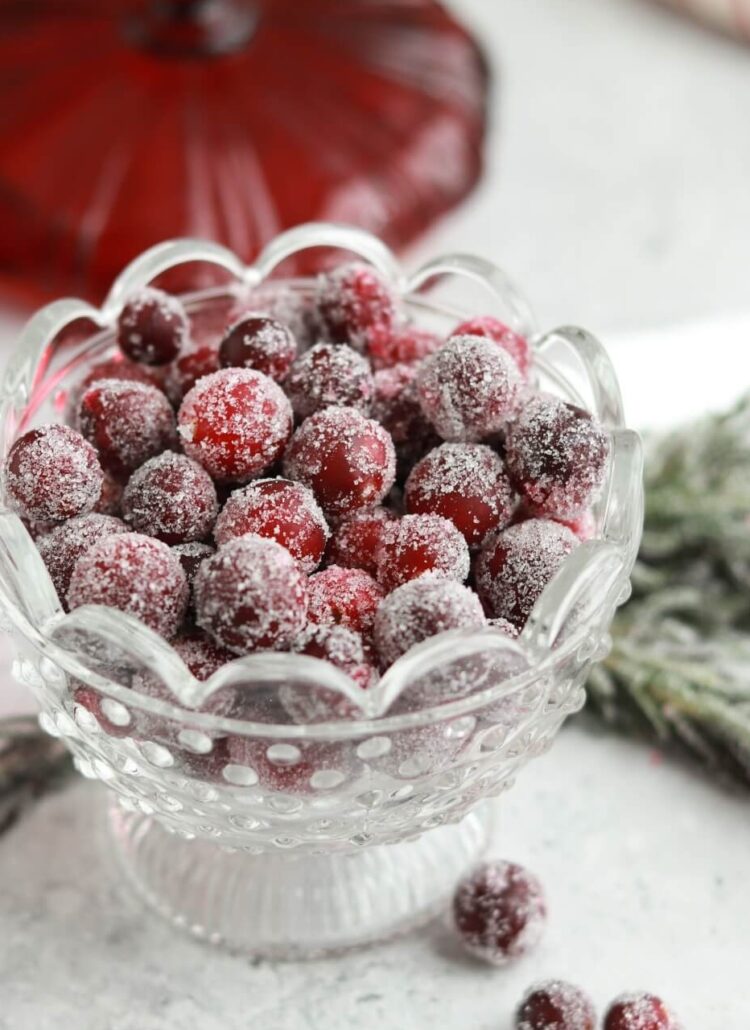
Making the decorations from scratch is so much fun and really makes this recipe feel like a labor of love! There are sugared cranberries, sugared rosemary, ground pecans (for the dirt), and meringue mushrooms that are almost too cute to eat! I have detailed instructions for how to make each decoration in the recipe card below.
How to Assemble + Decorate the Yule Log Cake
When all your decorations are made (if making from scratch) and your beautiful swiss roll cake is baking in the oven, here’s how to assemble and decorate the perfect festive Bûche De Noël:
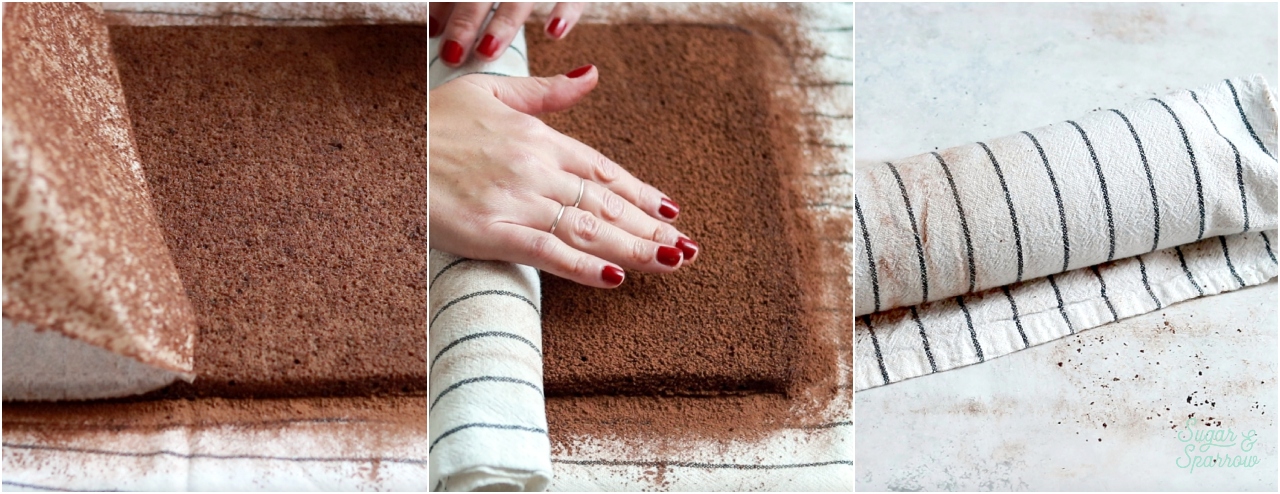
Step 1: Pre-Roll and Cool the Cake. Immediately after baking the swiss roll cake, run a paring knife around the edges and then invert it onto a cocoa powder dusted tea towel. Peel the parchment paper off the back, dust the top with more cocoa powder, and carefully roll the cake up in the towel starting with the shorter end. Let the cake cool completely to room temperature (about 1 ½ to 2 hours).
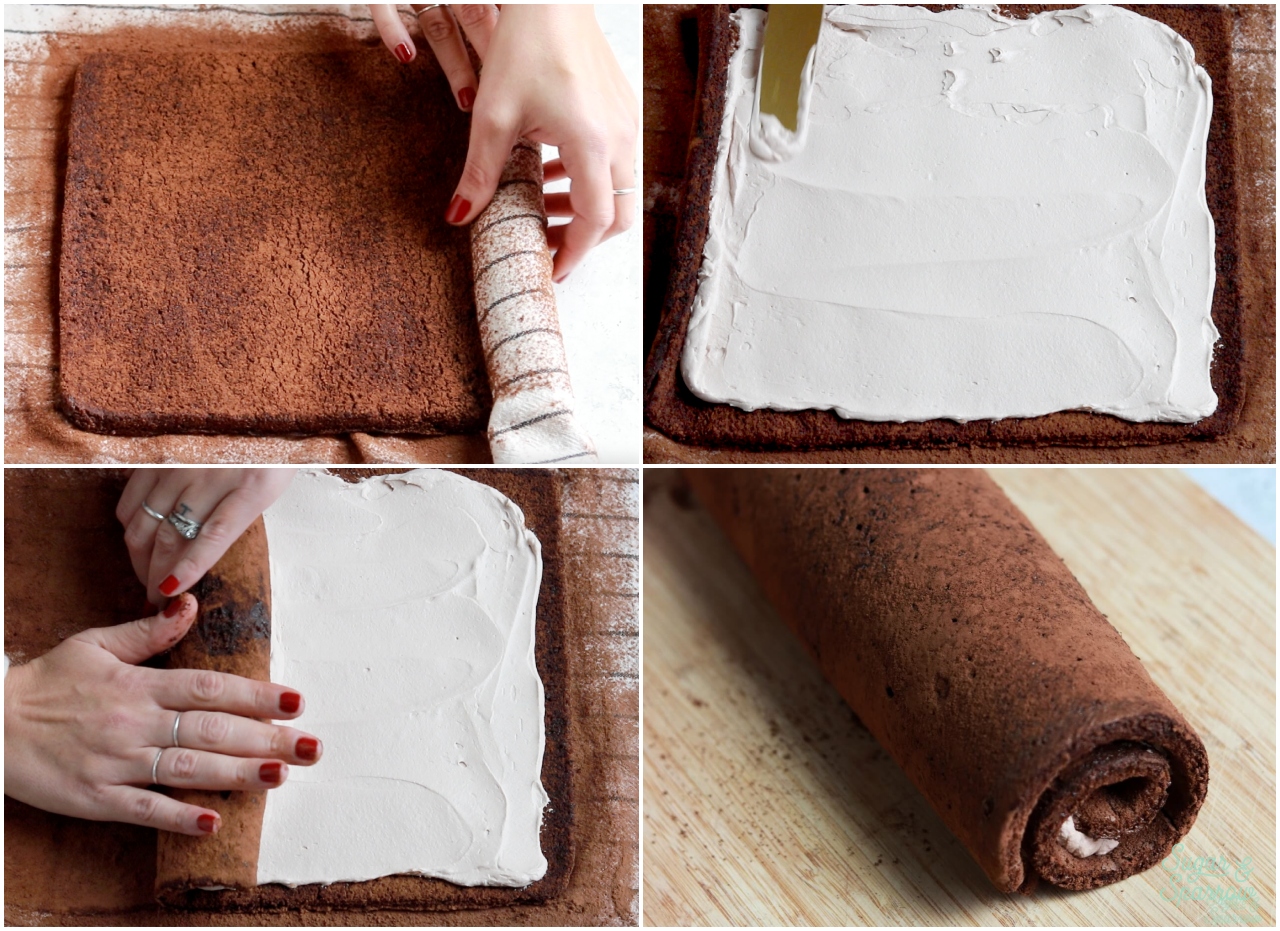
Step 2: Fill and Roll the Cake. At this point the pre-rolled cake should be completely cooled. Gently unroll the cake and add the chocolate whipped cream filling. Spread it in an even layer (leave about ½ inch around the edges), then carefully roll the cake back up.
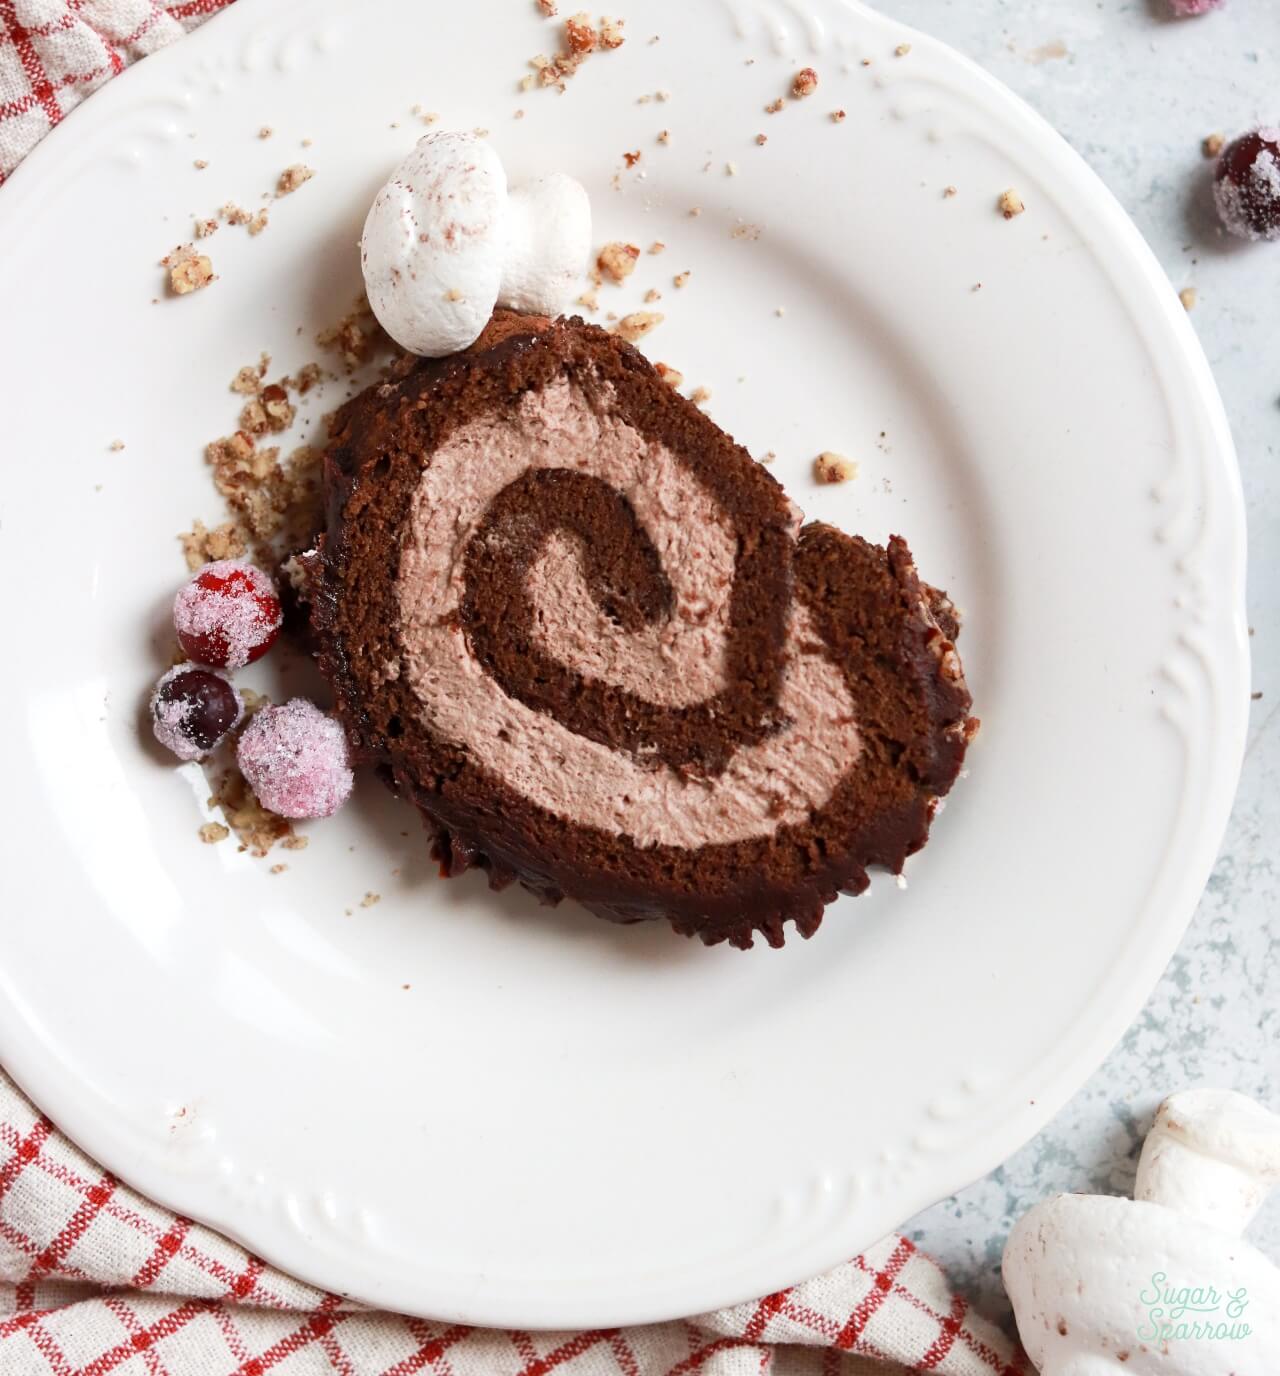
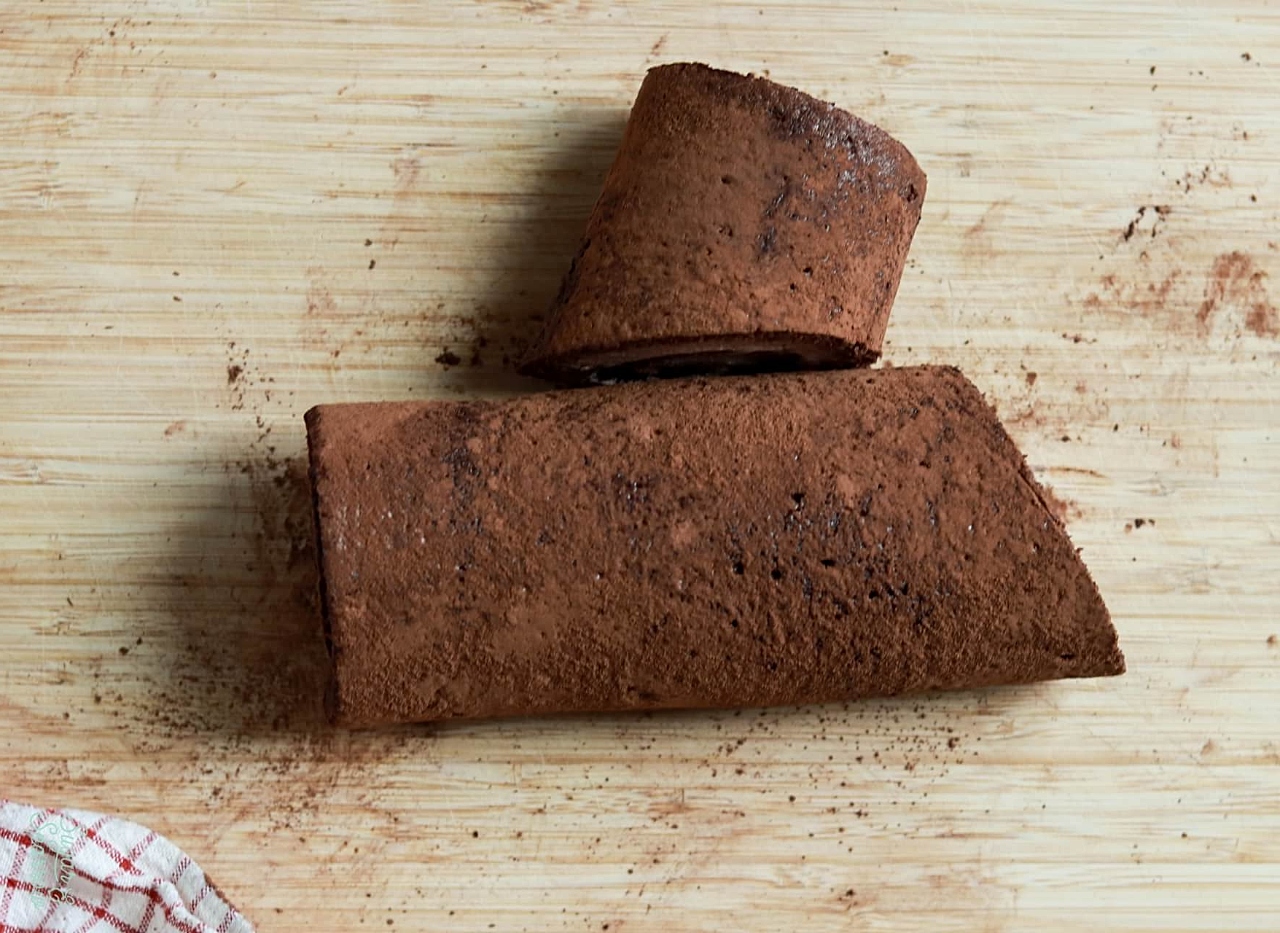
Step 3: Cut and Arrange the Yule Log Pieces. Use a serrated knife to slice a small diagonal section off one end of the swiss roll. Then, arrange the pieces as pictured on your serving plate.
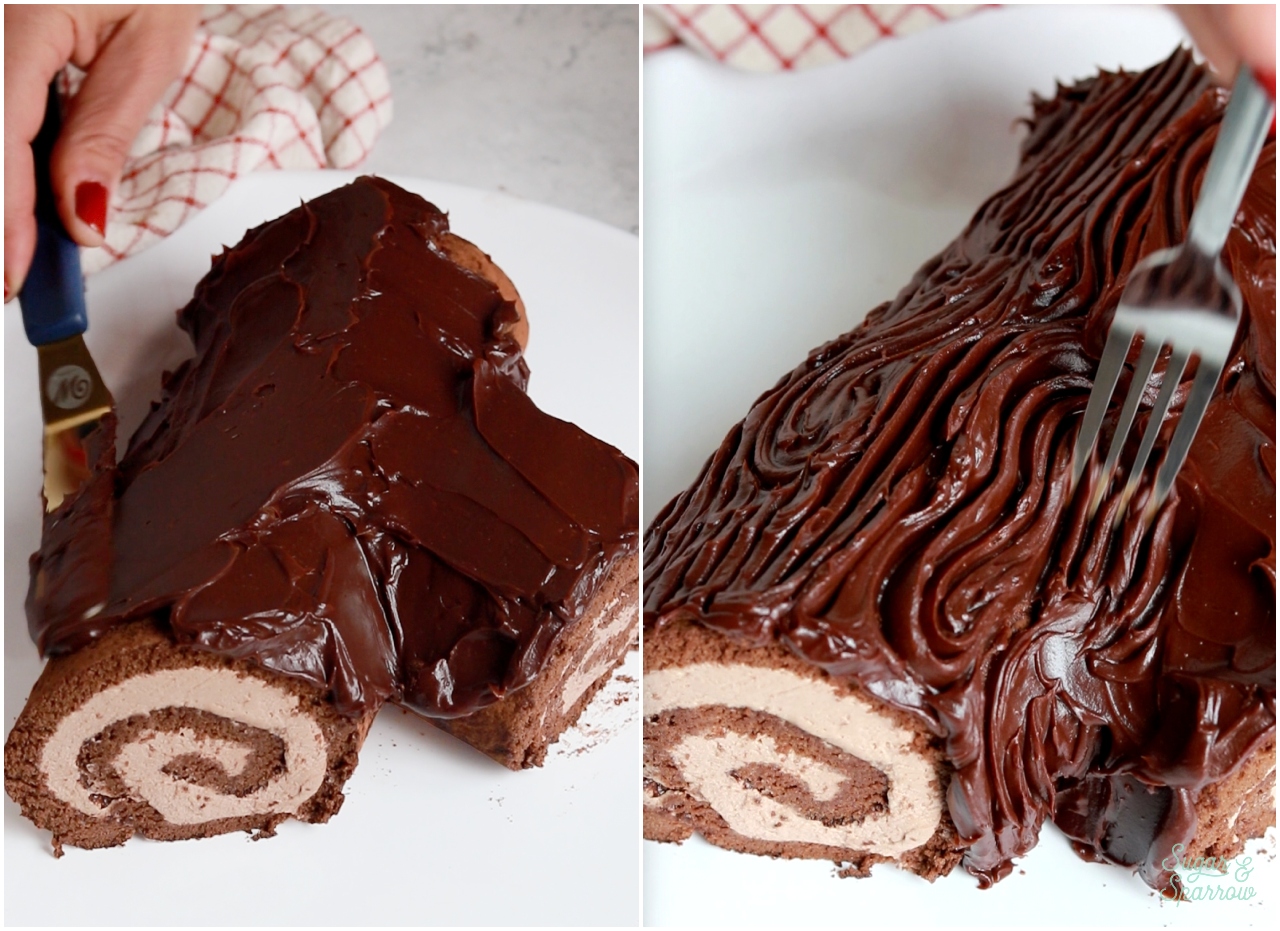
Step 4: Frost with Ganache. Spread the ganache all over the yule log and smooth it down with an angled spatula. Then, use a fork to create wood textures by raking it through and swirling it around every now and then.
Step 5: Decorate. Add the pecan dirt all around the base of the cake, then add pops of sugared cranberries, rosemary, and meringue mushrooms. So cute!
Yule Log Cake Tutorial Video
Here’s a detailed video of how to make every element of this yule log cake, then decorate it to perfection. Be sure to subscribe to my YouTube channel if you want more baking videos like this one!
I hope this yule log cake is the star of your holiday dessert table this year! If you make it, let me know how it went in the comments section below (don’t forget to rate the recipe!) and feel free to tag @sugarandsparrowco on Instagram if you post a photo. I would love to see it!
Yule Log Cake (Bûche De Noël)
Equipment
Ingredients
Meringue Mushrooms
- 1 large egg white
- 1/16 tsp cream of tartar less than 1/8 teaspoon
- 1/4 Cup (50g) granulated sugar
- 2 tsp cocoa powder for dusting (optional)
- 1/8 Cup (28g) semi-sweet chocolate chips
Sugared Cranberries & Rosemary
- 1/2 Cup (50g) fresh cranberries do not use frozen
- 5 rosemary sprigs
- 1/2 Cup (120ml) water
- 1 Cup (200g) granulated sugar, divided
Chocolate Swiss Roll Cake
- 1/2 Cup (66g) all-purpose flour
- 1/4 Cup (20g) unsweetened cocoa powder, plus more for dusting Dutch-processed or regular
- 1/2 tsp baking powder
- 1/4 tsp salt
- 4 large eggs, separated and at room temperature
- 2/3 Cup (133g) granulated sugar, divided
- 1/2 tsp pure vanilla extract
- 1/2 tsp instant coffee or espresso powder (optional)
- 3 Tbsp (45ml) vegetable oil
- 1/4 Cup (60ml) whole milk, room temperature
Chocolate Ganache Topping
- 1 Cup (170g) semi-sweet chocolate chips
- 3/4 Cup (180ml) heavy whipping cream
Chocolate Whipped Cream Filling
- 1 Cup (240ml) heavy whipping cream, cold
- 3 Tbsp granulated sugar
- 1 Tbsp unsweetened cocoa powder
- 1 tsp pure vanilla extract
Additional Garnish (optional)
- 1/4 Cup ground pecans hazelnuts or pistachios work as well
Instructions
Make the Meringue Mushrooms
- You can make these 1-3 days ahead (see notes). Preheat the oven to 200°F (93°C) and line a large baking sheet with parchment paper or a silicone baking mat.
- Make sure the bowl of your stand mixer and whisk attachment (or large bowl and hand mixer attachments) are clean and residue-free. Then, add the large egg white and 1/16 teaspoon of cream of tartar (measure 1/4 teaspoon of the cream of tartar, then divide that in half, then in half again) into the bowl. Beat together on high speed until foamy, about 2 minutes, scraping down the bowl and paddle in between to make sure the ingredients are combined. Turn the mixer to high speed and slowly add the sugar. Beat until stiff glossy peaks form, about 1-2 more minutes.
- Add the meringue into a piping bag fitted with a large round piping tip (I use Tip 2A) or simply snip off about 1/2 inch opening. On the prepared baking sheet, pipe the mushroom caps by hovering your tip 1/4 inch away from the surface and squeezing while slightly pulling up to create a shape that resembles a hershey's kiss, then quickly swirl the tip to the side so you get an even top. I like to dab the tops with a wet fingertip to make them smoother. I piped some smaller mushroom tops (a little less than 1 inch diameter) and some larger (about 1 1/2 inch diameter) for variety. Pipe the mushroom stems to look like taller hershey's kisses (1/2 to 3/4" diameter at the base) and squeeze the bag while you pull up to 1"-1 1/2" height). You'll have enough meringue for about 15 mushroom caps and stems.
- Bake the mushroom meringues for 2 hours (don't open the oven before this point), then remove and allow to cool completely to room temperature. Once cooled, use a paring knife to create a little hole on the underside of the caps and dust the tops with a little cocoa powder. Carefully slice off any pointy ends from the mushroom stems. Then, melt the chocolate in the microwave in 15-20 second intervals, stirring after each one, and place the melted chocolate into a piping bag. Snip off the end and pipe chocolate into the little hole you created on the bottom of a mushroom cap. Carefully press a mushroom stem into it and hold it there for a few seconds to secure it. Continue this assembly process with the rest of the mushroom caps and stems and allow them to dry completely.
Make the Sugared Cranberries
- You can make these 1-3 days ahead (see notes). Line a baking sheet with parchment paper and set aside. In a medium saucepan over medium heat, bring the 1/2 Cup of water and half of the sugar (1/2 Cup, 100g) to a simmer, whisking to dissolve the sugar. Add the cranberries and rosemary and toss to coat them, then use a slotted spoon to quickly transfer to the parchment lined baking sheet. Allow to sit for 1 hour (after which the sugar syrup will be tacky). Line a separate baking sheet with parchment paper and add the remaining 1/2 Cup (100g) of sugar into a shallow bowl. Working in small batches, coat the berries and rosemary in the sugar and transfer to the freshly lined baking sheet. Store at room temperature uncovered for up to 1 day, or store in the refrigerator for up to 3 days.
Make the Chocolate Swiss Roll Cake
- Preheat the oven to 350ºF (177ºC). Lightly grease the sides of a 10×15 jelly roll pan and line the bottom with parchment paper.
- In a medium bowl, sift together the flour, cocoa powder, baking powder, and salt. Set aside.
- Separate the eggs (if you haven't already) and make sure they are room temperature before moving on. Place the yolks in a large mixing bowl and add 1/3 Cup (66g) of the sugar. Whisk together vigorously by hand for 1-2 minutes, until pale and very well combined. Add the vanilla and espresso powder (if using) and whisk until combined, then whisk in the vegetable oil and whole milk. The mixture will be pale and a little bubbly on top. Add the dry ingredients you previously sifted together. Whisk until incorporated and the mixture resembles brownie batter. Set aside.
- In the bowl of your stand mixer fitted with the paddle attachment (or with a hand mixer and large bowl), add the egg whites and the remaining 1/3 Cup (66g) of granulated sugar. Mix on low speed until combined, then turn the mixer to medium-high speed and beat until it becomes a meringue with glossy stiff peaks (see blog post images above). This can take anywhere from 2-5 minutes or more depending on the temperature of your kitchen and speed of your mixer, so watch closely. The meringue on your whisk attachment should hold its peak when standing upright.
- Using a rubber spatula, gently fold half of the egg white meringue into the chocolate mixture to lighten the batter, then fold in the rest until there are no streaks of meringue.
- Pour the batter into your prepared pan and smooth it down evenly with an angled spatula. Bake for 11-14 minutes while you generously dust a tea towel with cocoa powder or powdered sugar in preparation for the baked cake. When the cake is done, the surface will look matte and the cake will spring back when lightly touched. I usually take mine out around the 12 minute mark.
- Immediately after the cake is finished baking, run a knife around the edges of the pan to release the sides, then quickly invert the cake onto your cocoa dusted tea towel. I promise it's less scary than it sounds! Remove the pan and gently peel away the parchment paper backing from the cake, then dust with more cocoa powder (or powdered sugar). Then, starting with the shorter end, gently but tightly roll the cake up in the tea towel. Transfer the rolled cake onto a cooling rack with the seam facing down and allow to cool fully for at least 2 hours.
Make the Chocolate Ganache
- Add the chocolate chips into a medium bowl (glass or metal) and set aside. In a small saucepan set over medium heat, add the heavy whipping cream and whisk occasionally until it begins to simmer. Then, pour it into the bowl of chocolate chips and let it sit for a minute before whisking together until fully combined and smooth. This needs to cool to room temperature before using, so place it (uncovered) in the refrigerator for 30-60 minutes, or cover and chill in the refrigerator for up to 2 weeks.
Make the Chocolate Whipped Cream Filling
- Add all of the chocolate whipped cream ingredients into the bowl of your stand mixer fitted with the whisk attachment (or use a large bowl with a hand mixer). Beat on medium-high until creamy yet stiff peaks form, about 2-3 minutes.
Assemble and Decorate
- When the cake is cooled, very slowly and gently unroll it. Add the chocolate whipped cream filling and smooth it down into an even layer, leaving about 1/2 inch of space from each edge. Gently yet tightly roll the cake back up into a roll without the towel this time. Transfer to a cutting board and cover with plastic wrap, then chill in the refrigerator for about 30 minutes (or up to 2 days) before moving on.
- Use a serrated knife to slice off a short (3-4 inch) diagonal section off the edge of the yule log. Arrange the pieces on your serving plate as pictured in the blog post above (feel free to slice off the end of the smaller piece to expose the swirl). Bring the ganache to room temperature (if it's cold, gently warm it in the microwave in 5 second intervals, stirring after each one, until creamy like peanut butter), then spread it all over the yule log to cover every surface (except for the swirl edges). Smooth the ganache down with an angled spatula, then use a fork to create the wood textures by gently raking and swirling it through the ganache. Add ground pecans around the base of the yule log, then garnish with sugared cranberries/rosemary and meringue mushrooms.
Notes
- Meringue Mushrooms: the unassembled mushrooms can be made ahead and stored at room temperature in an airtight container for 1-2 weeks as long as they are stored in a dry (not humid) place. Humidity tends to soften the meringues. After assembling with chocolate, they can be stored at room temperature for up to 3 days, but I recommend assembling on decorating day for best results.
- Sugared Cranberries: can be made 1 day ahead and stored at room temperature (loosely covered) or in an airtight container in the refrigerator for up to 3 days. If they get soggy, simply re-roll them in fresh granulated sugar and they should look good as new.
- Chocolate Swiss Roll Cake: after baking and pre-rolling the cake it can be stored at room temperature for up to one day. If cooling longer than 2 hours, be sure to cover the exposed edges by tucking the ends of the towel under the roll. After filling and rolling the cake, cover tightly with plastic wrap and store in the refrigerator for up to 2 days before decorating, or freeze for up to 3 months.
- Chocolate Whipped Cream Filling: can be made up to 1 day ahead of time, stored in an airtight container in the refrigerator.
- Chocolate Ganache Topping: can be made up to 2 weeks in advance and stored in an airtight container in the refrigerator. When you’re ready to decorate the cake, gently reheat it in the microwave in 5 second intervals, stirring after each one, until the ganache is room temperature and peanut butter consistency.
- Assembled Yule Log: can be made up to 2 days in advance and stored in the refrigerator (although I would wait to add the decorations until serving day for best presentation). You can also freeze the assembled cake (sans decorations) for up to 3 months.

Followed recipe as listed. Absolutely delicious!! And fun to make!!
Yay, Susan! I’m so happy to hear that it was a hit!
Can you do this recipe with a normal half sheet pan?
Hi Reilly! I haven’t tried it in a half sheet. The pan I’m using is 10×15 and a half sheet is 13×18, so I’m thinking you’ll probably need to make 1.5x the recipe to have enough batter. Baking time and oven temp should be about the same though!
amazing!! we made the swiss role recipe and a slightly adjusted chocolate ganache recipe (we used unsweetened chocolate so just added some sugar). it came out incredible! my siblings and i had a great time making this together. definitely will be coming back to this next year and will try to make the meringue mushrooms as well! thank you for the recipe and merry christmas!
Yay, Rei! I am so happy this recipe was a hit and how fun that you got to make it with your siblings! That is so special. Merry Christmas!
Thank you for this great tutorial & recipe…I made 2 other rolls and was in tears last night because both failed. This was easy to follow and I had no issues!!!! MERRY CHRISTMAS
Ahhh I’m so glad that this recipe saved the day! Merry Christmas, Diane!
Excited to try esp since your recipe looks like it has less sugar than other recipes. Do you think i can reduce the sugar a bit more in the sponge? Thanks ❤️
Hi Toni! The sugar in the sponge not only sweetens it but provides a soft texture and flexibility (important for preventing cracks in a rolled cake). I haven’t tried this recipe with less sugar so it would be an experiment, but if you want to try reducing the sugar to 1/2 Cup total (add 1/4 Cup to the egg whites and 1/4 Cup to the egg yolks), that’s what I would try.
Whitney, confirming only 1/2 a cup of flour is needed?
Hi Susan! Yes, just 1/2 Cup (66g) of all purpose flour for this one.
Just made this with all the components and it turned out great! Tastes delicious, and was a lot easier to make than I thought it would be. Only thing I did different was make a chocolate whipped cream cream cheese filling instead. Thanks for the recipe!
Yay, Jay!! I’m so happy this recipe was delicious AND easier than expected! Thanks so much for letting me know 🙂 also, adding cream cheese to the filling sounds amazing!
I would like to make it for an event but I’m wondering if I could freeze it for 1 week.
Hi Laura! Yes, you can freeze the assembled yule log (without the decorations) for up to 3 months. The meringue mushrooms and sugared cranberries won’t freeze/thaw as well, so I would wait to add those the day you serve it. Enjoy!