• Cake
  • Frosting
  • YouTube
  • My Favorite Tools
  • Nav Social Icons

  • Skip to primary navigation
  • Skip to main content
  • Skip to primary sidebar
  • Skip to footer
  • Recipes
    • Cake
    • Cupcakes
    • Frosting
    • Ice Cream
    • Vegan
  • Cake Basics
  • Tutorials
  • Blog
  • About
  • Mobile Menu Widgets

    Connect

    Search

Sugar & Sparrow logo in script font

Sugar & Sparrow

Lifestyle and Cake from Portland Oregon

  • Cake Basics
  • Recipes
    • Cake
    • Cupcakes
    • Cookies & Bars
    • Filling
    • Frosting
    • Ice Cream
    • No-Bake
    • Small Batch
    • Vegan
  • Tutorials
  • Book
  • Blog
  • About

No-Churn Blackberry Lavender Ice Cream

July 23, 2024 · In: Featured, Ice Cream, Recipes, Seasonal, Summer

Jump to Recipe

I know there’s only a month left of Summer but I couldn’t let this season go by without sharing my latest no-churn creation: blackberry lavender ice cream. Oh my goodness, this is everything I want in a floral ice cream. The perfect amount of lavender notes (not soapy AT ALL) paired with a homemade honey blackberry jam that rounds it out just right. It’s a little whimsical and fancy, yet so easy to whip up without an ice cream maker. If you’re looking to impress at your next gathering or make yourself a treat that you can enjoy for the next several days, this is it. 

This post may contain affiliate links. For more information, see our disclosure policy.

blackberry lavender ice cream by sugar and sparrow

This recipe requires a little more involvement than the average no-churn ice cream recipe, but it’s still way easier than a churned recipe. There are a couple elements that require a tiny bit of cooking, which I’ll explain below. 

blackberry lavender ice cream no churn
what is culinary lavender

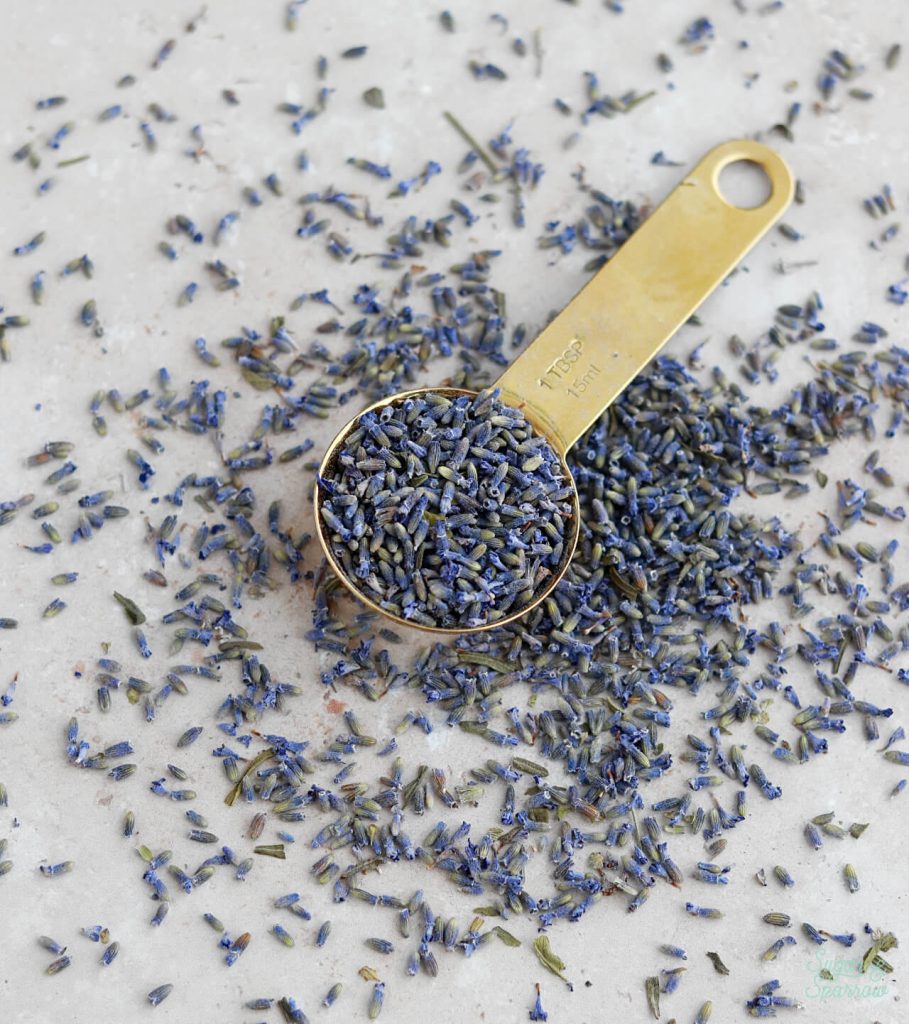
This lavender ice cream base is made without any extracts or syrups. Instead, it’s made by infusing heavy whipping cream with dried culinary lavender for the freshest flavor that isn’t at all artificial or soapy tasting. You’ll essentially simmer the heavy whipping cream, add the culinary lavender, let it steep, then cool it way back down and strain out the lavender before whipping it up into an ice cream base. I absolutely love how it turned out!

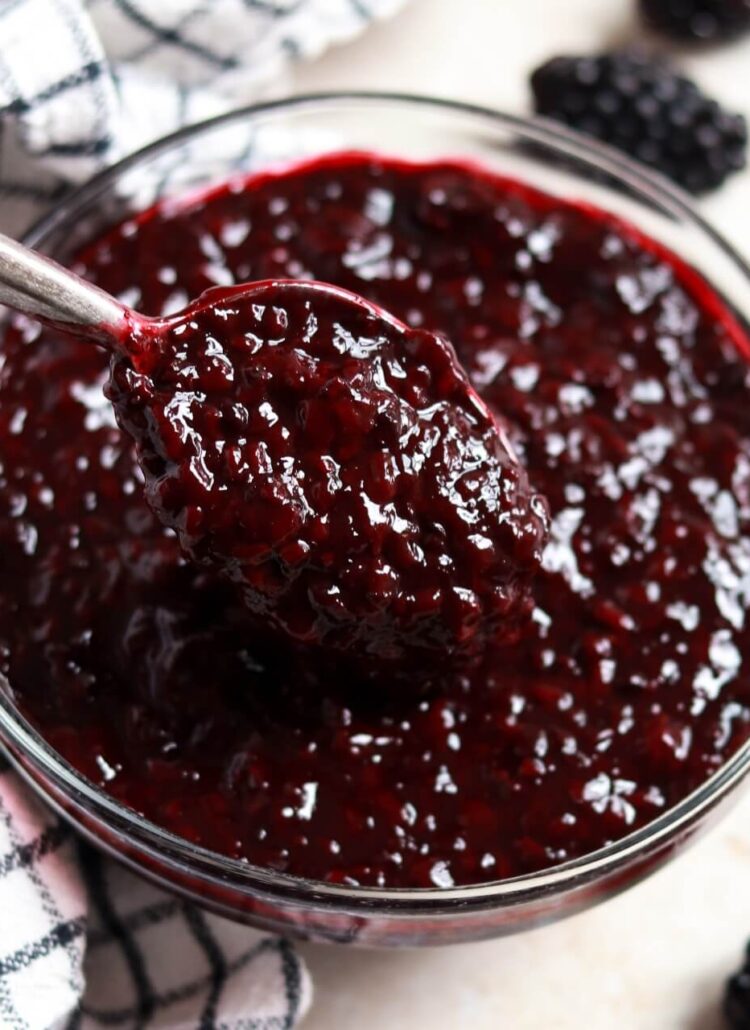
While the no-churn lavender ice cream would be amazing all on its own, I decided to add a ribbon of blackberry jam. My neighbors had a surplus of blackberries, which pair SO well with lavender, so I took it as a sign. The jam is so simple to make with only three ingredients: fresh blackberries, honey, and a little lemon juice. I cooked these ingredients together until the liquid reduced slightly, then cooled it down before swirling it throughout the lavender ice cream. It is heavenly and really rounds out the flavor. 

homemade blackberry jam recipe
lavender ice cream with blackberry jam swirl

I really wanted to make this ice cream purple (because lavender) but it turns out I didn’t have to use any food coloring! Instead, I added a little of the blackberry jam to the lavender ice cream base which turned it a beautiful light purple. Such a fun little step in this recipe to use natural food coloring!

no churn lavender ice cream recipe
blackberry lavender no churn ice cream

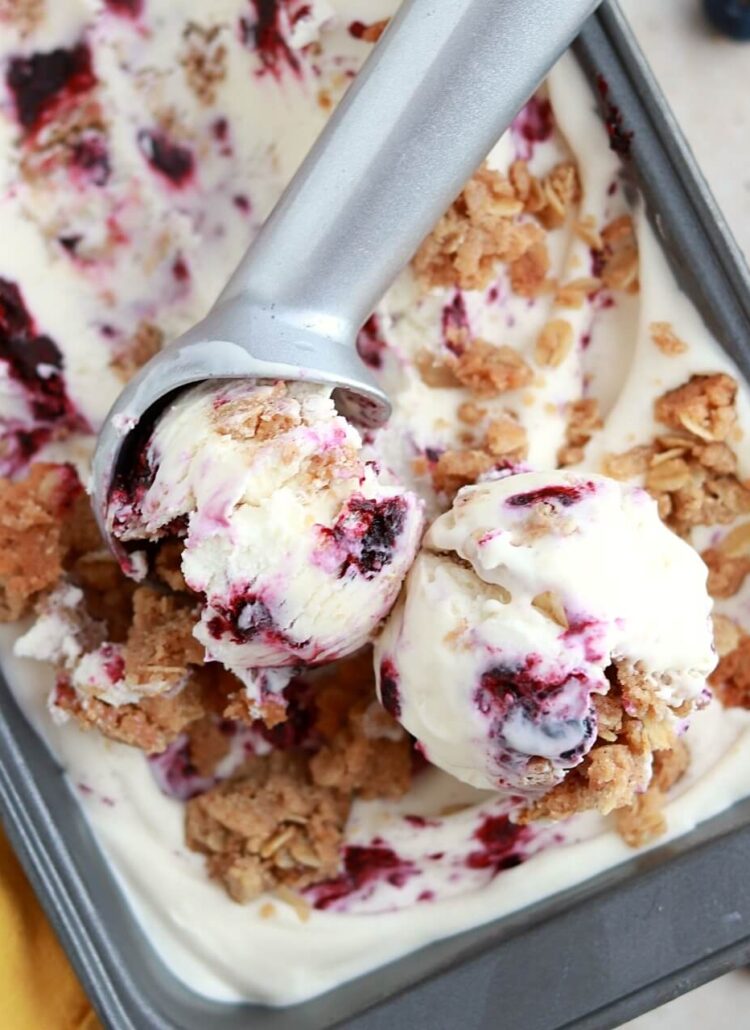
I could not stop eating this blackberry lavender no-churn ice cream during the photoshoot. It’s so pleasantly aromatic, light, and bursting with beautiful berry lavender flavor. The perfect balance of floral and fruity and I can’t wait for you to try it!

blackberry lavender no churn ice cream

No-Churn Blackberry Lavender Ice Cream

Lavender-infused ice cream with the perfect floral flavor and ribbons of easy homemade blackberry jam. The perfect Summertime treat, no fancy ice cream equipment needed!
Print Recipe Pin Recipe
Prep Time:20 minutes mins
Cook Time:30 minutes mins
Freezing Time:8 hours hrs
Servings: 12 servings

Ingredients

Lavender Cream

  • 2 Cups (480ml) heavy whipping cream
  • 2 1/2 tsp dried culinary lavender

Blackberry Jam

  • 1 1/2 Cups (210g) blackberries fresh or frozen
  • 2 Tbsp honey
  • 1 tsp lemon juice

No-Churn Lavender Ice Cream

  • 2 Cups (480ml) lavender cream (recipe above)
  • 14 Oz sweetened condensed milk
  • 1 Tbsp blackberry jam (optional for color, recipe above)

Instructions

Make the Lavender Cream

  • Pour the heavy whipping cream into a medium saucepan set over medium heat. Whisking occasionally, bring the cream to a simmer, then remove from the heat and stir in the dried culinary lavender.
  • Pour the lavender cream into a separate airtight container and let it cool in the refrigerator for 3-4 hours, until it's very cold, before moving on with the ice cream portion of the recipe.

Make the Blackberry Jam

  • In a medium saucepan, add the blackberries, honey, and lemon juice. Cook over medium heat, stirring occasionally and mashing up the berries, until the mixture begins to boil. Continue cooking over medium heat until the mixture has reduced by 1/3, about 10-15 minutes.
  • Remove from the heat and place into an airtight container. Let the jam chill in the refrigerator for 2-3 hours before moving on with the recipe. It will thicken as it cools.

Make the No-Churn Lavender Ice Cream

  • Place a large metal bowl into the refrigerator to chill for at least 15-20 minutes. Meanwhile, add the sweetened condensed milk and 1 Tbsp of blackberry jam into a small bowl and whisk to combine. Set aside.
  • Remove the large chilled metal bowl from the refrigerator. Place a fine mesh sieve over the bowl and pour the lavender cream into it so that the lavender is strained from the cream. Press down on the lavender in the sieve to collect as much cream as possible, then discard the lavender.
  • Beat the strained lavender cream with a hand mixer (or using the whisk attachment on your stand mixer) on high speed until stiff peaks form, about 3 minutes.
  • Using a rubber spatula, fold one half of the sweetened condensed milk mixture into the heavy whipping cream mixture. When combined, gently fold in the rest of the sweetened condensed milk mixture in.
  • In an 9x5x3 inch loaf pan, add 1/2 of the lavender ice cream mixture. Add about half of the jam mixture by spoonfuls and swirl them into the ice cream with a skewer or butter knife. Add the rest of the lavender ice cream mixture and repeat the jam swirling process.
  • Cover the loaf pan with aluminum foil and freeze for 6-8 hours, after which it should be semi-firm, scoopable, and ready to enjoy!

Notes

Make ahead tips:
  1. The lavender cream can be made ahead and stored in an airtight container in the refrigerator for up to one week before using in the recipe.
  2. The homemade blackberry jam can be made ahead and stored in an airtight container in the refrigerator for up to 2 weeks. 
  3. The assembled ice cream is best stored in an airtight container (or in the loaf pan with aluminum foil cover) in the freezer. It will last for several months (if you can make it last that long). 

Did you make this no-churn blackberry lavender ice cream? I want to know how it went! Let me know in the comments below and feel free to tag @sugarandsparrowco on Instagram to show me. I love to see what you create with my recipes!

By: Whitney · In: Featured, Ice Cream, Recipes, Seasonal, Summer · Tagged: blackberry, ice cream, lavender, no churn ice cream

you’ll also love

no churn vanilla ice cream berry crisp toppingsNo-Churn Berry Crisp Ice Cream
no churn strawberry shortcake ice cream recipe with shortcake crumblesNo-Churn Strawberry Shortcake Ice Cream
no churn dulce de leche ice cream recipe by sugar and sparrowNo Churn Dulce de Leche Ice Cream

Join the List

Stay up to date & receive the latest posts in your inbox.

Reader Interactions

Comments

  1. Mel says

    August 5, 2024 at 2:44 am

    Would this be easy enough to double? If I did 4 cups of cream 5tsp of lavender or would I reduce the lavender a little?

    Reply
    • Whitney says

      August 5, 2024 at 12:43 pm

      You can absolutely double this! 4 Cups of cream and 5 tsp lavender will be perfect for that scale.

      Reply

Leave a Reply Cancel reply

Your email address will not be published. Required fields are marked *

Recipe Rating


Next Post >

DIY Party Animal Cake Toppers

Primary Sidebar

Welcome to Sugar & Sparrow

Welcome to Sugar & Sparrow

Helping you whip up pretty desserts with confidence and creativity. And hopefully sharing a few laughs with you along the way!

Learn More

Connect

let’s bake!

Get my very best recipes, baking tips, and decorating tutorials sent to your inbox

Featured Posts

Anyone Can Cake giveaway with Wilton

Anyone Can Cake x Wilton GIVEAWAY!

unicorn cake tutorial

Unicorn Party Cake Tutorial

rainbow cake by sugar and sparrow

Gradient Rainbow Buttercream Cake Tutorial

Search

Archives

Follow Along

@sugarandsparrowco

LEMON CUPCAKES 🍋 after about a dozen recipe tes LEMON CUPCAKES 🍋 after about a dozen recipe tests, this one is everything I could want in a lemon cupcake! Fluffy-yet-moist, bursting with natural lemon flavor, and absolutely irresistible topped with lemon cream cheese buttercream. 

Full recipe (with frosting) linked in my bio + at https://sugarandsparrow.com/homemade-lemon-cupcakes/

INGREDIENTS:
1 Cup (132g) all-purpose flour
1 tsp baking powder
1/4 tsp salt
1/4 Cup (60ml) whole milk, room temperature
3 Tbsp (45ml) lemon juice from 1 medium lemon
3/4 Cup (150g) granulated sugar
3 Tbsp (42g) unsalted butter, room temperature
2 Tbsp (30ml) vegetable oil
2 large eggs, room temperature
1 tsp pure vanilla extract

INSTRUCTIONS:
1. Preheat the oven to 350ºF (177ºF) and line a standard cupcake pan with 12 paper liners.
2. In a large bowl, whisk together the flour, baking powder, and salt. Set aside. 
3. In the bowl of a stand mixer fitted with the paddle attachment (or with a hand mixer and large bowl), add the lemon zest to the sugar and mix on low speed until fragrant and well combined, about 1 minute. Meanwhile, combine the lemon juice with the milk and set aside. 
4. Add the butter to the lemon-sugar mixture and cream on medium speed until and combined, about 2 minutes. Add the vegetable oil and beat until light and creamy, about 3 minutes. Scrape down the bowl and paddle as needed.
5. Mix in the eggs one at a time on low speed, then add the vanilla and turn the mixer to medium speed for one minute.
6. Turn the mixer off and add the flour mixture all at once. Mix on low speed until just combined, then slowly pour in the lemon-milk mixture. Mix until just combined, about 30 seconds.
7. Divide the batter equally between the liners and bake for 14-18 min. Cool, then top with frosting of your choice (link in bio for lemon cream cheese frosting)�
#lemoncupcakes #creamcheesefrosting #lemon #cupcakes #cupcakedecorating
April in my kitchen 🌸 I published 5 NEW recipes April in my kitchen 🌸 I published 5 NEW recipes on my site, baked my Oreo cupcake recipe for a fundraiser and found it was just as delicious as I remember, and filmed/photographed 3 recipes that will be on my blog in May (Lemon Cupcakes, Lemon Cream Cheese Buttercream, and No-Bake Marbled Strawberry Cheesecake) 🥰 

Comment “APRIL” to get all the available recipes and stay tuned for more! 

#bakersofinstagram #springbaking #cakedecorating #cupcakes #bakinglove
SHEET PAN COOKIE CAKE 🍪 slice it warm for a fud SHEET PAN COOKIE CAKE 🍪 slice it warm for a fudgy chocolate chip cookie OR let it settle into a moist and chewy cookie cake that’s perfect for decorating! My fave vanilla buttercream + sprinkles turn this giant chocolate chip cookie into the perfect birthday cake alternative at the end 🥳
⁣
Full recipe + decorating ideas at https://sugarandsparrow.com/sheet-pan-chocolate-chip-cookie-cake/
⁣
INGREDIENTS⁣
1 Cup (226g) unsalted butter, melted⁣
1 1/3 Cups (267g) packed light or dark brown sugar⁣
1/2 Cup (100g) granulated sugar⁣
3 large eggs⁣
1 Tbsp pure vanilla extract⁣
1 tsp baking soda⁣
1 tsp cornstarch⁣
1/2 tsp salt⁣
3 Cups (398g) all purpose flour⁣
2 Cups (350g) semi-sweet chocolate chips⁣
⁣
INSTRUCTIONS⁣
1. Preheat the oven to 350ºF (177ºC). Grease and line a 13×18 inch sheet pan.⁣
2. In a large bowl, add the brown sugar and granulated sugar. Melt the butter in the microwave and pour it over the top of the sugars. Whisk together until uniform. Add the eggs and vanilla, then continue whisking until uniform. Whisk in the baking soda, cornstarch, and salt.⁣
3. Add the flour and use a silicone spatula to fold it in until smooth cookie dough forms. Reserve 1/2 Cup of the chocolate chips and set them aside, then fold the remaining 1 1/2 Cups of chocolate chips into the cookie dough.⁣
4. Place the chocolate chip cookie dough onto the prepared sheet pan and use an offset spatula to spread it all the way to the edges in an even layer.⁣
5. Bake the cookie cake for 14-16 minutes, until it looks golden brown on the edges and set. 
6. Enjoy warm or let it cool and decorate with vanilla buttercream and sprinkles! ⁣
⁣
#cookiecake #chocolatechipcookies #sheetcake #birthdaycake #cakedecorating
STRAWBERRY CUPCAKES 🍓based on my beloved strawb STRAWBERRY CUPCAKES 🍓based on my beloved strawberry layer cake recipe, this cupcake version is just as moist yet fluffy and bursting with natural strawberry flavor! Between the mix of fresh strawberries in the cupcakes + freeze-dried strawberries in the frosting, the flavor is out of this world 🚀

Full recipe link in my bio (with strawberry buttercream) + at https://sugarandsparrow.com/strawberry-cupcakes/

STRAWBERRY CUPCAKES
Yield: 14 cupcakes

INGREDIENTS:
5 oz (143g) fresh or frozen strawberries
1/3 Cup (80ml) whole milk, room temp
1 1/2 Cups (158g) sifted cake flour
1 tsp baking powder
1/4 tsp baking soda
1/2 tsp salt
6 Tbsp (85g) unsalted butter, room temp
1 Cup (200g) granulated sugar
2 large eggs, room temp
3 Tbsp (45g) sour cream, room temp
1 tsp vanilla extract
1 drop pink food coloring (optional)

INSTRUCTIONS: 
1. Puree the strawberries using a food processor (you’ll have about 1/2 cup of puree), then place into a saucepan over medium-low heat. Bring to a simmer, then cook for 10-15 min, stirring occasionally, until you have 1/4 cup. Refrigerate until room temp.
2. Preheat oven to 350ºF (177ºC) and line a standard cupcake pan with liners.
3. Whisk together the sifted cake flour, baking powder, baking soda, and salt and set aside.
4. In a stand mixer w/ paddle attachment (or hand mixer + large bowl), whip the butter on high for 2 min. Add sugar and beat for 2 min, until light and fluffy. Turn the mixer to low and add the eggs one at a time, then add the vanilla and sour cream, turn the mixer to high and beat for 1 min. Meanwhile, whisk together the strawberry puree, whole milk, and food coloring (if using).
5. Turn the mixer off and add all of the dry ingredients at once. Mix on low until just combined, then add the strawberry milk mixture until just combined, about 30 seconds.
6. Fill the cupcake liners 2/3 full and bake for 14-18 minutes. Cool completely before topping with strawberry buttercream (full recipe linked above). 

#strawberrycupcakes #strawberrycake #pinkcupcakes #strawberry #cupcakes
COFFEE BUTTERCREAM (recipe below)☕️ this frost COFFEE BUTTERCREAM (recipe below)☕️ this frosting has AMAZING coffee flavor, is so easy to decorate cakes with, and pairs beautifully with so many flavors (chocolate, vanilla, or any cake flavor you’d want to turn into a latte). 

All my cake pairing suggestions are linked in my bio or at https://sugarandsparrow.com/coffee-buttercream-recipe/ 

COFFEE BUTTERCREAM⁣
Yield: 2.5 Cups⁣

INGREDIENTS⁣
1 1/2 tsp instant coffee or espresso powder⁣
1 1/2 Tbsp whole milk, room temperature⁣
1 Cup (226g) unsalted butter, room temperature⁣
3 1/2 Cups (420g) powdered sugar⁣
2 tsp pure vanilla extract⁣
Pinch of salt⁣

INSTRUCTIONS⁣
1. Combine the instant espresso/coffee with the whole milk and set aside. In the bowl of a stand mixer, beat the butter on high until creamy and smooth (about 5 minutes), scraping down the bowl and paddle a few times in between.⁣
2. Turn the mixer to low and add the powdered sugar a few cups at a time, scraping down the bowl and paddle between intervals. Add the vanilla, the coffee/espresso milk mixture, and salt. Mix on low until fully incorporated, about one minute.⁣

#coffeebuttercream #buttercream #frosting #coffeecake

Footer

On the Blog

  • Cake Basics
  • Recipes
  • Tutorials

Info

  • About
  • Privacy Policy & Disclosure

stay in the know

Copyright © 2026 · Theme by Sugar & Sparrow