• Cake
  • Frosting
  • YouTube
  • My Favorite Tools
  • Nav Social Icons

  • Skip to primary navigation
  • Skip to main content
  • Skip to primary sidebar
  • Skip to footer
  • Recipes
    • Cake
    • Cupcakes
    • Frosting
    • Ice Cream
    • Vegan
  • Cake Basics
  • Tutorials
  • Blog
  • About
  • Mobile Menu Widgets

    Connect

    Search

Sugar & Sparrow logo in script font

Sugar & Sparrow

Lifestyle and Cake from Portland Oregon

  • Cake Basics
  • Recipes
    • Cake
    • Cupcakes
    • Cookies & Bars
    • Filling
    • Frosting
    • Ice Cream
    • No-Bake
    • Small Batch
    • Vegan
  • Tutorials
  • Book
  • Blog
  • About

Gold Ganache Drip Cake Tutorial

January 10, 2023 · In: Decorations & Garnishes, Featured, Recipes, Tutorials

I’ve always loved the look of gold drip cakes but I never really tried making one until my niece’s golden birthday. Since it was gold-themed, I thought it was the perfect time to learn the art of the gold drip. I’ve made a few gold drip cakes since that one and have definitely learned my fair share of what products and methods to use (and not use), and how to make a gold drip that doesn’t taste terrible (because that matters too). 
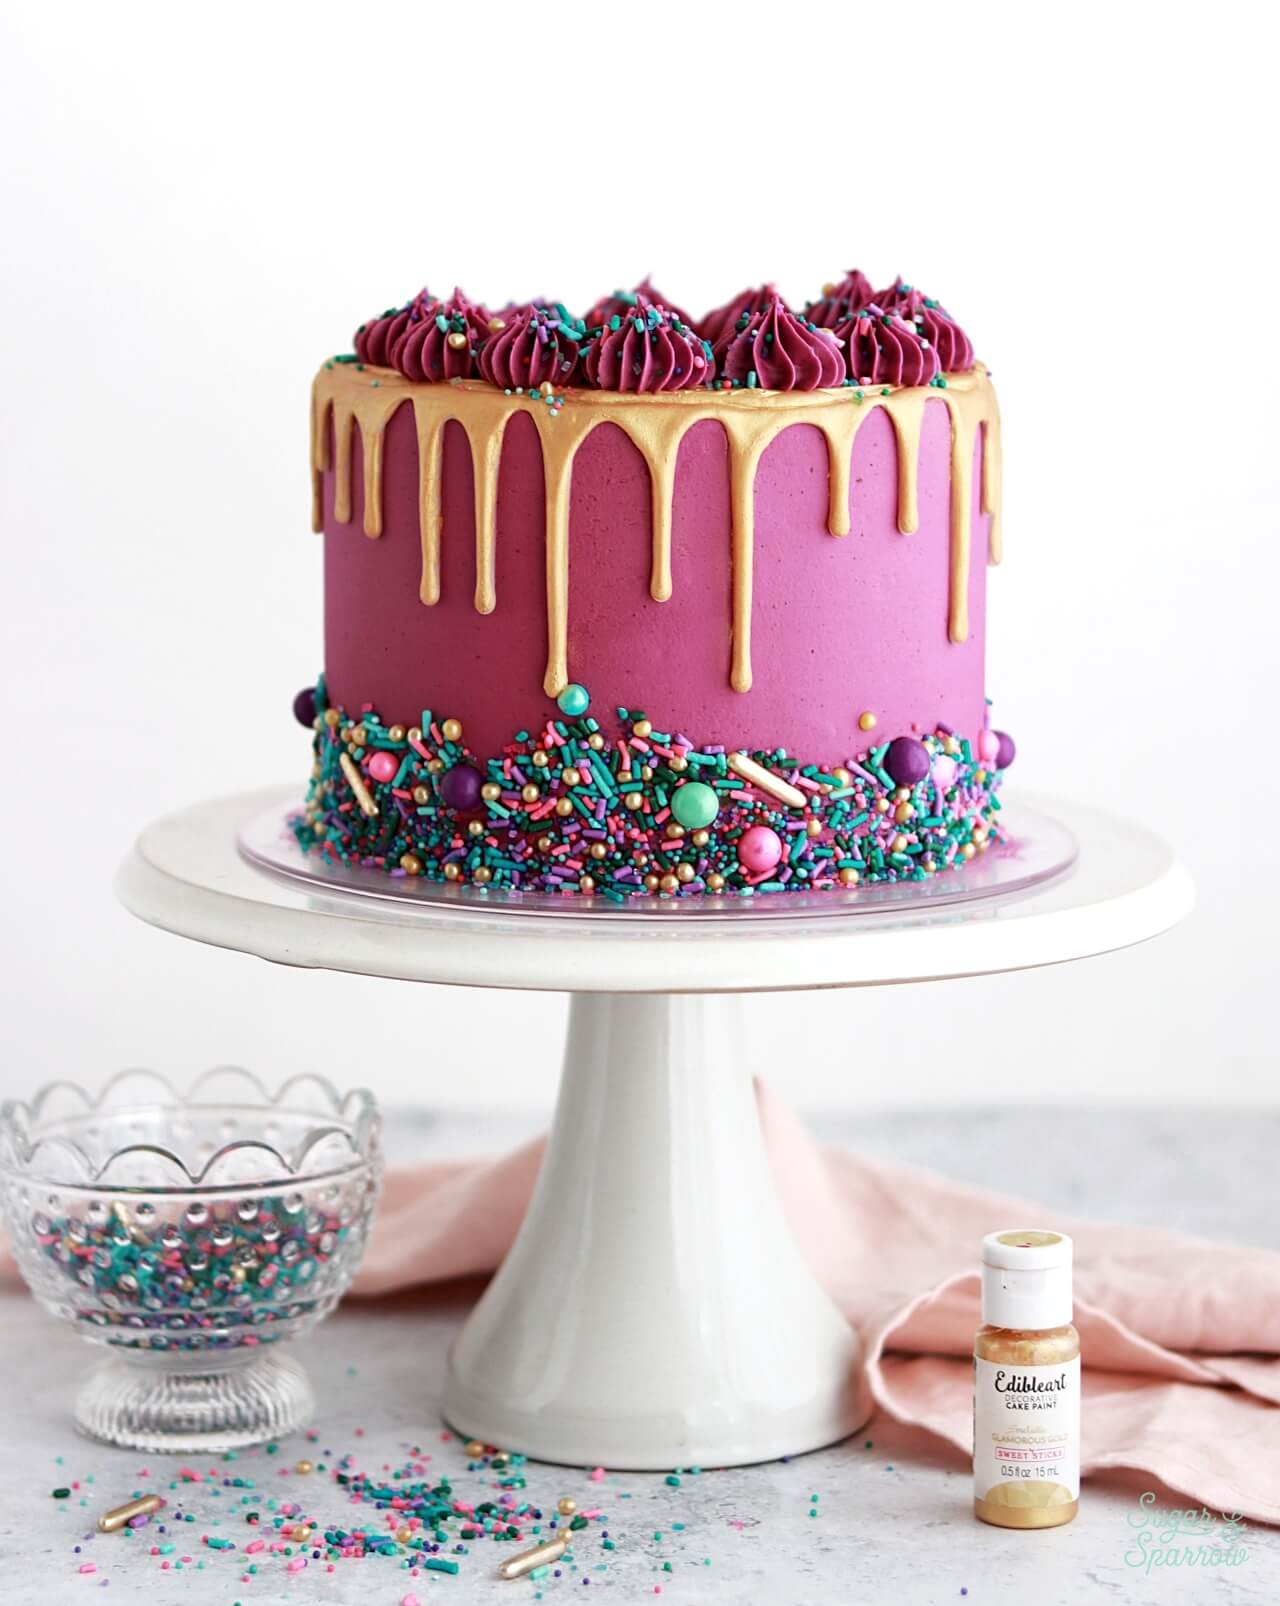
gold drip cake by sugar and sparrow
gold ganache drip cake tutorial

My first order of business was figuring out what kind of drip to use as the base. I’d heard that using straight melted chocolate was one way to go, but I found that too thick and hard to work with. Instead, I figured out a way to create the gold drip with my favorite white chocolate ganache recipe. It’s easy to work with, tastes superb, and if you give it enough time in the refrigerator it will set firmly enough to paint.

how to make a gold drip cake

That brings me to my next order of business: what product to use for turning the drip gold. First I tried mixing gold luster dust with a little lemon extract to create a paint-like consistency. It looked great when I painted it on the drip, but it ended up doing two terrible things in the long run: it would not dry and it was so thin that it ran right down past the drip. Luster dust mixed with something like vodka or grain alcohol might work better, but I wasn’t up for a trip to the liquor store to figure it out. 
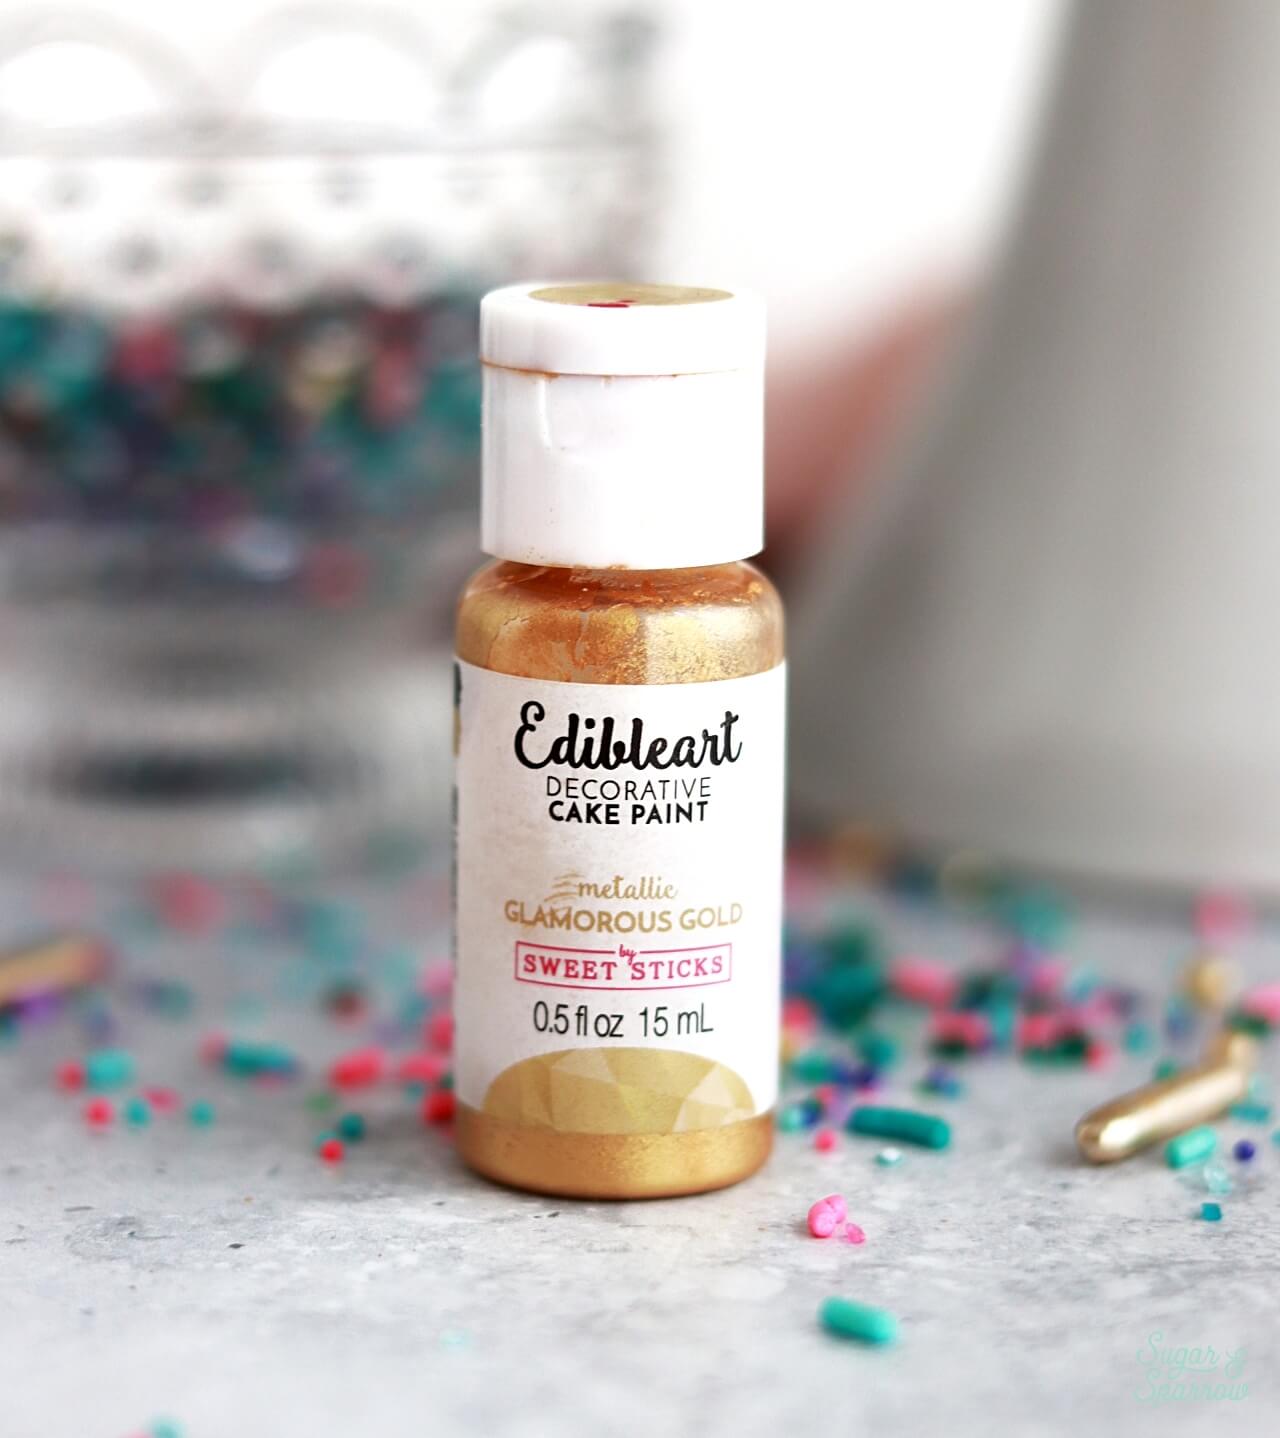
edible art paint in glamorous gold

Instead, I decided to use Edible Art Paint in Glamorous Gold. It’s a premixed edible metallic paint that’s FDA approved and it worked like a charm. I needed to paint two coats onto the drip to get the best coverage, but it looked amazing and ended up drying perfectly. With the right product, all that was left to do is practice! I’ve been working on getting better at painting the drip without painting the cake (but I did find a solution that works for cleaning up small mess-ups that I’ll talk about below).
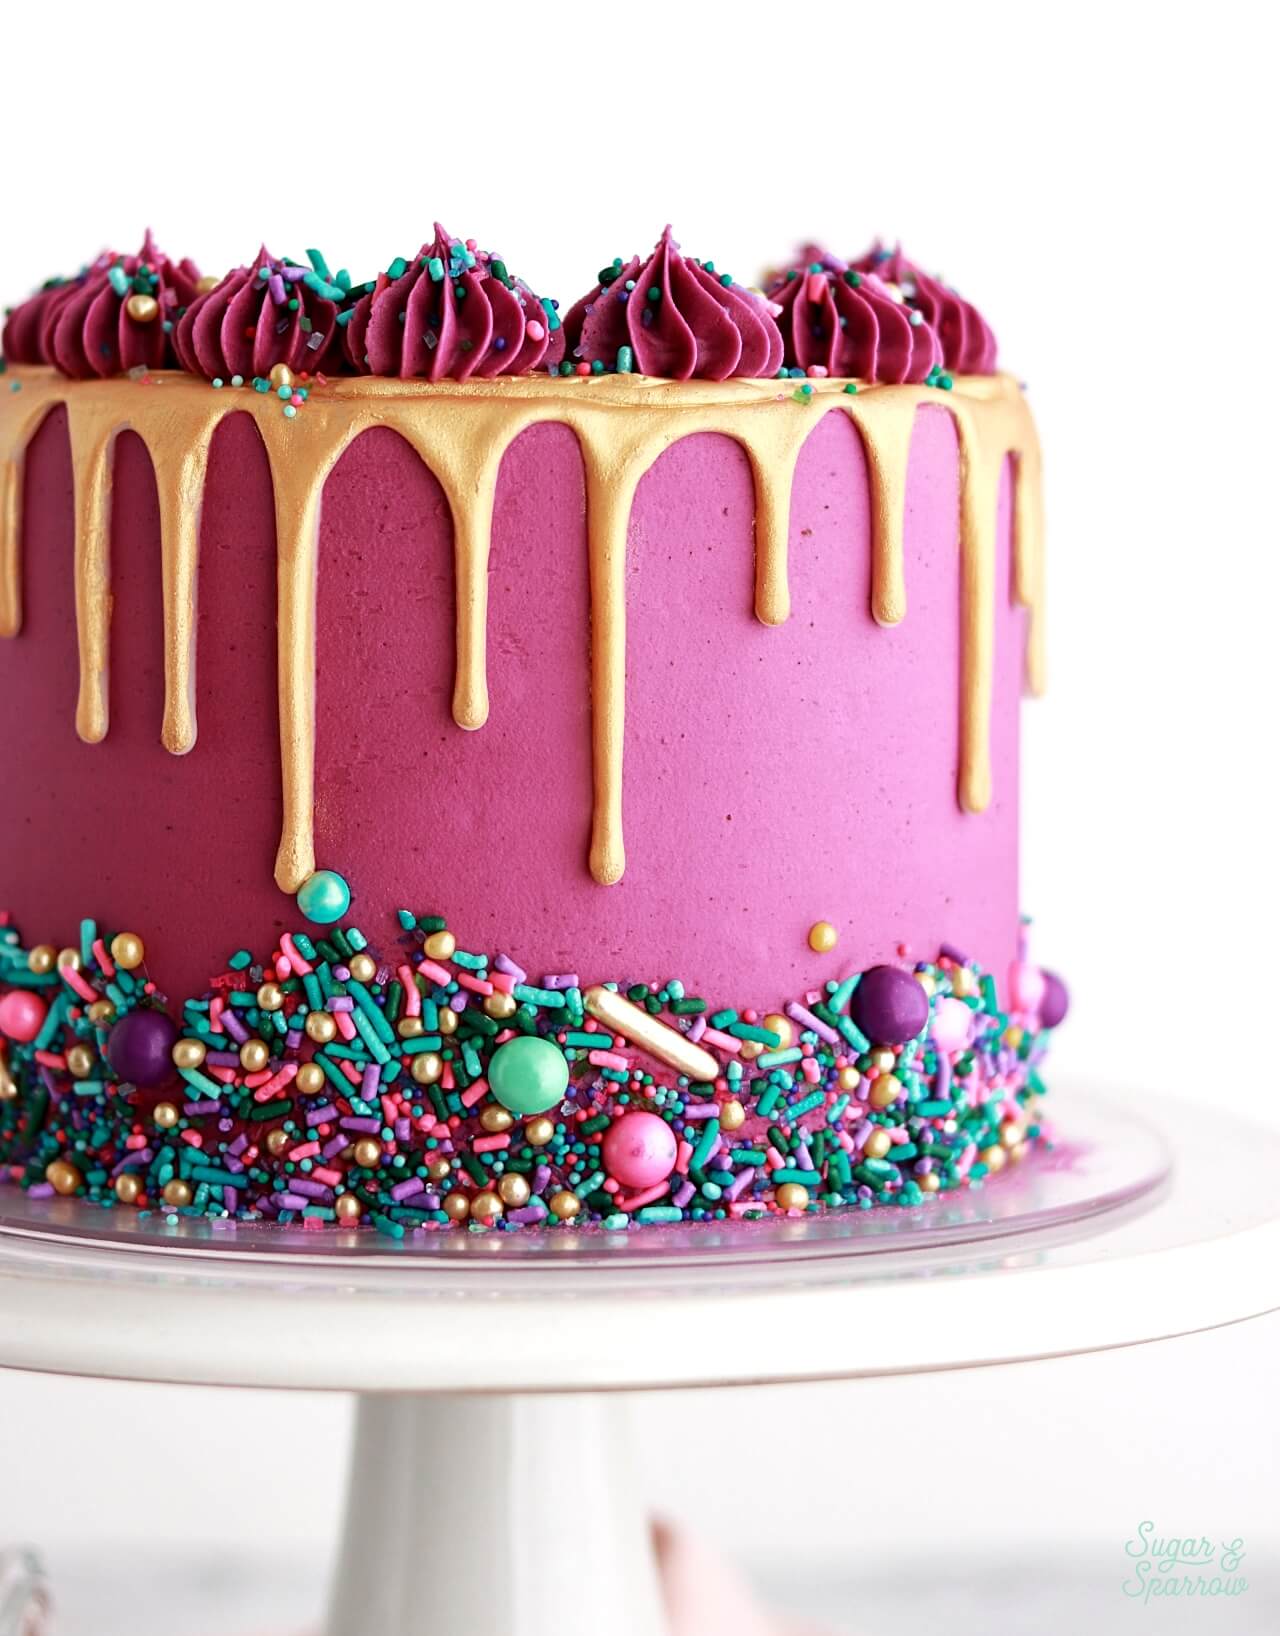
painting white chocolate ganache gold
how to make a gold drip cake

Here’s a quick video that shows the full process of creating a gold drip, from dripping the cake with white chocolate ganache to painting and troubleshooting:

If you have yet to check out my YouTube channel, head there to see more cake recipe videos, decorating tutorials, and my entire Cake Basics series in video format. Hit the subscribe button while you’re there so you never miss a new video!

You Will Need

  • A cake that’s been frosted smooth and chilled 
  • Cake turntable
  • 1 batch of my white chocolate ganache recipe
  • Piping bag
  • Angled spatula
  • Edible Art Paint in Glamorous Gold
  • Small food-grade paint brush
  • Vodka or grain alcohol (just for touch ups)

Step 1: Drip the Cake 

Place the chilled, frosted cake on your turntable. When the white chocolate ganache has reached room temperature and is ideal drip consistency, place it into the piping bag and carefully snip off about ¼ inch opening on the end. Add a test drip to the side of the cake to make sure the ganache is just right (not too thick or thin), and if all is good, continue adding drips around the side of the cake.
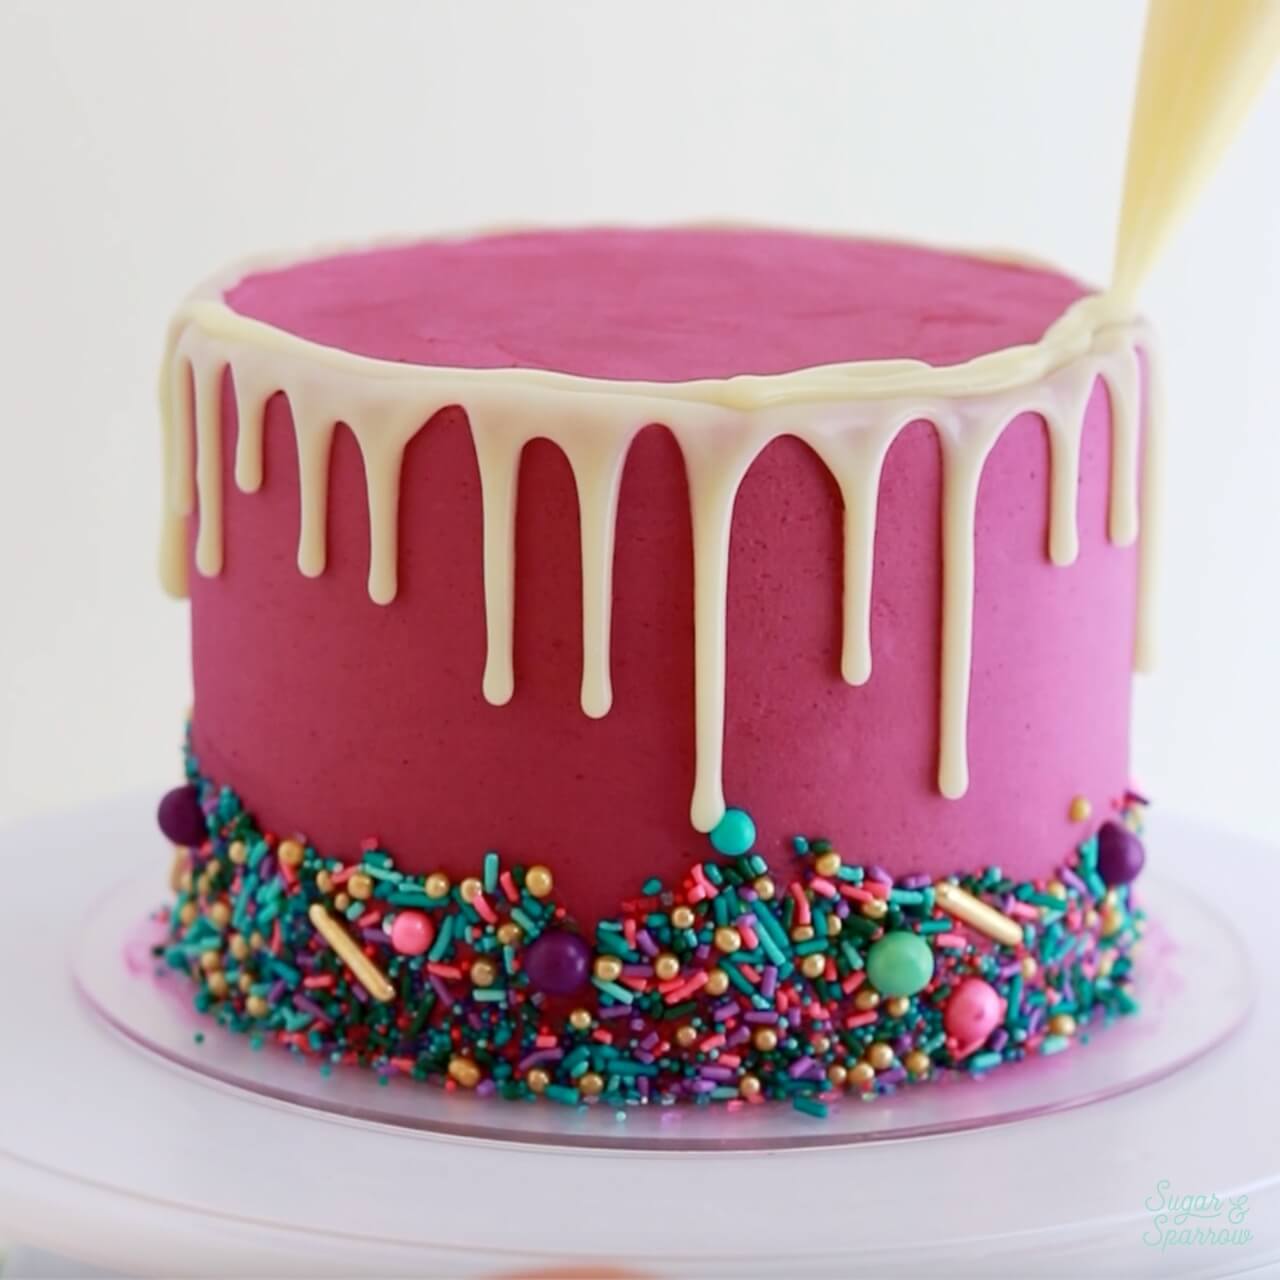
white chocolate ganache drip cake tutorial

When the sides are dripped, fill in the top of the cake with more ganache and smooth it down with an angled spatula. Be careful not to add too much ganache or smooth too closely to the edges so you don’t accidentally push more ganache over the edges of the cake. 

white chocolate ganache drip tutorial

If this is your first time working with white chocolate ganache or you could use some tips on getting better at drip cakes, this blog post and video tutorial should answer all of your questions! 

Step 2: Let the Drip Set

After you drip the cake, place it into the refrigerator for 30 minutes at minimum. The more time you can let the drip firm up in the refrigerator the better (overnight is actually best!). 

The more firm the drip, the easier it will be to paint in the next step. 

Step 3: Paint the Drip 

Add 5-10 drops of the Edible Art Paint into a pinch bowl. Using the small paint brush, carefully paint the gold onto the ganache, starting on top of the cake and working your way over every drip. This is a tedious process that requires some patience, so be prepared for that! 

how to paint drip cake gold
how to make a gold drip cake

After painting the first coat of Edible Art Paint, place the cake into the refrigerator for another 15-30 minutes to let the paint dry a bit. Then, paint a second coat over the top of the first. 

painting gold drip cake

Step 4: Erase Mess-Ups (if needed)

If there are any spots where you accidentally painted past the drip and onto the buttercream, there is a fix! Place a few teaspoons of vodka or grain alcohol into a pinch bowl and dip a clean paint brush into it, then paint over the stray paint. The idea here is essentially like using nail polish remover to clean up around your nails after painting them. Do this part carefully!

removing edible art paint from buttercream

The higher the alcohol content in your paint remover, the quicker it will evaporate and dry. It will not make your cake taste like alcohol (in case you’re worried about that!). 

And there you have it – a beautiful metallic drip cake that is sure to impress! It’s the perfect way to add some glitz and elegance to your cake. 

gold drip cake tutorial
pink cake with gold drip

FYI: I finished the look on this particular cake with a star border made with Wilton tip 6B and Sprinkle Pop “Treasure Hunt” sprinkles. And the color I used for this beautiful buttercream is AmeriColor Electric Purple. So stunning!

Did you make a gold drip cake with this tutorial? I’d love to know how it went! Leave a comment below and be sure to tag @sugarandsparrowco on Instagram to show me your work. I love to see what you create!

By: Whitney · In: Decorations & Garnishes, Featured, Recipes, Tutorials · Tagged: drip cake tutorial, edible art paint, gold cake, gold drip cake, gold ganache, white chocolate ganache

you’ll also love

edible gold crown cake topper tutorialEdible Gold Crown Cake Topper Tutorial
white chocolate ganache recipe for drip cakesWhite Chocolate Ganache Drip Cake Recipe + Tips [Video Included!]
sprinkle drip cake tutorialSprinkle Drip Cake Tutorial

Join the List

Stay up to date & receive the latest posts in your inbox.

Reader Interactions

Comments

  1. Daran Millner says

    February 4, 2026 at 6:06 pm

    How did you get such a deep and beautiful color on buttercream? Every time I try to achieve a deep color, I have to put so much gel coloring in that it starts changing the taste of my buttercream. I can never get black or navy or even a deep red. I am in love with this color and would like some help please. 🙂

    Reply
    • Whitney says

      February 5, 2026 at 10:34 am

      Hi Daran! There are a few ways to make darker colored buttercreams, for this one I just added AmeriColor Fuchsia (this brand is really concentrated) and frosted the cake, then refrigerated it. Refrigeration (and time) tends to darken buttercream colors. If you want to speed up the process you can use the blooming method where you microwave a little bit of the buttercream until it’s melted but not hot (so the color blooms) and mix it into the rest of the buttercream. For darker colors like black, navy, and brick red I usually start with chocolate buttercream and then add color from there. I hope that helps! I have more tips in this blog post but you’re making me realize I need more content on creating darker colors: https://sugarandsparrow.com/how-to-color-frosting/

      Reply
      • Daran Millner says

        February 5, 2026 at 11:11 am

        Thank you so much! I will definitely try these tips! Is this a vanilla cake with vanilla buttercream and the ganache that you have shown here? I wish this entire creation was on your recipe list. It is stunning. Unfortunatley, the sprinkles you used aren’t available anymore, but I’m sure to find something similar.

        Reply
        • Whitney says

          February 8, 2026 at 2:41 pm

          Hi Daran! Yes, it’s a vanilla cake with vanilla buttercream and white chocolate ganache. Hope that helps!

          Reply
  2. Sam says

    February 24, 2025 at 5:12 am

    I am confused that this recommends painting the ganache, but when I click through to the ganache recipe, you have said in the comments section that you can’t paint it as it doesn’t dry hard enough and to instead just use melted white chocolate. I would love to know which method I should use.

    Reply
    • Whitney says

      February 24, 2025 at 8:18 am

      Hi Sam! Before I tried painting the ganache I thought it wouldn’t be firm enough for painting, as that’s what my prior research told me. However, after trying painting the ganache with Edible Art Paint it worked just fine! So go with this method.

      Reply
      • Sam says

        February 26, 2025 at 10:09 pm

        Thanks for the reply- that is really helpful ☺️ I have watched your video and it says to refrigerate it for a maximum of over night before painting it. Why is this? I was hoping to refrigerate it for 24 hours before painting it (just due to when I’m able to work on the cake)

        Reply
        • Whitney says

          February 27, 2025 at 9:50 am

          Hi Sam! That is confusing. I honestly don’t know why I said a maximum of overnight the cake should be totally fine to paint after 24 hours.

          Reply
  3. Stella Isermann says

    May 31, 2023 at 8:06 am

    Could you just add gold dust directly into the ganache instead of painting it on after?

    Reply
    • Whitney says

      May 31, 2023 at 8:40 am

      I wish! That would be so convenient. Unfortunately you would need so much gold dust to saturate the ganache that it would ruin the consistency. It’s much easier to just paint it on if you’re working with ganache or there are some gold drip recipes out there that are that don’t involve painting, like this one: https://www.youtube.com/watch?v=ce58m1M9KJM

      Reply

Leave a Reply Cancel reply

Your email address will not be published. Required fields are marked *

Recipe Rating


Next Post >

Nutella Buttercream Recipe

Primary Sidebar

Welcome to Sugar & Sparrow

Welcome to Sugar & Sparrow

Helping you whip up pretty desserts with confidence and creativity. And hopefully sharing a few laughs with you along the way!

Learn More

Connect

let’s bake!

Get my very best recipes, baking tips, and decorating tutorials sent to your inbox

Featured Posts

best cake recipes of 2020

Sugar & Sparrow’s Best of 2020

sprinkle rose cupcakes tutorial

Sprinkled Rose Cupcakes Tutorial

small batch lemon cake recipe by sugar and sparrow

Small Batch Lemon Cake

Search

Archives

Follow Along

@sugarandsparrowco

My kitchen in May 💛 some of these recipes had me f My kitchen in May 💛 some of these recipes had me feeling CRAZY with how many tests they took 🤪 but in the end I am so happy with these ones I got to hit the publish button on + I made my DREAM birthday cake that I can’t wait to share ASAP!!

Comment “MAY” to get all the recipes that are available now:

-Strawberry Shortcake Sheet Cake
-Lemon Cupcakes
-Lemon Cream Cheese Buttercream
-Orange Poppyseed Cake
-Whipped Mascarpone Frosting
-No-Bake Marbled Strawberry Cheesecake
-Chocolate Chip Cookie Cake

https://sugarandsparrow.com/everything-i-baked-in-may
 
#dessert #bakersofinstagram #baking #bakinglove #dessertlovers
CLASSIC BIRTHDAY CAKE 🥳 yellow cake with chocolate CLASSIC BIRTHDAY CAKE 🥳 yellow cake with chocolate frosting makes me so nostalgic for my childhood birthdays + my homemade version captures that moist and fluffy texture of box mix, but it’s 100% HOMEMADE! Pair it with chocolate frosting + lots of rainbow sprinkles and make it to celebrate someone special 💛
  
Full recipe (with chocolate frosting) is linked in my bio or at https://sugarandsparrow.com/yellow-cake-recipe/
  
INGREDIENTS  
2 Cups (210g) sifted cake flour  
1 1/2 tsp baking powder  
1/2 tsp baking soda  
1/2 tsp salt  
1/2 Cup (113g) unsalted butter, room temp  
3 Tbsp (45ml) vegetable oil  
1 1/3 Cups (267g) granulated sugar  
2 large eggs, room temp  
2 large egg yolks, room temp  
1/3 Cup (80g) sour cream, room temp  
2 tsp pure vanilla extract  
3/4 Cup (180ml) whole milk, room temp  
  
INSTRUCTIONS  
1. Preheat the oven to 350°F (177°C). Grease and line three 6-inch or two 8-inch cake pans.  
2. In a medium bowl, add the sifted cake flour, baking powder, baking soda and salt. Whisk together and set aside.  
3. In the bowl of your stand mixer fitted with the paddle attachment (or with a handheld mixer and large bowl), beat the butter on high speed until it’s creamy, 2 min. Add the vegetable oil and sugar, then continue to mix on medium-high until pale and fluffy, 2 min. Add the eggs and egg yolks one at a time, mixing on low speed for 10-15 seconds after each addition. Add the vanilla and sour cream and turn the mixer to high speed for 1 min.   
4. Turn the mixer off and add the dry ingredients all at once. Mix on low speed until the ingredients just start to combine, then add the milk in a steady stream and continue mixing until incorporated, about 30 seconds.   
5. Pour the batter evenly into the prepared cake pans and bake for 28-32 minutes. Let the cakes cool, then fill and frost with chocolate buttercream (full recipe linked in my bio!)
  
#birthdaycake #yellowcake #cakedecorating #chocolatecake #cakelover
S’MORES ICEBOX CAKE 🔥 Every bit as gooey and decad S’MORES ICEBOX CAKE 🔥 Every bit as gooey and decadent as it seems and I am blown away at how EASY this recipe is! It’s layers of graham crackers, chocolate ganache, and homemade marshmallow creme, piled high in a loaf pan and refrigerated overnight. The graham crackers soften into a cake-like texture and transform this dessert into the easiest s’mores cake ever.  
 
Recipe linked in my bio and at https://sugarandsparrow.com/smores-icebox-cake/
 
#smorescake #iceboxcake #nobake #smores #cakedecorating
WHIPPED MASCARPONE FROSTING ✨silky smooth, delicio WHIPPED MASCARPONE FROSTING ✨silky smooth, deliciously light, and the perfect consistency for cake decorating (including filling layer cakes + piping)! Imagine a whipped cream frosting with notes of rich mascarpone cheese and that’s what this frosting tastes like. It’s a DREAM on my orange poppyseed cake and I can’t stop thinking of other Spring/Summer cake flavors I want to try it with! 

Full recipe with cake pairing suggestions at https://sugarandsparrow.com/whipped-mascarpone-frosting/ 

INGREDIENTS:
1 Cup (8oz, 227g) mascarpone cheese, cold
2 tsp pure vanilla extract
1/8 tsp salt
1 Cup (240ml) heavy whipping cream, cold
2 Cups (240g) powdered sugar

INSTRUCTIONS:
1. With the whisk attachment on a stand mixer (or hand mixer with a large bowl), beat the mascarpone, vanilla, and salt together at medium speed until creamy, 1-2 min
2. Turn the mixer to low and add the heavy whipping cream slowly, then turn the mixer to medium speed and beat until soft peaks form, which could take less than 1 min (keep an eye on it!). You should be able to dip a spatula into the mixture and see a peak that slightly droops when held upright. 
3. Add the powdered sugar all at once and mix on low speed until incorporated, then turn the mixer to medium speed and whip for about 30 seconds longer, until the frosting is thick and silky. Use right away or refrigerate for up to 4 days.

#mascarpone #mascarponecream #whippedcreamfrosting #whippedcreamcake #cakedecorating
BERRY CHANTILLY CAKE 🍓🫐fully inspired by the iconi BERRY CHANTILLY CAKE 🍓🫐fully inspired by the iconic Whole Foods Chantilly cake (iykyk 🙌🏼) and every bit as delicious! My homemade version is layers of extra soft and fluffy vanilla cake, berry jam, Chantilly cream frosting with rich notes of mascarpone and a hint of almond, and fresh berries throughout. It’s the idealideal berries and cream cake and ALWAYS a hit!! 
⁣
Full recipe is linked in my bio (or at https://sugarandsparrow.com/berry-chantilly-cake-recipe/)

PS: I also have a sheet cake version of this recipe! Google “sugar and sparrow berry Chantilly sheet cake” to find it! 

#chantillycake #whippedcreamcake #berrycake #cakedecorating #vanillacake

Footer

On the Blog

  • Cake Basics
  • Recipes
  • Tutorials

Info

  • About
  • Privacy Policy & Disclosure

stay in the know

Copyright © 2026 · Theme by Sugar & Sparrow