• Cake
  • Frosting
  • YouTube
  • My Favorite Tools
  • Nav Social Icons

  • Skip to primary navigation
  • Skip to main content
  • Skip to primary sidebar
  • Skip to footer
  • Recipes
    • Cake
    • Cupcakes
    • Frosting
    • Ice Cream
    • Vegan
  • Cake Basics
  • Tutorials
  • Blog
  • About
  • Mobile Menu Widgets

    Connect

    Search

Sugar & Sparrow logo in script font

Sugar & Sparrow

Lifestyle and Cake from Portland Oregon

  • Cake Basics
  • Recipes
    • Cake
    • Cupcakes
    • Cookies & Bars
    • Filling
    • Frosting
    • Ice Cream
    • No-Bake
    • Small Batch
    • Vegan
  • Tutorials
  • Book
  • Blog
  • About

Mixed Berry Crisp Recipe

June 27, 2025 · In: Featured, Recipes, Seasonal, Summer

Jump to Recipe

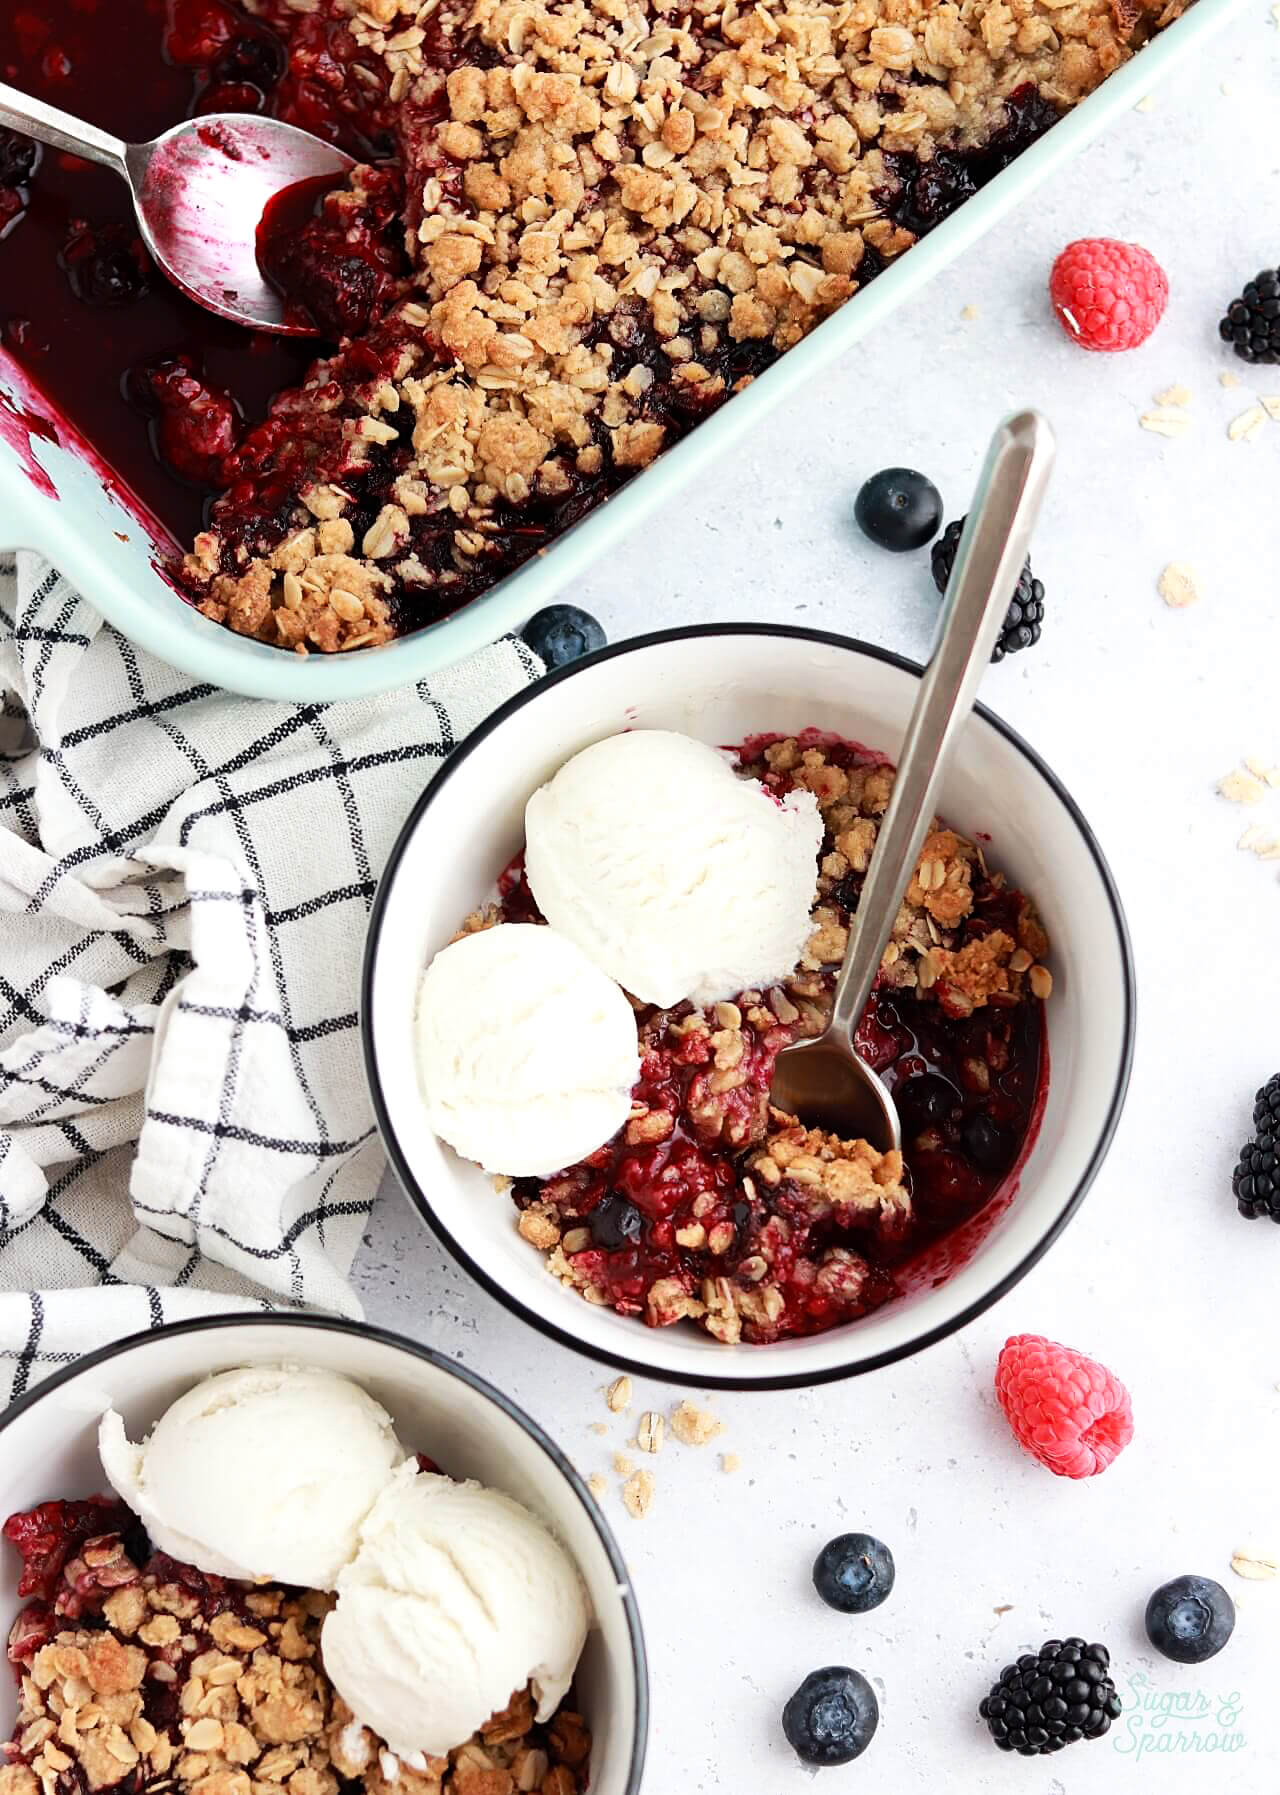
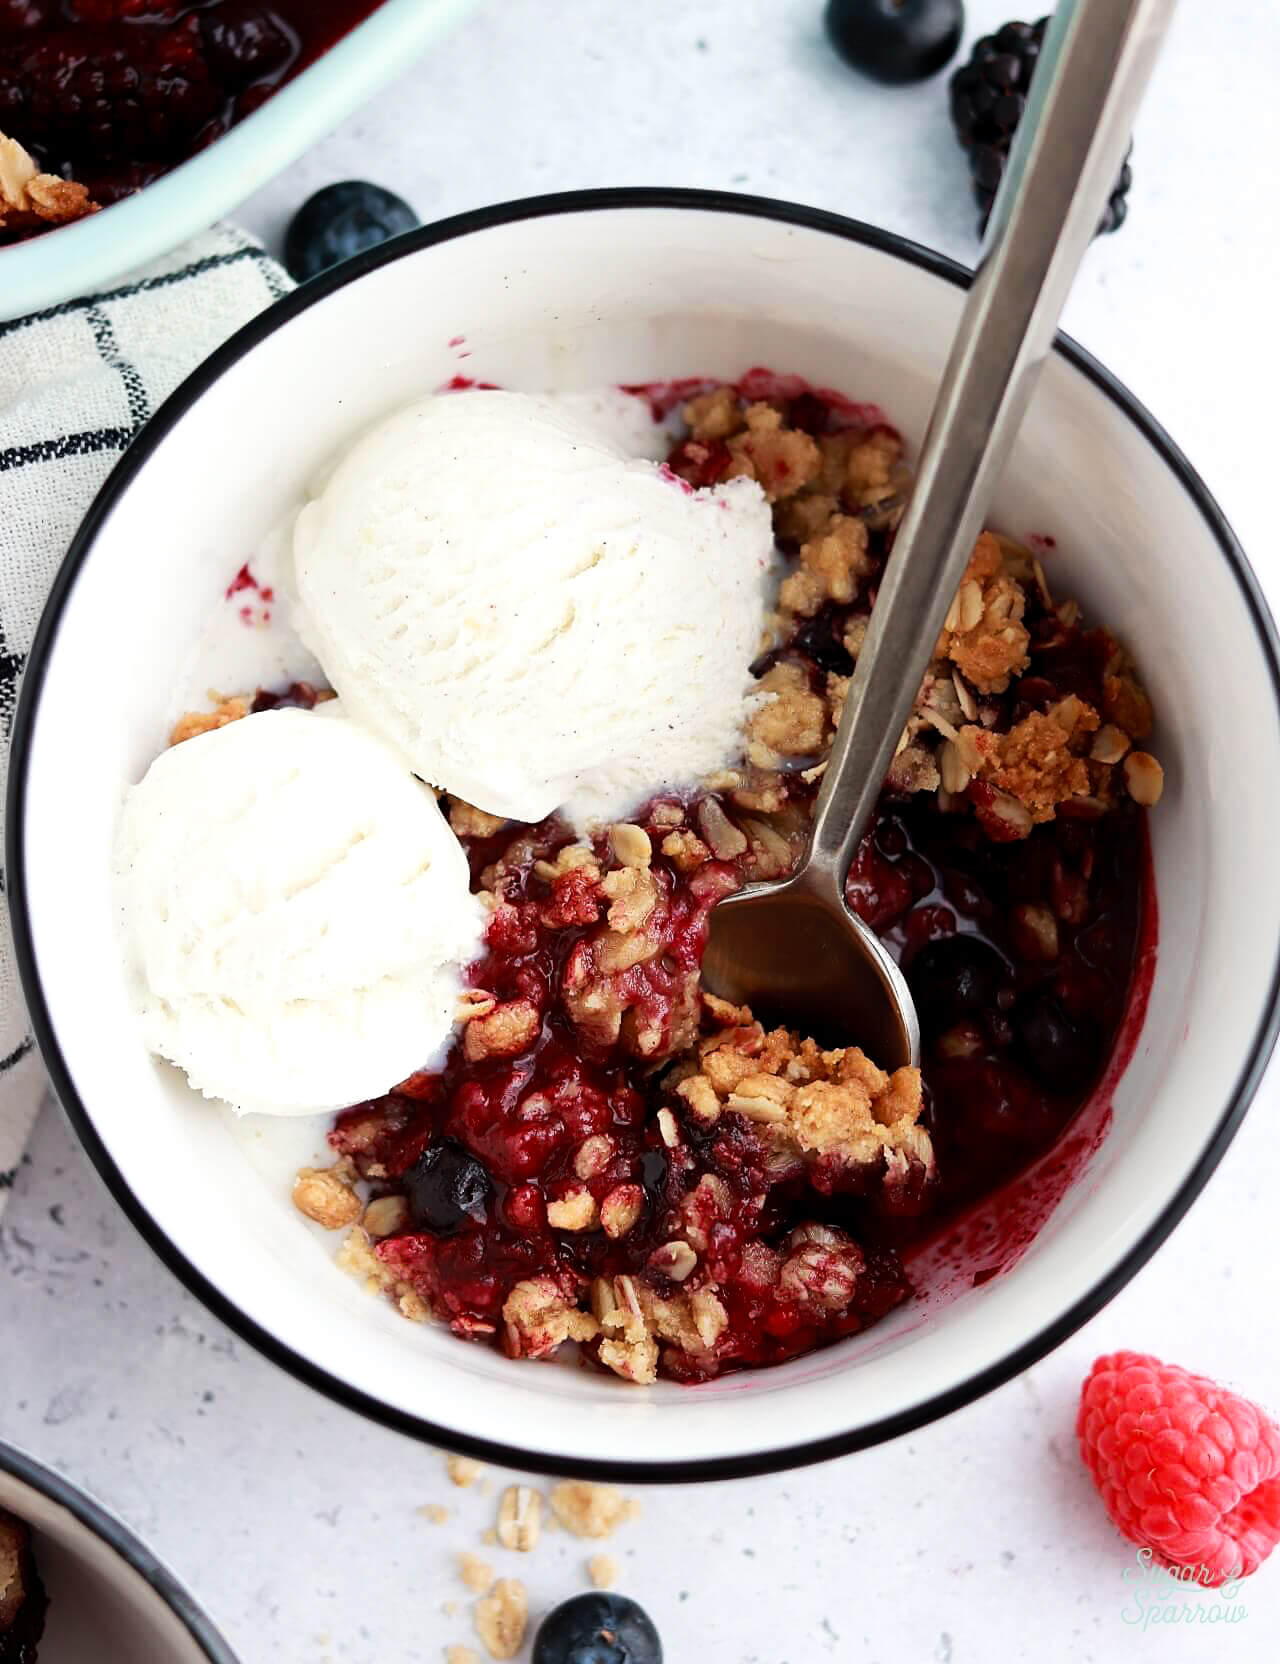
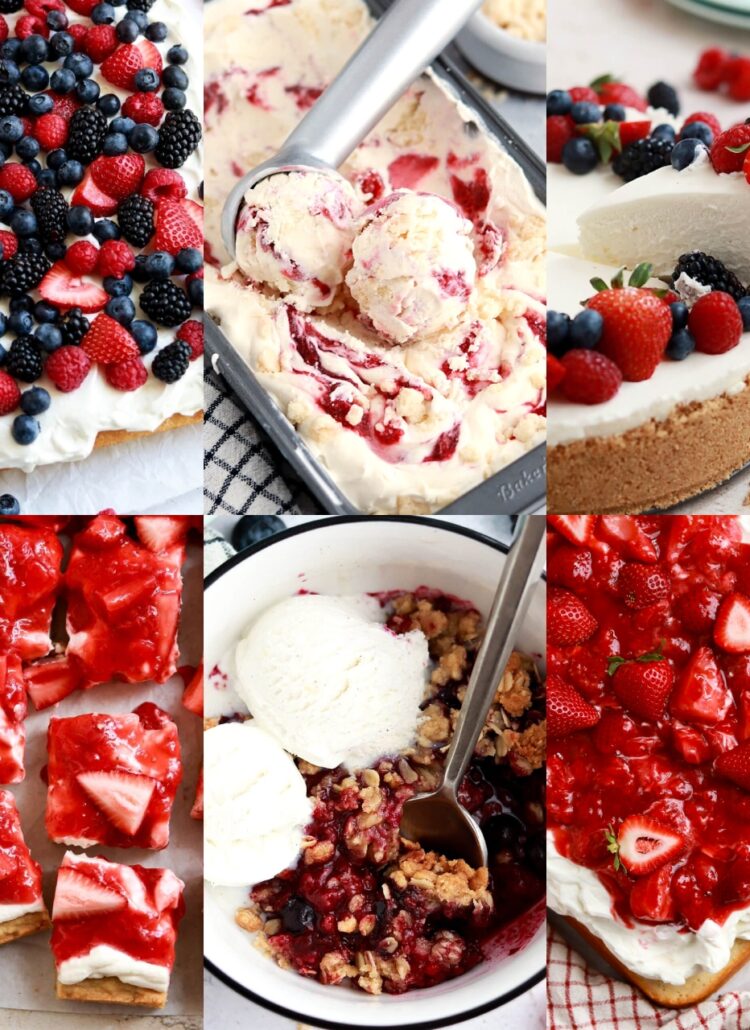
There’s something undeniably comforting about a warm dish of mixed berry crisp topped with a scoop of vanilla ice cream. The way the juicy berries bubble up beneath the buttery oat topping is pure magic—simple, rustic, and nostalgic all at once. This triple berry crisp can be made with either fresh or frozen berries, so it can be made any time of year but summertime is when I crave it most. It’s so easy to make, adaptable for any kind of berries, and always a crowd-pleaser. 

triple berry crisp recipe by sugar and sparrow
berry crisp recipe in bowl with vanilla ice cream

Mixed Berry Crisp Ingredients

This triple berry crisp uses simple ingredients and comes together so quickly. Here are some of the key ingredients along with substitutions you can make:

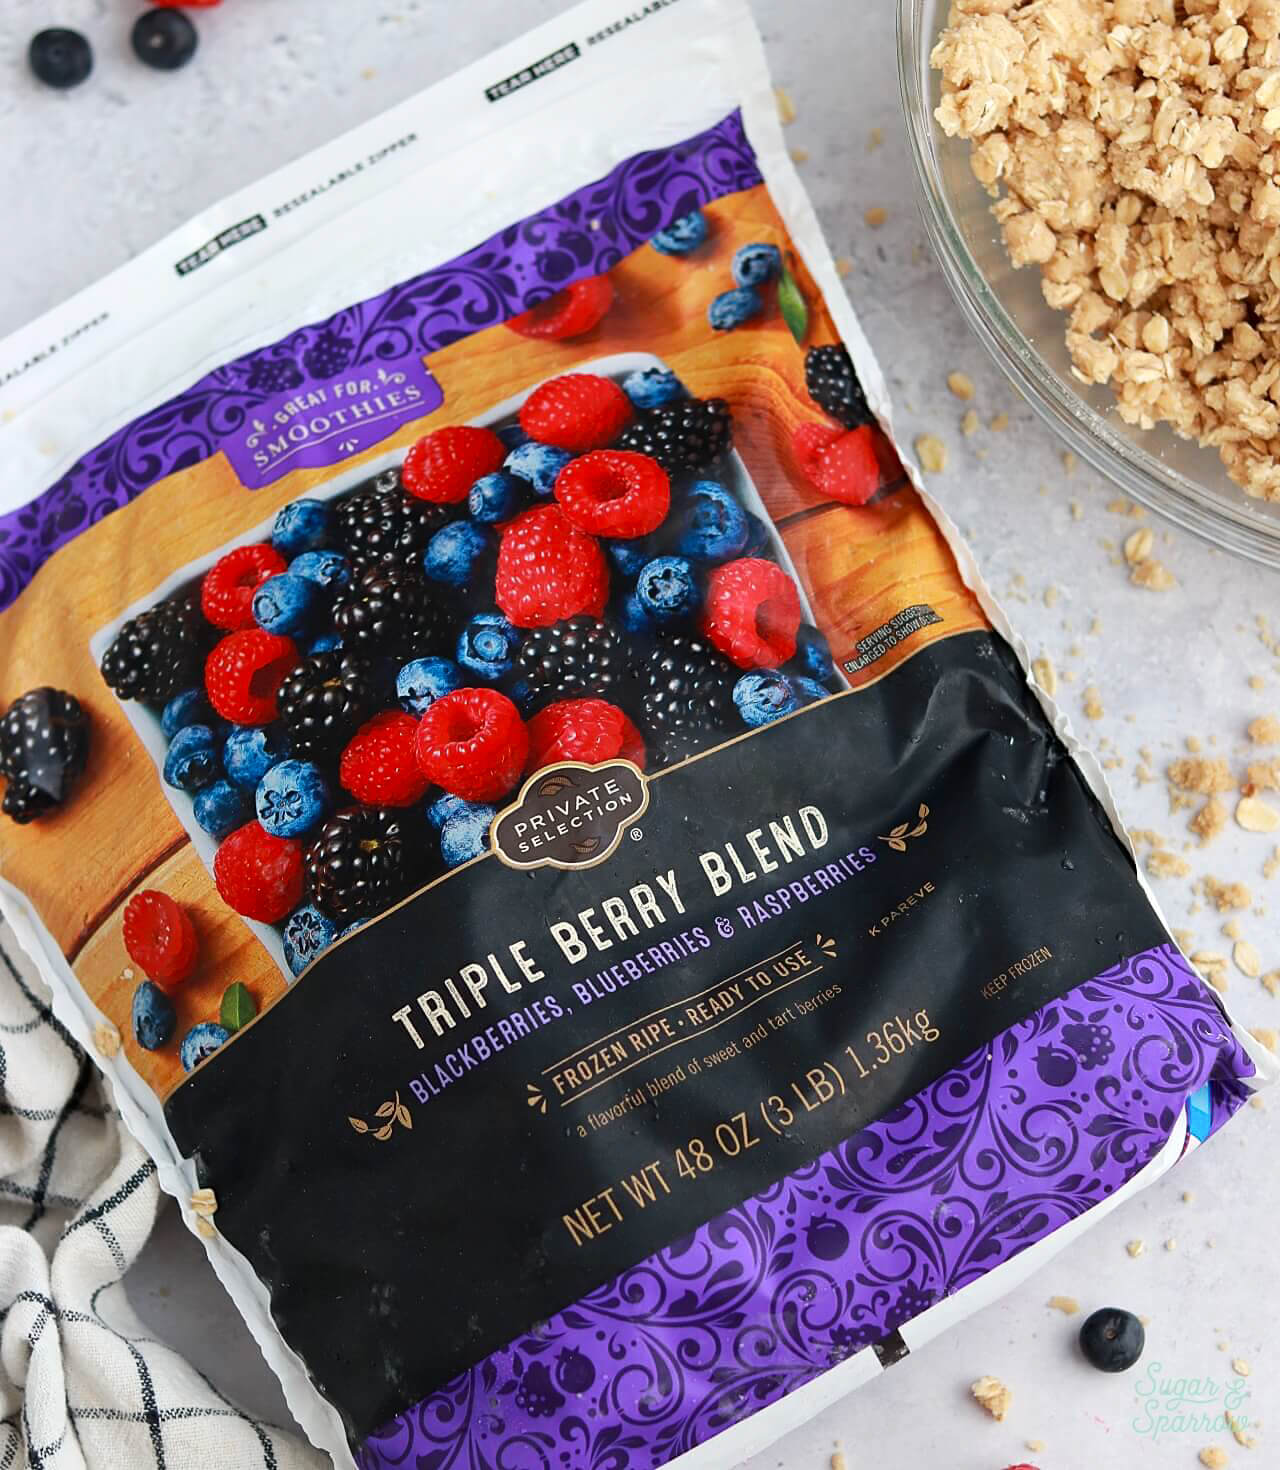
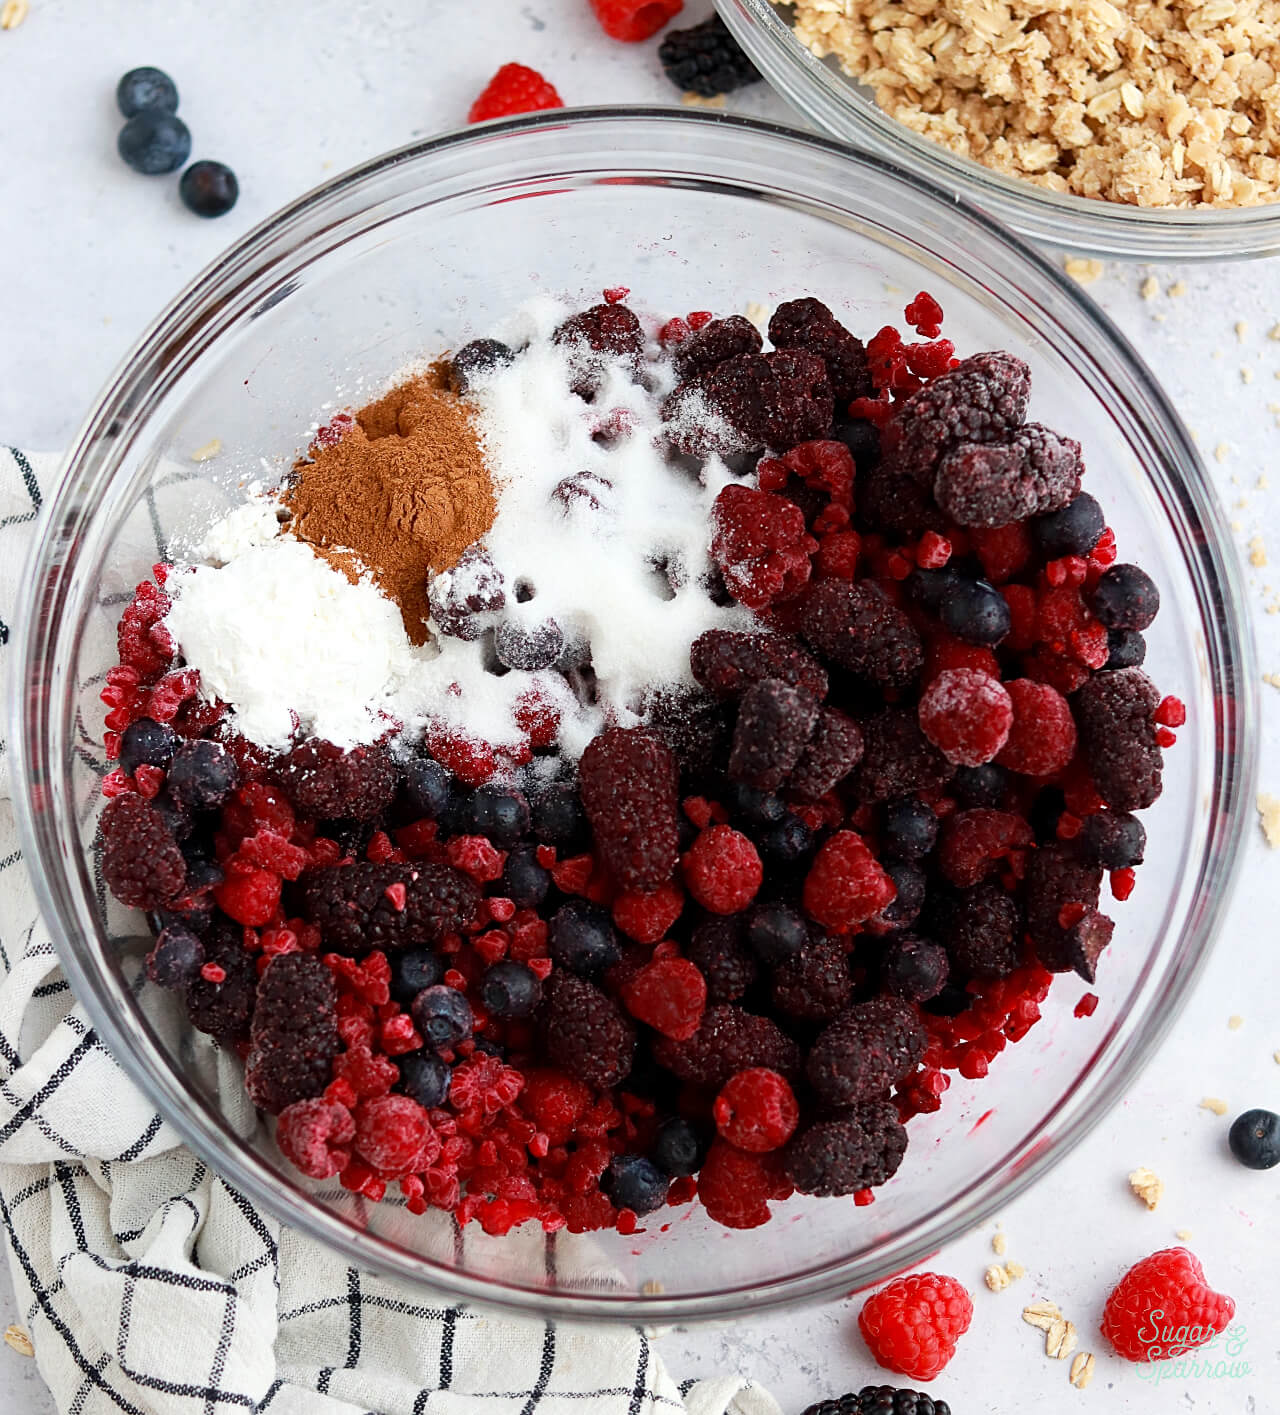
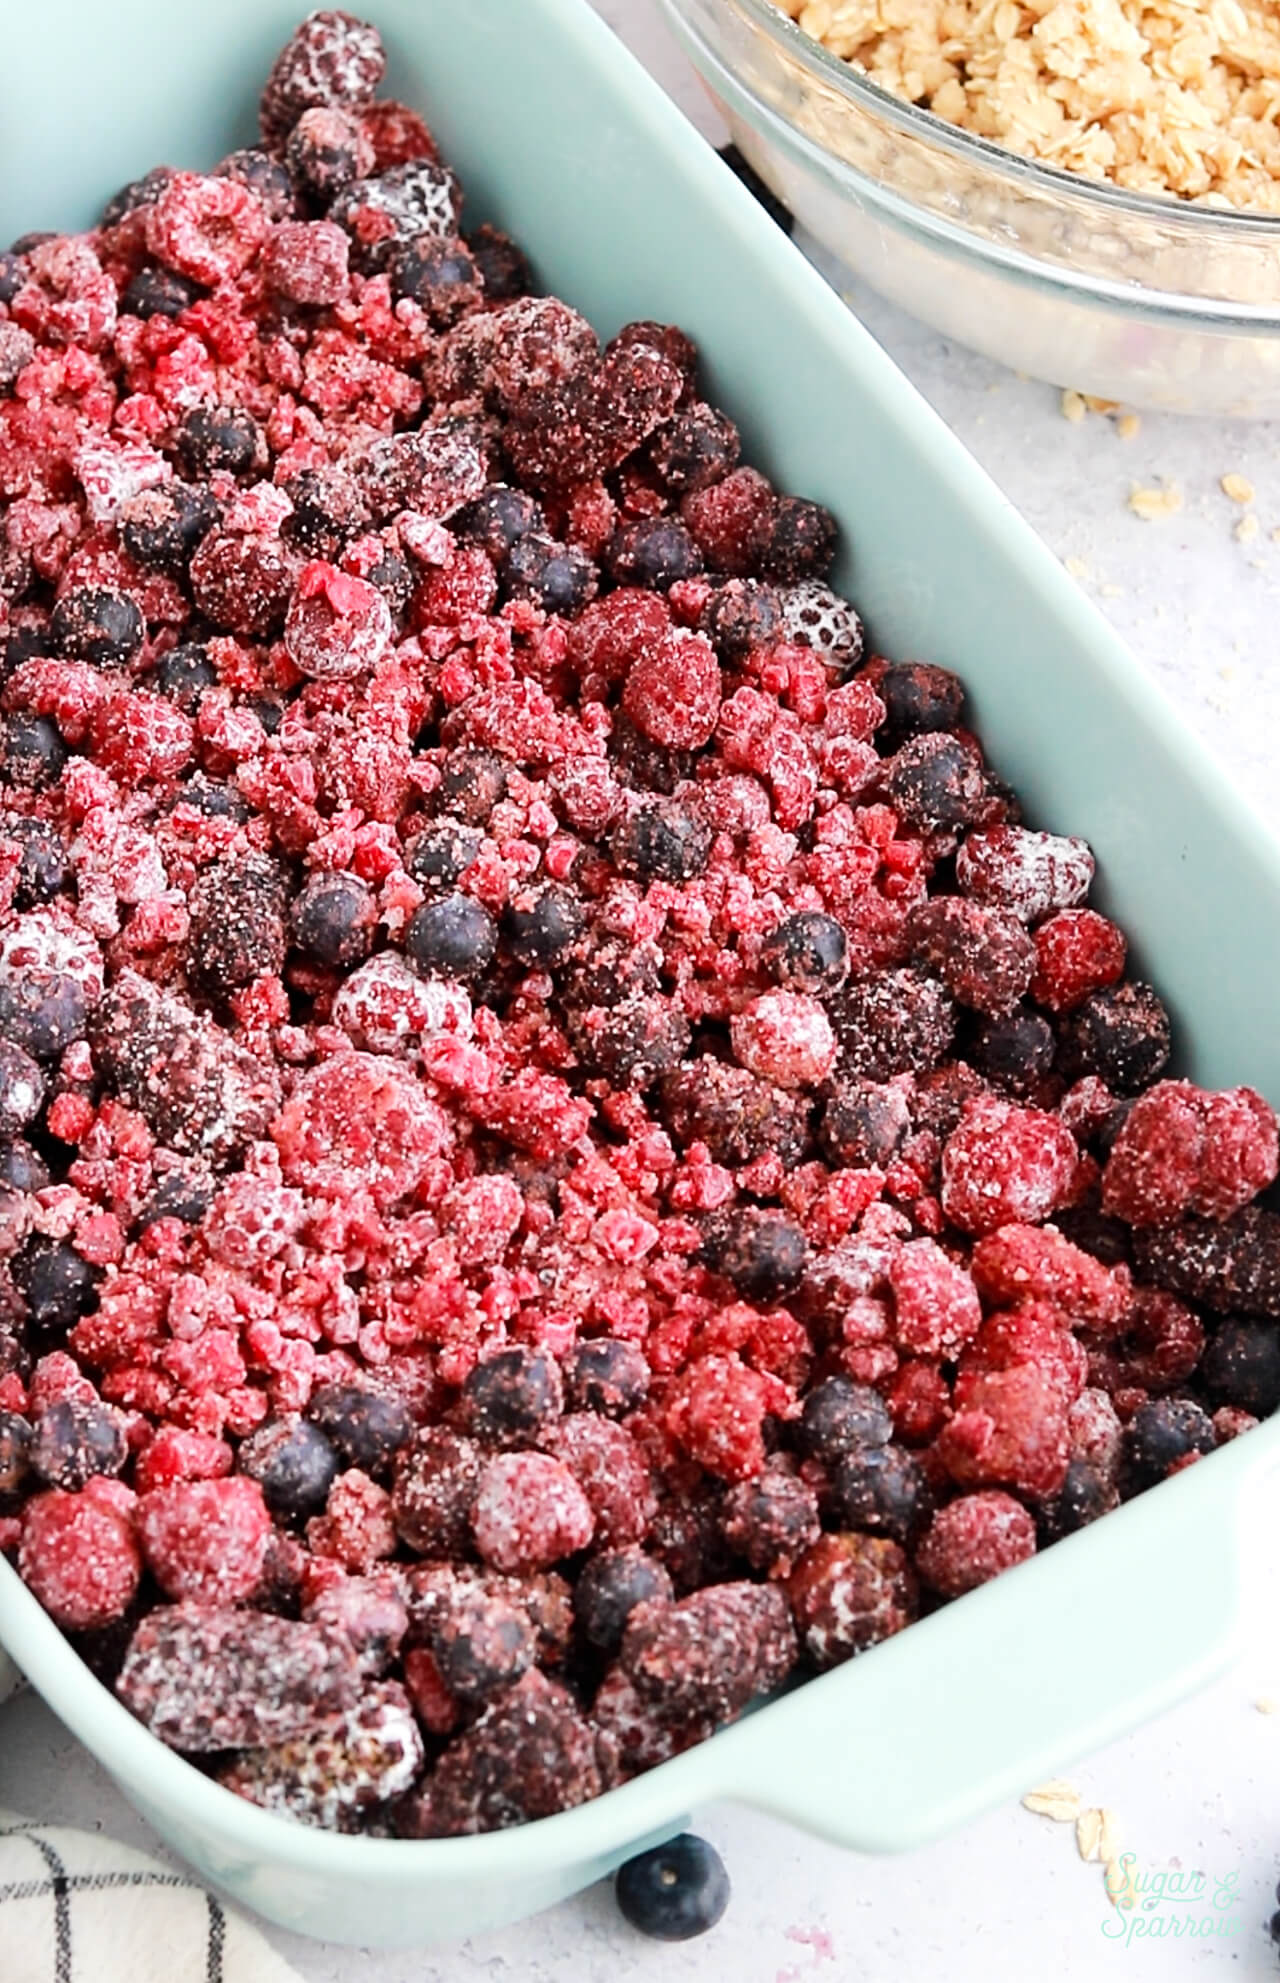
  • Mixed Berries. Use fresh or frozen mixed berries for this recipe. I used frozen mixed berries I found at my local grocery store and the package included raspberries, blueberries, and blackberries.
  • Cornstarch. Coating the berries in cornstarch helps create a thicker berry filling during the baking process. Don’t skip this ingredient or you’ll end up with berry soup underneath that beautiful crisp topping!
  • Cinnamon. I love to use a little cinnamon in the filling and the topping to make the whole dessert extra cozy. 
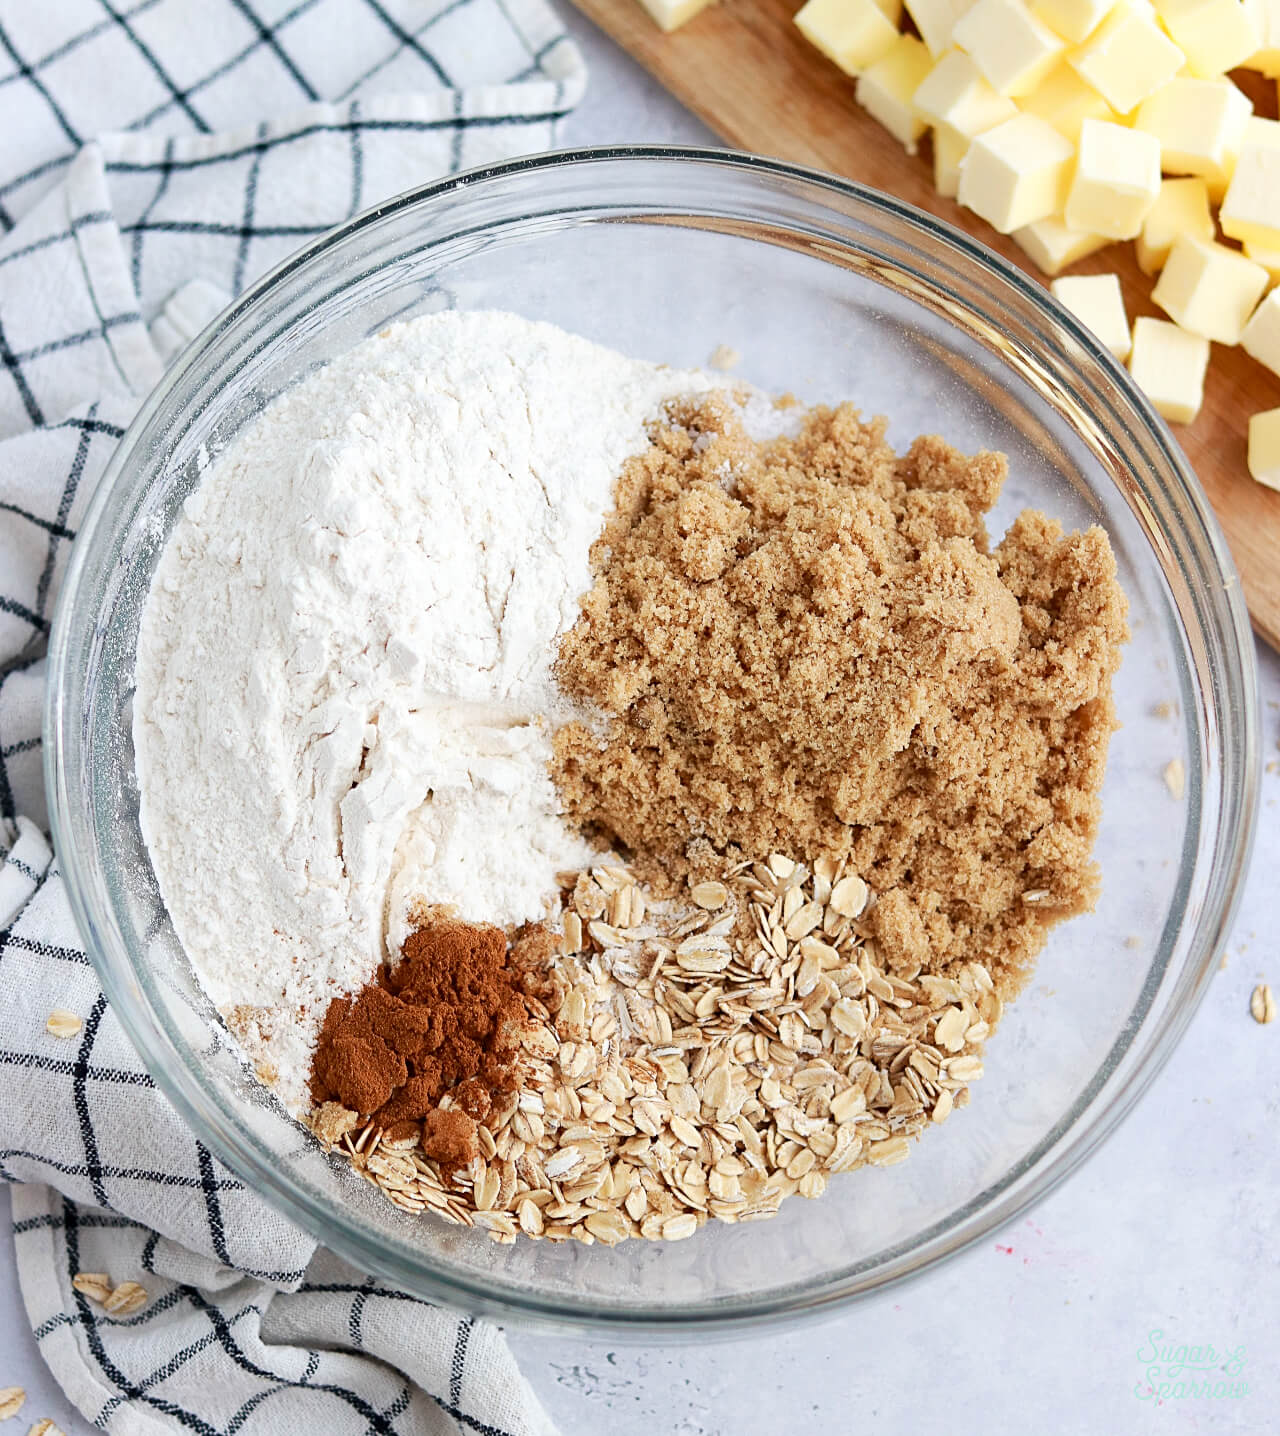
  • All-Purpose Flour. This is essential to bind the crisp topping ingredients together. If you need a gluten-free crisp, you can substitute this for GF all-purpose flour.
  • Rolled Oats. I use old-fashioned rolled oats in the crisp topping, but quick oats can be used in a pinch. 
  • Brown Sugar + Granulated Sugar. Brown sugar in the crisp topping adds more dimension to the crisp topping, while granulated sugar is best for sweetening the filling. 
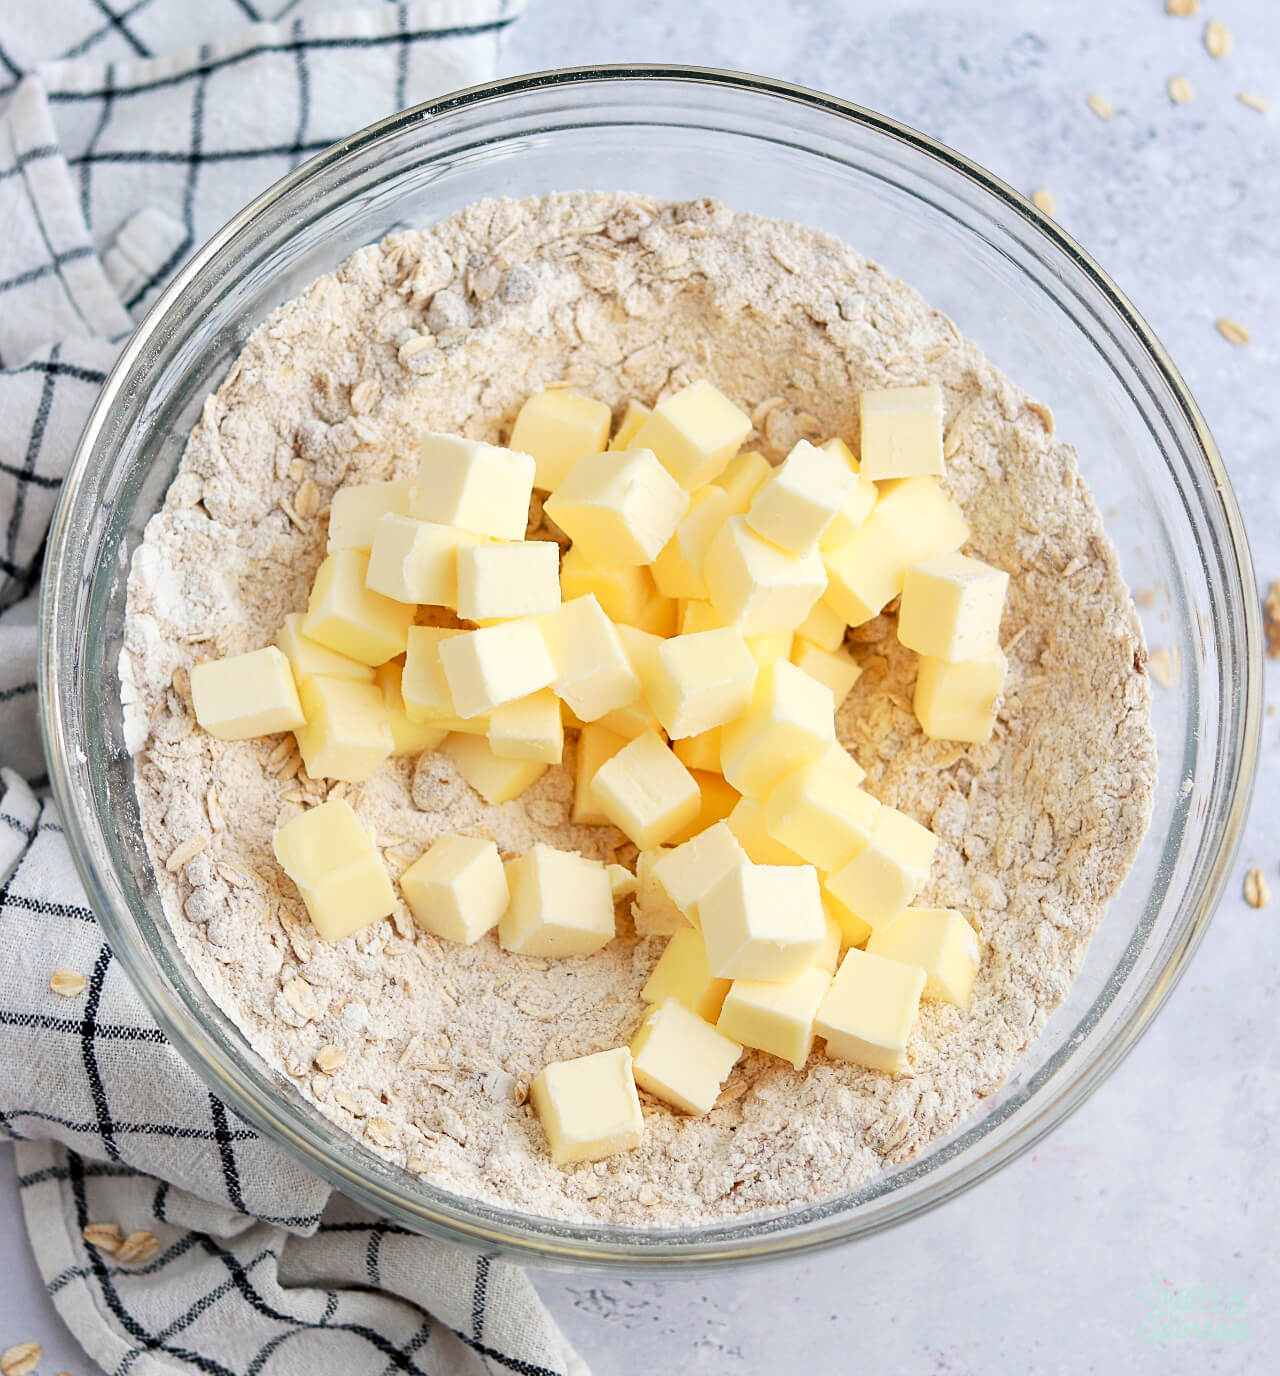
  • Unsalted Butter. Using cold and cubed unsalted butter is essential for creating the perfect crisp topping. If you only have salted butter on hand, you can use that as a substitute and omit the ½ teaspoon of salt. 
frozen berries for berry crisp recipe

How to Make a Berry Crisp

I love how quick this berry crisp comes together. Here’s how to make it:

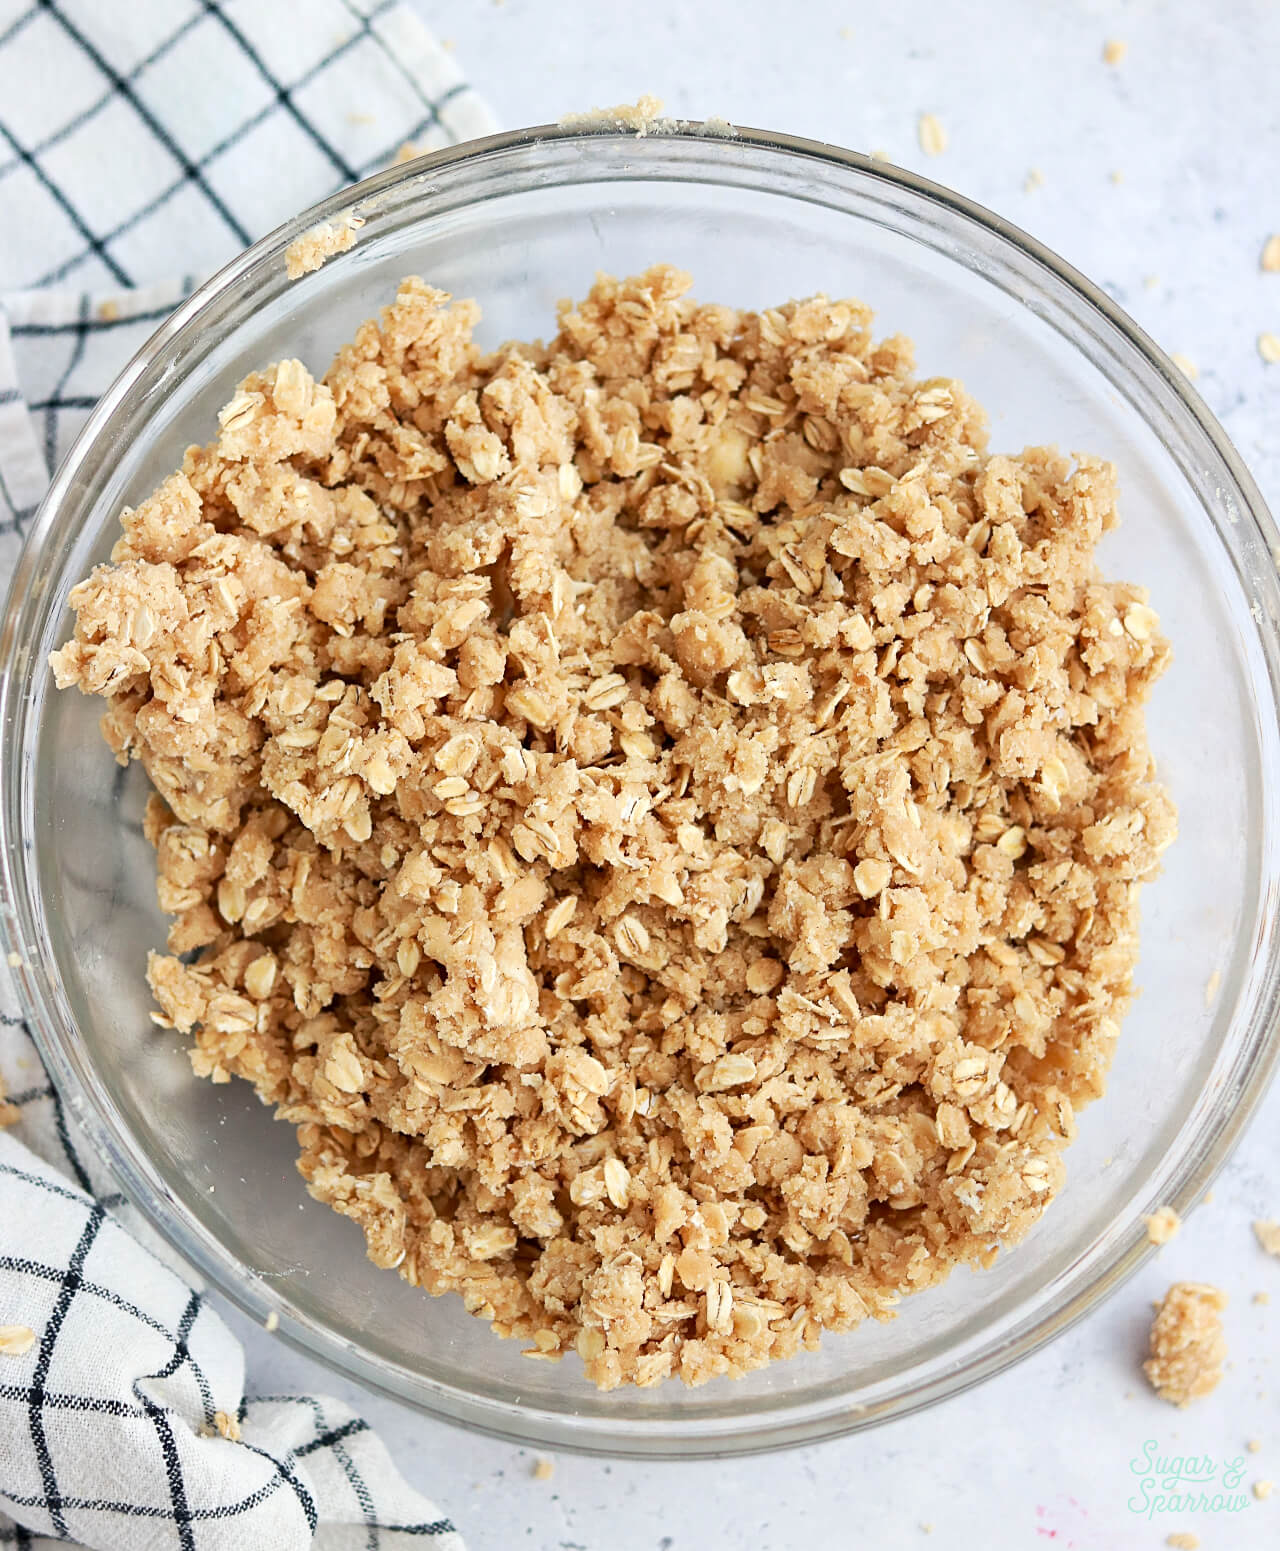
Make the Crisp Topping. In a medium bowl, mix together all of the dry ingredients for the crisp topping. Add the cold, cubed butter on top and work it in with your hands, pressing it together with the dry ingredients until the mixture is crumbly and well-combined. 

berry crisp topping ingredients
how to make berry crisp topping
streusel topping recipe

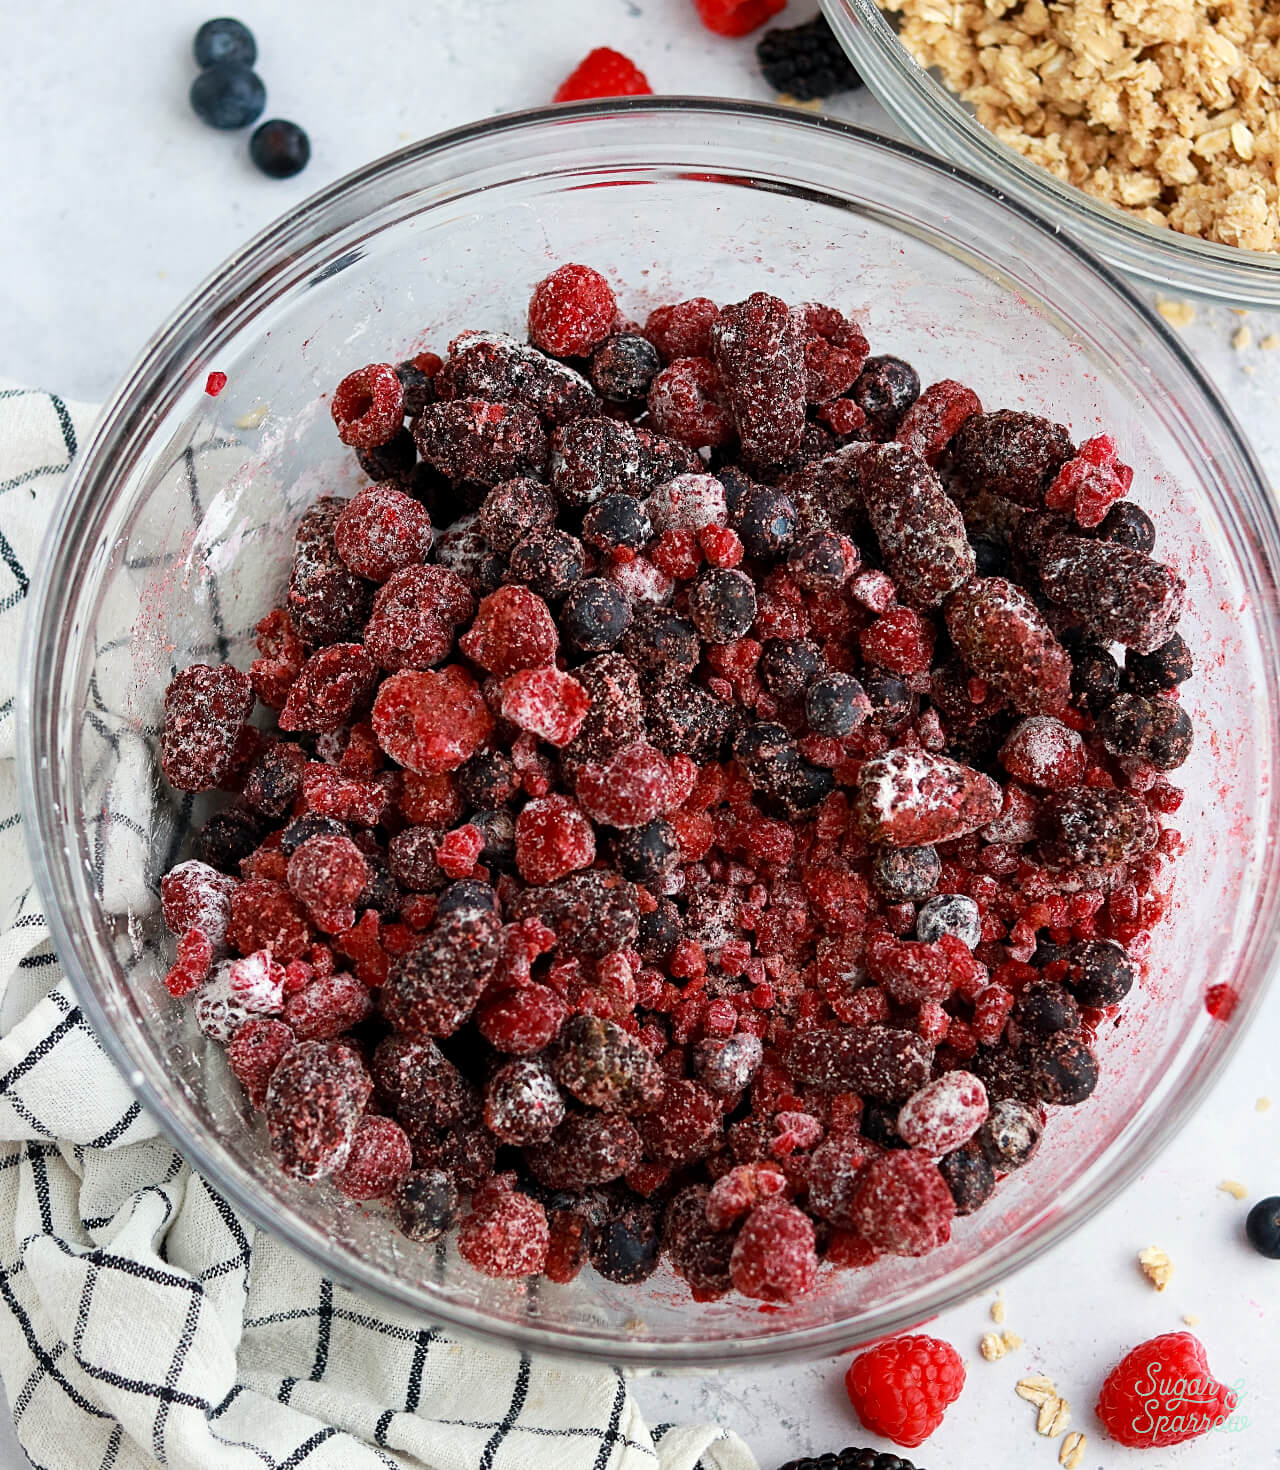
Make the Berry Filling. In another large bowl, add the berries and sprinkle the rest of the ingredients (sugar, cornstarch, and cinnamon) on top. Mix together to coat the berries. 

berry filling for crisp recipe
how to make berry crisp

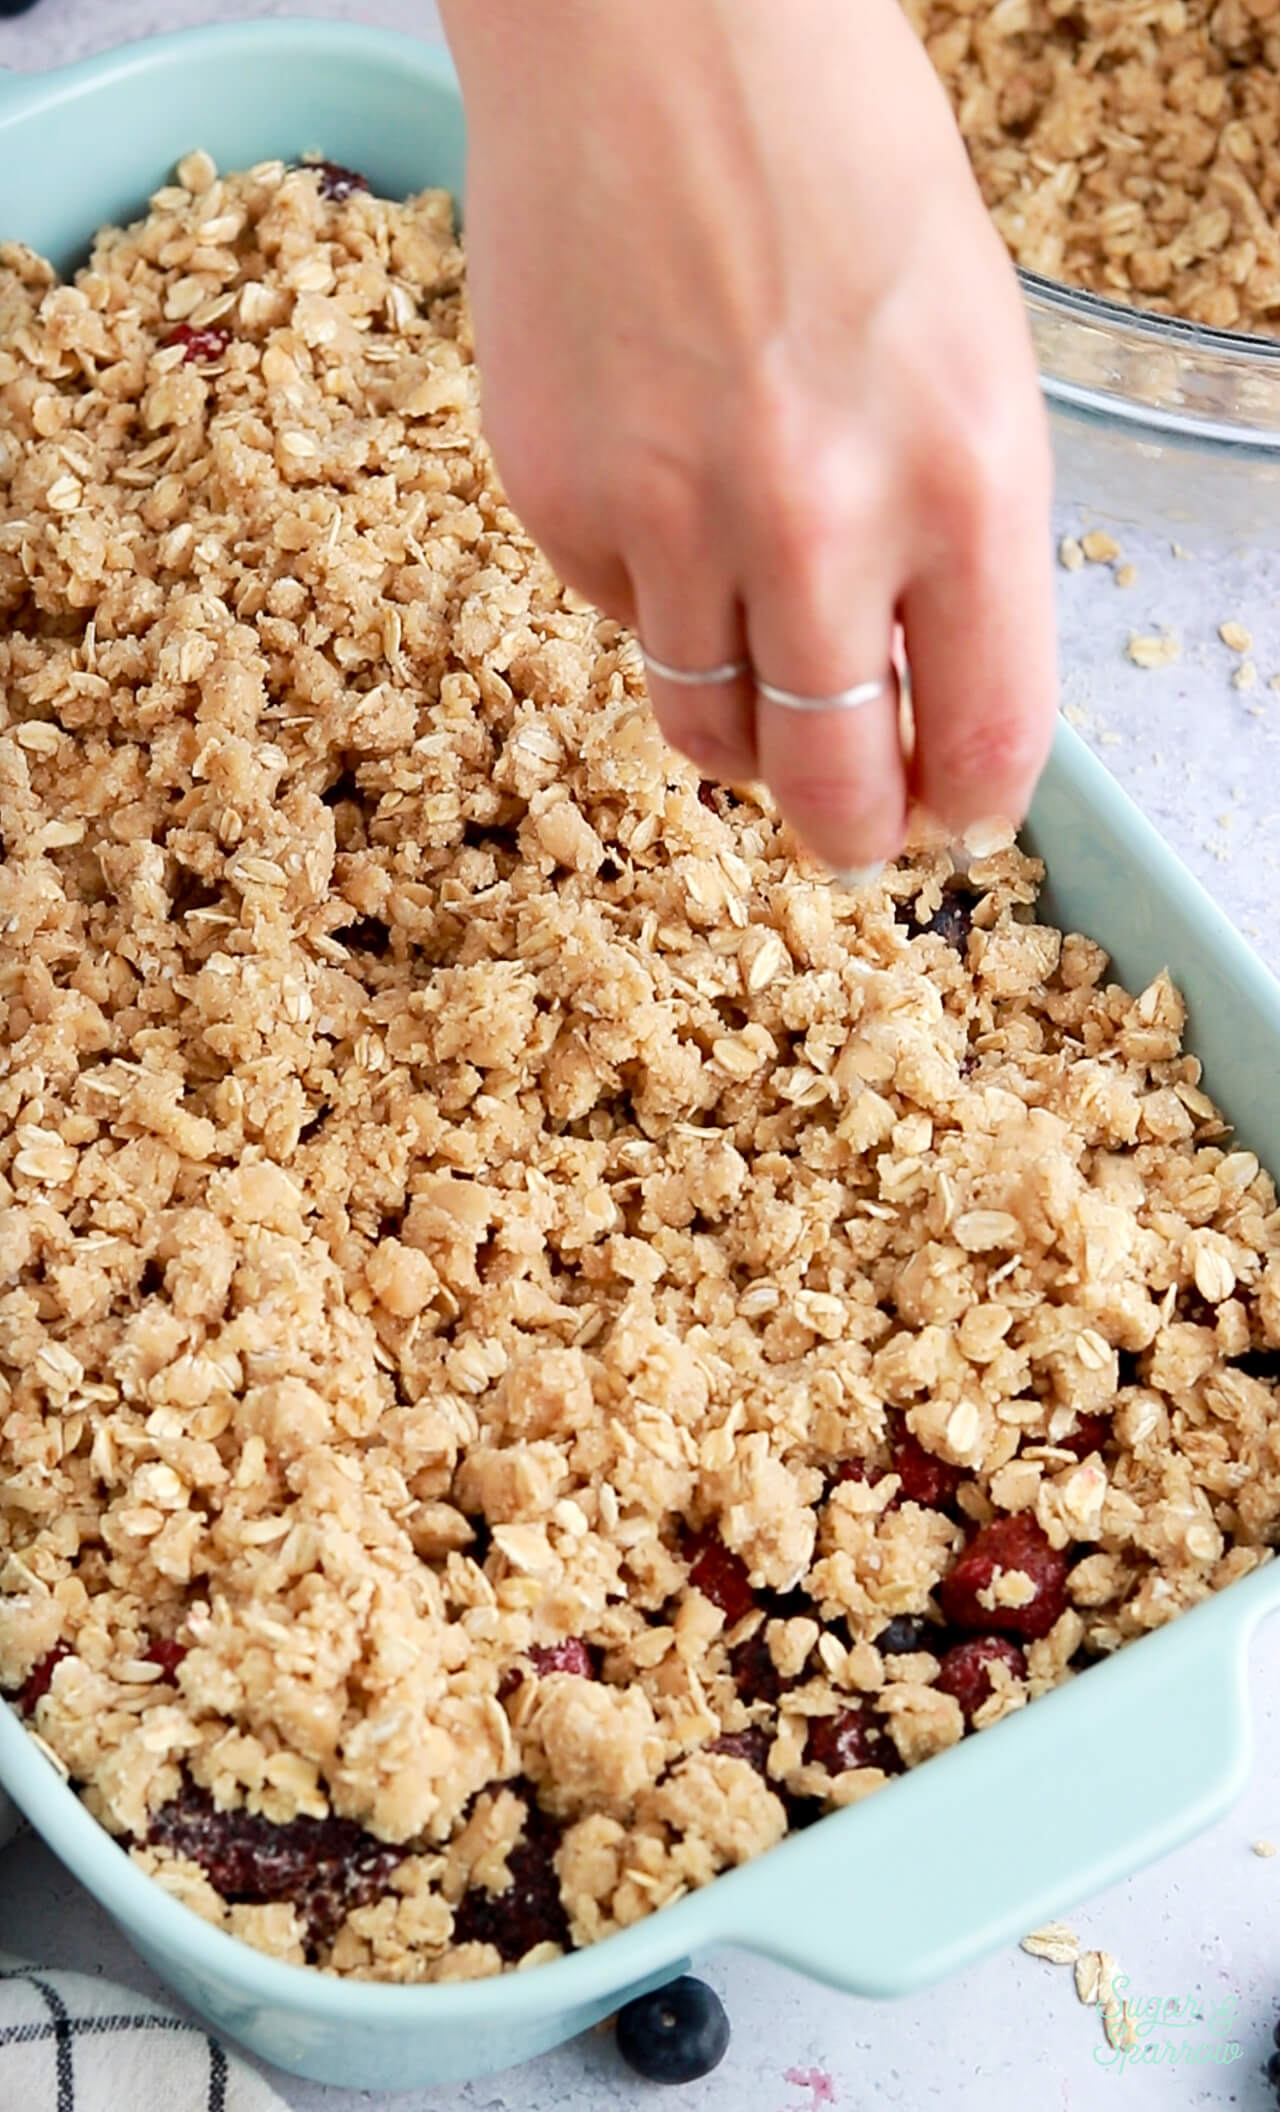
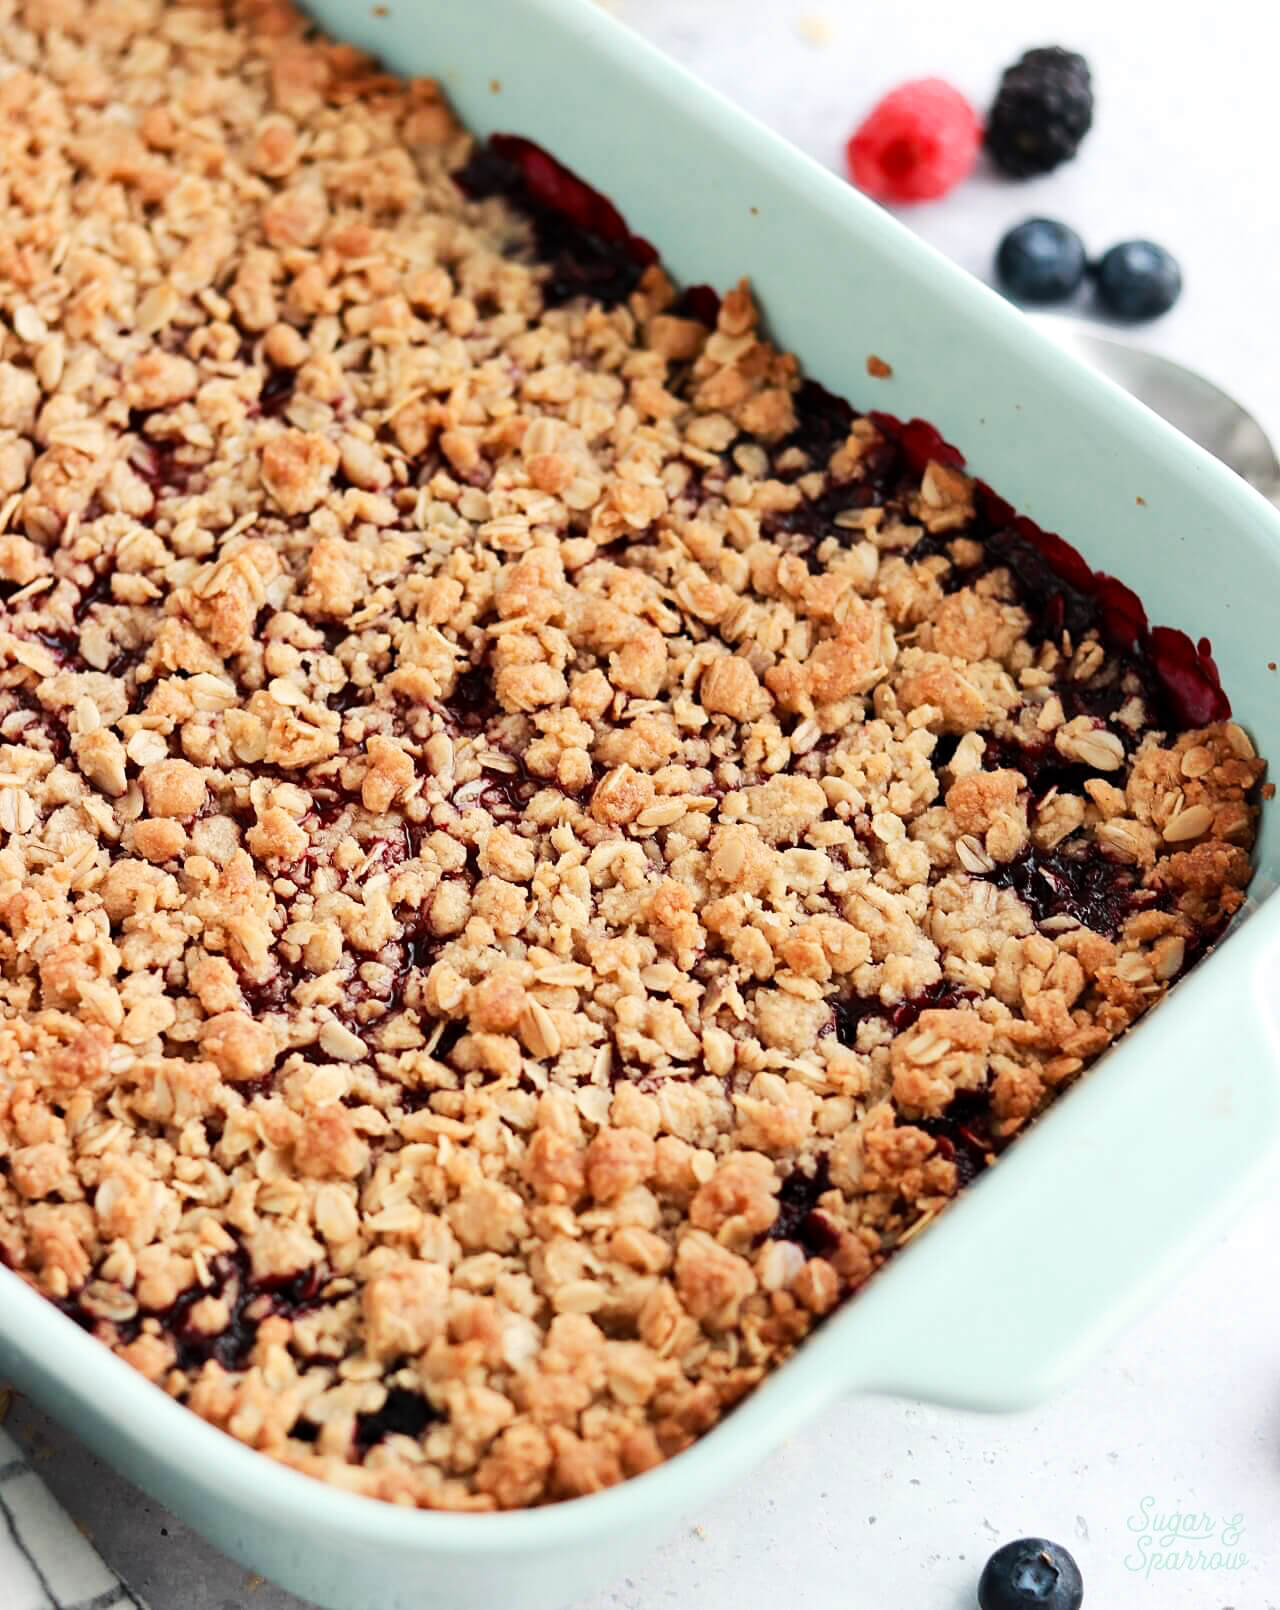
Assemble the Crisp. Lightly grease a 9×13 baking dish and add the berry mixture in an even layer. Add the crisp topping on top in an even layer. 

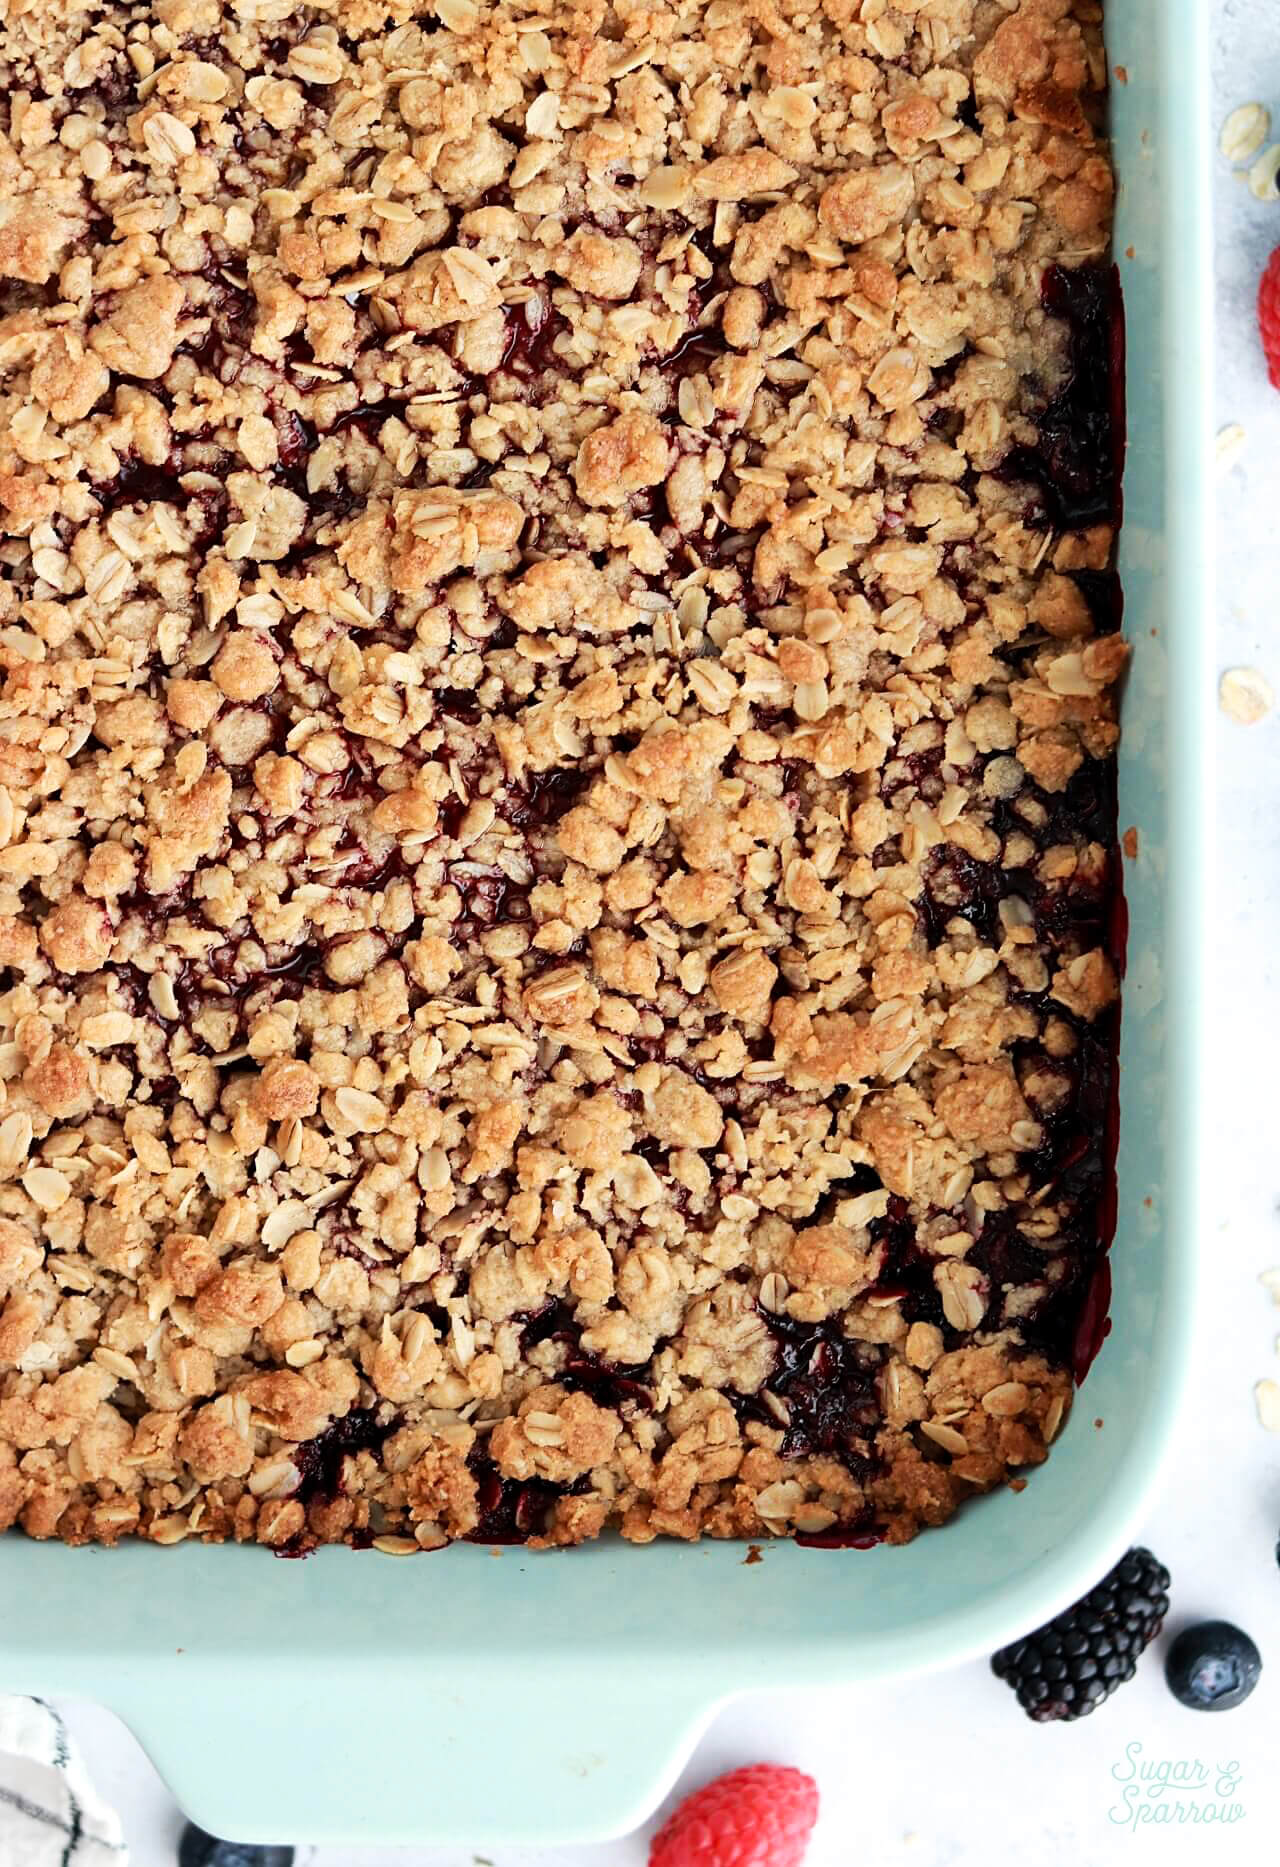
Bake Until Golden. Bake the crisp at 375ºF (190ºC) for 35-40 minutes, or until the filling is bubbling and the crisp topping is lightly golden. 

berry crisp recipe in 9x13 dish

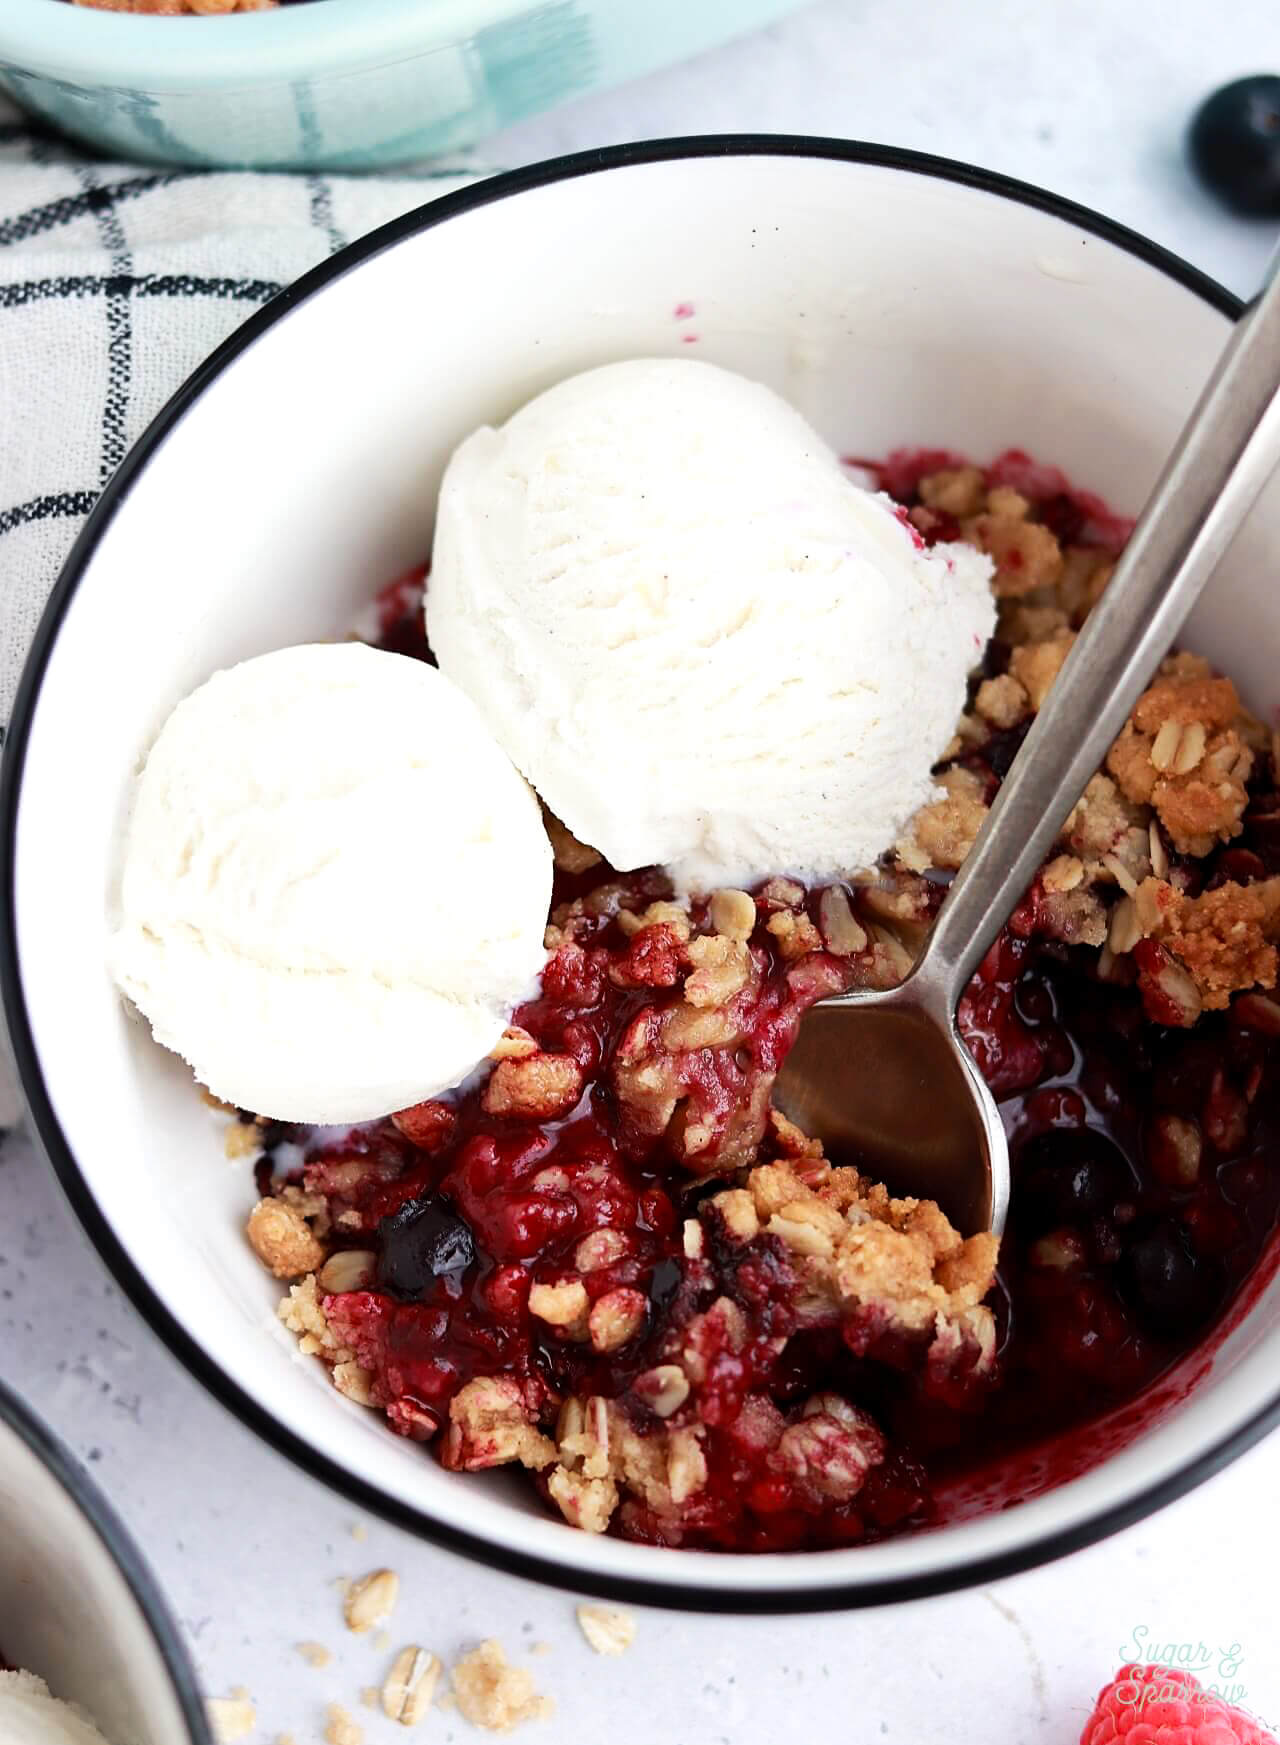
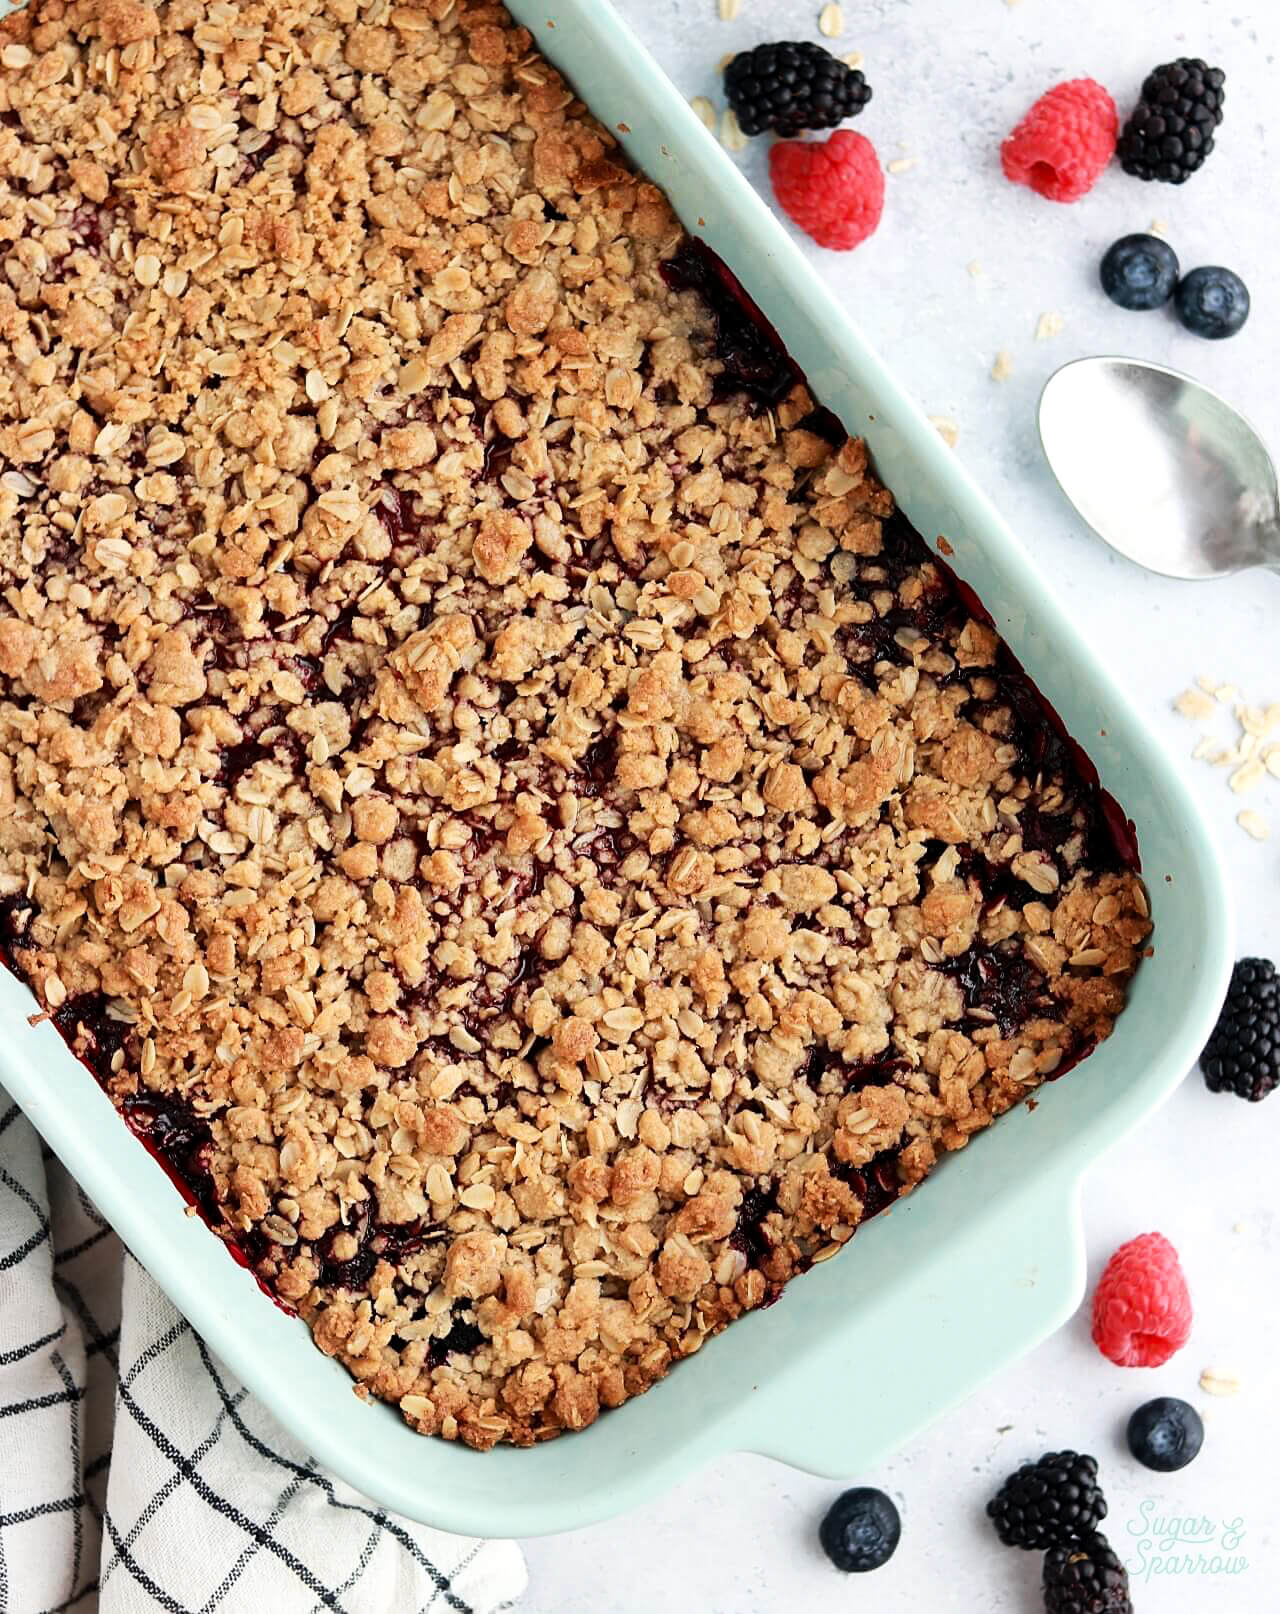
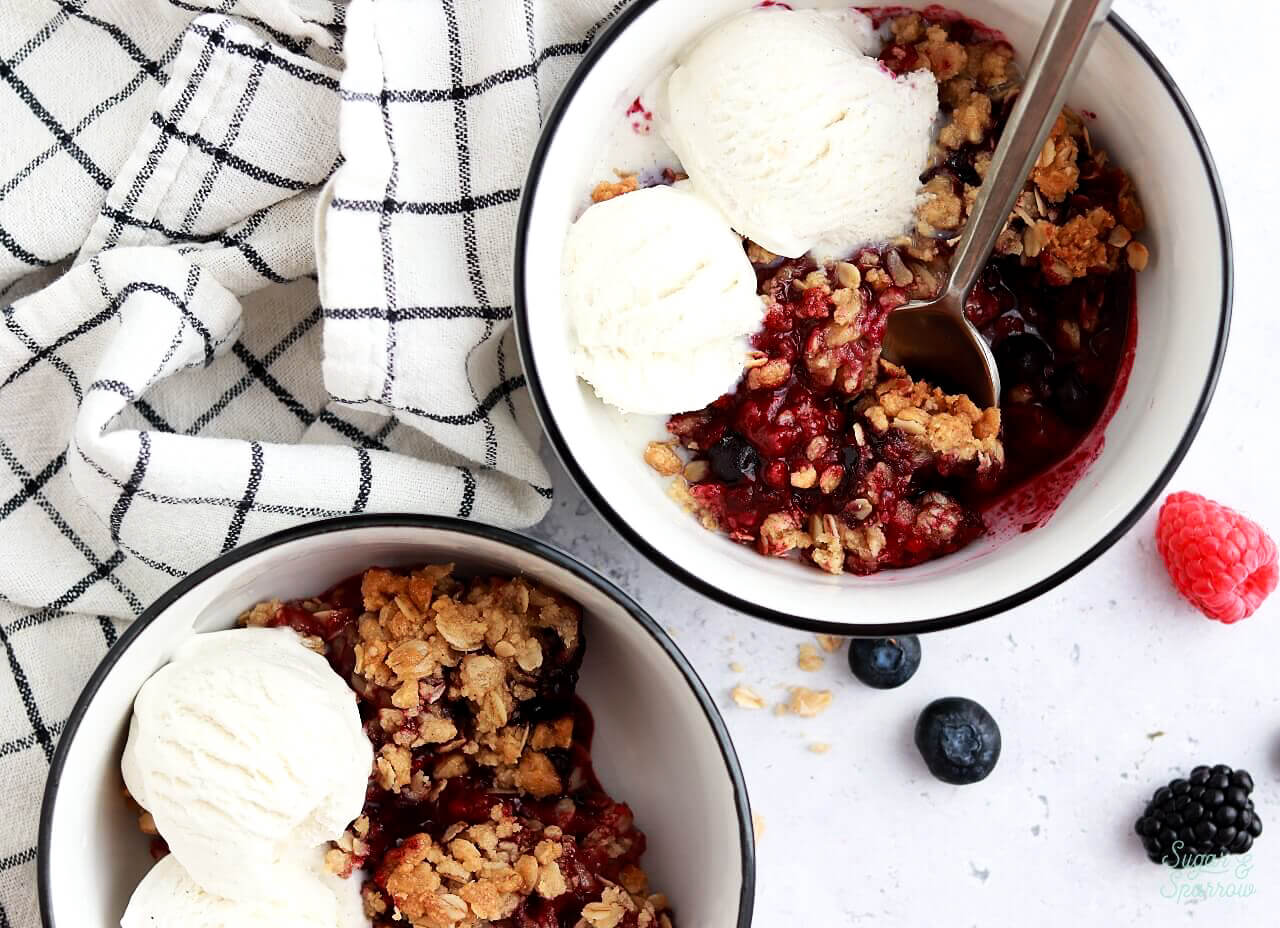
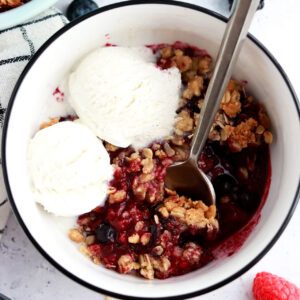
Serve or Store. After baking, let the crisp sit for about 15 minutes before serving. It’s especially delicious topped with a scoop of vanilla ice cream! 

berry crisp recipe with summer berries
berry crisp with ice cream recipe

If you’d rather make this berry crisp ahead of time, you can let the crisp cool before covering with plastic wrap or aluminum foil. Store it in the refrigerator for up to 5 days before serving. You can serve it cold, at room temperature, or warm it back up in the oven.

FAQ’s

What’s the Difference Between Crisp and Cobbler? The only real difference is the topping. Crisps have a streusel topping that usually contains oats and gets crunchy when baked. Cobbler is topped with more of a cakey biscuit. Both are delicious.

mixed berry crisp recipe with frozen berries

Should I Use Fresh or Frozen Berries? Either fresh or frozen berries work with this recipe! I like using frozen berries for convenience, especially since they can be used year-round. 

Can I Make Berry Crisp Ahead of Time? Yes. You can make the crisp topping ahead of time, or assemble and bake the entire crisp ahead. See the notes section of the recipe below for specifics.

summer dessert recipes berry crisp

This triple berry crisp is my go-to for an easy dessert that everyone loves. Let me know if you make it in the comments below (don’t forget to add a rating!) and feel free to tag @sugarandsparrowco on Instagram to show me a picture. I love to see what you create with my recipes!

berry crisp recipe with vanilla ice cream

Mixed Berry Crisp

Delicious mixed berry filling with buttery oat topping, best served warm with a scoop of vanilla ice cream. It's the perfect easy summer dessert!
Print Recipe Pin Recipe
Prep Time:10 minutes mins
Cook Time:35 minutes mins
Cooling Time:15 minutes mins
Total Time:1 hour hr
Course: Dessert
Cuisine: American
Servings: 14 servings

Ingredients

Crisp Topping

  • 2 Cups (265g) all purpose flour
  • 1 1/3 Cups (155g) old-fashioned rolled oats
  • 1 Cup (200g) packed brown sugar light or dark
  • 1/2 tsp salt
  • 1/2 tsp cinnamon
  • 1 Cup (226g) unsalted butter, cold and cubed

Berry Filling

  • 7 1/2 Cups (940g) mixed berries fresh or frozen
  • 1/3 Cup (67g) granulated sugar
  • 1 1/2 Tbsp cornstarch
  • 1 tsp cinnamon

Instructions

Make the Crisp Topping

  • Preheat the oven to 375ºF (190ºC) and lightly grease a 9×13 pan.
  • In a medium bowl, combine the the flour, oats, brown sugar, salt and cinnamon. Add the cold cubed butter and cut it into the dry ingredients using your hands or a pastry cutter. Then, squeeze the ingredients together with your hands until the mixture is crumbly and well-combined. Set aside.

Make the Berry Filling & Assemble

  • In another large bowl, add the mixed berries. Sprinkle the sugar, cornstarch, and cinnamon on top, then fold together with a rubber spatula to coat the berries.
  • Add the berry filling into the greased baking dish and spread into an even layer. Add the crisp topping on top in an even layer, then bake for 35-40 minutes or until the berry filling is bubbling and the crisp topping is lightly golden.
  • Let the crisp cool for about 15 minutes before serving warm with a scoop of vanilla ice cream, if desired.

Notes

Make it GF: substitute the all-purpose flour with GF all-purpose flour
Make it Vegan: substitute the unsalted butter with an equivalent amount of vegan butter (the sticks are best). 
Make Ahead Tips:
  1. The crisp topping can be made ahead and stored in an airtight container in the refrigerator for up to 3 days. 
  2. The baked crisp can be made ahead and stored in the refrigerator, covered with plastic wrap or aluminum foil, for up to 5 days. 
  3. Store leftovers in the refrigerator in an airtight container for up to 7 days. If you baked the crisp ahead of time, deduct this time by the amount of days you baked ahead. 

By: Whitney · In: Featured, Recipes, Seasonal, Summer · Tagged: berry crisp, crisp, summer desserts

you’ll also love

no bake cheesecake recipe by sugar and sparrowThe Perfect No-Bake Cheesecake Recipe
4th of july dessert recipesThe Best 4th of July Desserts for Your BBQ
painted cake tutorialPainted Buttercream Cake Tutorial

Join the List

Stay up to date & receive the latest posts in your inbox.

Reader Interactions

Leave a Reply Cancel reply

Your email address will not be published. Required fields are marked *

Recipe Rating


Next Post >

Black Forest Cake Recipe

Primary Sidebar

Welcome to Sugar & Sparrow

Welcome to Sugar & Sparrow

Helping you whip up pretty desserts with confidence and creativity. And hopefully sharing a few laughs with you along the way!

Learn More

Connect

let’s bake!

Get my very best recipes, baking tips, and decorating tutorials sent to your inbox

Featured Posts

watercolor cake tutorial by sugar and sparrow

Watercolor Cake Tutorial

amazon prime day deals for bakers 2024

The Best Baking Deals for Prime Day 2024

brown butter chocolate chip skillet cookie recipe

Brown Butter Chocolate Chip Skillet Cookie with C&H® Sugar

Search

Archives

Follow Along

@sugarandsparrowco

LEMON CUPCAKES 🍋 after about a dozen recipe tes LEMON CUPCAKES 🍋 after about a dozen recipe tests, this one is everything I could want in a lemon cupcake! Fluffy-yet-moist, bursting with natural lemon flavor, and absolutely irresistible topped with lemon cream cheese buttercream. 

Full recipe (with frosting) linked in my bio + at https://sugarandsparrow.com/homemade-lemon-cupcakes/

INGREDIENTS:
1 Cup (132g) all-purpose flour
1 tsp baking powder
1/4 tsp salt
1/4 Cup (60ml) whole milk, room temperature
3 Tbsp (45ml) lemon juice from 1 medium lemon
3/4 Cup (150g) granulated sugar
3 Tbsp (42g) unsalted butter, room temperature
2 Tbsp (30ml) vegetable oil
2 large eggs, room temperature
1 tsp pure vanilla extract

INSTRUCTIONS:
1. Preheat the oven to 350ºF (177ºF) and line a standard cupcake pan with 12 paper liners.
2. In a large bowl, whisk together the flour, baking powder, and salt. Set aside. 
3. In the bowl of a stand mixer fitted with the paddle attachment (or with a hand mixer and large bowl), add the lemon zest to the sugar and mix on low speed until fragrant and well combined, about 1 minute. Meanwhile, combine the lemon juice with the milk and set aside. 
4. Add the butter to the lemon-sugar mixture and cream on medium speed until and combined, about 2 minutes. Add the vegetable oil and beat until light and creamy, about 3 minutes. Scrape down the bowl and paddle as needed.
5. Mix in the eggs one at a time on low speed, then add the vanilla and turn the mixer to medium speed for one minute.
6. Turn the mixer off and add the flour mixture all at once. Mix on low speed until just combined, then slowly pour in the lemon-milk mixture. Mix until just combined, about 30 seconds.
7. Divide the batter equally between the liners and bake for 14-18 min. Cool, then top with frosting of your choice (link in bio for lemon cream cheese frosting)�
#lemoncupcakes #creamcheesefrosting #lemon #cupcakes #cupcakedecorating
April in my kitchen 🌸 I published 5 NEW recipes April in my kitchen 🌸 I published 5 NEW recipes on my site, baked my Oreo cupcake recipe for a fundraiser and found it was just as delicious as I remember, and filmed/photographed 3 recipes that will be on my blog in May (Lemon Cupcakes, Lemon Cream Cheese Buttercream, and No-Bake Marbled Strawberry Cheesecake) 🥰 

Comment “APRIL” to get all the available recipes and stay tuned for more! 

#bakersofinstagram #springbaking #cakedecorating #cupcakes #bakinglove
SHEET PAN COOKIE CAKE 🍪 slice it warm for a fud SHEET PAN COOKIE CAKE 🍪 slice it warm for a fudgy chocolate chip cookie OR let it settle into a moist and chewy cookie cake that’s perfect for decorating! My fave vanilla buttercream + sprinkles turn this giant chocolate chip cookie into the perfect birthday cake alternative at the end 🥳
⁣
Full recipe + decorating ideas at https://sugarandsparrow.com/sheet-pan-chocolate-chip-cookie-cake/
⁣
INGREDIENTS⁣
1 Cup (226g) unsalted butter, melted⁣
1 1/3 Cups (267g) packed light or dark brown sugar⁣
1/2 Cup (100g) granulated sugar⁣
3 large eggs⁣
1 Tbsp pure vanilla extract⁣
1 tsp baking soda⁣
1 tsp cornstarch⁣
1/2 tsp salt⁣
3 Cups (398g) all purpose flour⁣
2 Cups (350g) semi-sweet chocolate chips⁣
⁣
INSTRUCTIONS⁣
1. Preheat the oven to 350ºF (177ºC). Grease and line a 13×18 inch sheet pan.⁣
2. In a large bowl, add the brown sugar and granulated sugar. Melt the butter in the microwave and pour it over the top of the sugars. Whisk together until uniform. Add the eggs and vanilla, then continue whisking until uniform. Whisk in the baking soda, cornstarch, and salt.⁣
3. Add the flour and use a silicone spatula to fold it in until smooth cookie dough forms. Reserve 1/2 Cup of the chocolate chips and set them aside, then fold the remaining 1 1/2 Cups of chocolate chips into the cookie dough.⁣
4. Place the chocolate chip cookie dough onto the prepared sheet pan and use an offset spatula to spread it all the way to the edges in an even layer.⁣
5. Bake the cookie cake for 14-16 minutes, until it looks golden brown on the edges and set. 
6. Enjoy warm or let it cool and decorate with vanilla buttercream and sprinkles! ⁣
⁣
#cookiecake #chocolatechipcookies #sheetcake #birthdaycake #cakedecorating
STRAWBERRY CUPCAKES 🍓based on my beloved strawb STRAWBERRY CUPCAKES 🍓based on my beloved strawberry layer cake recipe, this cupcake version is just as moist yet fluffy and bursting with natural strawberry flavor! Between the mix of fresh strawberries in the cupcakes + freeze-dried strawberries in the frosting, the flavor is out of this world 🚀

Full recipe link in my bio (with strawberry buttercream) + at https://sugarandsparrow.com/strawberry-cupcakes/

STRAWBERRY CUPCAKES
Yield: 14 cupcakes

INGREDIENTS:
5 oz (143g) fresh or frozen strawberries
1/3 Cup (80ml) whole milk, room temp
1 1/2 Cups (158g) sifted cake flour
1 tsp baking powder
1/4 tsp baking soda
1/2 tsp salt
6 Tbsp (85g) unsalted butter, room temp
1 Cup (200g) granulated sugar
2 large eggs, room temp
3 Tbsp (45g) sour cream, room temp
1 tsp vanilla extract
1 drop pink food coloring (optional)

INSTRUCTIONS: 
1. Puree the strawberries using a food processor (you’ll have about 1/2 cup of puree), then place into a saucepan over medium-low heat. Bring to a simmer, then cook for 10-15 min, stirring occasionally, until you have 1/4 cup. Refrigerate until room temp.
2. Preheat oven to 350ºF (177ºC) and line a standard cupcake pan with liners.
3. Whisk together the sifted cake flour, baking powder, baking soda, and salt and set aside.
4. In a stand mixer w/ paddle attachment (or hand mixer + large bowl), whip the butter on high for 2 min. Add sugar and beat for 2 min, until light and fluffy. Turn the mixer to low and add the eggs one at a time, then add the vanilla and sour cream, turn the mixer to high and beat for 1 min. Meanwhile, whisk together the strawberry puree, whole milk, and food coloring (if using).
5. Turn the mixer off and add all of the dry ingredients at once. Mix on low until just combined, then add the strawberry milk mixture until just combined, about 30 seconds.
6. Fill the cupcake liners 2/3 full and bake for 14-18 minutes. Cool completely before topping with strawberry buttercream (full recipe linked above). 

#strawberrycupcakes #strawberrycake #pinkcupcakes #strawberry #cupcakes
COFFEE BUTTERCREAM (recipe below)☕️ this frost COFFEE BUTTERCREAM (recipe below)☕️ this frosting has AMAZING coffee flavor, is so easy to decorate cakes with, and pairs beautifully with so many flavors (chocolate, vanilla, or any cake flavor you’d want to turn into a latte). 

All my cake pairing suggestions are linked in my bio or at https://sugarandsparrow.com/coffee-buttercream-recipe/ 

COFFEE BUTTERCREAM⁣
Yield: 2.5 Cups⁣

INGREDIENTS⁣
1 1/2 tsp instant coffee or espresso powder⁣
1 1/2 Tbsp whole milk, room temperature⁣
1 Cup (226g) unsalted butter, room temperature⁣
3 1/2 Cups (420g) powdered sugar⁣
2 tsp pure vanilla extract⁣
Pinch of salt⁣

INSTRUCTIONS⁣
1. Combine the instant espresso/coffee with the whole milk and set aside. In the bowl of a stand mixer, beat the butter on high until creamy and smooth (about 5 minutes), scraping down the bowl and paddle a few times in between.⁣
2. Turn the mixer to low and add the powdered sugar a few cups at a time, scraping down the bowl and paddle between intervals. Add the vanilla, the coffee/espresso milk mixture, and salt. Mix on low until fully incorporated, about one minute.⁣

#coffeebuttercream #buttercream #frosting #coffeecake

Footer

On the Blog

  • Cake Basics
  • Recipes
  • Tutorials

Info

  • About
  • Privacy Policy & Disclosure

stay in the know

Copyright © 2026 · Theme by Sugar & Sparrow