• Cake
  • Frosting
  • YouTube
  • My Favorite Tools
  • Nav Social Icons

  • Skip to primary navigation
  • Skip to main content
  • Skip to primary sidebar
  • Skip to footer
  • Recipes
    • Cake
    • Cupcakes
    • Frosting
    • Ice Cream
    • Vegan
  • Cake Basics
  • Tutorials
  • Blog
  • About
  • Mobile Menu Widgets

    Connect

    Search

Sugar & Sparrow logo in script font

Sugar & Sparrow

Lifestyle and Cake from Portland Oregon

  • Cake Basics
  • Recipes
    • Cake
    • Cupcakes
    • Cookies & Bars
    • Filling
    • Frosting
    • Ice Cream
    • No-Bake
    • Small Batch
    • Vegan
  • Tutorials
  • Book
  • Blog
  • About

How To Make Fresh Flowers Safe For Cakes

May 25, 2018 · In: Featured, Tutorials

There’s something about working with fresh flowers in the cake decorating process that gets me so excited! The thrill always starts at the flower shop, because I really get to nerd out on different combinations of blooms. With a color palette in mind, I love to play around with different textures and varieties of flowers. But deciding on a good floral palette involves more than just what will look best – the flowers have to actually be safe for cakes.

using fresh flowers in cake decorating

In addition to making sure the blooms you’re purchasing for your cake are organic and haven’t been sprayed with pesticides, it’s important to know ahead of time which flowers to avoid. I’ve found that in some cases, the florist won’t even know! So before I teach you how to incorporate fresh florals into your cake designs, make them last, and keep them from leaking their stem juices into your precious cake, I wanted to share a list of flowers that are safe for your cakes (and in some cases, even completely edible!) and which ones to avoid completely:

Flowers That Are Safe: Pansies, Lavender, Violas, Violets, Roses, Marigold, Cornflower, Carnations, Chrysanthemums, Day Lily, Hibiscus, Peony, Chamomile, Freesia, Gerber Daisy, Lisianthus, Queen Anne’s Lace, Primrose, Sunflowers. Here’s a longer list (and what parts of each flower are actually edible!).

Flowers To Avoid: Lily Of The Valley, Daffodil, Poinsettia, Azaleas, Calla Lily, Hyacinth, Oleander, Wisteria, Rhododendron, Hydrangea, Mistletoe, Holly, Sweet Pea. Here’s the long list.

Now that you know which flowers work best for keeping your cake tasty and non-toxic, here’s my method for decorating cakes with fresh florals:

You Will Need:

  • Fresh florals (organic, pesticide-free, and from the safe list)
  • Floral scissors or pruning tool
  • A frosted cake
  • Floral tape
  • Scissors

Step 1: Wash And Trim The Flowers

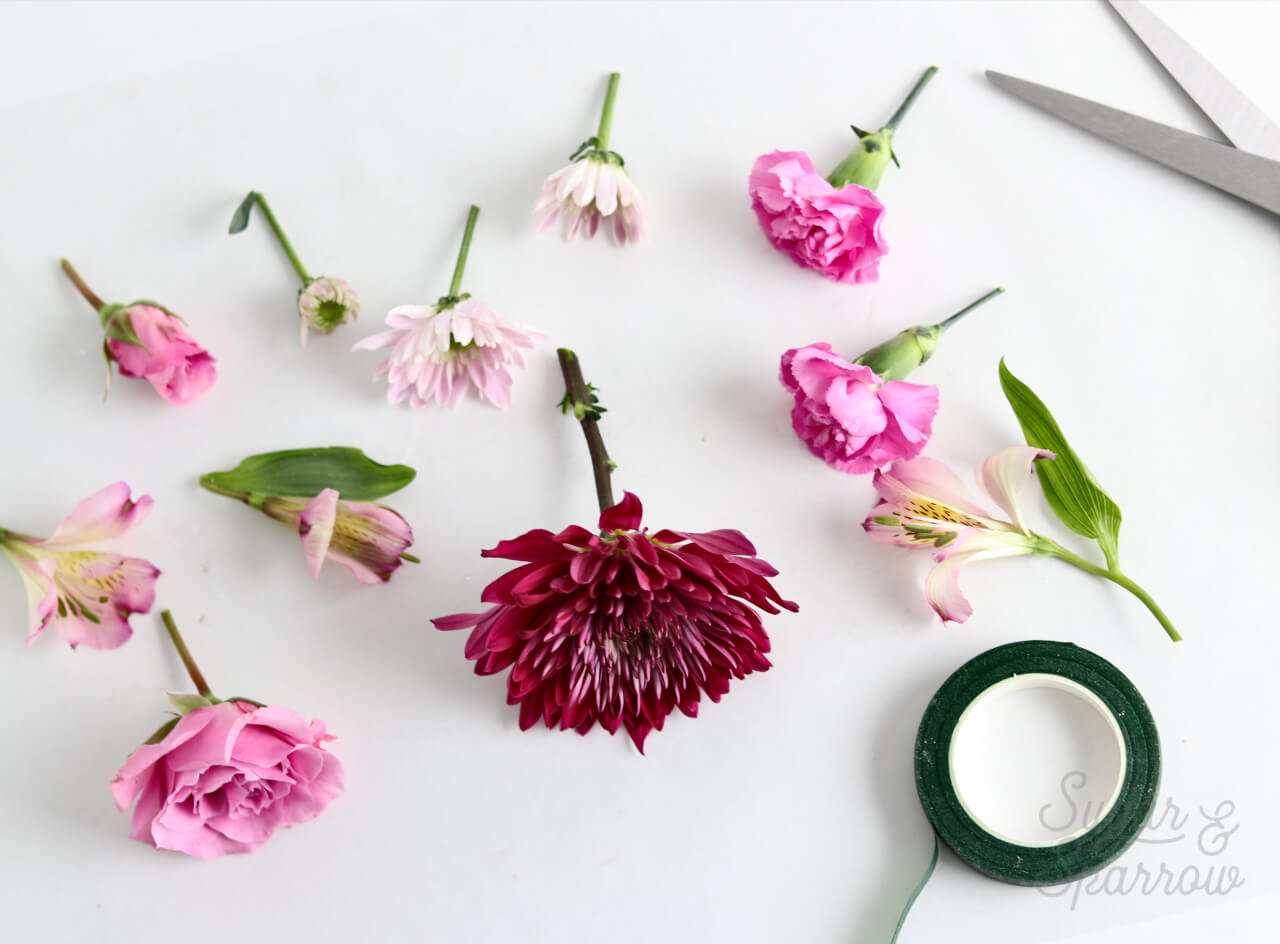
Under a sink with cold water running, gently wash your flowers to make sure there aren’t any bugs or dirt lingering in the petals. Locate where you’d like to trim the stem (I usually keep it 2-3 inches long) and place it under the water. Snip the stem at an angle and keep the trimmed portion under the water for another few seconds. I consider that the flower’s final drink.
how to prepare fresh flowers cake decorating

Pat the flowers and stems dry with a paper towel carefully.

Step 2: Wrap The Stems

Cut a piece of floral tape that’s about 2-3 inches long. Wrap the tape around the stem, focusing on covering the majority of the stem and where it’s been pruned. The goal here is to create a barrier between the cake and the stem, especially the bottom of the stem, and prevent it from leaking flower secretion (ok yes that’s gross sounding but also a good band name!) into the cake layer.

how to make flowers food safe for cakes

Wrapping the stem in this way also keeps the flowers fresh for longer, because it helps hold the moisture and nourishment within the stem.

Step 3: Decorate The Cake

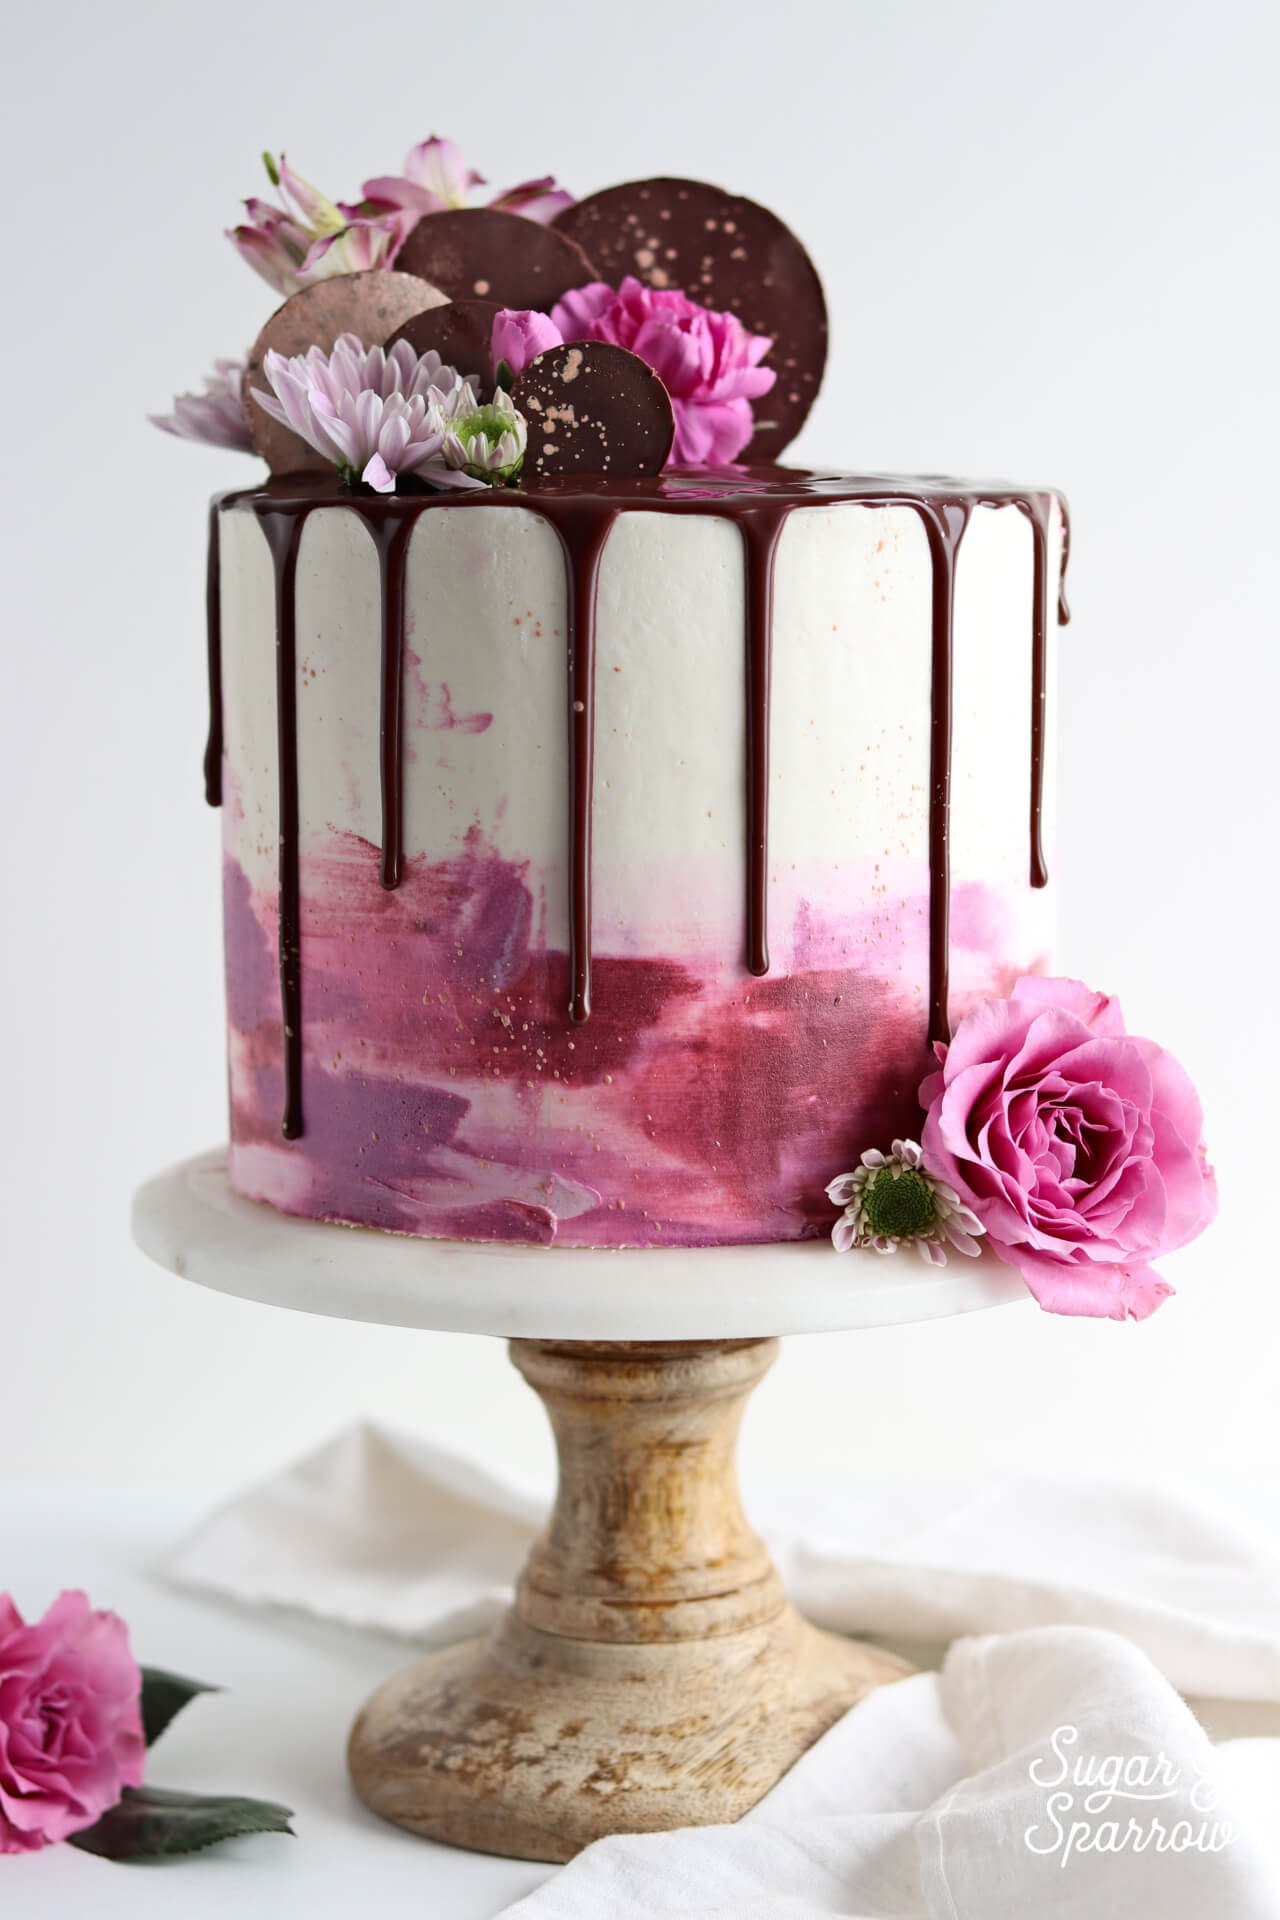
Now that you’ve created a good barrier between the cake and your floral stems, plus you’ve set your mind at ease by choosing flowers from the safe list, it’s time to arrange them on your cake – my favorite part! I usually take some time to loosely plan where to place the flowers (off the cake) before committing to an arrangement. Once you’re happy with a plan, stick the covered stems into the cake one by one. Simple as that!
which flowers can you use on cakes

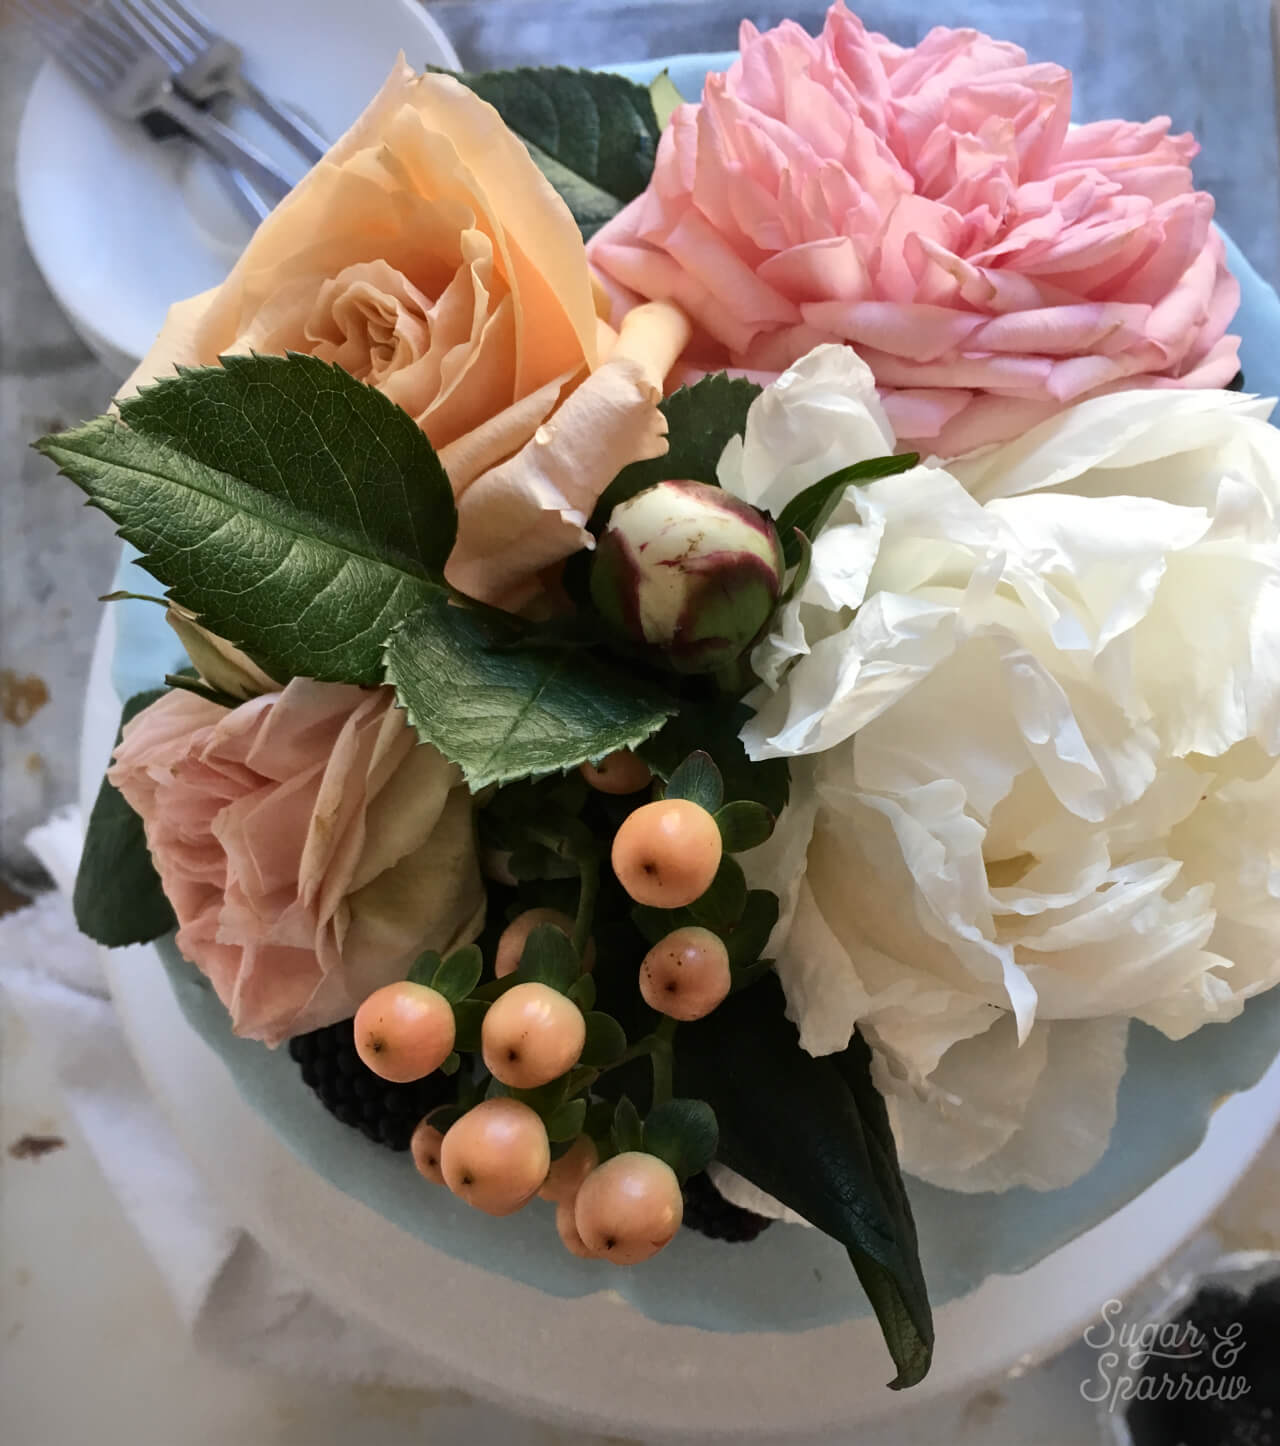
For larger flower bouquets, a great trick for keeping those stems from contaminating your cake is to create a small (1-2 inch) fondant ball and stick your stems into that before placing the whole thing on top of your cake. I’ve definitely used that trick for fuller floral arrangements and it works like a charm. You’ll still need to wrap your stems with floral tape before sticking them into the fondant holder to keep the moisture contained.
how to arrange fresh flowers on a cake

And if you’re really wanting to keep those flowers fresh, you can always try using one of those plastic tubes you get from the florist. You can fill them with a little water and stick your flowers into it like a vase before submerging it into the cake. I’ve never tried that method, but I hear it works great.

Storage And Timing

Keep in mind that each flower will have a specific lifespan once you wrap the stem, so the best way to be sure how long it will remain fresh is to ask your florist beforehand. In my experience, I’ve had really good luck storing cakes with fresh florals in the refrigerator. Typically, fresh flowers will last around eight hours in the refrigerator and remain fresh for a few hours outside of the fridge environment. Even though I’ve had good luck with the fridge, I always like to prepare and place the flowers at the very last second possible (sometimes even on-site at the event) to ensure the freshest blooms. Because after all that prep work and stressing over a cake, the last thing you want to happen is wilting. 

Have you tried any of these methods before? Know any tips that aren’t on my list? I’d love to know your secrets for working with fresh florals too! Let me know in the comments.

By: Whitney · In: Featured, Tutorials · Tagged: cake, cake decorating, cake with flowers, florist, flower arranging, flower prep, food safe flowers, fresh flowers, toxic flowers, tutorial

you’ll also love

the best vanilla cupcakes recipeThe Perfect Vanilla Cupcake Recipe
pumpkin layer cake recipe by sugar and sparrowPerfect Pumpkin Layer Cake Recipe
oreo cookies and cream cakeOreo Layer Cake Recipe

Join the List

Stay up to date & receive the latest posts in your inbox.

Reader Interactions

Comments

  1. Lisa says

    July 4, 2025 at 12:01 pm

    Hi Whitney! I love your blog and really appreciate this post. Do you have any advice for using pinecones on a cake? My son and his fiancé are getting married in October and it is a fall theme for the wedding. She wants a simple cake with just a few small pinecones. I was going to get some at Hobby Lobby and use just a few small craft pinecones. Any suggestions for using on the cake? Thanks so much! 🙂

    Reply
    • Whitney says

      July 5, 2025 at 8:24 pm

      Hi Lisa! You could probably use decorative pinecones from a craft store as long as they aren’t coated in anything that isn’t recommended for food. A few other ideas are 1) use real pinecones, but make them food safe by baking them in the oven to get rid of bugs/dirt. Here’s an article I found: https://refreshrestyle.com/how-to-bake-pinecones/ or 2) Make edible pinecones. This tutorial looks easy: https://www.tiktok.com/@fitwaffle/video/7434953789272034592?lang=en Hope that helps!

      Reply
  2. Norma says

    February 12, 2024 at 11:22 am

    Hi, thank you for the great advice! I’m wondering about laying the actual petals on icing. I saw mentioned that you could put waxed paper under the petals.. do you normally do that or just let them sit on the icing?

    Reply
    • Whitney says

      February 21, 2024 at 8:13 pm

      Hi Norma! If the petals are food safe you can lay them right on the icing. If they’re toxic I would put a barrier (like wax paper) in between the icing and the petals or use a different flower that is food safe.

      Reply
  3. Nikki says

    January 29, 2024 at 11:20 am

    Hi! I don’t have many farmers markets that sell organic flowers and the ones online cost a lot to get shipped over.

    Is there a safe way to use the ones from the grocery store?

    What options would you suggest?

    Reply
    • Whitney says

      February 4, 2024 at 9:54 pm

      Hi Nikki! You can safely use grocery store flowers as long as they’re edible/non-toxic. If they’re not fully edible just be sure to wrap the stems well or take other measures to prevent the stems from touching the cake.

      Reply
  4. Jenny Walker says

    February 27, 2023 at 11:06 am

    Thank you for your informative blog but I am sorry I must disagree with you on the use of tape to be inserted into the cake. Florist tape, which is used by most cake decorators, contains a glue. This is what makes it sticky. Glue is not food safe so should not be inserted into a cake. The only real safe option is a plastic flower pic or spike.

    Reply
    • Whitney says

      March 1, 2023 at 4:57 pm

      Thanks, Jenny! It’s been awhile since I updated this post so I’ll definitely look into that!

      Reply
    • Denise says

      May 13, 2025 at 7:26 am

      Hi there, I started using strips of press n seal food wrap instead of floral tape because it stretches similarly and is a little sticky, but made to use with food. It can be frustrating to cut the strips, but it works very well for me.

      Reply
« Older Comments

Leave a Reply Cancel reply

Your email address will not be published. Required fields are marked *

Recipe Rating


Next Post >

How To Frost A Flawless Semi-Naked Cake

Primary Sidebar

Welcome to Sugar & Sparrow

Welcome to Sugar & Sparrow

Helping you whip up pretty desserts with confidence and creativity. And hopefully sharing a few laughs with you along the way!

Learn More

Connect

let’s bake!

Get my very best recipes, baking tips, and decorating tutorials sent to your inbox

Featured Posts

fruit pizza with berries recipe

Perfect Fruit Pizza with Berries

floral cupcakes tutorial

5 Easy Designs For Buttercream Flower Cupcakes

lemon sheet cake recipe by sugar and sparrow

Lemon Sheet Cake

Search

Archives

Follow Along

@sugarandsparrowco

SALTED CARAMEL BUTTERCREAM ✨I could eat this salty SALTED CARAMEL BUTTERCREAM ✨I could eat this salty-sweet caramel frosting by the spoonful but it’s absolutely delicious on cakes, cupcakes, macarons, and more 🙌🏽 I use my homemade EASY salted caramel recipe here but you can use any salted caramel sauce that you love.⁣

✨Full recipe (including homemade salted caramel) + cake pairing suggestions are on my blog at https://sugarandsparrow.com/salted-caramel-buttercream-recipe/ 
⁣
SALTED CARAMEL BUTTERCREAM⁣
Yield: 2.5 Cups ⁣
⁣
INGREDIENTS⁣
1 Cup (226g) unsalted butter, room temperature⁣
3 1/2 Cups (420g) powdered sugar⁣
2 tsp vanilla extract⁣
1/2 Cup (120ml) salted caramel sauce, room temperature⁣
Pinch of salt⁣
⁣
INSTRUCTIONS:⁣
1. In a stand mixer fitted with the paddle attachment, whip the butter on high until it’s creamy and light in color, 5-6 minutes. ⁣
2. Turn the mixer to low and add the powdered sugar a few cups at a time, scraping down the bowl and paddle after each interval.⁣
3. With the mixer still on low, mix in the vanilla extract, salted caramel, and a pinch of salt. Continue mixing on low speed until fully combined. ⁣
⁣
#saltedcaramel #caramel #cakedecorating #frosting #buttercream
NO-CHURN BERRY CRISP ICE CREAM✨you don’t need any NO-CHURN BERRY CRISP ICE CREAM✨you don’t need any fancy equipment to whip up this delicious ice cream that tastes JUST like berry crisp a la mode! I layered my favorite 3-ingredient no-churn vanilla ice cream base with ribbons of homemade berry filling + buttery oat streusel in every bite. Even if you’ve never made ice cream from scratch before, I promise you can master this recipe!! 
 
🍦Full recipe linked in my bio or find it at https://sugarandsparrow.com/no-churn-berry-crisp-ice-cream/

#nochurnicecream #icecream #icecreamlover #berries #summerdessert
STRAWBERRY SHEET CAKE 🍓based on my favorite strawb STRAWBERRY SHEET CAKE 🍓based on my favorite strawberry layer cake recipe, this sheet cake version is so fun to decorate + such a crowd pleaser! I love using a combination of fresh and freeze-dried strawberries to create the most powerful authentic flavor ✨
 
🍓Full recipe (with strawberry buttercream) at https://sugarandsparrow.com/strawberry-sheet-cake-recipe/
⁣ 
STRAWBERRY SHEET CAKE⁣ 
Serves 24
⁣ 
INGREDIENTS⁣ 
1 Cup (12oz) fresh strawberries, pureed ⁣ 
3/4 Cup (180ml) whole milk, room temp⁣ 
2 1/2 Cups (265g) sifted cake flour⁣ 
2 tsp baking powder⁣ 
1/4 tsp baking soda⁣ 
1/2 tsp salt⁣ 
3/4 Cup (170g) unsalted butter, room temp⁣ 
1 2/3 Cups (350g) granulated sugar⁣ 
3 large eggs, room temp⁣ 
1/3 Cup (75g) sour cream, room temp⁣ 
2 tsp pure vanilla extract⁣ 
1-2 drops pink food coloring (optional)⁣ 
⁣ 
INSTRUCTIONS⁣ 
1. Simmer the strawberry puree in a saucepan over medium-low heat for 30-35 minutes, stirring occasionally. At this point the puree should have reduced from 1 Cup to 1/2 Cup (if you have more, keep cooking!). Refrigerate until room temp, then whisk together with the whole milk and set aside.⁣ 
2. Preheat the oven to 350ºF. Grease and line a 13×9 inch baking pan. 
3. In a medium bowl, whisk together the sifted cake flour, baking powder, baking soda, and salt. Set aside. ⁣ 
4. In the bowl of a stand mixer with the paddle attachment, whip the butter on high until creamy, 2 min. Add the sugar and beat with the butter until light and fluffy, 2 min. Turn the mixer to low and add the eggs one at a time. Add the vanilla and sour cream, then turn the mixer to high and beat for 1 minute.⁣ 
5. With the mixer on low, add all of the dry ingredients at once until just combined, then add the strawberry milk mixture and pink food coloring (if using) until just combined. Give the batter a few stirs by hand to make sure everything is incorporated without over-mixing. ⁣ 
6. Pour batter into the prepared cake pan and bake for 35-40 minutes. ⁣ Cool completely to room temperature before topping with strawberry buttercream (full recipe at the li
COOKIES & CREAM ICE CREAM CAKE 🤎 If you’re an Oreo COOKIES & CREAM ICE CREAM CAKE 🤎 If you’re an Oreo lover, this is your sign to make an ice cream cake this summer: no-churn cookies & cream ice cream set on an Oreo cookie crust, topped with hot fudge and whipped cream frosting. The perfect amount of Oreos in EVERY BITE! 

Full recipe link in my bio + at https://sugarandsparrow.com/cookies-and-cream-ice-cream-cake/ 

OREO CRUST
22 Oreo cookies
5 Tbsp melted butter

ICE CREAM LAYER
2 Cups (480ml) heavy whipping cream, cold
2 tsp pure vanilla extract
14 Oz sweetened condensed milk
15 Oreo cookies, roughly chopped

TOPPINGS
12.8 Oz jar of hot fudge
Whipped cream frosting (see full recipe link)
4 Oreo cookies, chopped

INSTRUCTIONS
1. Mix together the Oreo crust ingredients and pack tightly into the bottom of a 9-inch springform pan. Freeze while you make the ice cream.
2. In a chilled bowl, whip the heavy cream and vanilla to stiff peaks. Fold in the sweetened condensed milk until uniform, then fold in the chopped Oreos. Pile the ice cream on top of the Oreo crust, smooth it down, cover and freeze overnight.
3. When the ice cream layer is set, top with the hot fudge, whipped cream frosting, and more chopped Oreos. Store in the freezer until ready to serve! 

#oreocake #icecreamcake #nochurnicecream #birthdaycake #cookiesandcream
EASY OREO ICEBOX CAKE (recipe below) 🤎 You only ne EASY OREO ICEBOX CAKE (recipe below) 🤎 You only need 4 ingredients for this recipe and it sets into the perfect summer dessert in the refrigerator overnight! It’s 7 alternating layers of Oreos and homemade whipped cream + every bite tastes like a perfect milk-dunked Oreo in the very best way ✨
 
Full recipe at https://sugarandsparrow.com/oreo-icebox-cake/ 
 
INGREDIENTS: 
2 Cups (480ml) cold heavy whipping cream 
1/4 Cup (30g) powdered sugar 
1 tsp pure vanilla extract 
36 Oreo cookies 
 
INSTRUCTIONS: 
1. Add the heavy whipping cream, powdered sugar, and vanilla extract into a chilled mixing bowl. Using the whisk attachment on your stand mixer or a hand mixer, beat the ingredients until stiff peaks form. 
2. Line a loaf pan with plastic wrap, then add a thin layer of the whipped cream onto the bottom of the pan. Add a layer of Oreo cookies on top (cut some of the Oreos to fit as needed). 
3. Add 1/3 of the remaining whipped cream on top of the Oreo layer, followed by a second layer of Oreos. Repeat until you have seven total layers, ending with whipped cream. 
4. Cover the cake and refrigerate overnight, then enjoy!  
 
#oreocake #vintagecake #nobakecake #oreo #nobake

Footer

On the Blog

  • Cake Basics
  • Recipes
  • Tutorials

Info

  • About
  • Privacy Policy & Disclosure

stay in the know

Copyright © 2026 · Theme by Sugar & Sparrow
