When the Spring flowers start blooming, a few magical things happen: my happiness level increases almost instantly (I always forget how beautiful Portland gets after a long, rainy Winter!) and I get super inspired to incorporate floral work into my cake and cupcake designs. I’ve taught myself quite a few techniques for creating buttercream blooms over the past year, and I want to pass along some of that knowledge to you with these five super easy floral cupcake designs. They’re perfect for your next Spring-inspired spread, celebrating Mother’s Day, or any ol’ day!

If you’re a visual learner, here’s a quick video to show you the techniques before you read about them in the step-by-step tutorial:
For all five of these cupcakes, you will need:
- Wilton tips 2D or 1M, 104, 224, and 3
- Piping bags
- Baked cupcakes
- Medium consistency buttercream (simply add ½ cup powdered sugar to my Vanilla Buttercream Recipe)
- Color gels of your choice
The Classic Rosette
Using tip 2D (you could alternatively use 1M) pipe a swirl starting in the center and ending on the outer edge.

This one is the easiest and still looks so pretty.

Roses
Using tip 104 with the larger opening pointed down at the cupcake, pipe the center bud. Pipe petals around the bud as you rotate the cupcake – shorter petals in the beginning and longer petals toward the end until you get to the edge.

I like to pipe my petals outward (hold the tip at a 45 degree angle) as I get toward the edge.

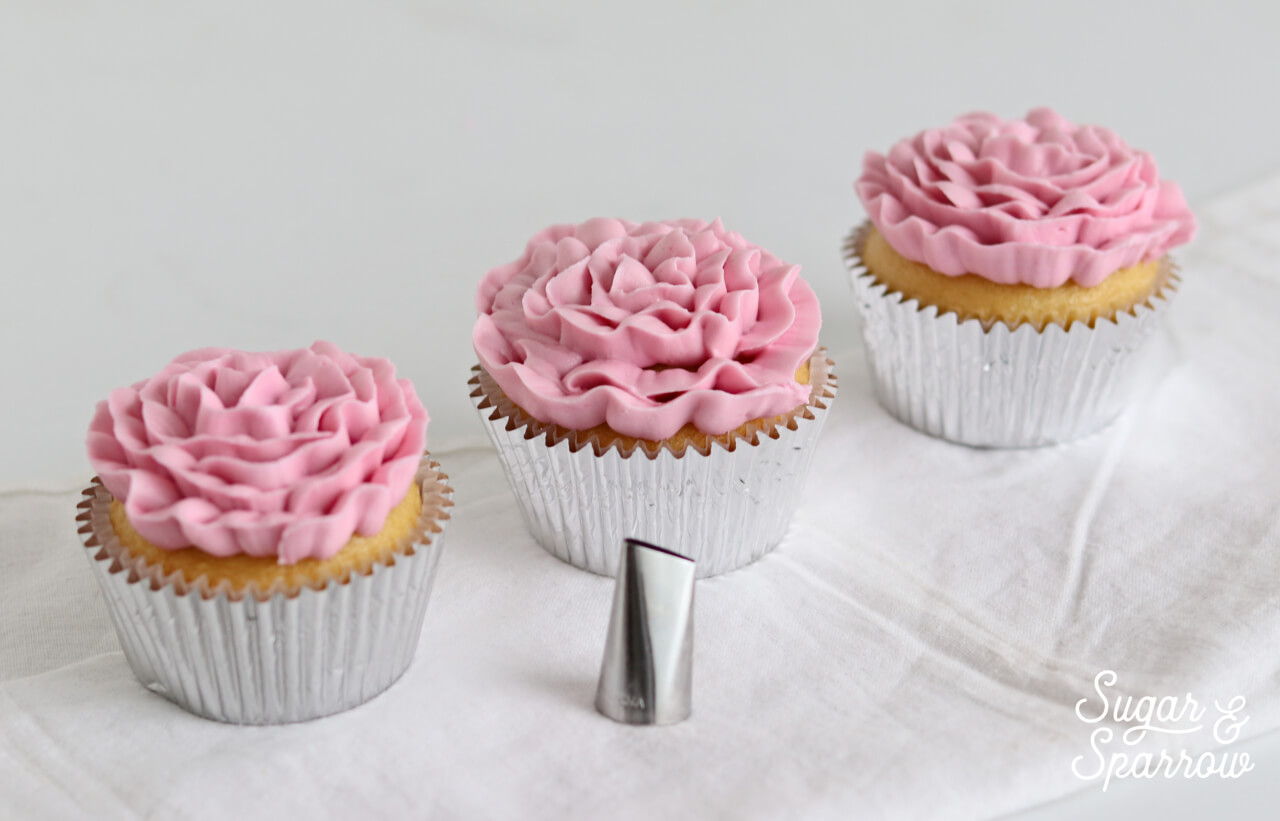
Carnations
Using tip 104 with the larger opening pointed down at the cupcake, rotate the cupcake while piping squiggly petals around the center. The petals should be long and ruffle-like as you rotate the cupcake.
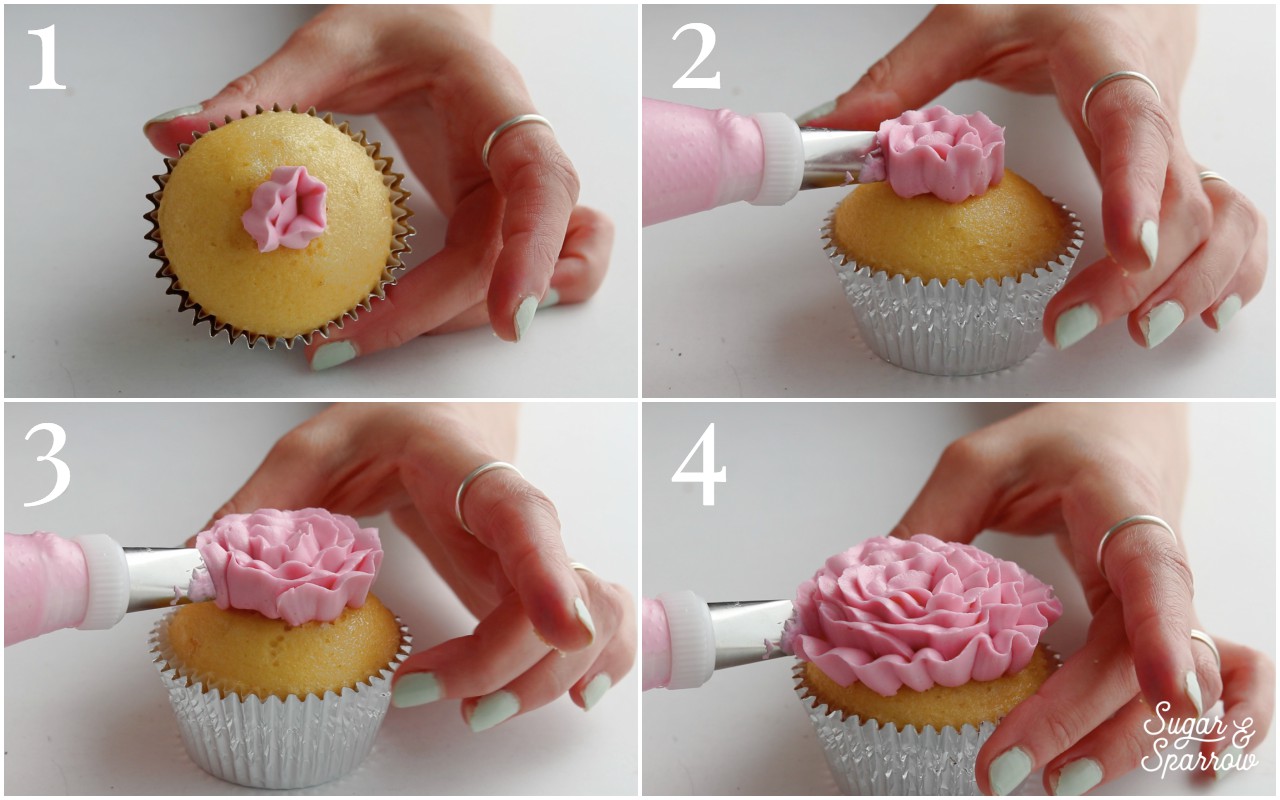
Slightly moving the tip up and down as you pipe will create some cool, realistic depth to your floral work.
Hydrangeas
Pipe a small swirl in the center of the cupcake with a circular tip (or snip a ½ inch opening on a piping bag) to create some height to build upon. Using tip 224, pipe drop flowers onto the cupcake and twist as you pipe.

Repeat until the surface of the cupcake and mound is covered in drop flowers.

Camellias
Holding tip 104 horizontally and flat against the cupcake with the thinner edge pointed outward, pipe a ring of petals around the edge. For the next set of petals, hold the tip at a 45 degree angle so they stand a little bit taller. For the final set(s) of petals, hold the tip at more of a 75 degree angle so they stand taller still.

Color a little bit of your buttercream yellow for the center of the Camellia. Using tip 3, Pipe one large circle in the very center to create height to build upon. Finish the center by piping small dots over the surface.

Whether you make these floral cupcakes to celebrate Mother’s Day or any day, be sure to tag me on Instagram and show me! I’d love to see those buttercream blooms.


Especially as this was said to be for Beginners it would have been a lot better had you Not done each so fast. Remember Beginners have not done this before and need things a bit slower!
Hello, you can slow down YouTube videos by clicking on the gear. 🙂
Holaaa gracias x compartirlo. Emociona lograr algo bonito, cada vez mejor
Thanks so much, Pracedis!
Such a great tutorial! Feel like whipping up some cupcakes just to practice buttercream flowers now!
Yess, Sammer! I hope you do!
I got some supplies and tried my hand at these flowers tonight! Some were harder that others but it was a lot of fun. Excited to have a new creative outlet. Thanks for sharing, Whitney!
Oh yay! I’m so happy to hear that, Amanda! They get easier and easier with practice and I’m so excited for you to have a new creative outlet too 🙂