• Cake
  • Frosting
  • YouTube
  • My Favorite Tools
  • Nav Social Icons

  • Skip to primary navigation
  • Skip to main content
  • Skip to primary sidebar
  • Skip to footer
  • Recipes
    • Cake
    • Cupcakes
    • Frosting
    • Ice Cream
    • Vegan
  • Cake Basics
  • Tutorials
  • Blog
  • About
  • Mobile Menu Widgets

    Connect

    Search

Sugar & Sparrow logo in script font

Sugar & Sparrow

Lifestyle and Cake from Portland Oregon

  • Cake Basics
  • Recipes
    • Cake
    • Cupcakes
    • Cookies & Bars
    • Filling
    • Frosting
    • Ice Cream
    • No-Bake
    • Small Batch
    • Vegan
  • Tutorials
  • Book
  • Blog
  • About

Homemade Pumpkin Spice Syrup

October 8, 2025 · In: Fall, Featured, Recipes, Seasonal

Jump to Recipe

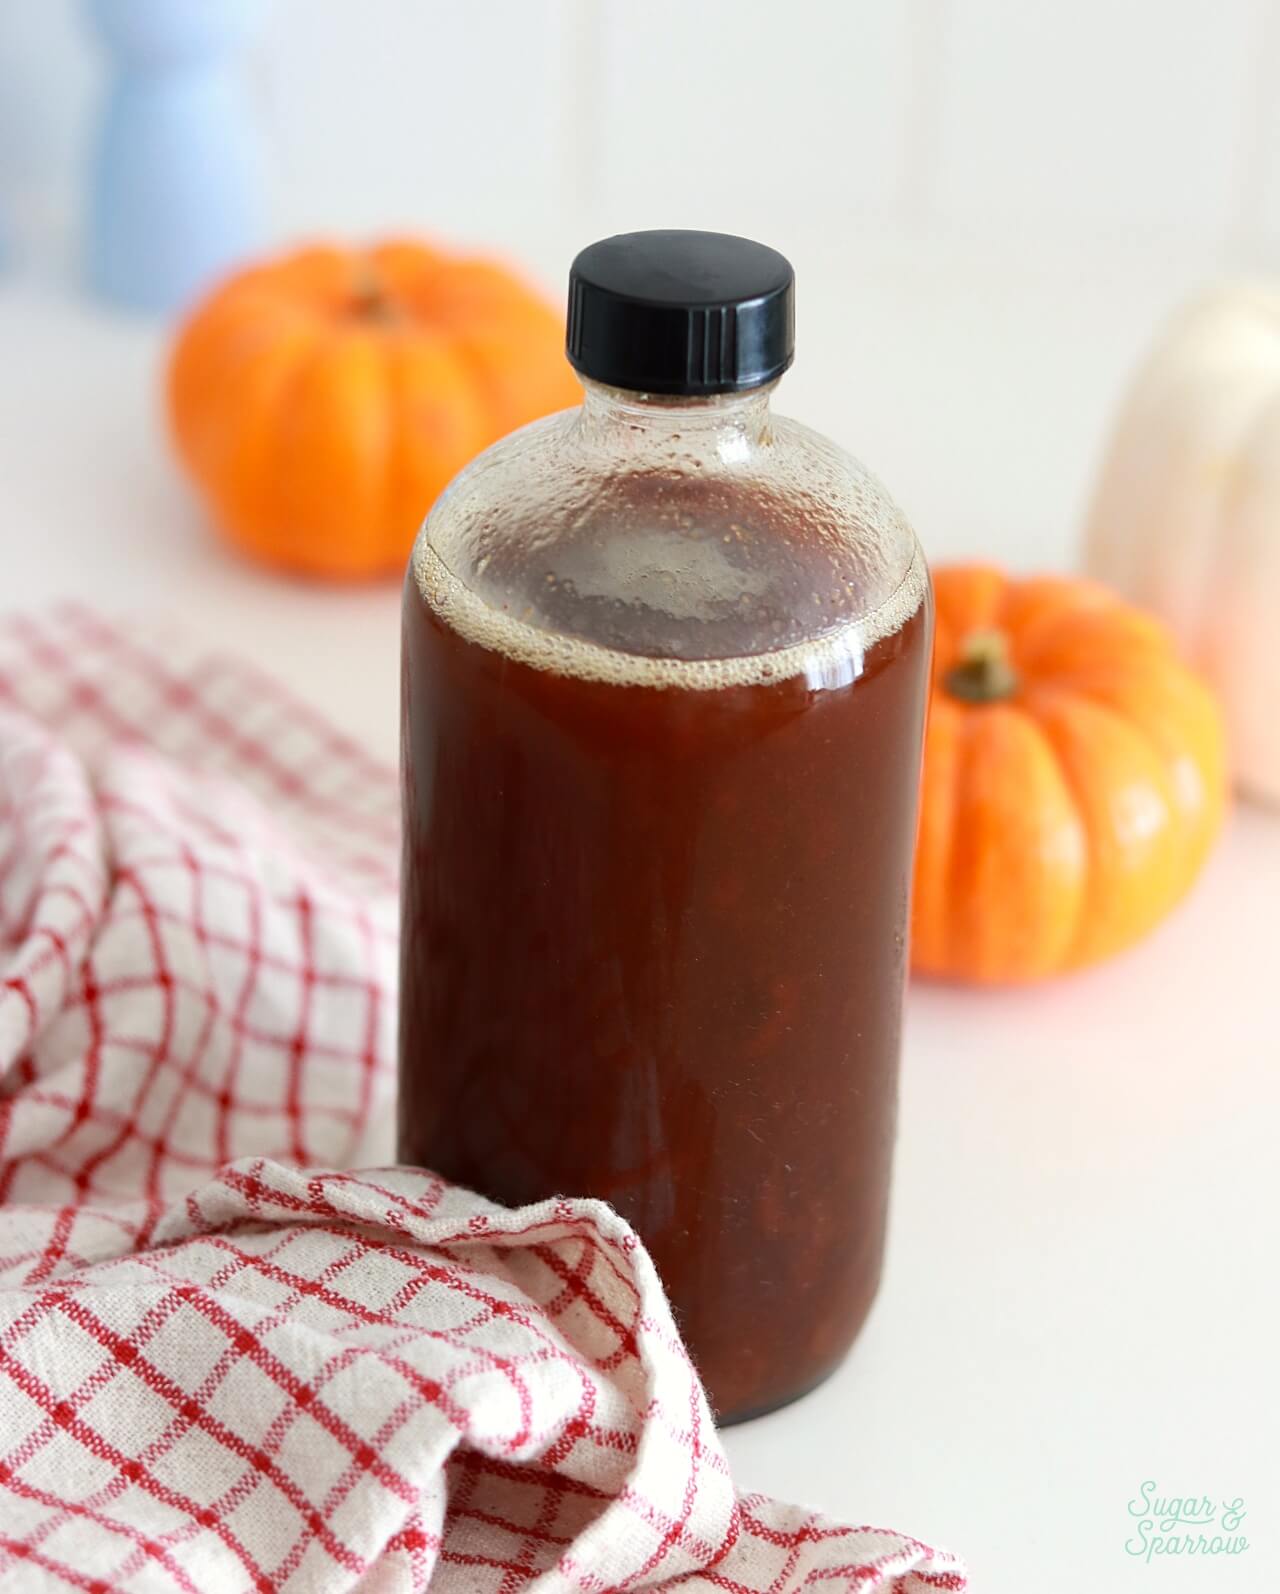
I love pumpkin flavored everything, which is why you’ll find a good amount of baking recipes that use canned pumpkin on my blog. It’s rare to find a recipe that uses the entire can of pumpkin (my easy pumpkin sheet cake is an exception!), so oftentimes I find myself with leftover pumpkin puree this time of year. My favorite thing to do with it is make this pumpkin spice syrup for my coffee! It’s so easy to whip up with simple ingredients and is perfect for homemade pumpkin spice lattes, brushing on cake layers, pouring onto pancakes, or gifting to your friends and family. 

homemade pumpkin spice syrup recipe

Pumpkin Spice Syrup Ingredients

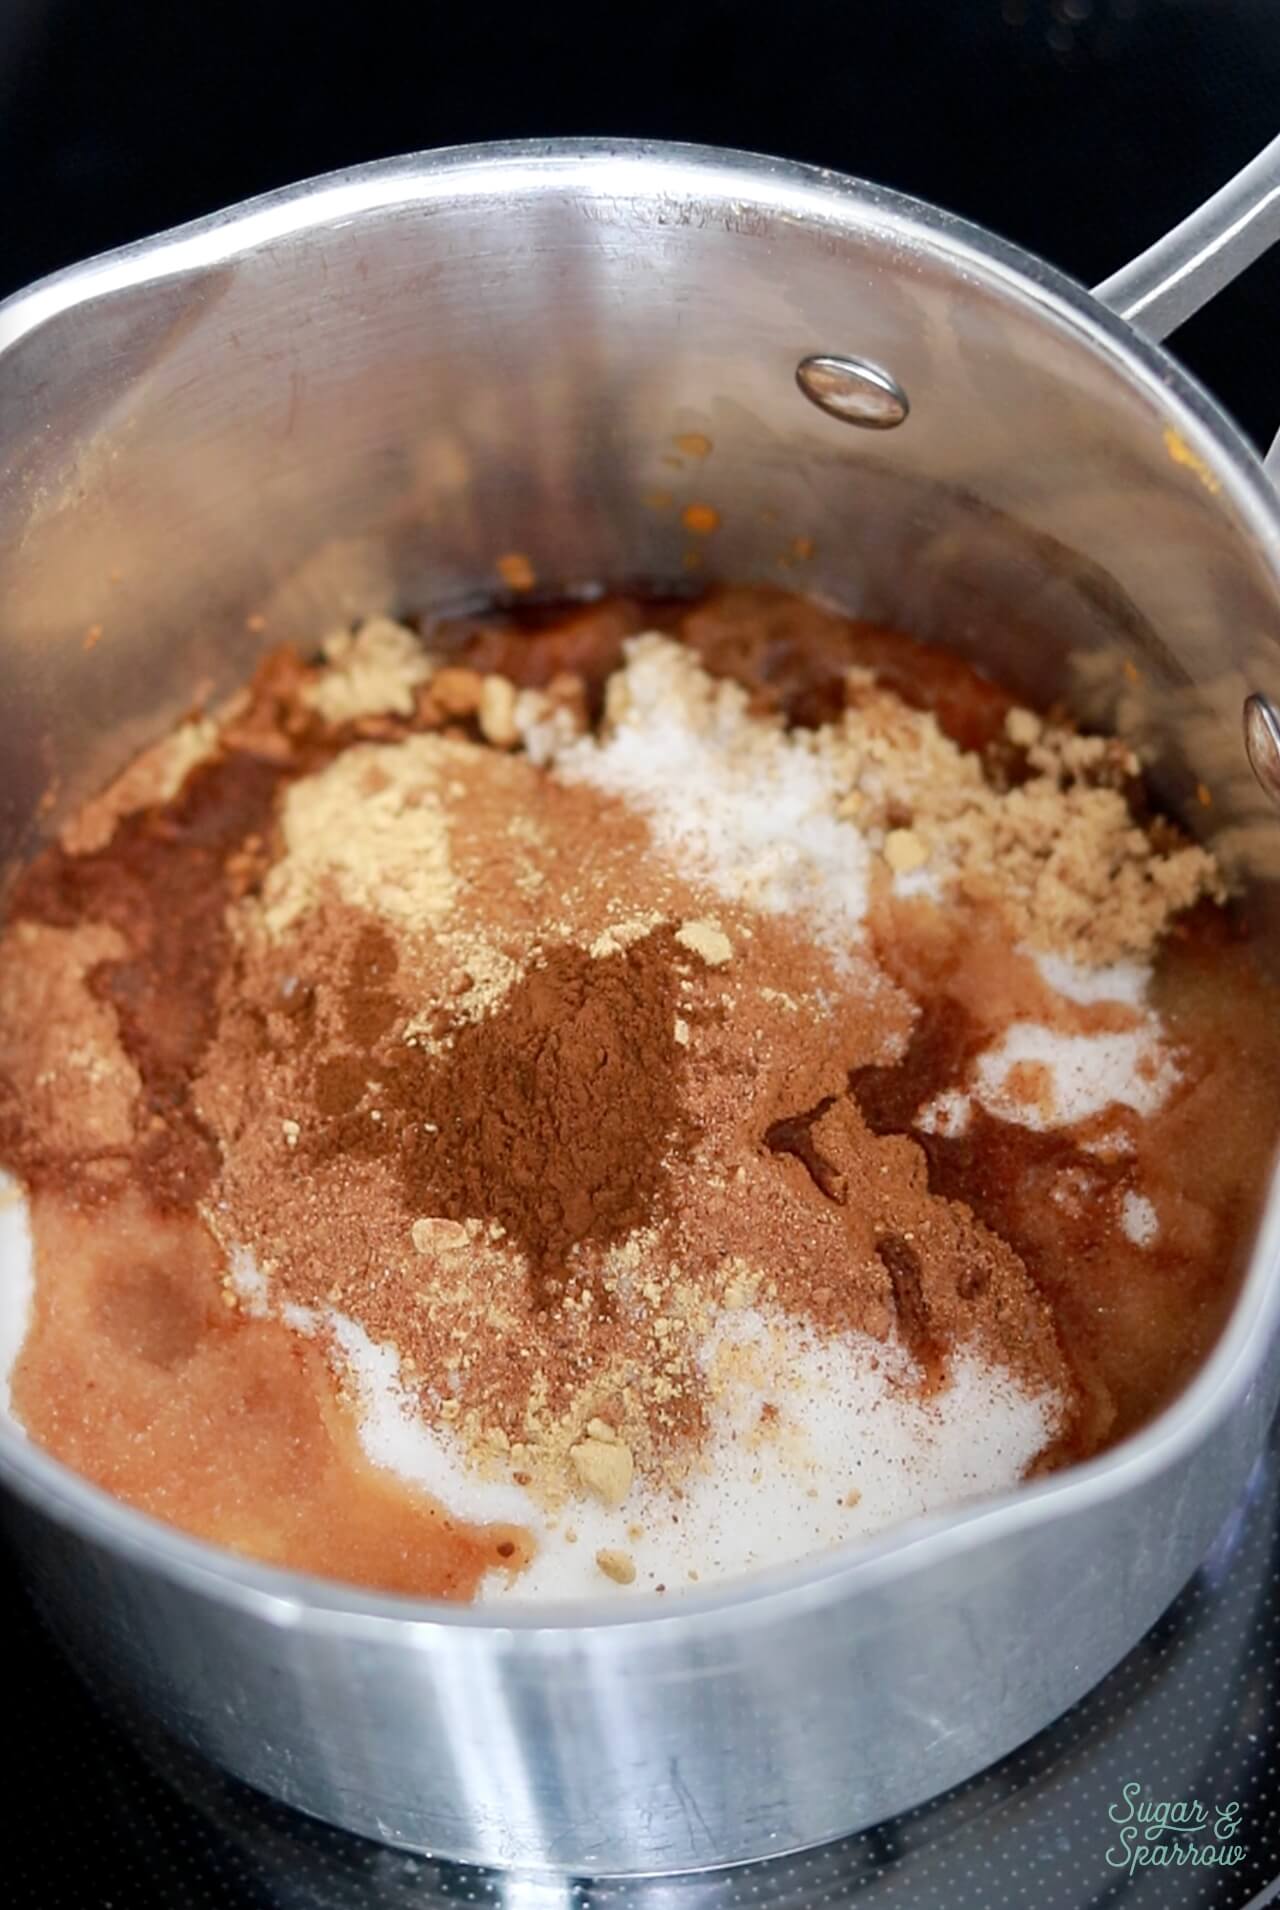
  • Pumpkin puree. For an all-natural pumpkin flavor. 
  • Granulated sugar + brown sugar. Both sugars help sweeten the pumpkin spice syrup, but the brown sugar adds a little more depth and coziness to the flavor. 
  • Spices. I use cinnamon, ginger, nutmeg, and cloves to enhance the pumpkin flavor and create the perfect amount of warmth. 
  • Vanilla extract. A little vanilla perfectly rounds out all the flavors. 
  • Water. Equal parts water and sugar make this the perfect syrup consistency. 

How to Make Pumpkin Spice Syrup

Making homemade pumpkin spice syrup is surprisingly easy! Here’s how to do it from start to finish: 

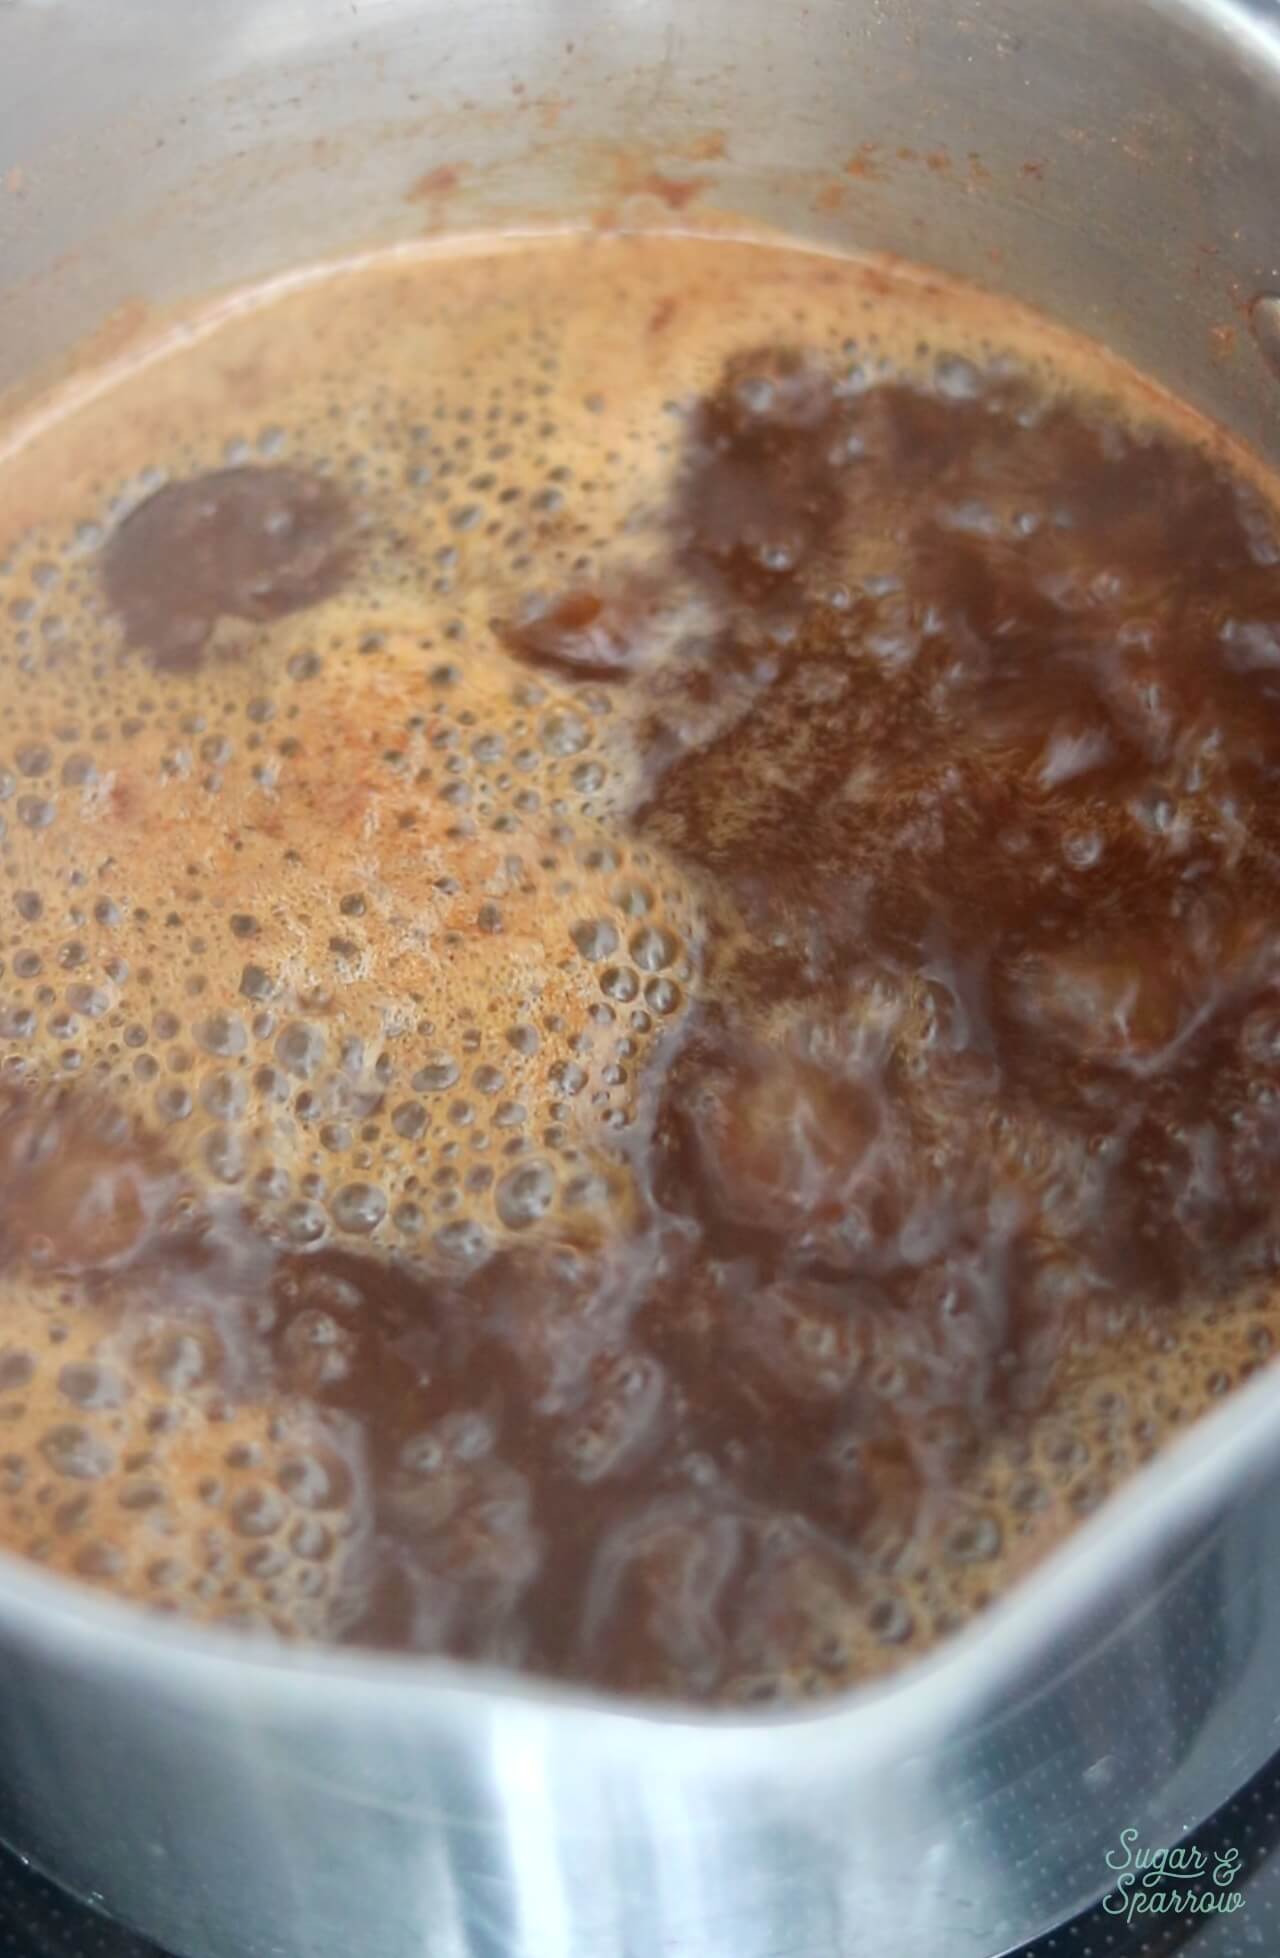
Step 1: Boil the ingredients. Add all of the ingredients into a medium saucepan set over medium heat and stir to combine. Keep stirring the mixture occasionally until it starts to boil.

pumpkin spice syrup ingredients
boiling pumpkin spice simple syrup in a saucepan

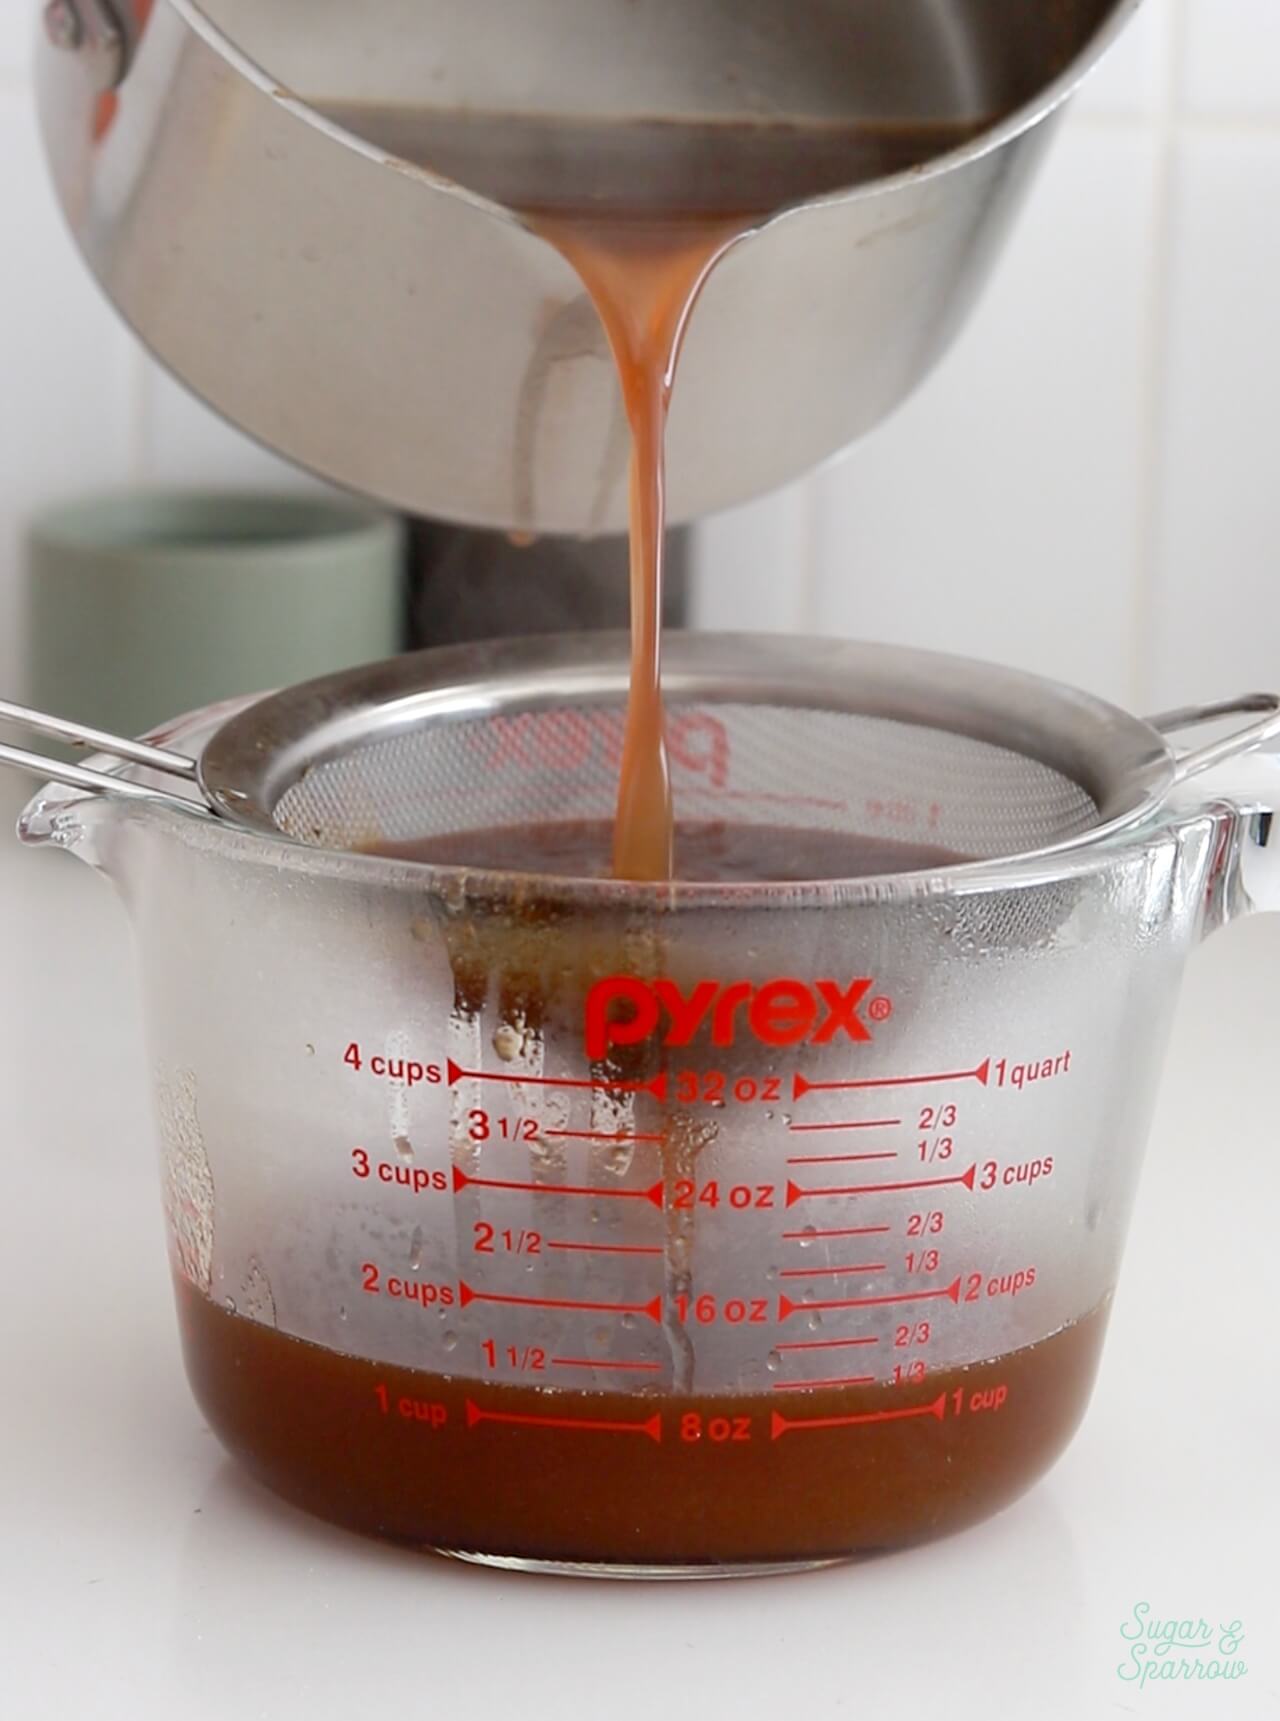
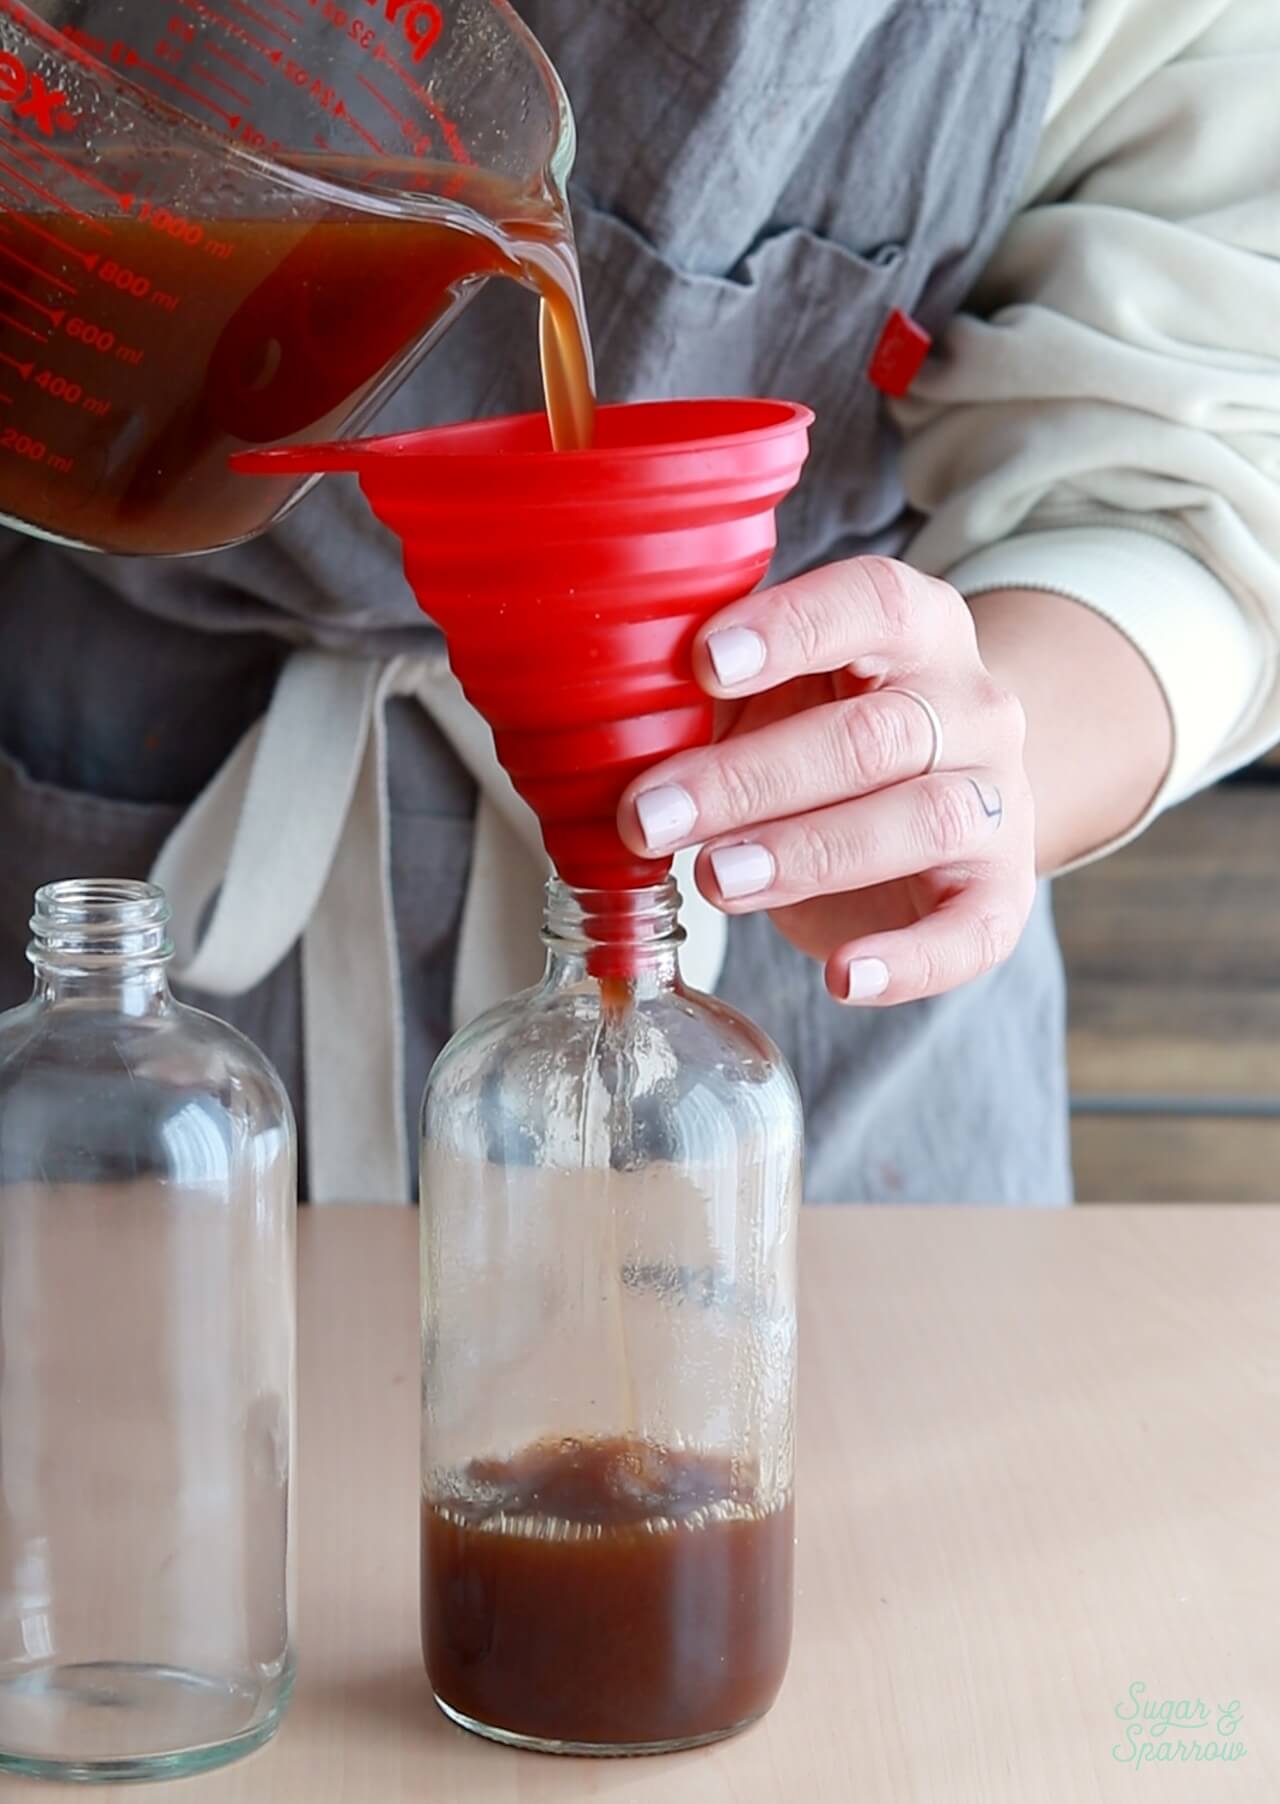
Step 2: Strain. Set a fine mesh sieve over a large glass measuring cup or jar, then pour the pumpkin spice syrup through the sieve to strain out the thicker ingredients. 

straining pumpkin spice simple syrup through a fine mesh sieve

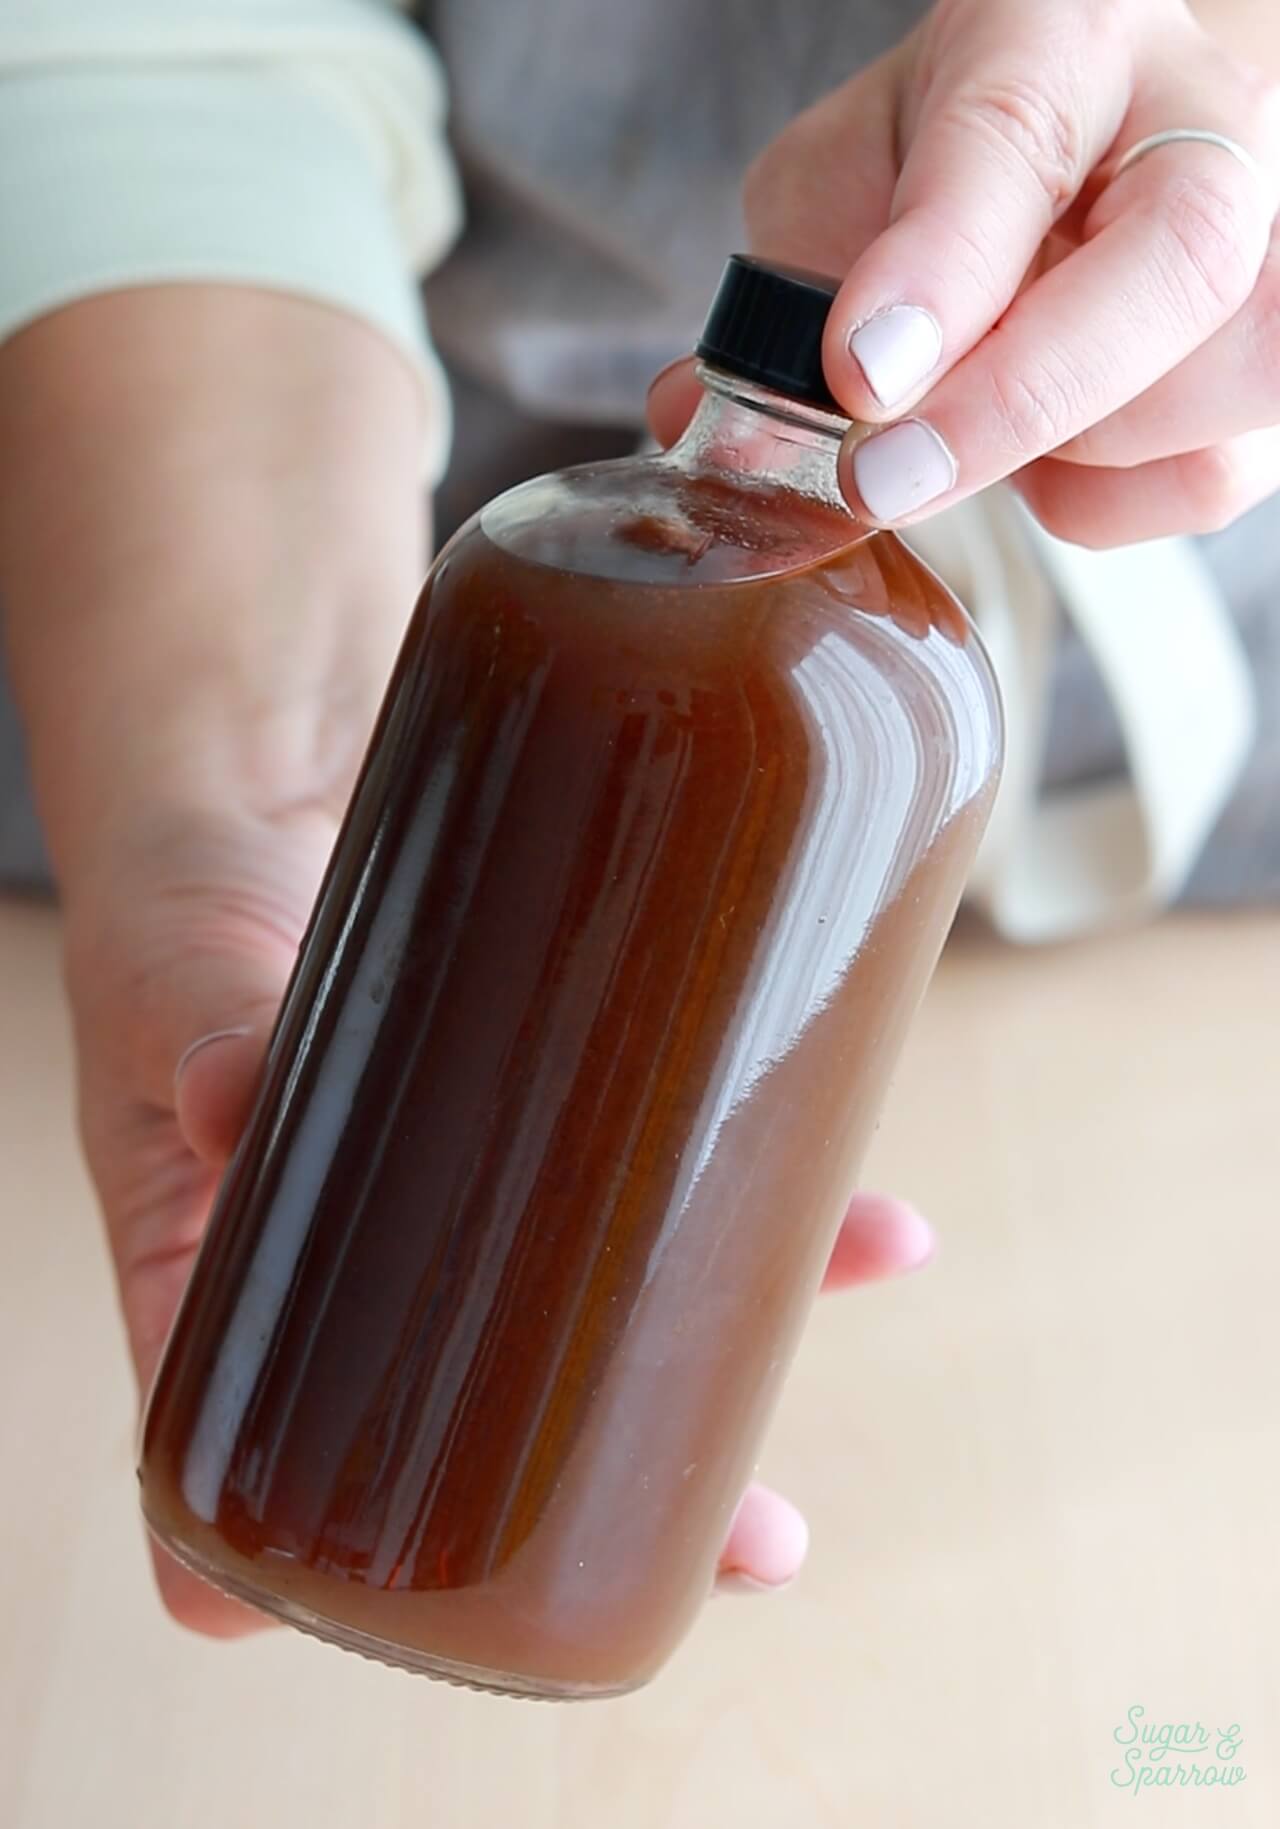
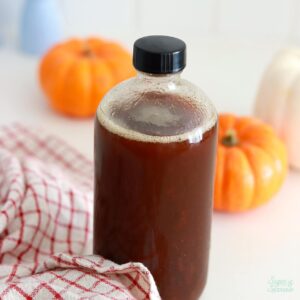
Step 3: Store. Pour the strained syrup into an airtight container and store it in the refrigerator for up to two weeks. It will thicken a little bit more in the refrigerator as it cools.  

How to Use Pumpkin Spice Syrup

This pumpkin spice syrup is super versatile! Here are some of my favorite ways to use it, starting with my favorite way: 

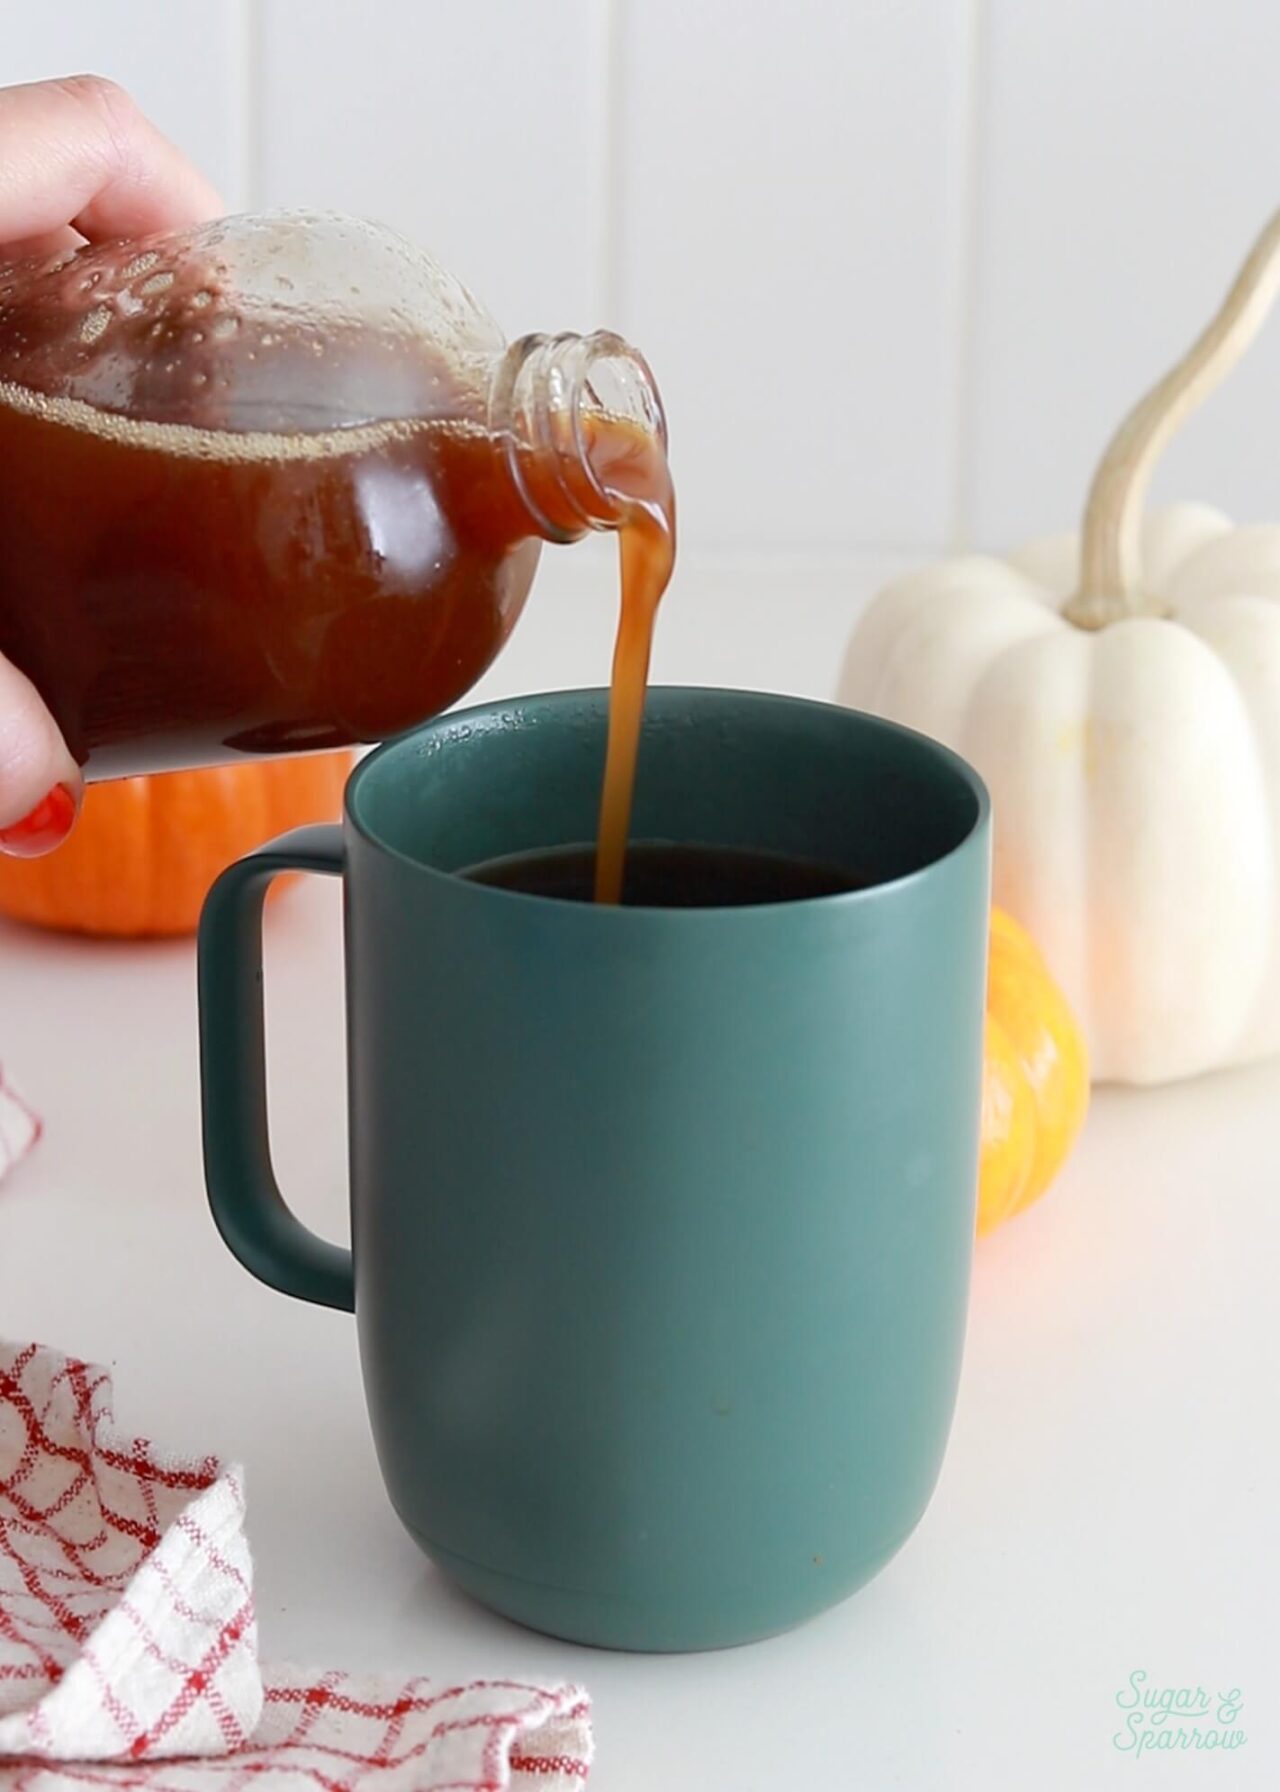
  • Add 1-2 Tablespoons to coffee or a homemade latte to make it pumpkin spice flavored. I like to add oat milk to mine as well, but you do you!
  • Brush it onto cake layers for a pumpkin-flavored soak. 
  • Pour it over waffles or pancakes in place of maple syrup. 
  • Swirl it into yogurt or oatmeal as a Fall inspired sweetener. 
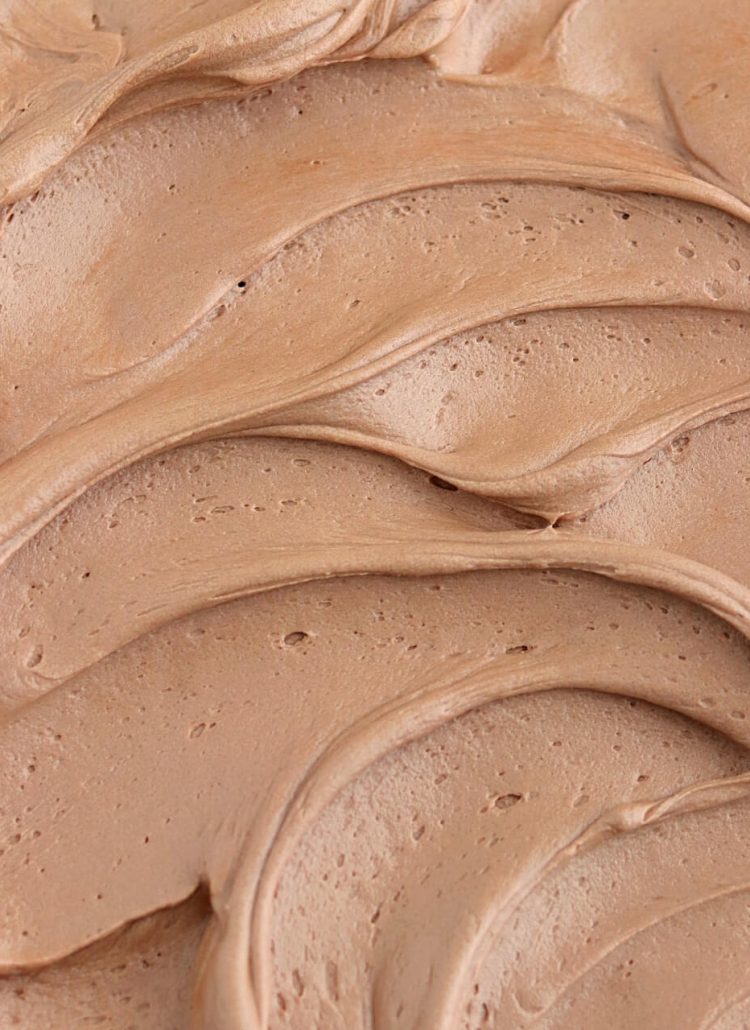
  • Whip it up with heavy whipping cream to create pumpkin spice whipped cream.
  • Double the recipe, pour it into cute jars, and give it to your friends and family as holiday gifts!  
homemade pumpkin spice syrup recipe for coffee

More Baking Ideas for Leftover Pumpkin Puree

If you’re looking for more ways to use your leftover pumpkin puree, here are some other recipes from my blog you’ll love: 

  • Pumpkin Chocolate Chip Cookie Bars
  • Pumpkin Cupcakes
  • No-Bake Pumpkin Cheesecake
  • Pumpkin Layer Cake 
  • Pumpkin Chocolate Chip Cake

I hope you love this pumpkin spice syrup as much as I do! Let me know if you make it in the comments below, I’d love to hear what you do with it. You can also tag @sugarandsparrowco on Instagram to show me!

pumpkin spice syrup recipe

Pumpkin Spice Syrup

Easy homemade pumpkin spice syrup for adding to coffee, brushing onto cake layers, pouring over pancakes and waffles, and more! It's the best use of leftover pumpkin puree and uses all natural ingredients for the perfect pumpkin flavor.
Print Recipe Pin Recipe
Prep Time:5 minutes mins
Cook Time:10 minutes mins
Cooling Time:1 hour hr 30 minutes mins
Total Time:1 hour hr 45 minutes mins
Course: Dessert
Cuisine: American
Servings: 1.25 Cups

Ingredients

  • 1/4 Cup (63g) pumpkin puree*
  • 1/2 Cup (100g) packed brown sugar light or dark
  • 1/2 Cup (100g) granulated sugar
  • 1/2 tsp ground cinnamon
  • 1/2 tsp ground nutmeg
  • 1/4 tsp ground ginger
  • 1/4 tsp ground cloves
  • 1 1/2 tsp pure vanilla extract
  • 1 Cup water

Instructions

  • In a medium saucepan set over medium heat, add all of the ingredients and whisk to combine. Continue whisking occasionally until the mixture begins to boil, then remove it from the heat.
  • Set a fine mesh sieve over a large glass measuring cup or wide-mouth jar. Then, carefully pour the pumpkin spice syrup through the sieve to strain out any large clumps of ingredients.
  • Transfer the pumpkin spice syrup into an airtight container and let it cool in the refrigerator to thicken, about 1-2 hours, before using. It will last two weeks in the refrigerator. Shake well before using.

Notes

*Be sure to use canned pumpkin puree, not pumpkin pie mix. Pumpkin should be the only ingredient listed on the can. 
Making Ahead: this pumpkin spice syrup can be made ahead and stored in an airtight container in the refrigerator for up to two weeks. Shake well before using and enjoy! 

By: Whitney · In: Fall, Featured, Recipes, Seasonal · Tagged: pumpkin spice latte, pumpkin spice syrup

you’ll also love

flourless chocolate cake recipe by sugar and sparrowRich & Fudgy Flourless Chocolate Cake
christmas yule log recipeYule Log Cake Recipe (Bûche De Noël)
chocolate geometric shapes tutorialChocolate Geometric Shapes Tutorial

Join the List

Stay up to date & receive the latest posts in your inbox.

Reader Interactions

Leave a Reply Cancel reply

Your email address will not be published. Required fields are marked *

Recipe Rating


Next Post >

Earl Grey Buttercream

Primary Sidebar

Welcome to Sugar & Sparrow

Welcome to Sugar & Sparrow

Helping you whip up pretty desserts with confidence and creativity. And hopefully sharing a few laughs with you along the way!

Learn More

Connect

let’s bake!

Get my very best recipes, baking tips, and decorating tutorials sent to your inbox

Featured Posts

small chocolate cake recipe serves 2

Small Batch Chocolate Cake

lavender buttercream recipe by sugar and sparrow

Lavender Buttercream Frosting

lemon cake with cream cheese buttercream

Lemon Cake With Lemon Cream Cheese Buttercream

Search

Archives

Follow Along

@sugarandsparrowco

RASPBERRY CAKE FILLING (recipe below) ♥️ this RASPBERRY CAKE FILLING (recipe below) ♥️ this perfectly sweet/tart raspberry cake filling is beautifully thick, seedless, and so rewarding to make from scratch! It takes just a handful of ingredients and can be made with fresh OR frozen raspberries 🙌🏼 

Get the full recipe + cake pairing suggestions at the link in my bio or at https://sugarandsparrow.com/seedless-raspberry-cake-filling/

INGREDIENTS:
2 1/2 Cups (10oz, 315g) fresh or frozen raspberries
1/2 Cup (100g) granulated sugar
1 Tbsp lemon juice
1 tsp lemon zest
1 1/2 Tbsp (12g) cornstarch
1 1/2 Tbsp (22ml) water

INSTRUCTIONS: 
1. In a saucepan set over medium heat, add the raspberries, granulated sugar, lemon juice, and lemon zest. Cook until the mixture begins to boil, stirring occasionally. 
2. Once boiling, lower the heat and simmer for 10-15 minutes while you continue stirring occasionally. Then, remove from heat and use a fine mesh sieve to strain out the seeds over a medium bowl. After straining, you’ll be left with about 1/4 Cup of seedy pulp.
3. In a small separate bowl, combine the cornstarch and water until uniform. Return the strained raspberry filling to the saucepan (wipe it free of any remaining seeds if needed) and add the cornstarch/water mixture. Cook over medium heat until boiling, stirring constantly, then reduce to a simmer and cook for 1-3 minutes, until the filling has thickened slightly, is no longer cloudy, and coats the back of the spatula.
4. Pour into an airtight container and refrigerate for at least 4 hours and up to 1 week. It will be jello-like once set but after stirring it will become a thick, jammy consistency that’s perfect to use as a cake or cupcake filling!

#raspberrycake #cakefilling #cakedecorating #raspberries #baking
STRAWBERRY LEMON CAKE 🍓🍋 this cake is so lig STRAWBERRY LEMON CAKE 🍓🍋 this cake is so light and refreshing and bursting with all-natural flavors! It’s layers of my favorite extra fluffy lemon cake + the most delicious freeze-dried strawberry buttercream that ends up the prettiest natural pink color. I’ll never get over those little flecks of strawberry in the buttercream or the tiny chamomile flowers adding so much cheer! 

Grab the recipe at the link in my bio or at https://sugarandsparrow.com/strawberry-lemon-cake/

#strawberrylemon #lemoncake #strawberrycake #cakedecorating #strawberrybuttercream
CHOCOLATE SHEET CAKE (recipe below) 🍫 🥳 this CHOCOLATE SHEET CAKE (recipe below) 🍫 🥳 this is everything I want in a chocolate cake: rich and decadent, stick-to-your-fork fudgy, ultra-chocolatey, shareable, and EASY! Like box mix easy but from-scratch and a MUST try if you’re in need of a good chocolate cake recipe to feed a crowd👩🏽‍🍳⁣ 
 
Get the full recipe (with chocolate frosting) at the link in my bio or at https://sugarandsparrow.com/chocolate-sheet-cake/ ✨⁣ 
⁣ 
CHOCOLATE SHEET CAKE
2 Cups (265g) all purpose flour⁣ 
1 2/3 Cups (340g) white granulated sugar⁣ 
2/3 Cup (60g) unsweetened natural cocoa powder⁣ 
2 tsp baking soda⁣ 
1 tsp baking powder⁣ 
1/2 tsp kosher salt⁣ 
1/2 Cup (120ml) vegetable oil⁣ 
2 eggs, room temperature⁣ 
1 1/2 tsp pure vanilla extract⁣ 
1 Cup (240ml) full-fat buttermilk⁣ 
1 Cup (240ml) hot coffee OR hot water⁣ 
⁣ 
INSTRUCTIONS⁣ 
1. Preheat the oven to 325ºF. Grease and line a 9x13 inch cake pan. ⁣ 
2. Place all of the dry ingredients into the bowl of a stand mixer (or use a large bowl with a hand mixer) and mix on low to combine. Add the vegetable oil, eggs, vanilla, and buttermilk and mix on low until combined. With the mixer still on low, add the hot coffee or hot water in a slow stream, then turn the mixer to medium and beat until smooth, about 2 minutes. The batter will be very thin. ⁣ 
3. Pour the batter into the prepared pan and bake for 35-40 minutes, until a toothpick inserted comes out clean.⁣ Full recipe (with frosting) link in my bio.
⁣ 
#chocolatecake #chocolate #sheetcake #chocolatelover #birthdaycake
VANILLA RASPBERRY LAYER CAKE ♥️ between the na VANILLA RASPBERRY LAYER CAKE ♥️ between the naturally pink raspberry buttercream, jammy homemade raspberry filling, and soft vanilla cake layers, this is the perfect cake for Spring!! It’s has amazing, authentic raspberry flavor in every bite from fresh (or frozen) raspberries in the filling + freeze-dried raspberries in the frosting 😋

Get the full recipe link in my bio or find it at https://sugarandsparrow.com/vanilla-raspberry-layer-cake/ 

#raspberrycake #raspberries #vanillacake #cakedecorating #pinkcake
SMALL BATCH VANILLA CAKE 🎂🥳 this mini vanill SMALL BATCH VANILLA CAKE 🎂🥳 this mini vanilla cake recipe makes the PERFECT amount for 2-4 people and can be baked as a tiny 4-inch layer cake or a single layer 6-inch cake. It goes with any frosting flavor but vanilla buttercream keeps it classic for date night, a small gathering, a smash cake, or satisfying a cake craving. 
⁣
✨Full recipe (with frosting) linked in my bio + at https://sugarandsparrow.com/small-batch-vanilla-cake/ 
⁣⁣⁣⁣
SMALL BATCH VANILLA CAKE⁣⁣⁣⁣
⁣⁣⁣⁣
INGREDIENTS⁣⁣⁣⁣
3/4 Cups (79g) sifted cake flour⁣⁣⁣
1 tsp baking powder⁣⁣⁣
1/4 tsp salt⁣⁣⁣
1/4 Cup (57g) unsalted butter, room temperature⁣⁣⁣
1/2 Cup (100g) granulated sugar⁣⁣⁣
1 large egg, room temperature⁣⁣⁣
2 Tbsp (30g) sour cream, room temperature⁣⁣⁣
1 tsp pure vanilla extract⁣⁣⁣
1/3 Cup (80ml) whole milk, room temperature⁣⁣⁣
⁣⁣⁣⁣
INSTRUCTIONS ⁣⁣⁣⁣
1. Preheat the oven to 350ºF. Grease and line three 4-inch or one 6-inch cake pan.⁣⁣⁣
2. In the bowl of your stand mixer (a handheld mixer works fine too!), cream together the butter and sugar on medium-high until light and fluffy, 3 min. Turn the mixer to low and add the egg, mixing until just combined. Add the vanilla and sour cream, turn the mixer to high, and beat for 1 min. ⁣⁣⁣
3. Turn the mixer to low speed and add the dry ingredients all at once. Mix until just combined, then slowly pour in the milk. Continue to mix on low speed until just combined, about 30 seconds. ⁣⁣⁣
4. Pour the batter evenly between the prepared cake 4-inch pans (or all into one 6-inch cake pan). If using 4-inch cake pans, bake for 18-22 minutes. If using a 6-inch cake pan bake for 24-28 minutes. The cake is done when it springs back to the touch and a toothpick inserted comes out with a few moist crumbs. ⁣⁣⁣
⁣⁣⁣⁣
#vanillacake #cakes #vanilla #minicake #cakedecorating

Footer

On the Blog

  • Cake Basics
  • Recipes
  • Tutorials

Info

  • About
  • Privacy Policy & Disclosure

stay in the know

Copyright © 2026 · Theme by Sugar & Sparrow