• Cake
  • Frosting
  • YouTube
  • My Favorite Tools
  • Nav Social Icons

  • Skip to primary navigation
  • Skip to main content
  • Skip to primary sidebar
  • Skip to footer
  • Recipes
    • Cake
    • Cupcakes
    • Frosting
    • Ice Cream
    • Vegan
  • Cake Basics
  • Tutorials
  • Blog
  • About
  • Mobile Menu Widgets

    Connect

    Search

Sugar & Sparrow logo in script font

Sugar & Sparrow

Lifestyle and Cake from Portland Oregon

  • Cake Basics
  • Recipes
    • Cake
    • Cupcakes
    • Cookies & Bars
    • Filling
    • Frosting
    • Ice Cream
    • No-Bake
    • Small Batch
    • Vegan
  • Tutorials
  • Book
  • Blog
  • About

No-Bake Pumpkin Cheesecake with Biscoff Cookie Crust

September 29, 2024 · In: Fall, Featured, No-Bake, Recipes, Seasonal, Winter

Jump to Recipe

My next door neighbor loves pumpkin flavored things more than anyone I know, so when I whipped up this recipe for no-bake pumpkin cheesecake, I wanted her absolute approval. I placed a few slices in a tupperware container and balanced it on the fence post in between our houses, and about an hour later I got a text. Not only was it her favorite dessert I’ve ever made (and she’s tried a lot of my recipes), but she also wanted me to send the recipe to her husband so he could make it for her birthday every year as a tradition. Y’all. There is no bigger honor than one of my recipes becoming a tradition. 

This post may contain affiliate links. For more information, see our disclosure policy.
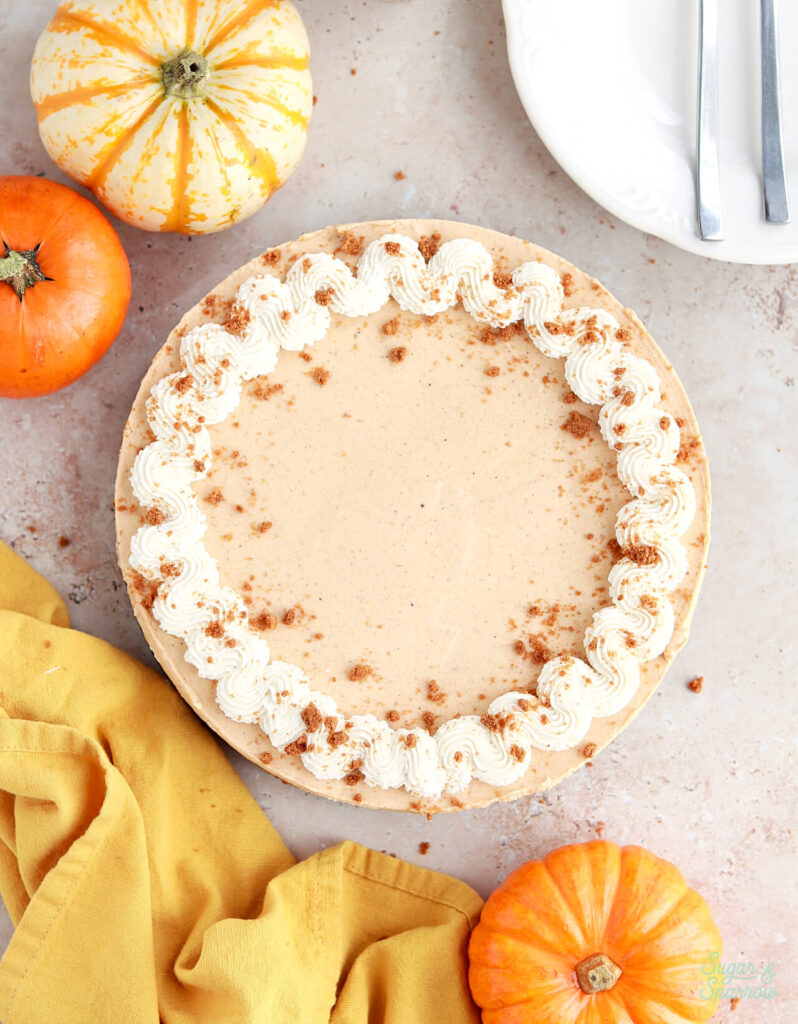
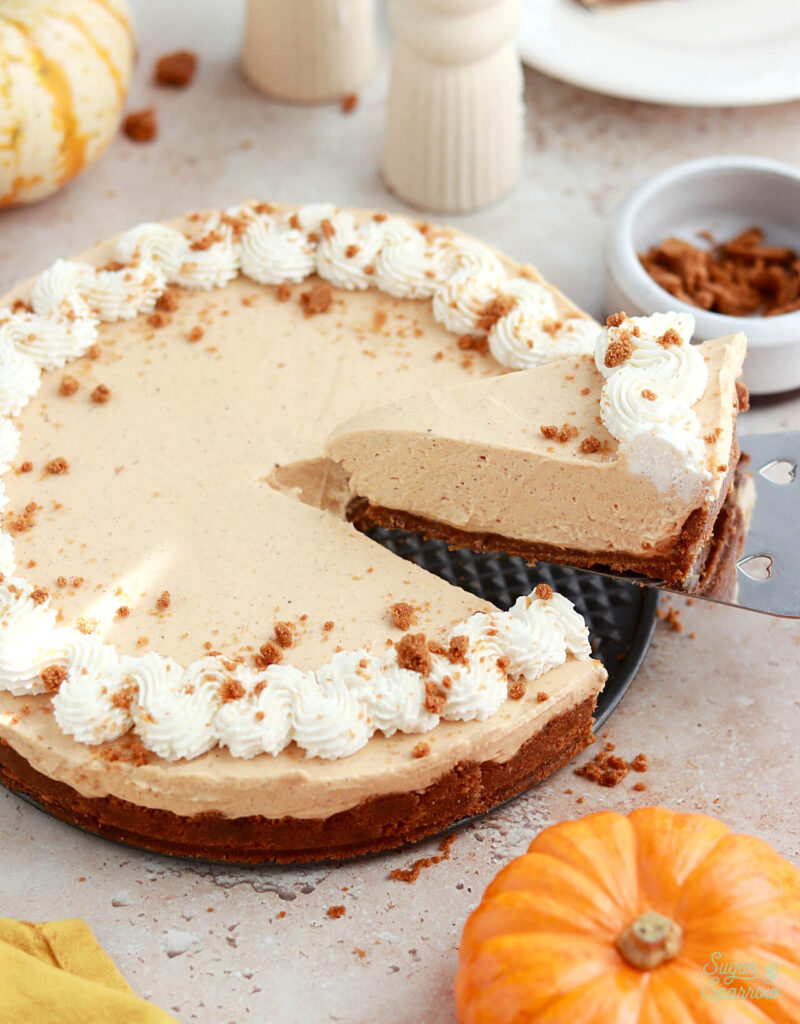
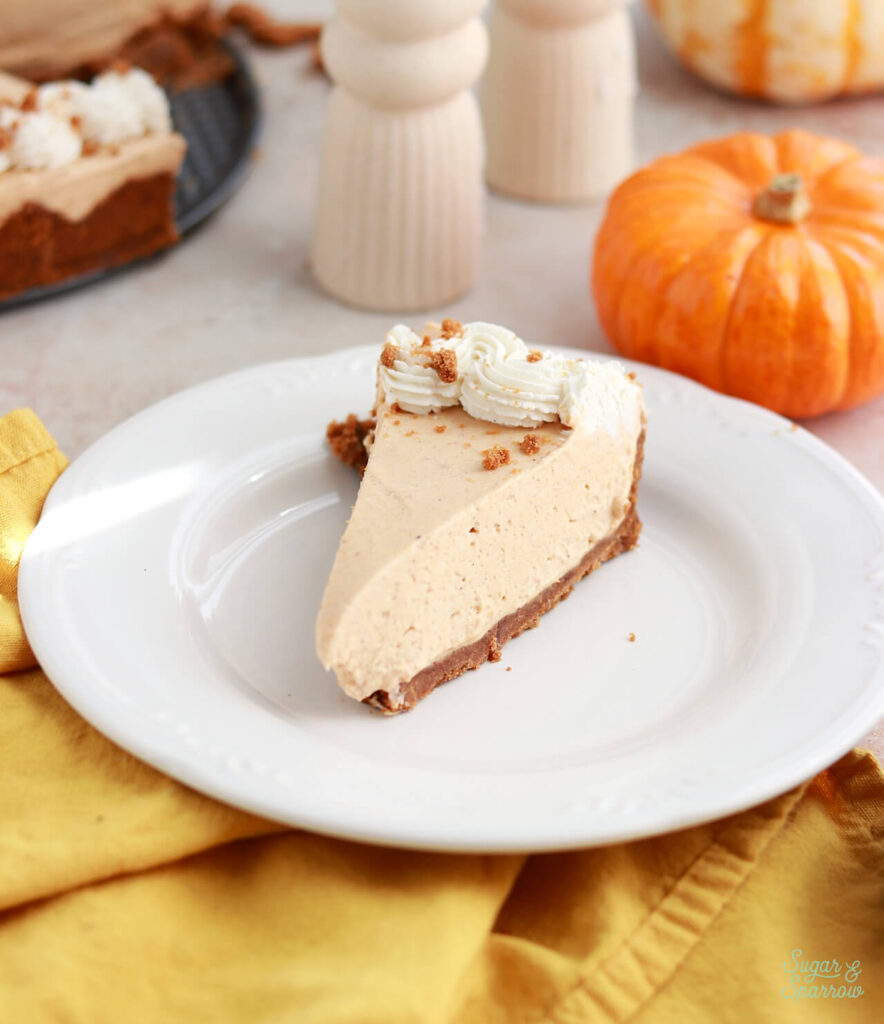
no bake pumpkin cheesecake by sugar and sparrow
no bake pumpkin cheesecake with biscoff cookie crust recipe

As a pumpkin lover myself, I can agree that this no-bake pumpkin cheesecake is a winner. It’s got the dreamiest mousse-like texture, beautiful pumpkin cheesecake flavor, and all the Fall spices to elevate. Furthermore, it has a delicious Biscoff cookie crust which really takes things to the next level. I thought about doing a traditional graham cracker crust, but Biscoff sounded like the right move and I have no regrets. 
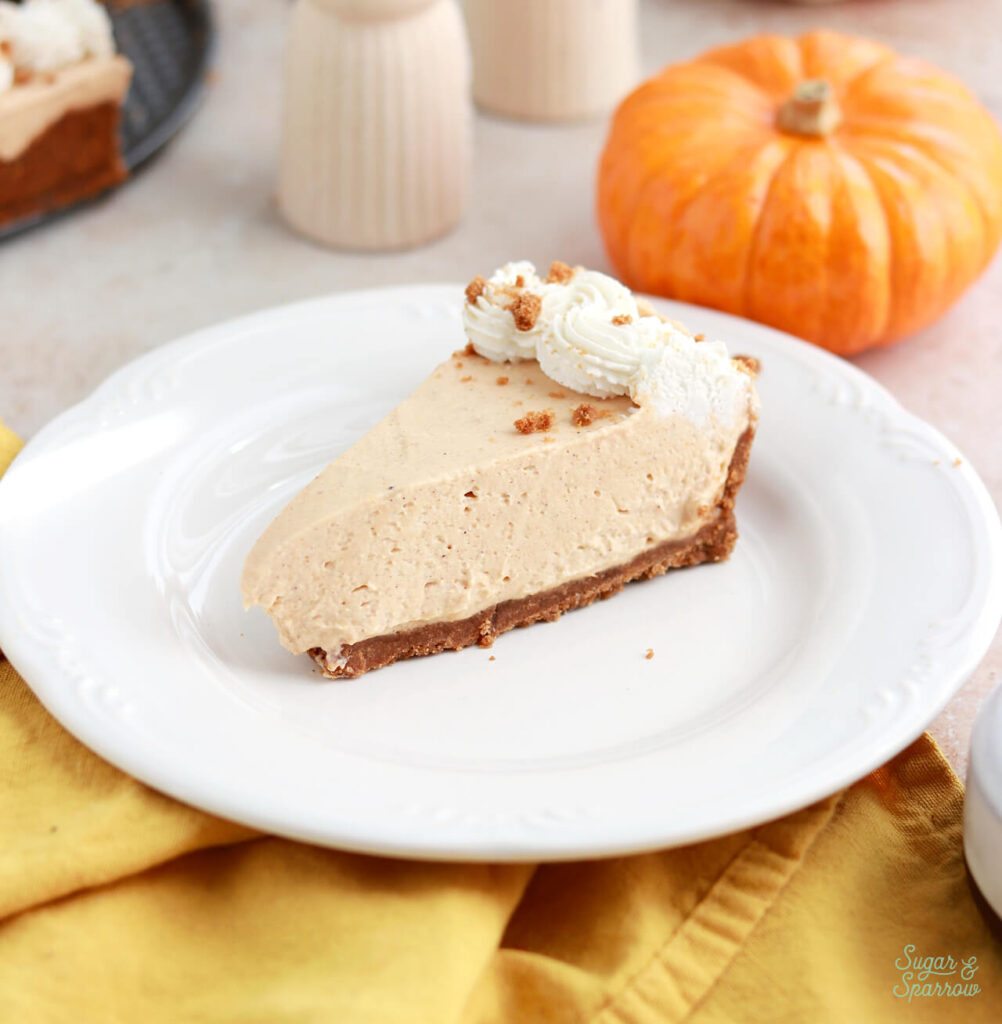
easy pumpkin cheesecake recipe

If you’ve never heard of no-bake cheesecake, here’s what you need to know. Just as was implied, there is no baking involved. You’ll basically be whipping up a flavored base with cream cheese, canned pumpkin puree, sugar, and spices. Then you’ll whip up some heavy cream and fold it in for stability. That concludes the making of your cheesecake filling, and after adding it into your cookie crust-lined springform pan, all that’s left to do is refrigerate the dessert for at least 6 hours. I like to pop it into the refrigerator, let it do its thing overnight, then have dessert ready to go when I need it the following day. 

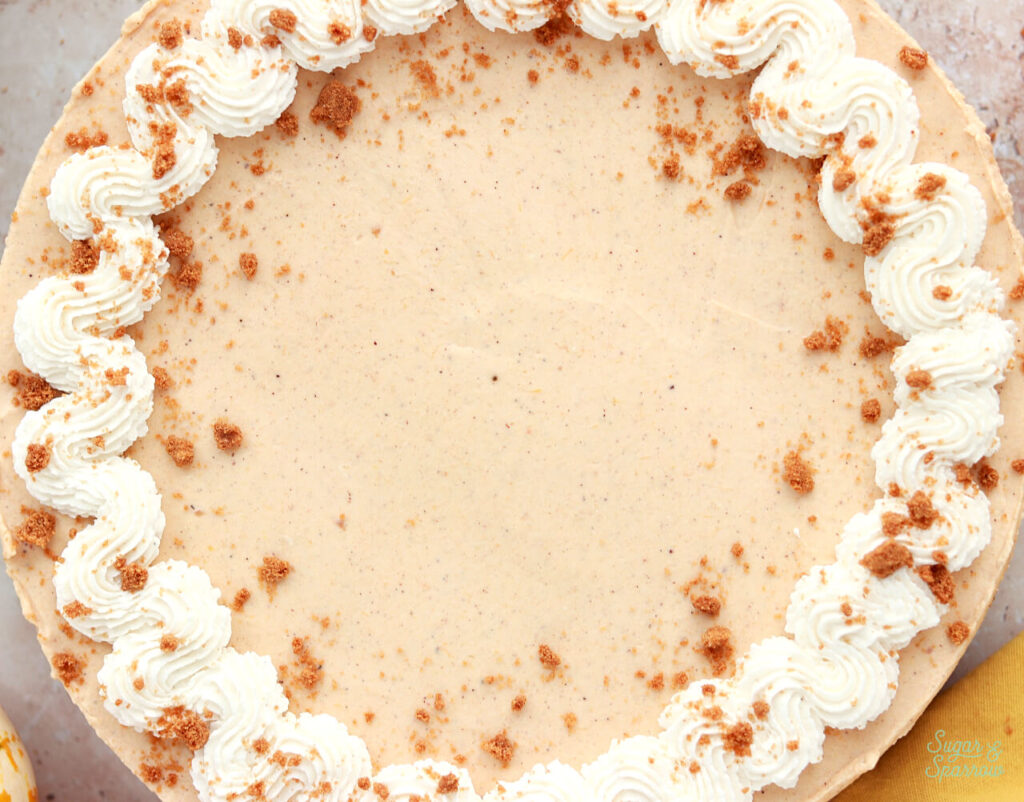
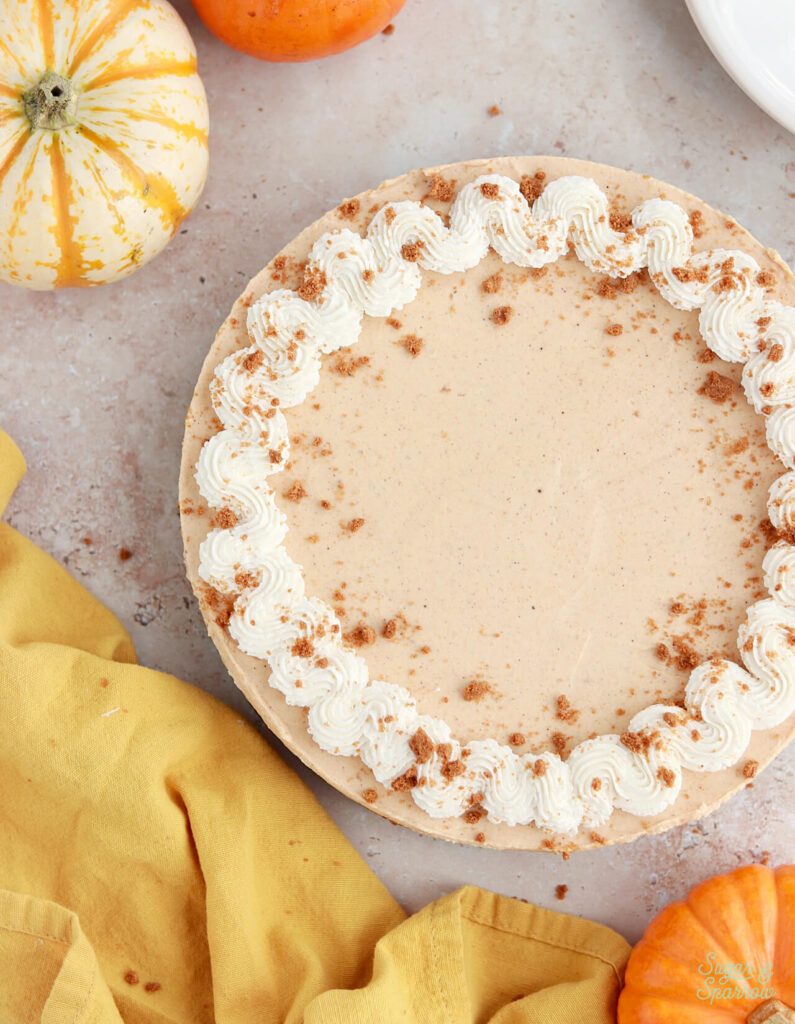
To decorate, I made a simple spiced whipped cream and piped it on top with Wilton Tip 4B. Then, I sprinkled some Biscoff cookie crumbs on top. My only regret was not using a bigger piping tip (I think 6B would have looked even better). Next time! 
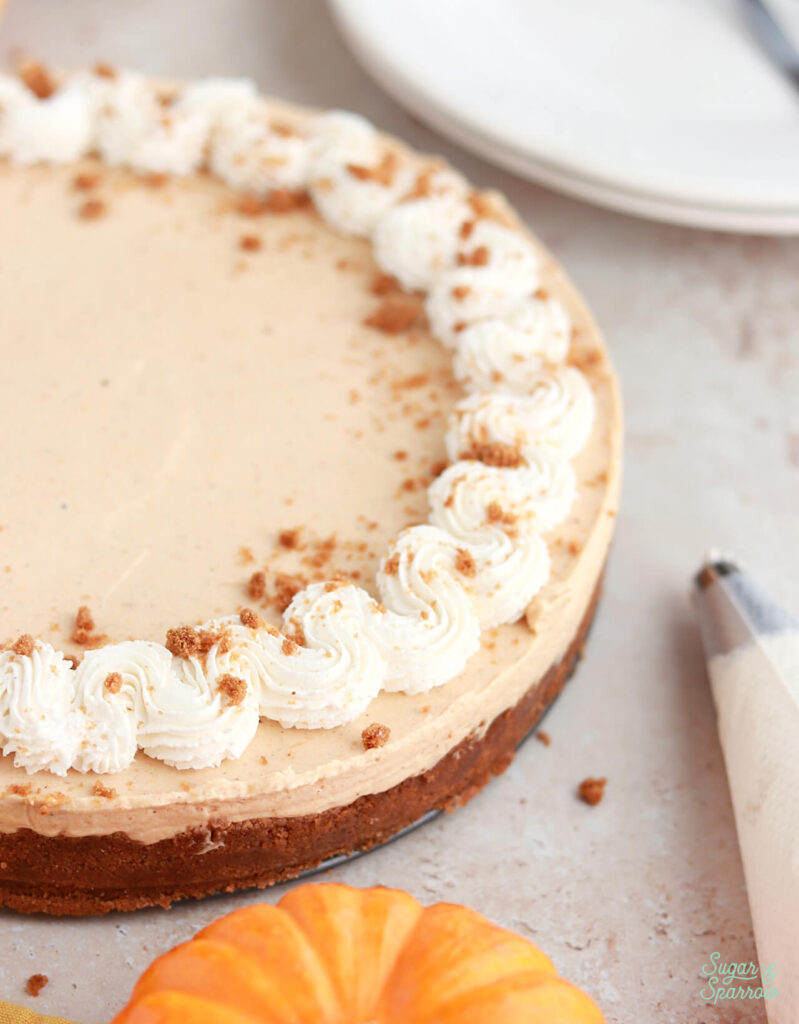
how to decorate a pumpkin cheesecake
no bake pumpkin cheesecake with spiced whipped cream

No-bake cheesecake is kinda a revolution to me. I just love that there are so many flavor possibilities and I can’t stop adding ideas to my list. Some of my favorite flavors I recommend adding to your list (after this one of course):
  • no-bake mango cheesecake
  • no-bake Oreo cheesecake
  • no-bake eggnog cheesecake
no bake pumpkin cheesecake by sugar and sparrow
the best no bake pumpkin cheesecake recipe

I can’t wait for you to make this cozy no-bake pumpkin cheesecake and hope you love it as much as I do. Actually, I want you to love this recipe as much as my neighbor does. I want it to become TRADITION!
easy no bake pumpkin cheesecake recipe

No-Bake Pumpkin Cheesecake with Biscoff Cookie Crust

4.67 from 3 votes
The dreamiest mousse-like pumpkin spice cheesecake with buttery Biscoff cookie crust, absolutely no baking necessary! The perfect Fall or Winter dessert.
Print Recipe Pin Recipe
Prep Time:25 minutes mins
Cook Time:0 minutes mins
Refrigeration:8 hours hrs
Total Time:8 hours hrs 25 minutes mins
Course: Dessert
Cuisine: American
Servings: 12 slices

Equipment

  • 9-inch springform pan

Ingredients

Biscoff Cookie Crust

  • 1 package (250g) Biscoff cookies, ground into crumbs
  • 1/3 Cup (75g) unsalted butter, melted

No-Bake Pumpkin Cheesecake Filling

  • 1 Cup (240ml) heavy whipping cream, cold
  • 16 Oz (452g) full-fat, brick style cream cheese, room temperature*
  • 1 Cup (227g) pumpkin purèe**
  • 3/4 Cup (90g) powdered sugar
  • 1/4 Cup (50g) packed brown sugar light or dark
  • 1 tsp pure vanilla extract
  • 3/4 tsp ground cinnamon
  • 1/2 tsp ground ginger
  • 1/2 tsp ground nutmeg
  • 1/2 tsp ground allspice
  • 1/4 tsp ground cloves
  • 1/8 tsp salt

Spiced Whipped Cream

  • 1/2 Cup heavy whipping cream, cold
  • 1/2 tsp pure vanilla extract
  • 1/2 tsp ground cinnamon

Additional Garnish (optional)

  • 2 Biscoff cookies, crumbled

Instructions

Make the Biscoff Cookie Crust

  • Using a food processor, grind the Biscoff cookies into a fine crumb. You can alternatively place the Biscoff cookies in a large Ziploc bag and use a rolling pin to crush them into crumbs.
  • Add the Biscoff cookie crumbs into a medium bowl and pour the melted butter on top. Mix until uniform, then press the mixture into the bottom and up the sides of a 9-inch springform pan or 10-inch springform pan. Use a round glass or jar to pack the crust as tightly as possible (this helps keep it together when you cut the cheesecake slices later). Freeze the Biscoff cookie crust in the pan for 10-20 minutes while you prepare the pumpkin cheesecake filling.

Make the No-Bake Pumpkin Cheesecake Filling

  • Using a hand mixer with a medium bowl or a stand mixer fitted with a whisk attachment, whip the cold heavy cream on medium-high speed until stiff peaks form, about 4–5 minutes. Set aside.
  • In another large bowl (either with a hand mixer or stand mixer), beat the cream cheese on medium speed until creamy. Scrape down the bowl and paddle as needed. Add the pumpkin, powdered sugar, brown sugar, vanilla, cinnamon, ginger, nutmeg, allspice, cloves, and salt. Beat on medium-high speed until smooth and combined (no lumps), about 3-4 minutes.
  • Use a rubber spatula to gently fold the whipped cream into the cheesecake filling until combined.
  • Remove the Biscoff crust from the freezer and add the pumpkin cheesecake filling into it. Spread the filling to the edges of the crust and smooth the top using an angled spatula, then cover it tightly with plastic wrap or aluminum foil. Refrigerate for at least 8 hours and up to 2 days. For best results, chill the cheesecake overnight. This will yield the most set filling.

Make the Spiced Whipped Cream

  • Place the metal bowl from your stand mixer and the whisk attachment (or a medium metal bowl and hand mixer attachments) into the freezer for 10 minutes to chill.
  • Add all of the spiced whipped cream ingredients into the chilled bowl. mix together on low speed until combined, then increase the speed to high and beat until stiff peaks form, 2-3 minutes.

Assembly

  • When you’re ready to serve the no-bake pumpkin cheesecake, remove the rim from the springform pan. Add the spiced whipped cream into a piping bag fitted with Wilton Tip 4B or 6B. Pipe a squiggle border around the edge of the cheesecake, then sprinkle with Biscoff cookie crumbs.

Notes

*This recipe only works with brick-style cream cheese, not the spread or tub. Those latter options unfortunately have too much liquid content and will make the filling too watery. 
**Canned pumpkin is great as long as it’s 100% pumpkin and purèed. Do not use pumpkin pie filling since that has sugar and spices already added. 
Make Ahead Tips:
  1. After making and freezing the Biscoff cookie crust, it can be covered and stored in the refrigerator until you add the filling (1-2 days ahead is best for the freshest flavor).
  2. You can make and assemble the no-bake pumpkin cheesecake up to 2 days in advance, stored in the refrigerator and covered in aluminum foil or plastic wrap. You can alternatively freeze the cheesecake for up to 3 months after it’s set in the refrigerator. Be sure to cover well if freezing. I recommend one layer of plastic wrap and one layer of aluminum foil. 
Leftovers: Store leftovers (covered well) in the refrigerator for up to 5 days or in the freezer for up to 3 months. 

This no-bake pumpkin cheesecake is sure to be a hit this Fall/Winter season! I hope you love it as much as I do. Let me know what you think in the comments below and feel free to tag @sugarandsparrowco on Instagram if you post a pic! I love to see what you create.
By: Whitney · In: Fall, Featured, No-Bake, Recipes, Seasonal, Winter · Tagged: biscoff cookie crust, no bake cheesecake, pumpkin cheesecake

you’ll also love

no bake cheesecake recipe by sugar and sparrowThe Perfect No-Bake Cheesecake Recipe
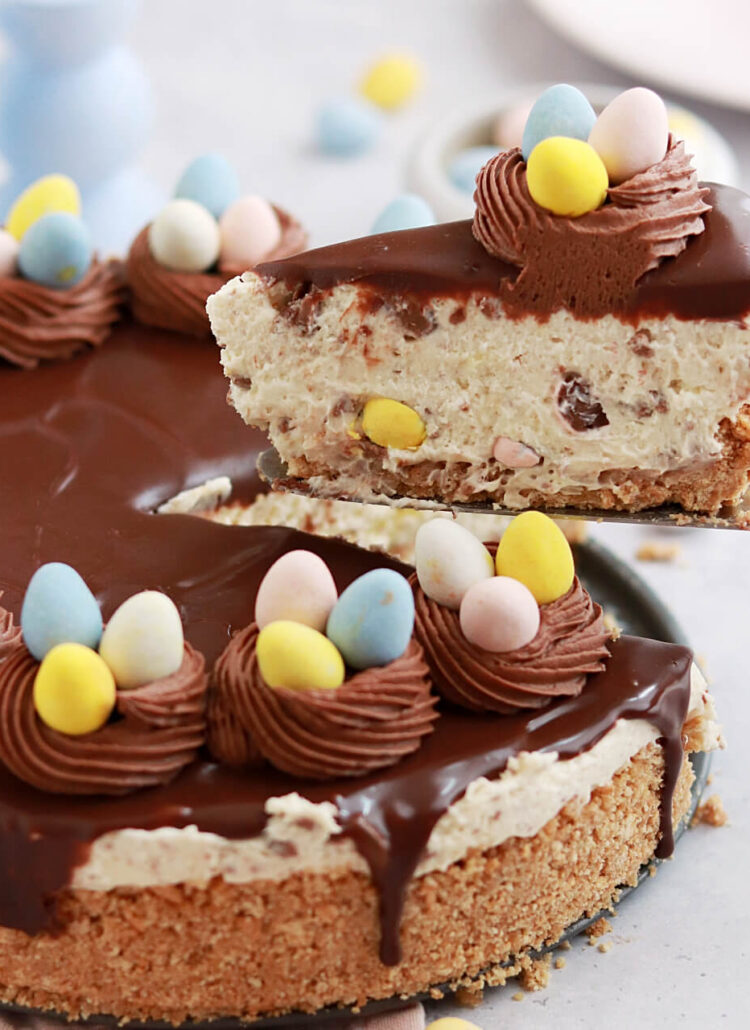
easy Cadbury Mini Egg Cheesecake recipeNo-Bake Cadbury Mini Egg Cheesecake
no bake eggnog cheesecake recipe by sugar and sparrowNo-Bake Eggnog Cheesecake with Biscoff Cookie Crust

Join the List

Stay up to date & receive the latest posts in your inbox.

Reader Interactions

Comments

  1. CatieB says

    November 18, 2025 at 5:24 pm

    Your recipe short on YouTube just appeared and I searched to find you. Thank you for posting it. I have to put in a grocery shopping order, because I want to take this for Thanksgiving as one occasion the choices for dessert. Tradition is good, but I think it is also good to shake it up every once in a while. Hope you have a blessed and happy Thanksgiving.

    Reply
    • Whitney says

      November 18, 2025 at 7:48 pm

      I hope you love this recipe, Catie! Happy Thanksgiving!

      Reply
  2. Jack says

    October 2, 2025 at 10:12 am

    can i use less cream cheese?

    Reply
    • Whitney says

      October 3, 2025 at 10:03 am

      Hi Jack! Since the cream cheese is important for the structure/texture of the cheesecake, I don’t recommend using less as it might not set properly.

      Reply
  3. Shannon says

    December 29, 2024 at 2:57 pm

    5 stars
    This no bake cheesecake recipe was really good and simple to make. My family really enjoyed it! I will say that the temperature in the kitchen makes a difference with the cheesecake mixture so I will chill my bowl and mixer blades so it forms better. Also, I will set it longer in fridge so it forms better. I can’t wait to make the others! Looking forward to it!

    Reply
  4. Pablo says

    November 29, 2024 at 9:22 pm

    4 stars
    25 minutes prep time my….
    Took me about 1 hr to prepare. But otherwise, delicious recipe. Thanks.

    Reply
  5. Wafaa says

    October 5, 2024 at 2:07 pm

    5 stars
    Yum this was delicious.

    I made it for a friend’s birthday and everyone loved it.

    It didn’t set properly for me and I think it’s because the heavy cream we have in New Zealand is not as fatty as it’s meant to be for this recipe. Next time I will try a much thicker cream. Will definitely make it again – many times

    Reply

Leave a Reply Cancel reply

Your email address will not be published. Required fields are marked *

Recipe Rating


Next Post >

Oatmeal Creme Pie Cake

Primary Sidebar

Welcome to Sugar & Sparrow

Welcome to Sugar & Sparrow

Helping you whip up pretty desserts with confidence and creativity. And hopefully sharing a few laughs with you along the way!

Learn More

Connect

let’s bake!

Get my very best recipes, baking tips, and decorating tutorials sent to your inbox

Featured Posts

strawberry buttercream recipe by sugar and sparrow

Favorite Strawberry Buttercream Recipe

whipped chocolate ganache for cakes

Whipped Chocolate Ganache

woven tapestry inspired cake tutorial by sugar and sparrow

Woven Tapestry Cake Tutorial

Search

Archives

Follow Along

@sugarandsparrowco

LEMON RASPBERRY CAKE 🍋♥️ this cake has the dreamie LEMON RASPBERRY CAKE 🍋♥️ this cake has the dreamiest layers: soft and zesty lemon cake with raspberries baked into every bite, thick homemade raspberry filling, and lemon raspberry buttercream with the prettiest natural color 😍 
 
✨recipe linked in my bio or at https://sugarandsparrow.com/lemon-raspberry-layer-cake/
 
#lemonraspberry #lemoncake #raspberrycake #pinkcake #layercake
SALTED CARAMEL BUTTERCREAM ✨I could eat this salty SALTED CARAMEL BUTTERCREAM ✨I could eat this salty-sweet caramel frosting by the spoonful but it’s absolutely delicious on cakes, cupcakes, macarons, and more 🙌🏽 I use my homemade EASY salted caramel recipe here but you can use any salted caramel sauce that you love.⁣

✨Full recipe (including homemade salted caramel) + cake pairing suggestions are on my blog at https://sugarandsparrow.com/salted-caramel-buttercream-recipe/ 
⁣
SALTED CARAMEL BUTTERCREAM⁣
Yield: 2.5 Cups ⁣
⁣
INGREDIENTS⁣
1 Cup (226g) unsalted butter, room temperature⁣
3 1/2 Cups (420g) powdered sugar⁣
2 tsp vanilla extract⁣
1/2 Cup (120ml) salted caramel sauce, room temperature⁣
Pinch of salt⁣
⁣
INSTRUCTIONS:⁣
1. In a stand mixer fitted with the paddle attachment, whip the butter on high until it’s creamy and light in color, 5-6 minutes. ⁣
2. Turn the mixer to low and add the powdered sugar a few cups at a time, scraping down the bowl and paddle after each interval.⁣
3. With the mixer still on low, mix in the vanilla extract, salted caramel, and a pinch of salt. Continue mixing on low speed until fully combined. ⁣
⁣
#saltedcaramel #caramel #cakedecorating #frosting #buttercream
NO-CHURN BERRY CRISP ICE CREAM✨you don’t need any NO-CHURN BERRY CRISP ICE CREAM✨you don’t need any fancy equipment to whip up this delicious ice cream that tastes JUST like berry crisp a la mode! I layered my favorite 3-ingredient no-churn vanilla ice cream base with ribbons of homemade berry filling + buttery oat streusel in every bite. Even if you’ve never made ice cream from scratch before, I promise you can master this recipe!! 
 
🍦Full recipe linked in my bio or find it at https://sugarandsparrow.com/no-churn-berry-crisp-ice-cream/

#nochurnicecream #icecream #icecreamlover #berries #summerdessert
STRAWBERRY SHEET CAKE 🍓based on my favorite strawb STRAWBERRY SHEET CAKE 🍓based on my favorite strawberry layer cake recipe, this sheet cake version is so fun to decorate + such a crowd pleaser! I love using a combination of fresh and freeze-dried strawberries to create the most powerful authentic flavor ✨
 
🍓Full recipe (with strawberry buttercream) at https://sugarandsparrow.com/strawberry-sheet-cake-recipe/
⁣ 
STRAWBERRY SHEET CAKE⁣ 
Serves 24
⁣ 
INGREDIENTS⁣ 
1 Cup (12oz) fresh strawberries, pureed ⁣ 
3/4 Cup (180ml) whole milk, room temp⁣ 
2 1/2 Cups (265g) sifted cake flour⁣ 
2 tsp baking powder⁣ 
1/4 tsp baking soda⁣ 
1/2 tsp salt⁣ 
3/4 Cup (170g) unsalted butter, room temp⁣ 
1 2/3 Cups (350g) granulated sugar⁣ 
3 large eggs, room temp⁣ 
1/3 Cup (75g) sour cream, room temp⁣ 
2 tsp pure vanilla extract⁣ 
1-2 drops pink food coloring (optional)⁣ 
⁣ 
INSTRUCTIONS⁣ 
1. Simmer the strawberry puree in a saucepan over medium-low heat for 30-35 minutes, stirring occasionally. At this point the puree should have reduced from 1 Cup to 1/2 Cup (if you have more, keep cooking!). Refrigerate until room temp, then whisk together with the whole milk and set aside.⁣ 
2. Preheat the oven to 350ºF. Grease and line a 13×9 inch baking pan. 
3. In a medium bowl, whisk together the sifted cake flour, baking powder, baking soda, and salt. Set aside. ⁣ 
4. In the bowl of a stand mixer with the paddle attachment, whip the butter on high until creamy, 2 min. Add the sugar and beat with the butter until light and fluffy, 2 min. Turn the mixer to low and add the eggs one at a time. Add the vanilla and sour cream, then turn the mixer to high and beat for 1 minute.⁣ 
5. With the mixer on low, add all of the dry ingredients at once until just combined, then add the strawberry milk mixture and pink food coloring (if using) until just combined. Give the batter a few stirs by hand to make sure everything is incorporated without over-mixing. ⁣ 
6. Pour batter into the prepared cake pan and bake for 35-40 minutes. ⁣ Cool completely to room temperature before topping with strawberry buttercream (full recipe at the li
COOKIES & CREAM ICE CREAM CAKE 🤎 If you’re an Oreo COOKIES & CREAM ICE CREAM CAKE 🤎 If you’re an Oreo lover, this is your sign to make an ice cream cake this summer: no-churn cookies & cream ice cream set on an Oreo cookie crust, topped with hot fudge and whipped cream frosting. The perfect amount of Oreos in EVERY BITE! 

Full recipe link in my bio + at https://sugarandsparrow.com/cookies-and-cream-ice-cream-cake/ 

OREO CRUST
22 Oreo cookies
5 Tbsp melted butter

ICE CREAM LAYER
2 Cups (480ml) heavy whipping cream, cold
2 tsp pure vanilla extract
14 Oz sweetened condensed milk
15 Oreo cookies, roughly chopped

TOPPINGS
12.8 Oz jar of hot fudge
Whipped cream frosting (see full recipe link)
4 Oreo cookies, chopped

INSTRUCTIONS
1. Mix together the Oreo crust ingredients and pack tightly into the bottom of a 9-inch springform pan. Freeze while you make the ice cream.
2. In a chilled bowl, whip the heavy cream and vanilla to stiff peaks. Fold in the sweetened condensed milk until uniform, then fold in the chopped Oreos. Pile the ice cream on top of the Oreo crust, smooth it down, cover and freeze overnight.
3. When the ice cream layer is set, top with the hot fudge, whipped cream frosting, and more chopped Oreos. Store in the freezer until ready to serve! 

#oreocake #icecreamcake #nochurnicecream #birthdaycake #cookiesandcream

Footer

On the Blog

  • Cake Basics
  • Recipes
  • Tutorials

Info

  • About
  • Privacy Policy & Disclosure

stay in the know

Copyright © 2026 · Theme by Sugar & Sparrow