• Cake
  • Frosting
  • YouTube
  • My Favorite Tools
  • Nav Social Icons

  • Skip to primary navigation
  • Skip to main content
  • Skip to primary sidebar
  • Skip to footer
  • Recipes
    • Cake
    • Cupcakes
    • Frosting
    • Ice Cream
    • Vegan
  • Cake Basics
  • Tutorials
  • Blog
  • About
  • Mobile Menu Widgets

    Connect

    Search

Sugar & Sparrow logo in script font

Sugar & Sparrow

Lifestyle and Cake from Portland Oregon

  • Cake Basics
  • Recipes
    • Cake
    • Cupcakes
    • Cookies & Bars
    • Filling
    • Frosting
    • Ice Cream
    • No-Bake
    • Small Batch
    • Vegan
  • Tutorials
  • Book
  • Blog
  • About

Easy Chocolate Mousse Cake

January 14, 2025 · In: Cake, Featured, Recipes, Seasonal, Valentines

Jump to Recipe

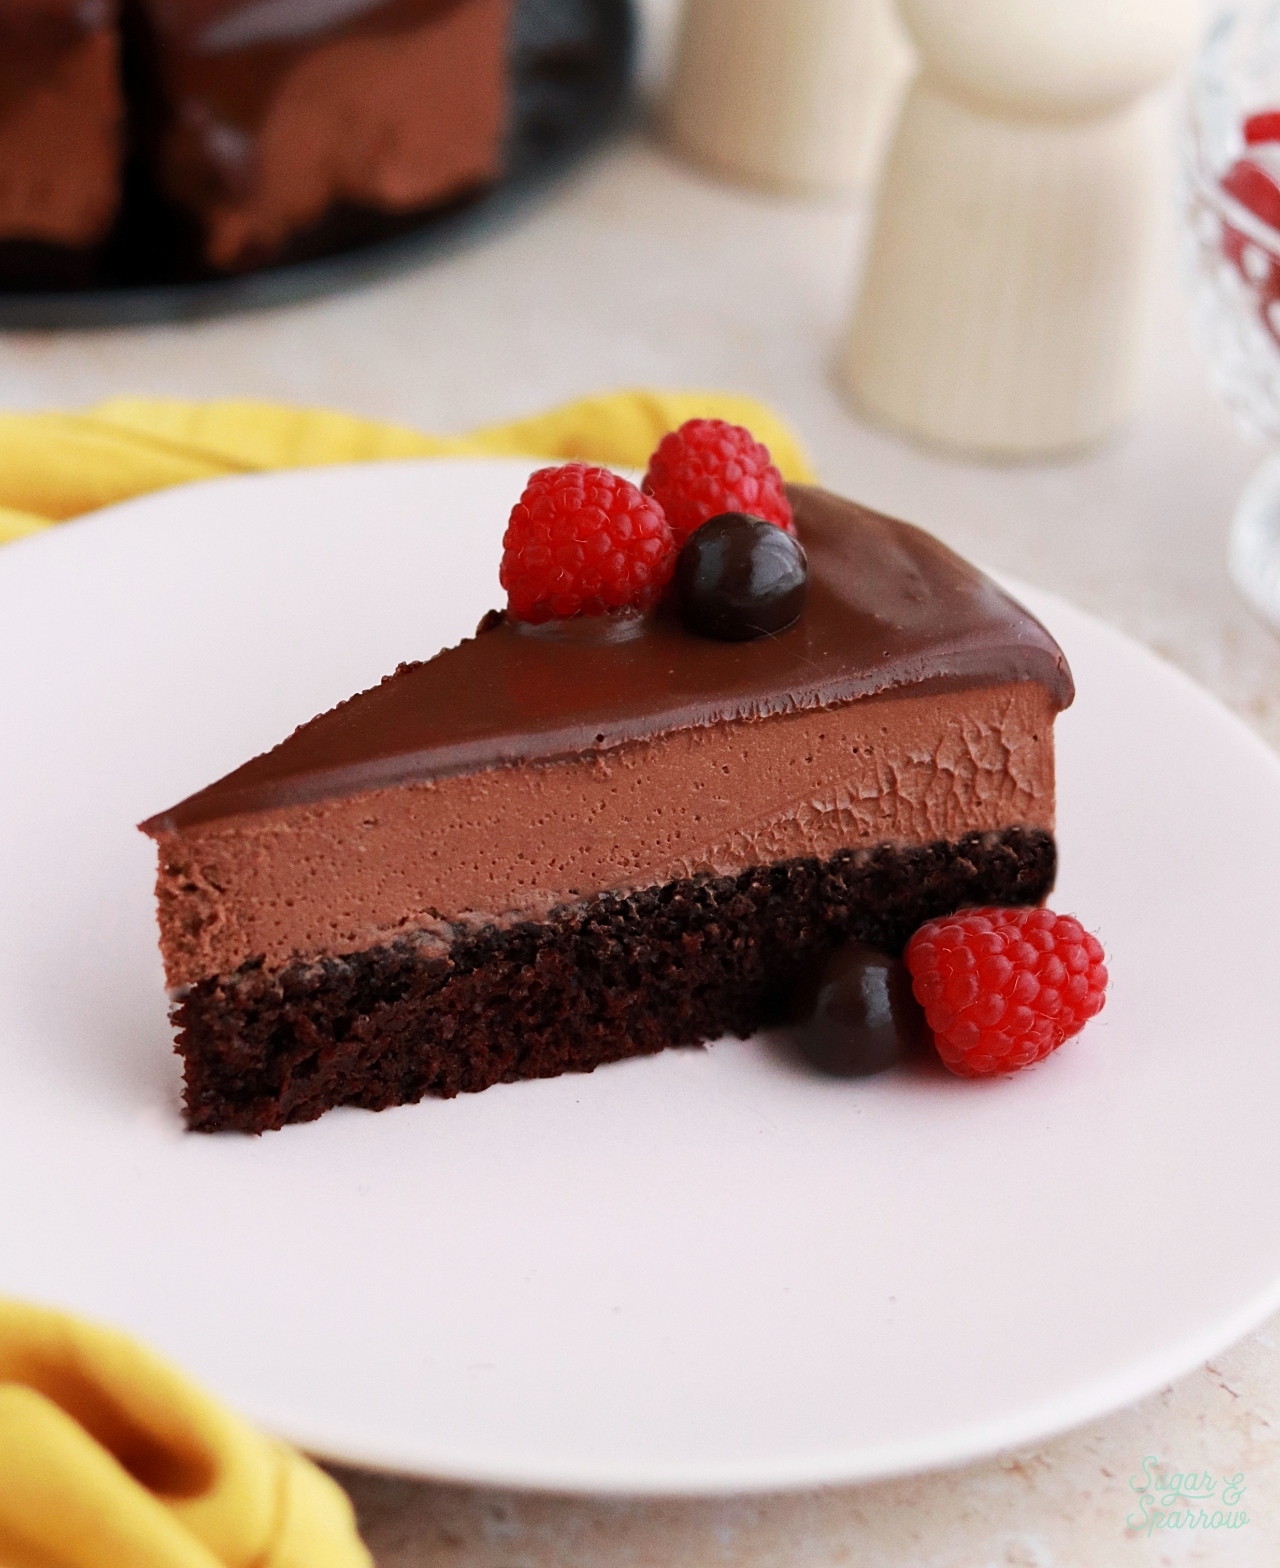
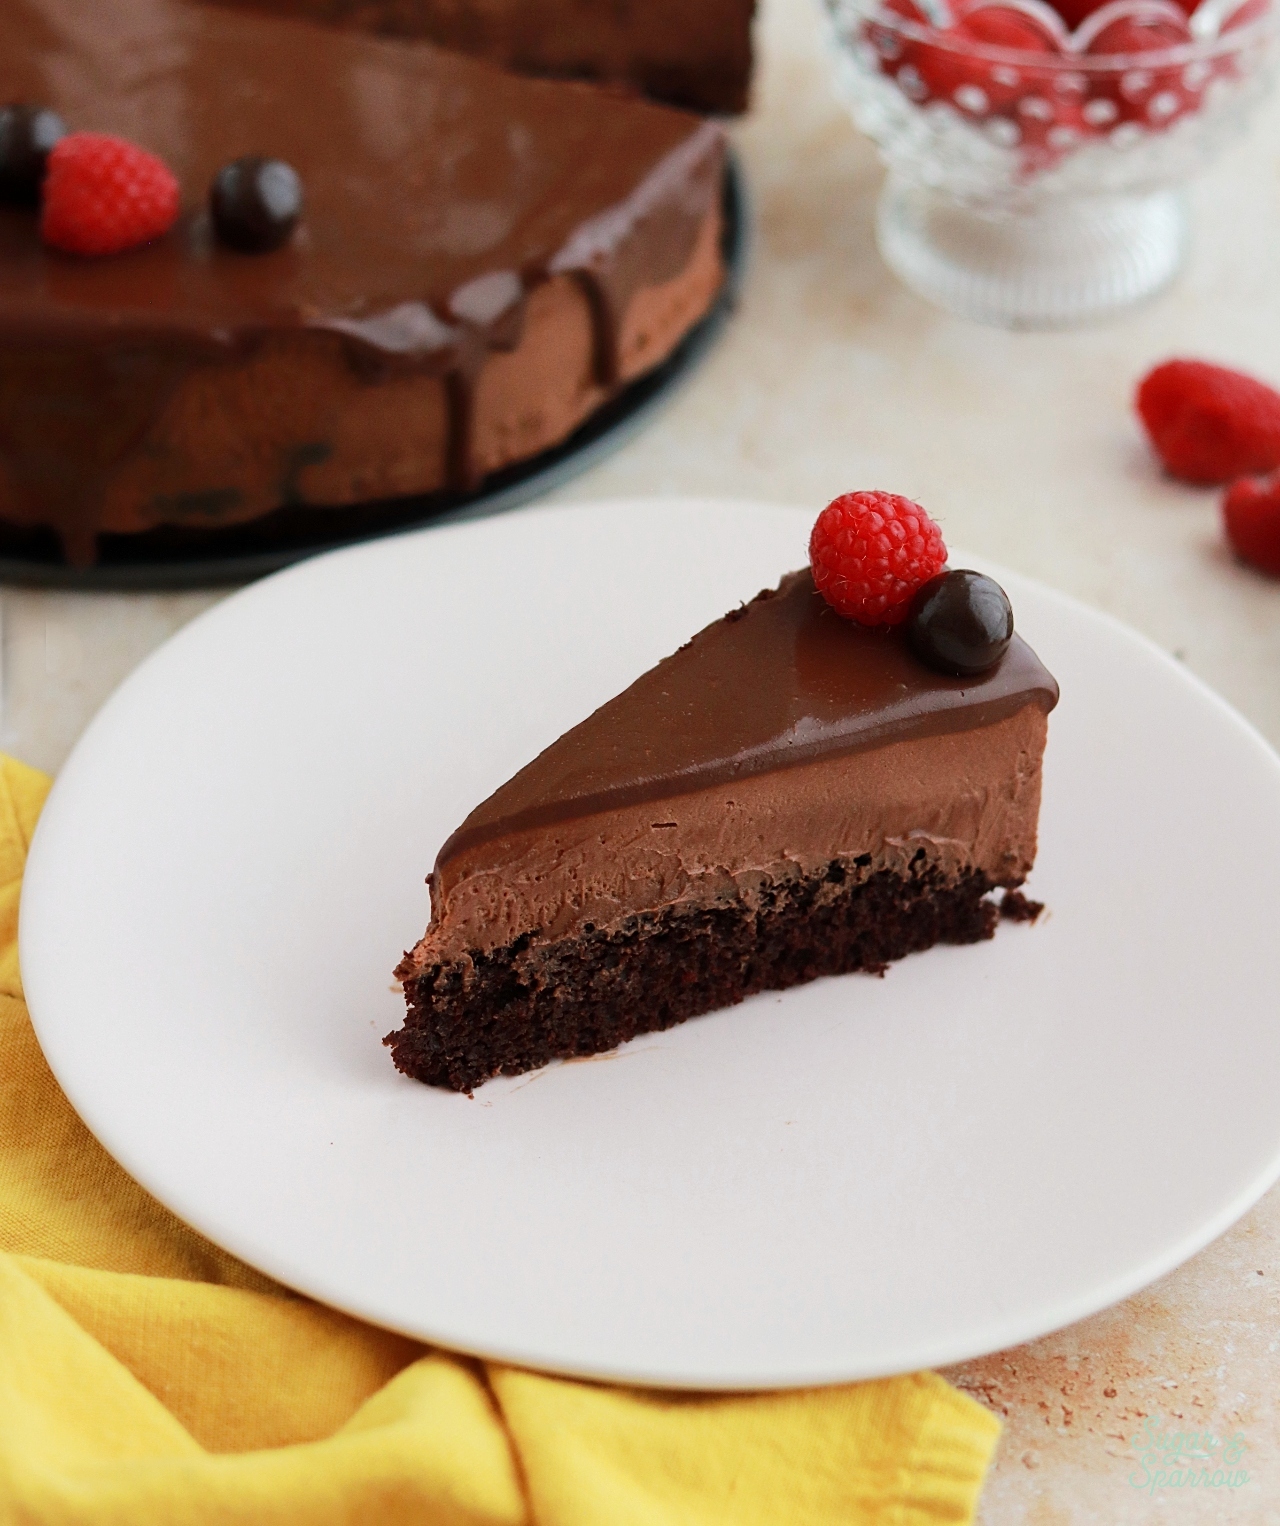
This chocolate mousse cake is a chocolate lover’s DREAM. It’s three exquisite layers of chocolate in one beautiful and easy dessert: a rich and decadent chocolate cake with a generous layer of velvety chocolate mousse on top, topped with shiny chocolate ganache. I love garnishing this dessert with fresh raspberries and chocolate covered espresso beans for a little sophistication. She looks complex, but this is probably one of the easiest chocolate mousse cakes you’ll ever make. I can’t wait to show you how! 
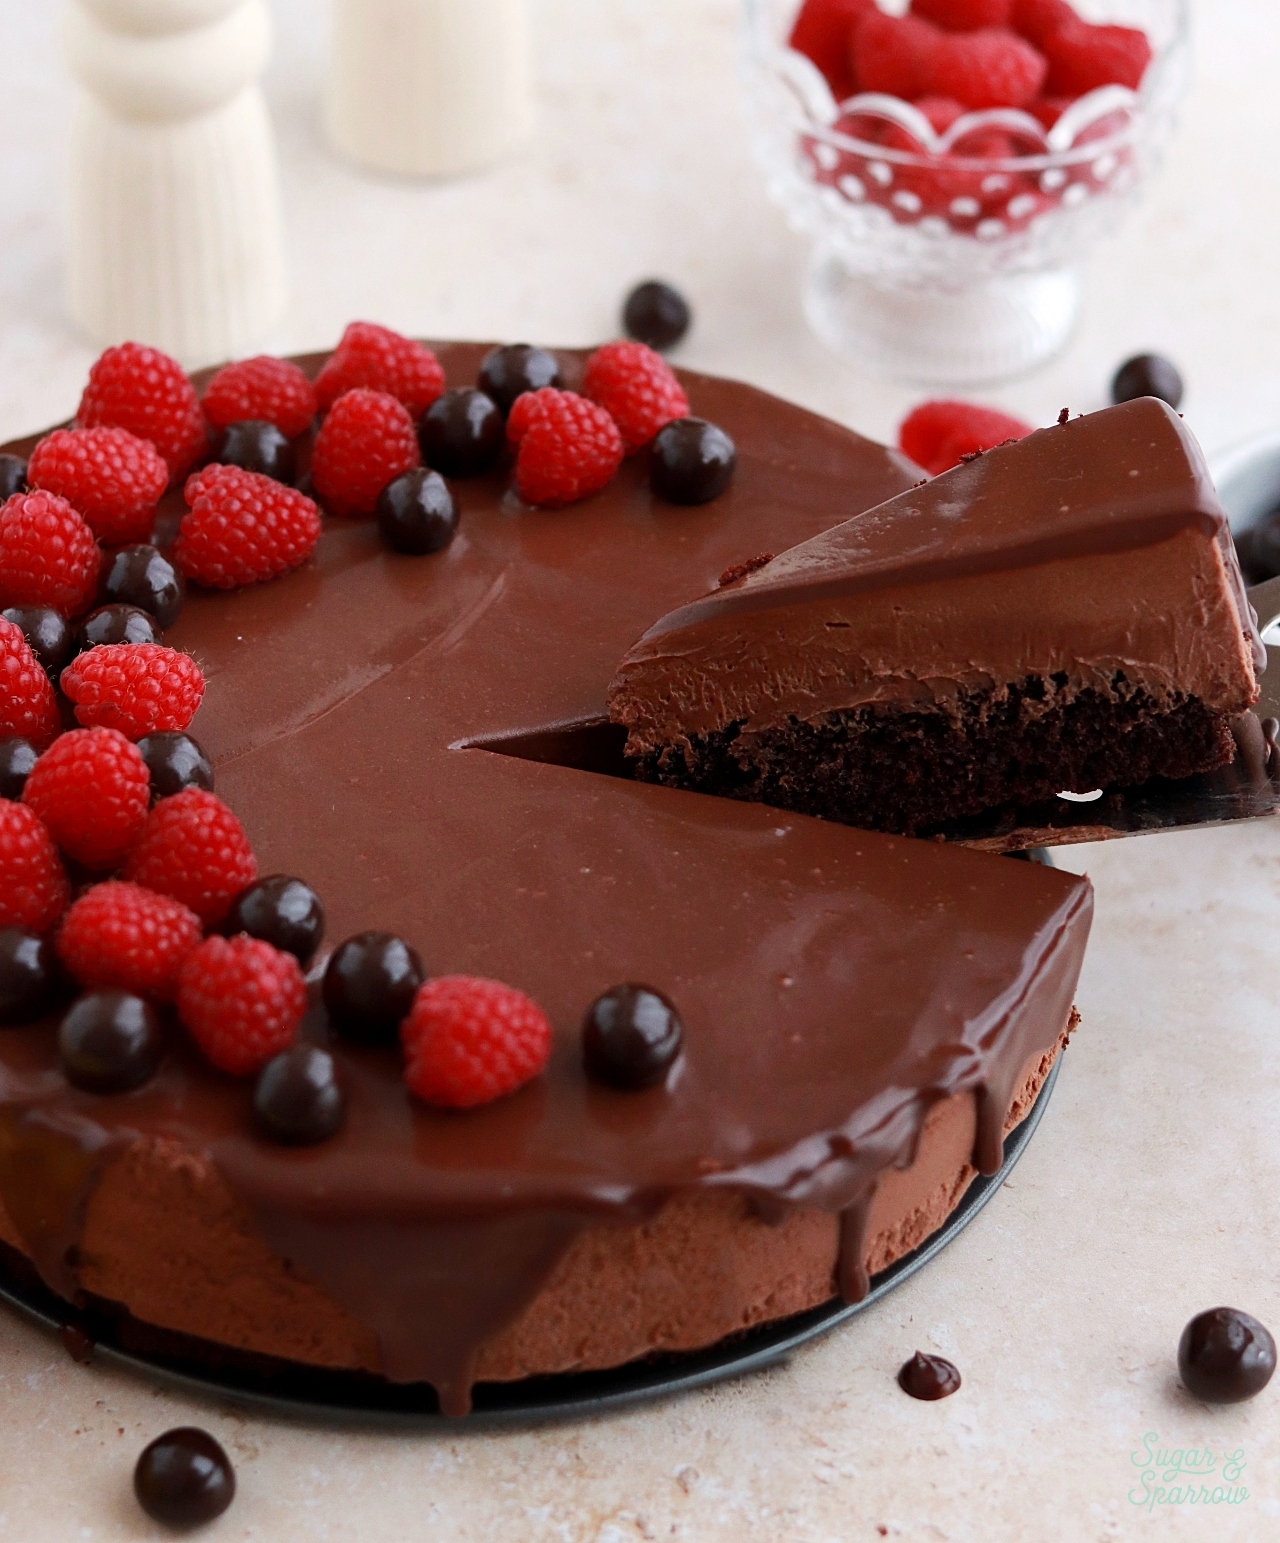
chocolate mousse cake recipe by sugar and sparrow
chocolate mousse cake easy

One reader, Lauren, says: “This recipe is phenomenal!! I made this for my family for Valentine’s Day and it was soo decadent. Everyone kept saying how moist the cake was and how smooth the mousse was. It was officially named our yearly Valentine dessert!” ★★★★★

Decadent Chocolate Cake 

This rich and decadent chocolate cake layer is a halved version of my favorite one-bowl chocolate cake. There are so many reasons why I gravitate towards this recipe any time I need a chocolate cake: It’s nearly as easy as whipping up a boxed cake mix and uses simple ingredients I always have in my pantry. The crumb is stick-to-your-fork moist due to the vegetable oil base and the addition of buttermilk. It has an incredible chocolate flavor that’s even more amplified with a little bit of coffee. There are absolutely no complicated steps involved, which makes it absolutely fail proof. I could go on forever! 
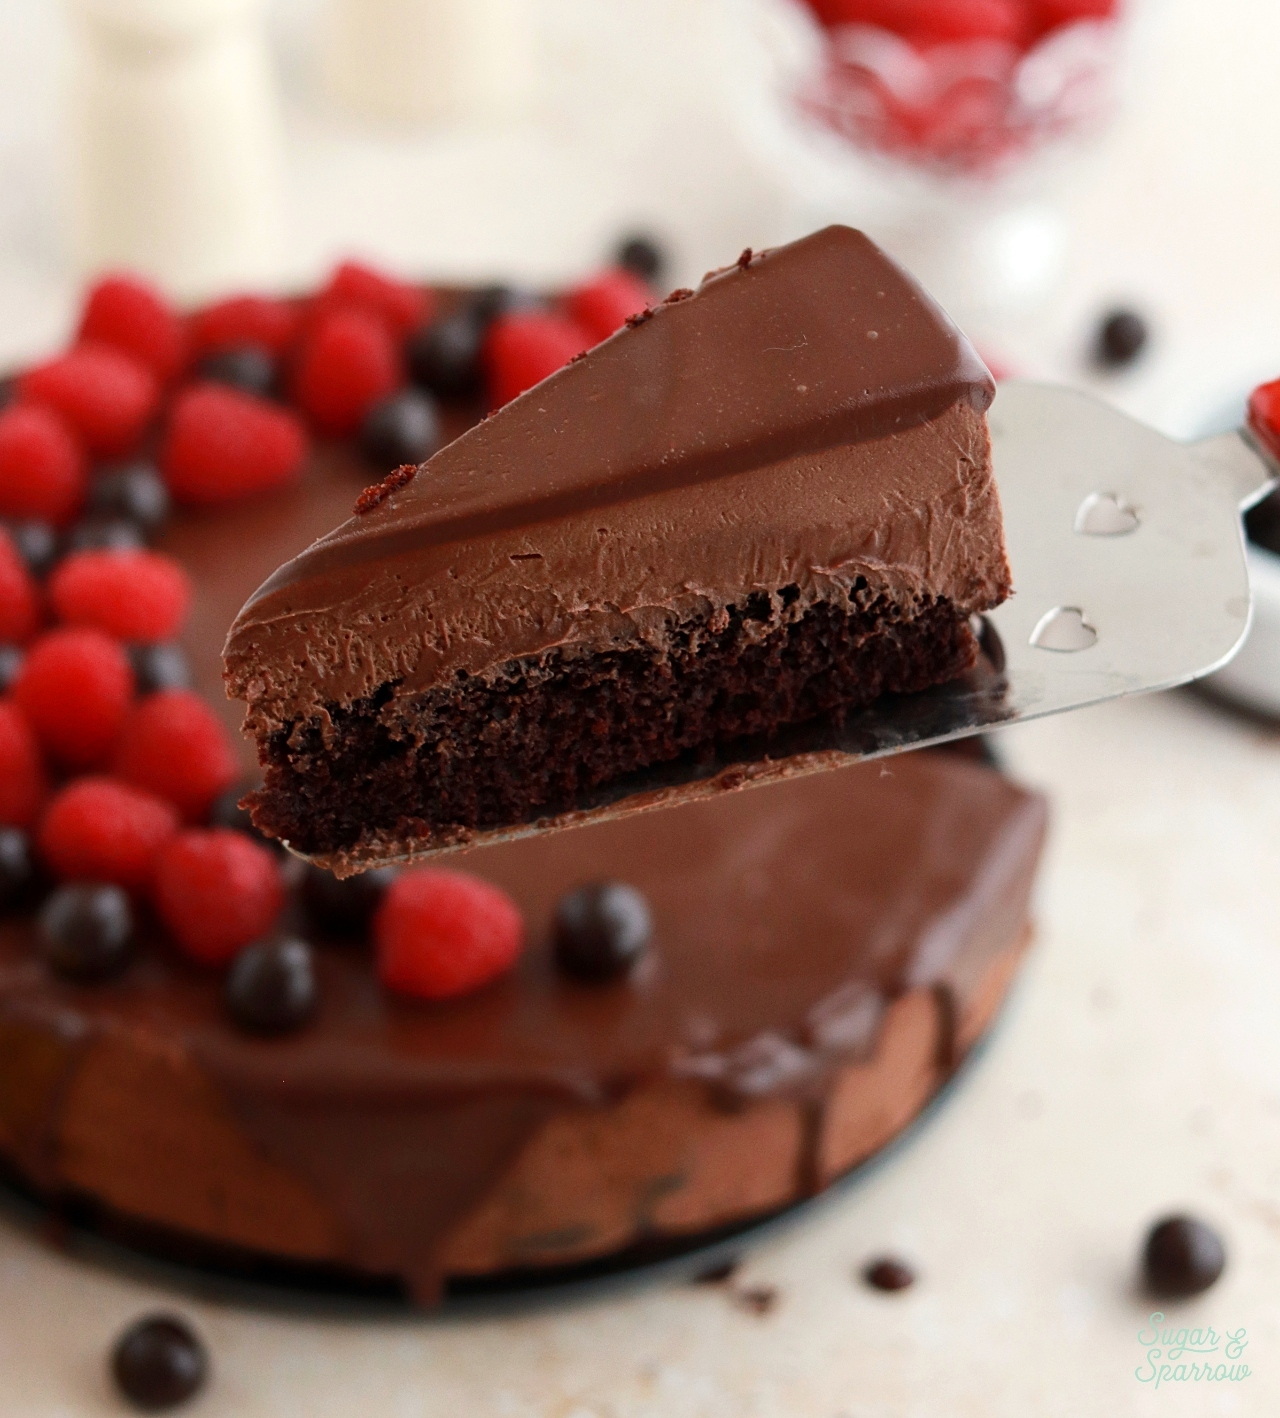
chocolate cake recipe with chocolate mousse

You’ll bake the chocolate cake layer in a 9-inch springform pan – the same pan that you’ll be assembling the rest of the cake components in. Once baked, there are two important things to do before moving on to the mousse portion of the recipe: 

  1. Make sure the chocolate cake is fully cooled to room temperature before adding the mousse layer on top.
  2. After the cake has cooled, level it so that you have a nice even cake layer for the mousse to sit on. Trimming off the top also makes the cake more porous, which helps the mousse soak into the cake slightly and make it even more moist. 
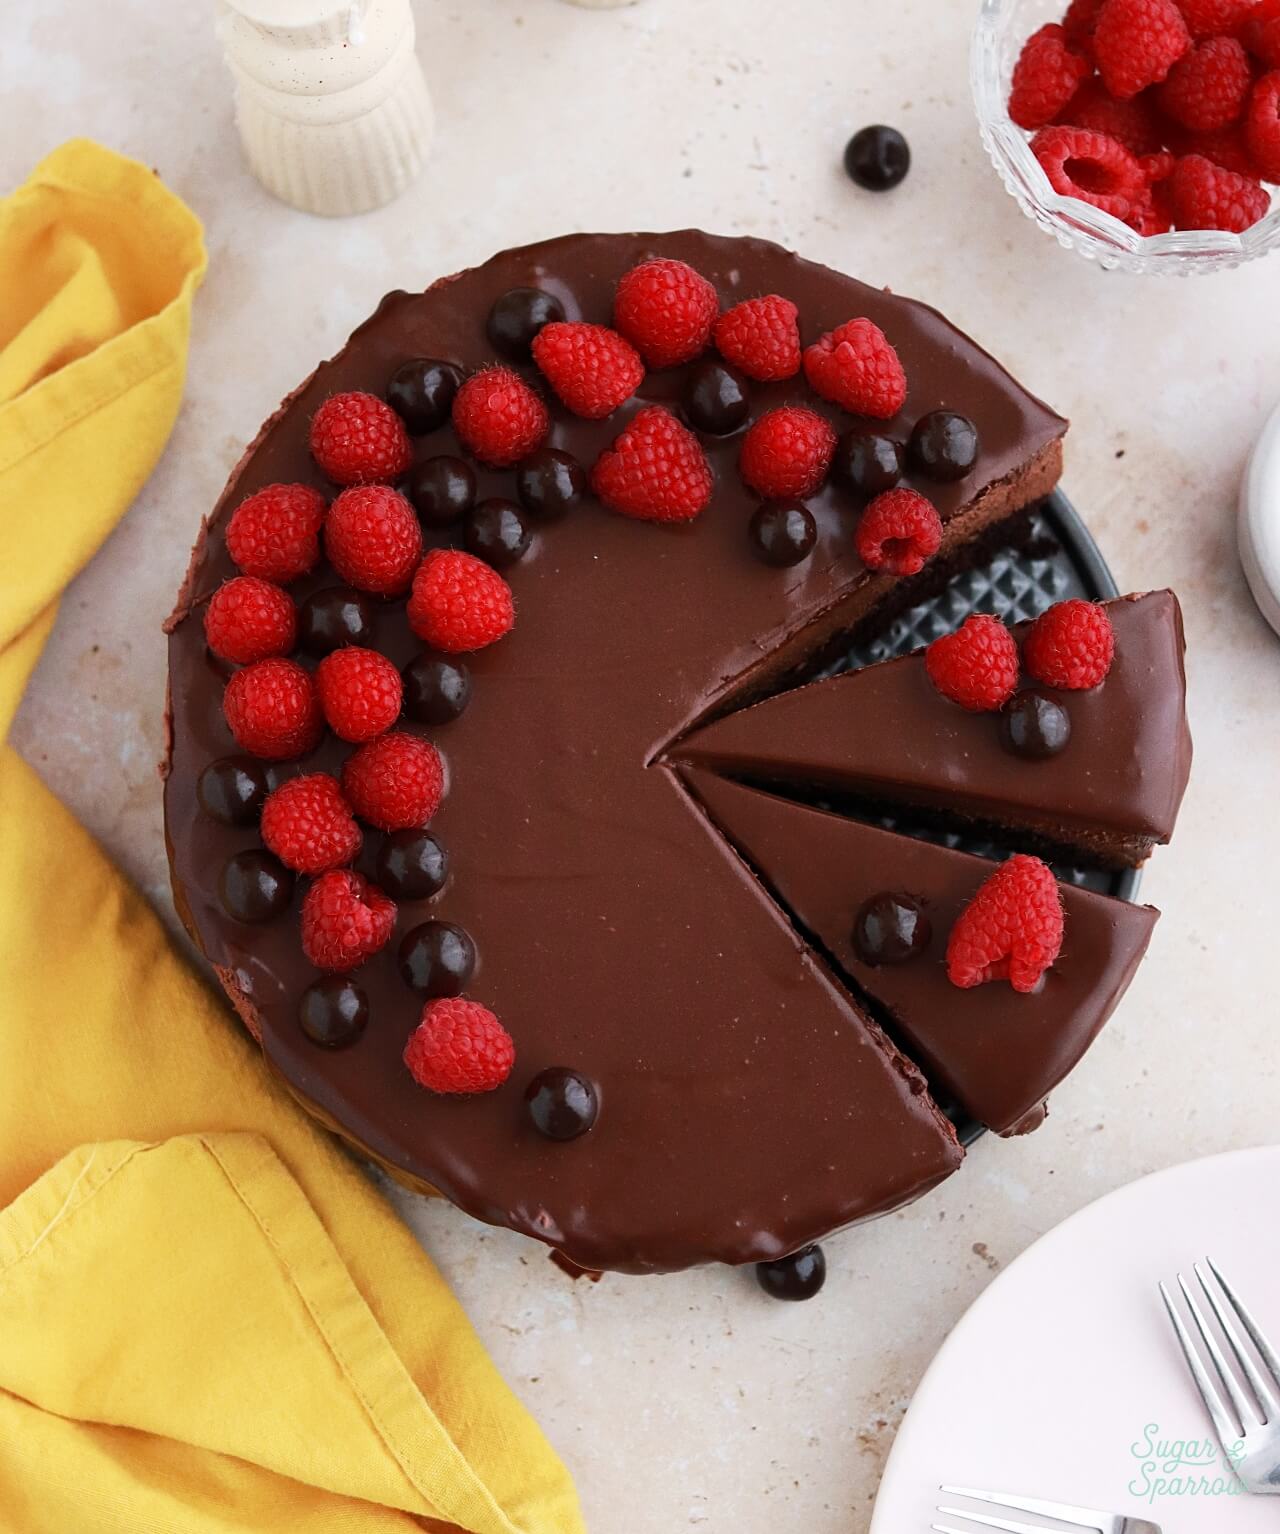
easy chocolate mousse cake recipe

The Easiest Chocolate Mousse 

This may not be a traditional chocolate mousse recipe, but it tastes just as delicious and pillowy soft without any eggs or complicated cooking techniques. Instead, this mousse starts with a classic chocolate ganache recipe that is two parts chocolate and one part heavy whipping cream. In other words, 2 Cups of semi-sweet chocolate chips + 1 Cup of heavy whipping cream. You’ll bring the cream to a simmer in a saucepan, then pour it over the chocolate chips and whisk until the consistency is uniform, then let the ganache cool to room temperature.
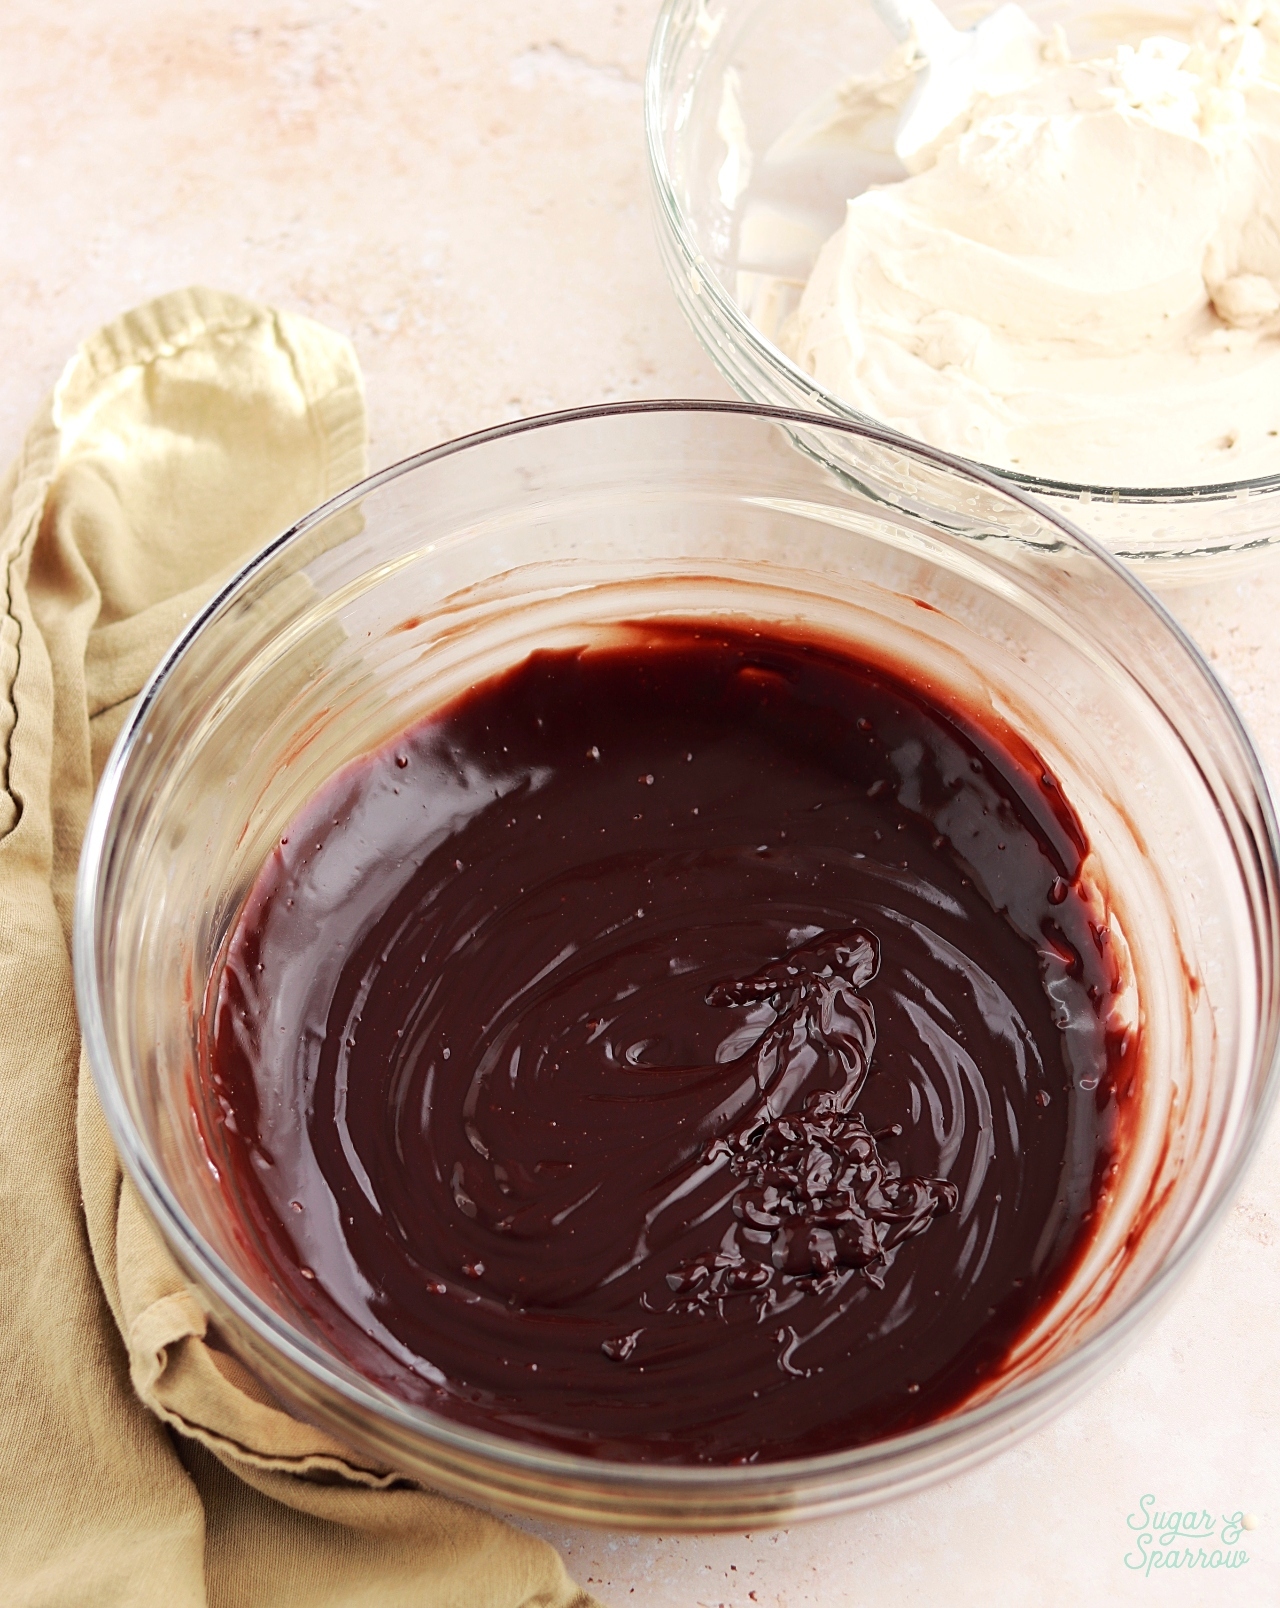
chocolate ganache mousse recipe

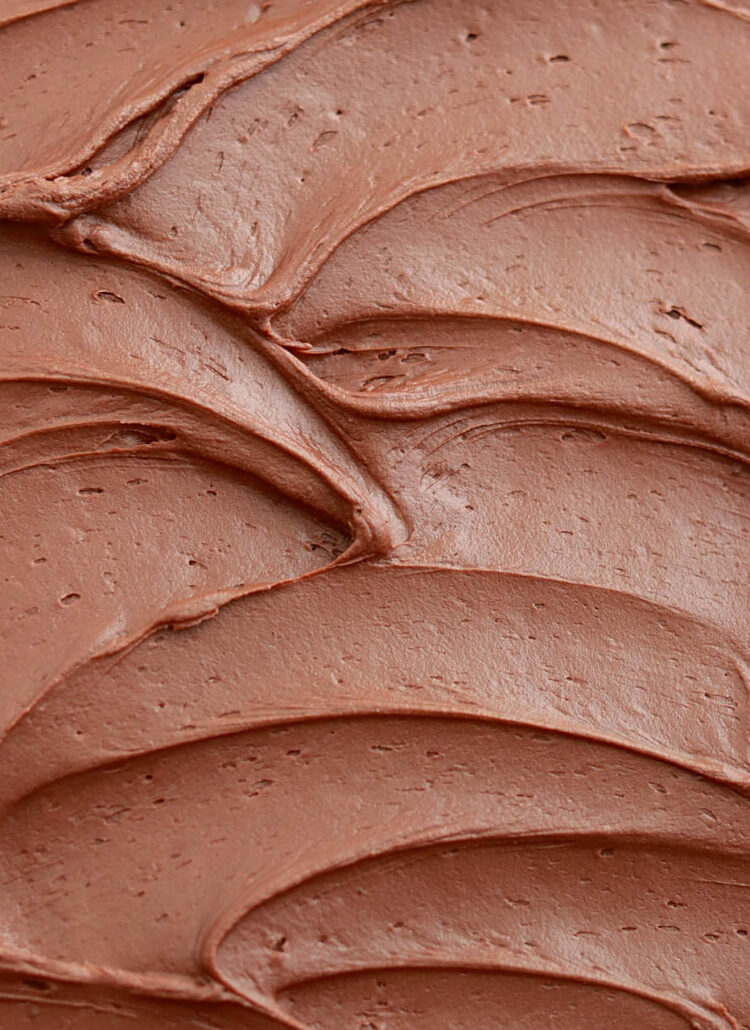
The second part of the chocolate mousse is making the whipped cream. This essentially means blending together more heavy whipping cream, a little powdered sugar, some vanilla, and some instant coffee or espresso powder (optional, but delicious!). You’ll whip these ingredients together until stiff peaks form, then fold the whipped cream into the ganache until you have a creamy chocolate mousse. It’s so good I could eat it by the spoonful! 
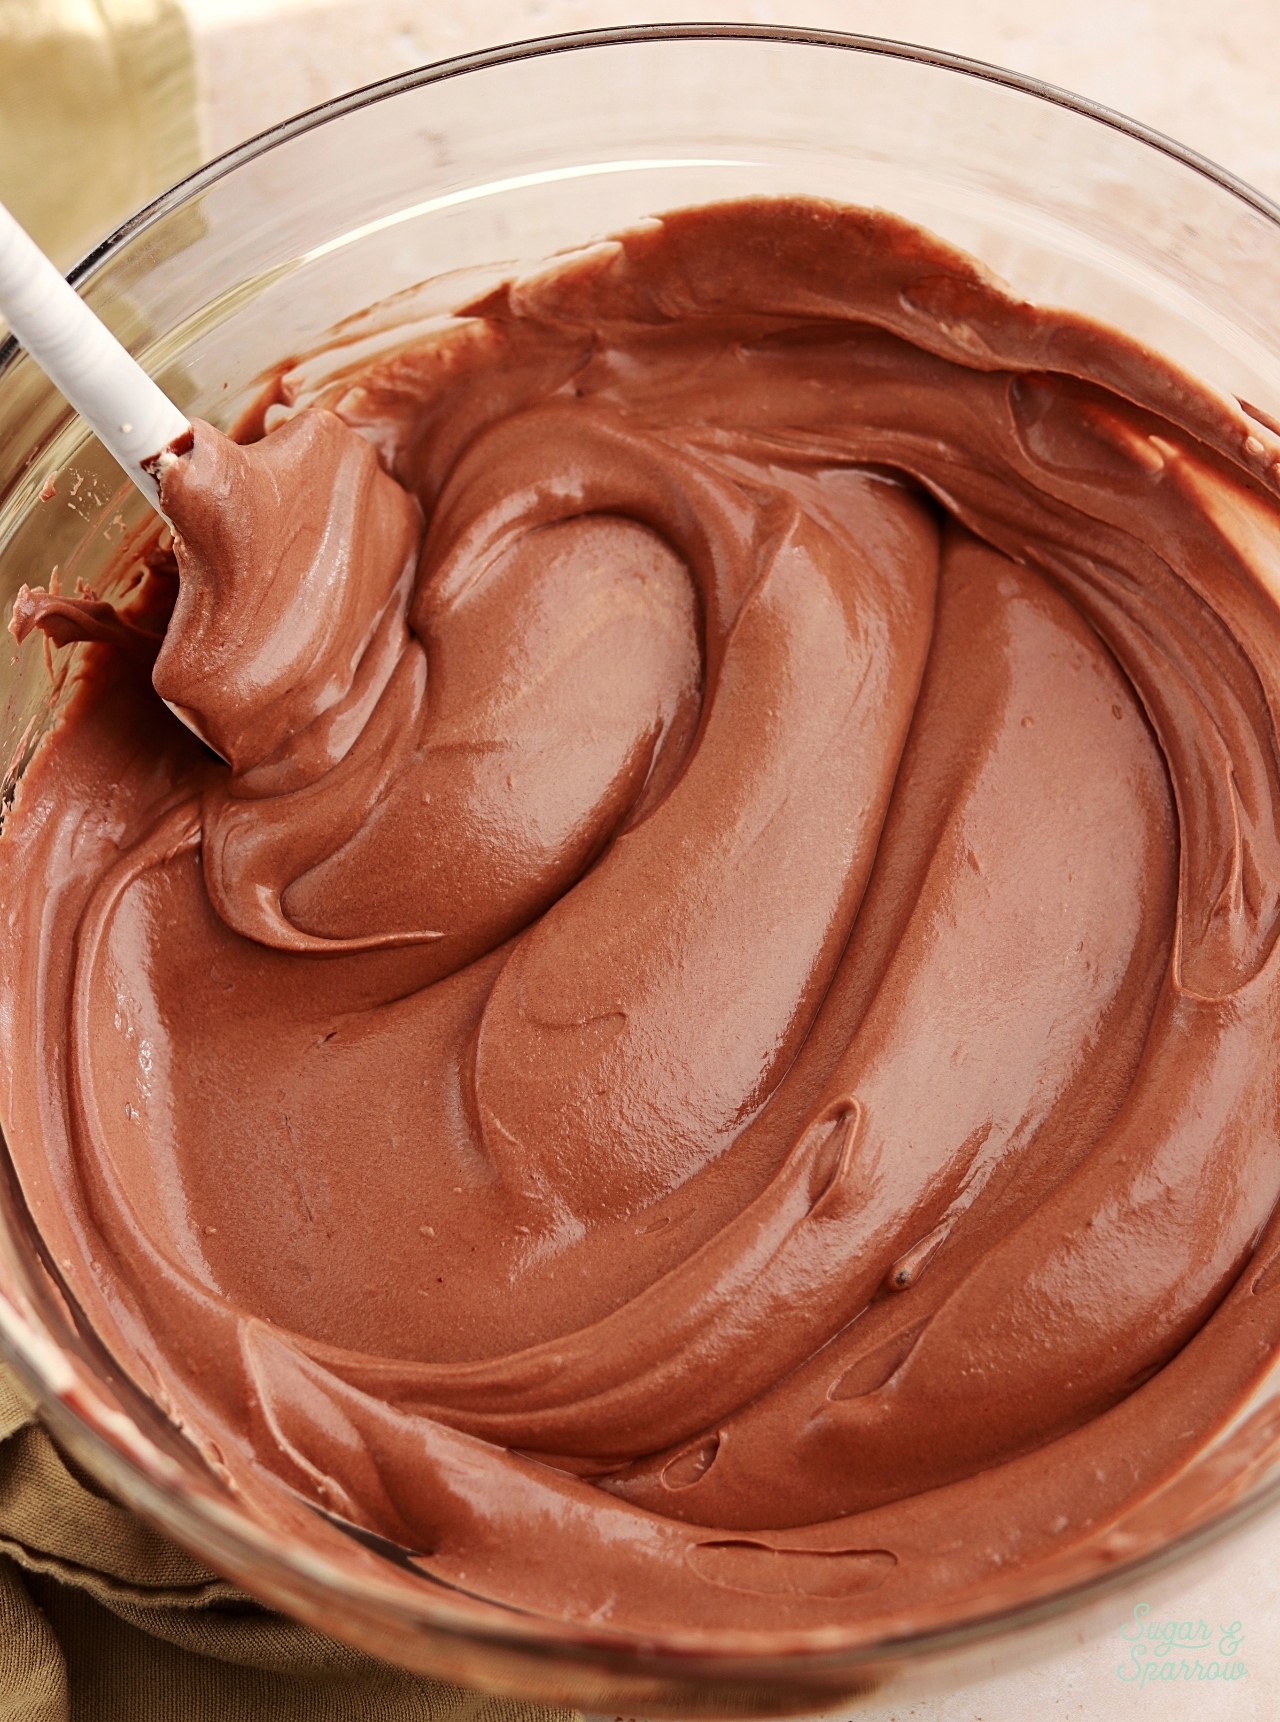
easy chocolate mousse recipe

Assembling the Chocolate Mousse Cake 

Now that you have your cake and mousse components, you’ll assemble them in the springform pan. You’ll wrap an acetate collar around the cake layer before adding the mousse on top and smoothing it down with an angled spatula. Then, place the whole thing in the refrigerator until it sets. This takes about 5-6 hours, but I like to assemble the chocolate mousse cake the night before I’m serving it just so I know I’m not cutting it too close. 
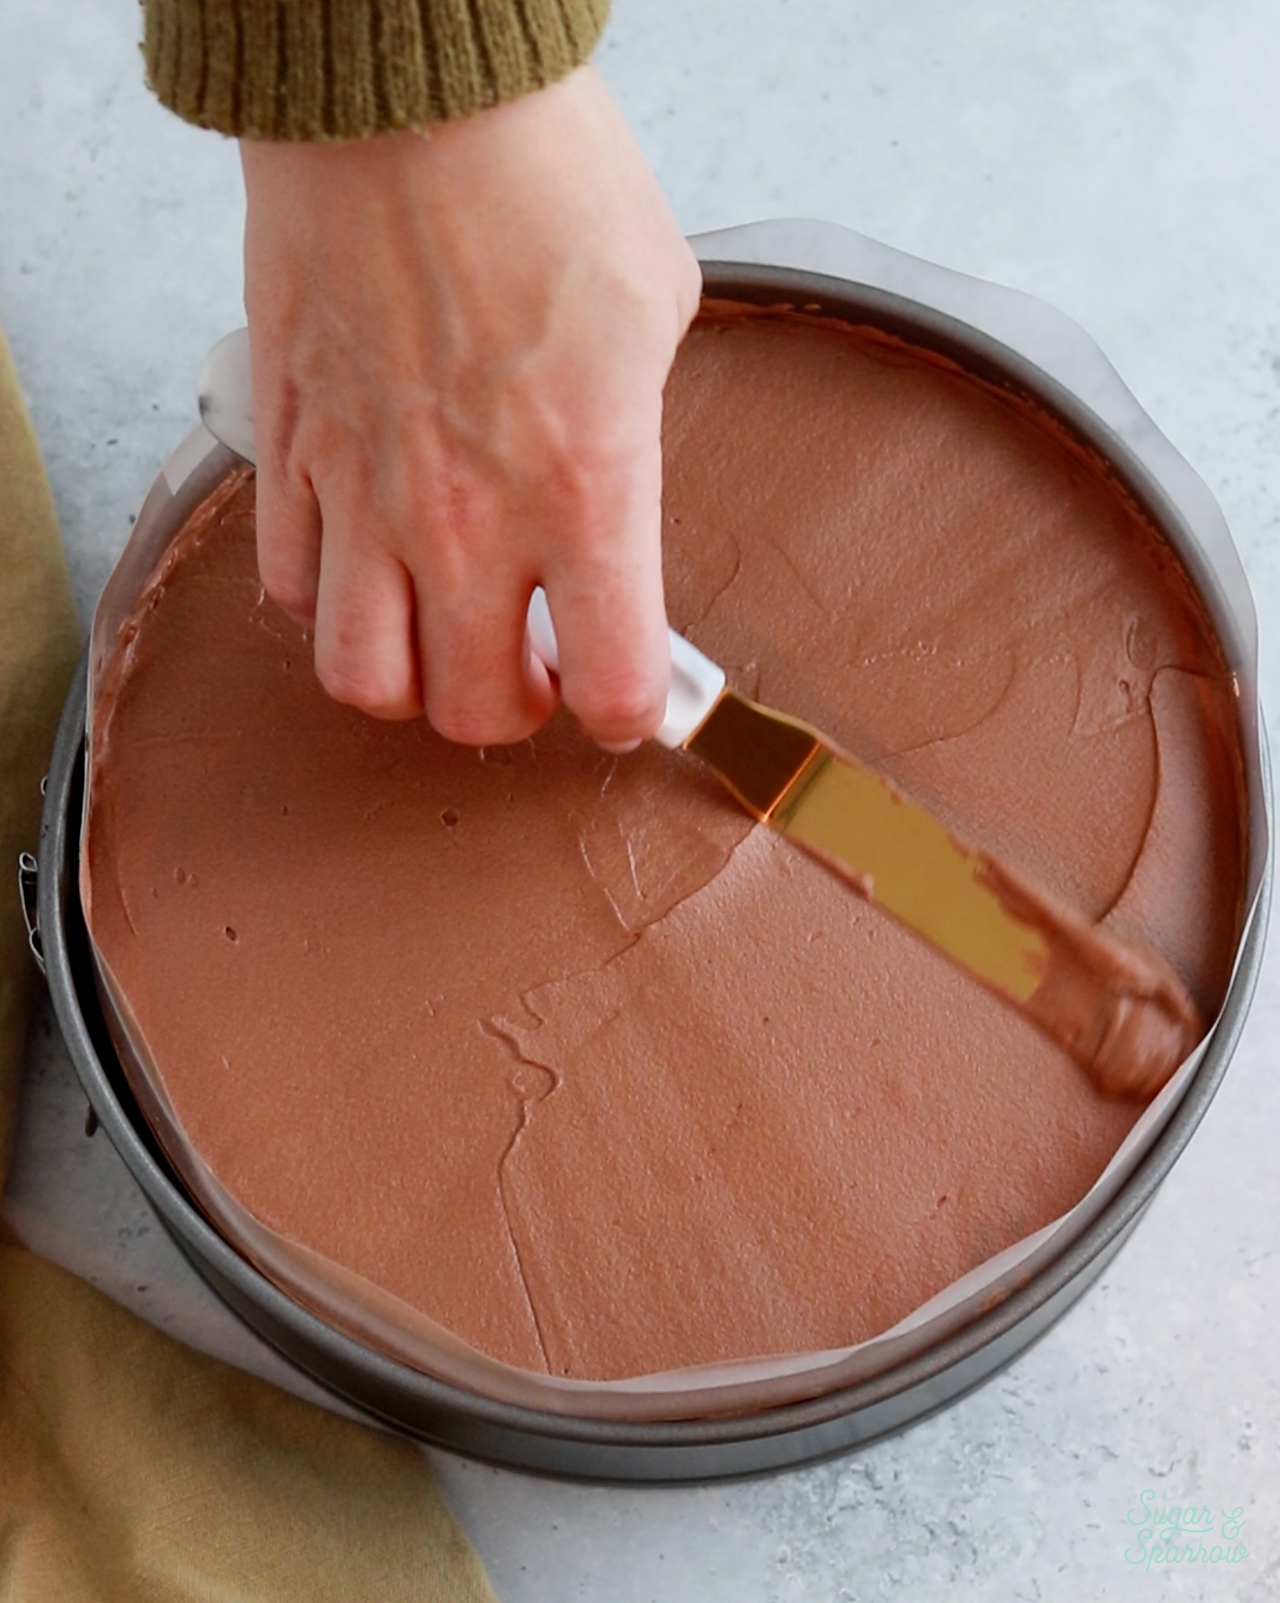
assembling a chocolate mousse cake in a springform pan with acetate collar

After the mousse cake is set it’s so satisfying to unwrap the acetate collar and see the layers!
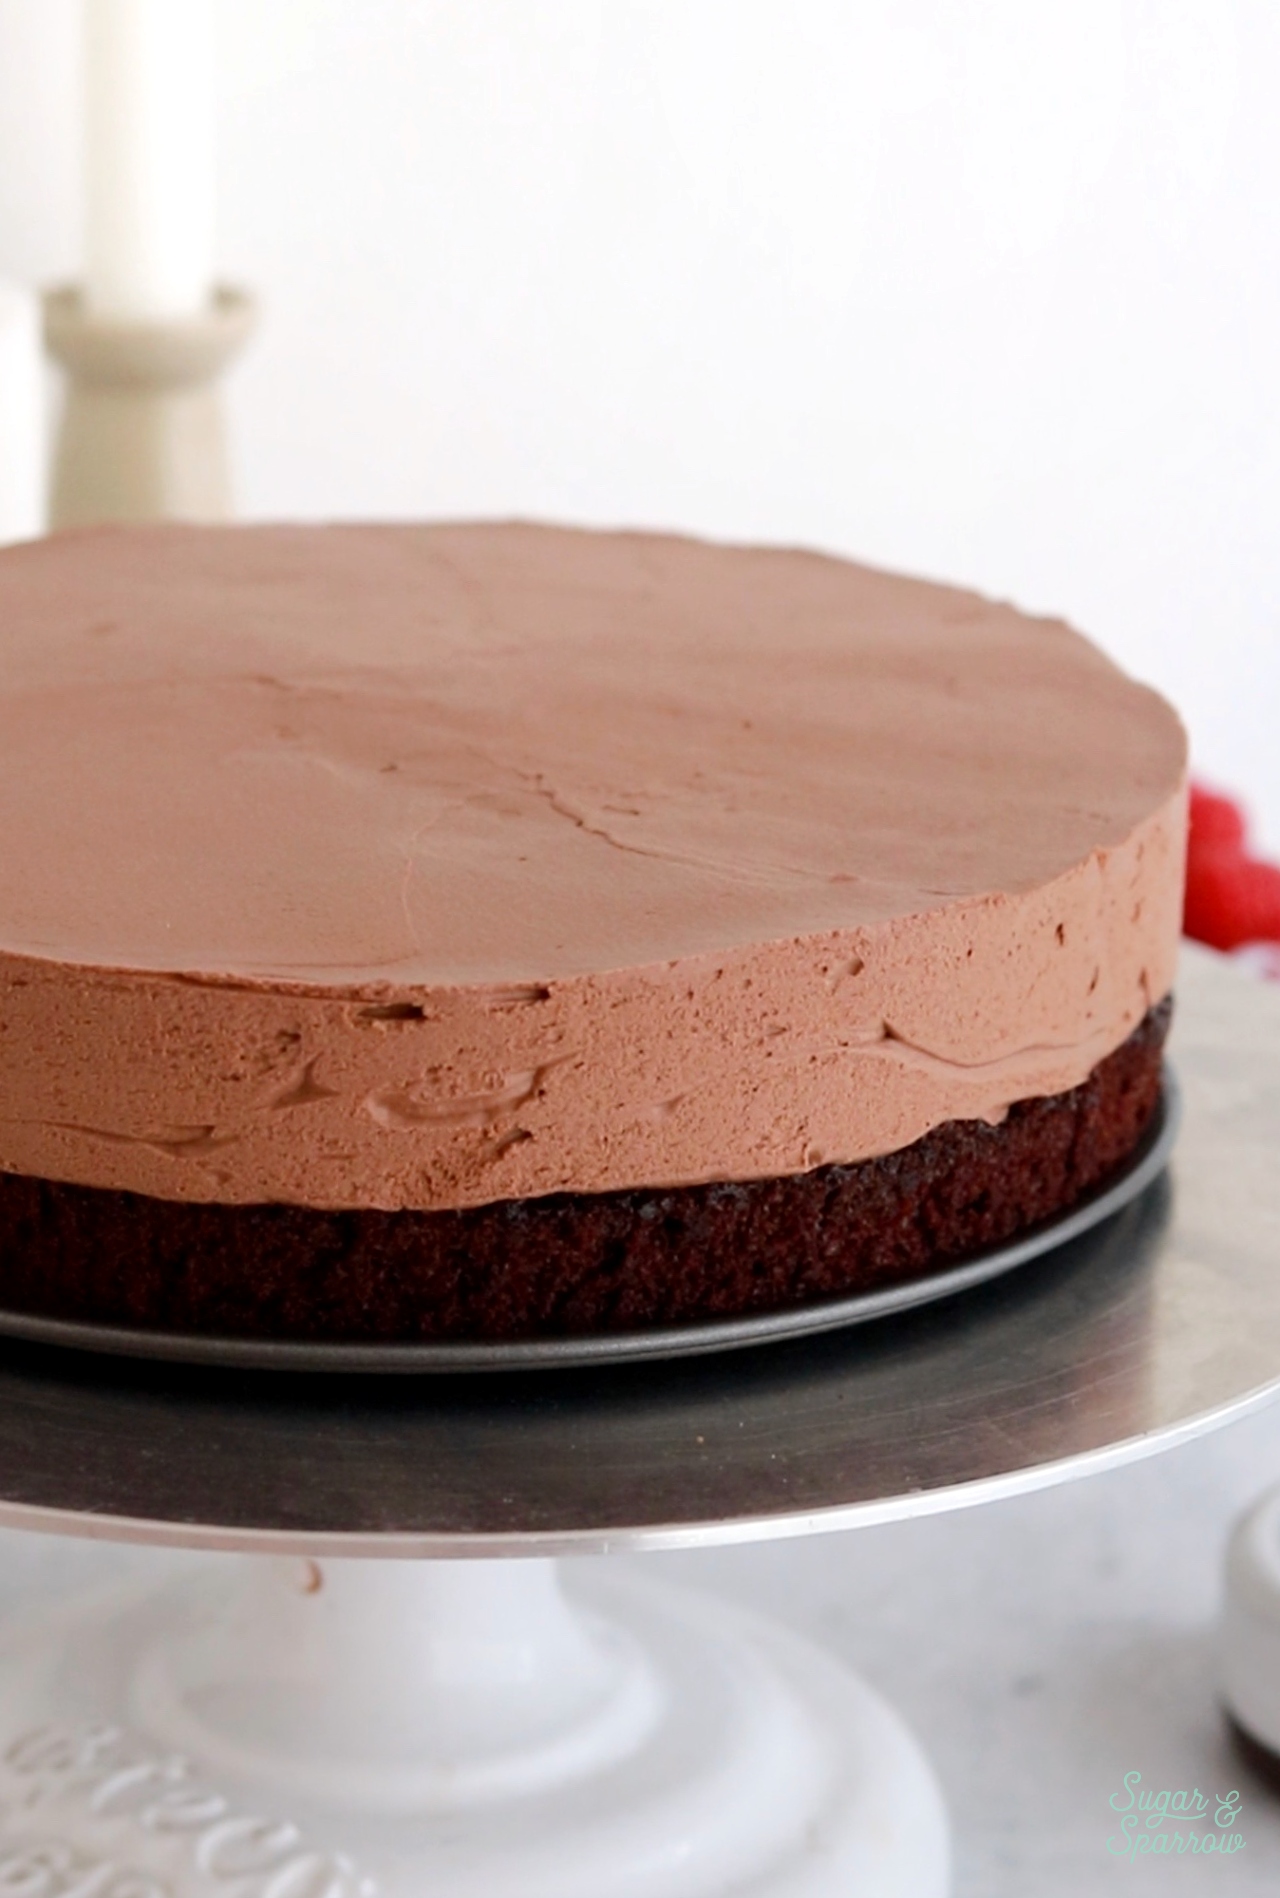
chocolate mousse cake layer

Chocolate Ganache + Finishing Touches  

The last chocolate component of this mousse cake is the chocolate ganache topping. It’s made exactly the same way you make the chocolate ganache for the mousse base, only this time we use a 1:1 ratio of chocolate to heavy whipping cream (aka ½ Cup semi-sweet chocolate chips + ½ Cup heavy whipping cream). This makes the ganache perfect pouring consistency. 

Once you make the chocolate ganache, it takes about 20 minutes for it to cool to room temperature before you can pour it on top of the chocolate mousse cake, which at this point should be fully set. I remove the springform collar from the pan to expose the beautiful mousse cake layers, then pour the ganache on top and spread it with an angled icing spatula until it drips over the sides. 
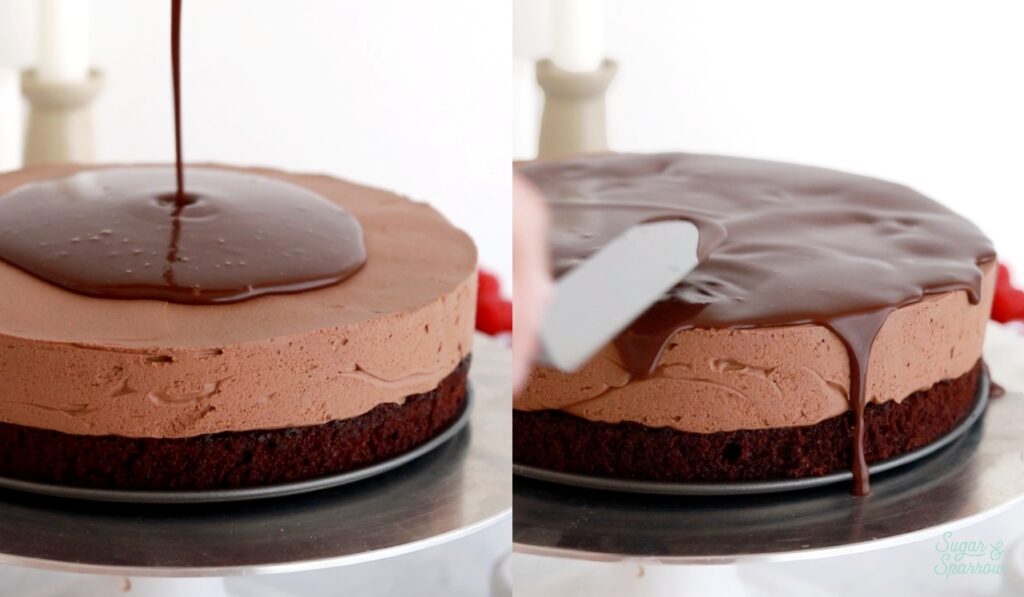
pouring chocolate ganache onto chocolate mousse cake

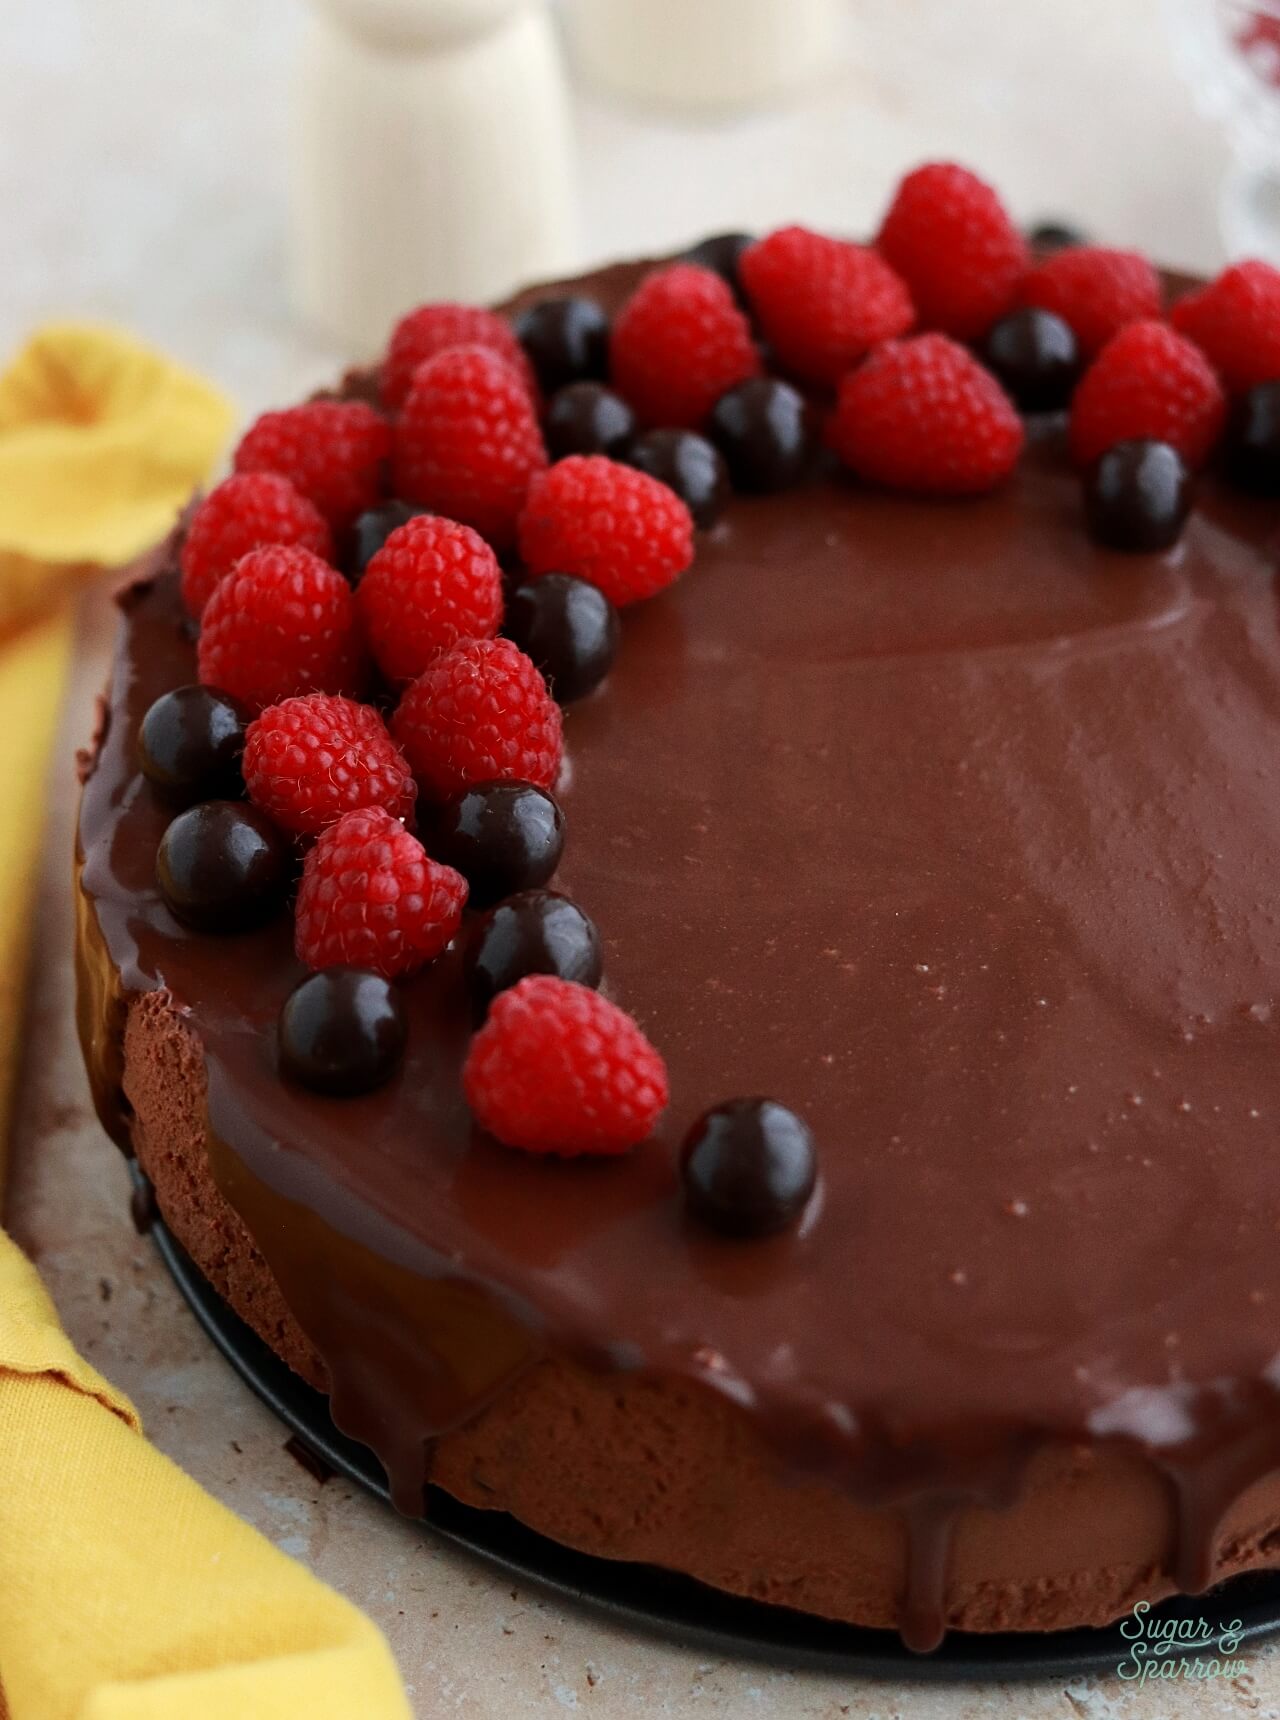
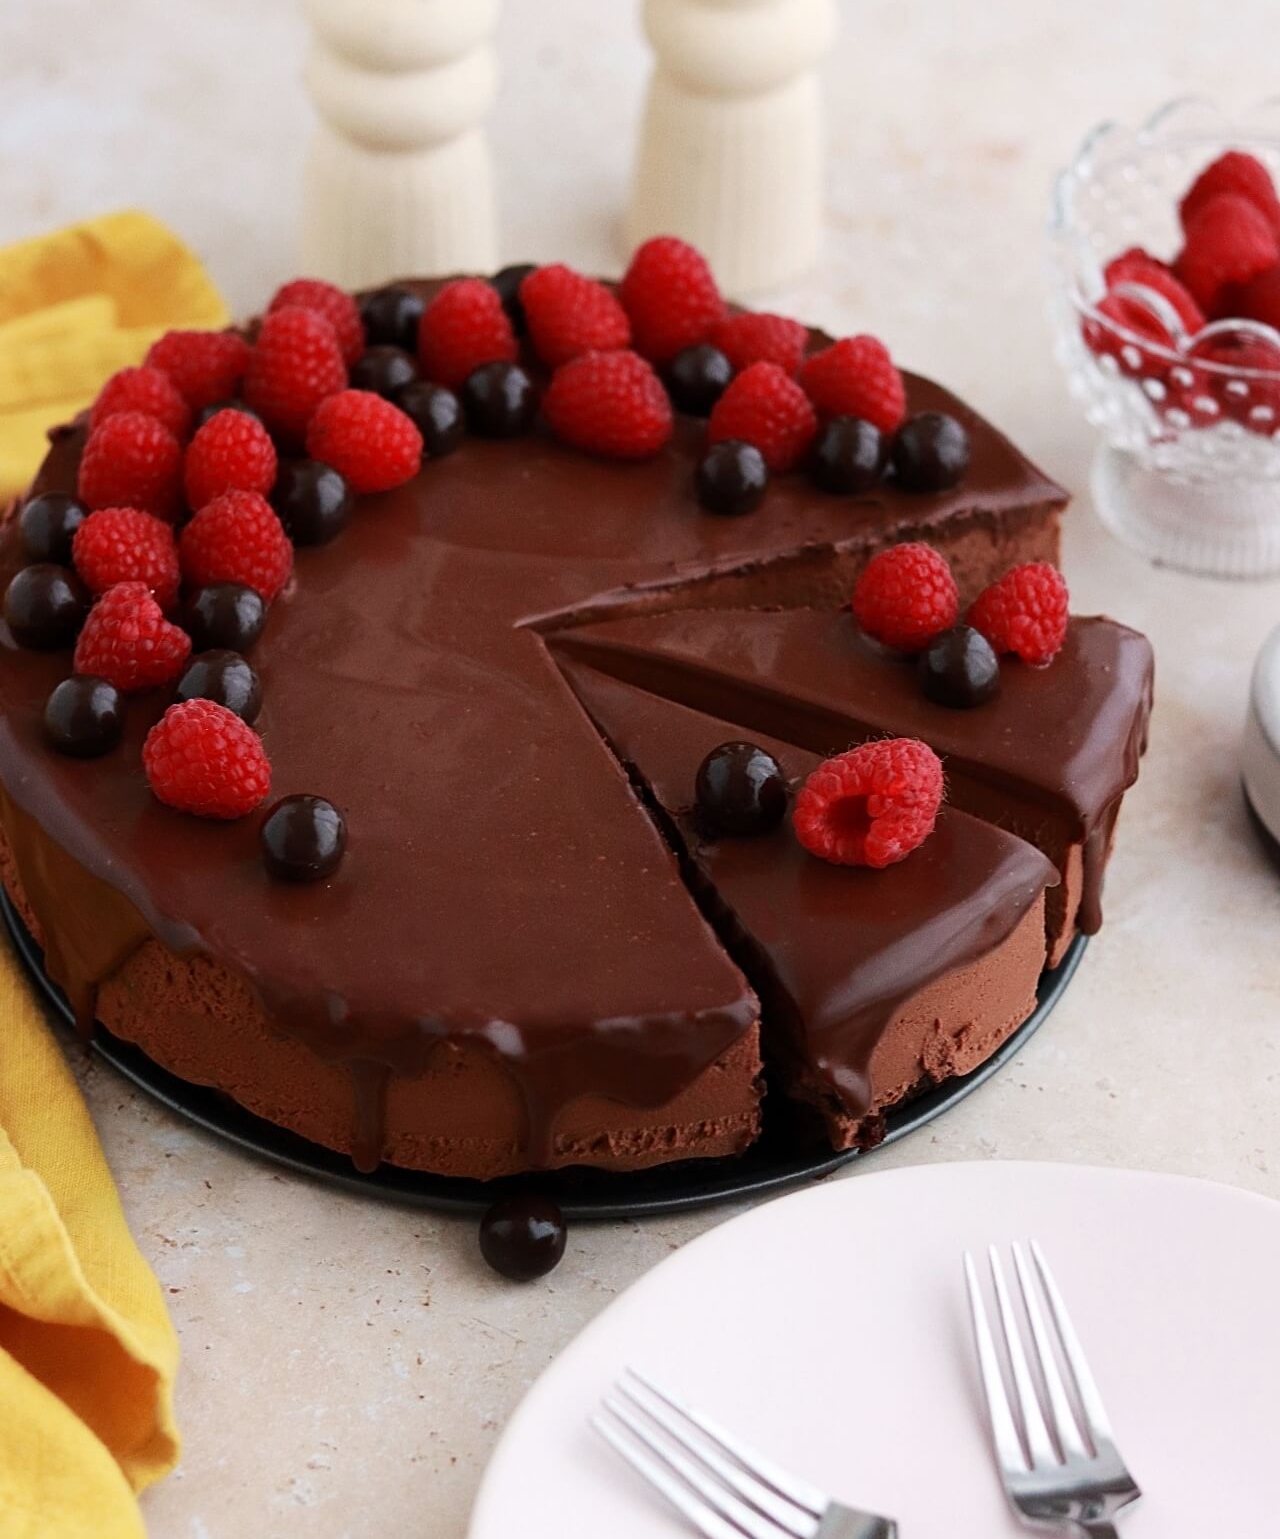
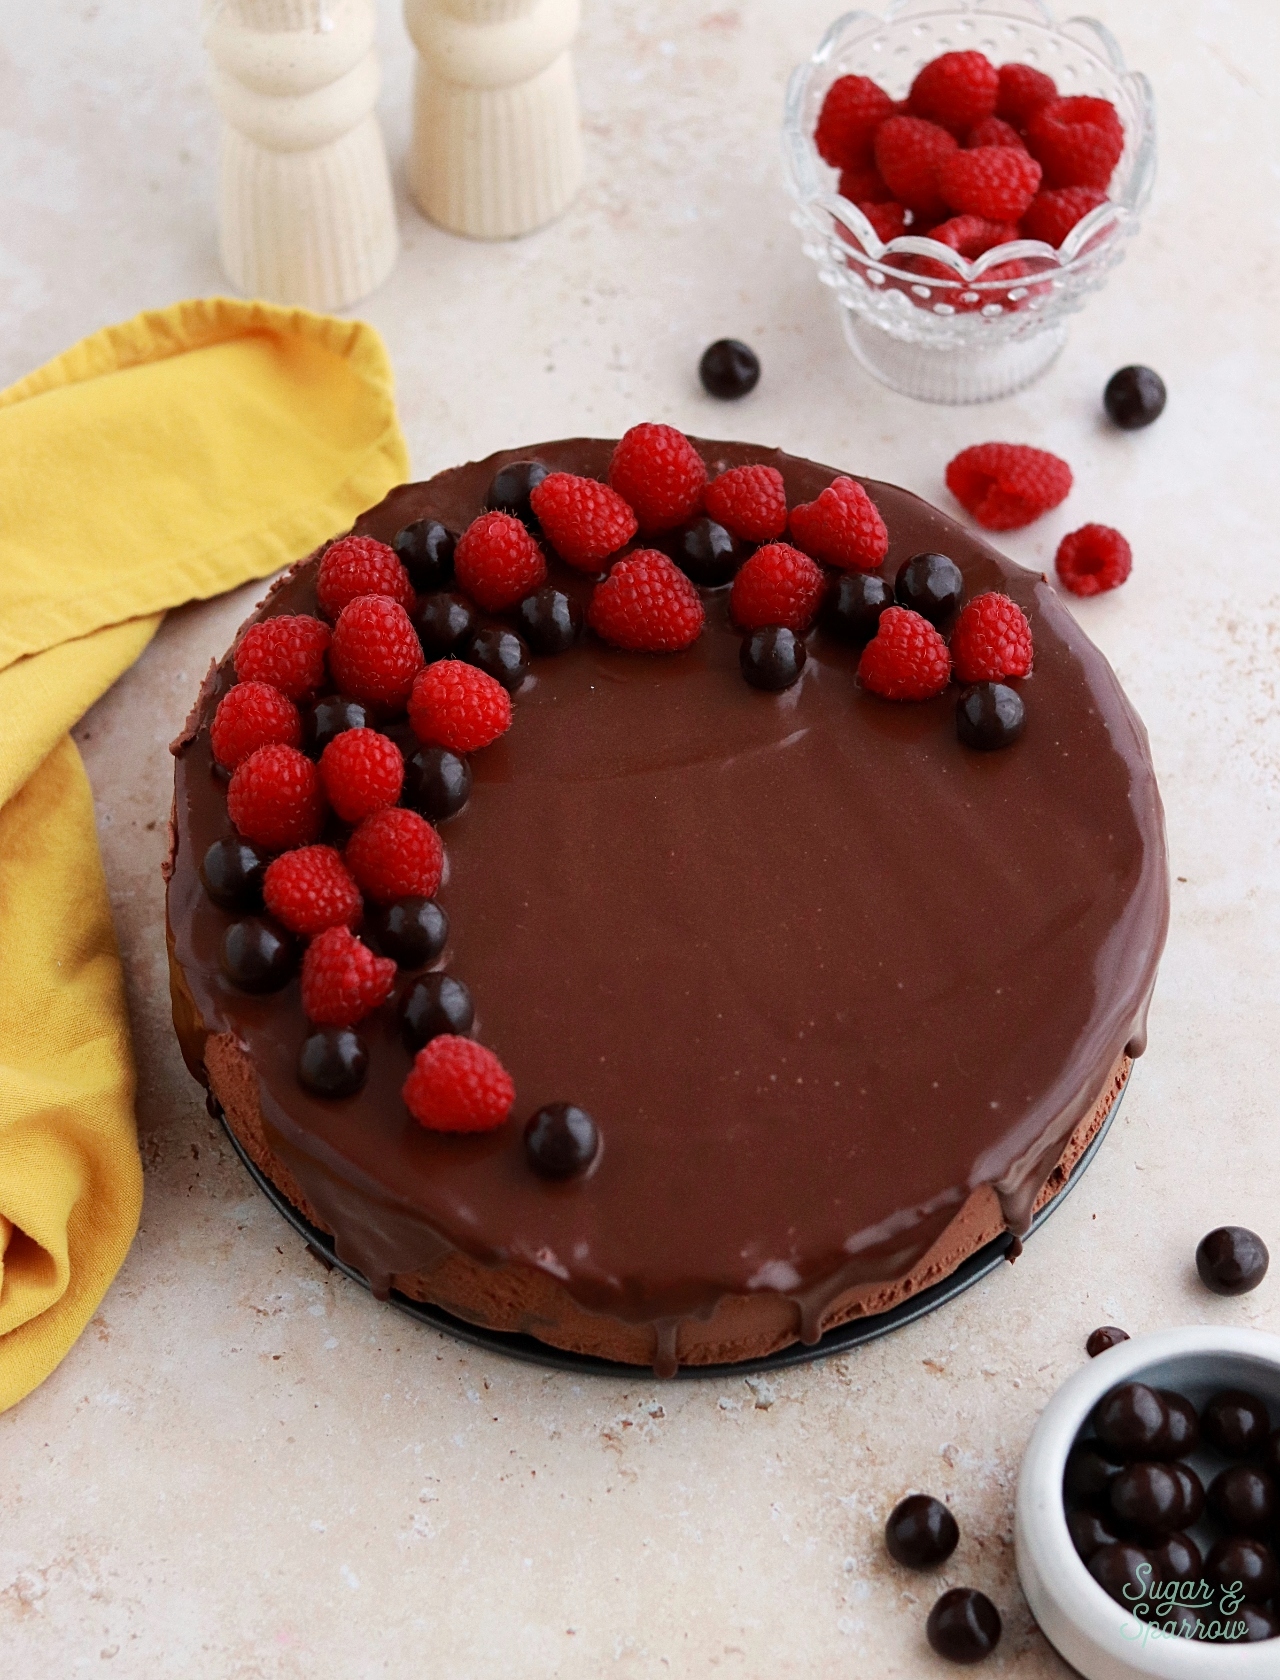
You can totally leave this chocolate mousse cake as-is and let those three beautiful layers of chocolate shine. I like to garnish the cake with fresh raspberries and chocolate covered espresso beans for a little extra pop of color and texture. It’s so pretty in a crescent shape, but feel free to get creative with how you decorate (or don’t decorate)! 
chocolate cake with chocolate mousse and chocolate ganache
chocolate mousse cake with chocolate ganache topping

Chocolate Mousse Cake Tips for Success 

The different components of this chocolate mousse cake are each easy to make, but there are a few things to keep in mind as you navigate this recipe:

  • Plan it out. There’s a fair amount of waiting in this recipe, which requires some planning. You’ll need to wait for the cake layer to come to room temperature, wait for the ganache base for the mousse to come to room temperature, wait for the entire mousse cake to set, then wait for the ganache topping to come to room temperature before adding the finishing touches. I recommend reading through the recipe and planning out the elements over the course of a couple days so you don’t feel rushed. 
  • Make your springform pan leak-proof. Since you’ll be baking the chocolate cake layer in the springform pan, it’s important to make sure it’s leak-proof. Otherwise the batter might leak out in the baking process which is frustrating and messy. If you have a leaky springform pan, one trick is to line the outside with aluminum foil (in addition to lining the inside with parchment). This will catch any batter that tries to escape. 
  • Level the chocolate cake layer. This isn’t a requirement, but it does make the final slice a little more aesthetically pleasing because all the layers will be so even. Also, it makes the cake layer more porous for the mousse to soak in a little, which makes it even more moist. 
  • Let the mousse cake set. In order for the chocolate mousse cake to demold perfectly, it’s important to wait at least 6 hours for it to set. This way it won’t budge when you remove the springform collar. 
  • Let the ganache topping cool. The ganache topping will thicken slightly as it cools, making it perfect for pouring over the mousse cake and gently dripping down the sides. This post has everything you need to know about topping a cake with ganache and it’s worth a read if you haven’t worked with ganache before. 
chocolate mousse cake recipe by sugar and sparrow
chocolate mousse cake

I’m so excited for you to make this chocolate mousse cake! Being a devoted chocolate lover myself, I think it’s one of the best desserts I’ve ever made. I hope you love it as much as I do!
easy chocolate mousse cake with raspberries

Easy Chocolate Mousse Cake

5 from 12 votes
Three exquisite layers of chocolate in one beautiful and easy dessert: rich and decadent chocolate cake topped with a generous layer of velvety chocolate mousse and shiny chocolate ganache. A chocolate lover's dream cake!
Print Recipe Pin Recipe
Prep Time:1 hour hr
Cook Time:50 minutes mins
Cooling Time:9 hours hrs 40 minutes mins
Total Time:11 hours hrs 30 minutes mins
Course: Dessert
Cuisine: American
Servings: 12 slices

Equipment

  • 9-inch springform pan
  • acetate collar

Ingredients

Chocolate Cake

  • 1 Cup (133g) all purpose flour
  • 3/4 Cup (150g) granulated sugar
  • 1/3 Cup (30g) unsweetened natural cocoa powder
  • 1 tsp baking soda
  • 1/2 tsp baking powder
  • 1/4 tsp salt
  • 1/4 Cup (60ml) vegetable oil
  • 1 large egg, room temperature
  • 1 tsp pure vanilla extract
  • 1/2 Cup (120ml) full-fat buttermilk*, room temperature DIY recipe in notes
  • 1/2 Cup (120ml) hot coffee or hot water

Easy Chocolate Mousse

  • 2 Cups (370g) semi-sweet chocolate chips
  • 2 1/3 Cups (560ml) heavy whipping cream, divided
  • 2 Tbsp powdered sugar
  • 2 tsp pure vanilla extract
  • 1 tsp instant coffee or espresso powder (optional)

Chocolate Ganache

  • 1/2 Cup (93g) semi-sweet chocolate chips
  • 1/2 Cup (120ml) heavy whipping cream

Garnishes (optional)

  • 3 Oz fresh raspberries
  • 2 Oz chocolate covered espresso beans

Instructions

Make the Chocolate Cake

  • Preheat the oven to 350ºF (177ºC) and prepare a 9-inch springform pan by spraying the sides with cooking spray and fitting the bottom with a parchment circle. I also like to line the outside of the pan with aluminum foil to ensure there is no leakage of cake batter, but if you're sure your springform pan is leak-proof you can skip the aluminum foil.
  • Place all of the dry ingredients into a large bowl and whisk to combine. Add the vegetable oil, eggs, vanilla, and buttermilk and whisk until uniform. Add the hot coffee (or hot water) in a slow stream, then whisk until smooth and combined. The batter will be very thin.
  • Pour into the prepared cake pan and bake for 25-30 minutes, until a toothpick inserted comes out clean. Cool completely before moving on to making the chocolate mousse.

Make the Easy Chocolate Mousse

  • Place the semi-sweet chocolate chips into a large glass or metal bowl and set aside.
  • Place 1 Cup (240ml) of the heavy whipping cream into a small saucepan set over medium-low heat. Whisk frequently until the cream begins to simmer around the edges, then pour it over the chocolate chips and whisk until it becomes a smooth ganache. Set aside until the ganache cools to room temperature, about 25 minutes. Wait until it is room temperature to move on to the next step.
  • In the bowl of your stand mixer fitted with the whisk attachment (or using a medium bowl and hand mixer), add the remaining 1 1/3 Cups (320ml) of heavy whipping cream, powdered sugar, vanilla, and instant coffee or espresso powder (if using). Mix at low speed until the ingredients are combined, then turn the mixer to high and beat until stiff peaks form, about 4 minutes.
  • Add the whipped cream mixture to the cooled ganache and fold gently with a rubber spatula until there are no streaks.

Assemble the Chocolate Mousse Cake

  • Remove the cooled chocolate cake layer from the springform pan. Using a serrated knife or cake leveler, level the top of the cake to create an even layer. Gently peel off the parchment paper on the bottom of the cake layer, then place it back into the springform pan.
  • Wrap an acetate cake collar around the cake layer and secure it with a piece of scotch tape. This will help keep the mousse in place as it sets.
  • Add the chocolate mousse on top of the cake layer and smooth it down with an angled spatula until it reaches the edges of the acetate and has an even surface. Refrigerate for 6 hours, or overnight.

Make the Chocolate Ganache

  • Wait until the chocolate mousse cake is set before making the chocolate ganache unless you're making it ahead of time (instructions for making ahead and reheating are in the notes section of this recipe).
  • Place 1/2 Cup (93g) of semi-sweet chocolate chips into a medium glass or metal bowl and set aside.
  • Add 1/2 Cup (120ml) of heavy whipping cream into a small saucepan set over medium heat. Bring to a simmer, whisking frequently, then pour it over the bowl of chocolate and whisk until uniform and smooth. Allow the chocolate ganache to cool to room temperature, about 20 minutes.

Add the Finishing Touches

  • Once the mousse cake is set, unclip the springform collar and remove it. Then, unwrap the acetate from the sides of the mousse cake.
  • Pour the cooled chocolate ganache over the top of the cold chocolate mousse cake and spread it with an angled spatula until it runs over the edges. To create the look pictured, garnish with fresh raspberries and chocolate covered espresso beans in a crescent design. Serve immediately, or place back into the refrigerator until you're ready to serve.

Notes

*DIY Buttermilk recipe: add 2 tsp of white vinegar to a jar and top it with 1/2 Cup of whole milk. Stir and let sit for 15 minutes before using in the recipe. 
Acetate Collar: If you don’t have access to an acetate collar, you can make one using a strip of parchment paper. Use the same technique to secure it around the cake layer.  
Make Ahead Tips: 
  1. The chocolate cake layer can be made ahead and stored at room temperature, covered tightly in plastic wrap, for up to two days. Alternatively, you can cover with plastic wrap and store in the freezer for up to two months before thawing to room temperature. 
  2. The chocolate ganache can be made ahead and stored in the refrigerator in an airtight container for up to two weeks. When you’re ready to use it as a drip, microwave it in 10 second increments, stirring after every interval until your ganache is room temperature and uniform in consistency.
  3. The assembled chocolate mousse cake can be stored in the refrigerator in its springform pan, the top covered with plastic wrap or aluminum foil, for up to five days. 

By: Whitney · In: Cake, Featured, Recipes, Seasonal, Valentines · Tagged: chocolate ganache, chocolate mousse

you’ll also love

oreo cookies and cream cakeOreo Layer Cake Recipe
whipped chocolate ganache for cakesWhipped Chocolate Ganache
funfetti birthday cake recipeDouble Funfetti Birthday Cake

Join the List

Stay up to date & receive the latest posts in your inbox.

Reader Interactions

Comments

  1. Lydia Hong Papson says

    May 18, 2026 at 11:47 am

    Hi Whitney, can I lower the semi chocolate chips to 1 1/2 cup instead of 2 cups? Thank you for your response.

    Reply
    • Whitney says

      May 18, 2026 at 11:54 am

      Hi Lydia! Lowering the chocolate amount will throw off the consistency of the mousse. If you need to lower the chocolate chip amount to 1 1/2 Cups you can make a reduced batch of the mousse and lower the rest of the ingredients to keep the consistency right. You’ll end up with slightly less of the mousse but the texture will still be the way it’s intended to be (velvety and stable). The reduced measurements would be:
      1 1/2 Cups chocolate chips
      1 3/4 Cups heavy whipping cream
      1 1/2 Tbsp powdered sugar
      1 1/2 tsp vanilla
      3/4 tsp instant coffee (if using)

      Reply
  2. Kathy says

    April 29, 2026 at 11:02 am

    I need to feed about 20, so can this be made in a 9X13 pan. I realize it would not look pretty, but could it work, and if so, how would I adjust the recipe?

    Reply
    • Whitney says

      April 29, 2026 at 9:22 pm

      Hi Kathy! It should work if you double everything! Bake a double batch of the cake recipe in a 9×13 pan (bake at 325F for 30-35 minutes), then top with a double batch of chocolate mousse followed by a double batch of the chocolate ganache. Hope that helps!

      Reply
  3. Ceri says

    April 24, 2026 at 3:34 am

    5 stars
    It is easy and it looks great. Tastes amazing too! Thank you!

    Reply
  4. Lisa says

    April 4, 2026 at 10:37 am

    I hope you see my question! I know it’s a busy Easter weekend. First, I just have to say you are a real inspiration!!! Your Cadbury Egg cake is BEAUTIFUL (I love those eggs btw and look forward to seeing them on the shelves every March!). And I’m looking forward to baking your Cranberry/Orange Cske ( I’m not sure of exact name -SORRY!!)looks stunning, I’m sure taste just as good or better!

    Today I have a question about your Chocolate Mousse Cake. I’d like to make this today, but I only have an 8 inch springform pan. I’m thinking it will work, but I wanted your opinion, AND how long is the bake time for an 8 inch? How far should I pour the batter into the pan? I was going to use extra batter for cupcakes .

    Happy Easter & my fingers are crossed you’ll see my questions.

    Thanks again!

    Reply
    • Whitney says

      April 5, 2026 at 9:12 pm

      Hi Lisa! I hope I get this to you in time. You can bake this in an 8-inch pan, just fill it about 1/3 full, check for doneness around the 25 minute mark, and use the rest for cupcakes (same oven temp, bake for 14-18 min). Enjoy! And Happy Easter!

      Reply
  5. Cath says

    March 25, 2026 at 2:24 am

    I’ve made this once and it was amazing! Could I add a layer of white chocolate mousse to make it more like tuxedo cake? Do you think it would stand up to an extra layer? Thank you!

    Reply
    • Whitney says

      March 25, 2026 at 7:16 am

      Hi Cath! That sounds amazing!! I think it would totally stand up to the extra layer of mousse. I haven’t tried white chocolate mousse myself, but it should be a similar process to the chocolate mousse but with different ratios of cream and white chocolate. I’d try the white chocolate mousse from this recipe if you don’t already have one in mind: https://cakebycourtney.com/rich-and-decadent-tuxedo-cake-with-white-chocolate-mousse/#recipe

      Reply
  6. Steve says

    March 16, 2026 at 9:18 pm

    5 stars
    My spouse made this with love for my birthday, and it came out perfect! Absolutely winner of Best Cake Ever Award!

    Reply
    • Whitney says

      March 17, 2026 at 9:45 am

      Yay, Steve! I’m so happy to hear that!!

      Reply
  7. Abby says

    February 2, 2026 at 3:11 pm

    5 stars
    THANK YOU SO MUCH, WHITNEY!!
    I made this recipe twice; once for my hospitality culminating assignment and again for a family member’s birthday. Both times it turned out stellar! I am an intermediate baker, and this was the easiest and best-tasting cake I’ve ever made–the mousse is absolutely stunning, and both it and the ganache are so easy to make! Everyone said it tasted store-bought or even professional. You’re genuinely amazing, and I, as well as everyone who tried the cake, can’t thank you enough. I plan to hopefully make 9 more of your cakes by 2027!

    Reply
    • Whitney says

      February 3, 2026 at 10:22 am

      That makes me so happy, Abby! I’m glad this recipe was such a hit and I’m cheering you on in your baking goals 🙂

      Reply
  8. Shasha 85 says

    February 2, 2026 at 12:05 pm

    Hi, can I skip the egg? As I need to make eggless chocolate cake?

    Reply
    • Whitney says

      February 3, 2026 at 10:23 am

      Hi Sasha! If you want to make an eggless chocolate cake I’d recommend halving this recipe for the cake layer: https://sugarandsparrow.com/eggless-chocolate-cake-recipe

      Reply
  9. Jennifer says

    January 21, 2026 at 8:05 pm

    Made this for my boyfriend for his birthday today and he can’t get over how amazing it is!!! It turned out wonderfully— I give you all the credit. Thank you so much for this fantastic recipe ❤️

    Reply
    • Whitney says

      January 22, 2026 at 10:57 am

      Aw yay, Jennifer! So happy it was a hit!

      Reply
  10. Ru says

    December 29, 2025 at 12:42 am

    Hi, thank you for this recipe! I am planning to make a dessert for a NYE dinner party. I have a big unopened box of shortbread (high quality) from Christmas. Would the mousse and ganache layers work if i made a shortbread biscuit base, akin to a cheesecake base, and used the rest of your recipe? I was planning to crush the shortbread and mix with melted butter then press into the tin base as a no bake alternative to use up the biscuits, speed up the time required and avoid food waste. any idea if this would work? Thanks so much!

    Reply
    • Whitney says

      December 29, 2025 at 8:37 pm

      Hi Ru! A shortbread base sounds amazing for this mousse cake! And making the shortbread crust the way you described will be perfect. Happy New Year!

      Reply
  11. Nicole says

    December 27, 2025 at 2:02 pm

    Loved this recipe. Could I add more sugar? My son liked it but thought it would be more sweet. So I was thinking about adding more sugar but I don’t know how that would affect the recipe. Thank you for your advice.

    Reply
    • Whitney says

      December 27, 2025 at 9:39 pm

      Hi Nicole! I’m so happy you love this recipe! I haven’t tried it with more sugar, but you should be able to add 1/4 Cup extra and it shouldn’t affect the texture. Hope that helps!

      Reply
  12. Wathanee says

    December 10, 2025 at 6:48 pm

    Hello. How much instant coffee do you need for 120 ml hot coffee ? Thank you

    Reply
    • Whitney says

      December 10, 2025 at 10:01 pm

      Hi Wathanee! To make the coffee for this recipe with instant coffee, you’ll want to add 1/2 tsp of instant coffee to 1/2 Cup (120ml) of hot water. Enjoy!

      Reply
« Older Comments

Leave a Reply Cancel reply

Your email address will not be published. Required fields are marked *

Recipe Rating


Next Post >

Red Velvet Cupcakes with Cream Cheese Frosting

Primary Sidebar

Welcome to Sugar & Sparrow

Welcome to Sugar & Sparrow

Helping you whip up pretty desserts with confidence and creativity. And hopefully sharing a few laughs with you along the way!

Learn More

Connect

let’s bake!

Get my very best recipes, baking tips, and decorating tutorials sent to your inbox

Featured Posts

dia de los muertos cupcakes

Dia De Los Muertos Spiderweb Cupcakes

lemon blueberry layer cake with cream cheese frosting

Lemon Blueberry Cake with Lemon Cream Cheese Buttercream

fault line cake tutorial

Sprinkle Fault Line Cake Tutorial

Search

Archives

Follow Along

@sugarandsparrowco

Everything I baked in June☀️I was so motivated to Everything I baked in June☀️I was so motivated to bake this month (summer flavors had me INSPIRED!) and could barely keep up with myself but I ended up publishing 7 new recipes on my website + finalized 5 more that will be up ASAP! 

Comment “JUNE” to get all the recipes that are available now:

-Cookie Dough Ice Cream Cake
-Rocky Road Cupcakes (w/ homemade marshmallow creme filling!)
-Blackberry Lavender Cake
-Homemade Blackberry Filling
-Whipped Cream Cheese Frosting
-Strawberry Shortcake Cookie Bars
-Berries & Cream Sheet Cake

https://sugarandsparrow.com/everything-i-baked-in-june
 
#cake #bakersofinstagram #baking #bakinglove #cakedecorating
WHIPPED CREAM CHEESE FROSTING ☁️ this easy 4-ingre WHIPPED CREAM CHEESE FROSTING ☁️ this easy 4-ingredient whipped cream frosting is deliciously light, comes together SO easily, and is stabilized with cream cheese to make it the perfect thick consistency for filling and frosting cakes and cupcakes!! It’s so good with my strawberry shortcake sheet cake and berries & cream cake and I have a feeling I’m going to be whipping it up for many more summer cakes😍

Full recipe with cake pairing suggestions at https://sugarandsparrow.com/whipped-cream-cheese-frosting/ 

INGREDIENTS 
1 Cup (8oz, 226g) full-fat brick-style cream cheese, cold
1 Cup (120g) powdered sugar
1 tsp pure vanilla extract
2 1/2 Cups (600ml) heavy whipping cream, cold

INSTRUCTIONS
1. Chill the bowl of your stand mixer (or the large bowl you’ll be using with your hand mixer) into the refrigerator for 20 minutes.
2. Into the cold mixing bowl, add the cream cheese and beat on medium speed with the whisk attachment until creamy, 2 min. Add the powdered sugar and mix on low speed until mostly incorporated, then turn the mixer to medium-high speed and mix for 1 min.
3. Add the vanilla extract, then turn the mixer to medium-high speed and slowly pour in the heavy whipping cream (down the side of the bowl so it doesn’t fly everywhere). Once all the cream is added, continue mixing on medium-high for just about 30 seconds longer, keeping a close eye on the mixing bowl to watch it thicken. It should come together into a thick, silky frosting consistency at this point, where you can dip the whisk into the frosting and it holds a slight peak when you hold it upright.
4. Use the frosting immediately to decorate cakes and/or cupcakes for best results!

#whippedcreamfrosting #creamcheesefrosting #cakedecorating #whippedcream #frosting
TOP 10 4TH OF JULY DESSERTS 🎆 These are just a few TOP 10 4TH OF JULY DESSERTS 🎆 These are just a few of my favorite summer dessert recipes that will disappear at any Fourth of July celebration.

Comment “JULY” and I’ll send you all 20+ of my favorite 4th of July dessert ideas – naturally red white and blue desserts like my berries and cream cake, easy no-bake desserts, no-churn ice cream, strawberry shortcake inspired recipes, and all the treats that will go FAST at any barbecue.

https://sugarandsparrow.com/4th-of-july-desserts/

#fourthofjuly #4thofjuly #summerdessert #partycake #dessertideas
STRAWBERRY SHORTCAKE COOKIE BARS 🍓my hot take: str STRAWBERRY SHORTCAKE COOKIE BARS 🍓my hot take: strawberry shortcake toppings on a buttery, soft sugar cookie base is WAY BETTER than traditional strawberry shortcake. I topped my favorite sugar cookie bar recipe with silky whipped cream cheese frosting + homemade strawberry sauce and now I’m ruined 😵

Full recipe is linked in my bio + at https://sugarandsparrow.com/strawberry-shortcake-cookie-bars/ 

SOFT SUGAR COOKIE BARS
2 Cups + 2 Tbsp (283g) all purpose flour
1 tsp baking powder
1/2 tsp baking soda
1/2 tsp salt
3/4 Cup (170g) unsalted butter, room temp
1 Cup (200g) granulated sugar
1 large egg
1 large egg yolk
1 1/2 tsp pure vanilla extract

1. Preheat the oven to 350ºF (177ºC). Grease and line an 8-inch square baking pan with parchment paper, leaving a slight overhang for easy release.
2. Whisk together the flour, baking powder, baking soda, and salt. Set aside.
3. Using a stand mixer with the paddle attachment (or hand mixer) cream together the butter and sugar on high speed until pale and fluffy, 2-3 min.
4. Turn the mixer to medium and add the egg, egg yolk, and vanilla. Mix until combined, then add the flour mixture and mix on low speed until a uniform cookie dough forms.
5. Press the cookie dough into the prepared pan in an even layer, all the way to the edges. Bake for 18-20 minutes, until the edges are just starting to brown. 
6. Cool the sugar cookie bars in the pan for 30 minutes, then transfer to a wire rack to cool completely. Top with whipped cream cheese frosting and strawberry sauce (full recipe linked in my bio!)

#strawberryshortcake #strawberries #whippedcreamfrosting #cookiebars #sugarcookies
BLACK FOREST CAKE 🍒 this is my favorite thing to m BLACK FOREST CAKE 🍒 this is my favorite thing to make during cherry season! My version is decadent chocolate cake soaked with homemade cherry syrup, fresh cherry filling, and whipped cream frosting. Top it with a chocolate ganache drip if you want to go the extra mile! 

Full recipe + decorating tutorial is linked in my bio + at https://sugarandsparrow.com/black-forest-cake-recipe/

PS I’m working on a sheet cake version of this recipe that’s even easier! Stay tuned.

#blackforestcake #cherrycake #chocolatecake #cherries #cakedecorating

Footer

On the Blog

  • Cake Basics
  • Recipes
  • Tutorials

Info

  • About
  • Privacy Policy & Disclosure

stay in the know

Copyright © 2026 · Theme by Sugar & Sparrow