• Cake
  • Frosting
  • YouTube
  • My Favorite Tools
  • Nav Social Icons

  • Skip to primary navigation
  • Skip to main content
  • Skip to primary sidebar
  • Skip to footer
  • Recipes
    • Cake
    • Cupcakes
    • Frosting
    • Ice Cream
    • Vegan
  • Cake Basics
  • Tutorials
  • Blog
  • About
  • Mobile Menu Widgets

    Connect

    Search

Sugar & Sparrow logo in script font

Sugar & Sparrow

Lifestyle and Cake from Portland Oregon

  • Cake Basics
  • Recipes
    • Cake
    • Cupcakes
    • Cookies & Bars
    • Filling
    • Frosting
    • Ice Cream
    • No-Bake
    • Small Batch
    • Vegan
  • Tutorials
  • Book
  • Blog
  • About

Cadbury Mini Egg Ganache

April 8, 2025 · In: Featured, Filling, Recipes, Seasonal, Spring

This Cadbury Mini Egg ganache is smooth and creamy with rich chocolatey flavor and little bits of candy shell throughout. It’s thick enough to use as a filling for cakes, cupcakes, tarts, and macarons. It’s one of the layers in my Cadbury Mini Egg cake and I think it’s so delicious and easy to make that it deserves its very own recipe post. Enjoy! 

cadbury mini egg cake filling

How to Make Cadbury Mini Egg Ganache

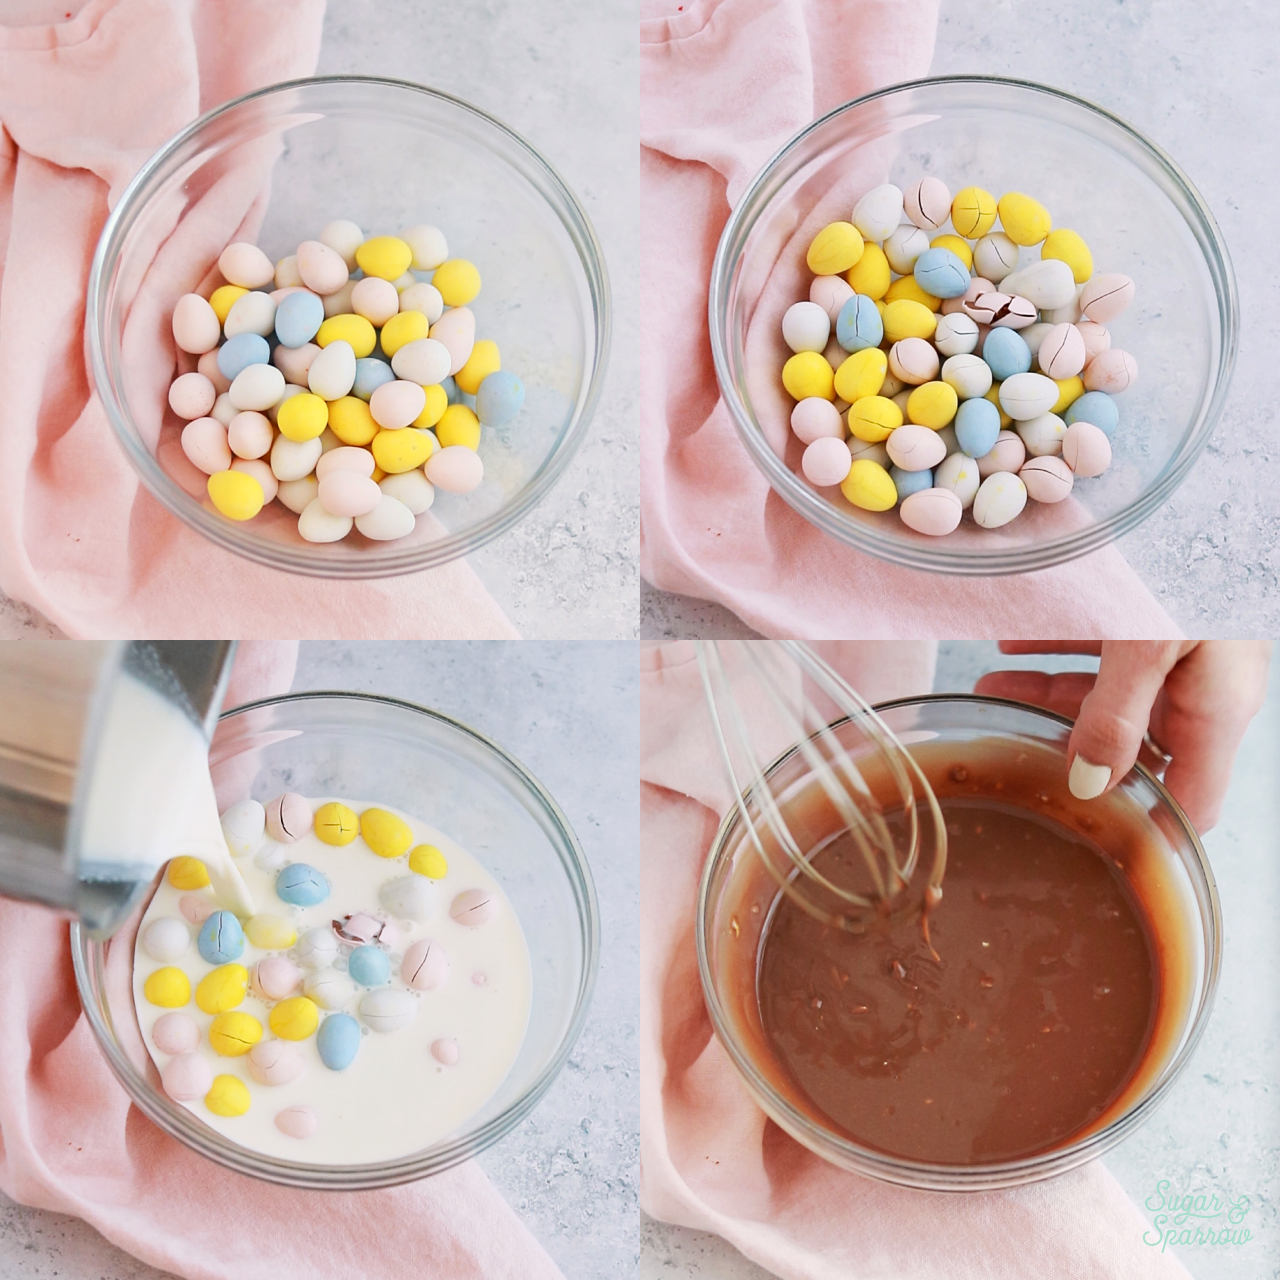
This delicious ganache is made with just two ingredients: Cadbury Mini Eggs and heavy whipping cream (or double cream). Just like a standard ganache, the cream is heated to a simmer before pouring over the chocolate and whisking until a uniform ganache is created. The only difference here is that the chocolate has a candy shell. The trick to getting these ingredients to combine is to gently microwave the Cadbury Mini Eggs until the shells crack, which helps soften the chocolate beneath and allows the shell to break into small bits easily. Those little bits of candy shell end up being so delicious in the final ganache!  

how to make cadbury mini egg ganache
cadbury mini egg ganache recipe

Tips for Success 

When you first whisk together the Cadbury Mini Eggs and heated heavy whipping cream, the mixture will be a bit thin. Don’t worry – it will thicken beautifully into the perfect filling consistency that stays soft in the refrigerator, but is stable enough to hold its shape between the cake layers. That said, here are some best practices to ensure the best possible results:

  • Microwave the Mini Eggs until the shells crack. In order to combine the chocolate of the Mini Egg with the heavy whipping cream, you’ll need to easily be able to break through the hard candy shells. The best way to do this is to gently microwave the Mini Eggs until the shells crack, so once you pour the heated heavy whipping cream over them the chocolate will melt and combine much easier. 
  • Cover the surface of the ganache with plastic wrap. Once you whisk together the heavy whipping cream and Cadbury Mini Eggs into a smooth ganache, it will need a trip to the refrigerator to thicken. Cover the ganache with plastic wrap and make sure the surface of the ganache is covered. This will ensure that condensation won’t form as the ganache is cooling. 
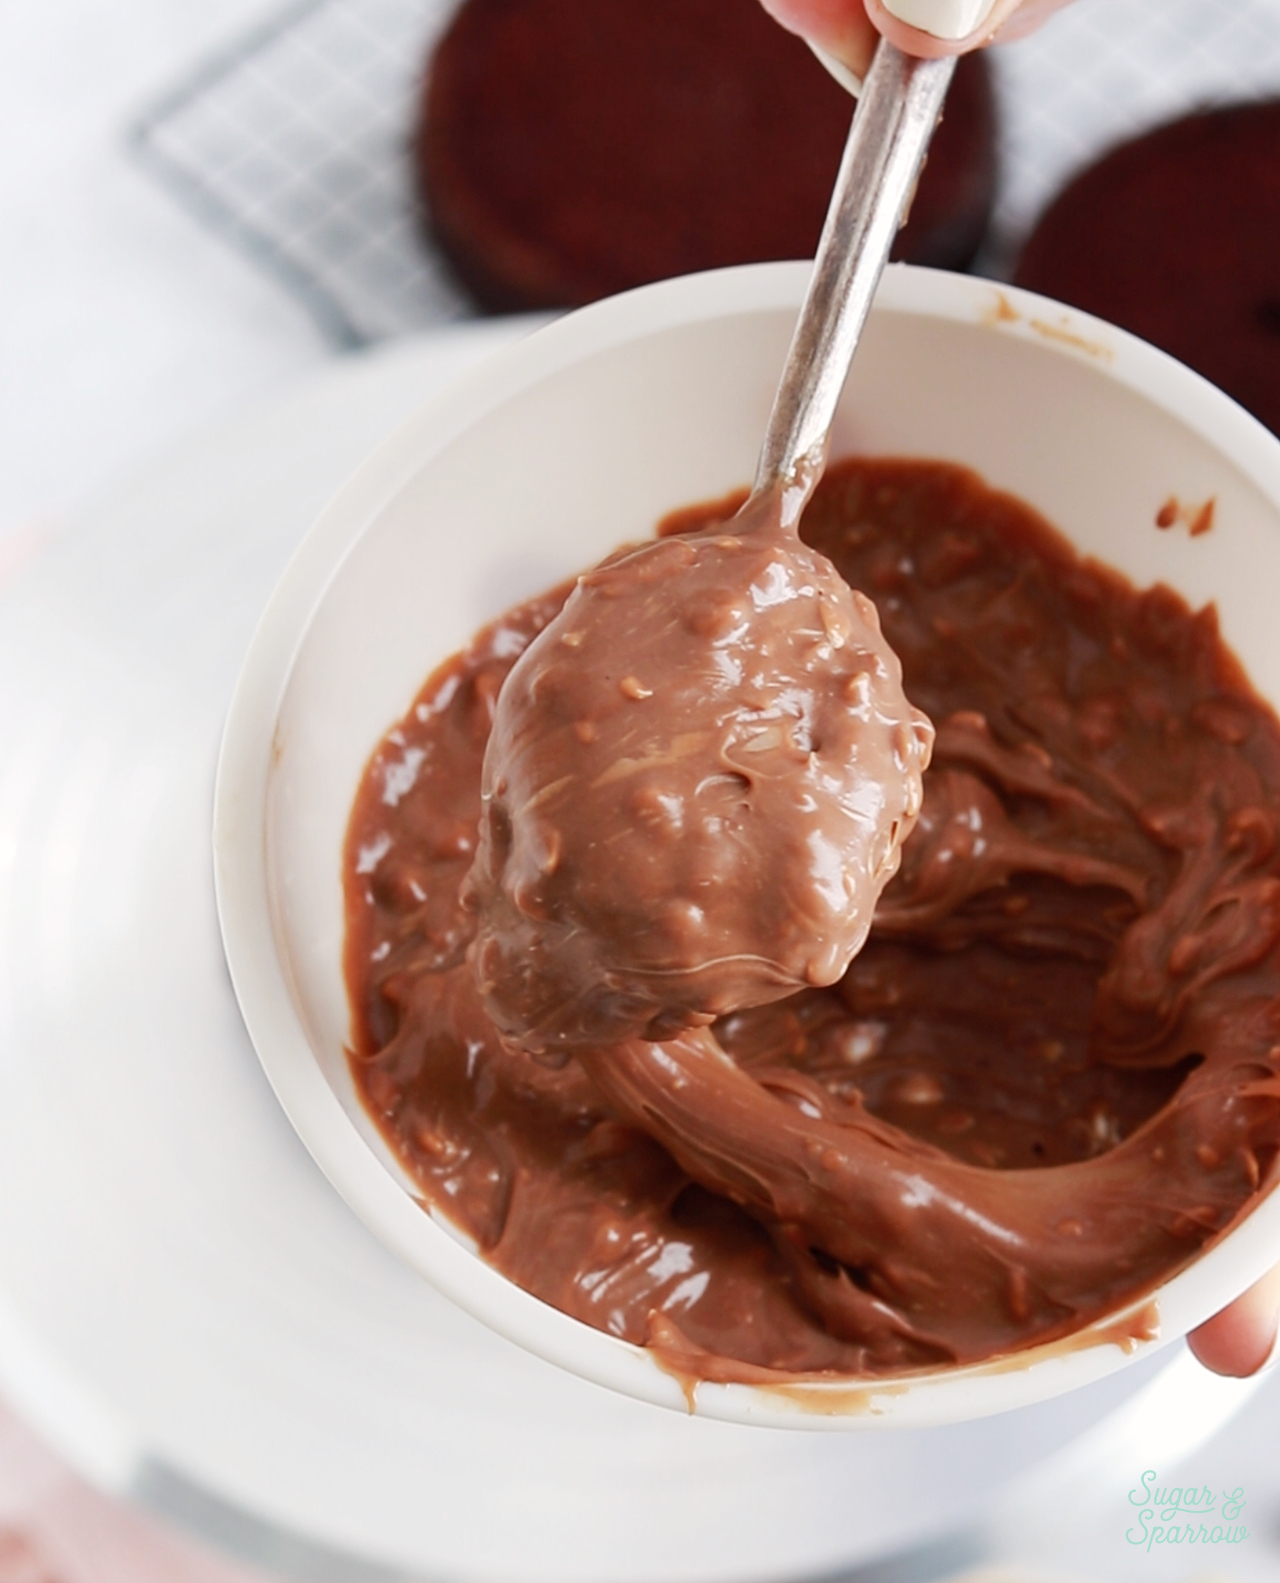
  • Allow 1-2 hours for cooling. This ganache needs to cool in the refrigerator in order to thicken to the perfect consistency, which is similar to the texture of nutella. Any less time and the ganache won’t be as thick. 
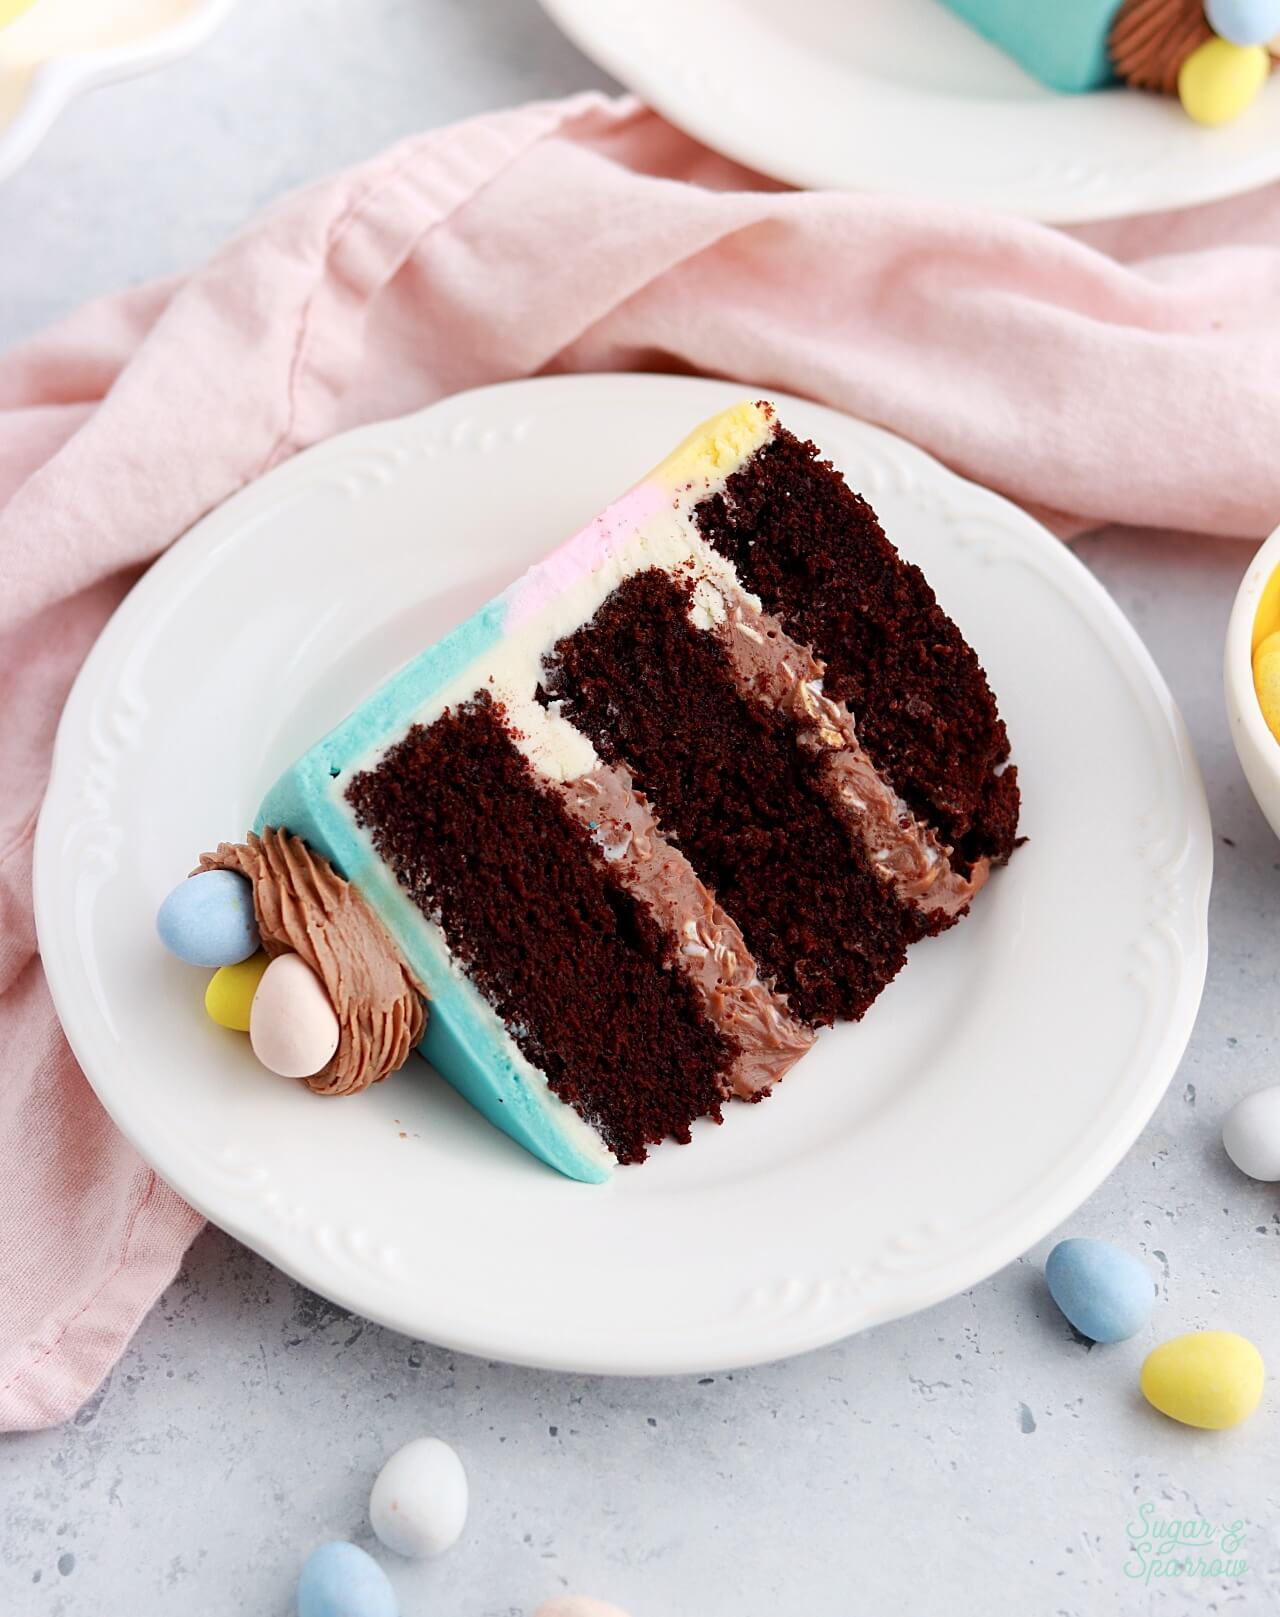
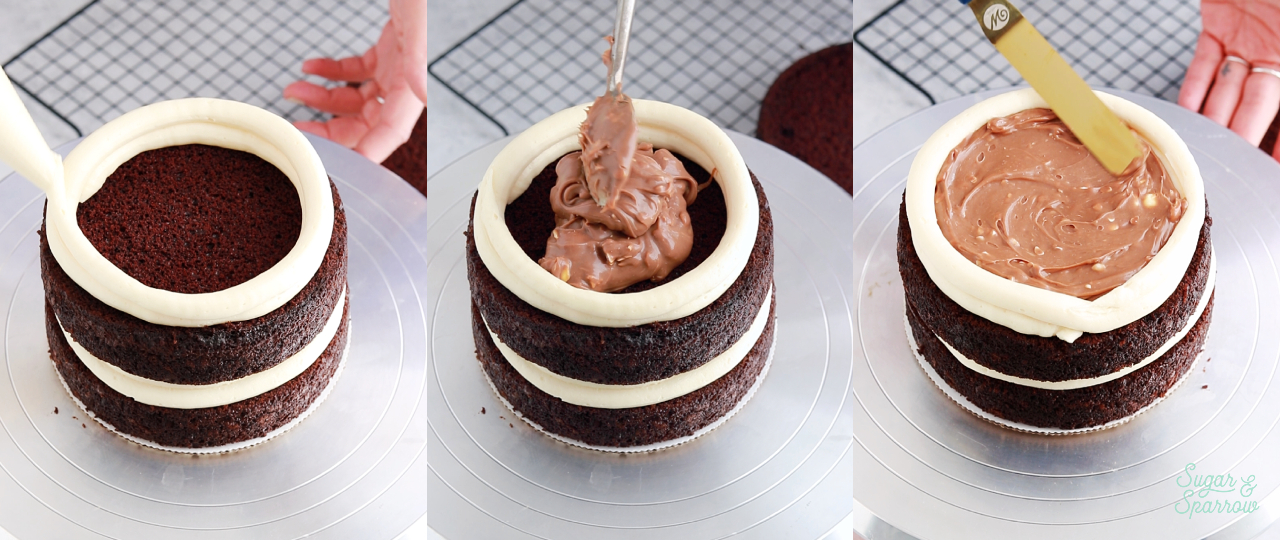
  • Create a buttercream dam for filling cakes. Since this Cadbury Mini Egg ganache is a soft filling, it will squish out from between your cake layers unless you create a buttercream dam. This is essentially a wall of buttercream you’ll pipe around the edge of each cake layer before filling in the center with the ganache. Since buttercream is much thicker than ganache, the dam will help hold the filling inside while supporting the cake layer(s) above. See this blog post about filling and stacking cakes for more info about working with soft fillings. 
how to make a buttercream dam cake fillings
cadbury mini egg ganache filling for cake

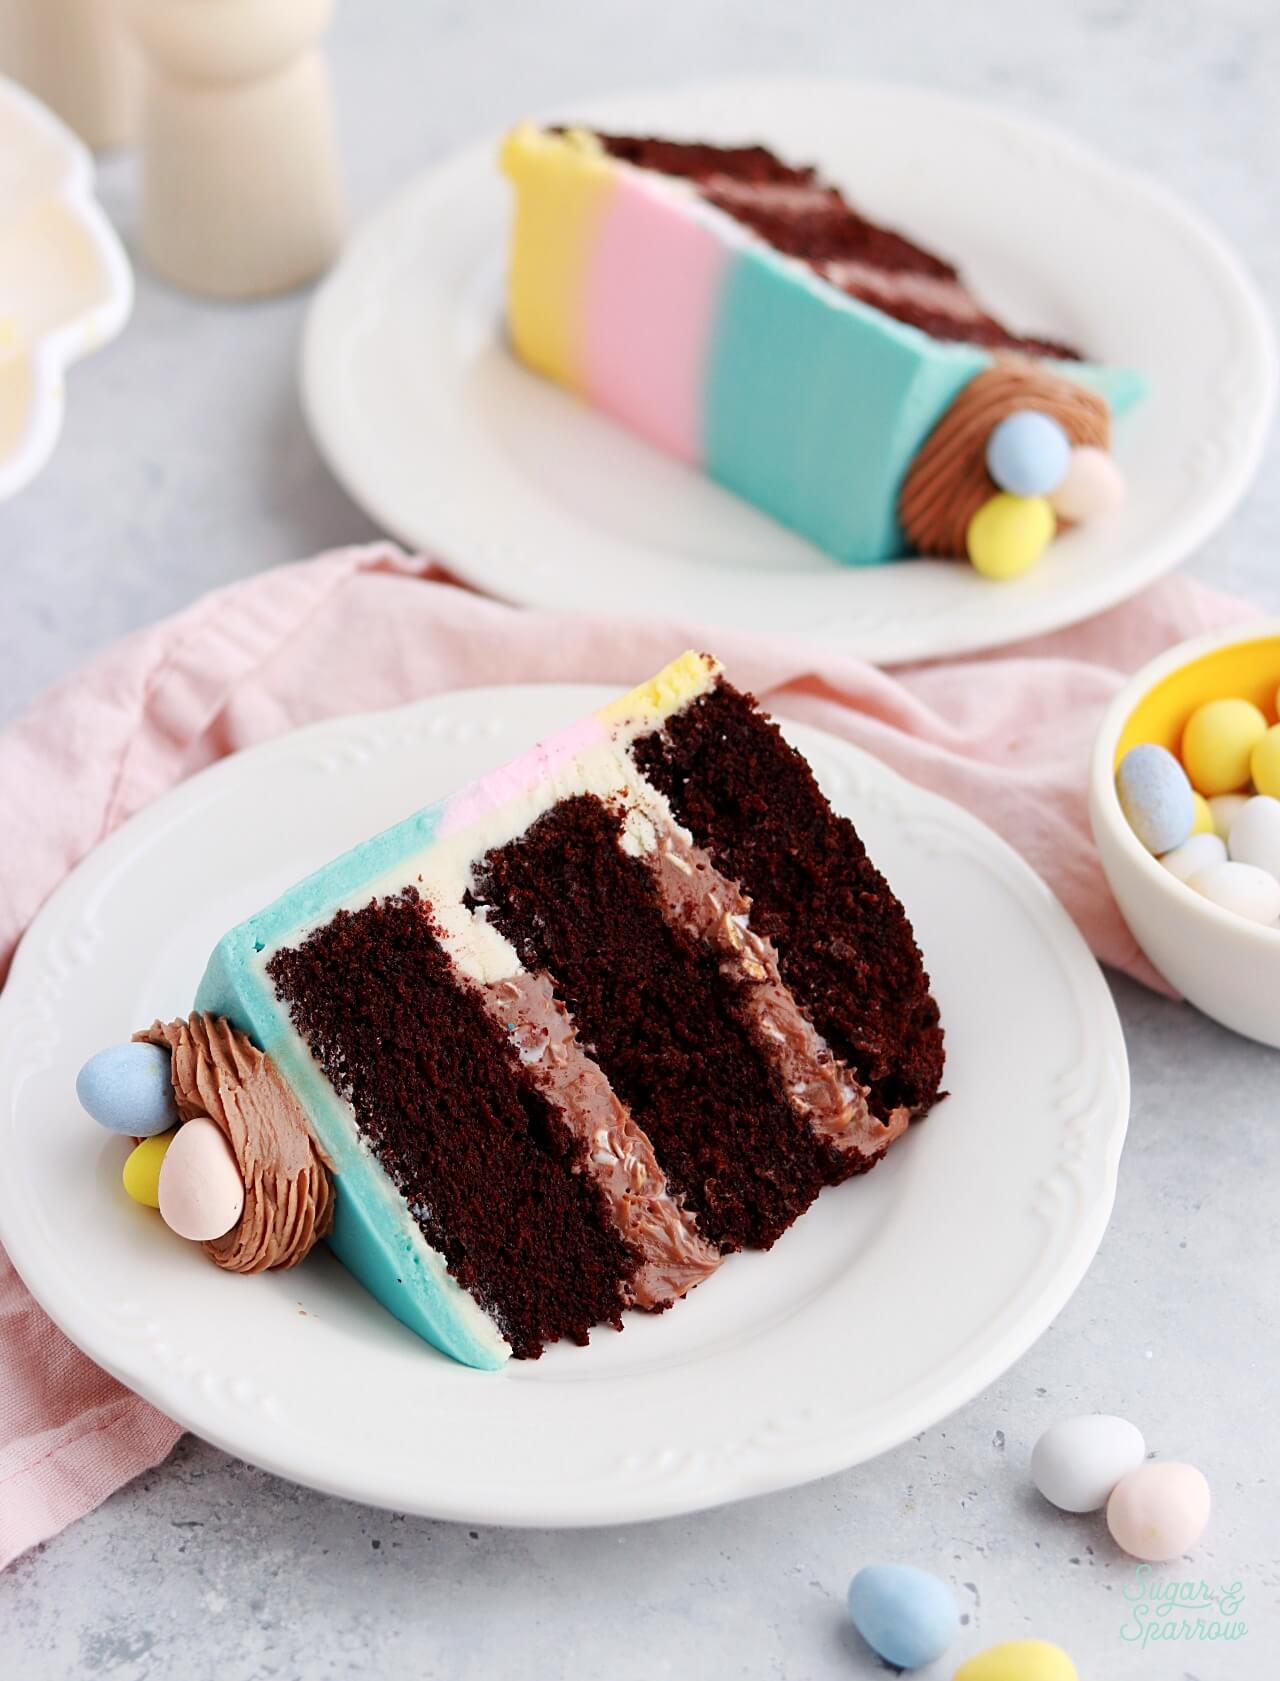
Whether you’re using this Cadbury Mini Egg ganache as a filling for a Cadbury flavored cake like this one or you’re pairing it with other desserts like macarons, cookies, or cheesecake, I hope you love it as much as I do! It’s the perfect addition to any springtime bake.

Cadbury Mini Egg chocolate ganache filling for cakes

Cadbury Mini Egg Ganache

Silky smooth chocolate ganache with bits of candy shell from Cadbury Mini Eggs! The perfect decadent filling for cakes, cupcakes, macarons, and more.
Print Recipe Pin Recipe
Prep Time:15 minutes mins
Cook Time:5 minutes mins
Cooling Time:2 hours hrs
Course: Dessert
Cuisine: American
Servings: 1.25 Cups

Ingredients

  • 1 Cup (212g) Cadbury Mini Eggs
  • 1/2 Cup (120ml) heavy whipping cream

Instructions

  • Pour the heavy whipping cream into a small saucepan set over medium heat and bring to a simmer, whisking frequently. Meanwhile, place the Cadbury Mini Eggs in a glass bowl and microwave them in 30 second increments, until the shells crack under slight pressure and the chocolate inside looks melty. In my experience it took 2.5 intervals (so, 1 minute 15 seconds).
  • When the heavy whipping cream starts to simmer, pour it over the Cadbury Mini Eggs and cover the bowl with a plate for 2 minutes. Afterwards, whisk the mixture into a uniform consistency, breaking down the shells as you go. It will look pretty rough at first, but I promise it will come together in 1-2 minutes of whisking. When it's fully combined it will look like smooth milk chocolate ganache with tiny bits of candy shell throughout.
  • Place a piece of plastic wrap over the surface of the ganache and place in the refrigerator for 1-2 hours, until completely cooled and the consistency is much thicker, almost like Nutella. Once it reaches this consistency, use this ganache as a filling for cakes, cupcakes, macarons, and more!

Notes

To Make Ahead: this filling can be made ahead and stored in an airtight container in the refrigerator for up to two weeks. When you’re ready to use it, bring back to room temperature and re-mix until smooth. 
Yield: this recipe makes enough to fill a triple layer 6-inch or 8-inch cake, or to fill 20-24 cupcakes. 

I hope you’re as obsessed with this Cadbury Mini Egg ganache recipe as I am! Let me know what you think in the comments below + be sure to tag @sugarandsparrowco on Instagram to show me. I love to see what you create!

By: Whitney · In: Featured, Filling, Recipes, Seasonal, Spring · Tagged: cadbury mini eggs, ganache filling

you’ll also love

easy Cadbury Mini Egg Cheesecake recipeNo-Bake Cadbury Mini Egg Cheesecake
cadbury mini egg cake by sugar and sparrowCadbury Mini Egg Cake
how to fill and stack cake layersHow to Fill and Stack Cake Layers

Join the List

Stay up to date & receive the latest posts in your inbox.

Reader Interactions

Leave a Reply Cancel reply

Your email address will not be published. Required fields are marked *

Recipe Rating


Next Post >

No-Bake Cadbury Mini Egg Cheesecake

Primary Sidebar

Welcome to Sugar & Sparrow

Welcome to Sugar & Sparrow

Helping you whip up pretty desserts with confidence and creativity. And hopefully sharing a few laughs with you along the way!

Learn More

Connect

let’s bake!

Get my very best recipes, baking tips, and decorating tutorials sent to your inbox

Featured Posts

white chocolate ganache recipe for drip cakes

White Chocolate Ganache Drip Cake Recipe + Tips [Video Included!]

vanilla raspberry layer cake recipe with raspberry filling and raspberry frosting

Vanilla Raspberry Layer Cake

conversation heart cakes by sugar and sparrow

Mini Conversation Heart Cakes Tutorial

Search

Archives

Follow Along

@sugarandsparrowco

STRAWBERRY SHORTCAKE ICE CREAM CAKE 🍓if Strawbe STRAWBERRY SHORTCAKE ICE CREAM CAKE 🍓if Strawberry Shortcake Ice Cream Bars make you nostalgic for your childhood ice cream truck days, you’re going to LOVE this easy ice cream cake version - no ice cream maker needed 🙌🏼 

Full recipe on my blog at https://sugarandsparrow.com/strawberry-shortcake-ice-cream-cake/

STRAWBERRY CRUNCH 
24 whole (280g) Golden Oreos, finely ground
3 Oz box strawberry jello
4 Tbsp unsalted butter, melted

ICE CREAM LAYERS
1/2 Cup (15g) freeze-dried strawberries
2 Cups heavy whipping cream, cold
1 Tbsp pure vanilla extract, divided
14 Oz sweetened condensed milk
1 1/2 tsp strawberry jam or preserves

1. Combine the strawberry crunch ingredients and bake on a lined cookie sheet at 350ºF for 4 min.
2. For the crust, combine 1 Cup of the strawberry crunch with 2 Tbsp melted butter. Press into the bottom of a 6-inch springform pan and line with an acetate collar. Place in the freezer while you move on.
3. Using a food processor, grind the freeze-dried strawberries into a fine powder. Set aside.
4. Add the heavy whipping cream and 2 tsp of vanilla extract into a chilled bowl, then whip it with a hand mixer to stiff peaks. Place in the refrigerator.
5. Divide the condensed milk between two medium bowls. To one bowl, add 1 teaspoon of vanilla. To the second bowl, add the finely strawberry powder and the jam/preserves. Whisk the ingredients together within each individual bowl.
6. Divide the whipping cream evenly between each of the two bowls you created in the previous step. Fold each sweetened condensed milk mixture together with the divided whipped cream to create the vanilla ice cream and strawberry ice cream.
7. Layer half of each of the ice creams on top of the strawberry crunch crust, sprinkle a layer of strawberry crunch on top, then repeat. Freeze for 6 hours and serve. 
#icecreamcake #strawberryshortcake #nochurnicecream #icecreamlover #strawberry
LEMON CUPCAKES 🍋 after about a dozen recipe tes LEMON CUPCAKES 🍋 after about a dozen recipe tests, this one is everything I could want in a lemon cupcake! Fluffy-yet-moist, bursting with natural lemon flavor, and absolutely irresistible topped with lemon cream cheese buttercream. 

Full recipe (with frosting) linked in my bio + at https://sugarandsparrow.com/homemade-lemon-cupcakes/

INGREDIENTS:
1 Cup (132g) all-purpose flour
1 tsp baking powder
1/4 tsp salt
1/4 Cup (60ml) whole milk, room temperature
3 Tbsp (45ml) lemon juice from 1 medium lemon
3/4 Cup (150g) granulated sugar
3 Tbsp (42g) unsalted butter, room temperature
2 Tbsp (30ml) vegetable oil
2 large eggs, room temperature
1 tsp pure vanilla extract

INSTRUCTIONS:
1. Preheat the oven to 350ºF (177ºF) and line a standard cupcake pan with 12 paper liners.
2. In a large bowl, whisk together the flour, baking powder, and salt. Set aside. 
3. In the bowl of a stand mixer fitted with the paddle attachment (or with a hand mixer and large bowl), add the lemon zest to the sugar and mix on low speed until fragrant and well combined, about 1 minute. Meanwhile, combine the lemon juice with the milk and set aside. 
4. Add the butter to the lemon-sugar mixture and cream on medium speed until and combined, about 2 minutes. Add the vegetable oil and beat until light and creamy, about 3 minutes. Scrape down the bowl and paddle as needed.
5. Mix in the eggs one at a time on low speed, then add the vanilla and turn the mixer to medium speed for one minute.
6. Turn the mixer off and add the flour mixture all at once. Mix on low speed until just combined, then slowly pour in the lemon-milk mixture. Mix until just combined, about 30 seconds.
7. Divide the batter equally between the liners and bake for 14-18 min. Cool, then top with frosting of your choice (link in bio for lemon cream cheese frosting)�
#lemoncupcakes #creamcheesefrosting #lemon #cupcakes #cupcakedecorating
April in my kitchen 🌸 I published 5 NEW recipes April in my kitchen 🌸 I published 5 NEW recipes on my site, baked my Oreo cupcake recipe for a fundraiser and found it was just as delicious as I remember, and filmed/photographed 3 recipes that will be on my blog in May (Lemon Cupcakes, Lemon Cream Cheese Buttercream, and No-Bake Marbled Strawberry Cheesecake) 🥰 

Comment “APRIL” to get all the available recipes and stay tuned for more! 

#bakersofinstagram #springbaking #cakedecorating #cupcakes #bakinglove
SHEET PAN COOKIE CAKE 🍪 slice it warm for a fud SHEET PAN COOKIE CAKE 🍪 slice it warm for a fudgy chocolate chip cookie OR let it settle into a moist and chewy cookie cake that’s perfect for decorating! My fave vanilla buttercream + sprinkles turn this giant chocolate chip cookie into the perfect birthday cake alternative at the end 🥳
⁣
Full recipe + decorating ideas at https://sugarandsparrow.com/sheet-pan-chocolate-chip-cookie-cake/
⁣
INGREDIENTS⁣
1 Cup (226g) unsalted butter, melted⁣
1 1/3 Cups (267g) packed light or dark brown sugar⁣
1/2 Cup (100g) granulated sugar⁣
3 large eggs⁣
1 Tbsp pure vanilla extract⁣
1 tsp baking soda⁣
1 tsp cornstarch⁣
1/2 tsp salt⁣
3 Cups (398g) all purpose flour⁣
2 Cups (350g) semi-sweet chocolate chips⁣
⁣
INSTRUCTIONS⁣
1. Preheat the oven to 350ºF (177ºC). Grease and line a 13×18 inch sheet pan.⁣
2. In a large bowl, add the brown sugar and granulated sugar. Melt the butter in the microwave and pour it over the top of the sugars. Whisk together until uniform. Add the eggs and vanilla, then continue whisking until uniform. Whisk in the baking soda, cornstarch, and salt.⁣
3. Add the flour and use a silicone spatula to fold it in until smooth cookie dough forms. Reserve 1/2 Cup of the chocolate chips and set them aside, then fold the remaining 1 1/2 Cups of chocolate chips into the cookie dough.⁣
4. Place the chocolate chip cookie dough onto the prepared sheet pan and use an offset spatula to spread it all the way to the edges in an even layer.⁣
5. Bake the cookie cake for 14-16 minutes, until it looks golden brown on the edges and set. 
6. Enjoy warm or let it cool and decorate with vanilla buttercream and sprinkles! ⁣
⁣
#cookiecake #chocolatechipcookies #sheetcake #birthdaycake #cakedecorating
STRAWBERRY CUPCAKES 🍓based on my beloved strawb STRAWBERRY CUPCAKES 🍓based on my beloved strawberry layer cake recipe, this cupcake version is just as moist yet fluffy and bursting with natural strawberry flavor! Between the mix of fresh strawberries in the cupcakes + freeze-dried strawberries in the frosting, the flavor is out of this world 🚀

Full recipe link in my bio (with strawberry buttercream) + at https://sugarandsparrow.com/strawberry-cupcakes/

STRAWBERRY CUPCAKES
Yield: 14 cupcakes

INGREDIENTS:
5 oz (143g) fresh or frozen strawberries
1/3 Cup (80ml) whole milk, room temp
1 1/2 Cups (158g) sifted cake flour
1 tsp baking powder
1/4 tsp baking soda
1/2 tsp salt
6 Tbsp (85g) unsalted butter, room temp
1 Cup (200g) granulated sugar
2 large eggs, room temp
3 Tbsp (45g) sour cream, room temp
1 tsp vanilla extract
1 drop pink food coloring (optional)

INSTRUCTIONS: 
1. Puree the strawberries using a food processor (you’ll have about 1/2 cup of puree), then place into a saucepan over medium-low heat. Bring to a simmer, then cook for 10-15 min, stirring occasionally, until you have 1/4 cup. Refrigerate until room temp.
2. Preheat oven to 350ºF (177ºC) and line a standard cupcake pan with liners.
3. Whisk together the sifted cake flour, baking powder, baking soda, and salt and set aside.
4. In a stand mixer w/ paddle attachment (or hand mixer + large bowl), whip the butter on high for 2 min. Add sugar and beat for 2 min, until light and fluffy. Turn the mixer to low and add the eggs one at a time, then add the vanilla and sour cream, turn the mixer to high and beat for 1 min. Meanwhile, whisk together the strawberry puree, whole milk, and food coloring (if using).
5. Turn the mixer off and add all of the dry ingredients at once. Mix on low until just combined, then add the strawberry milk mixture until just combined, about 30 seconds.
6. Fill the cupcake liners 2/3 full and bake for 14-18 minutes. Cool completely before topping with strawberry buttercream (full recipe linked above). 

#strawberrycupcakes #strawberrycake #pinkcupcakes #strawberry #cupcakes

Footer

On the Blog

  • Cake Basics
  • Recipes
  • Tutorials

Info

  • About
  • Privacy Policy & Disclosure

stay in the know

Copyright © 2026 · Theme by Sugar & Sparrow