• Cake
  • Frosting
  • YouTube
  • My Favorite Tools
  • Nav Social Icons

  • Skip to primary navigation
  • Skip to main content
  • Skip to primary sidebar
  • Skip to footer
  • Recipes
    • Cake
    • Cupcakes
    • Frosting
    • Ice Cream
    • Vegan
  • Cake Basics
  • Tutorials
  • Blog
  • About
  • Mobile Menu Widgets

    Connect

    Search

Sugar & Sparrow logo in script font

Sugar & Sparrow

Lifestyle and Cake from Portland Oregon

  • Cake Basics
  • Recipes
    • Cake
    • Cupcakes
    • Cookies & Bars
    • Filling
    • Frosting
    • Ice Cream
    • No-Bake
    • Small Batch
    • Vegan
  • Tutorials
  • Book
  • Blog
  • About

London Fog Cake with Earl Grey Buttercream

September 18, 2023 · In: Cake, Fall, Featured, Recipes, Seasonal, Winter

Jump to Recipe

If you’re a black tea drinker, you’ve probably had your fair share of Earl Grey. Its bergamot orange notes are totally irresistible to me, and while I love it as-is, it’s even better made into a London Fog (aka a delicious Earl Grey tea latte). When I was thinking about cozy cold-weather cake flavors, this delicious combo came to mind – aromatic Earl Grey tea infused cake paired with a creamy vanilla Earl Grey frosting. It’s essentially a London Fog in cake form and I couldn’t be more satisfied with it! 

Earl Grey layer cake recipe
London Fog cake recipe with Earl Grey buttercream

What is a London Fog?

A London Fog is essentially a vanilla-sweetened Earl Grey tea latte with foamy milk. To make it, you steep some quality Earl Grey tea, add some vanilla syrup (or your favorite sweetener with a little vanilla extract), and top it off with some foamy milk. The name ‘London Fog’ comes from the effect of the foamy milk hitting the black tea and creating a cloud-like plume, resembling a foggy London afternoon. But while it sounds like the drink originated in England, it actually comes from Canada! 

London Fog cake with Earl Grey buttercream recipe by Sugar & Sparrow
Earl Grey Buttercream recipe on London Fog cake

The Perfect London Fog Flavor in Cake Form 

Creating this warm and comfy London Fog flavor in cake form begins with the magic of steeping. You’ll add some loose leaf Earl Grey tea into a pot of milk and bring it to a boil, then steep the tea to infuse the milk with the flavor. After straining out the tea leaves, you’re left with Earl Grey milk that you’ll use to flavor both the cake and the buttercream. 

Let’s talk about these London Fog cake layers. Not only are they infused with Earl Grey milk, they also have loose leaf Earl Grey tea added right into the batter. This creates a lovely flecked appearance but also enhances the tea flavor, adding just the right amount. These layers are also super moist with the addition of sour cream and have a beautifully soft crumb due to the cake flour. 

London Fog layer cake recipe

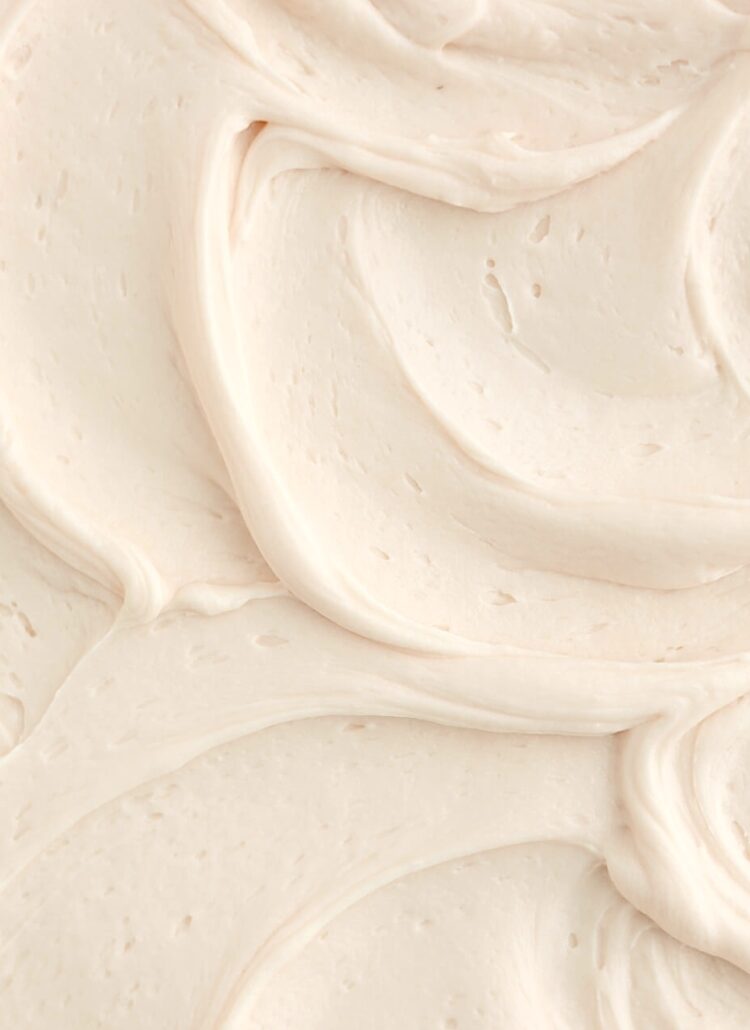
The Earl Grey buttercream is flavored with a few tablespoons of the Earl Grey milk and an extra dose of vanilla to amplify the London Fog vibe. It’s super smooth and creamy, and when paired with the cake, creates the perfect flavor experience. If you’re a Earl Grey tea lover, you will be in heaven with this cake.  

London Fog Cake Decorating Details 

After filling and crumb coating the London Fog cake with the Earl Grey buttercream, I decided to add some texture to the final coating of frosting with a scalloped cake comb. I knew I wanted to top the cake with a salted caramel drip as a finishing touch, and the scalloped buttercream was such a beautiful backdrop for it. 

London fog cake recipe with salted caramel drip

I made a half batch of my favorite salted caramel recipe for the drip and decided to use it on half of the cake (aka a half drip). Although salted caramel is not traditionally part of a London Fog, it adds just a little hit of sweet complexity to the whole cake. If you’re not a salted caramel fan or you don’t feel like making it, feel free to omit it. The cake and buttercream are the real stars of this show. 

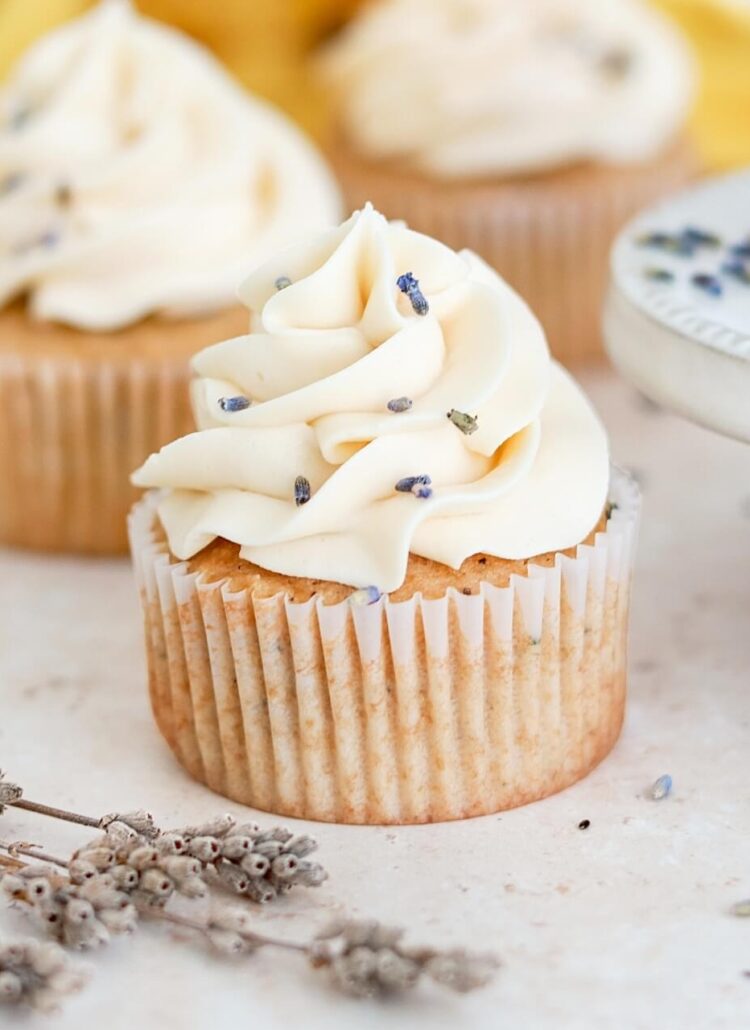
After the salted caramel half drip set, I used the rest of the Earl Grey buttercream to pipe stars in a crescent formation following the drip as a guide for the beginning and end. I used Wilton Tip 4B for all of the star piping. To finish it all off, I sprinkled some loose leaf Earl Grey tea on top. Simple and beautiful! 

Wilton tip 4b buttercream piping
Earl Grey Cake Recipe with Salted Caramel Drip

This London Fog cake is best enjoyed on a cozy cold day surrounded by friends while the rain patters softly against the window. Ok, that sounds extra romantic so if you can’t have that setting it also tastes amazing any old day, even if you’re enjoying it for breakfast on a day where all you have planned is lounging in your pajamas. Whatever the scene, I hope you love this one as much as I do!

London fog cake recipe with earl grey buttercream and salted caramel drip

London Fog Cake

5 from 6 votes
The classic London Fog drink in cake form: layers of deliciously moist Earl Grey tea-infused cake and silky smooth Earl Grey buttercream, topped with a salted caramel drip for effect. The perfect cozy cold-weather cake!
Print Recipe Pin Recipe
Prep Time:40 minutes mins
Cook Time:45 minutes mins
Servings: 15 slices

Ingredients

Earl Grey Milk

  • 1 1/3 Cups (315ml) whole milk
  • 1 Tbsp (2g) Earl Grey tea, loose leaf

London Fog Cake

  • 2 1/2 Cups (265g) sifted cake flour* DIY recipe in notes
  • 2 tsp baking powder
  • 1/2 tsp baking soda
  • 1 tsp Earl Grey tea, finely ground
  • 1/2 tsp salt
  • 1 Cup (226g) unsalted butter, room temperature
  • 1 3/4 Cups (350g) granulated sugar
  • 3 large eggs, room temperature
  • 1/2 Cup (120g) sour cream, room temperature
  • 2 tsp pure vanilla extract
  • 1 Cup (240ml) Earl Grey milk, room temperature (recipe above)

Earl Grey Buttercream

  • 1 1/2 Cups (339g) unsalted butter, room temperature
  • 5 1/4 Cups (630g) powdered sugar
  • 1 Tbsp (15ml) pure vanilla extract
  • 3 Tbsp (45ml) Earl Grey Milk, room temperature (recipe above)
  • 1/4 tsp salt

Salted Caramel Drip (Optional)

  • 1/2 Cup (100g) granulated sugar
  • 3 Tbsp (43g) unsalted butter, room temperature, cut into cubes
  • 1/4 Cup (60ml) heavy whipping cream, room temperature
  • 1/2 tsp salt

Garnish

  • 2 tsp Earl Grey tea, loose leaf

Instructions

Make the Earl Grey Milk

  • Bring the milk and tea to a boil in a small pot over medium-high heat. Turn the heat off and steep for 10 minutes. Use a fine mesh sieve to strain the tea leaves from the milk and be sure to press all the liquid out from the leaves.
  • After straining, reserve 3 Tbsp (45ml) of the Earl Grey milk for the buttercream recipe. After this, you should be left with 1 Cup (240 ml) of Earl Grey milk for the cake recipe. If you end up with less, top it up with more whole milk to measure out 1 Cup (240 ml) exactly. If you end up with more, discard the extra Earl Grey milk and measure out exactly 1 Cup. Let the Earl Grey milk cool to room temperature before using it in the recipes.

Make the London Fog Cake

  • Preheat the oven to 350°F/177ºF. Prepare three 6-inch or two 8-inch cake pans by spraying the sides with a baking spray and fitting a parchment paper circle to the bottom of the pan.
  • Add the cake flour, baking powder, baking soda, ground Earl Grey tea, and salt into a medium bowl and whisk to combine. Set aside.
  • In the bowl of a stand mixer fitted with the paddle attachment, beat the butter at high speed for about 2 minutes, until it is creamy. Add the sugar and mix the ingredients at medium-high speed for 2 minutes, scraping the bowl and paddle at the halfway point. Decrease the mixer’s speed to low and add the eggs, one at a time, mixing until they are just combined and scraping the bowl and paddle as needed. Add the sour cream and vanilla, increase the mixer’s speed to high and beat the ingredients for 1 minute.
  • With the mixer in the off position, add in the dry ingredients all at once. Turn the mixer to low speed and mix until just combined, then add the (room temperature!) Earl Grey milk mixture in a slow steady steam and mix until just incorporated. Scrape down the sides and bottom of the bowl and give it a few stirs to make sure there are no lumps. The batter will be slightly thick.
  • Pour the batter evenly into the prepared cake pans and bake for 30-35 minutes. They're done when they spring back to the touch and a toothpick inserted into the middle comes out clean. Let the cakes cool in the pan for five minutes before turning them out onto a wire rack for an additional few hours of cooling.

Make the Earl Grey Buttercream

  • In the bowl of a stand mixer fitted with the paddle attachment (a hand mixer works fine too!), cream the butter on medium-high until it’s creamy and light in color, about 5 minutes.
  • With the mixer on low speed, add the powdered sugar a few cups at a time, scraping down after each addition and making sure each cup is fully incorporated before adding the next one. Add the Earl Grey milk, vanilla, and salt. Continue mixing on low speed until fully combined and smooth, scraping down the bowl and paddle as needed.

Make the Salted Caramel Drip (Optional)

  • Have everything pre-measured and ready to go (you’ll be constantly stirring). Place the sugar in a medium saucepan over medium-high heat and stir constantly with a wooden spoon, until it melts into an amber-colored liquid and no sugar clumps remain, 4-5 minutes. 
  • Reduce the heat to medium. Carefully add the butter (it will bubble up when you do) and use a whisk to combine it with the sugar mixture until the butter is fully melted and incorporated, about 2 minutes.
  • Add the heavy whipping cream in a steady stream while whisking. As soon as the cream is incorporated, let the caramel boil for a full minute before removing it from the heat and stirring in the salt. Let the salted caramel come to slightly above room temperature before dripping the cake in Step 3 of the Assembly instructions below.

Assembly

  • Once the London Fog cakes are completely cooled, level them to your desired height. Add a swipe of Earl Grey buttercream onto a cardboard cake circle and place the first cake layer on top. Fill and stack the cake with Earl Grey buttercream, then crumb coat the cake with Earl Grey buttercream. Place the crumb coated cake in the refrigerator for at least 30 minutes to let the buttercream set firm.
  • To create the design pictured, reserve about 1/4 Cup of the remaining Earl Grey buttercream for the piping on top of the cake, then use the rest of the buttercream to frost the cake. Use a cake comb to create the scalloped texture, then place the cake in the refrigerator for another 30+ minutes to let the frosting firm up.
  • Once the frosting is cold and firm to the touch, make sure the salted caramel (if using) is slightly above room temperature, then place it into a piping bag. Snip off the end of the piping bag and create the drip halfway around the cake. Place the salted caramel dripped cake back into the refrigerator for 5-10 minutes to let the drip set.
  • Place all of the remaining Earl Grey buttercream into a piping bag fitted with Wilton Tip 4B. Pipe buttercream stars on top of the cake in a crescent formation using the salted caramel drip as your guide for beginning and ending the piping. Finish the look by sprinkling loose leaf Earl Grey tea on top of the piping.

Notes

*DIY Cake Flour Recipe: To make your own cake flour, spoon and level one cup of all-purpose flour and remove 2 Tbsp. Add 2 Tbsp of cornstarch. Repeat per the amount of cake flour you need, then sift the flour and cornstarch mixture 4 times (don’t skip that step!). After sifting, spoon and level to re-measure the amount of cake flour you need. If measuring with a kitchen scale, you’ll want to measure out 330g of homemade cake flour (since all-purpose weighs more than store bought cake flour).
Make Ahead Tips: 
  1. The Earl Grey milk can be made ahead and stored in an airtight container in the refrigerator up to 3 days ahead. Bring it back to room temperature when you’re ready to use it in the cake and buttercream recipes.
  2. The London Fog cake layers can be baked ahead and stored at room temperature, wrapped in plastic wrap, for up to two days. Alternatively you can store the cakes in the freezer for up to two months.  
  3. The Earl Grey buttercream can be made ahead and stored in an airtight container in the refrigerator for up to two weeks. When you’re ready to use it, bring it back to room temperature and re-mix in your stand mixer to bring it back to smooth buttercream consistency. 
To Make as Cupcakes: fill the tins no more than 2/3 full and bake at 350ºF for 15-18 minutes, or until a toothpick inserted comes out clean. 

I hope you fall head over heels for this London Fog cake like I have! Let me know what you think in the comments below and feel free to tag @sugarandsparrowco on Instagram if you post a pic. I love to see what you create!

By: Whitney · In: Cake, Fall, Featured, Recipes, Seasonal, Winter · Tagged: earl grey buttercream, earl grey cake, earl grey tea, fall cakes, london fog cake, winter cakes

you’ll also love

earl grey buttercream recipeEarl Grey Buttercream
london fog cupcake recipe with earl grey teaLondon Fog Cupcakes
24 fall baking recipes38+ Fall Baking Recipes

Join the List

Stay up to date & receive the latest posts in your inbox.

Reader Interactions

Comments

  1. Roeyn says

    March 3, 2026 at 1:58 pm

    Hi! This cake is one of my favorites and I plan on making it for a friend’s birthday. Do you have any tips on adjusting the recipe to fit three 9-inch pans? I’m not sure if I should just double it and hope for the best or if you have any ideas. Thanks!

    Reply
    • Whitney says

      March 3, 2026 at 7:47 pm

      So happy you love this recipe, Reoyn! This recipe works as-is for three 9-inch pans if you’re okay with slightly shorter layers (about 1 inch tall). You may need to decrease the baking time and start checking for doneness at the 25 minute mark if you go that route. If you want taller layers I would suggest making 1.5x the recipe and filling the pans no more than 2/3 full. You may have a little extra batter left over. Hope that helps!

      Reply
  2. Mariam says

    February 16, 2026 at 5:35 am

    Absolutely delicious! You can taste the tea in every fluffy, airy bite and the buttercream was perfect.

    Reply
    • Whitney says

      February 18, 2026 at 12:50 pm

      Yay, Mariam! So happy you love this recipe!

      Reply
  3. Suzy de Silva says

    February 11, 2026 at 1:37 pm

    For the Earl Grey cake, is it 1 tablespoon vanilla in the buttercream? It sounds like a lot.

    Reply
    • Whitney says

      February 13, 2026 at 10:52 am

      Hi Suzy! Yes, 1 Tbsp of vanilla is correct for the amount of buttercream this recipe makes (enough to fill and frost the cake).

      Reply
  4. Suzy de Silva says

    February 9, 2026 at 12:04 am

    Hi! What’s the best way to grind tea finely?

    Reply
    • Whitney says

      February 9, 2026 at 9:54 am

      Hi Suzy! Mortar and pestle or just chop the leaves as finely as you can, add them into a ziploc bag and go over it with a rolling pin a few times to squeeze out some of the essential oils.

      Reply
  5. Audrey says

    September 25, 2025 at 6:18 pm

    I used your recipe as a base and experimented to make it gluten free/ corn free and with less lactose.

    For the batter, I used bobs red mill gf flour, sifted same measurements. I used almond milk for the tea. Instead of sour cream I used a longer ferment yogurt so there was less lactose. And I used 1 cup of sugar.

    For the buttercream, instead of powdered sugar I put a few tablespoons of granulated sugar. Sometimes I’ll run it in the food processor with rice flour to make a corn free powdered sugar but I didn’t feel like doing that and the texture was fine. And the almond milk tea mixture.

    10/10 even with the substitutions. It was moist, flavorful and very much like what you’d thing a London Fog cake would taste like

    Reply
    • Whitney says

      September 25, 2025 at 10:18 pm

      This is so awesome, Audrey! I’m so happy you had success with these substitutions to make a GF/corn-free version of this recipe. It’s so helpful to know what you did! Thanks for sharing 🙂

      Reply
  6. Rachel says

    June 26, 2025 at 11:49 am

    I look forward to making this cake. Is it possible to use Earl Grey tea bags instead of the loose leaf? If so, how many would I need to use? Thanks.

    Reply
    • Whitney says

      June 26, 2025 at 2:01 pm

      Hi Rachel! Yes, you can use Earl Grey tea bags. Use two tea bags for the Earl Grey Milk and cut open a third tea bag for the 1 tsp of finely ground Earl Grey Tea that you add to the dry ingredients. Hope that helps!

      Reply
    • Melissa Kennedy says

      July 13, 2025 at 5:30 am

      5 stars
      Hi, I made this for the first time for my house warming…..first night in our new house. Our family will enjoy it tomorrow. I made mine gluten free and used 3 teabag for the cake mix and 9 teabags for the milk. Came out real good. Had to make another batch of milk cuz I didn’t have enough. I just drank the rest like a London fog.

      Reply
  7. Amber says

    March 4, 2025 at 6:17 am

    Hi Whitney, I am a huge fan of your recipes ( your Apple Spiced Cake is my absolute favorite and go to) could you provide the all purpose flour measurements for this recipe instead of cake flour? The flavors are SO good but I just love the density you get with all purpose.
    Thank you for your recipes!

    Reply
    • Whitney says

      March 7, 2025 at 6:49 am

      Hi Amber! If you want to try this with all purpose flour you can use an equal amount (2 3/4 Cups). It will weigh more than cake flour if you’re measuring by weight, about 365g. Hope that helps!

      Reply
  8. Suzanne says

    November 21, 2024 at 5:15 pm

    This looks so good! What a great combination of flavors!

    Reply
  9. Erin says

    June 20, 2024 at 7:47 pm

    5 stars
    Oh my days. I made this for myself for my birthday and it did not disappoint . I did make a whipped cream buttercream instead of the regular buttercream, but the cake itself is the true gem. It’s also been requested for again.

    Reply
  10. Angela says

    June 14, 2024 at 7:44 am

    Looking forward to making the cake! Should I measure out 290g of cake flour and then sift? Or should the cake flour measure out to be 290g after it has been sifted?

    Reply
    • Whitney says

      June 16, 2024 at 2:47 pm

      Hi Angela! Measure out 290g after sifting. Hope that helps!

      Reply
  11. Dru says

    May 14, 2024 at 6:48 pm

    5 stars
    Just made this for my girlfriend’s birthday and it was a huge hit. I haven’t baked a cake in 10 years, but following the instructions got me a crumb that impressed my baker friends

    Reply
    • Whitney says

      May 15, 2024 at 10:16 am

      That’s amazing, Dru! I’m so happy it was a hit!

      Reply
  12. Whitney says

    April 17, 2024 at 9:23 am

    Hi Hannah! What kind of flour did you use? Is there a chance it wasn’t cake flour or did you use the DIY cake flour recipe with all purpose flour? Cake flour (especially sifted) is more lightweight than all other flours, so if you used all purpose (or plain) flour in the DIY Cake Flour version, it will weigh a lot more than true cake flour in a cup-for-cup measurement, and won’t be enough if you’re using gram measurements. Let me know and I can help you get the measurements correct.

    Reply
  13. Jeannine H. says

    April 14, 2024 at 6:48 am

    5 stars
    Very tasty and wonderful texture! I used this recipe for a friend who wanted an Earl Grey wedding cake, and boy was it a hit! I did use just a Swiss meringue buttercream though with two tea packets’ worth of Earl Grey, so I didn’t copy everything exactly, but the flavors went together really well. She also had me do a blueberry cake filling between layers. It’s also worth noting for anyone planning on making cupcakes that one batch makes about 24 standard cupcakes with some batter leftover (please don’t do what I did, I thought I filled mine 2/3 but they still bubbled over a wee bit. Measure your batter!!!

    Reply
  14. Marisa W says

    February 2, 2024 at 10:24 am

    5 stars
    Incredibly delicious cake- loved the soft floral notes of the earl grey tea! I made it with a lemon Swiss meringue buttercream (as requested by my customer) – this cake is a keeper! Thank you!

    Reply
  15. Jj says

    January 28, 2024 at 10:13 am

    I think I left this question on this part of your site, but can you just cut open tea bags of the earl gray, since I don’t have loose leaf? Also, can you freeze your buttercreams? I made your buttercream (again) and mine doesn’t spread as smoothly as I like. Do you just add more cream to thin it out a bit more, plus have it at room temp?

    Reply
    • Whitney says

      January 29, 2024 at 7:01 pm

      Hi there! Yes, you can absolutely cut open some tea bags and use the leaves inside. And yes, you can freeze buttercream for up to 2 months stored in an airtight container. The day before you’re ready to use it, transfer it to the refrigerator to thaw. Then a few hours before you’re ready to use it, remove it from the refrigerator and bring it to room temp before re-mixing on low speed until it becomes frosting consistency again. And yes, to thin the buttercream out add more room temperature cream/milk 1 tsp at a time until the desired consistency is reached. Hope that all helps!

      Reply
      • Jj says

        April 1, 2024 at 7:36 am

        Hi again! I made a 1 layer cake and used the rest of the batter for cupcakes. The frosting you can’t stop eating it! So delicious and by the 3rd day the cakes have a more intense flavor! The one thing is that mine were a bit on the dry side and I wondered if you would know why? Mixed it too much or cooked it too long?? I cooked the cake and cupcakes at separate times. Can I add more sour cream to make it moist? Any ideas of what I did wrong?

        Reply
  16. Anna says

    January 24, 2024 at 9:00 pm

    5 stars
    This cake is soo good! It has the perfect tea flavor that leaves me craving an actual London fog latte when I’m done. The only change I made was to substitute the sour cream for Greek yogurt since that’s what I had on hand.

    Reply
    • Whitney says

      January 25, 2024 at 2:52 pm

      Yay, Anna! I’m so happy this recipe was a hit and greek yogurt is the perfect substitute for sour cream!

      Reply
  17. Ryan says

    November 25, 2023 at 12:25 am

    This cake looks beautiful, I plan on making it next week. Can I substitute cake flour for All-purpose flour? Thanks!

    Reply
    • Whitney says

      December 9, 2023 at 7:24 pm

      Hi Ryan! So excited for you to make this cake. The cake flour is what makes the crumb of this cake so soft, and all purpose flour will work but the end result will be more dense. Instead, I recommend making this DIY version of cake flour using all purpose flour: https://sugarandsparrow.com/homemade-cake-flour-recipe/

      Reply
  18. Kayla says

    November 10, 2023 at 11:51 am

    Would it work to make this gluten free with gluten free flour?

    Reply
    • Whitney says

      November 21, 2023 at 10:18 pm

      Hi Kayla! I don’t have much experience with GF baking but I have heard of others subbing GF all purpose flour in my recipes with success! Here’s some info on subbing it: https://gfjules.com/converting-recipes-gluten-free-flour/

      Reply
  19. Renuka says

    September 26, 2023 at 12:10 pm

    Hi, I am new to your blog. I am drooling over your cakes. Will definitely be trying out some. Please if you don’t mind sharing, what camera do you use for your photos and videos ?

    Reply
    • Whitney says

      October 3, 2023 at 9:36 pm

      Thanks so much for the kind words about my cakes, Renuka! I mainly use a Canon T7i with a 50mm lens. I’ve had it for five years and they’ve since come out with this new edition: https://amzn.to/3PZvwyi

      Reply

Leave a Reply Cancel reply

Your email address will not be published. Required fields are marked *

Recipe Rating


Next Post >

Vintage Halloween Lambeth Cake Tutorial

Primary Sidebar

Welcome to Sugar & Sparrow

Welcome to Sugar & Sparrow

Helping you whip up pretty desserts with confidence and creativity. And hopefully sharing a few laughs with you along the way!

Learn More

Connect

let’s bake!

Get my very best recipes, baking tips, and decorating tutorials sent to your inbox

Featured Posts

how to convert layer cakes into sheet cakes

How to Convert My Layer Cake Recipes into Sheet Cakes

sugarbear sleep vitamins

SugarBear Sleep Vitamins Cake Collab

monster shag cake by sugar and sparrow

Monster Shag Cake Tutorial

Search

Archives

Follow Along

@sugarandsparrowco

LEMON CUPCAKES 🍋 after about a dozen recipe tes LEMON CUPCAKES 🍋 after about a dozen recipe tests, this one is everything I could want in a lemon cupcake! Fluffy-yet-moist, bursting with natural lemon flavor, and absolutely irresistible topped with lemon cream cheese buttercream. 

Full recipe (with frosting) linked in my bio + at https://sugarandsparrow.com/homemade-lemon-cupcakes/

INGREDIENTS:
1 Cup (132g) all-purpose flour
1 tsp baking powder
1/4 tsp salt
1/4 Cup (60ml) whole milk, room temperature
3 Tbsp (45ml) lemon juice from 1 medium lemon
3/4 Cup (150g) granulated sugar
3 Tbsp (42g) unsalted butter, room temperature
2 Tbsp (30ml) vegetable oil
2 large eggs, room temperature
1 tsp pure vanilla extract

INSTRUCTIONS:
1. Preheat the oven to 350ºF (177ºF) and line a standard cupcake pan with 12 paper liners.
2. In a large bowl, whisk together the flour, baking powder, and salt. Set aside. 
3. In the bowl of a stand mixer fitted with the paddle attachment (or with a hand mixer and large bowl), add the lemon zest to the sugar and mix on low speed until fragrant and well combined, about 1 minute. Meanwhile, combine the lemon juice with the milk and set aside. 
4. Add the butter to the lemon-sugar mixture and cream on medium speed until and combined, about 2 minutes. Add the vegetable oil and beat until light and creamy, about 3 minutes. Scrape down the bowl and paddle as needed.
5. Mix in the eggs one at a time on low speed, then add the vanilla and turn the mixer to medium speed for one minute.
6. Turn the mixer off and add the flour mixture all at once. Mix on low speed until just combined, then slowly pour in the lemon-milk mixture. Mix until just combined, about 30 seconds.
7. Divide the batter equally between the liners and bake for 14-18 min. Cool, then top with frosting of your choice (link in bio for lemon cream cheese frosting)�
#lemoncupcakes #creamcheesefrosting #lemon #cupcakes #cupcakedecorating
April in my kitchen 🌸 I published 5 NEW recipes April in my kitchen 🌸 I published 5 NEW recipes on my site, baked my Oreo cupcake recipe for a fundraiser and found it was just as delicious as I remember, and filmed/photographed 3 recipes that will be on my blog in May (Lemon Cupcakes, Lemon Cream Cheese Buttercream, and No-Bake Marbled Strawberry Cheesecake) 🥰 

Comment “APRIL” to get all the available recipes and stay tuned for more! 

#bakersofinstagram #springbaking #cakedecorating #cupcakes #bakinglove
SHEET PAN COOKIE CAKE 🍪 slice it warm for a fud SHEET PAN COOKIE CAKE 🍪 slice it warm for a fudgy chocolate chip cookie OR let it settle into a moist and chewy cookie cake that’s perfect for decorating! My fave vanilla buttercream + sprinkles turn this giant chocolate chip cookie into the perfect birthday cake alternative at the end 🥳
⁣
Full recipe + decorating ideas at https://sugarandsparrow.com/sheet-pan-chocolate-chip-cookie-cake/
⁣
INGREDIENTS⁣
1 Cup (226g) unsalted butter, melted⁣
1 1/3 Cups (267g) packed light or dark brown sugar⁣
1/2 Cup (100g) granulated sugar⁣
3 large eggs⁣
1 Tbsp pure vanilla extract⁣
1 tsp baking soda⁣
1 tsp cornstarch⁣
1/2 tsp salt⁣
3 Cups (398g) all purpose flour⁣
2 Cups (350g) semi-sweet chocolate chips⁣
⁣
INSTRUCTIONS⁣
1. Preheat the oven to 350ºF (177ºC). Grease and line a 13×18 inch sheet pan.⁣
2. In a large bowl, add the brown sugar and granulated sugar. Melt the butter in the microwave and pour it over the top of the sugars. Whisk together until uniform. Add the eggs and vanilla, then continue whisking until uniform. Whisk in the baking soda, cornstarch, and salt.⁣
3. Add the flour and use a silicone spatula to fold it in until smooth cookie dough forms. Reserve 1/2 Cup of the chocolate chips and set them aside, then fold the remaining 1 1/2 Cups of chocolate chips into the cookie dough.⁣
4. Place the chocolate chip cookie dough onto the prepared sheet pan and use an offset spatula to spread it all the way to the edges in an even layer.⁣
5. Bake the cookie cake for 14-16 minutes, until it looks golden brown on the edges and set. 
6. Enjoy warm or let it cool and decorate with vanilla buttercream and sprinkles! ⁣
⁣
#cookiecake #chocolatechipcookies #sheetcake #birthdaycake #cakedecorating
STRAWBERRY CUPCAKES 🍓based on my beloved strawb STRAWBERRY CUPCAKES 🍓based on my beloved strawberry layer cake recipe, this cupcake version is just as moist yet fluffy and bursting with natural strawberry flavor! Between the mix of fresh strawberries in the cupcakes + freeze-dried strawberries in the frosting, the flavor is out of this world 🚀

Full recipe link in my bio (with strawberry buttercream) + at https://sugarandsparrow.com/strawberry-cupcakes/

STRAWBERRY CUPCAKES
Yield: 14 cupcakes

INGREDIENTS:
5 oz (143g) fresh or frozen strawberries
1/3 Cup (80ml) whole milk, room temp
1 1/2 Cups (158g) sifted cake flour
1 tsp baking powder
1/4 tsp baking soda
1/2 tsp salt
6 Tbsp (85g) unsalted butter, room temp
1 Cup (200g) granulated sugar
2 large eggs, room temp
3 Tbsp (45g) sour cream, room temp
1 tsp vanilla extract
1 drop pink food coloring (optional)

INSTRUCTIONS: 
1. Puree the strawberries using a food processor (you’ll have about 1/2 cup of puree), then place into a saucepan over medium-low heat. Bring to a simmer, then cook for 10-15 min, stirring occasionally, until you have 1/4 cup. Refrigerate until room temp.
2. Preheat oven to 350ºF (177ºC) and line a standard cupcake pan with liners.
3. Whisk together the sifted cake flour, baking powder, baking soda, and salt and set aside.
4. In a stand mixer w/ paddle attachment (or hand mixer + large bowl), whip the butter on high for 2 min. Add sugar and beat for 2 min, until light and fluffy. Turn the mixer to low and add the eggs one at a time, then add the vanilla and sour cream, turn the mixer to high and beat for 1 min. Meanwhile, whisk together the strawberry puree, whole milk, and food coloring (if using).
5. Turn the mixer off and add all of the dry ingredients at once. Mix on low until just combined, then add the strawberry milk mixture until just combined, about 30 seconds.
6. Fill the cupcake liners 2/3 full and bake for 14-18 minutes. Cool completely before topping with strawberry buttercream (full recipe linked above). 

#strawberrycupcakes #strawberrycake #pinkcupcakes #strawberry #cupcakes
COFFEE BUTTERCREAM (recipe below)☕️ this frost COFFEE BUTTERCREAM (recipe below)☕️ this frosting has AMAZING coffee flavor, is so easy to decorate cakes with, and pairs beautifully with so many flavors (chocolate, vanilla, or any cake flavor you’d want to turn into a latte). 

All my cake pairing suggestions are linked in my bio or at https://sugarandsparrow.com/coffee-buttercream-recipe/ 

COFFEE BUTTERCREAM⁣
Yield: 2.5 Cups⁣

INGREDIENTS⁣
1 1/2 tsp instant coffee or espresso powder⁣
1 1/2 Tbsp whole milk, room temperature⁣
1 Cup (226g) unsalted butter, room temperature⁣
3 1/2 Cups (420g) powdered sugar⁣
2 tsp pure vanilla extract⁣
Pinch of salt⁣

INSTRUCTIONS⁣
1. Combine the instant espresso/coffee with the whole milk and set aside. In the bowl of a stand mixer, beat the butter on high until creamy and smooth (about 5 minutes), scraping down the bowl and paddle a few times in between.⁣
2. Turn the mixer to low and add the powdered sugar a few cups at a time, scraping down the bowl and paddle between intervals. Add the vanilla, the coffee/espresso milk mixture, and salt. Mix on low until fully incorporated, about one minute.⁣

#coffeebuttercream #buttercream #frosting #coffeecake

Footer

On the Blog

  • Cake Basics
  • Recipes
  • Tutorials

Info

  • About
  • Privacy Policy & Disclosure

stay in the know

Copyright © 2026 · Theme by Sugar & Sparrow