• Cake
  • Frosting
  • YouTube
  • My Favorite Tools
  • Nav Social Icons

  • Skip to primary navigation
  • Skip to main content
  • Skip to primary sidebar
  • Skip to footer
  • Recipes
    • Cake
    • Cupcakes
    • Frosting
    • Ice Cream
    • Vegan
  • Cake Basics
  • Tutorials
  • Blog
  • About
  • Mobile Menu Widgets

    Connect

    Search

Sugar & Sparrow logo in script font

Sugar & Sparrow

Lifestyle and Cake from Portland Oregon

  • Cake Basics
  • Recipes
    • Cake
    • Cupcakes
    • Cookies & Bars
    • Filling
    • Frosting
    • Ice Cream
    • No-Bake
    • Small Batch
    • Vegan
  • Tutorials
  • Book
  • Blog
  • About

Milk And Cereal Cake Recipe

May 30, 2018 · In: Cake, Featured, Recipes

Jump to Recipe

Ah, milk and cereal. They’re a match made in heaven, and nostalgic as heck. I can remember many a Saturday morning curled up in front of the TV with a bowl of milk and cereal in hand – it was a true staple in my childhood diet. The idea of translating those flavors into a cake didn’t occur to me until a year ago, when a friend of mine was having a cereal-themed birthday party. I thought it was such a fun and playful idea for a cake, and although I didn’t start testing flavors just then, I added it to my list of future cake ideas and the dream was alive.

Fast forward to present day, I found myself wandering the cereal aisle to find the perfect flavors to finally bring my milk and cereal cake dreams to life. I decided on Froot Loops, mainly because they taste good and they’re so pretty, but this recipe can be created with just about any cereal your heart desires (we all have our favorites!). I’ve made it successfully with the wheat pieces in Lucky Charms and I’m sure just about any cereal would be tasty. 
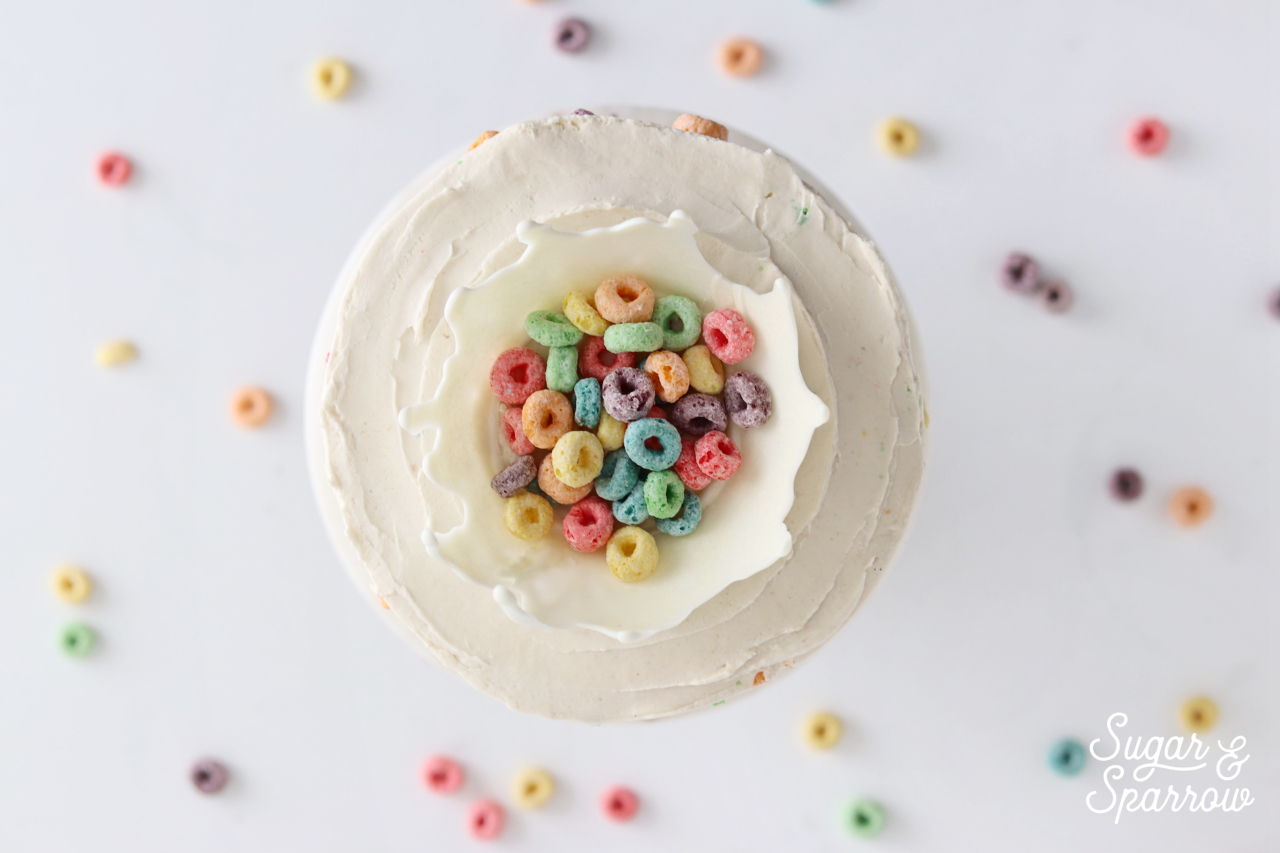
white chocolate milksplash cake topper by sugar and sparrow

Creating the perfect milk and cereal cake recipe definitely took some trial and error. My first go-round I ended up crushing up Froot Loops by hand and folding them into the cake batter, and while the result was pretty to look at (like rainbow funfetti!) the taste was off because the cereal got super chewy after the baking process. After trying some different approaches and conducting a few blind taste tests, I’ve refined the recipe to make this milk and cereal cake taste just as heavenly as it looks.
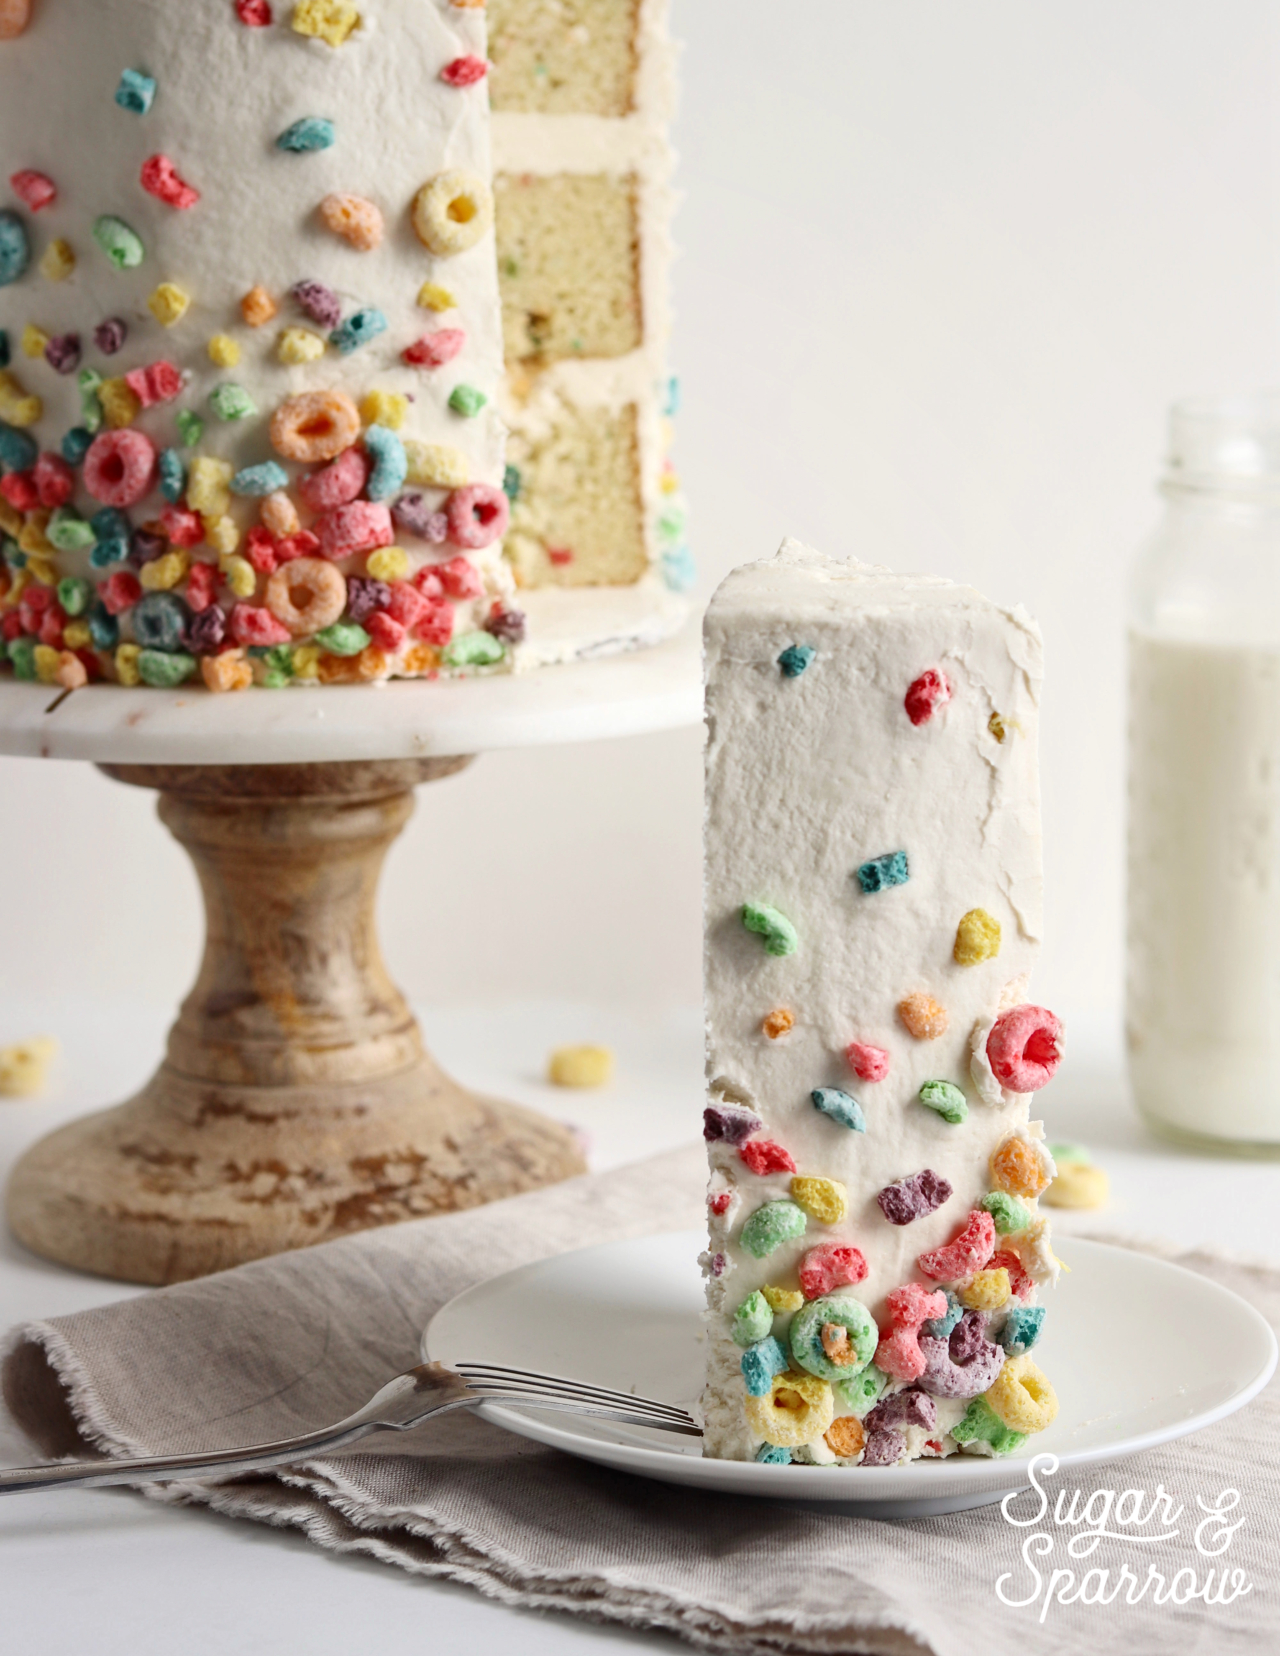
froot loop cake by sugar and sparrow

The secrets to the taste are: using actual cereal milk in place of regular milk (made by soaking the cereal in whole milk) and also adding finely ground cereal into the cake batter instead of just crushed up cereal pieces. To keep the cake moist and fluffy I’ve also incorporated sour cream and cake flour, which I swear by for all of my vanilla-based cakes.
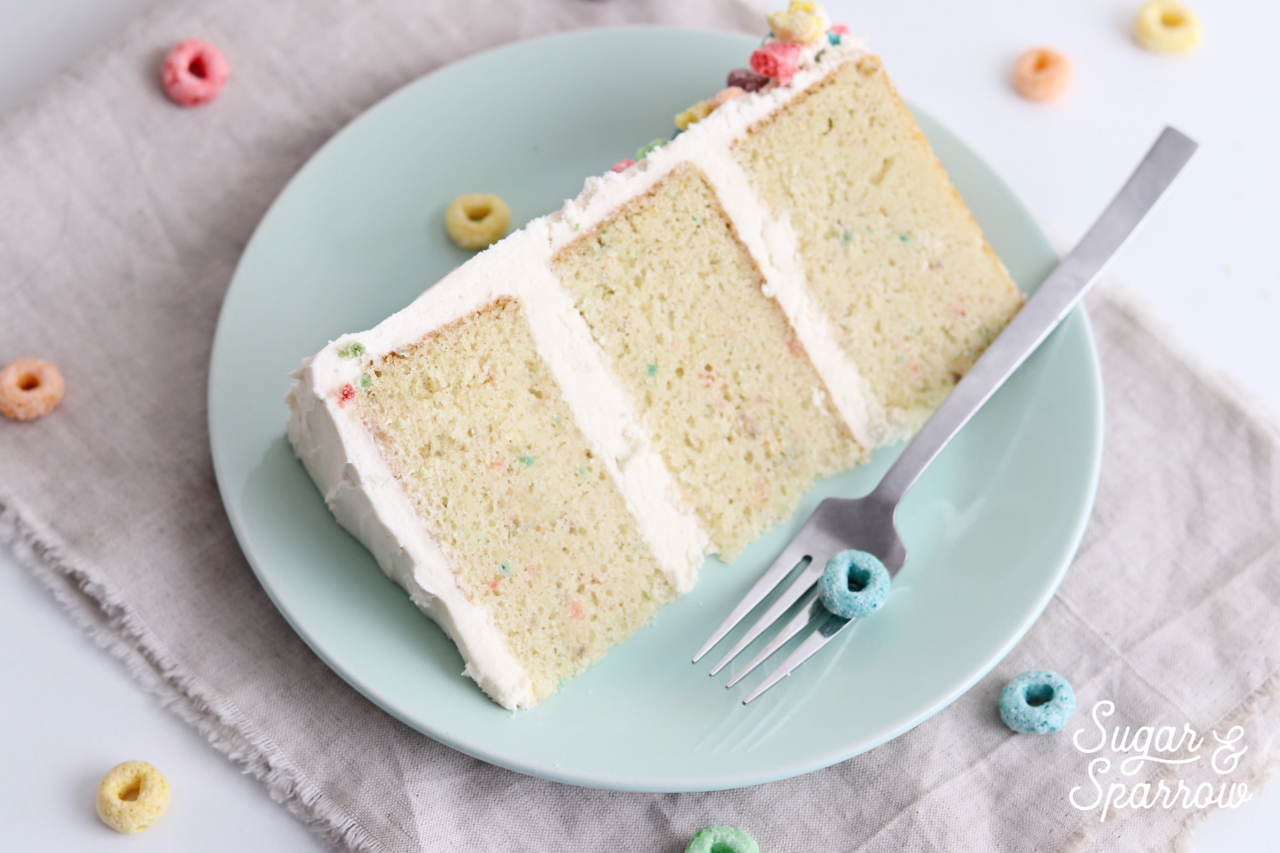
cereal cake recipe

If you’ve seen this cake on my Instagram, you’ll also see that the design concept really helps sell the premise of the cake. Some credit has to be given to my husband on that, because he totally helped come up with the idea of creating a “milk splash” out of white chocolate for the topper! Side by side, we sketched out the concept art before I took to the kitchen to figure out how to make it happen. Don’t worry, I’ve even created a full tutorial on the white chocolate milk splash in case you want to get the look!
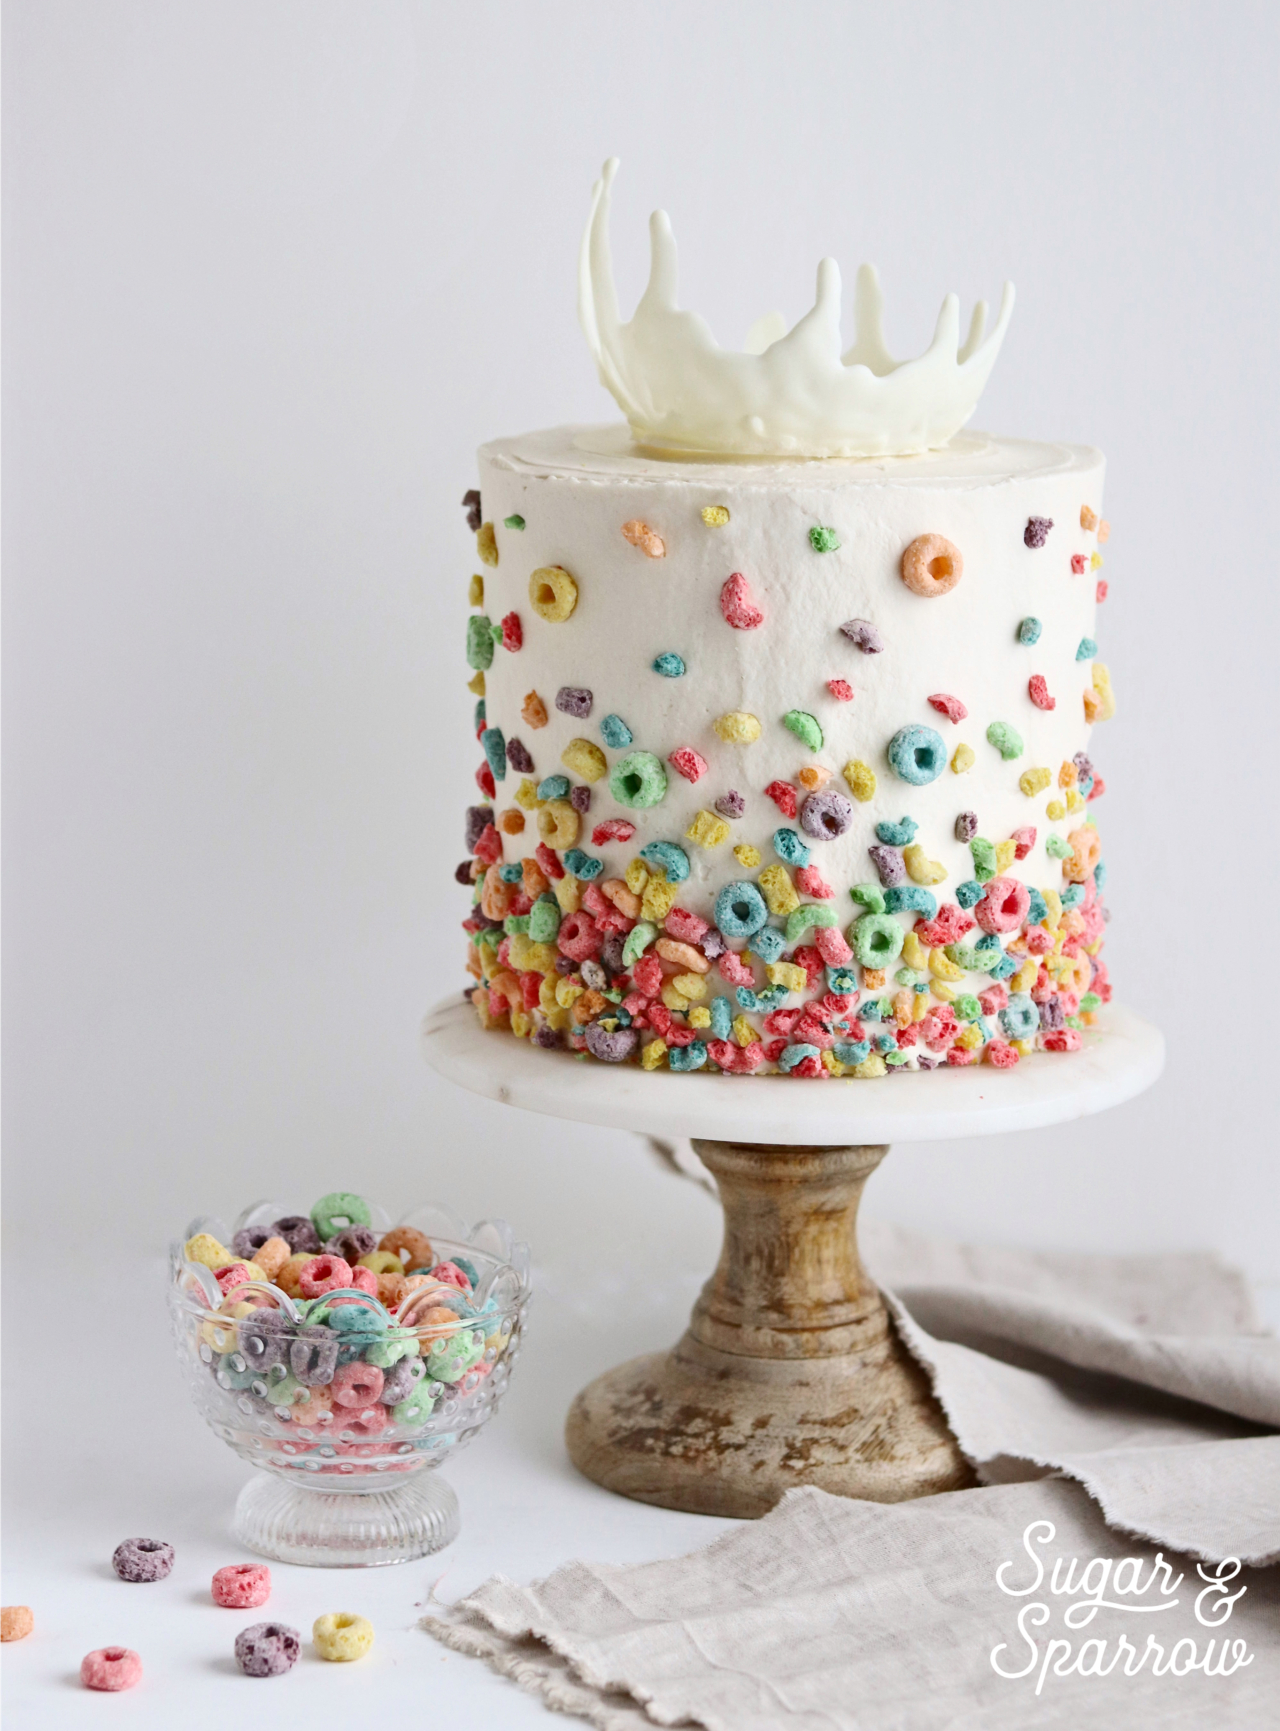
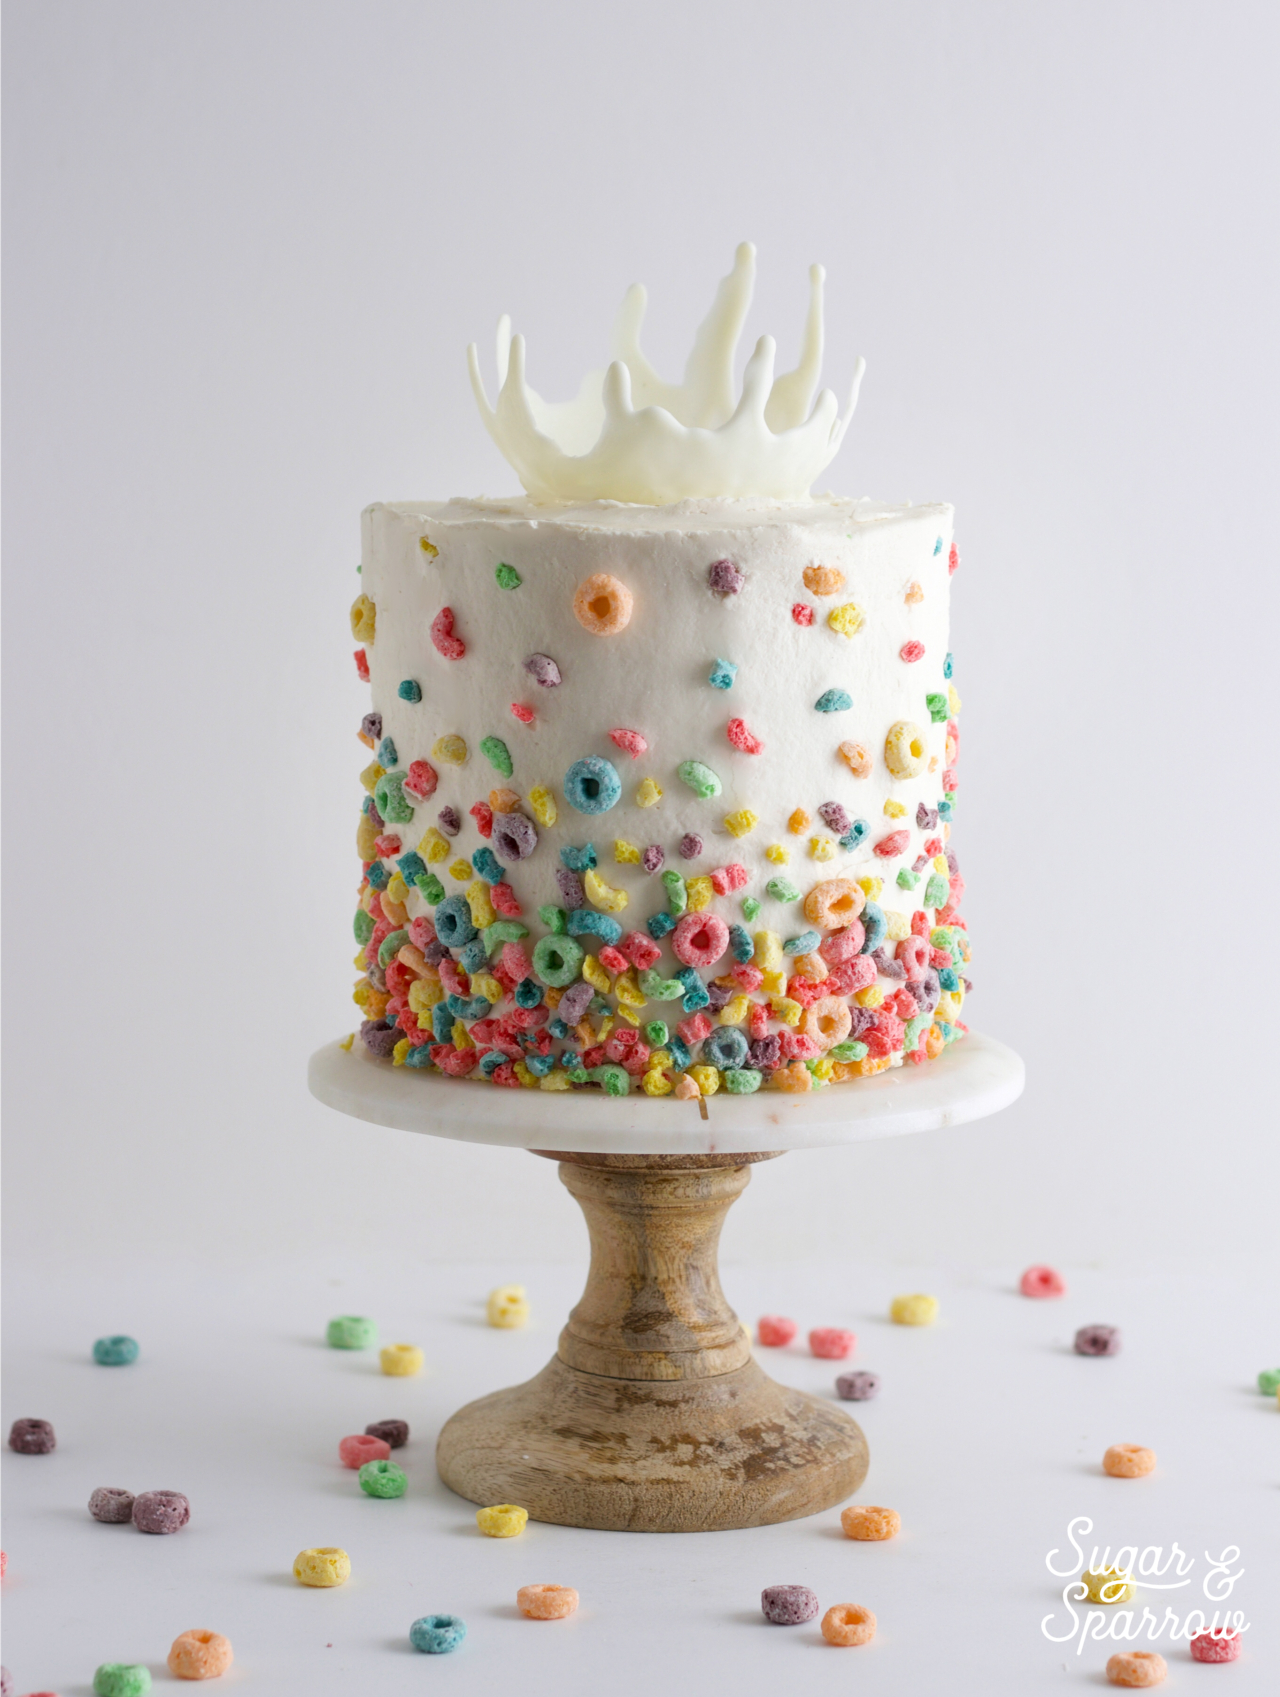
cereal cake with white chocolate milk splash by Sugar and Sparrow
milk and cereal milksplash cake by sugar and sparrow

Milk And Cereal Cake

4.83 from 17 votes
A moist and fluffy cereal-infused cake with cereal milk buttercream. Pairs perfectly with Saturday morning cartoons!
Print Recipe Pin Recipe
Prep Time:35 minutes mins
Cook Time:45 minutes mins
Total Time:1 hour hr 20 minutes mins

Ingredients

Cereal Milk

  • 2 Cups whole milk
  • 2 Cups Froot Loops (or cereal of your choice)

Milk And Cereal Cake

  • 1 Cup finely ground Froot Loops or cereal of your choice (equals about 3 cups of whole cereal)
  • 3 3/4 Cups (398g) cake flour, sifted before measuring
  • 1 Tbsp baking powder
  • 3/4 tsp baking soda
  • 1 1/2 tsp kosher salt
  • 1 1/8 Cups (254g) unsalted butter, room temperature
  • 2 Cups (410g) granulated sugar
  • 5 eggs, room temperature
  • 1 1/2 Tbsp vanilla
  • 1/2 Cup (112g) sour cream, room temperature
  • 1 1/2 Cups (360ml) cereal milk, room temperature

Cereal Milk Buttercream

  • 2 Cups (452g) unsalted butter, room temperature
  • 7 Cups (840g) powdered sugar
  • 4 Tbsp (59ml) cereal milk, room temperature
  • 1 Tbsp vanilla extract
  • 1/4 tsp salt, or to taste

Instructions

Make The Cereal Milk

  • Pour the whole milk over cereal and let sit for 15 minutes. Strain out the cereal and reserve the milk to use in the cake and buttercream recipes. 

Make The Milk And Cereal Cake

  • Preheat the oven to 350˚F and prepare three 8-inch or four 6-inch cake pans by spraying the sides with cooking spray and fitting a parchment or wax paper circle to the bottom of each pan. 
  • In a food processor, grind up Froot Loops (or cereal of your choice) into a fine powder. Keep in mind that 1 cup of finely ground cereal equals about 3 cups of whole cereal. Place into a medium sized bowl and add the sifted cake flour, baking powder, baking soda, and salt. Whisk to combine and set aside. 
  • In the bowl of a stand mixer with the paddle attachment, cream butter for one minute on high. Scrape down the bowl and paddle and add the sugar. Cream together on high for two minutes, scraping down bowl and paddle once in between. Turn mixer to low and add the eggs, one at a time, scraping down bowl and paddle as necessary. Once all eggs are added, turn the mixer to high and beat for three minutes. 
  • Add vanilla and sour cream and continue mixing for one minute. Turn the mixer to low and add all of the dry ingredients at once until just combined, then add the cereal milk all at once. Scrape down the bowl and paddle once more and mix on low for about 30 seconds. Do not overmix. Pour batter into prepared pans (about ⅔ full). 
  • Bake for 30-35 minutes or until a toothpick inserted into the center comes out clean. Cool the cakes for five minutes before releasing from the pan and continuing to cool on a baking sheet or wire rack for several hours.

Make The Cereal Milk Buttercream

  • In the bowl of a stand mixer fitted with the paddle attachment, whip the butter until fluffy and light (almost white) in color, about 7 minutes, scraping down the bowl and paddle twice during the process. Add powdered sugar a few cups at a time and beat on medium, scraping down the bowl and paddle after each interval. Add the cereal milk, vanilla, and salt and continue to mix on medium for two minutes.

Assembly

  • After torting the cake layers to the desired height, fill and frost them with cereal milk buttercream. Decorate with crushed up cereal and a white chocolate milk splash crown.

Notes

The cake layers can be made ahead, wrapped in plastic, and stored at room temperature for up to two days before frosting. Alternatively, you can wrap the cake layers and store them in the freezer for up to two months before thawing.
The buttercream can be made ahead and stored in an airtight container for up to two weeks in the refrigerator. When you’re ready to use it, bring it back to room temperature and then re-whip with your stand mixer to bring back the original consistency. 

___________________________________________________________________________

What’s your favorite cereal? If you substituted it into this recipe I want to know how it turned out! Let me know in the comments below, I’d love to hear.


By: Whitney · In: Cake, Featured, Recipes · Tagged: cake ideas, cake recipe, cereal cake, cereal milk buttercream, froot loop cake, froot loops, fruit loops, milk and cereal cake, milk splash cake

you’ll also love

the best vanilla cupcakes recipeThe Perfect Vanilla Cupcake Recipe
oreo cookies and cream cakeOreo Layer Cake Recipe
baymax birthday cake tutorialBaymax Birthday Cake

Join the List

Stay up to date & receive the latest posts in your inbox.

Reader Interactions

Comments

  1. Danielle says

    April 26, 2019 at 12:24 pm

    Could I do this with a 2x 9inch cake pan? I’ve looked everywhere for 6inch and can’t find one. How would I adjust baking time?

    Reply
    • Whitney says

      April 27, 2019 at 1:49 pm

      Hi Danielle! This recipe will work with two 9-inch pans. I would check the cakes at 40 minutes and see if they need more time from there 🙂

      Reply
  2. Sean says

    April 2, 2019 at 3:03 pm

    Making this cake tonight for my wife’s birthday tomorrow! She is an absolute cereal addict, and this will be a very nice surprise for her! Everyone wish me luck!

    Reply
    • Whitney says

      April 2, 2019 at 9:09 pm

      What a fun surprise, Sean! She’s going to love this cake!! Cheering you on and let me know how it goes 🙂

      Reply
  3. Caitlyn says

    March 26, 2019 at 10:17 pm

    5 stars
    I can’t wait to try this! Is there anyway you can help me cut down the recipe? For two 6 inch cakes instead of 3? Or would I just go with the same recipe and trim the cakes down?

    Reply
    • Whitney says

      March 27, 2019 at 9:30 am

      I’m excited for you to try this recipe too, Caitlyn! If you do two 6 inch cakes, you could reduce all of the ingredients by 1/3 but the math starts to get complicated. I would just make the whole recipe and have a little extra batter to save yourself the math. Either way, let me know how it goes!

      Reply
  4. Jaye says

    February 27, 2019 at 3:35 pm

    Thank you so much for your response! The party is on the 10th, so I will let you know how it turns out! Fingers crossed

    Reply
  5. Jaye says

    February 21, 2019 at 7:00 pm

    This cake is awesome! So very creative. I just started following you on Pinterest. I would love to make this for my (cereal-addicted) daughter’s 31st birthday next weekend. I have a couple of questions…If I wanted a 3 layer 8” or 9” cake, would a double batch be enough? Also, I’m trying to get an idea of the overall flavor of the cake. Is it very fruity tasting? Im considering doing half cereal milk and half plain milk. Any thoughts or suggestions you have would be much appreciated!

    Reply
    • Whitney says

      February 22, 2019 at 12:28 pm

      Hi Jaye! This cake will be perfect for your daughter!! To me, the cake tastes just like a bowl of milk and cereal, but not in an overpowering or overly fruity way. I tested it a bunch with different increments of cereal/cereal milk and this one is just the right amount, but I’m sure using half cereal milk and half whole milk will be totally fine! A double batch will be perfect for a three layer 8″ or 9″ cake. Let me know how you end up liking the recipe!

      Reply
  6. melly says

    February 19, 2019 at 9:33 am

    5 stars
    The cereal powder was grey. I was worried yesterday! But I woke up today to discover a moist cake that isn’t altogether too awful!
    I also discovered I’m no cake decorator! But thanks for the fun recipe. My husband will love it!

    Reply
    • Whitney says

      February 19, 2019 at 9:36 pm

      Hi Melly! Yeah, blending all the cereal colors together does make a grey color before you add it to the batter (unless you pick and choose which colors you blend) but I’m so happy to hear that the cake turned out! I hope your husband loves it!!

      Reply
      • Carol LiVecchi says

        July 10, 2019 at 8:35 am

        Whitney, did you pick and choose colors of cereal to blend? If so, which colors?
        I discovered your blog today and subscribed after about a minute. Your cake designs are beautiful and fresh and creative, and your recipes sound enticing. I’m really looking forward to trying them. Thanks for sharing.

        Reply
        • Whitney says

          July 11, 2019 at 9:20 am

          Hi Carol, I didn’t pick and choose the colors. When I added the cereal powder to the cake batter it didn’t turn the batter grey, it looked more like tiny bits of rainbow confetti. So excited for you to try this recipe and thanks for the kind words about my cakes!!

          Reply
  7. emma says

    January 22, 2019 at 10:50 am

    my husband is a cereal connoisseur & his birthday is this month … I’ve never made a cake before, but i’m gonna try this one!!!!!

    Reply
    • Whitney says

      January 22, 2019 at 2:23 pm

      Hi Emma! I’m so excited for you to make this cake!! It’s perfect for a cereal connoisseur 🙂 Let me know how it goes!

      Reply
  8. Callie says

    November 24, 2018 at 6:33 am

    Do you think it would still taste alright if I made a cream cheese buttercream frosting (half butter, half cream cheese) and added the cereal milk to that? I am not a fan of traditional buttercream, but I don’t know if it will have the same taste.
    I plan on using fruity pebbles and making this for my birthday next month! Thanks so much for this recipe!

    Reply
    • Whitney says

      November 24, 2018 at 10:13 am

      Hi Callie! Although I’ve never made the cereal milk buttercream with cream cheese, I’m sure it would taste amazing. I don’t think you can ever really go wrong with cream cheese frosting, so feel free to give it a try! And happy upcoming birthday month!

      Reply
  9. Olivia N says

    September 27, 2018 at 12:45 pm

    5 stars
    Thank you so much for sharing your recipes! I just made this with Cap’n Crunch. It’s not as pretty as the colorful fruitloops but the flavor is MAGIC!

    Reply
    • Whitney says

      September 27, 2018 at 1:58 pm

      Hi Olivia! You are so welcome. A Cap’n Crunch flavored cake sounds INCREDIBLE! So happy it turned out well!

      Reply
  10. Tembra says

    August 5, 2018 at 11:06 am

    5 stars
    Thank you! I made this today with lucky charms – added a layer of the cereal marshmallows between each layer as well. Great recipe

    Reply
    • Whitney says

      August 6, 2018 at 6:48 pm

      Yay!! I’m so glad you loved the recipe and it sounds delicious with Lucky Charms!

      Reply
  11. Tembra says

    July 30, 2018 at 10:49 am

    I plan on making a smaller, 6 inch cake instead . Should I half the recipe ?

    Reply
    • Whitney says

      July 31, 2018 at 9:39 am

      Hi Tembra! This recipe makes enough for a three-layer 6-inch cake and then some. If you half the recipe you’d totally have enough for a two-layer 6 inch cake. Hope that helps!

      Reply
      • Tembra says

        August 3, 2018 at 9:47 am

        Thank you! I thought it was a bigger cake for some reason. I prefer 6 inch ones anyways . Thanks !

        Reply
      • Wendy Womack says

        November 3, 2019 at 6:33 pm

        How can I make this as a 3-layer 8-inch?

        Reply
        • Whitney says

          November 4, 2019 at 8:37 am

          Hi Wendy! It depends on how tall you want the layers. This recipe will make three 8 inch layers as-is, each layer will be about 1 inch tall. If you’d like the layers to be taller I would 1.5 the recipe.

          Reply
  12. Jes says

    June 8, 2018 at 3:46 pm

    Omg this cake is so incredibly creative! Love!!

    Reply
    • Whitney says

      June 8, 2018 at 10:49 pm

      Thanks so much, Jes! It was a fun one 🙂

      Reply
  13. Rolanda says

    May 30, 2018 at 4:38 pm

    Awesome I love this

    Reply
    • Whitney says

      May 30, 2018 at 8:18 pm

      Thanks Rolanda!

      Reply
  14. Prakruthi says

    May 30, 2018 at 10:08 am

    5 stars
    hi … the cake look very beautiful .. I have one question .. the garnish .. that looks like a milk splash .. how is done .. ? could plz share the steps for it ?? thank u

    Reply
    • Whitney says

      May 30, 2018 at 11:57 am

      Hi Prakruthi! Thanks for your kind words about my cake 🙂 here’s the full tutorial for the white chocolate milk splash: https://sugarandsparrow.com/white-chocolate-milk-splash-tutorial/

      Reply
Newer Comments »

Trackbacks

  1. White Chocolate Milk Splash Tutorial says:
    May 30, 2018 at 8:33 am

    […] the topper for my Milk and Cereal Cake, I ended up creating a white chocolate “milk splash” to make it look like cereal milk was […]

    Reply

Leave a Reply Cancel reply

Your email address will not be published. Required fields are marked *

Recipe Rating


Next Post >

How To Make Fresh Flowers Safe For Cakes

Primary Sidebar

Welcome to Sugar & Sparrow

Welcome to Sugar & Sparrow

Helping you whip up pretty desserts with confidence and creativity. And hopefully sharing a few laughs with you along the way!

Learn More

Connect

let’s bake!

Get my very best recipes, baking tips, and decorating tutorials sent to your inbox

Featured Posts

cactus cake by sugar and sparrow

A Cactus Cake With Major Desert Vibes

the best snickers candy bar cake by sugar and saprrow

The Ultimate Snickers Cake

pastel m&m cake

Rainbow Candy Mosaic Cake

Search

Archives

Follow Along

@sugarandsparrowco

EASY HOMEMADE SALTED CARAMEL✨(recipe below) even i EASY HOMEMADE SALTED CARAMEL✨(recipe below) even if you’ve never made salted caramel from scratch before, this recipe is VERY beginner friendly + nearly fail proof! There are only 4 ingredients involved, no candy thermometer required, and takes just 10 minutes to make 👏🏽 this is my go-to caramel for drip cakes, drizzling desserts, flavoring coffee, adding it to buttercream, and so much more! 🍯  
 
Full recipe (with video + detailed instructions) linked in my bio or at https://sugarandsparrow.com/salted-caramel-recipe/
⁣ 
SALTED CARAMEL 
Yield: 1.25 Cup⁣s
⁣⁣ 
Ingredients:⁣⁣ 
1 Cup (200g) white granulated sugar⁣⁣ 
6 Tbsp (85g) unsalted butter, room temperature, cut into cubes⁣⁣ 
1/2 Cup (120ml) heavy whipping cream, room temperature⁣⁣ 
1 1/4 tsp kosher salt⁣⁣ 
⁣⁣ 
Instructions:⁣⁣ 
1. Place the sugar in a medium saucepan over medium-high heat and stir constantly until it melts into an amber-colored liquid and no sugar clumps remain, 5-6 minutes. ⁣⁣ 
2. Reduce the heat to medium. Carefully add the butter (it will bubble up when you do) and use a whisk to combine it with the sugar mixture until the butter is fully melted and incorporated, 2-3 minutes. ⁣⁣ 
3. Add the heavy whipping cream in a steady stream while whisking. As soon as the cream is incorporated, let the caramel boil for a full minute before removing it from the heat and stirring in the salt. ⁣⁣ 
4. Let the caramel cool to room temperature before using it in a cake recipe or as a drip. If you’re using it to drizzle over ice cream or warm baked goods, you only need to cool it slightly (20 minutes or so). It will thicken as it cools. ⁣⁣ 
⁣⁣ 
#caramel #saltedcaramel #bakedfromscratch #caramelcake #caramelsauce
SPICE CAKE 🤎 filled + frosted with brown butter cr SPICE CAKE 🤎 filled + frosted with brown butter cream cheese frosting for the dreamiest Fall cake!! These spice cake layers are perfectly moist with the ideal amount of spice, and the rich nutty caramel notes combined with the classic tang of cream cheese frosting take the flavor beyond.

Comment RECIPE and I’ll send it right to you! Or find the full recipe linked in my bio + at https://sugarandsparrow.com/spice-cake-recipe/

INGREDIENTS
2 1/4 Cups (298g) all purpose flour
1 tsp baking powder
1 tsp baking soda
1/2 tsp salt
1 Tbsp ground cinnamon
1 tsp ground allspice
1 tsp ground ginger
1/2 tsp ground nutmeg
1/4 tsp ground cloves
1 3/4 Cups (350g) packed brown sugar 
3/4 Cup (180ml) vegetable oil
1 Cup (240g) unsweetened applesauce
4 large eggs, room temperature
2 tsp pure vanilla extract
1 Cup (240ml) buttermilk, room temp

INSTRUCTIONS
1. Preheat the oven to 350ºF (177ºC). Grease and line three 6-inch cake pans or two 8-inch cake pans.
2. In a medium bowl, whisk together the flour, baking powder, baking soda, salt, cinnamon, allspice, ginger, nutmeg, and cloves. Set aside.
3. In a large bowl, add the brown sugar, vegetable oil, and unsweetened applesauce. Whisk together until uniform, then whisk in the eggs one at a time followed by the vanilla.
4. Whisk in half of the dry ingredients, followed by all of the buttermilk, then the rest of the dry ingredients. 
5. Pour the batter evenly between the prepared cake pans and bake for 32-36 minutes, until a toothpick inserted comes out clean or with just a few moist crumbs. Cool completely before frosting (full recipe with brown butter cream cheese frosting linked in my bio)

#spicecake #cakedecorating #layercake #cakelover #creamcheesefrosting
PUMPKIN CUPCAKES 🧡 topped with spiced cream cheese PUMPKIN CUPCAKES 🧡 topped with spiced cream cheese frosting to give every bite the most heavenly pumpkin spice flavor! The perfect cupcakes to kick off your fall baking 🍂

Comment RECIPE and I’ll send it right to you!

You can also find the link in my bio (or google ‘Sugar and Sparrow Pumpkin Cupcakes’) 

#pumpkinspice #pumpkincake #pumpkinseason #falldesserts #creamcheesefrosting
OATMEAL CREME PIE CAKE 🙌🏼 I’m always thinking abou OATMEAL CREME PIE CAKE 🙌🏼 I’m always thinking about this cake during back-to-school season because Oatmeal Creme Pies take me right back to my elementary school days! It’s layers of tender brown sugar oatmeal cake with the gooiest homemade marshmallow filling and tastes just like the real deal in cake form – perfect party cake for an Oatmeal Creme Pie lover! 

Full recipe linked in my bio + at https://sugarandsparrow.com/oatmeal-creme-pie-cake/ 
 
#oatmealcremepie #vintagecake #layercake #partycake #cakedecorating
NO-BAKE BISCOFF CHEESECAKE ✨this is the perfect EA NO-BAKE BISCOFF CHEESECAKE ✨this is the perfect EASY no-bake dessert for Fall and I cannot get over the incredible spiced caramel flavor!! I added Biscoff cookie butter to my favorite no-bake cheesecake base, piled it onto a Biscoff cookie crust, then topped it with a melted cookie butter drip + tons of crunchy cookie crumbs.  
 
🤎Full recipe linked in my bio + at https://sugarandsparrow.com/no-bake-biscoff-cheesecake/ 
 
BISCOFF CRUST: 
1 8.8oz package Biscoff cookies (250g) 
1/3 Cup (75g) unsalted butter, melted 
 
FILLING: 
16 Oz (452g) full-fat brick-style cream cheese, room temp 
1/4 Cup (50g) powdered sugar 
3/4 Cup (210g) creamy Biscoff cookie butter 
1 tsp ground cinnamon 
1 tsp pure vanilla extract 
1 Cup (240ml) heavy whipping cream, cold 
 
INSTRUCTIONS: 
1. Combine the Biscoff crust ingredients until the mixture resembles wet sand, then press firmly into the bottom of a 9-inch springform pan.  
2. In a large bowl, whip the cream cheese until smooth, then add the powdered sugar, cookie butter, cinnamon, and vanilla and mix until smooth.  
3. In a separate medium bowl, whip the heavy whipping cream to stiff peaks, then fold into the cream cheese mixture until no streaks remain. 
4. Add the filling on top of the Biscoff crust, cover, and refrigerate for at least 8 hours. 
5. Once set, top with melted cookie butter and crushed Biscoff cookies. 
 
#biscoff #biscoffcheesecake #nobakecheesecake #biscoffcake #nobake 

Footer

On the Blog

  • Cake Basics
  • Recipes
  • Tutorials

Info

  • About
  • Privacy Policy & Disclosure

stay in the know

Copyright © 2026 · Theme by Sugar & Sparrow