• Cake
  • Frosting
  • YouTube
  • My Favorite Tools
  • Nav Social Icons

  • Skip to primary navigation
  • Skip to main content
  • Skip to primary sidebar
  • Skip to footer
  • Recipes
    • Cake
    • Cupcakes
    • Frosting
    • Ice Cream
    • Vegan
  • Cake Basics
  • Tutorials
  • Blog
  • About
  • Mobile Menu Widgets

    Connect

    Search

Sugar & Sparrow logo in script font

Sugar & Sparrow

Lifestyle and Cake from Portland Oregon

  • Cake Basics
  • Recipes
    • Cake
    • Cupcakes
    • Cookies & Bars
    • Filling
    • Frosting
    • Ice Cream
    • No-Bake
    • Small Batch
    • Vegan
  • Tutorials
  • Book
  • Blog
  • About

Spiced Pumpkin Biscoff Cake

November 3, 2022 · In: Cake, Fall, Featured, Recipes, Seasonal, Winter

Jump to Recipe

Fall is the most inspiring time of year for me when it comes to recipes. The cold weather always gets me in the mood to bake, so that helps, but it’s the cozy flavors of the season that really amp me up. When I was thinking about new flavor pairings for my favorite pumpkin layer cake, I instantly thought Biscoff frosting would be incredible. Spoiler alert: I was not wrong. This cake is what Fall cake dreams are made of! 
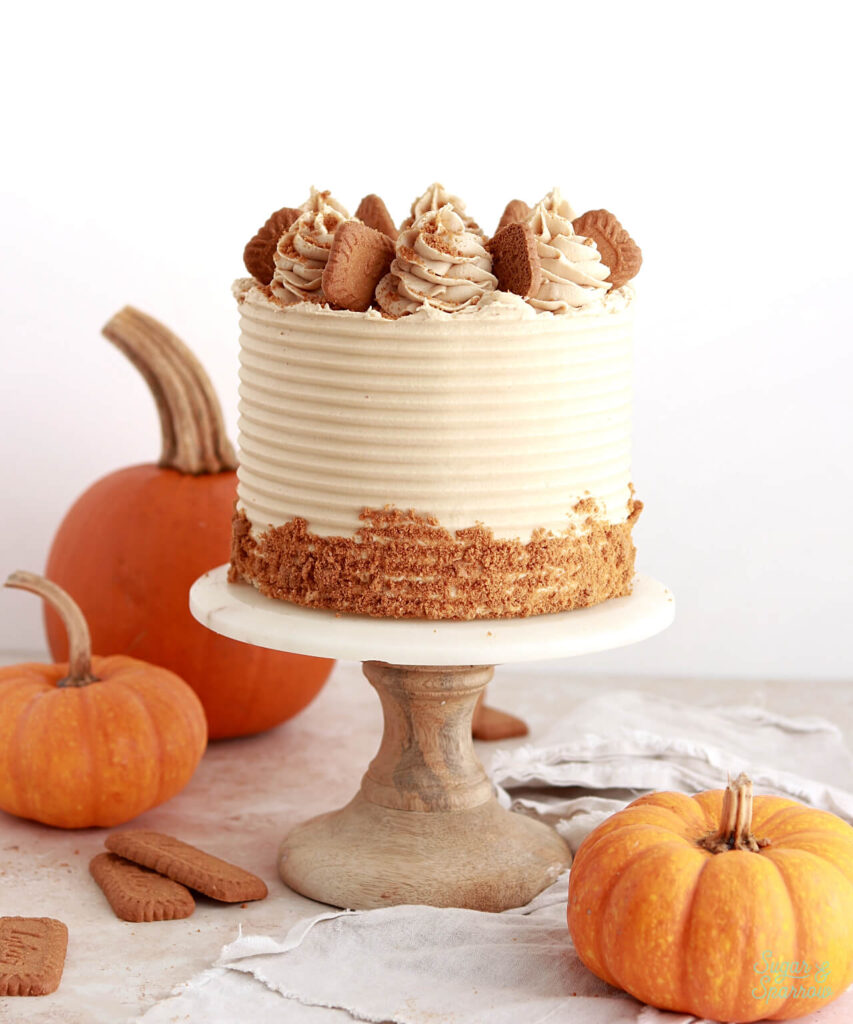
pumpkin cake with biscoff frosting recipe

This is my favorite pumpkin cake recipe, ever. It’s deliciously moist, packed with pumpkin flavor, and has just the right amount of spice. It’s been my go-to for years and something I crave every single Fall. I’ve paired it with cream cheese frosting for a classic combo, made it into a pumpkin pie-inspired layer cake for Thanksgiving, and used it to make the pumpkin spice latte cake you’ll find in my book. This pumpkin Biscoff cake, though. It is NEXT LEVEL. 
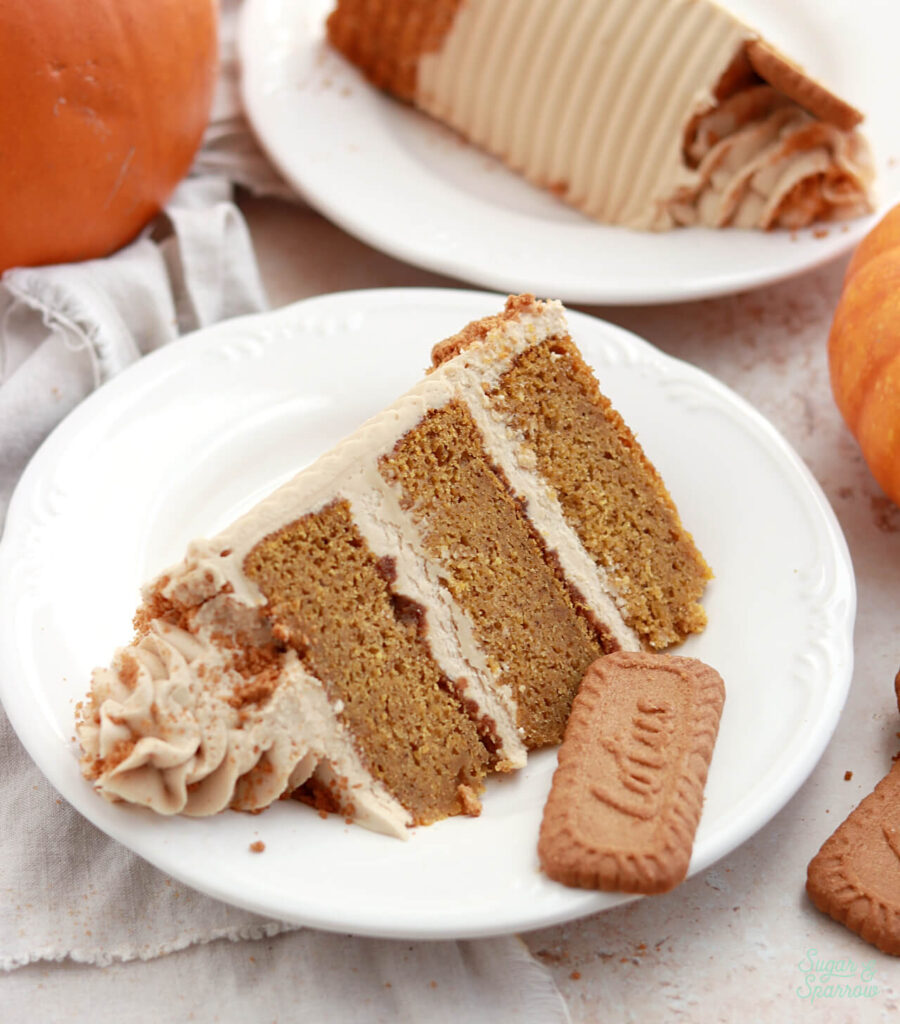
pumpkin biscoff cake recipe by sugar and sparrow
biscoff frosting with pumpkin cake recipe

The Biscoff frosting completely elevates this pumpkin cake. Made with Biscoff cookie butter spread, it has gorgeous notes of cinnamon and caramel that really amplify the spice flavor in the pumpkin cake. Together, these flavors are absolutely perfect for Fall. To take things a step further, I crumbled Biscoff cookie crumbs in between the cake layers and added them as garnish on the outside of the cake. Because you can never have too much Biscoff. 
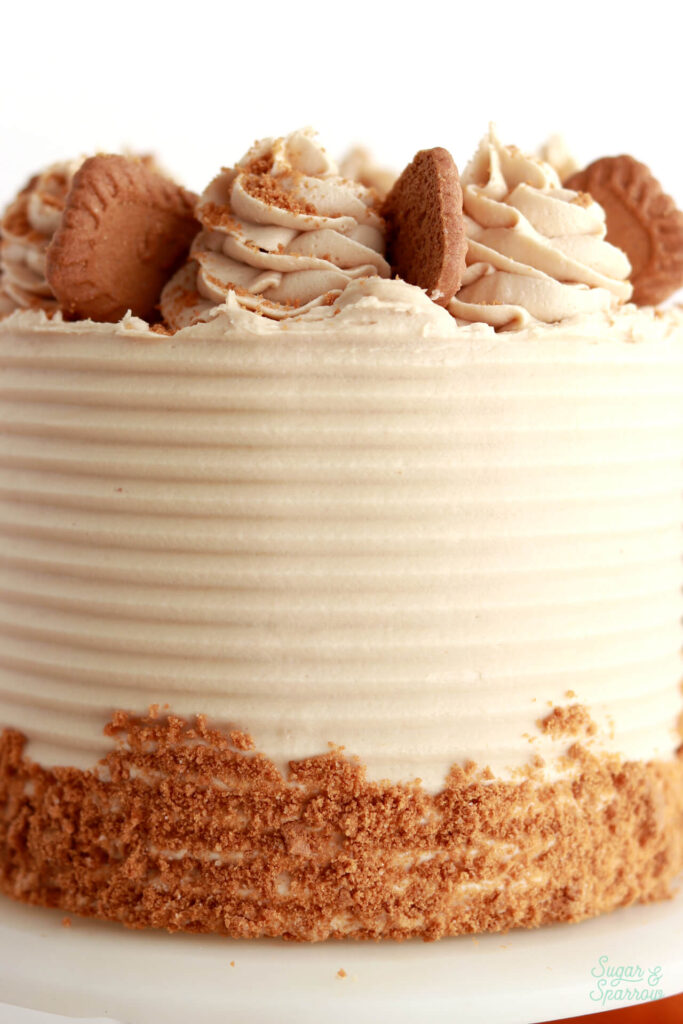
pumpkin cake with biscoff buttercream frosting

I’m lucky to be able to find Biscoff cookie butter spread at my local grocery store and Target, but if you’re having a hard time finding it locally you can get it here on Amazon. You can also substitute any cookie butter in place of the Biscoff spread, so if you have a different favorite brand feel free to use that instead! 
pumpkin biscoff layer cake recipe

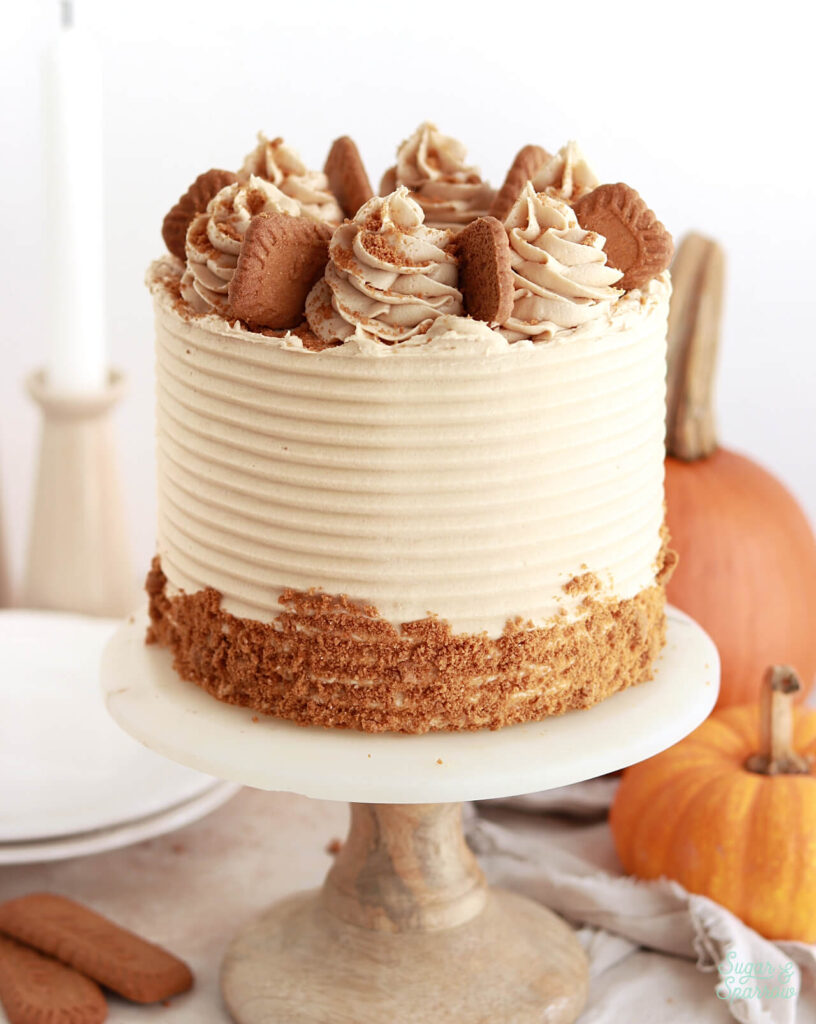
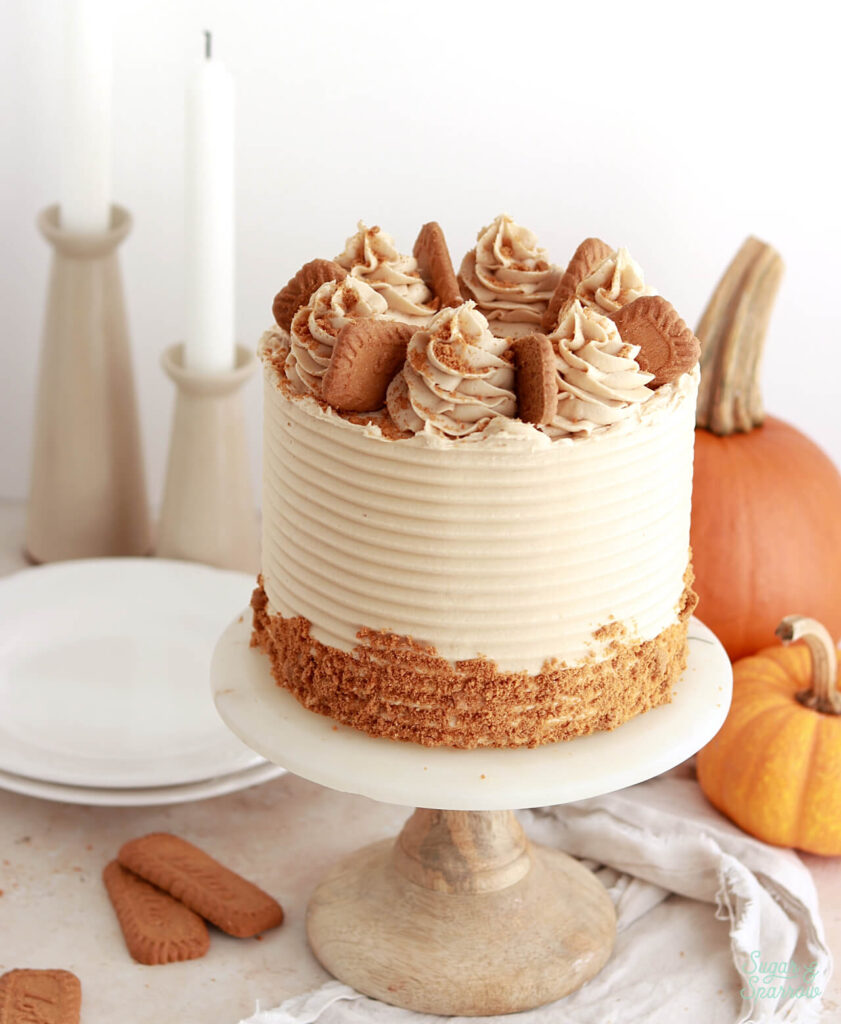
To decorate this cake, I used a Wilton cake comb to create the grooved texture in the Biscoff buttercream and left the top edge raw. It looked nice and rustic like that. Then, I added Biscoff cookie crumbs around the bottom edge of the cake and topped it with Biscoff buttercream swirls and more cookie garnishes. I used Wilton Tip 1M for the swirls here. 
pumpkin biscoff cake recipe by sugar and sparrow
pumpkin biscoff cake

However you decorate, this cake is bound to impress at your next Fall gathering! It would make an excellent Thanksgiving cake or just an all-around cozy bake for a rainy day. I’m completely in love with this flavor pairing and I hope you love it as much as I do! 
Pumpkin Biscoff Cake Recipe

Spiced Pumpkin Biscoff Cake

5 from 3 votes
Deliciously moist pumpkin cake layered with Biscoff cookie butter frosting and crumbled Biscoff cookies throughout. The perfect next-level Fall cake!
Print Recipe Pin Recipe
Prep Time:40 minutes mins
Cook Time:35 minutes mins
Servings: 15 slices

Ingredients

Pumpkin Cake

  • 2 3/4 Cups (290g) sifted cake flour* DIY recipe in notes
  • 2 1/2 tsp baking powder
  • 1 tsp baking soda
  • 1 tsp salt
  • 2 tsp ground cinnamon
  • 1 tsp allspice
  • 1 tsp nutmeg
  • 1/2 tsp ground ginger
  • 1 Cup (226g) unsalted butter, room temperature
  • 3/4 Cup (140g) packed brown sugar
  • 1 Cup (200g) granulated sugar
  • 3 large eggs, room temperature
  • 2 tsp pure vanilla extract
  • 1 1/2 Cups (12 oz) canned pumpkin purèe
  • 1 Cup (240ml) full fat buttermilk* DIY recipe in notes

Biscoff Frosting

  • 1 1/2 Cups (339g) unsalted butter, room temperature
  • 3/4 Cup (188g) Biscoff spread or cookie butter
  • 5 Cups (600g) powdered sugar
  • 1 1/2 tsp pure vanilla extract
  • 4 Tbsp (60ml) whole milk, room temperature
  • 1/4 tsp salt, or to taste

Additional Fillings/Toppings

  • 1/2 Cup (50g) crushed Biscoff cookies, divided
  • 4 Biscoff cookies, halved

Instructions

Make the Pumpkin Cake

  • Preheat the oven to 350ºF/177ºC and prepare three 6-inch or two 9-inch cake pans by spraying the sides with cooking spray and placing a wax or parchment paper circle into the bottom of each one. Measure the cake flour by spooning into your measuring cup and leveling it. Place it into a medium sized bowl and add the baking powder, baking soda, salt, ground cinnamon, allspice, nutmeg, and ground ginger. Whisk together and set aside.
  • In the bowl of your stand mixer (a handheld mixer works fine too!), cream the butter on high for two minutes until it's light and fluffy. Add in white and brown sugars and continue to mix on high for another two minutes, scraping down the bowl and paddle as needed. Add the eggs one at a time, mixing thoroughly after each addition. Add pumpkin puree and vanilla and mix for one minute on medium-high, scraping down the bowl and paddle once more.
  • With the mixer on low speed, add in the dry ingredients and mix until just combined. Add the buttermilk in a steady stream and mix until just incorporated. Scrape down the sides and bottom of the bowl and give it a few stirs to make sure there are no lumps. Batter will be slightly thick, but pourable.
  • Pour batter evenly between the cake pans (fill them no more than ⅔ full) and bake for 35-40 minutes, until a toothpick inserted comes out clean. Cool the cakes in the pan for ten minutes before removing and continuing to cool on a wire rack or flat surface.

Make the Biscoff Frosting

  • With a hand mixer or paddle attachment on your stand mixer, cream the butter and Biscoff cookie spread together on medium-high until it’s creamy and fully combined, about 5 minutes.
  • Turn the mixer to low and add the powdered sugar a few cups at a time, scraping down after each addition and making sure each addition is fully incorporated before adding the next. Add the vanilla, whole milk, and salt and continue to mix on low for another 2 minutes, scraping down the bowl and paddle as needed, until fully incorporated and smooth.

Assembly

  • Once the pumpkin cakes are completely cooled, level them to your desired height. Add a swipe of Biscoff frosting onto a cardboard cake circle and place the first cake layer on top. Add a layer of Biscoff frosting as filling, then sprinkle on about 2 Tablespoons of crushed Biscoff cookies before adding the next layer on top. Repeat the filling and stacking process with the final cake layer. Crumb coat the cake with Biscoff frosting, then place it in the refrigerator for at least 30 minutes to let the buttercream set firm.
  • To create the design pictured, frost the cake with Biscoff frosting and use a cake comb to create grooved texture on the sides. Keep the top edges raw. While the frosting is still tacky, gently press Biscoff cookie crumbs around the bottom third of the cake. Pipe swirls of Biscoff frosting on top of the cake and place half of a Biscoff cookie in between each swirl. Finish by sprinkling the rest of the Biscoff cookie crumbs over the swirls.

Notes

*DIY Cake Flour Recipe: To make your own cake flour, spoon and level one cup of all-purpose flour and remove 2 Tbsp. Add 2 Tbsp of cornstarch. Repeat per the amount of cake flour you need, then sift the flour and cornstarch mixture 4 times (don’t skip that step!). After sifting, spoon and level to re-measure the amount of cake flour you need. If measuring with a kitchen scale, you’ll end up with 365g of homemade cake flour (since all-purpose weighs more than store bought cake flour).
*DIY Buttermilk recipe: add 1 Tbsp of white vinegar to a jar and top it with 1 Cup of whole milk. Stir and let sit for 15 minutes before using in the recipe. 
Make Ahead Tips: 
  1. The pumpkin cake can be baked ahead and stored at room temperature, wrapped in plastic wrap, for up to two days. Alternatively you can store the cakes in the freezer for up to two months.  
  2. The Biscoff frosting can be made ahead and stored in an airtight container in the refrigerator for up to two weeks. When you’re ready to use it, bring it back to room temperature and re-mix in your stand mixer to bring it back to smooth buttercream consistency. 

I hope you fall head over heels for this pumpkin Biscoff cake like I have! Let me know what you think in the comments below and feel free to tag @sugarandsparrowco on Instagram if you post a pic! I love to see what you create.

By: Whitney · In: Cake, Fall, Featured, Recipes, Seasonal, Winter · Tagged: biscoff buttercream, biscoff cake, biscoff cookies, biscoff frosting, biscoff spread, cake comb, pumpkin biscoff cake, pumpkin cake

you’ll also love

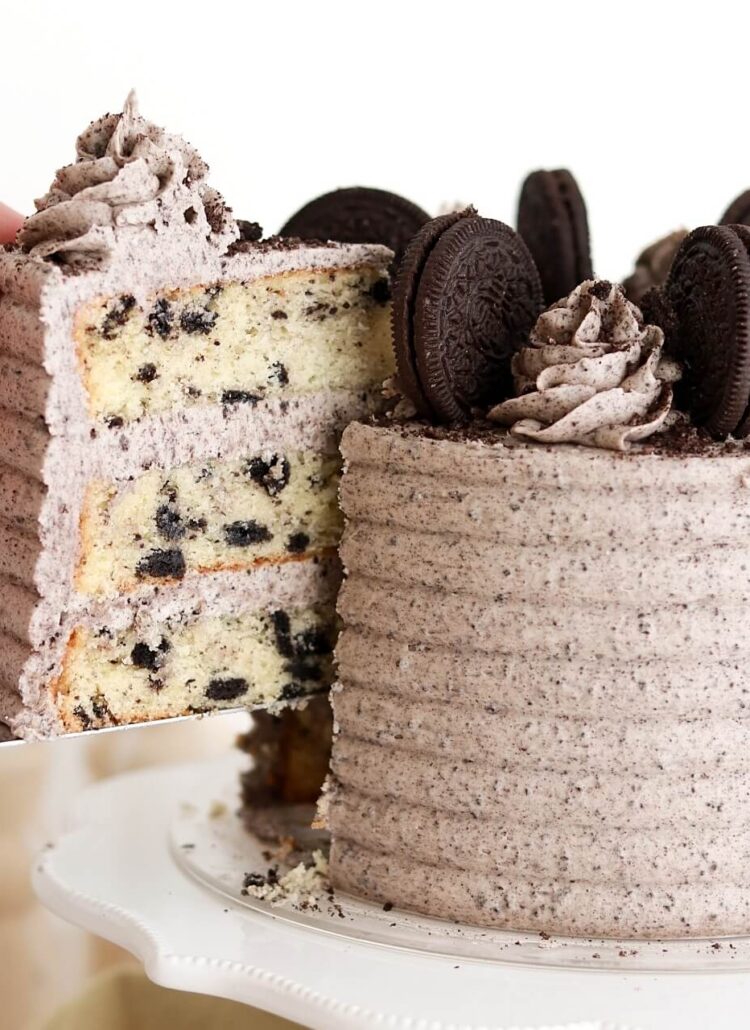
vanilla oreo cake with cookies and cream buttercreamCookies & Cream Cake (Vanilla Oreo Cake)
pumpkin layer cake recipe by sugar and sparrowPerfect Pumpkin Layer Cake Recipe
easy pumpkin cake with cream cheese frostingEasy Pumpkin Sheet Cake

Join the List

Stay up to date & receive the latest posts in your inbox.

Reader Interactions

Comments

  1. Alfonsa says

    November 5, 2024 at 8:55 am

    Can I bake all three pans at the same time?
    And how many degrees do you use?
    And which function of the oven do you use- top/bottom heat oder circulating air?

    Reply
    • Whitney says

      November 5, 2024 at 10:34 am

      Hi Alfonsa! Yes, I recommend baking all 3 layers at the same time. I have a conventional oven, so I just use the bake function at 350ºF/177ºC. If you have a fan-assisted oven, I recommend reducing the temperature by 25ºF since those ovens run much hotter and tend to over-bake cakes. Hope that helps!

      Reply
      • Alfonsa says

        November 6, 2024 at 3:36 am

        Thank you for your quick response!
        One last question: when I do the DIY buttermilk, does the milk has to be room temperature when stir with vinegar? Or room temperature just before adding the batter?
        When I added the buttermilk the batter clotted so I think my mistake was the too cold buttermilk…

        Reply
  2. Maggie Westcott says

    October 30, 2024 at 4:20 am

    I made this cake last week and it’s a huge hit! One question: would love to make a cupcake version of this. What modifications to bake time/temp would you recommend? Thanks!

    Reply
    • Whitney says

      October 30, 2024 at 8:45 pm

      Yay, Maggie! That makes me so happy! You can bake this recipe as cupcakes. Be sure to fill the tins no more than 2/3 full and bake at 350F for 15-18 min. Enjoy!

      Reply
  3. Krystal-Kay Hawkins says

    October 13, 2024 at 10:06 pm

    Can you please tell me the best way to store the leftover cake? Thanks so much!

    Reply
    • Whitney says

      October 19, 2024 at 12:51 pm

      Hi Krystal! There are a few ways to store leftover cake: 1) you can wrap the cake or slices in plastic wrap and store in the refrigerator for 3-4 days 2) store at room temperature under a bell jar or otherwise covered for 3-4 days 3) wrap the individual slices in plastic wrap and store in the freezer for up to 1 month. If you store the cake in the refrigerator or freezer, just bring it back to room temperature before eating it. Hope that helps!

      Reply
  4. Courtney says

    October 13, 2024 at 5:13 pm

    I have been baking for YEARS and this is hands down the absolute best cake I have ever made. It was so good that I converted it into cupcakes the next weekend to take to a game watching party. Absolutely amazing.

    Reply
    • Whitney says

      October 14, 2024 at 12:09 pm

      Yay, Courtney! That makes me so happy!

      Reply
  5. Ashley says

    April 27, 2024 at 7:25 pm

    I’d love to make this cake as it looks absolutely delicious. I’d be making it 3 layers 8in. I am also wondering if the taste of pumpkin is very strong as my kid loves spice cake having recently tried but unsure for pumpkin. Any tips would be appreciated. Thank you

    Reply
    • Whitney says

      May 2, 2024 at 8:30 pm

      Hi Ashley! It’s a pretty pumpkin-flavored spice cake 🙂 you could alternatively try this spiced chai cake recipe: https://sugarandsparrow.com/vanilla-chai-cake-recipe/ you’re reminding me that I need to add a traditional spice cake to my list of recipes to make!

      Reply
  6. Brittney Bowman says

    November 30, 2023 at 2:54 am

    5 stars
    I used a different cake recipe but used your frosting recipe and it was INCREDIBLE!

    Reply
  7. Autumn says

    November 23, 2023 at 7:44 pm

    5 stars
    I made this cake for Thanksgiving and it was an absolute hit. This will definitely be one I make again!

    Reply
  8. Selena says

    October 28, 2023 at 7:59 am

    5 stars
    I’m hoping to make this cake for an upcoming birthday party. What size cake box would you recommend so the icing on top fits also?

    Reply
    • Whitney says

      November 1, 2023 at 7:51 pm

      Hi Selena! For cakes this height I recommend these boxes: https://amzn.to/45VTLlF

      Reply
  9. Laura Reno says

    October 25, 2023 at 5:56 am

    I want to make a 3 layer round cake with a 9 inch cake pans. Will this recipe work with that or it will only make 2 layers? 0r if I doubled the recipe would that work for a 3 layer 9 inch? I don’t know if I would do 1 & 1/2 batch of the recipe. Just trying to see if I can make 3 layers or is that too much?

    Reply
    • Whitney says

      October 26, 2023 at 8:25 pm

      Hi Laura! 1.5x the recipe will be enough for 3 9-inch layers. You’ll want to divide the batter equally to have enough for all 3 pans. Enjoy!

      Reply
      • Holly says

        November 26, 2024 at 4:04 am

        Is 5 eggs okay to use then if we are x1.5 the recipe? Thank you Whitney!

        Reply
  10. Kara H. says

    October 9, 2023 at 10:10 am

    Hello,
    I would love to make this cake but reduce it to a single layer. Would you recommend halving the recipe in order to do so?

    Thank you!

    Reply
    • Whitney says

      October 16, 2023 at 7:39 am

      Hi Kara! Yes, if it’s an 8 or 9-inch layer, then half the recipe and you’ll have just the right amount.

      Reply
  11. Laura Reno says

    October 1, 2023 at 2:02 pm

    I want to use this recipe for a Halloween cake. Can the frosting be colored for different colors on my cake? If so, will any food coloring work?

    Reply
    • Whitney says

      October 3, 2023 at 9:47 pm

      Hi Laura! Yes, the frosting can be colored and any food coloring will work but I prefer gel-based colors with buttercream to keep the consistency in tact.

      Reply
  12. Milena says

    September 29, 2023 at 12:11 pm

    For the frosting, how can you make it less sweet? Could you do a mixture of butter and shortening?

    Reply
    • Whitney says

      October 3, 2023 at 9:53 pm

      Hi Milena! You could try adding up to 1/2 Cup less powdered sugar but the consistency will be thinner. And yes, you could sub up to half of the butter with shortening if you’d like!

      Reply
    • Wafaa says

      October 22, 2023 at 9:18 pm

      Hi Milena,

      I managed to make the buttercream less sweet,

      Instead of 6 cups of powdered sugar, I only added 2 to 2.5 cups powdered sugar, 1 to 2 tablespoons powdered milk and 1 tablespoon meringue powder and omitted the liquid milk. Kept everything else the same. The buttercream was stable, delicious and not too sweet. I was able to do the piping on top.

      Reply
  13. Paige Smith says

    July 23, 2023 at 2:54 pm

    Hi there! I’m wondering if your cake pan is 6×2 or 6×3. Thank you!

    Reply
    • Whitney says

      July 23, 2023 at 10:46 pm

      Hi Paige! I use 6 x 2 inch pans. Hope that helps!

      Reply
  14. Magda Garcia says

    June 21, 2023 at 10:42 am

    Hola!
    Antes que nada muchas gracias por sus conocimientos compartidos!!
    Yo tengo una pregunta, el pumpkin pie spice, organic de Great valué, tiene todo los ingredientes que mencionas, podré usarlo así? O recomiendas mejor por separado?

    Muchas Gracias de antemano por tu respuesta!! ☺️

    Reply
    • Whitney says

      June 26, 2023 at 10:19 pm

      Hi Magda! I do like adding the spices separately so I can control the amount of each spice but I think it will work to add pumpkin pie spice as a sub! I’m not sure exactly how much to add though, so I’d start with 3-4 tsp and go from there. Hope that helps!

      Reply
  15. Ashley says

    December 19, 2022 at 7:55 pm

    Made this cake for Thanksgiving and it was a huge crowd pleaser. The pumpkin cake was so flavourful and perfectly spiced with such a great pillowy texture. I added your salted caramel sauce as a drip on top of the cake which emphasized the caramel notes in the cookie butter buttercream. My family is already asking when I’ll make this cake again. I’ve yet to make one of your recipes that hasn’t turned out!

    Reply
    • Whitney says

      December 23, 2022 at 9:46 am

      Yay, Ashley! I’m so happy to hear that this cake was a hit! Adding salted caramel sauce sounds like such a good choice. I need to try that now!!

      Reply
Newer Comments »

Leave a Reply Cancel reply

Your email address will not be published. Required fields are marked *

Recipe Rating


Next Post >

Introducing My First Book: Anyone Can Cake!

Primary Sidebar

Welcome to Sugar & Sparrow

Welcome to Sugar & Sparrow

Helping you whip up pretty desserts with confidence and creativity. And hopefully sharing a few laughs with you along the way!

Learn More

Connect

let’s bake!

Get my very best recipes, baking tips, and decorating tutorials sent to your inbox

Featured Posts

24 best birthday cake recipes

My 24+ Best Birthday Cake Recipes

new years cake

New Years Goals (Not Resolutions)

vegan vanilla buttercream recipe by sugar and sparrow

Vegan Vanilla Buttercream Recipe

Search

Archives

Follow Along

@sugarandsparrowco

LEMON RASPBERRY CAKE 🍋♥️ this cake has the dreamie LEMON RASPBERRY CAKE 🍋♥️ this cake has the dreamiest layers: soft and zesty lemon cake with raspberries baked into every bite, thick homemade raspberry filling, and lemon raspberry buttercream with the prettiest natural color 😍 
 
✨recipe linked in my bio or at https://sugarandsparrow.com/lemon-raspberry-layer-cake/
 
#lemonraspberry #lemoncake #raspberrycake #pinkcake #layercake
SALTED CARAMEL BUTTERCREAM ✨I could eat this salty SALTED CARAMEL BUTTERCREAM ✨I could eat this salty-sweet caramel frosting by the spoonful but it’s absolutely delicious on cakes, cupcakes, macarons, and more 🙌🏽 I use my homemade EASY salted caramel recipe here but you can use any salted caramel sauce that you love.⁣

✨Full recipe (including homemade salted caramel) + cake pairing suggestions are on my blog at https://sugarandsparrow.com/salted-caramel-buttercream-recipe/ 
⁣
SALTED CARAMEL BUTTERCREAM⁣
Yield: 2.5 Cups ⁣
⁣
INGREDIENTS⁣
1 Cup (226g) unsalted butter, room temperature⁣
3 1/2 Cups (420g) powdered sugar⁣
2 tsp vanilla extract⁣
1/2 Cup (120ml) salted caramel sauce, room temperature⁣
Pinch of salt⁣
⁣
INSTRUCTIONS:⁣
1. In a stand mixer fitted with the paddle attachment, whip the butter on high until it’s creamy and light in color, 5-6 minutes. ⁣
2. Turn the mixer to low and add the powdered sugar a few cups at a time, scraping down the bowl and paddle after each interval.⁣
3. With the mixer still on low, mix in the vanilla extract, salted caramel, and a pinch of salt. Continue mixing on low speed until fully combined. ⁣
⁣
#saltedcaramel #caramel #cakedecorating #frosting #buttercream
NO-CHURN BERRY CRISP ICE CREAM✨you don’t need any NO-CHURN BERRY CRISP ICE CREAM✨you don’t need any fancy equipment to whip up this delicious ice cream that tastes JUST like berry crisp a la mode! I layered my favorite 3-ingredient no-churn vanilla ice cream base with ribbons of homemade berry filling + buttery oat streusel in every bite. Even if you’ve never made ice cream from scratch before, I promise you can master this recipe!! 
 
🍦Full recipe linked in my bio or find it at https://sugarandsparrow.com/no-churn-berry-crisp-ice-cream/

#nochurnicecream #icecream #icecreamlover #berries #summerdessert
STRAWBERRY SHEET CAKE 🍓based on my favorite strawb STRAWBERRY SHEET CAKE 🍓based on my favorite strawberry layer cake recipe, this sheet cake version is so fun to decorate + such a crowd pleaser! I love using a combination of fresh and freeze-dried strawberries to create the most powerful authentic flavor ✨
 
🍓Full recipe (with strawberry buttercream) at https://sugarandsparrow.com/strawberry-sheet-cake-recipe/
⁣ 
STRAWBERRY SHEET CAKE⁣ 
Serves 24
⁣ 
INGREDIENTS⁣ 
1 Cup (12oz) fresh strawberries, pureed ⁣ 
3/4 Cup (180ml) whole milk, room temp⁣ 
2 1/2 Cups (265g) sifted cake flour⁣ 
2 tsp baking powder⁣ 
1/4 tsp baking soda⁣ 
1/2 tsp salt⁣ 
3/4 Cup (170g) unsalted butter, room temp⁣ 
1 2/3 Cups (350g) granulated sugar⁣ 
3 large eggs, room temp⁣ 
1/3 Cup (75g) sour cream, room temp⁣ 
2 tsp pure vanilla extract⁣ 
1-2 drops pink food coloring (optional)⁣ 
⁣ 
INSTRUCTIONS⁣ 
1. Simmer the strawberry puree in a saucepan over medium-low heat for 30-35 minutes, stirring occasionally. At this point the puree should have reduced from 1 Cup to 1/2 Cup (if you have more, keep cooking!). Refrigerate until room temp, then whisk together with the whole milk and set aside.⁣ 
2. Preheat the oven to 350ºF. Grease and line a 13×9 inch baking pan. 
3. In a medium bowl, whisk together the sifted cake flour, baking powder, baking soda, and salt. Set aside. ⁣ 
4. In the bowl of a stand mixer with the paddle attachment, whip the butter on high until creamy, 2 min. Add the sugar and beat with the butter until light and fluffy, 2 min. Turn the mixer to low and add the eggs one at a time. Add the vanilla and sour cream, then turn the mixer to high and beat for 1 minute.⁣ 
5. With the mixer on low, add all of the dry ingredients at once until just combined, then add the strawberry milk mixture and pink food coloring (if using) until just combined. Give the batter a few stirs by hand to make sure everything is incorporated without over-mixing. ⁣ 
6. Pour batter into the prepared cake pan and bake for 35-40 minutes. ⁣ Cool completely to room temperature before topping with strawberry buttercream (full recipe at the li
COOKIES & CREAM ICE CREAM CAKE 🤎 If you’re an Oreo COOKIES & CREAM ICE CREAM CAKE 🤎 If you’re an Oreo lover, this is your sign to make an ice cream cake this summer: no-churn cookies & cream ice cream set on an Oreo cookie crust, topped with hot fudge and whipped cream frosting. The perfect amount of Oreos in EVERY BITE! 

Full recipe link in my bio + at https://sugarandsparrow.com/cookies-and-cream-ice-cream-cake/ 

OREO CRUST
22 Oreo cookies
5 Tbsp melted butter

ICE CREAM LAYER
2 Cups (480ml) heavy whipping cream, cold
2 tsp pure vanilla extract
14 Oz sweetened condensed milk
15 Oreo cookies, roughly chopped

TOPPINGS
12.8 Oz jar of hot fudge
Whipped cream frosting (see full recipe link)
4 Oreo cookies, chopped

INSTRUCTIONS
1. Mix together the Oreo crust ingredients and pack tightly into the bottom of a 9-inch springform pan. Freeze while you make the ice cream.
2. In a chilled bowl, whip the heavy cream and vanilla to stiff peaks. Fold in the sweetened condensed milk until uniform, then fold in the chopped Oreos. Pile the ice cream on top of the Oreo crust, smooth it down, cover and freeze overnight.
3. When the ice cream layer is set, top with the hot fudge, whipped cream frosting, and more chopped Oreos. Store in the freezer until ready to serve! 

#oreocake #icecreamcake #nochurnicecream #birthdaycake #cookiesandcream

Footer

On the Blog

  • Cake Basics
  • Recipes
  • Tutorials

Info

  • About
  • Privacy Policy & Disclosure

stay in the know

Copyright © 2026 · Theme by Sugar & Sparrow