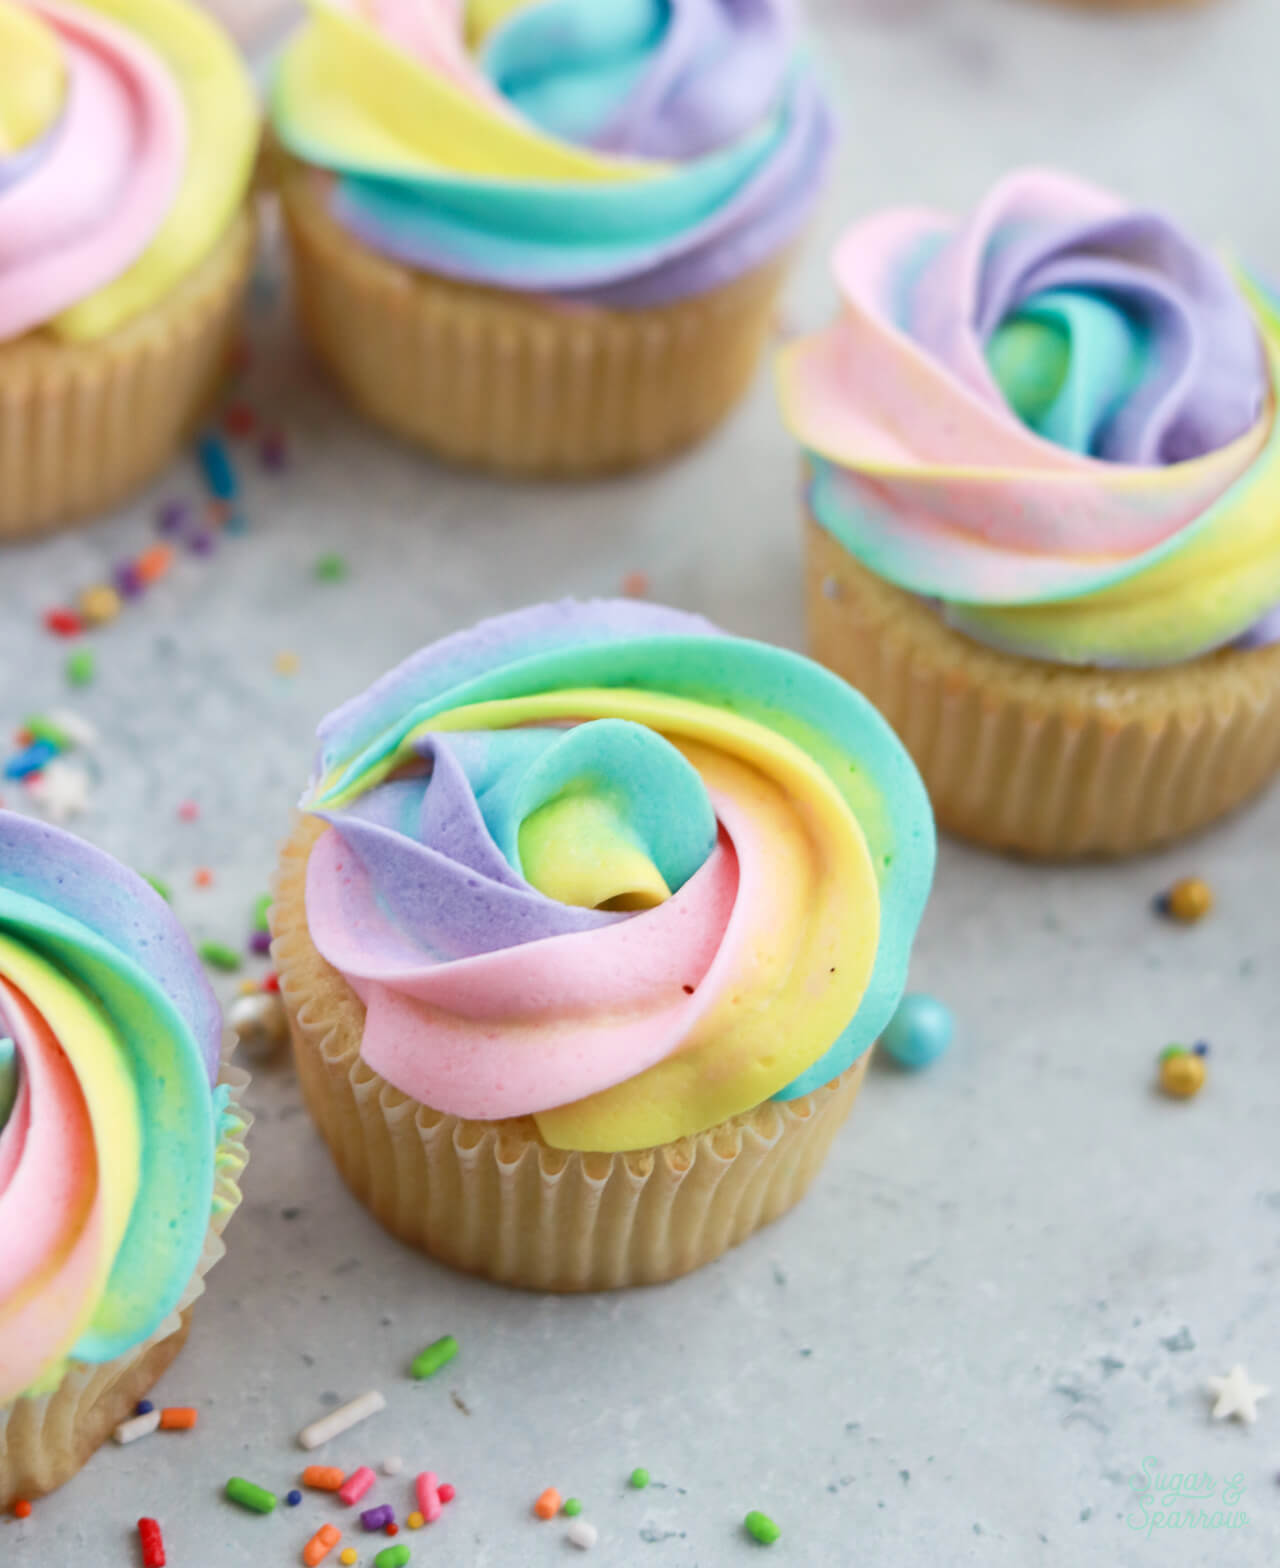
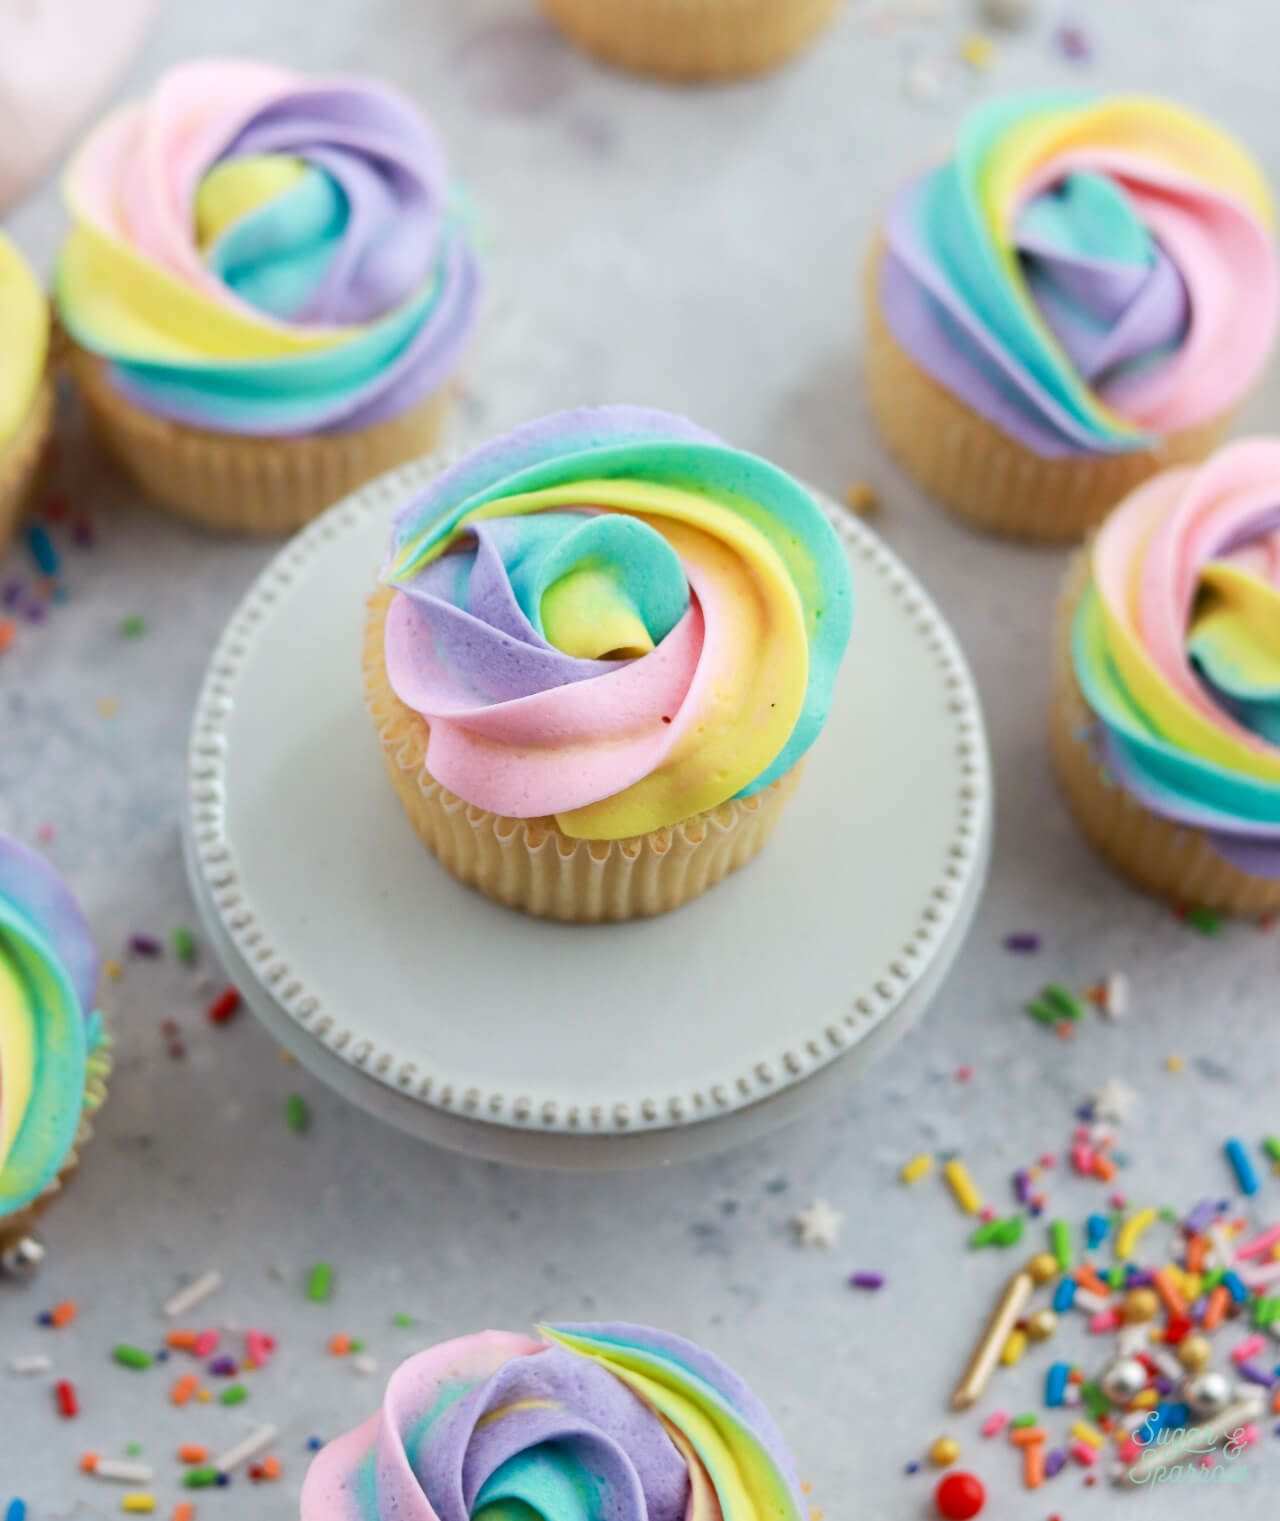
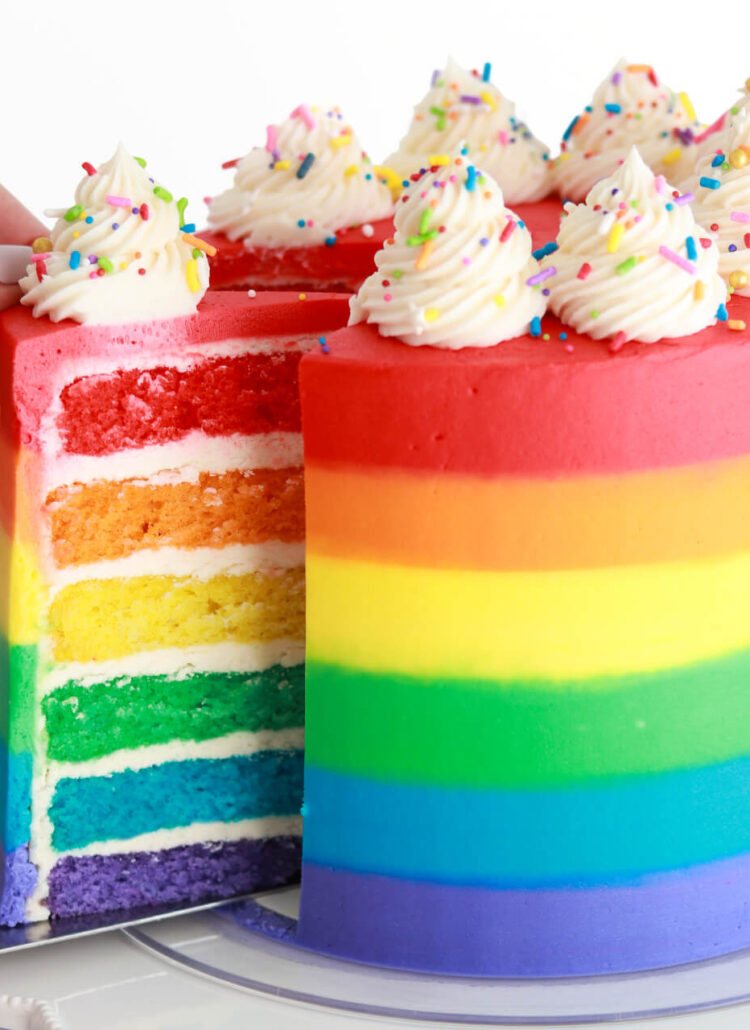
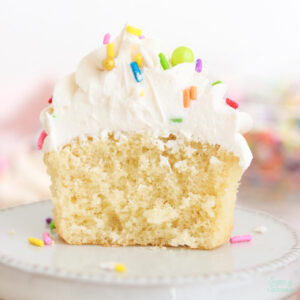
In this tutorial, I’ll teach you how to master the perfect rainbow buttercream swirl for cupcakes using just four colors of buttercream in one piping bag! Yes, there are technically seven colors in the rainbow but when these four colors are piped at the same time, they end up mixing together to make the in-between colors seamlessly. The rainbow swirls turn out so whimsical and this technique doesn’t need to be limited to cupcakes – you can use this method for decorating cakes, cookies, and more!
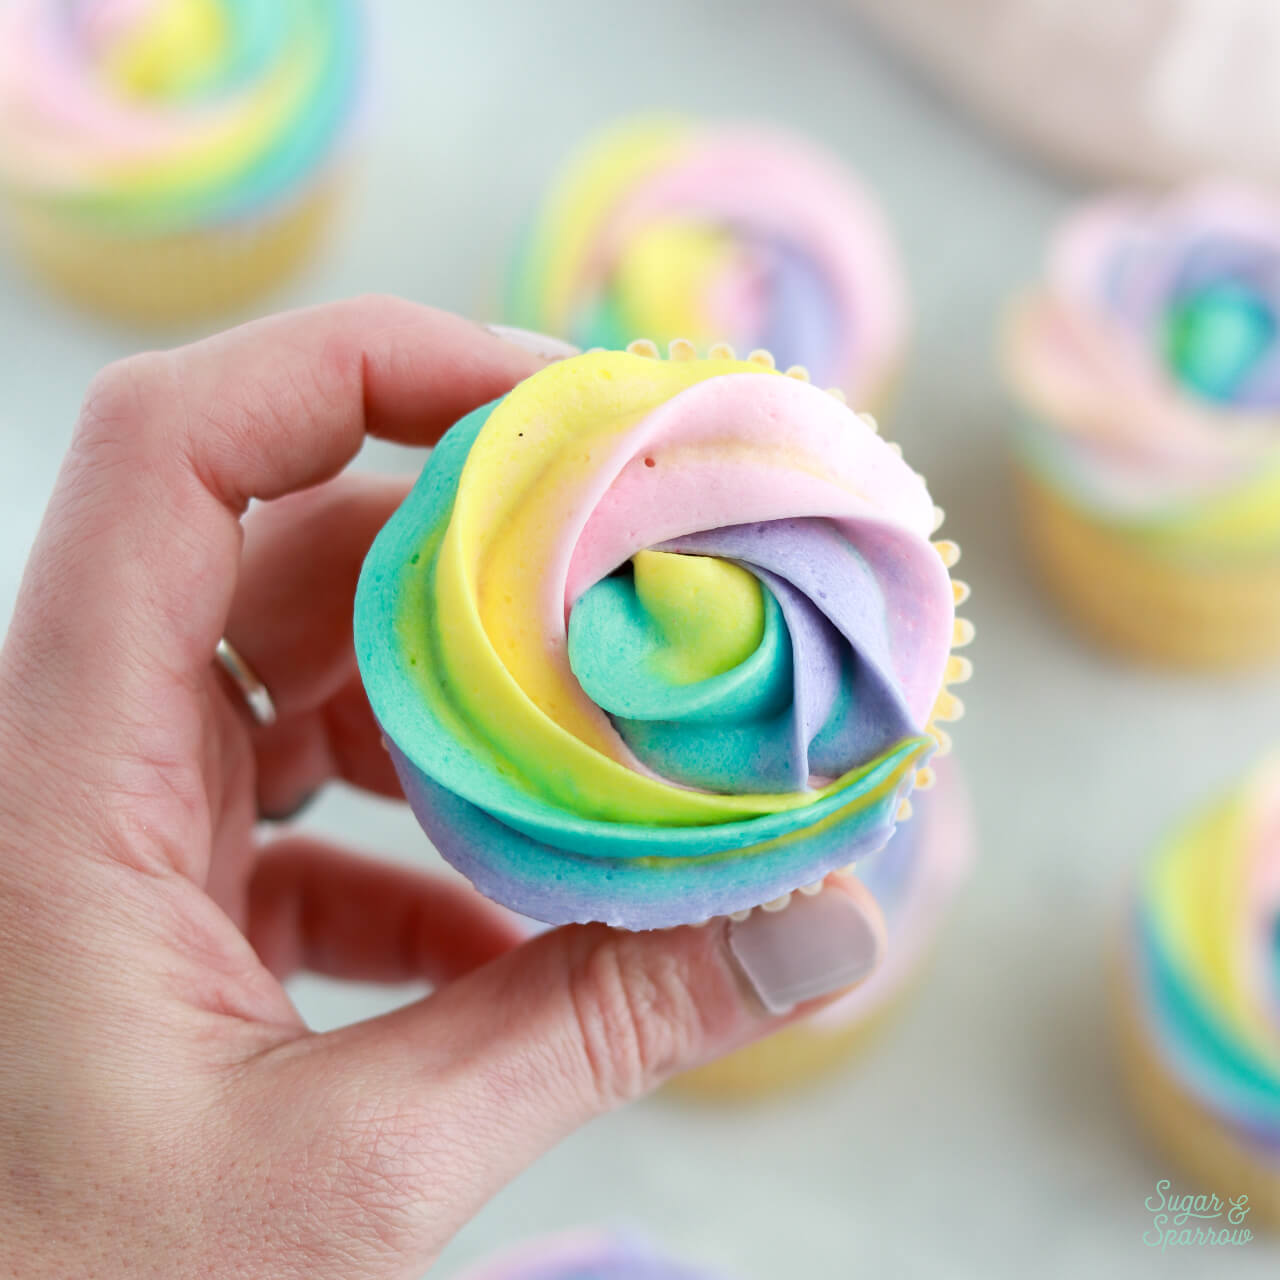
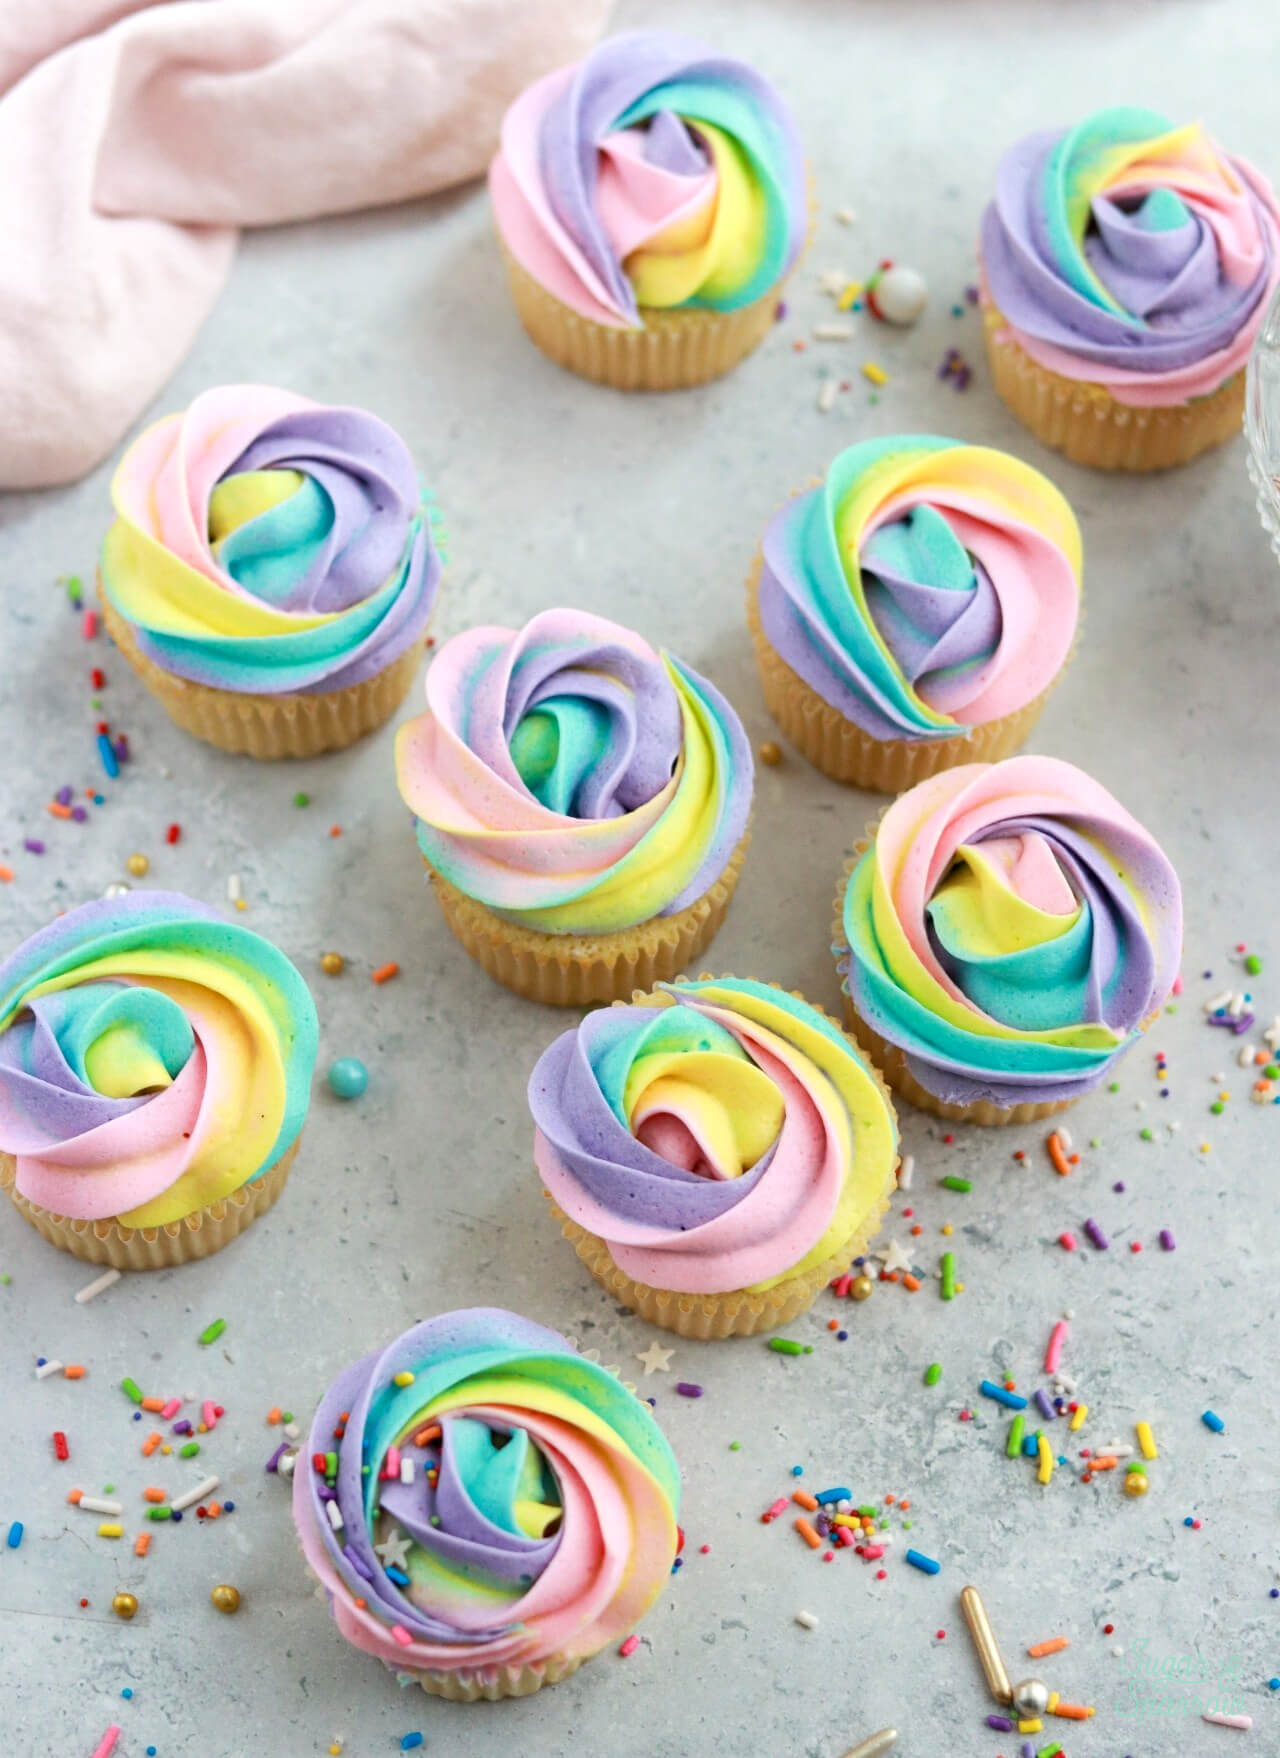
These rainbow cupcakes are perfect for St. Patrick’s Day, birthdays, and any event that could use a little more magic. They’re so pretty to look at and so much fun to make!
What Kind of Buttercream to Use
You can use any kind of buttercream for this tutorial that can be tinted easily. I usually gravitate toward this vanilla buttercream recipe (pictured throughout this post), which is an American buttercream that I’ve altered to be less sweet than average. It’s super easy to make, has amazing vanilla flavor, and is really easy to tint with any kind of food coloring. If you already have a go-to buttercream (Swiss Meringue, Italian Meringue, etc), you can easily use it with this tutorial.
What Kind of Food Coloring to Use
Any kind of food coloring will work, but I love using gel food coloring. For the pastel rainbow color palette pictured here, I used AmeriColor Deep Pink, Lemon Yellow, Sky Blue, and Regal Purple. All the food coloring brands that I love are:
- AmeriColor
- Wilton
- Colour Mill – oil-based gel that’s great for meringue-based buttercreams
- Chefmaster
- ENCO Naturals – if you’re looking for dye-free natural food coloring
Rainbow Swirl Cupcakes Tutorial Video
Here’s how to make these rainbow cupcakes, from coloring the buttercream to piping the swirls:
If you love video tutorials like this one, be sure to check out my YouTube channel! I’ve got a growing collection of cake recipes, decorating tutorials, and Cake Basics over there. Hit the subscribe button on my page so you never miss a new video.
Rainbow Cupcake Supplies
- 14 baked cupcakes (recipe below)
- 1 batch of vanilla buttercream
- Pink, blue, yellow, and purple food coloring
- 4 bowls and spoons for mixing
- Piping bags
- Plastic wrap
- Scissors
- Wilton Tip 1M or piping tip of your choice
How to Make Rainbow Swirl Cupcakes
Step 1: Tint the Buttercream
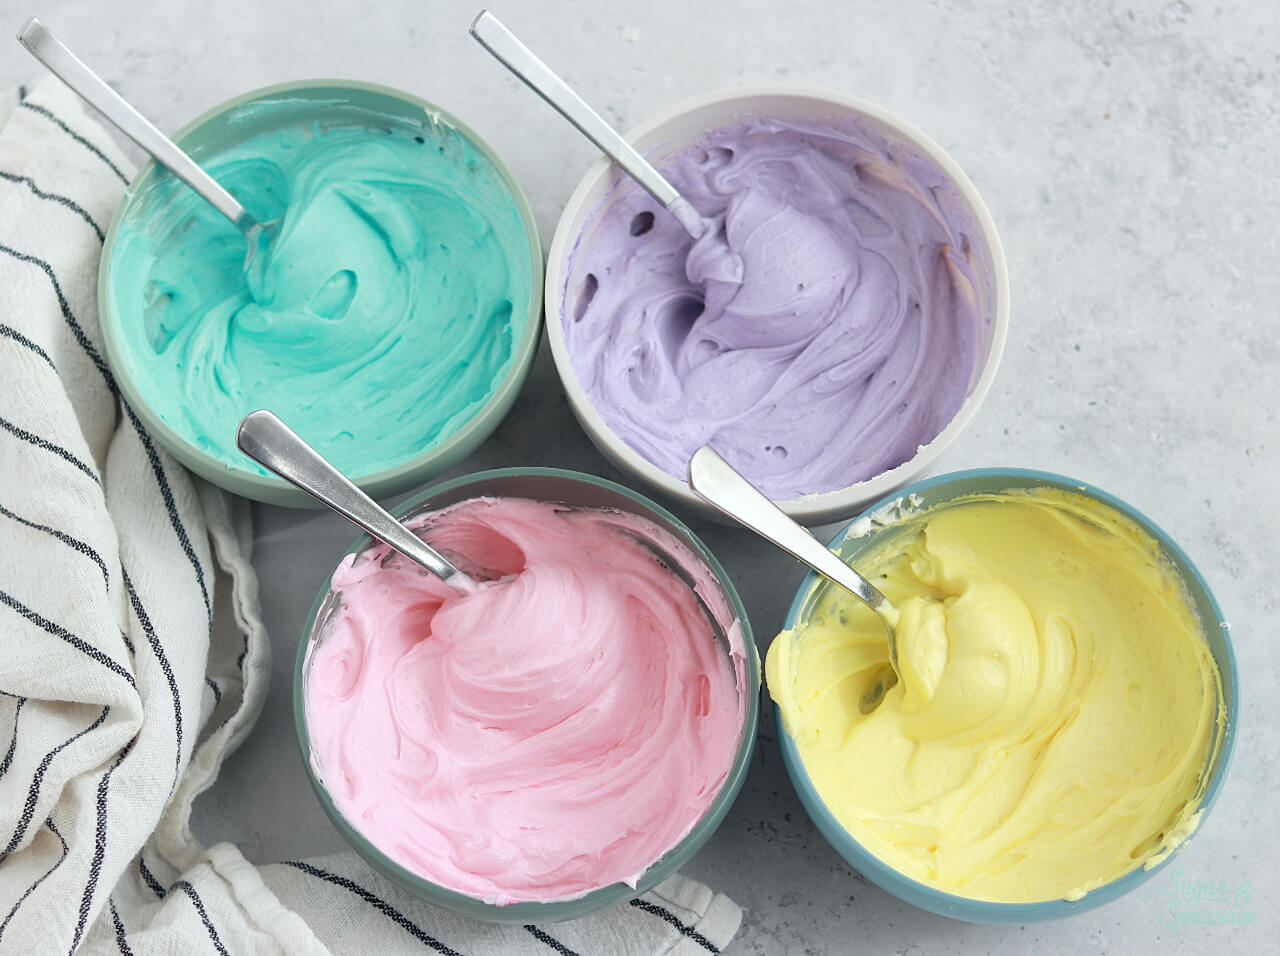
Divide the buttercream equally between four bowls. To the first bowl, add a few drops of pink food coloring and mix it in until you have a pastel pink color (or whatever shade of pink you’re hoping for).
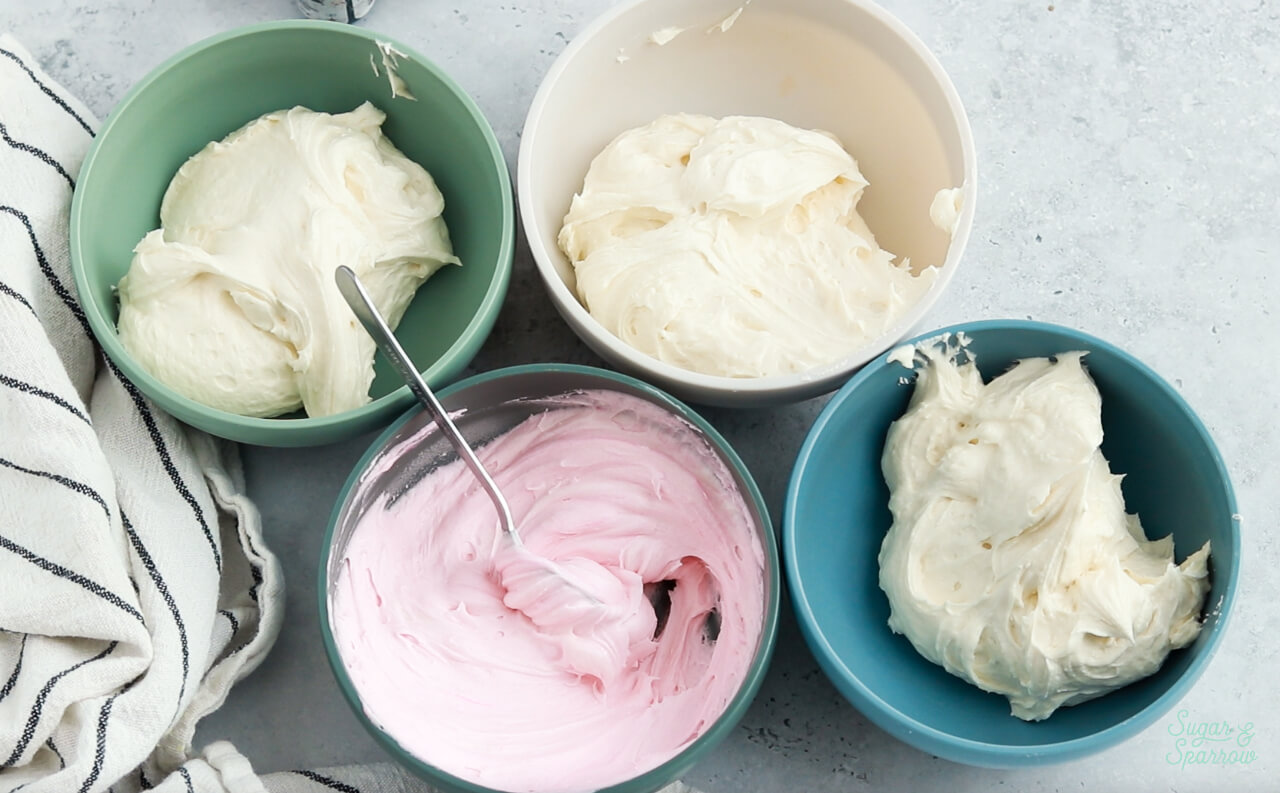
Repeat the process with the yellow, blue, and purple food coloring and the remaining three bowls of buttercream. To recreate the rainbow cupcakes pictured throughout this post, here is the color palette you should aim for:
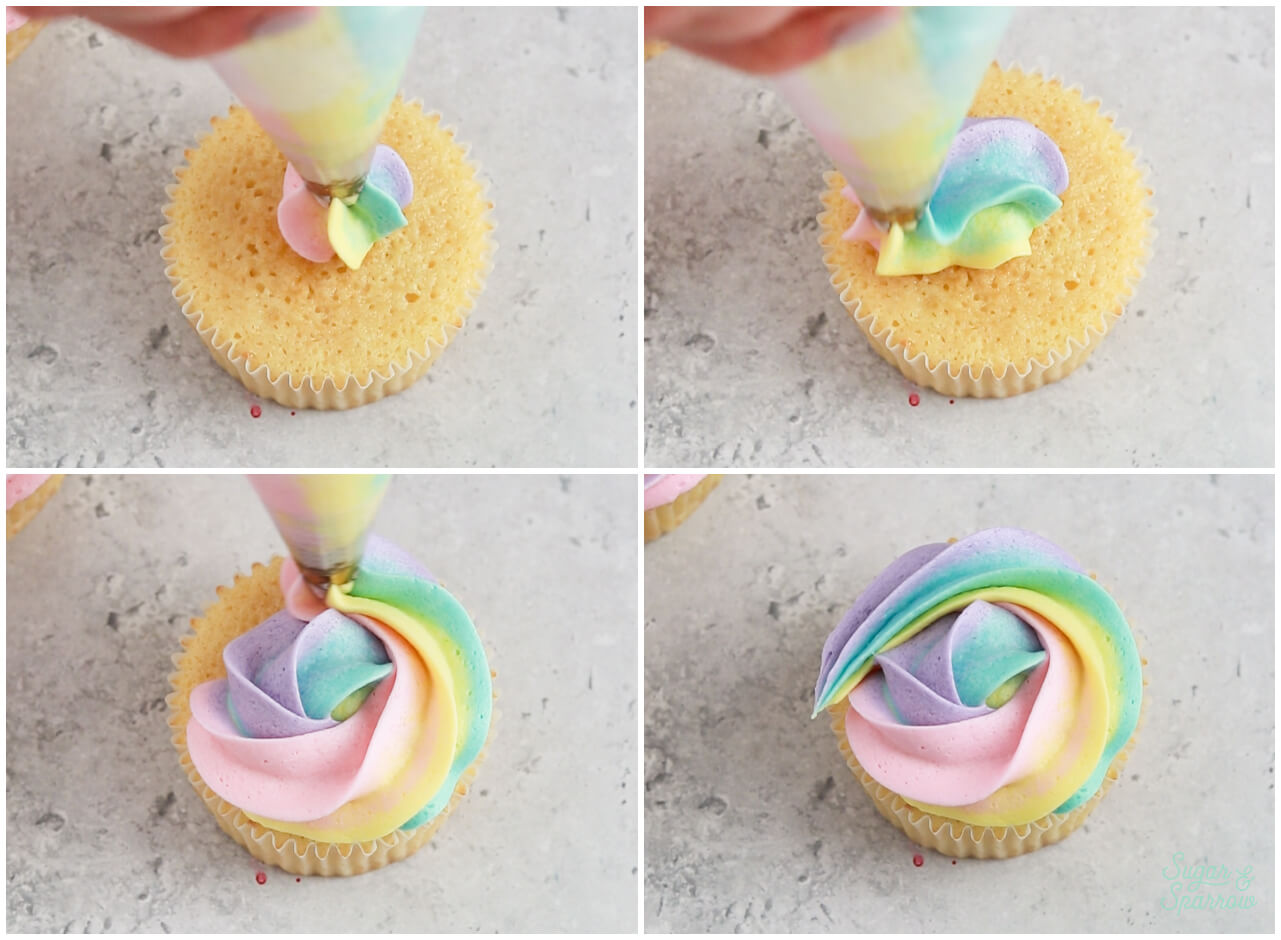
Step 2: Prepare the Rainbow Piping Bag
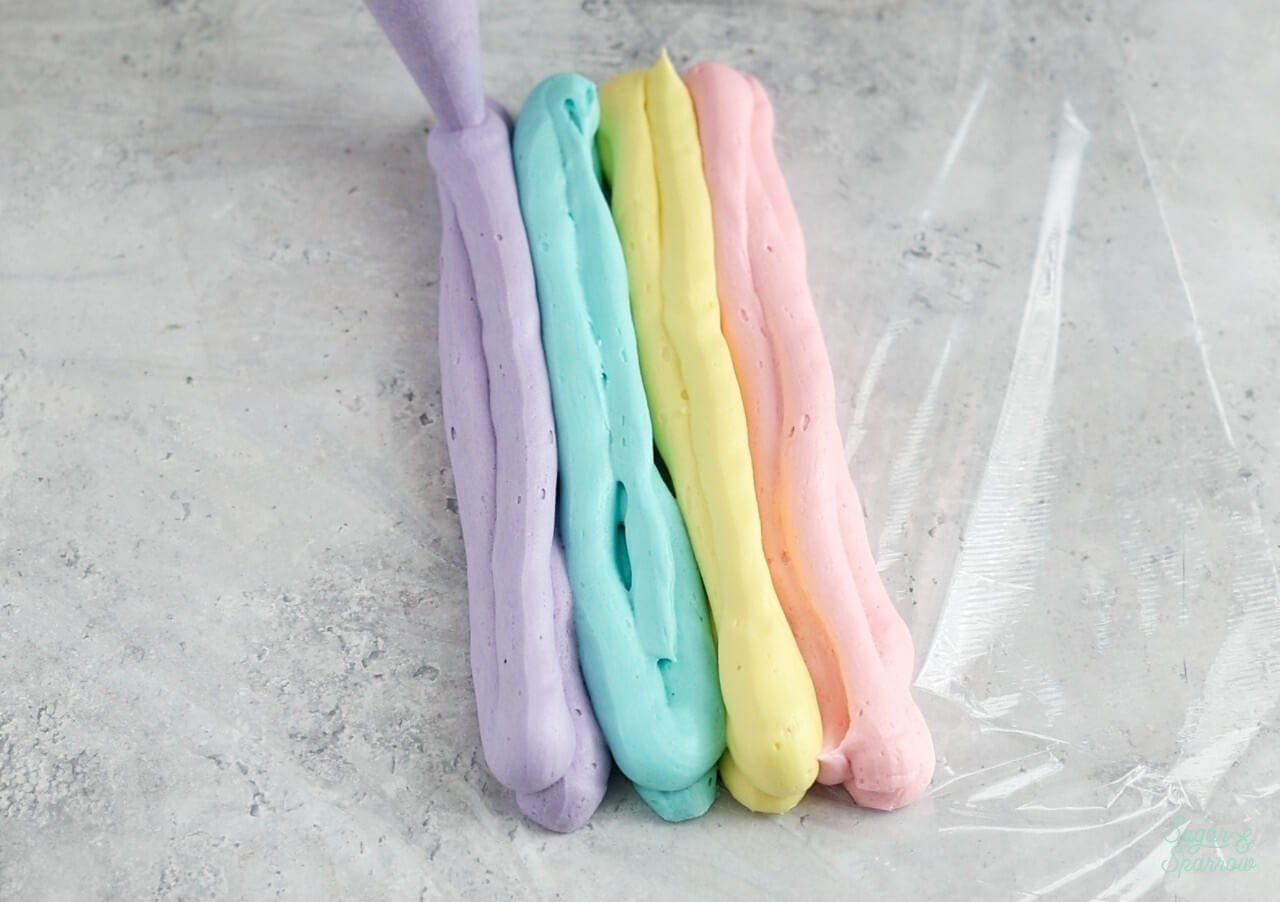
Spread a piece of plastic wrap onto a flat surface and pipe or spoon the pink buttercream onto it in a straight line. Add the yellow buttercream directly next to the pink buttercream, followed by blue and purple. It’s important to place the buttercream colors in this order:
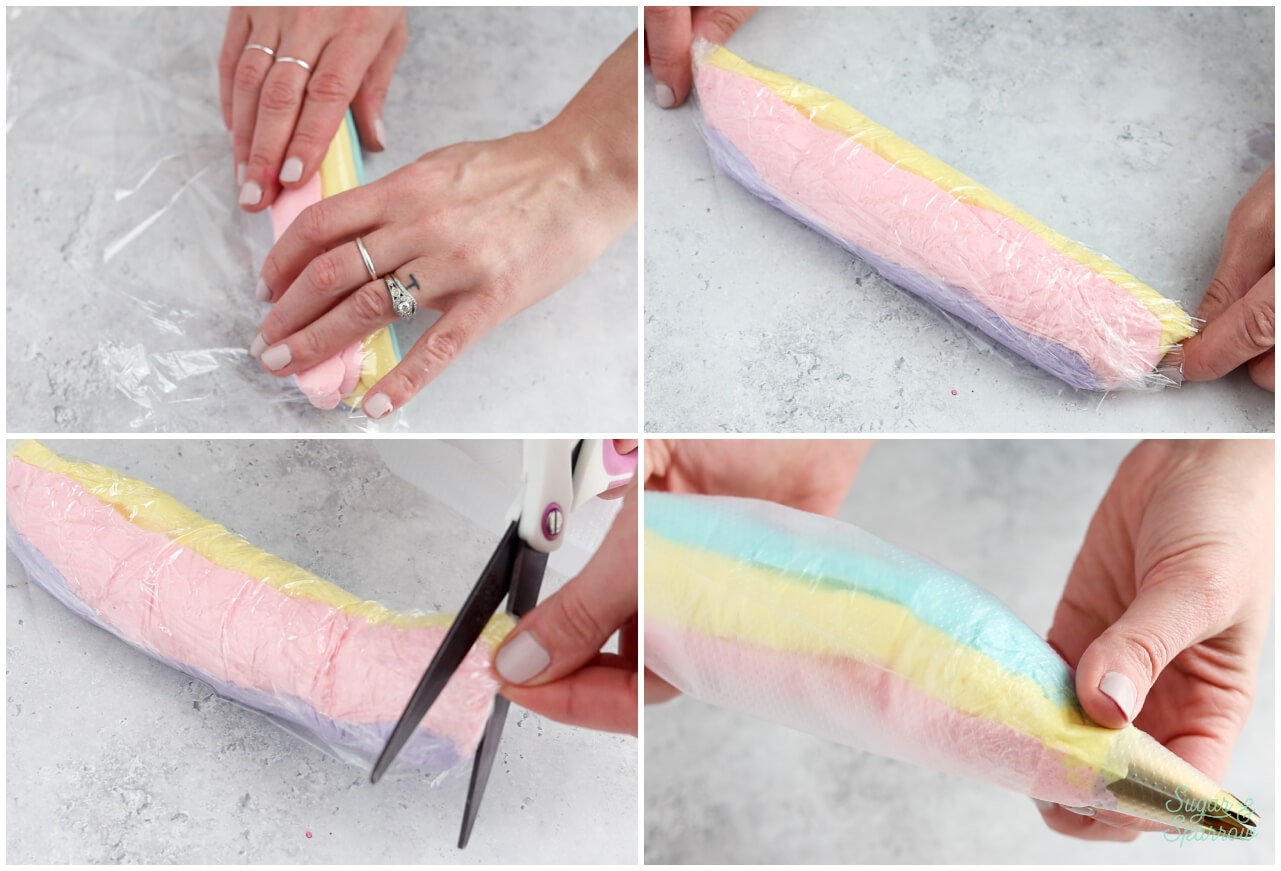
Once the colors are added onto the plastic wrap, gently fold/roll up the buttercream in the plastic wrap so that the pink and purple end up on top of one another. Continue rolling so that the buttercream is enclosed in a tube of plastic wrap, then cut off the end of the plastic wrapped buttercream tube. Place the tube inside a piping bag that’s already been fitted with a piping tip. I used Wilton Tip 1M.
Step 3: Pipe the Rainbow Swirls
Starting in the center of the cupcake, squeeze the piping bag while pulling it up about ½ inch from the cupcake surface, then continue squeezing while you move the piping bag to the left and swirl it around the edge in a counter-clockwise rotation. Once you’ve made a full rotation, gently release the pressure on the piping bag while quickly pulling the bag counter-clockwise. This will create the pointed end of the rainbow swirl.
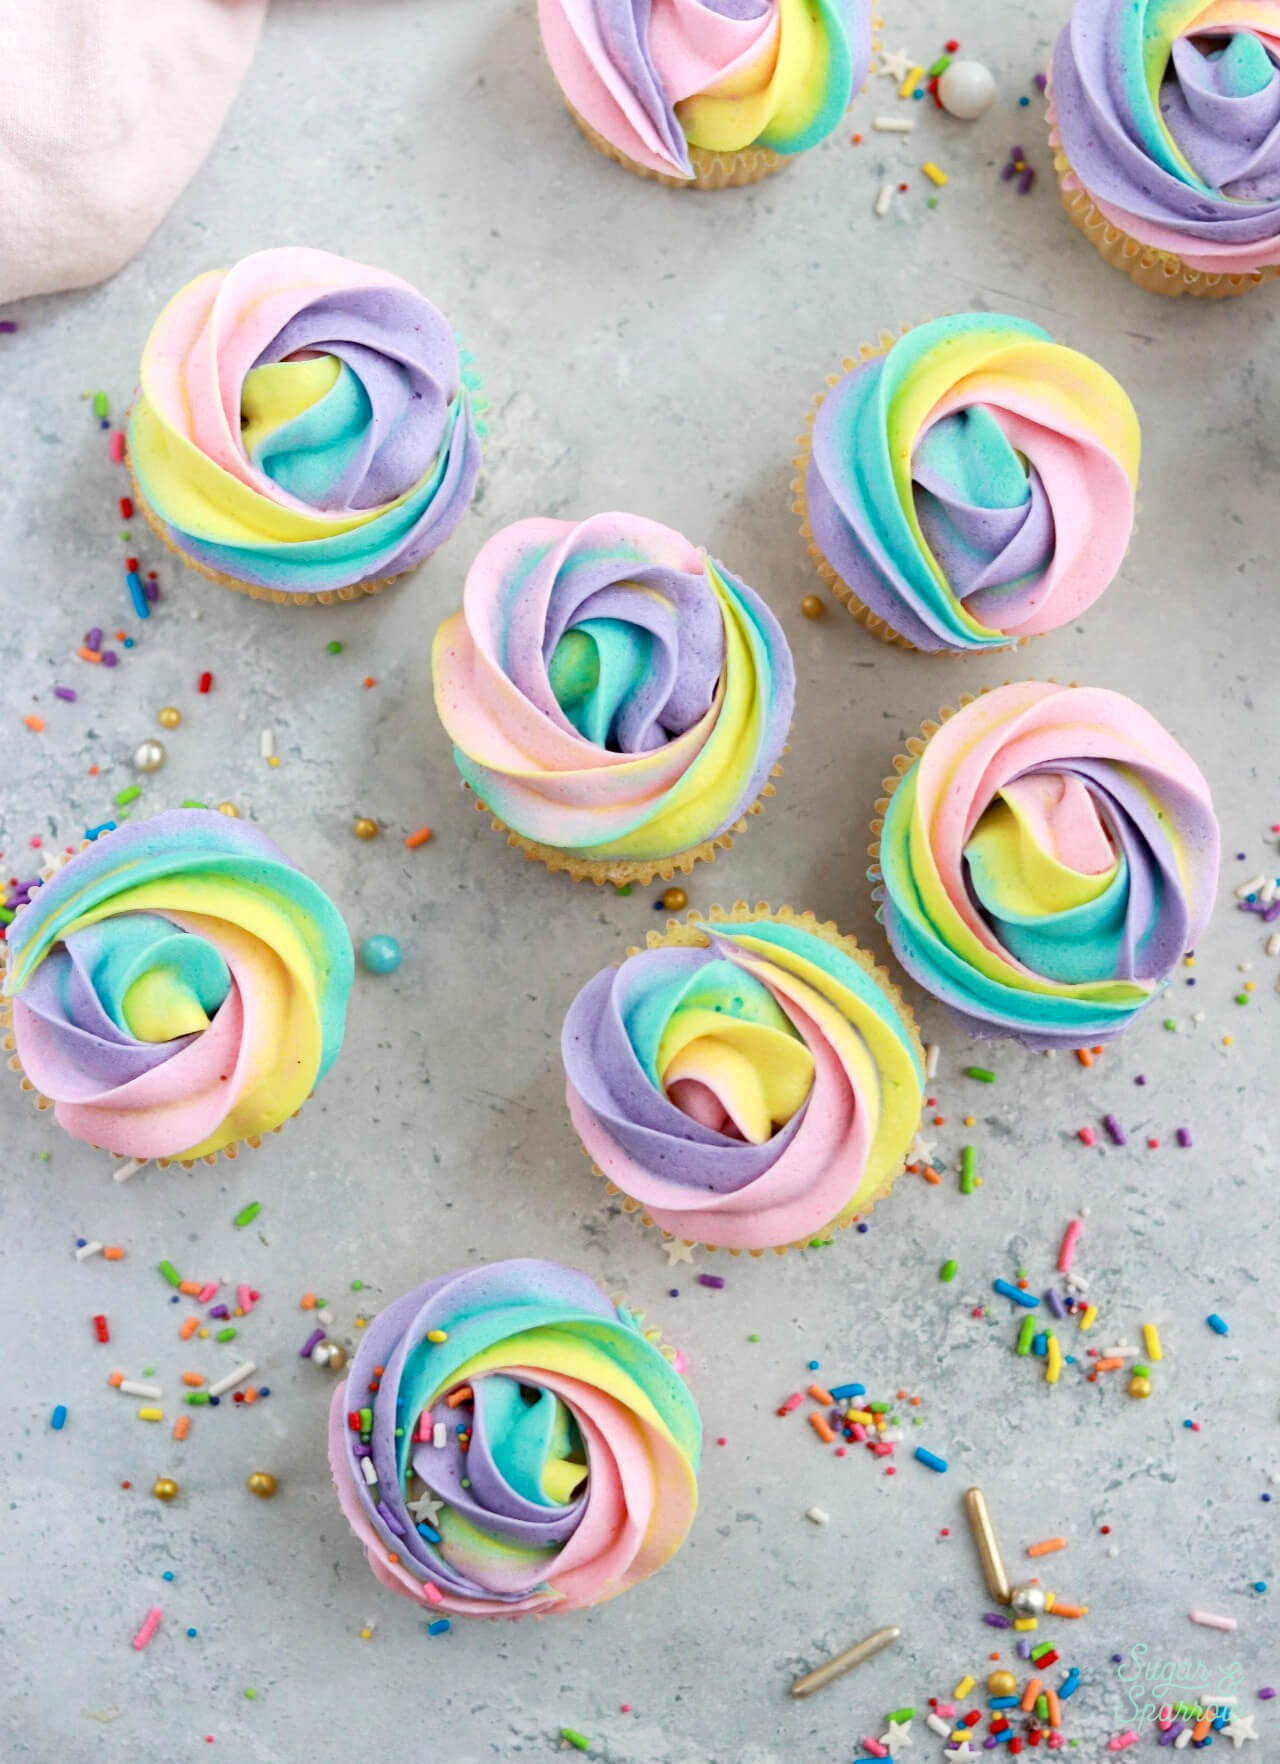
Repeat the rainbow swirl process on each cupcake until they all look perfectly whimsical!
You’ll find the full recipe for the vanilla cupcakes and vanilla buttercream I used to create these rainbow cupcakes below. If you make them, let me know in the comments below and feel free to tag @sugarandsparrowco on Instagram and show me – I love to see your baking projects!

Rainbow Swirl Cupcakes
Equipment
Ingredients
Vanilla Cupcakes
- 1 1/4 cups (132g) sifted cake flour* DIY recipe in notes
- 1 tsp baking powder
- 1/4 tsp baking soda
- 1/2 tsp salt
- 6 Tbsp (82g) unsalted butter, softened to room temperature
- 2 Tbsp (30ml) vegetable oil
- 3/4 cup (150g) granulated white sugar
- 2 large eggs, room temperature
- 2 Tbsp (30g) sour cream, room temperature
- 1 1/2 tsp pure vanilla extract
- 1/2 cup (120ml) whole milk, room temperature
Rainbow Vanilla Buttercream
- 1 Cup (226g) unsalted butter, room temperature
- 3 1/2 Cups (420g) powdered sugar
- 2 Tbsp whole milk, room temperature
- 2 tsp pure vanilla extract
- 1/4 tsp salt, or to taste
- 1-2 drops pink food coloring
- 1-2 drops yellow food coloring
- 1-2 drops blue food coloring
- 1-2 drop purple food coloring
Instructions
Make the Vanilla Cupcakes
- Preheat the oven to 350°F (177ºC) and line standard cupcake pan(s) with liners. This recipe makes about 14 cupcakes.
- Add the sifted cake flour, baking powder, baking soda, and salt into a bowl and whisk to combine. Set aside.
- In the bowl of your stand mixer fitted with the paddle attachment (or with an electric mixer and large bowl), beat the butter on high for two minutes until creamy. Add the vegetable oil and sugar and continue to mix on high for another two minutes. Scrape down the bowl and paddle. Turn the mixer to low speed and add the eggs one at a time, mixing thoroughly after each addition. Add the vanilla and sour cream, then turn the mixer to high speed and mix for one minute. Scrape down the bowl and paddle as needed.
- With the mixer on low speed, add in the dry ingredients all at once and mix until just combined, then add the milk in a steady stream. Continue mixing for another 20-30 seconds, until just combined. Scrape down the sides and bottom of the bowl and give it a few stirs to make sure there are no lumps (without over-mixing). The batter will be slightly thick.
- Spoon or pour the batter into the cupcake tins until they’re about ⅔ full, then bake for 14-18 minutes, until they spring back to the touch and a toothpick inserted into the middle comes out clean. Let the cupcakes cool in the pan for about five minutes before removing them from the pan and continuing to cool on a wire rack until room temperature. Make sure they are entirely room temperature before adding any frosting.
Make the Vanilla Buttercream
- With a hand mixer or paddle attachment on your stand mixer, cream the butter on medium-high until it’s creamy and light (almost white) in color. About 7 minutes.
- With the mixer on low, add the sifted powdered sugar one cup at a time, scraping down after each addition and making sure each cup is fully incorporated before adding the next one. Add vanilla, milk, and salt and mix on low for another minute until fully incorporated.
- Color the Buttercream: divide the vanilla buttercream between four bowls. Add the pink food coloring to the first bowl and mix it in. Repeat with the other three bowls and the yellow, blue, and purple food coloring.
Assembly
- Prepare the Rainbow Piping Bag: Spread a piece of plastic wrap onto a flat surface and pipe or spoon the pink buttercream onto it in a straight line. Next to the pink, pipe or spoon the yellow buttercream in a straight line and repeat the process with the blue and purple buttercream. See the picture in the blog post above for reference.
- Roll up the plastic wrap so that the pink and purple buttercream end up on top of one another. Continue rolling until the plastic wrap encloses the buttercream in a tube, then snip off the end. Place the buttercream tube into a piping bag fitted with Wilton Tip 1M with the cut end facing down.
- Pipe the Rainbow Swirls: Starting in the center of the cupcake, squeeze the piping bag while pulling it up about ½ inch from the cupcake surface, then continue squeezing while you move the piping bag to the left and swirl it around the edge in a counter-clockwise rotation. Once you’ve made a full rotation, gently release the pressure on the piping bag while quickly pulling the bag counter-clockwise. This will create the pointed end of the rainbow swirl. Repeat until each cupcake is topped with a rainbow swirl.
Notes
- The vanilla cupcakes can be baked, cooled, stored in their cupcake pan with plastic wrap over the top, and left out at room temperature up to one day ahead of decorating. Unfrosted cupcakes can be stored in an airtight container in the freezer for up to one month before thawing and frosting.
- The vanilla buttercream can be made ahead and stored at room temperature in an airtight container for up to one day, or in an airtight container in the refrigerator for up to two weeks. When you’re ready to use it, bring it back to room temperature and re-whip in your stand mixer to bring back to smooth buttercream consistency.
- Once decorated, the rainbow swirl cupcakes can be stored at room temperature for up to 4 days.
Leave a Reply