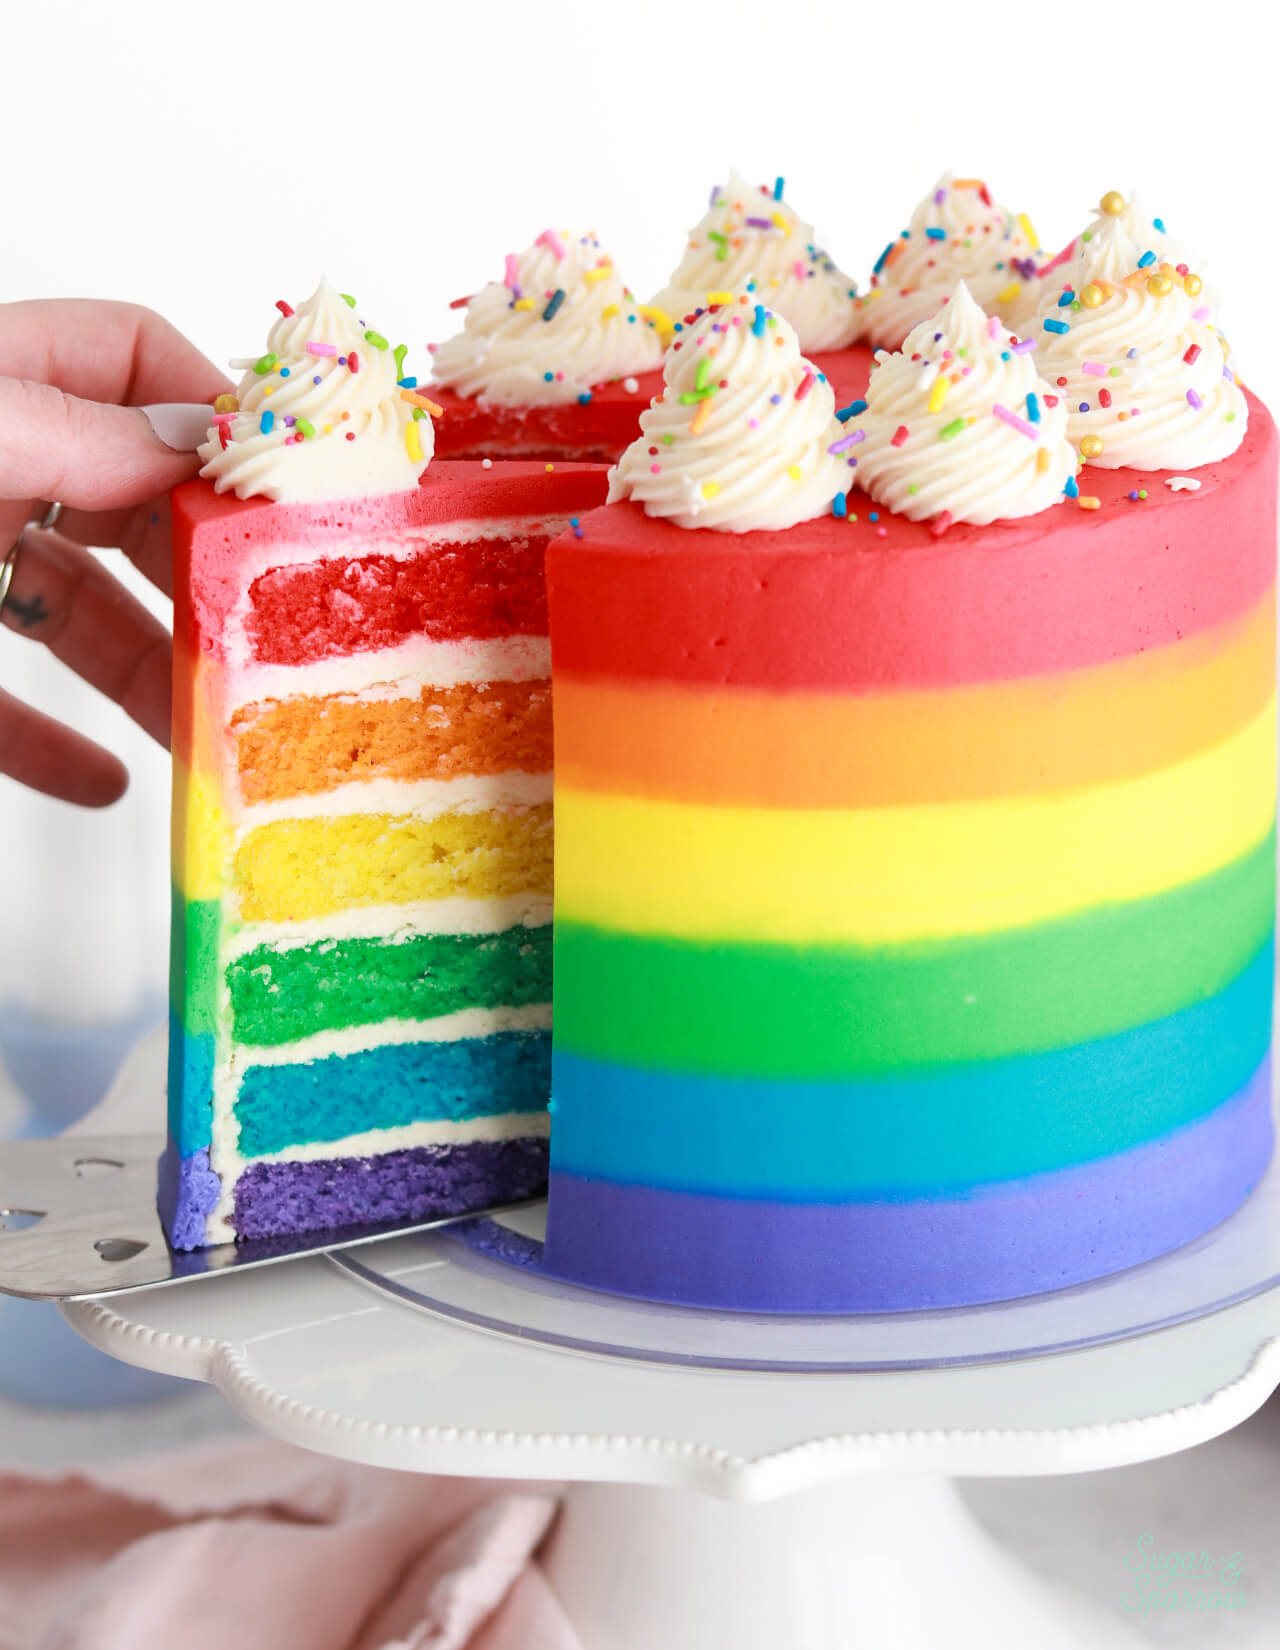
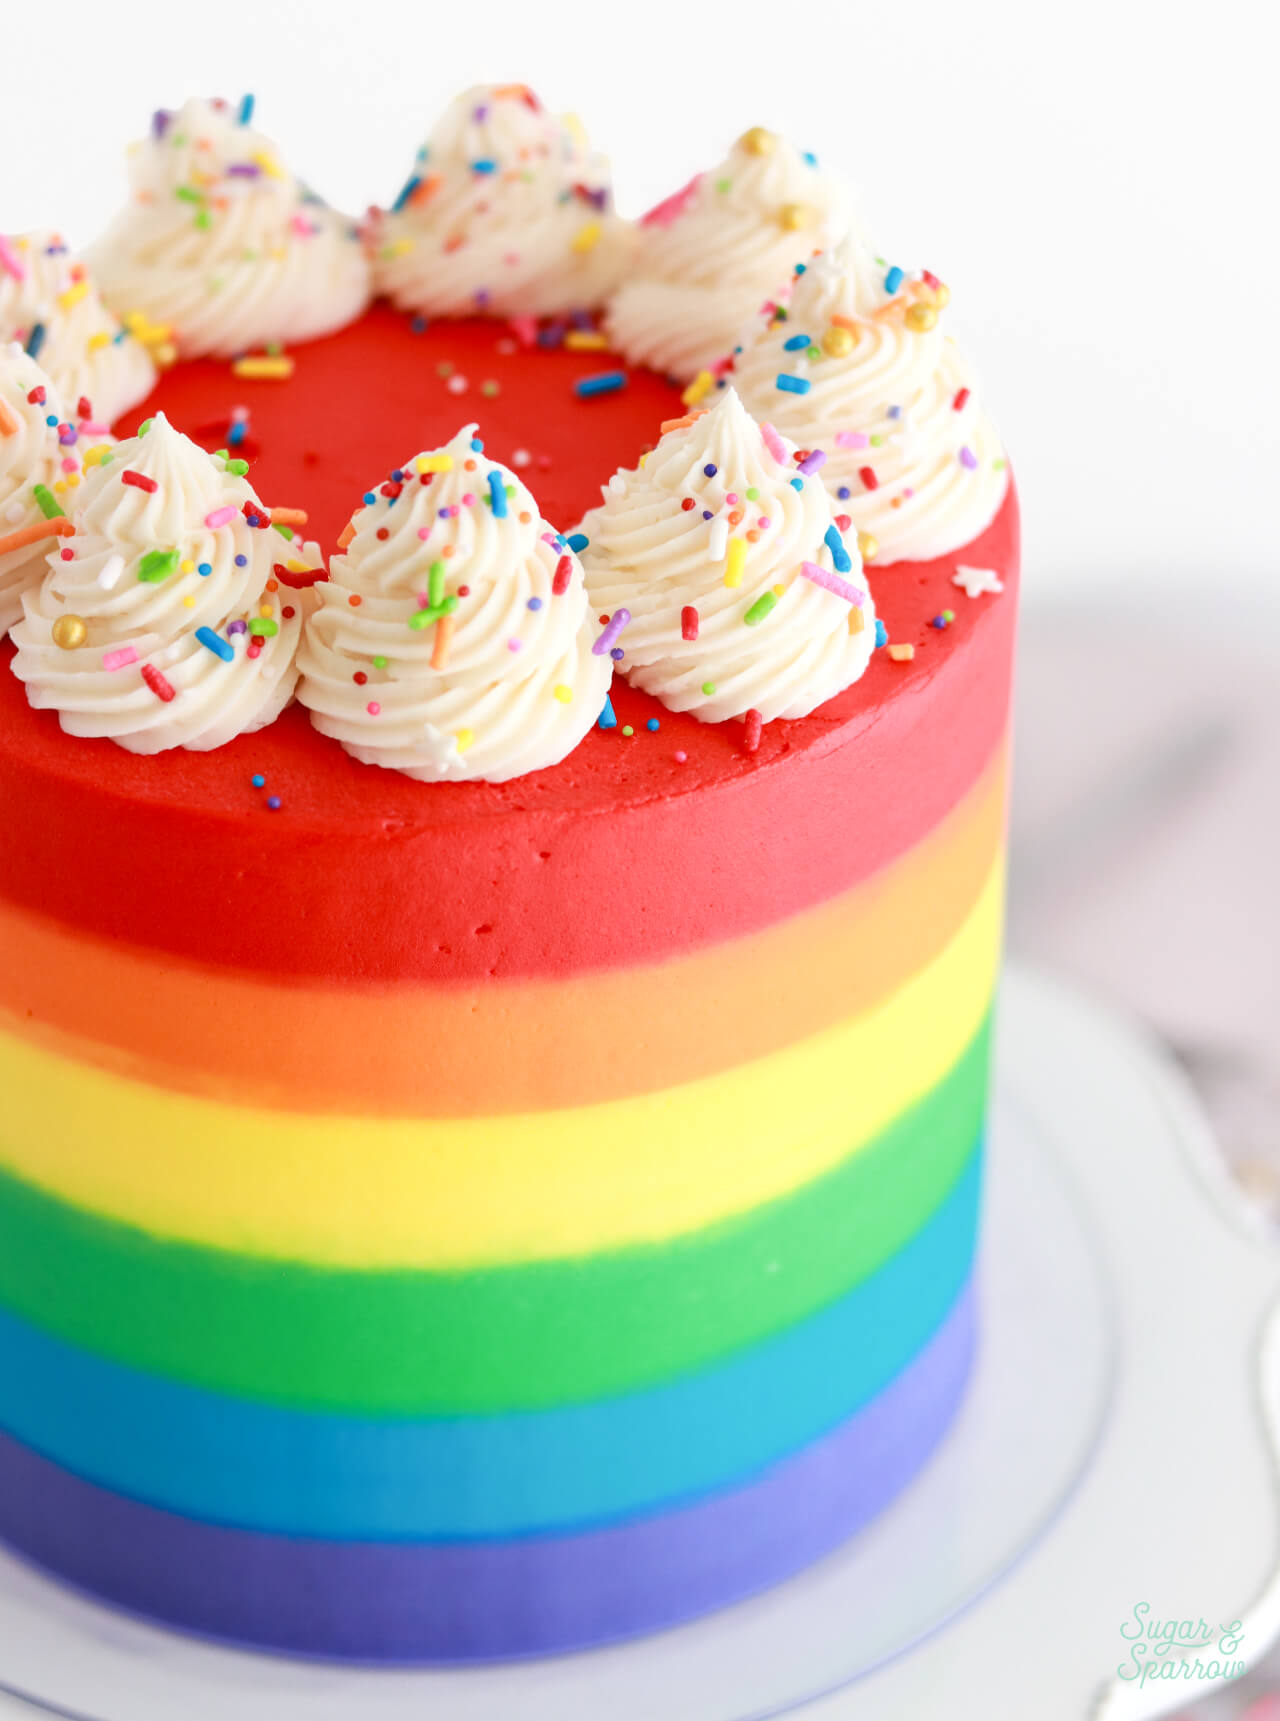
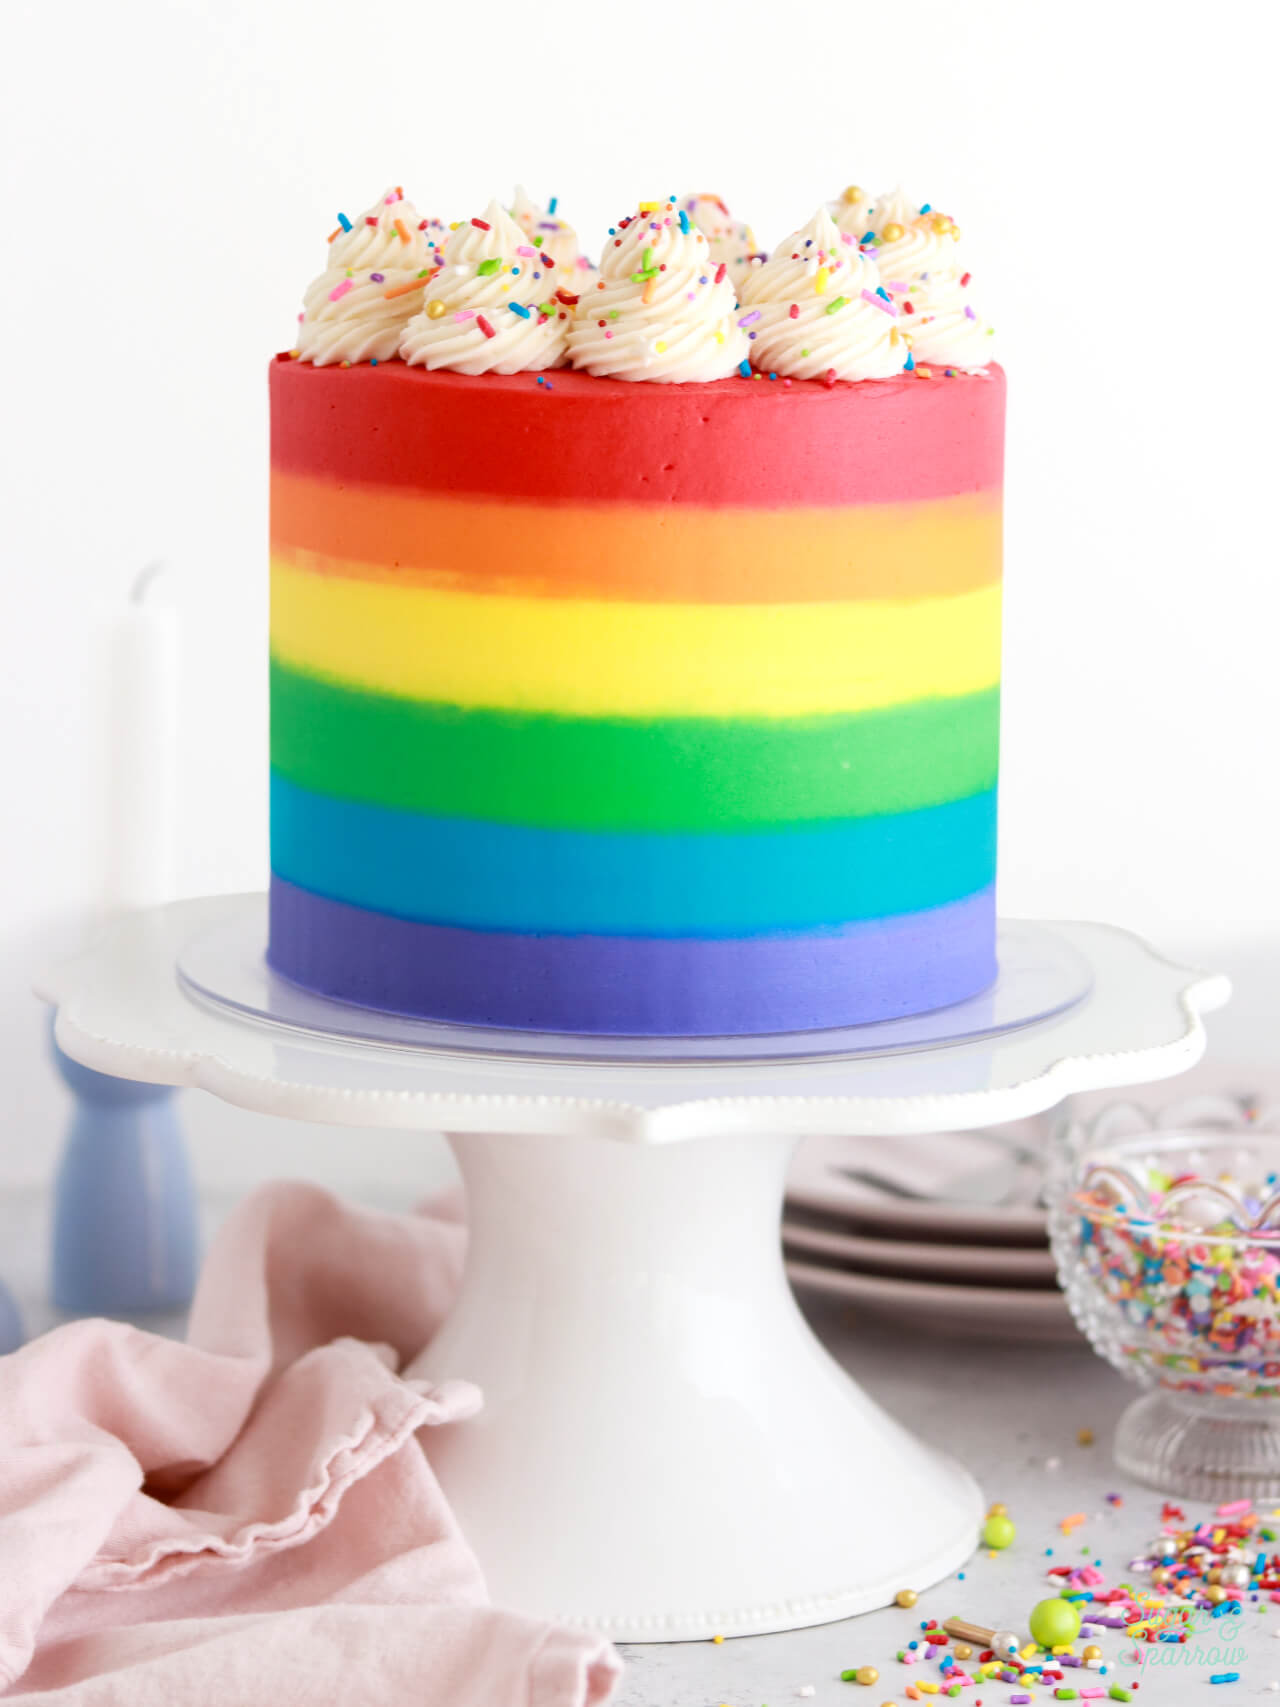
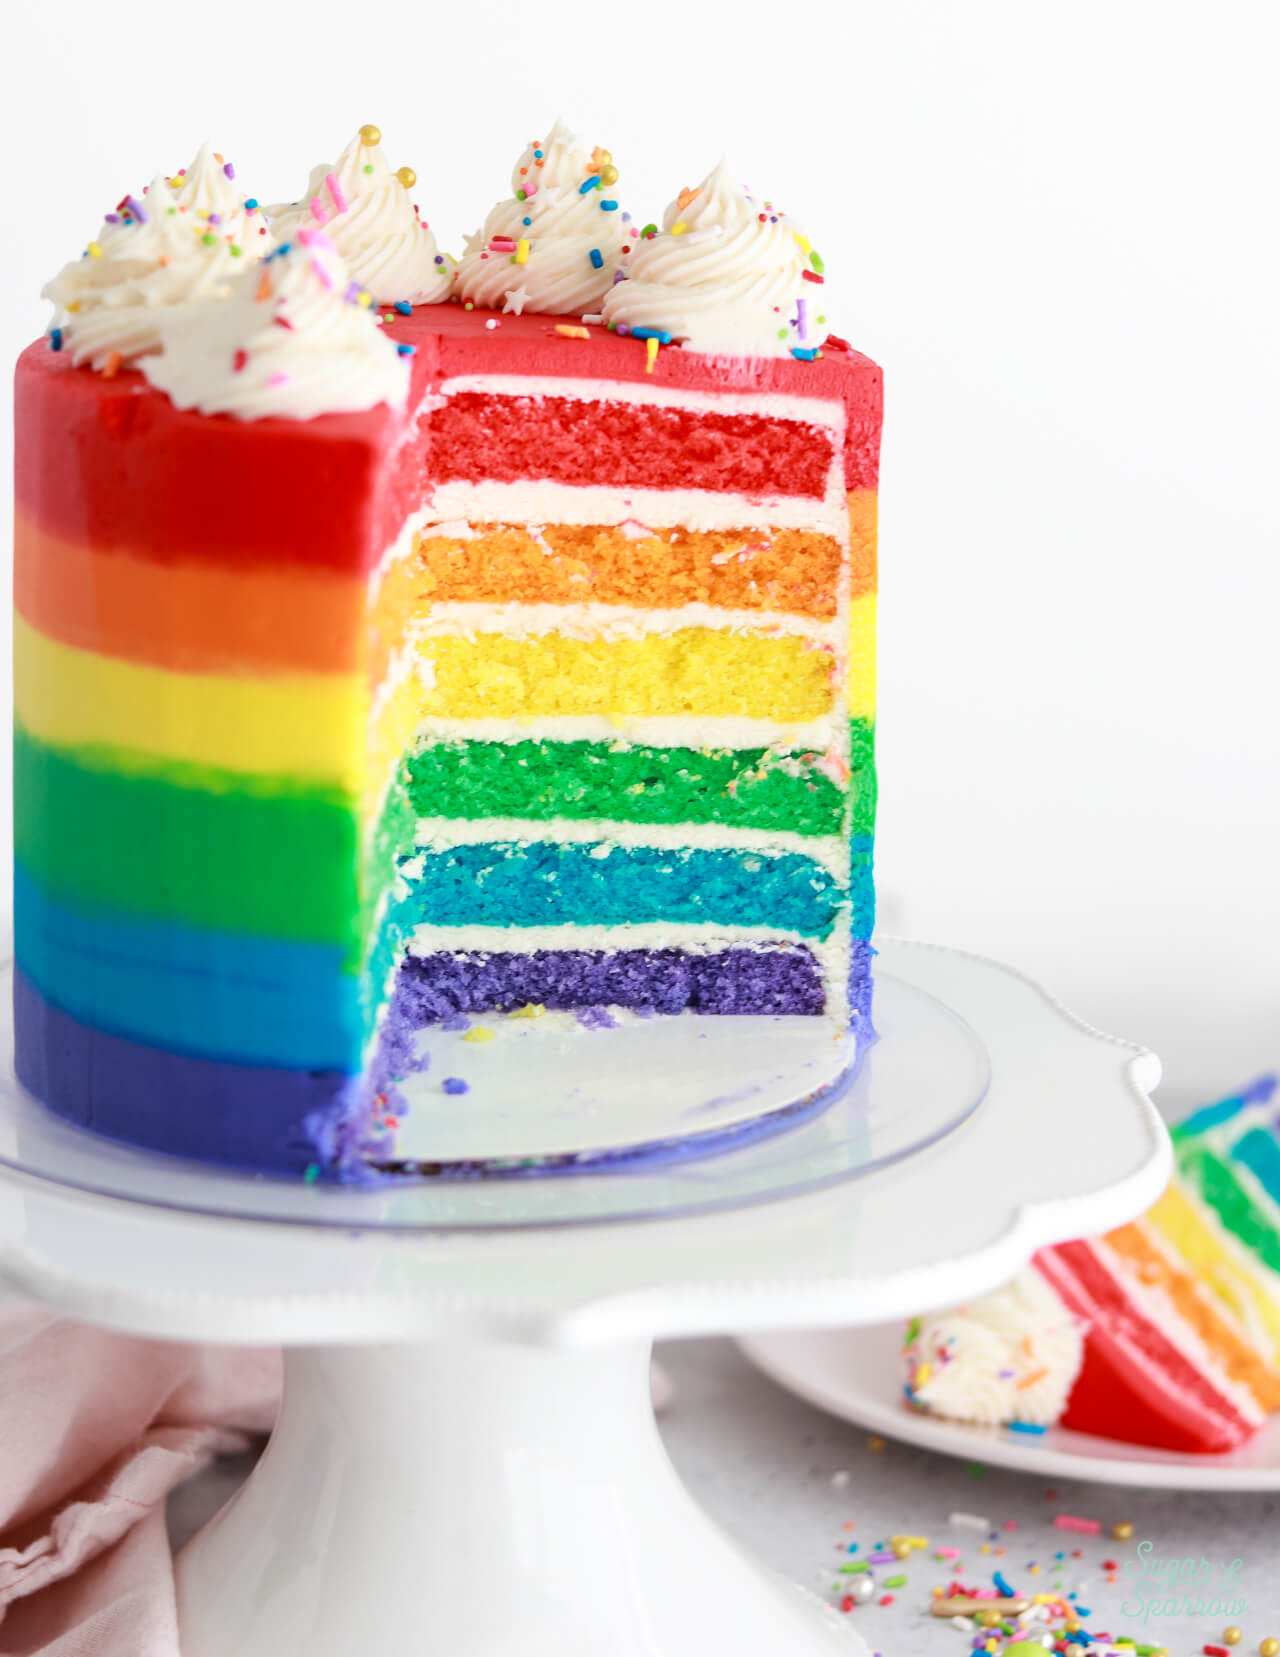
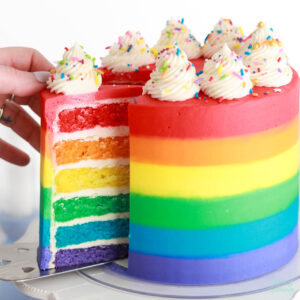
This is the ULTIMATE rainbow cake – six layers of rainbow colored cake layers inside, rainbow striped buttercream on the outside, and a rainbow sprinkled swirl border on top. I used my bakery-style white cake for the cake layers, which is super soft, moist, and easy to tint any color of the rainbow. The filling and frosting is my favorite vanilla buttercream, which is easy to make, silky smooth, and packed with vanilla flavor. All together, this cake is visually stunning inside and out, and tastes like soft vanilla cake heaven!
Rainbow Cake Elements & Supplies
This rainbow cake is definitely a project, but as long as you plan it out and have the right supplies, it’s super fun! Here’s everything that goes into this cake:
- Bakery-Style White Cake. The recipe begins by making my bakery-style white cake. It’s the softest, fluffiest vanilla cake recipe that tastes like it came from your favorite bakery, but it’s 100% HOMEMADE! It’s super moist (and stays that way for days), packed with vanilla flavor, and made with egg whites to keep the color of the cake nearly white. That makes it perfect for tinting rainbow colors.
- Vanilla Buttercream. My favorite vanilla buttercream is the filling and frosting for the rainbow cake, which is an incredibly easy American buttercream recipe that’s been tailored to be less sweet than average. Any white buttercream will work with this recipe, but you’ll need a lot of it – a little over 6 Cups – and it needs to be easy to tint rainbow colors.
- Food Coloring. I used Wilton Color Right food colors for tinting the cake layers and buttercream, and I’ve listed more brands I love below.
- Round Cake Pans. To create six cake layers in different colors, it’s very helpful to have six 6-inch cake pans.This way you can divide the batter evenly, add the food coloring, and distribute it between the pans and bake them all at once. If you only have a few cake pans, you’ll benefit greatly from having a kitchen scale so you can weigh the batter. Each pan has about 200g of cake batter in it, so with a kitchen scale you can weigh out what you need and bake in batches.
- Cake Decorating Equipment. To decorate this rainbow cake as pictured, you’ll need a cake turntable, piping bags, icing spatulas, an icing smoother, and a piping tip for the swirls on top. I used Wilton Tip 4B for the swirls pictured.
- Rainbow Sprinkles. Colorful rainbow sprinkles are the perfect finishing touch! I used Sprinkle Pop Rainbow Road sprinkles for this cake but any rainbow sprinkles will do the trick.
What Food Coloring Should I Use?
Any kind of food coloring will work to make this rainbow cake, but I love using gel food coloring. For the pastel rainbow color palette pictured here, I used the Wilton Color Right Performance Food Coloring System, which is a set of colors that can be mixed to create custom colors. I used the red, orange, yellow, and blue from the kit as-is, for the green I mixed yellow and blue, and for the purple I mixed the pink and blue. All the food coloring brands that I love are:
- AmeriColor
- Wilton
- Colour Mill – oil-based gel that’s great for meringue-based buttercreams
- Chefmaster
- ENCO Naturals – if you’re looking for dye-free natural food coloring
How to Make a Rainbow Layer Cake
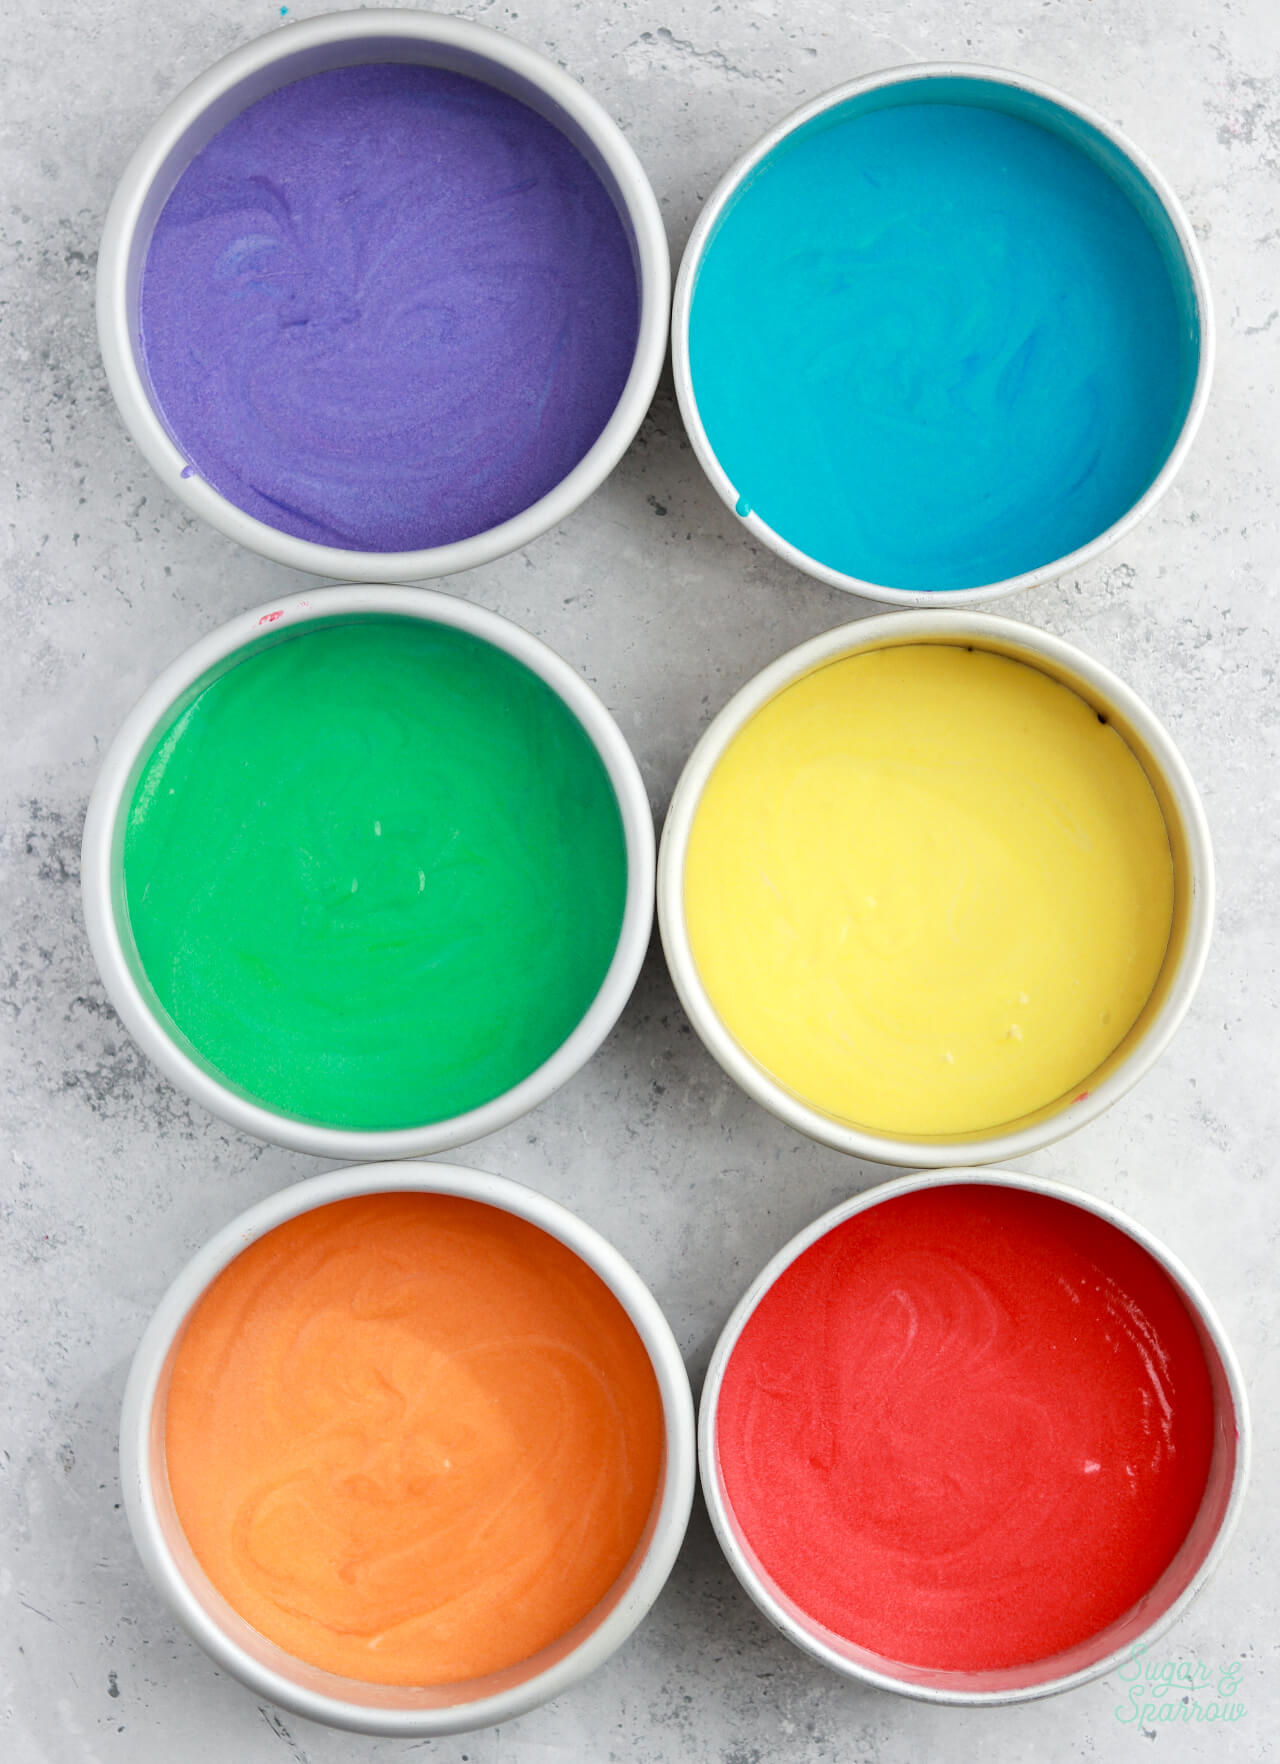
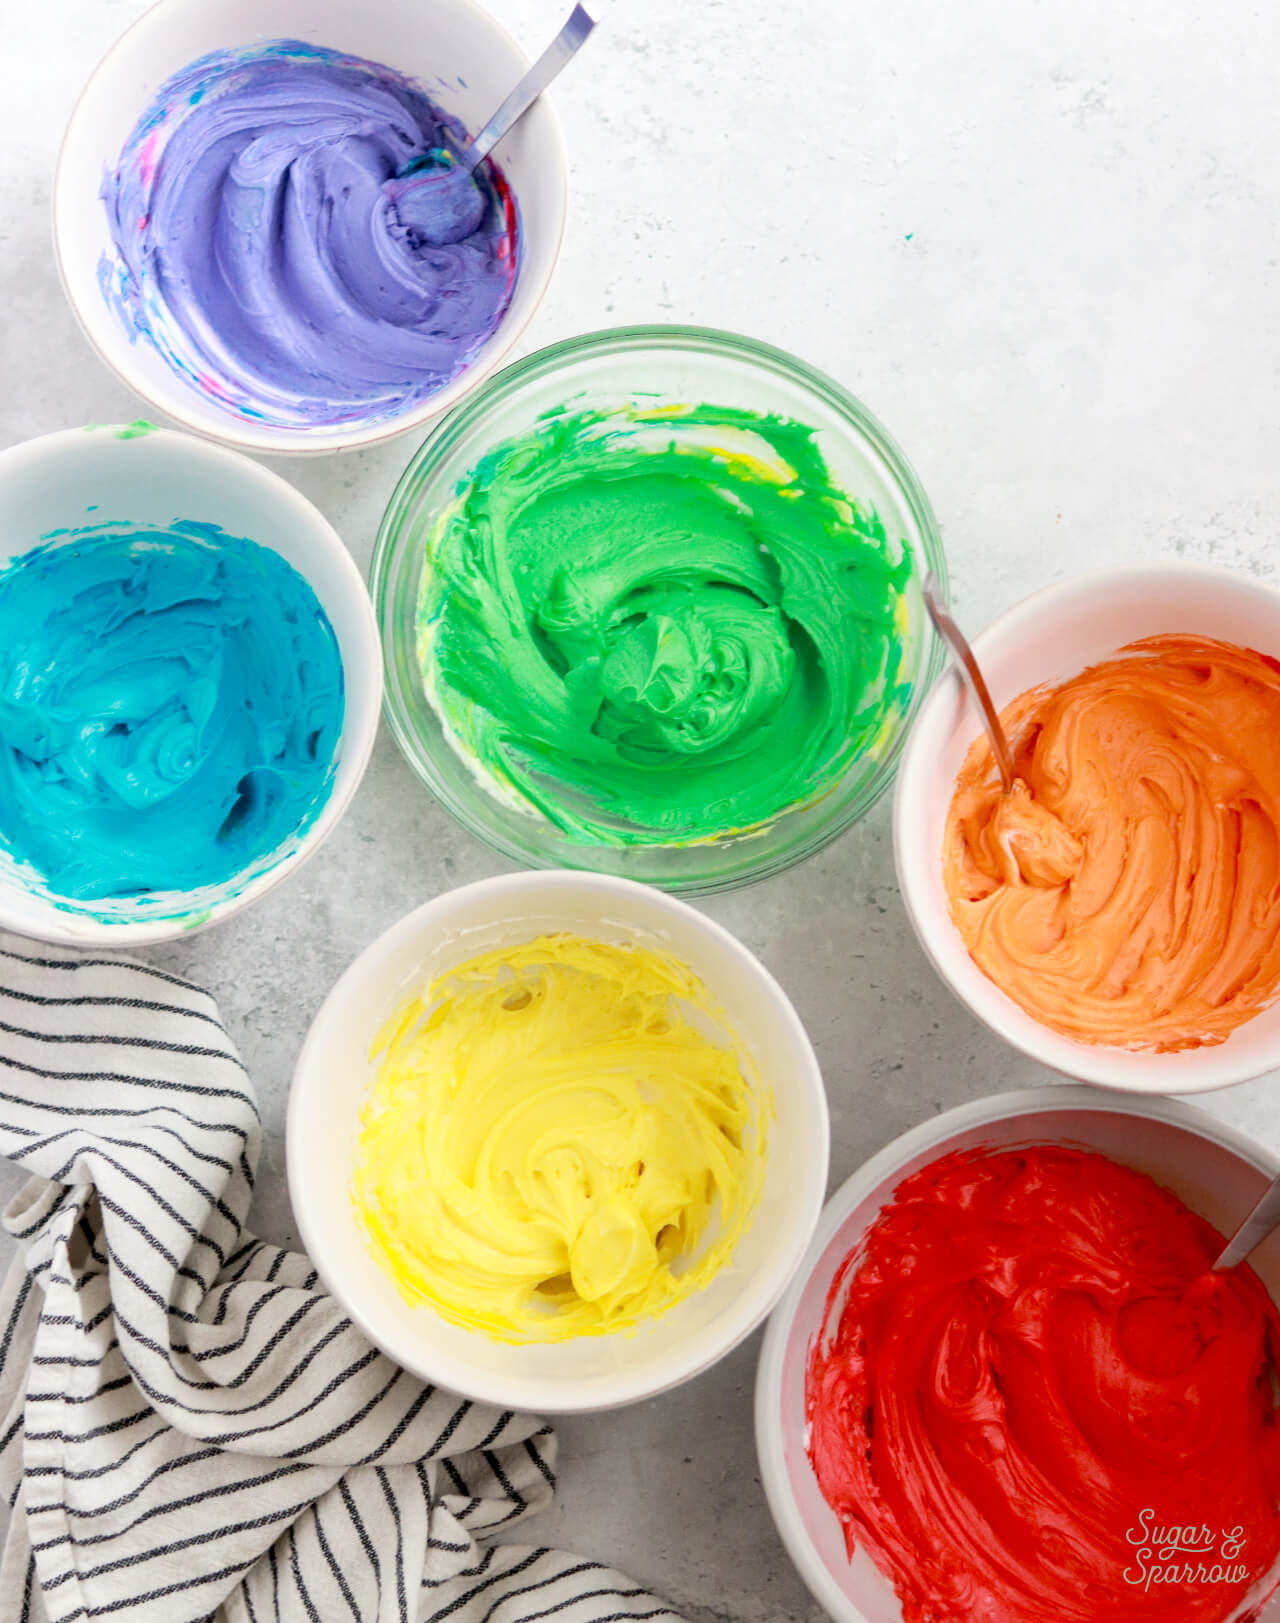
Step 1. Make the rainbow cake layers. Make the cake batter and divide it evenly between 6 bowls. You should have about 200g per bowl. Add food coloring to each bowl to create red, orange, yellow, green, blue, and purple cake layers, then bake the layers. Cool them to room temperature before filling and frosting.
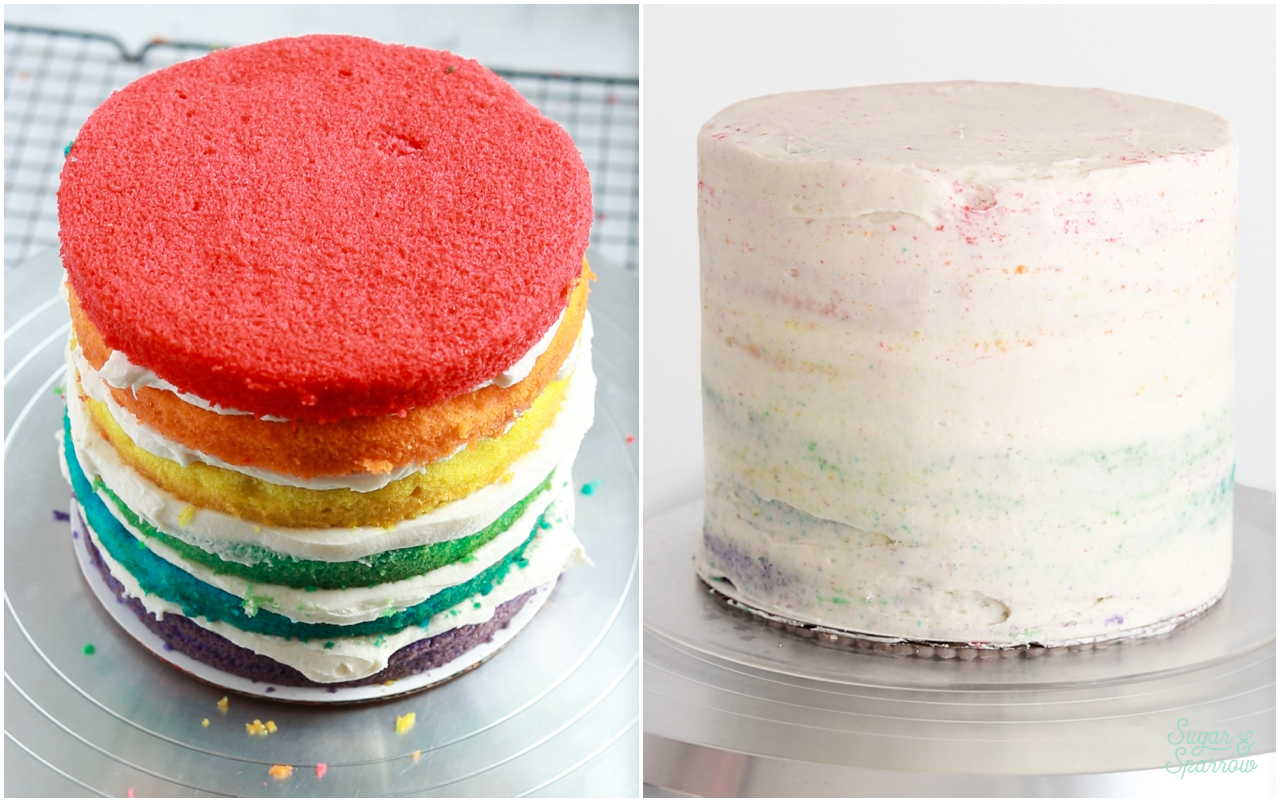
Step 2. Make the vanilla buttercream, fill, and crumb coat the cake. Make the vanilla buttercream, then prepare the cooled cake layers by leveling each one to a uniform height. Place the purple cake layer onto the turntable and add a thin (about 1/8 inch) layer of vanilla buttercream as filling, then place the blue layer on top.
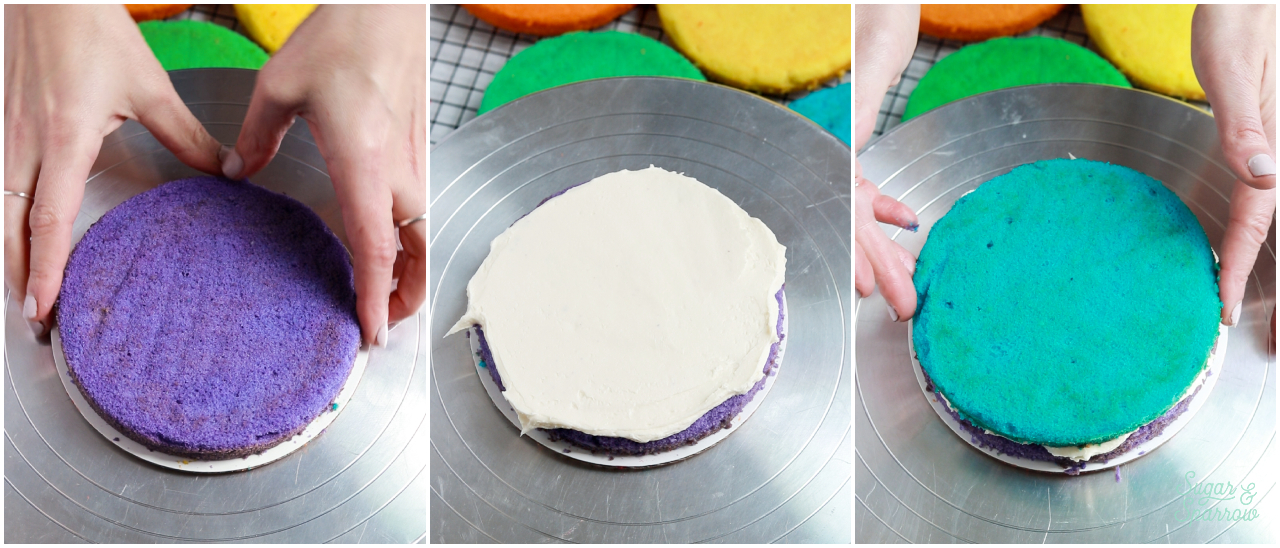
Repeat the process in reverse rainbow order before crumb coating the cake and placing it in the refrigerator to let the frosting firm up.
Step 3. Make the rainbow buttercream. Reserve about 1 Cup of buttercream for the swirls on top, then divide the rest of the buttercream between 6 bowls. One bowl (the one you’ll tint red) should have slightly more buttercream since it will be used for the top of the cake and one of the stripes. Add food coloring to each bowl to create red, orange, yellow, green, blue, and purple buttercream.
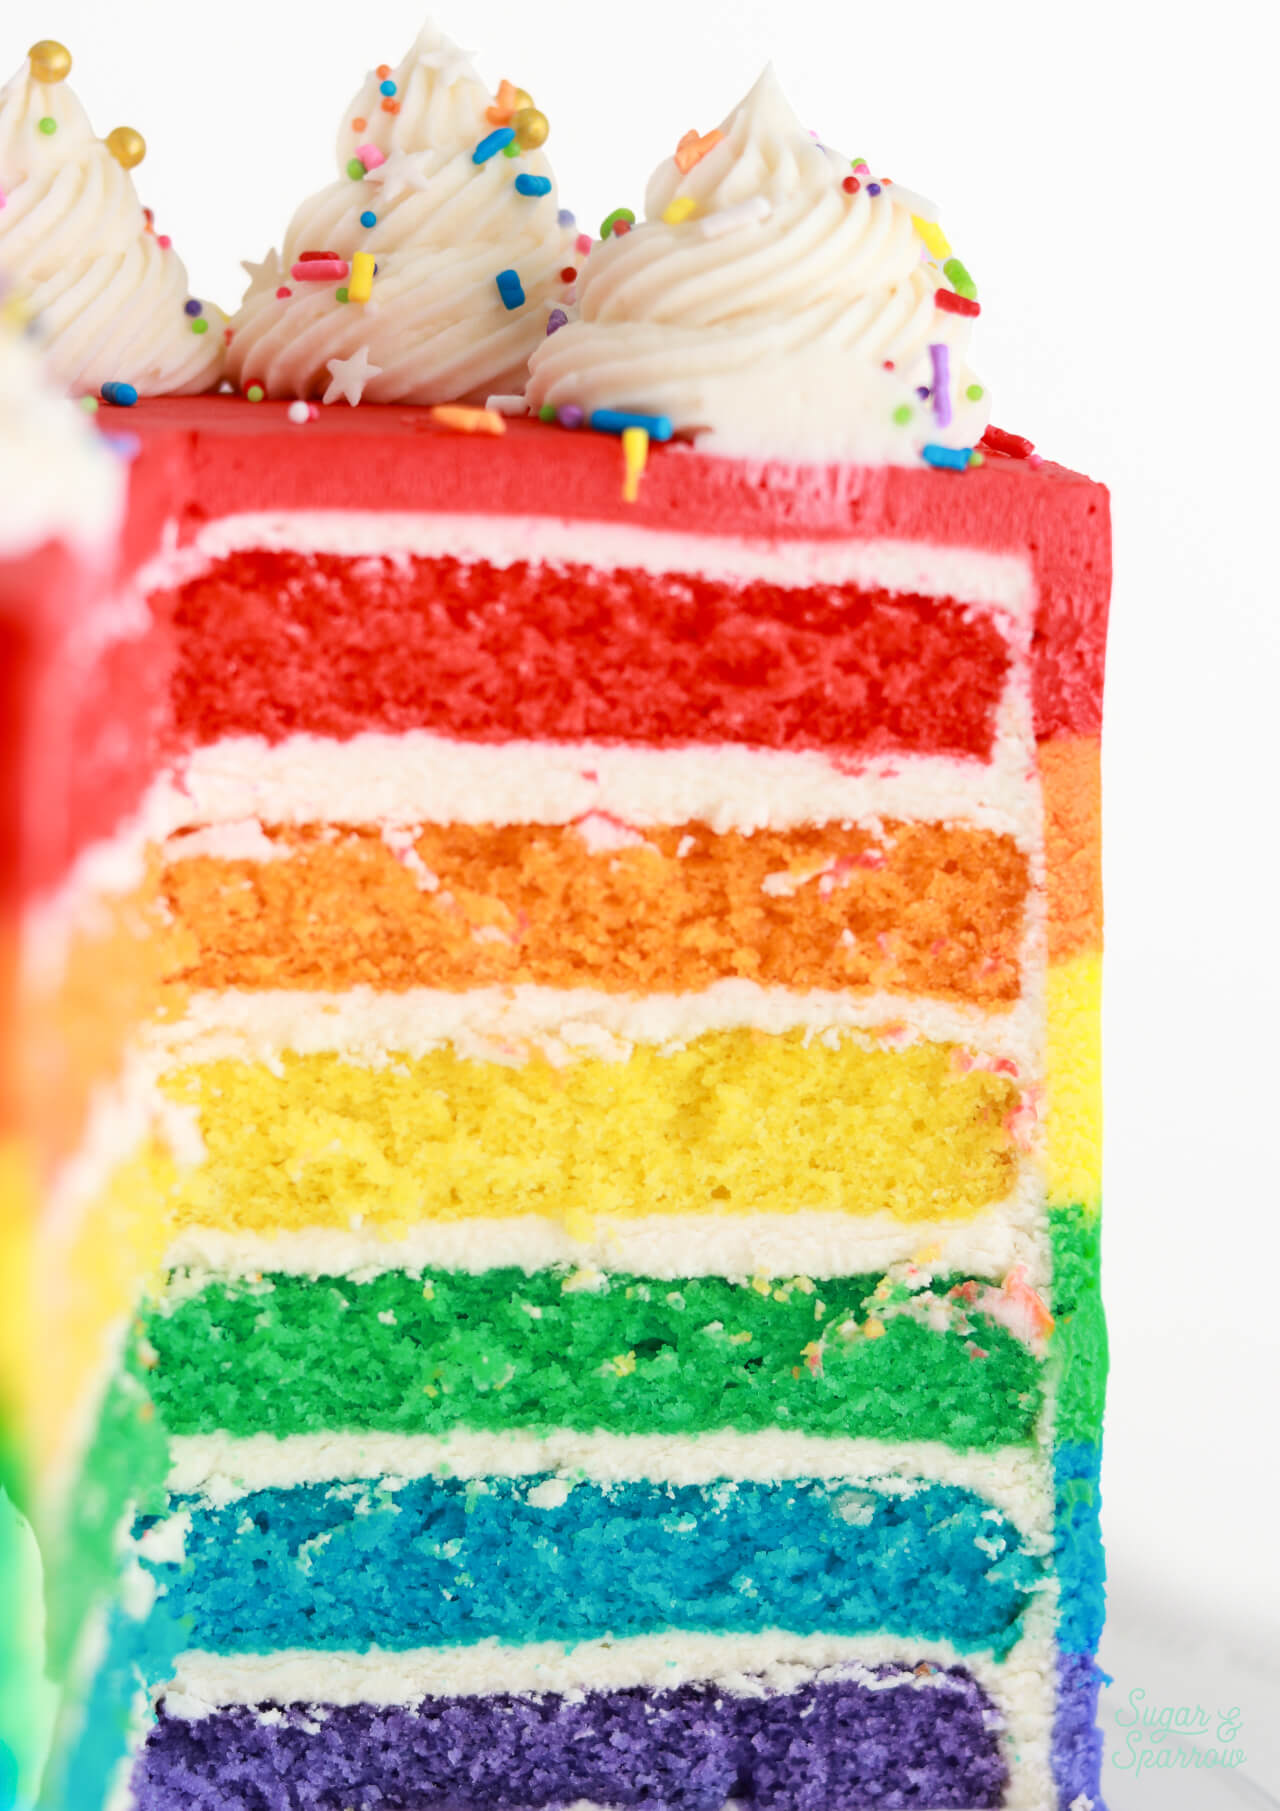
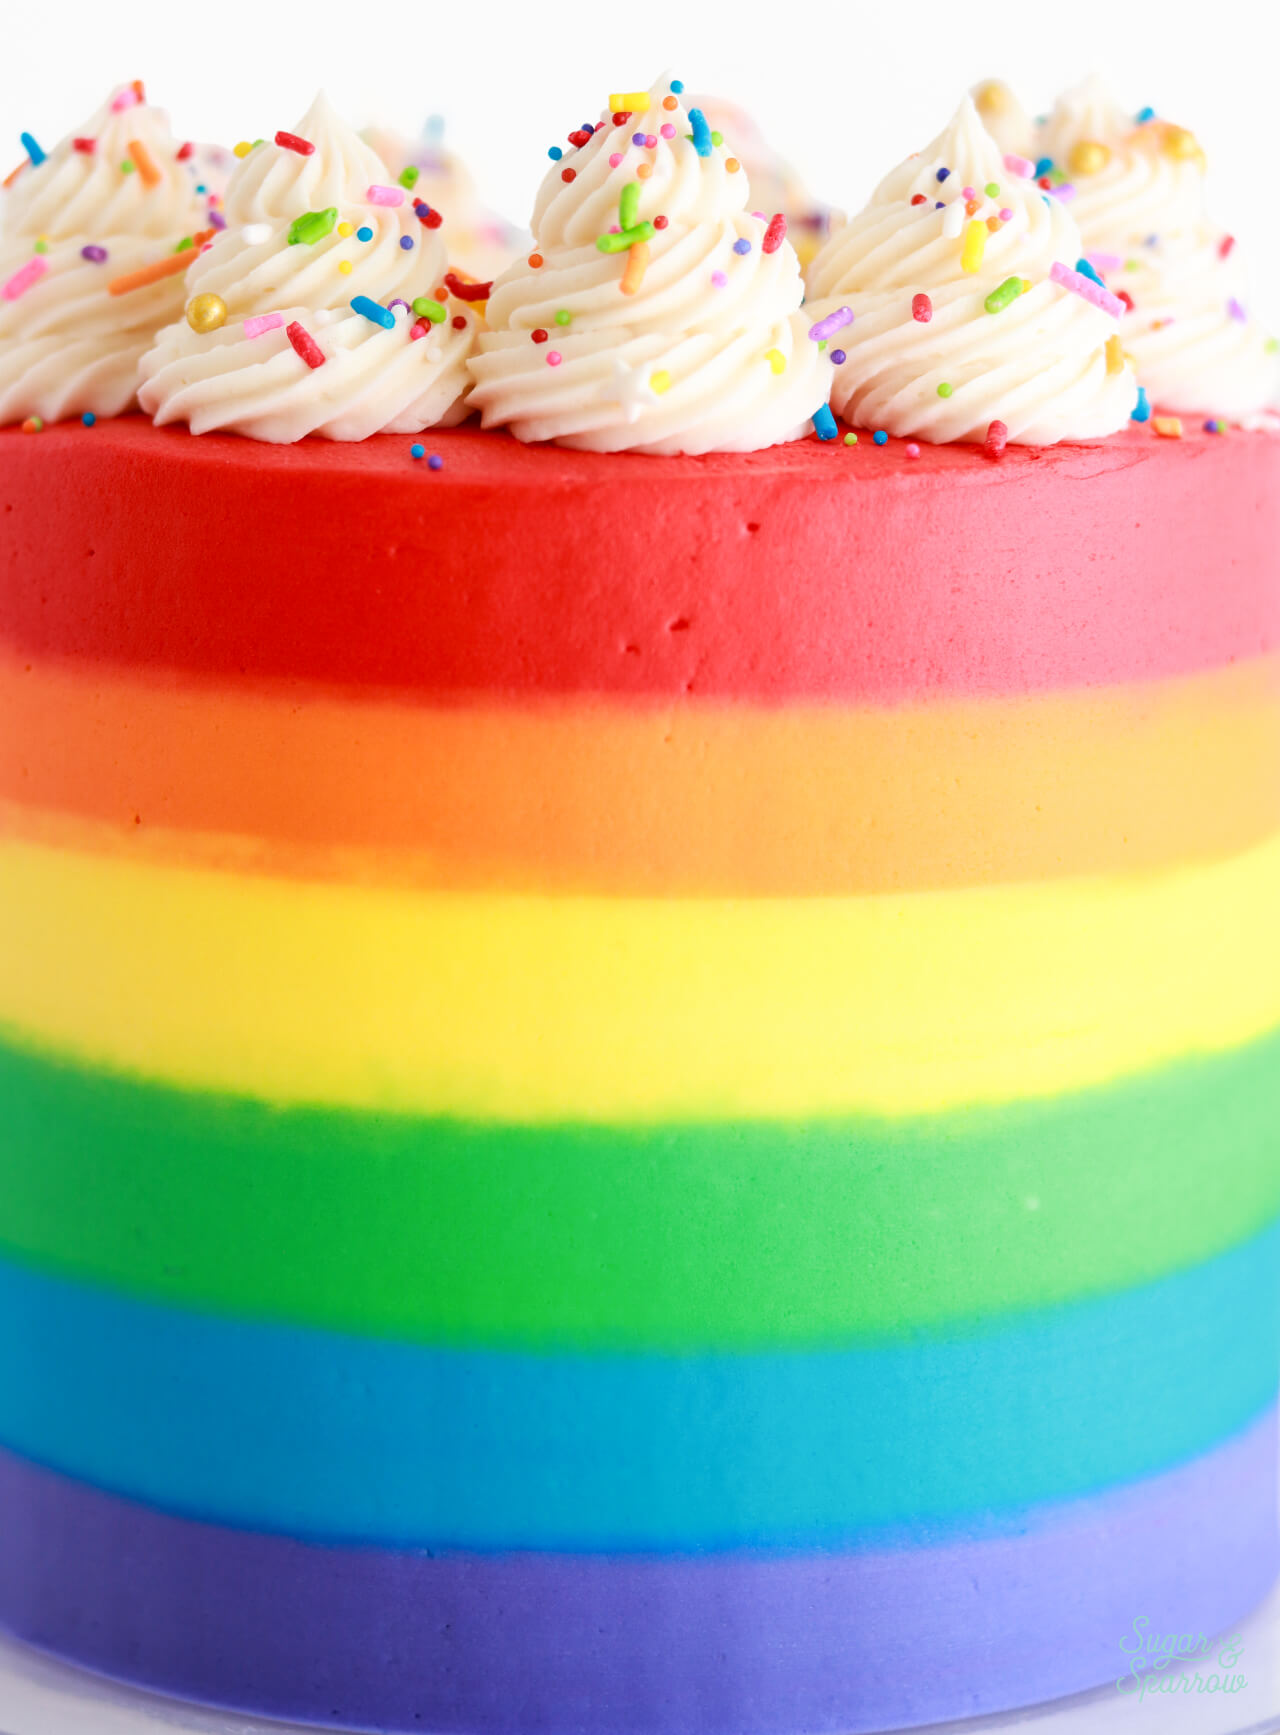
Step 4. Create the rainbow stripes. Place each buttercream color into a separate piping bag. Starting at the bottom with the purple buttercream, squeeze the piping bag while you rotate the turntable to add stripes of buttercream to the cake. Try to keep each color in line with the colors of the cake layers so they line up when the cake is sliced. Repeat the process in reverse rainbow order.
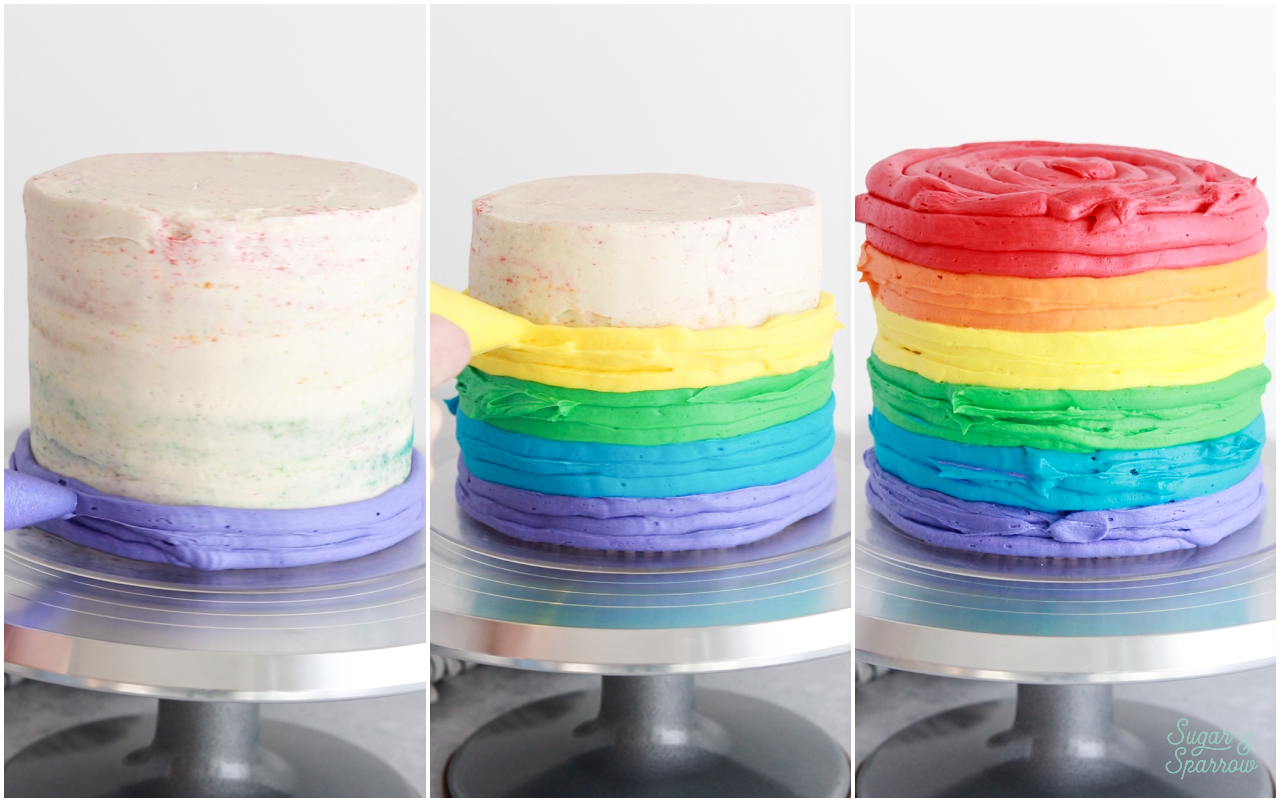
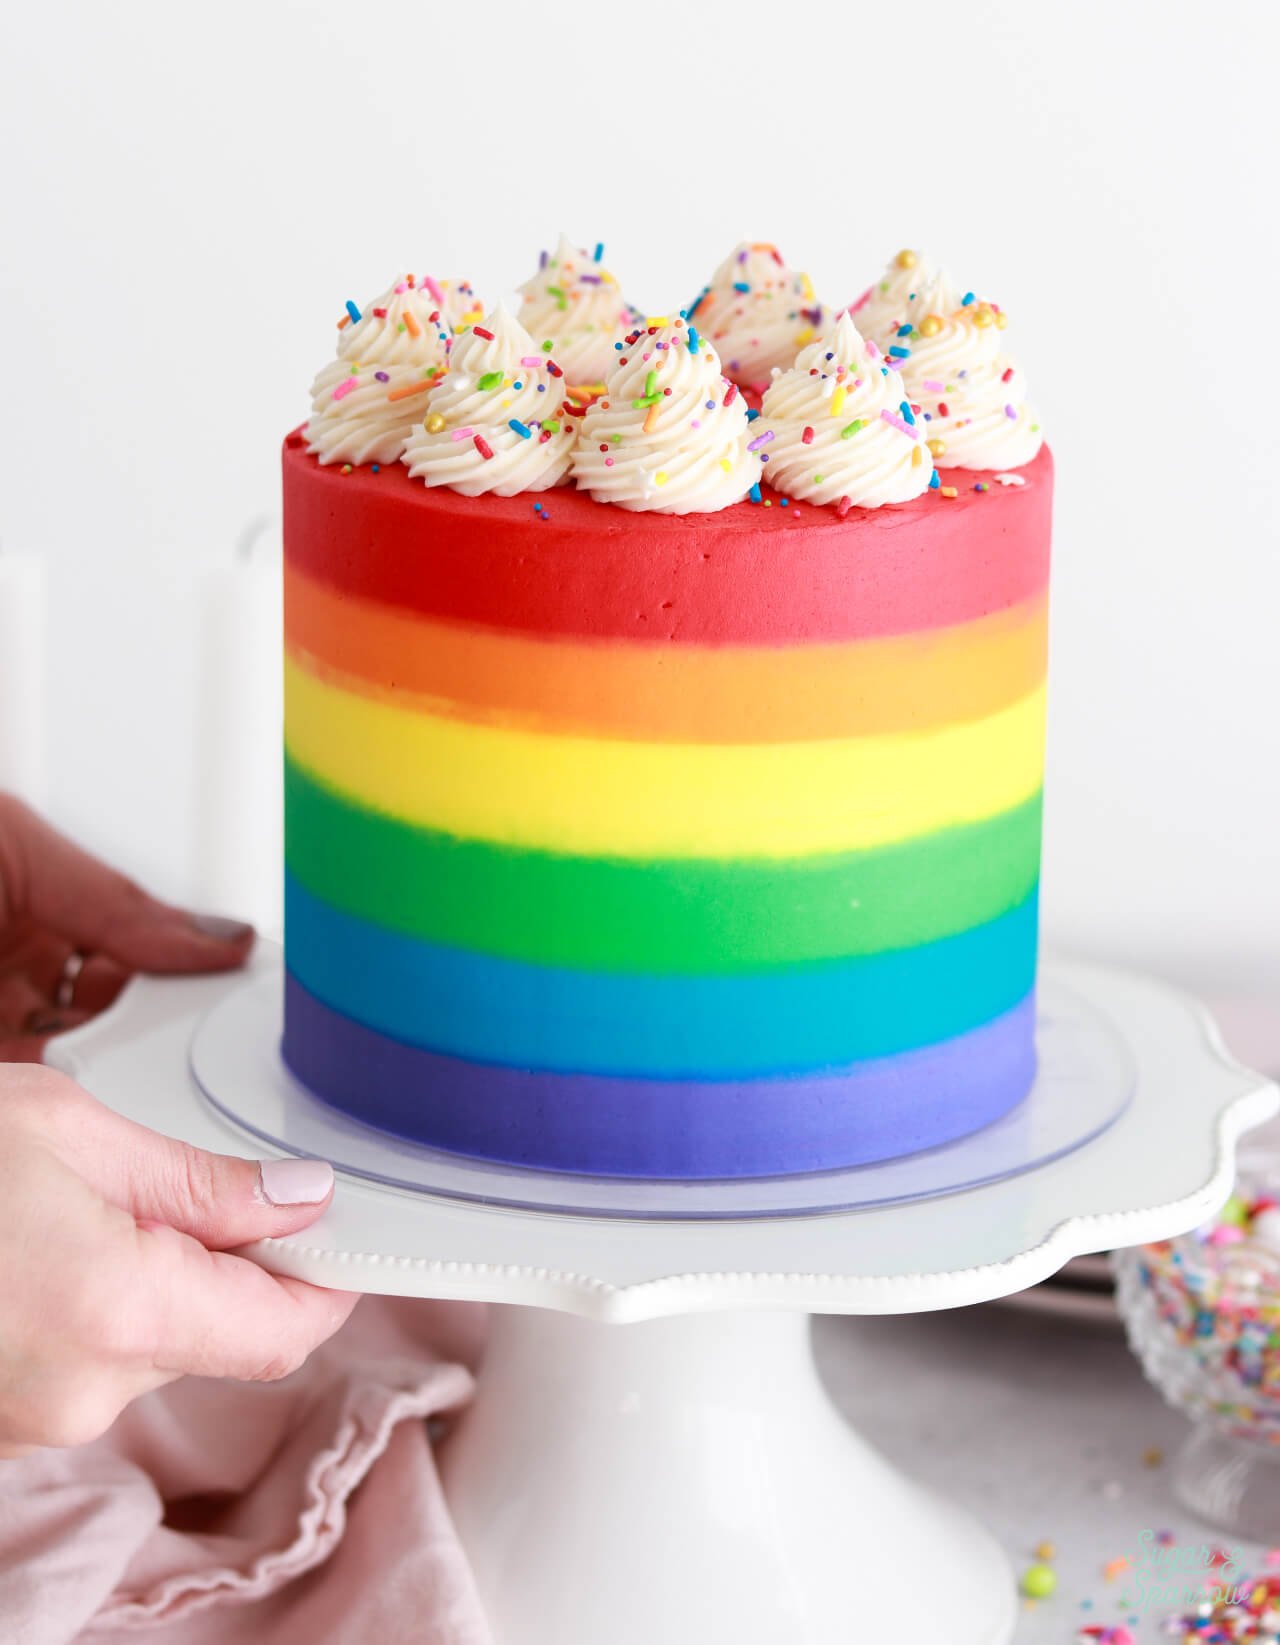
Add the red buttercream on top of the cake after piping the red stripe, then smooth it down with an icing spatula to create a flat top. Use the icing smoother to create a smooth buttercream finish on the sides of the cake before swiping the top edges inward to create sharp edges.
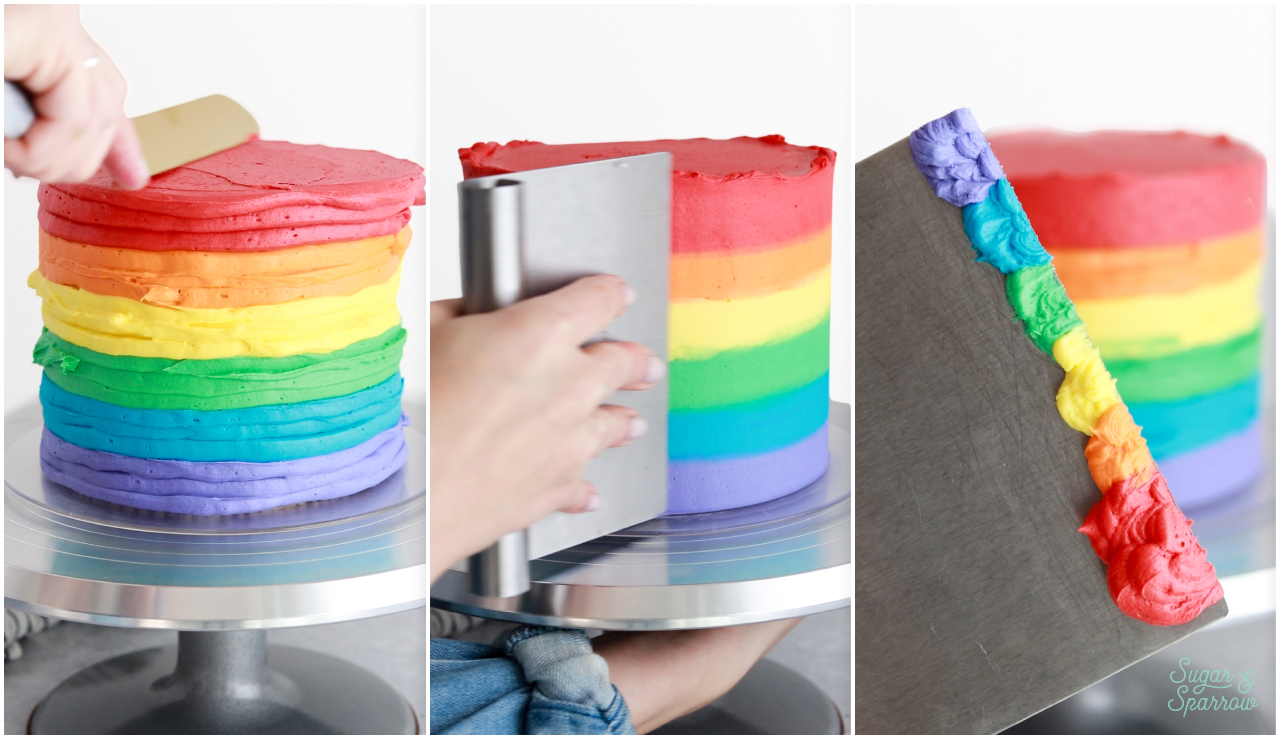
Be sure to clean your icing smoother often so that the rainbow colors don’t mix in the smoothing process. Even still, the stripes might look messy at first, but trust the process!
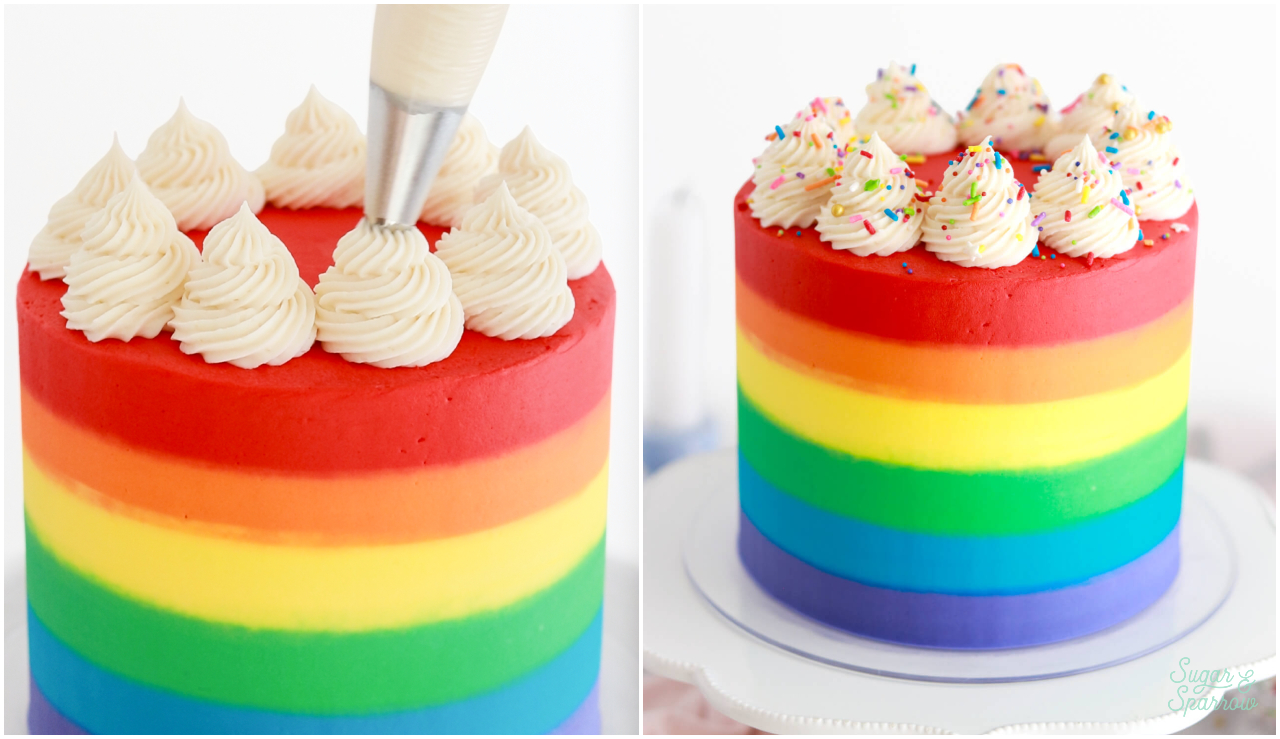
Step 5. Pipe the swirls on top and add the sprinkles. Place the reserved white buttercream into a piping bag fitted with Wilton Tip 4B and pipe a swirl border on top of the cake, then garnish with rainbow sprinkles.
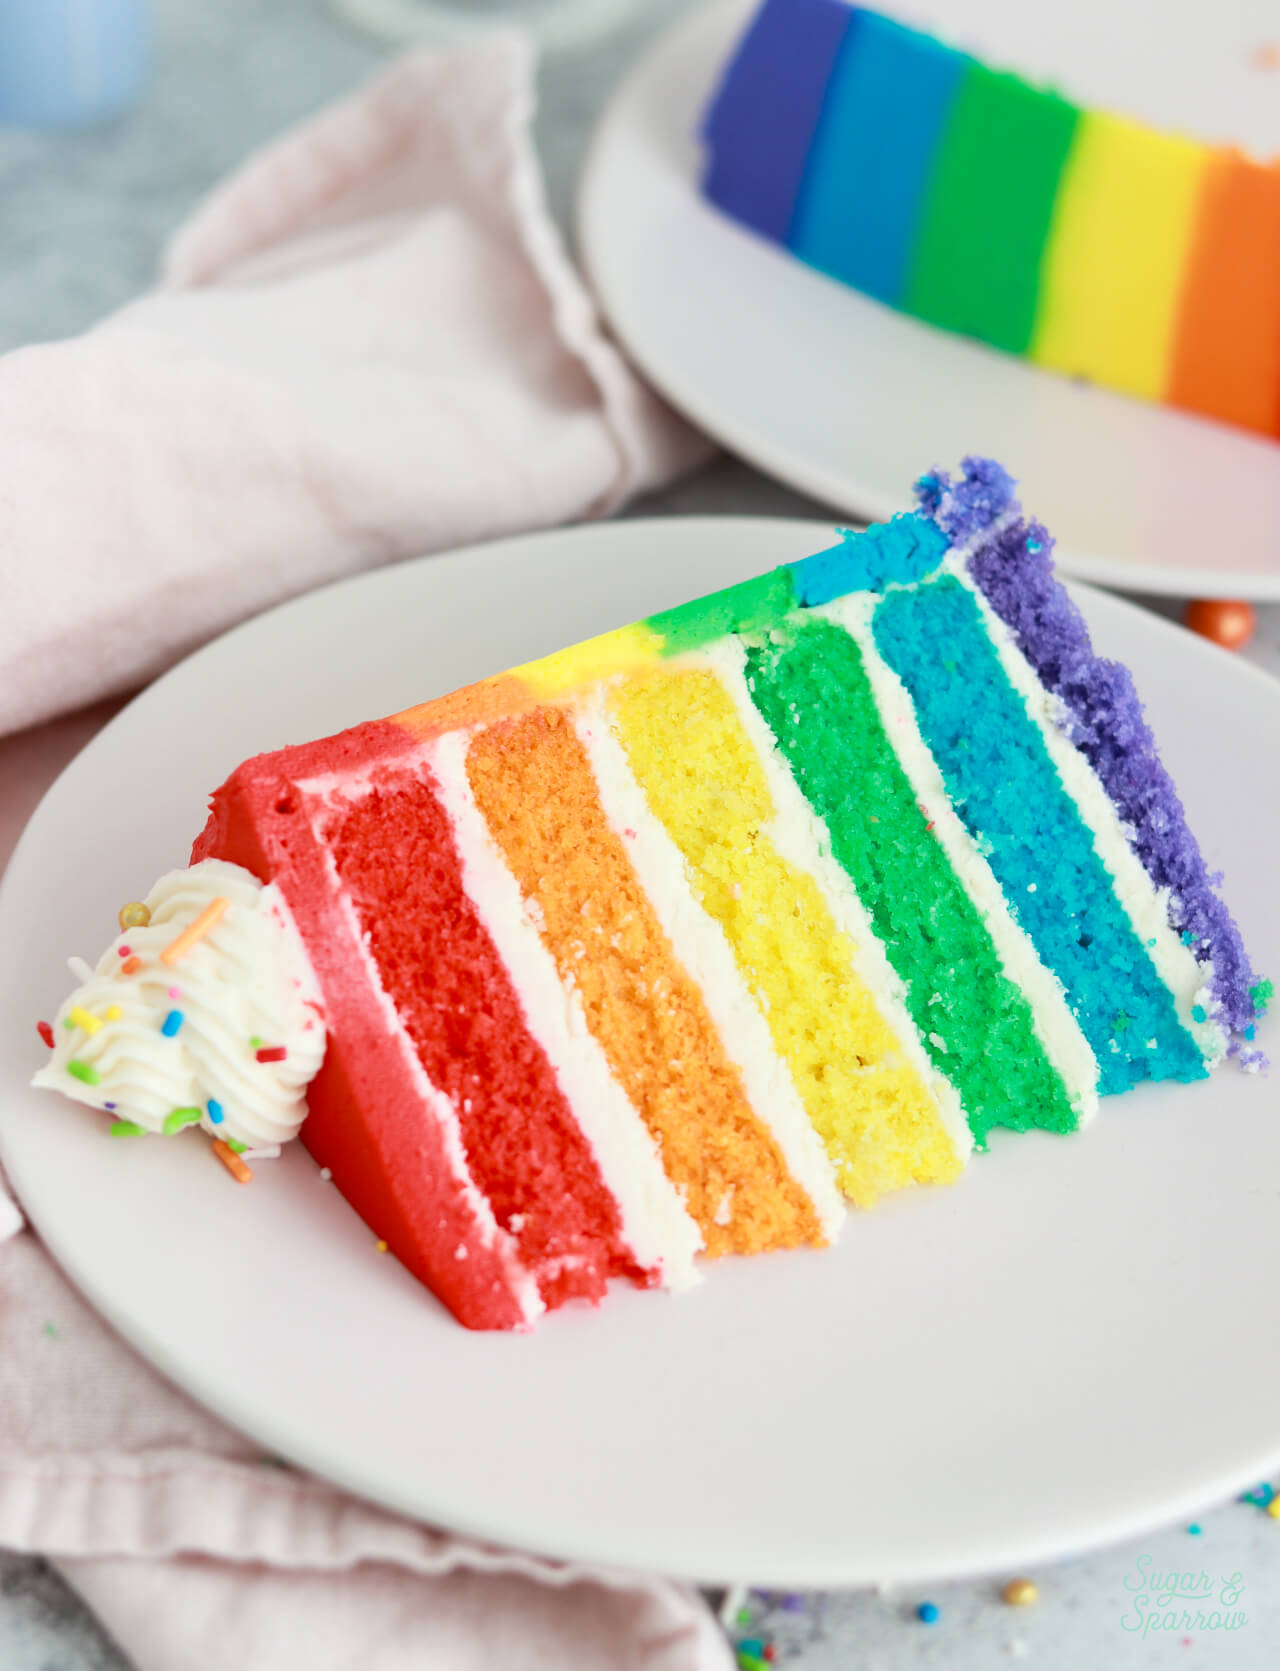
This is truly the most magical rainbow cake and a true showstopper – perfect for St. Patrick’s Day, birthdays, baby showers, and any celebration that could use more fun and whimsy!
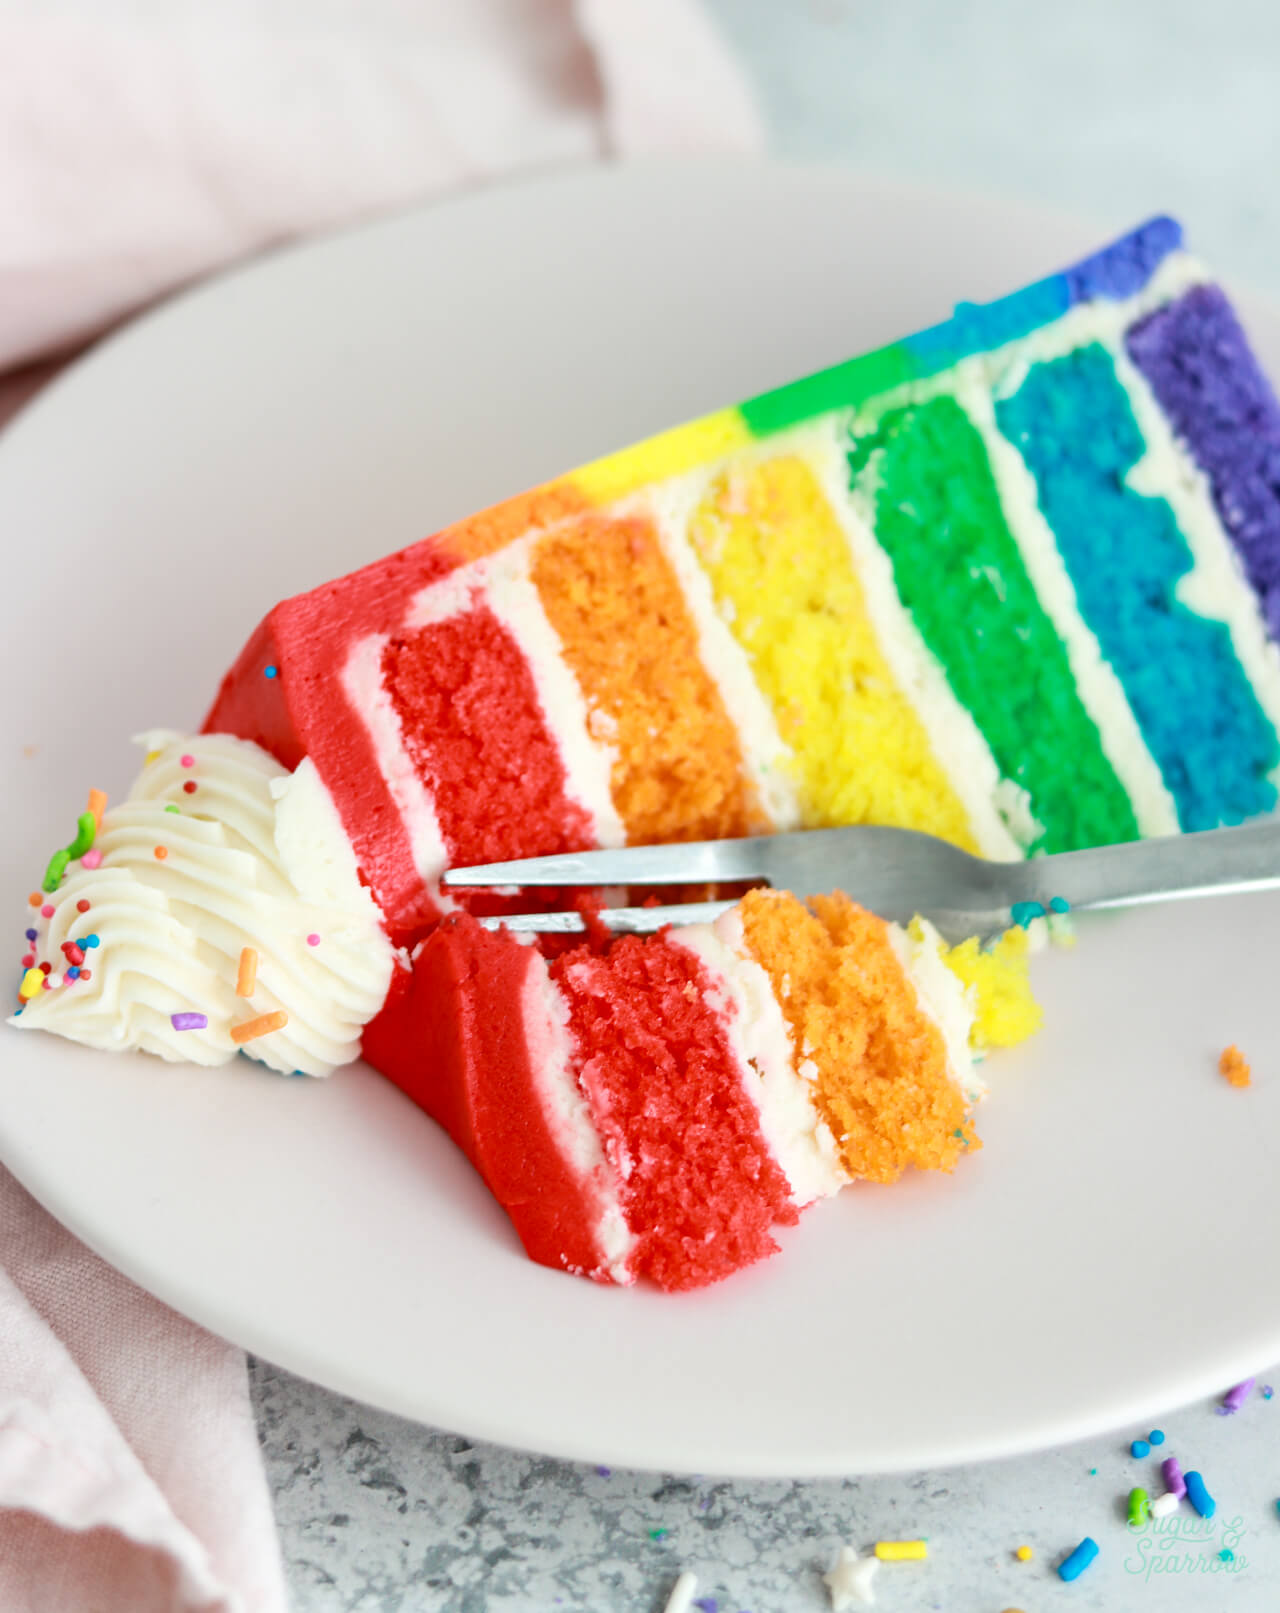
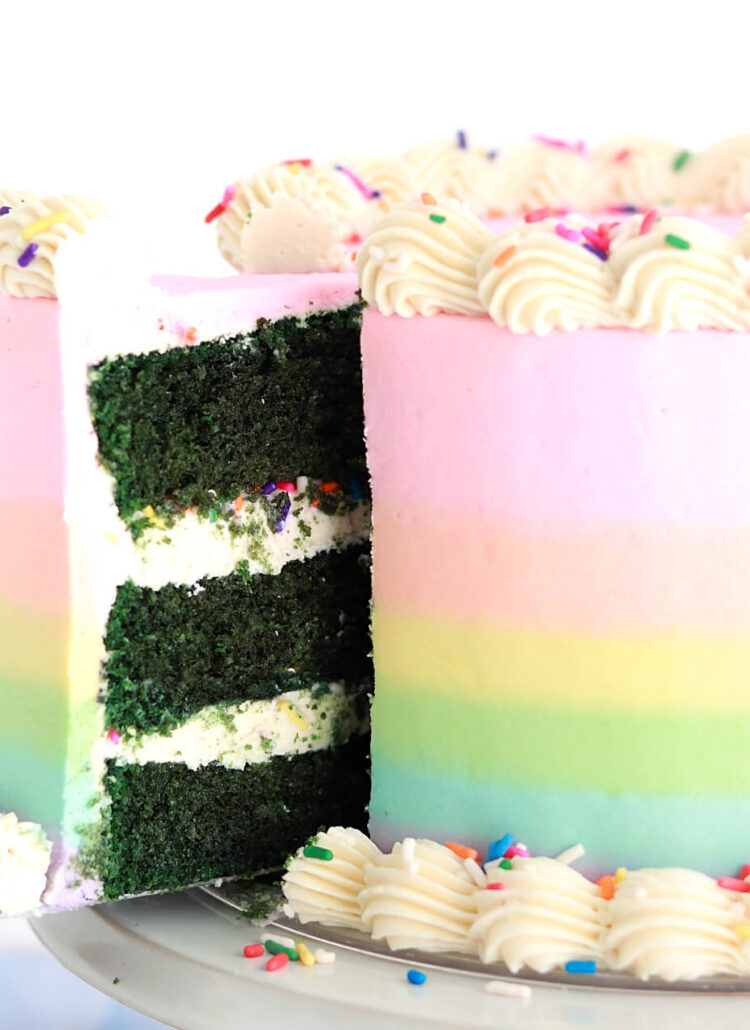
I can’t get over how beautiful each slice is.
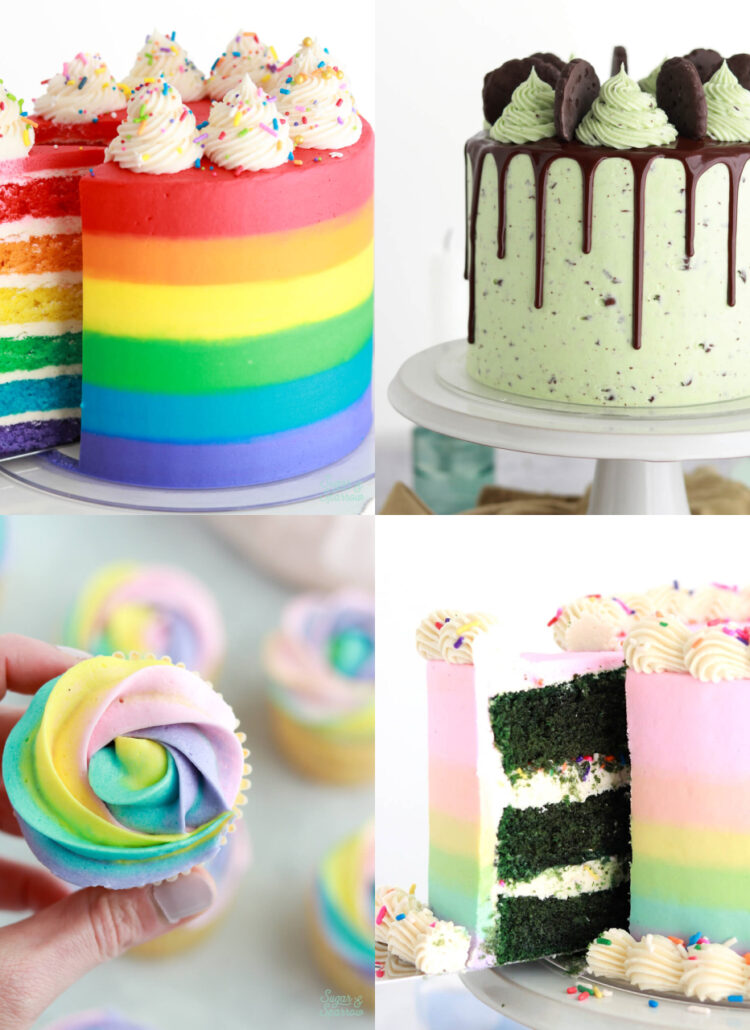
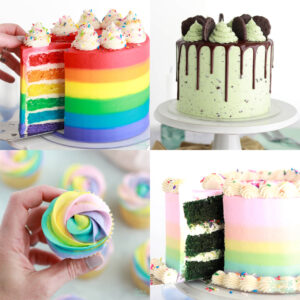
More Rainbow Recipes You’ll Love
If you need more rainbow desserts in your life, here are some of my favorites from the blog:
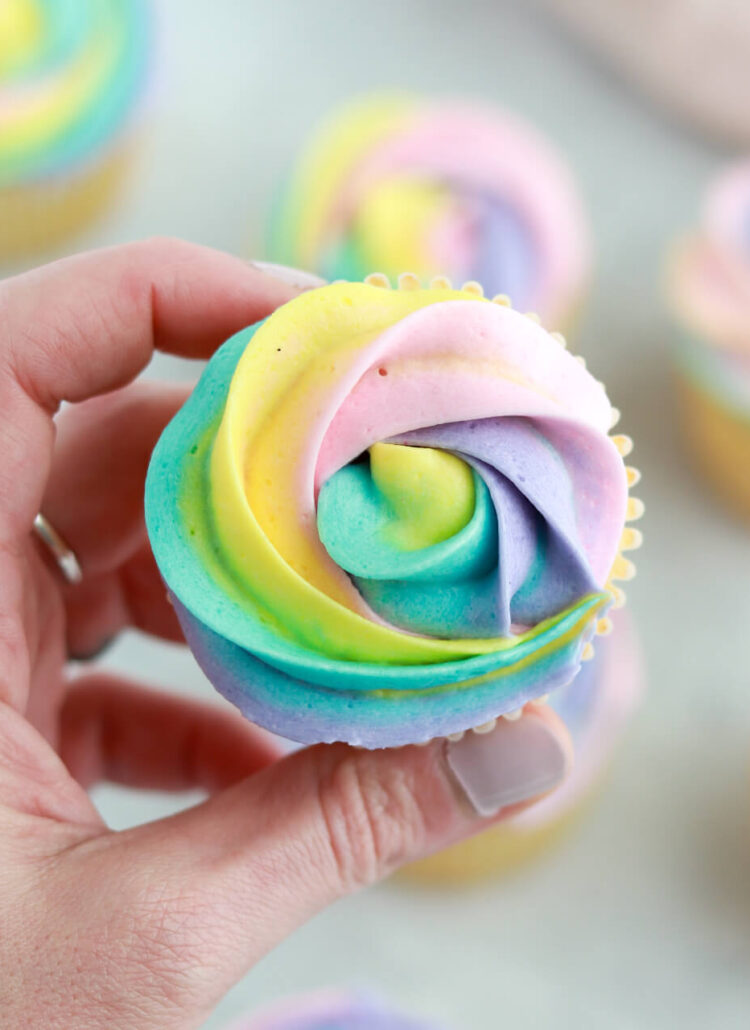
- Easy Rainbow Cupcakes
- Pastel Rainbow Birthday Cake
- Gradient Rainbow Buttercream Cake
- Green Velvet Cake with Rainbow Frosting
- Funfetti Layer Cake
This rainbow cake is sure to dazzle everyone at your next event and I hope you love it as much as I do! Let me know if you make it in the comments below and feel free to tag @sugarandsparrowco on Instagram and show me – I love to see your baking projects!
Rainbow Cake with Rainbow Buttercream
Equipment
- Six 6-inch cake pans
Ingredients
Rainbow Cake
- 2 1/2 Cups (265g) sifted cake flour* DIY recipe in notes
- 2 tsp baking powder
- 1/2 tsp baking soda
- 1/2 tsp salt
- 1 1/2 Cups (300g) granulated sugar
- 1/2 Cup (113g) unsalted butter, room temperature
- 4 large egg whites, room temperature
- 1/2 Cup (120ml) vegetable oil
- 1 Tbsp pure vanilla extract
- 1 1/4 Cups (300ml) full-fat buttermilk*, room temperature DIY recipe in notes
- red, orange, yellow, green, blue, and purple food coloring
Vanilla Buttercream
- 2 Cups (452g) unsalted butter, room temperature
- 7 Cups (840g) powdered sugar
- 4 tsp pure vanilla extract
- 1/4 Cup whole milk, room temperature
- pinch of salt, or to taste
- red, orange, yellow, green, blue, and purple food coloring
Garnish
- 2 Tbsp rainbow sprinkles
Instructions
Make the Rainbow Cake
- Preheat the oven to 325°F (163°C) and prepare six 6-inch cake pans by spraying the sides with baking spray and fitting a parchment paper circle to the bottom of each pan.
- In a medium bowl, add the flour, baking powder, baking soda and salt. Whisk together and set aside.
- In the bowl of a stand mixer fitted with the paddle attachment, beat the butter at high speed until creamy, about 2 minutes. Add the sugar and cream it together with the butter at medium-high speed until light and fluffy, about 2 minutes, scraping the bowl and paddle at the halfway point. Turn the mixer to low and add the egg whites one at a time, mixing until they are just combined and scraping down the bowl and paddle as needed. Add the vegetable oil and vanilla, increase the mixer speed to high and beat for 1 minute.
- Turn the mixer off and add the flour mixture all at once. Mix the ingredients on low speed until just combined, then slowly pour in the buttermilk. Continue mixing at low speed for about 30 seconds, until the batter is uniform and combined. The batter will be slightly thin.
- Divide the batter evenly between six bowls. You should have about 200g of batter per bowl. In the first bowl, whisk in a few drops of red food coloring until you create red colored batter (keep in mind it will darken in the baking process!). Repeat the process with the remaining bowls using orange, yellow, green, blue, and purple food coloring.
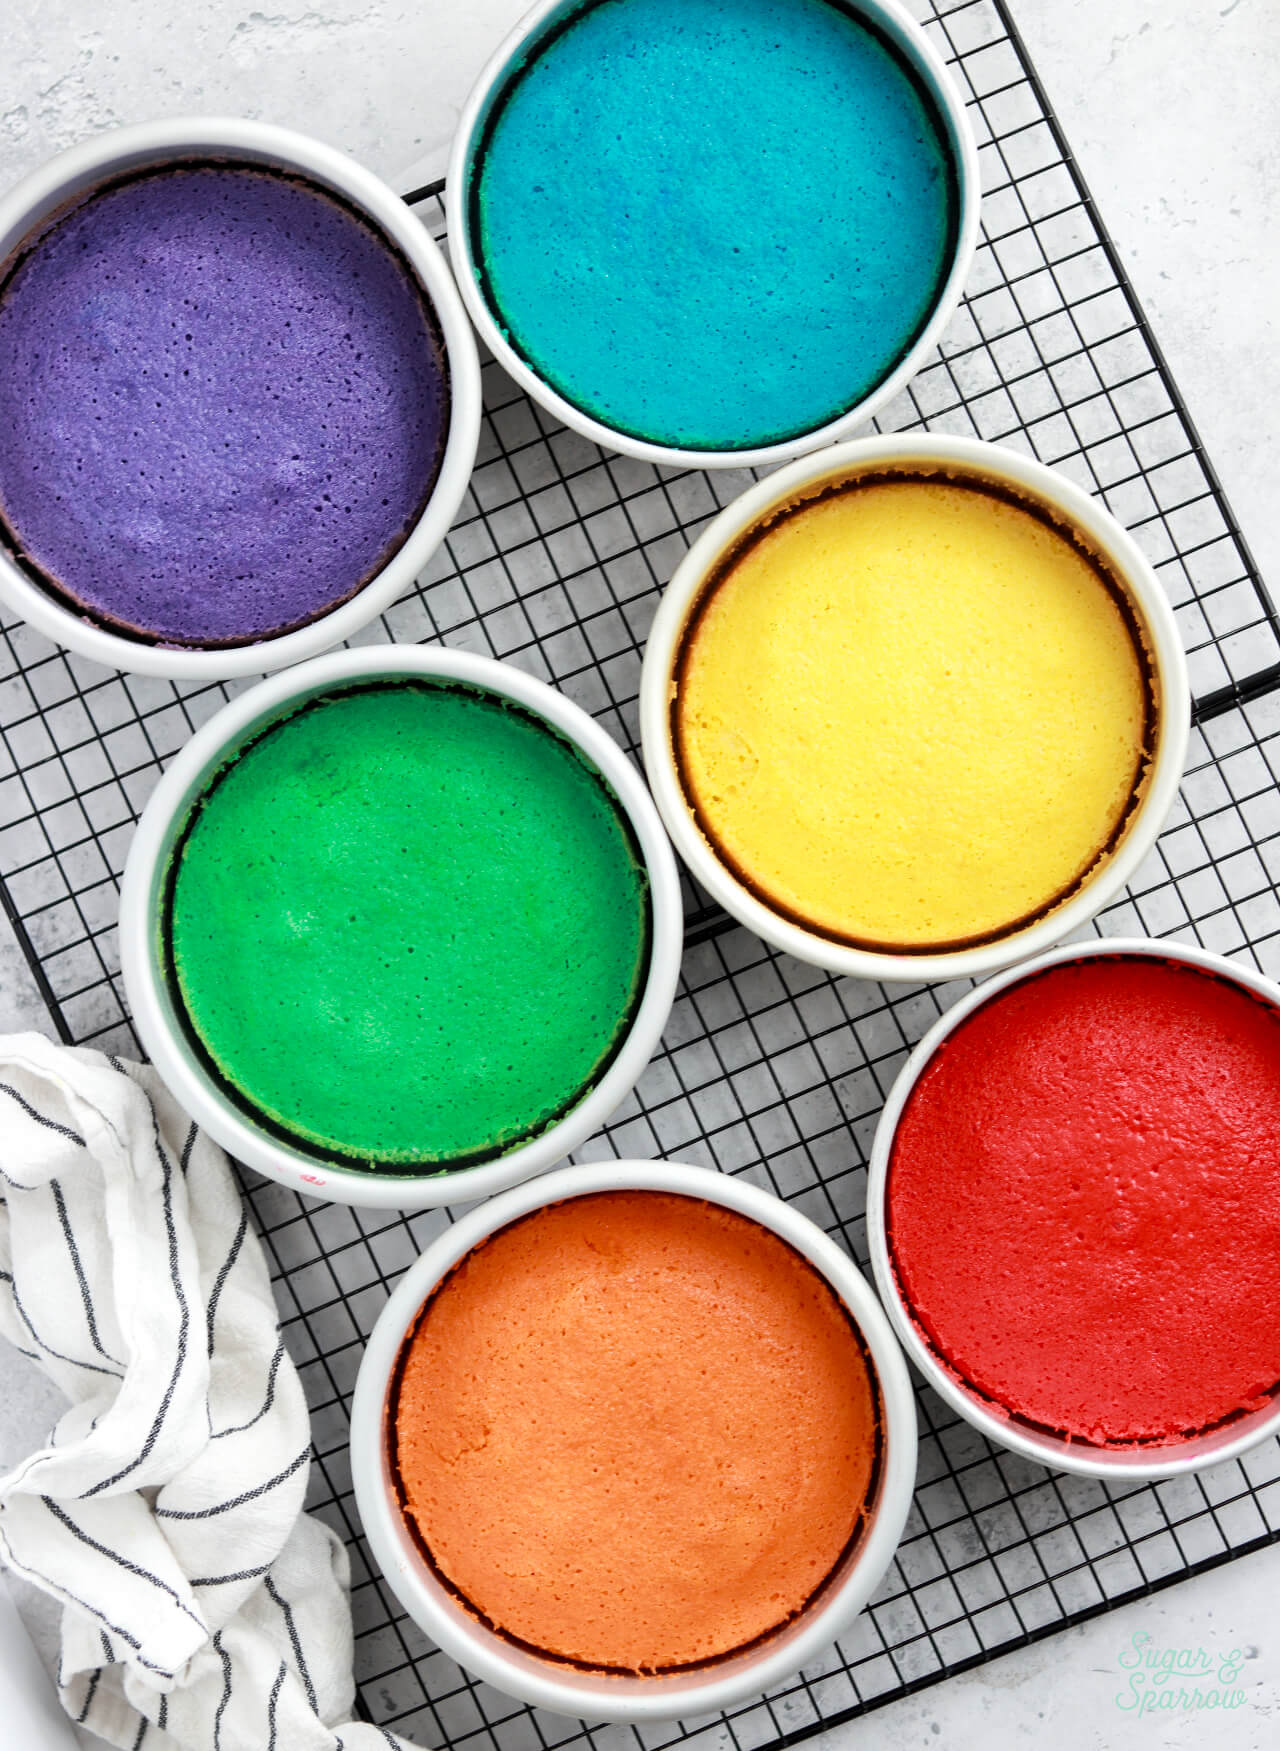
- Pour each bowl of batter into a separate cake pan and bake for 18-22 minutes, until the layers spring back to the touch and a toothpick inserted comes out clean. Let the cake layers cool in their pans for 5 minutes, then remove them from the pans and allow them to cool completely on a wire rack.
Make the Vanilla Buttercream
- With a hand mixer or paddle attachment on your stand mixer, cream the butter on medium-high until it’s creamy and light (almost white) in color. About 7 minutes.
- With the mixer on low, add the powdered sugar one cup at a time, scraping down after each addition and making sure each cup is fully incorporated before adding the next one. Add the vanilla, milk, and salt and mix on low for another minute until fully incorporated. Wait to add the food coloring until Step 2 of the Assembly process below.
Assembly
- Once the cake layers are completely cooled, level them to get rid of any domed tops and create even layers. Add a swipe of vanilla buttercream onto a cardboard cake circle and place the first cake layer on top. Fill and stack the cake layers in reverse rainbow order, using about 1/8 inch of buttercream between each layer. When you get to the final cake layer, place it upside down on top of the stack, then crumb coat the cake with vanilla buttercream. Refrigerate the cake for 15-20 minutes to let the crumb coat firm up while you prepare the rest of the buttercream.
- Color the Buttercream: Reserve about 1 Cup of buttercream for the swirls on top, then divide the rest of the buttercream between 6 bowls. One bowl (the one you’ll tint red) should have slightly more buttercream since it will be used for the top of the cake and one of the stripes. Add food coloring to each bowl to create red, orange, yellow, green, blue, and purple buttercream.
- To create the rainbow striped design pictured: Add each buttercream color into its own piping bag and cut off about 1/2 inch opening. Starting at the bottom with the purple buttercream, squeeze the piping bag while you rotate the turntable to add stripes of buttercream to the cake. Try to keep each color in line with the colors of the cake layers so they line up when the cake is sliced. Repeat the process in reverse rainbow order, then cover the top of the cake with red buttercream. Smooth the top down with an angled spatula, then create a smooth finish on the sides with your icing smoother before swiping the top edges inward to create sharp edges.
- Add the reserved white buttercream into a piping bag fitted with Tip 4B and pipe swirls on top of the cake, then garnish the swirls with rainbow sprinkles.
Notes
- The cake layers can be made ahead and stored at room temperature, covered tightly in plastic wrap, for up to two days. Alternatively, you can cover with plastic wrap and store in the freezer for up to two months before thawing to room temperature.
- The vanilla buttercream can be made ahead and stored in an airtight container in the refrigerator for up to two weeks. When you’re ready to use it, bring it back to room temperature and re-whip in your stand mixer to bring back to smooth buttercream consistency.
Leave a Reply