• Cake
  • Frosting
  • YouTube
  • My Favorite Tools
  • Nav Social Icons

  • Skip to primary navigation
  • Skip to main content
  • Skip to primary sidebar
  • Skip to footer
  • Recipes
    • Cake
    • Cupcakes
    • Frosting
    • Ice Cream
    • Vegan
  • Cake Basics
  • Tutorials
  • Blog
  • About
  • Mobile Menu Widgets

    Connect

    Search

Sugar & Sparrow logo in script font

Sugar & Sparrow

Lifestyle and Cake from Portland Oregon

  • Cake Basics
  • Recipes
    • Cake
    • Cupcakes
    • Cookies & Bars
    • Filling
    • Frosting
    • Ice Cream
    • No-Bake
    • Small Batch
    • Vegan
  • Tutorials
  • Book
  • Blog
  • About

How to Make Stable Cream Cheese Frosting for Cake Decorating

February 24, 2026 · In: FAQ, Featured, Frosting, Recipes

Jump to Recipe

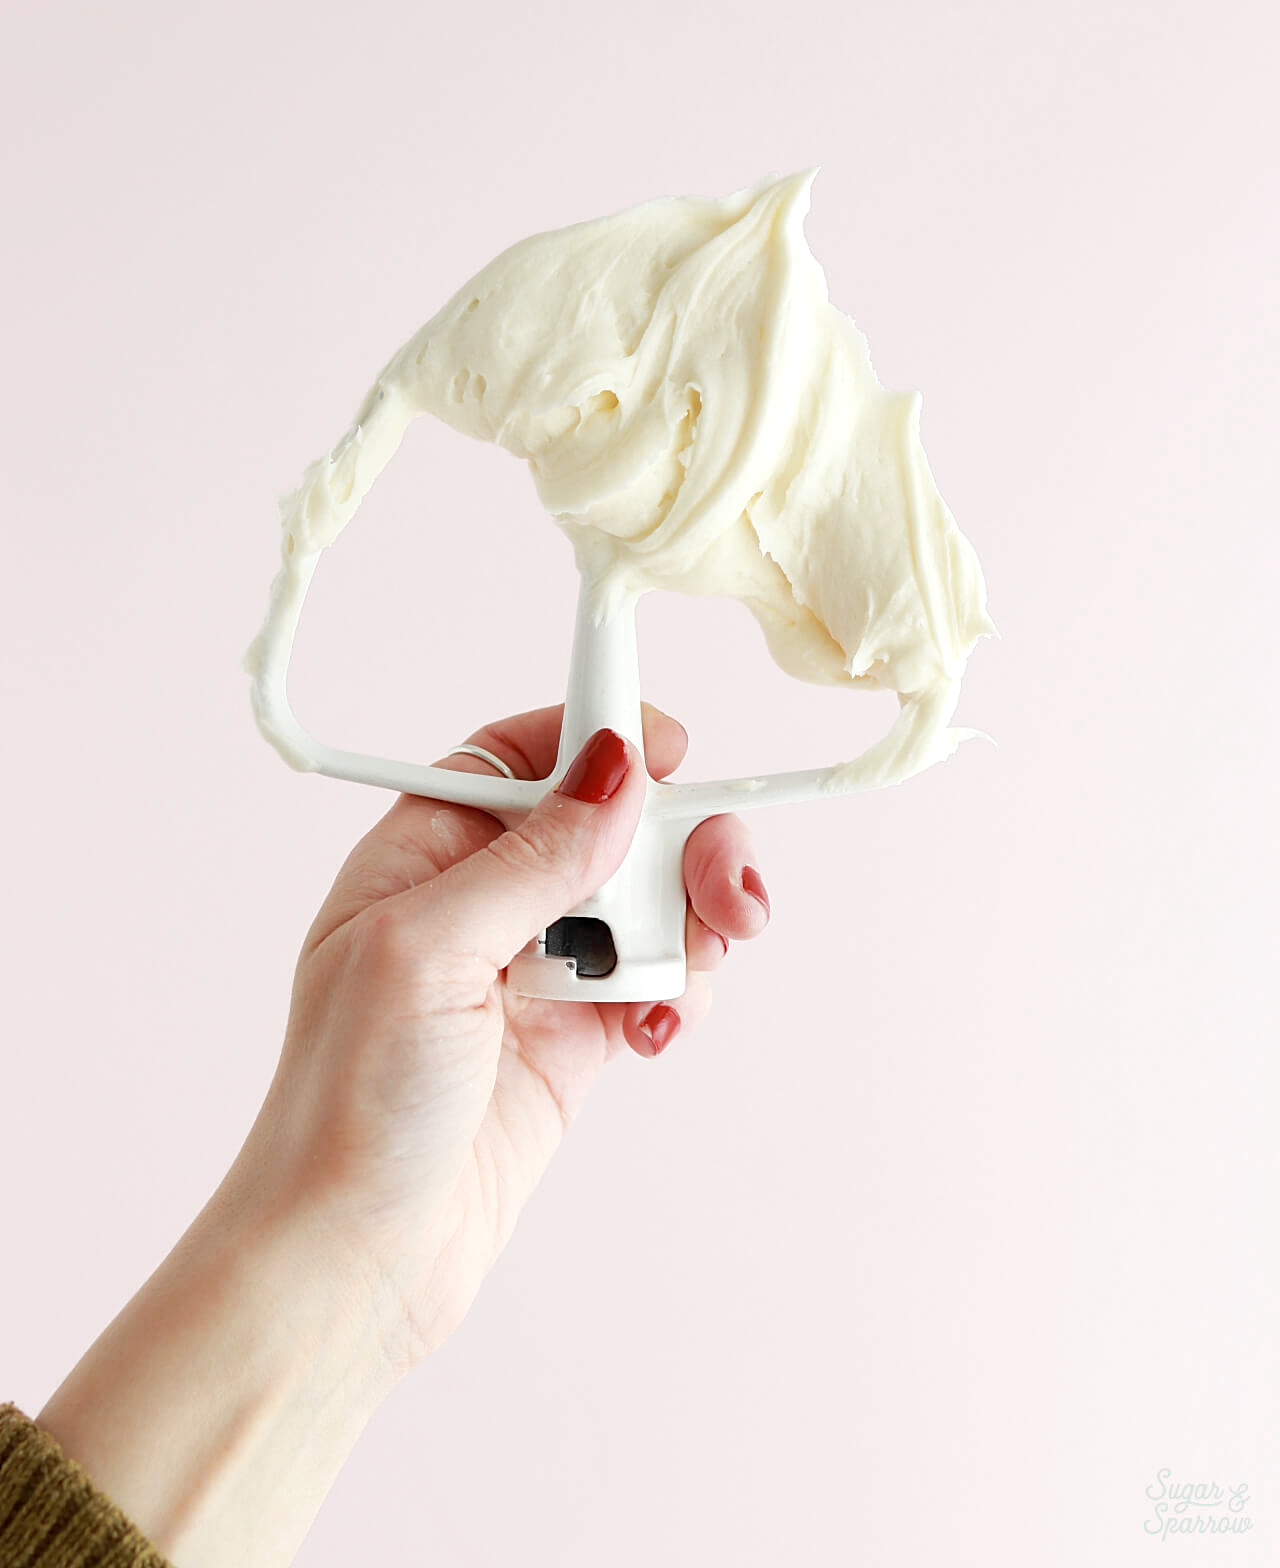
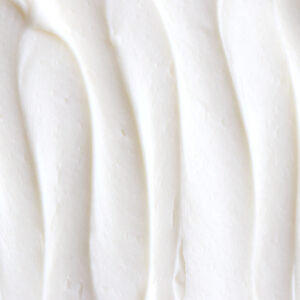
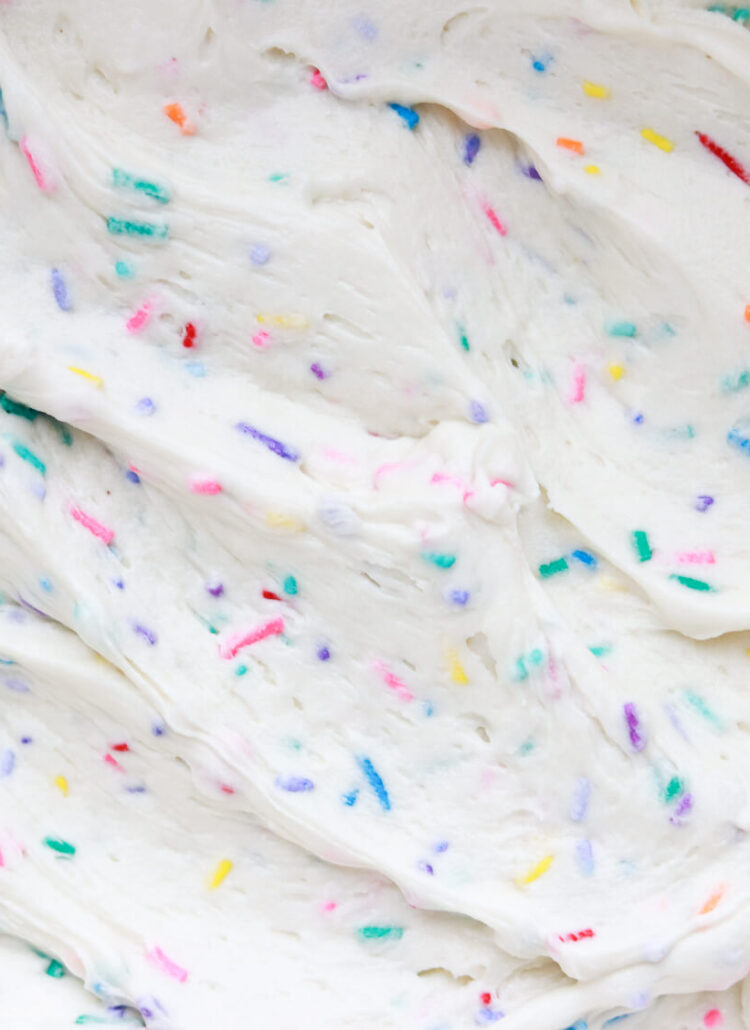
Cream cheese buttercream has a reputation for being difficult to work with – the consistency is naturally soft, which can make filling, frosting, and decorating cakes a challenge. If you love the flavor of cream cheese frosting but have had bad experiences working with it in the past, you’ve come to the right place! I’m sharing everything I know about how to stabilize cream cheese frosting without sacrificing flavor (or making it too sweet), plus all my best tips for decorating cakes and cupcakes with it. 

cream cheese buttercream recipe thats pipeable

How to Prevent Runny Cream Cheese Frosting

Before I share methods for making cream cheese frosting EXTRA stable, I want to talk about some best practices that will naturally make your frosting more stable and set you up for success. Knowing these things before you even start the recipe can make a huge difference: 

  • Use full-fat brick style cream cheese. I use Philadelphia brand, but any brick-style cream cheese that’s not low fat will do. Other kinds of cream cheese (low fat or the spreadable kind in the tub) contain too much water content and will always result in a soupy frosting that’s too thin for filling and frosting a cake. If you don’t have access to brick-style cream cheese, I suggest making a different kind of frosting that you have ingredients for vs. trying to make the spreadable cream cheese work (it truly doesn’t!). 
  • Use room temperature ingredients. Both the butter and cream cheese in your recipe should be room temperature (about 68ºF) before starting, and you can even get away with the cream cheese being slightly cooler than that. Any warmer than room temperature and you will risk the final frosting being too soft. 
  • Don’t overmix. After beating together the butter and cream cheese, I keep the mixer on low speed for the rest of the recipe. Once all the sugar, vanilla, salt, and stabilizer (if using) is mixed in and dissolved, turn the mixer off. When cream cheese frosting is overbeaten or mixed for too long, the frosting starts to break down and become runny. 
  • Use a high ratio of butter to cream cheese. Using more butter in a cream cheese frosting helps naturally stabilize it. Some recipes call for a 1:1 ratio of butter to cream cheese in light of this. My recipe (below) uses half as much butter as cream cheese because I find that a 1:1 ratio creates more of a buttery flavor, but if stability is more important to you than taste, this is an option to consider.
  • Use shortening (if necessary). Replacing some or all of the butter with shortening (especially high ratio shortening if you can find it!) will make your cream cheese frosting extra stable and heat resistant. This is an ideal option for warm and humid climates.
  • Change up the mixing order. Recently, I learned that you can change up the order of ingredients and end up with a more stable cream cheese frosting! Basically, you whip only the butter until it’s creamy and pale (about 5-7 minutes), then mix in the powdered sugar, vanilla, and salt. The mixture will be kind of crumbly from all the powdered sugar by this point. Then, add cold brick-style cream cheese and continue mixing on low speed until it comes together as a frosting. It takes a few minutes, but I can attest that it works! 
carrot cake recipe by sugar and sparrow
cream cheese buttercream for cake decorating

3 Ways to Stabilize Cream Cheese Frosting 

Now that you know how to prevent runny cream cheese frosting from the get-go, here are some ways to make your already naturally stable cream cheese buttercream even MORE stable:  

  1. Buttermilk Powder. This is my new favorite way to stabilize cream cheese frosting! I add ¼ cup per batch of cream cheese buttercream. The extra powder thickens the frosting without making it too sweet (like extra powdered sugar would), and the buttermilk flavor enhances the tanginess of the cream cheese flavor. It’s so good! You can actually use any kind of milk powder for this, but I use this cultured buttermilk powder. 
  2. Cornstarch. Adding ¼ Cup of cornstarch per standard batch of buttercream was my preferred method before discovering the buttermilk powder, and it’s still a great way to stabilize your frosting. Since powdered sugar already contains cornstarch, it’s like adding extra powdered sugar without the sweetness. 
  3. Meringue Powder. Adding 1 tablespoon of meringue powder per standard batch of cream cheese buttercream is a great way to make it a thicker consistency for easier cake decorating. The proteins in the meringue powder help soak up some of the excess water content. Just be sure to whisk this into your powdered sugar before adding it to the frosting so it’s evenly distributed. 

What if the Cream Cheese Frosting is Still Too Soft? 

One final tip for working with cream cheese buttercream: if you find that your kitchen environment is humid or the frosting is still a bit soft, pop it in the refrigerator for 10-15 minutes, then re-mix it on low speed in your stand mixer. The butter in the recipe will solidify a little bit in the refrigerator, so the overall buttercream should feel a bit thicker afterwards. 

cream cheese buttercream recipe by sugar and sparrow

The refrigerator is your friend while filling and frosting a layer cake with cream cheese buttercream as well. I like to fill, stack, and crumb coat the cake, then pop it into the refrigerator for 20-30 minutes to let the crumb coat firm up before moving on to frosting the cake. This is something I do with nearly every layer cake I make, but it’s especially important when working with cream cheese frosting! 

carrot cake recipe with cream cheese buttercream

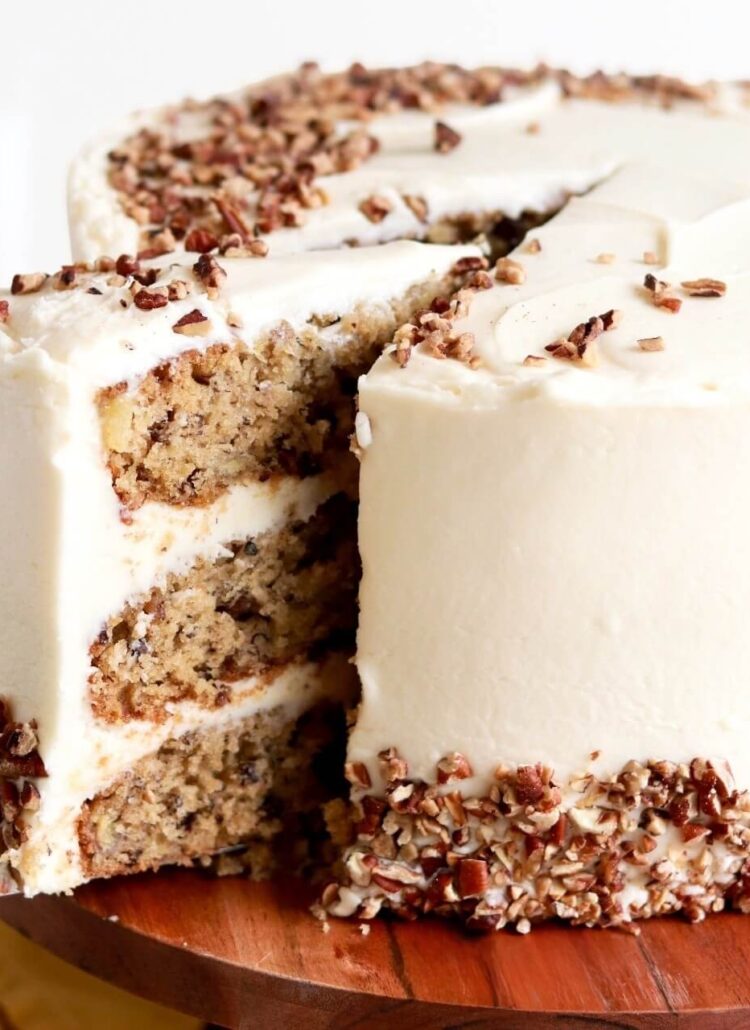
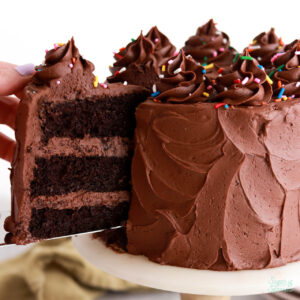
Cakes to Pair with Cream Cheese Frosting 

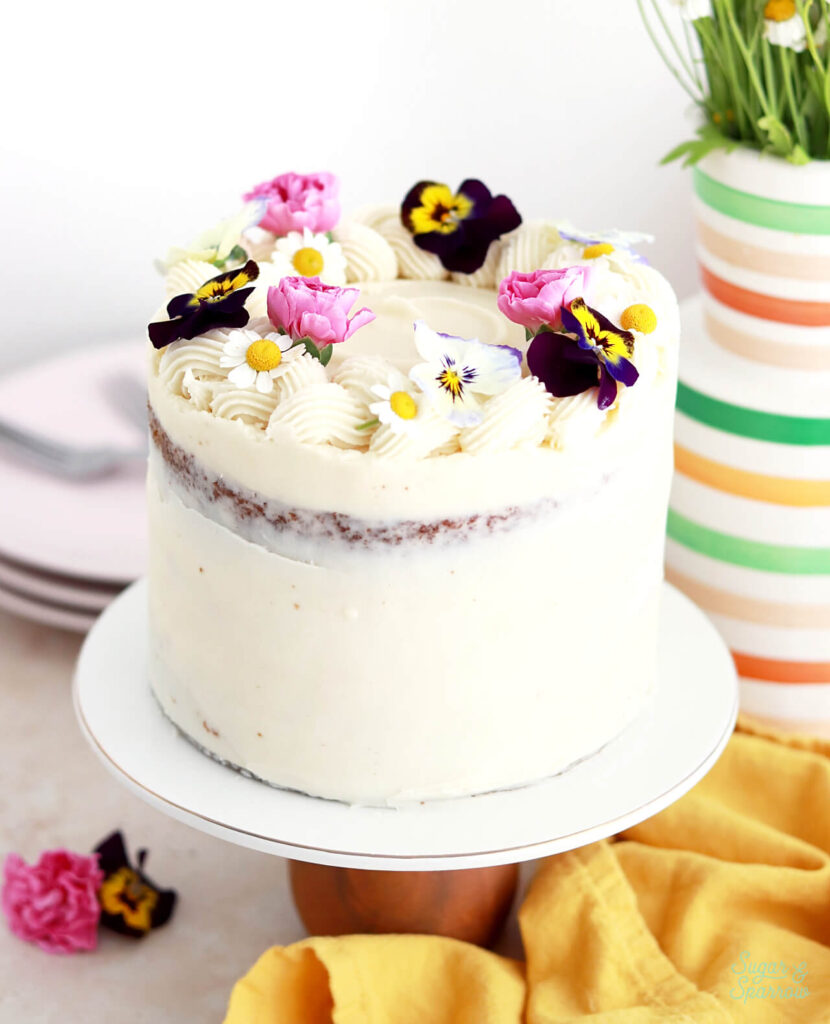
Cream cheese buttercream is amazing on pretty much any cake! If you’re inspired to make some cream cheese buttercream but can’t think of what to pair it with, here are some recipes from my blog to try. Just be sure to make a double batch of the frosting recipe below if you want to have enough to fill, frost, and decorate a layer cake:
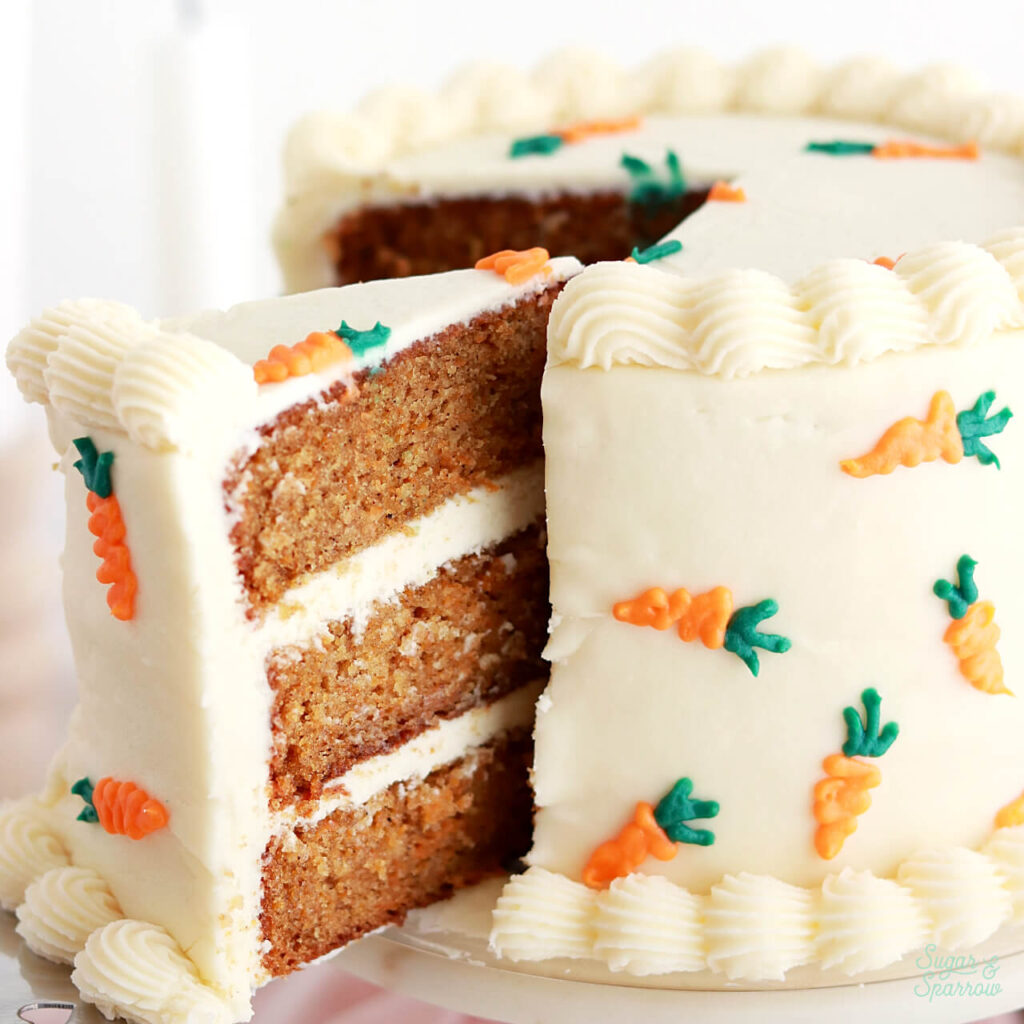
  • Carrot Cake
  • Lemon Cake
  • Lemon Blueberry Cake
  • Red Velvet Cake
  • Coconut Cake
  • Pumpkin Cake
  • Spice Cake 
  • Chocolate Cake
carrot cake recipe with cream cheese buttercream

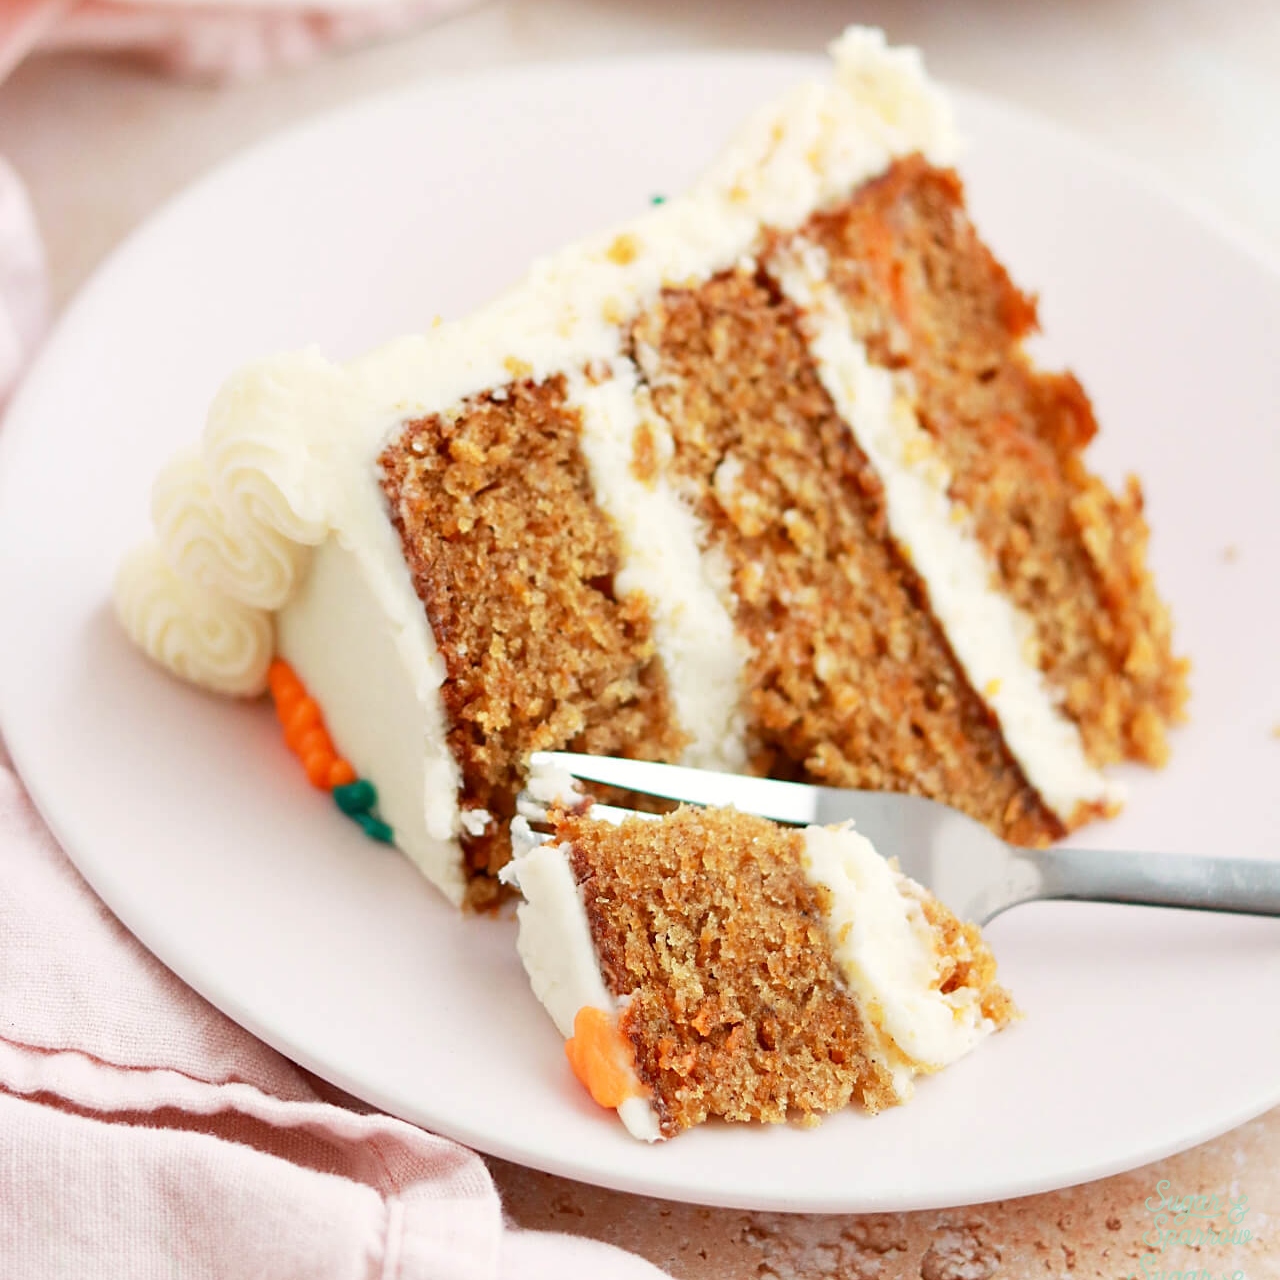
I hope you found these tips helpful for your next batch of cream cheese frosting! Let me know if I missed anything in the comments below and if you make this frosting, feel free to tag @sugarandsparrowco on Instagram and show me! I love to see your creations and hear your feedback.

cream cheese buttercream recipe thats pipeable

Cream Cheese Buttercream

4.80 from 5 votes
A delicious, irresistible cream cheese frosting that's the perfect consistency for piping, filling and stacking layer cakes, and decorating cakes and cupcakes.
Print Recipe Pin Recipe
Prep Time:15 minutes mins
Course: Dessert
Cuisine: American
Servings: 2.5 Cups

Ingredients

  • 4 Cups (480g) powdered sugar
  • 1/4 Cup (32g) buttermilk powder or cornstarch (optional)*
  • 1/2 Cup (113g) unsalted butter, room temperature
  • 8 Oz (226g) full-fat cream cheese, room temperature brick-style, not the spread
  • 1 1/2 tsp pure vanilla extract
  • 1/4 tsp salt

Instructions

  • Sift together the powdered sugar and buttermilk powder or cornstarch (if using) and set aside. In the bowl of a stand mixer fitted with the paddle attachment, cream the butter and cream cheese on medium-high until light, fluffy, and uniform (no lumps), about 5 minutes.
  • Turn the mixer to low speed and add the powdered sugar and cornstarch mixture a few cups at a time, mixing thoroughly after each addition and scraping down the bowl and paddle as needed. Add the vanilla and salt and mix on low for another minute, until fully combined and smooth.

Notes

*Both buttermilk powder and cornstarch help thicken the consistency of the cream cheese buttercream without adding extra sweetness. The buttermilk powder enhances the tang of the cream cheese and the cornstarch adds no flavor. You can alternatively add 1 Tbsp meringue powder in place of buttermilk powder/cornstarch. I highly recommend one of these stabilization methods if you’re using this frosting to pipe intricate details.
Yield: This buttercream makes enough to:
  • Frost 12-15 cupcakes with a piping bag
  • Fill and crumb coat a three-layer 6-inch cake or two-layer 8-inch cake. To have enough for frosting and decorating as well, double the recipe. 
To Make Ahead: You can store this cream cheese buttercream in an airtight container and keep it in the refrigerator for up to two weeks. When you’re ready to use it, bring it back to room temperature and re-mix it with your stand mixer on low speed until it’s smooth and uniform. 
Storing After Decorating: Decorated cakes and cupcakes with cream cheese buttercream should be stored in the refrigerator until an hour before serving.

By: Whitney · In: FAQ, Featured, Frosting, Recipes · Tagged: cream cheese, heat stable, stabilized cream cheese frosting

you’ll also love

fruit pizza with berries recipePerfect Fruit Pizza with Berries
ruby chocolate buttercream recipeRuby Chocolate Buttercream Recipe
berry chantilly cake recipe inspired by whole foodsBerry Chantilly Cake Recipe

Join the List

Stay up to date & receive the latest posts in your inbox.

Reader Interactions

Comments

  1. Jackie says

    April 20, 2026 at 3:51 pm

    Hi
    How much do I use of the buttermilk powder, when making the small batch cream cheese frosting, Also, can I use it in the brown butter cream cheese frosting too.

    Reply
    • Whitney says

      April 21, 2026 at 9:41 am

      Hi Jackie! I would add 2 Tablespoons of buttermilk powder to the small batch cream cheese frosting recipe and yes, you can use it in the brown butter cream cheese frosting as well. Enjoy!

      Reply

Leave a Reply Cancel reply

Your email address will not be published. Required fields are marked *

Recipe Rating


Next Post >

Perfect Gluten-Free Chocolate Cake (Easy & FUDGY)

Primary Sidebar

Welcome to Sugar & Sparrow

Welcome to Sugar & Sparrow

Helping you whip up pretty desserts with confidence and creativity. And hopefully sharing a few laughs with you along the way!

Learn More

Connect

let’s bake!

Get my very best recipes, baking tips, and decorating tutorials sent to your inbox

Featured Posts

cadbury mini egg cake by sugar and sparrow

Cadbury Mini Egg Cake

how to mix rainbow buttercream colors

The Easiest Way to Make Rainbow Buttercream Colors

pastel m&m cake

Rainbow Candy Mosaic Cake

Search

Archives

Follow Along

@sugarandsparrowco

LEMON CUPCAKES 🍋 after about a dozen recipe tes LEMON CUPCAKES 🍋 after about a dozen recipe tests, this one is everything I could want in a lemon cupcake! Fluffy-yet-moist, bursting with natural lemon flavor, and absolutely irresistible topped with lemon cream cheese buttercream. 

Full recipe (with frosting) linked in my bio + at https://sugarandsparrow.com/homemade-lemon-cupcakes/

INGREDIENTS:
1 Cup (132g) all-purpose flour
1 tsp baking powder
1/4 tsp salt
1/4 Cup (60ml) whole milk, room temperature
3 Tbsp (45ml) lemon juice from 1 medium lemon
3/4 Cup (150g) granulated sugar
3 Tbsp (42g) unsalted butter, room temperature
2 Tbsp (30ml) vegetable oil
2 large eggs, room temperature
1 tsp pure vanilla extract

INSTRUCTIONS:
1. Preheat the oven to 350ºF (177ºF) and line a standard cupcake pan with 12 paper liners.
2. In a large bowl, whisk together the flour, baking powder, and salt. Set aside. 
3. In the bowl of a stand mixer fitted with the paddle attachment (or with a hand mixer and large bowl), add the lemon zest to the sugar and mix on low speed until fragrant and well combined, about 1 minute. Meanwhile, combine the lemon juice with the milk and set aside. 
4. Add the butter to the lemon-sugar mixture and cream on medium speed until and combined, about 2 minutes. Add the vegetable oil and beat until light and creamy, about 3 minutes. Scrape down the bowl and paddle as needed.
5. Mix in the eggs one at a time on low speed, then add the vanilla and turn the mixer to medium speed for one minute.
6. Turn the mixer off and add the flour mixture all at once. Mix on low speed until just combined, then slowly pour in the lemon-milk mixture. Mix until just combined, about 30 seconds.
7. Divide the batter equally between the liners and bake for 14-18 min. Cool, then top with frosting of your choice (link in bio for lemon cream cheese frosting)�
#lemoncupcakes #creamcheesefrosting #lemon #cupcakes #cupcakedecorating
April in my kitchen 🌸 I published 5 NEW recipes April in my kitchen 🌸 I published 5 NEW recipes on my site, baked my Oreo cupcake recipe for a fundraiser and found it was just as delicious as I remember, and filmed/photographed 3 recipes that will be on my blog in May (Lemon Cupcakes, Lemon Cream Cheese Buttercream, and No-Bake Marbled Strawberry Cheesecake) 🥰 

Comment “APRIL” to get all the available recipes and stay tuned for more! 

#bakersofinstagram #springbaking #cakedecorating #cupcakes #bakinglove
SHEET PAN COOKIE CAKE 🍪 slice it warm for a fud SHEET PAN COOKIE CAKE 🍪 slice it warm for a fudgy chocolate chip cookie OR let it settle into a moist and chewy cookie cake that’s perfect for decorating! My fave vanilla buttercream + sprinkles turn this giant chocolate chip cookie into the perfect birthday cake alternative at the end 🥳
⁣
Full recipe + decorating ideas at https://sugarandsparrow.com/sheet-pan-chocolate-chip-cookie-cake/
⁣
INGREDIENTS⁣
1 Cup (226g) unsalted butter, melted⁣
1 1/3 Cups (267g) packed light or dark brown sugar⁣
1/2 Cup (100g) granulated sugar⁣
3 large eggs⁣
1 Tbsp pure vanilla extract⁣
1 tsp baking soda⁣
1 tsp cornstarch⁣
1/2 tsp salt⁣
3 Cups (398g) all purpose flour⁣
2 Cups (350g) semi-sweet chocolate chips⁣
⁣
INSTRUCTIONS⁣
1. Preheat the oven to 350ºF (177ºC). Grease and line a 13×18 inch sheet pan.⁣
2. In a large bowl, add the brown sugar and granulated sugar. Melt the butter in the microwave and pour it over the top of the sugars. Whisk together until uniform. Add the eggs and vanilla, then continue whisking until uniform. Whisk in the baking soda, cornstarch, and salt.⁣
3. Add the flour and use a silicone spatula to fold it in until smooth cookie dough forms. Reserve 1/2 Cup of the chocolate chips and set them aside, then fold the remaining 1 1/2 Cups of chocolate chips into the cookie dough.⁣
4. Place the chocolate chip cookie dough onto the prepared sheet pan and use an offset spatula to spread it all the way to the edges in an even layer.⁣
5. Bake the cookie cake for 14-16 minutes, until it looks golden brown on the edges and set. 
6. Enjoy warm or let it cool and decorate with vanilla buttercream and sprinkles! ⁣
⁣
#cookiecake #chocolatechipcookies #sheetcake #birthdaycake #cakedecorating
STRAWBERRY CUPCAKES 🍓based on my beloved strawb STRAWBERRY CUPCAKES 🍓based on my beloved strawberry layer cake recipe, this cupcake version is just as moist yet fluffy and bursting with natural strawberry flavor! Between the mix of fresh strawberries in the cupcakes + freeze-dried strawberries in the frosting, the flavor is out of this world 🚀

Full recipe link in my bio (with strawberry buttercream) + at https://sugarandsparrow.com/strawberry-cupcakes/

STRAWBERRY CUPCAKES
Yield: 14 cupcakes

INGREDIENTS:
5 oz (143g) fresh or frozen strawberries
1/3 Cup (80ml) whole milk, room temp
1 1/2 Cups (158g) sifted cake flour
1 tsp baking powder
1/4 tsp baking soda
1/2 tsp salt
6 Tbsp (85g) unsalted butter, room temp
1 Cup (200g) granulated sugar
2 large eggs, room temp
3 Tbsp (45g) sour cream, room temp
1 tsp vanilla extract
1 drop pink food coloring (optional)

INSTRUCTIONS: 
1. Puree the strawberries using a food processor (you’ll have about 1/2 cup of puree), then place into a saucepan over medium-low heat. Bring to a simmer, then cook for 10-15 min, stirring occasionally, until you have 1/4 cup. Refrigerate until room temp.
2. Preheat oven to 350ºF (177ºC) and line a standard cupcake pan with liners.
3. Whisk together the sifted cake flour, baking powder, baking soda, and salt and set aside.
4. In a stand mixer w/ paddle attachment (or hand mixer + large bowl), whip the butter on high for 2 min. Add sugar and beat for 2 min, until light and fluffy. Turn the mixer to low and add the eggs one at a time, then add the vanilla and sour cream, turn the mixer to high and beat for 1 min. Meanwhile, whisk together the strawberry puree, whole milk, and food coloring (if using).
5. Turn the mixer off and add all of the dry ingredients at once. Mix on low until just combined, then add the strawberry milk mixture until just combined, about 30 seconds.
6. Fill the cupcake liners 2/3 full and bake for 14-18 minutes. Cool completely before topping with strawberry buttercream (full recipe linked above). 

#strawberrycupcakes #strawberrycake #pinkcupcakes #strawberry #cupcakes
COFFEE BUTTERCREAM (recipe below)☕️ this frost COFFEE BUTTERCREAM (recipe below)☕️ this frosting has AMAZING coffee flavor, is so easy to decorate cakes with, and pairs beautifully with so many flavors (chocolate, vanilla, or any cake flavor you’d want to turn into a latte). 

All my cake pairing suggestions are linked in my bio or at https://sugarandsparrow.com/coffee-buttercream-recipe/ 

COFFEE BUTTERCREAM⁣
Yield: 2.5 Cups⁣

INGREDIENTS⁣
1 1/2 tsp instant coffee or espresso powder⁣
1 1/2 Tbsp whole milk, room temperature⁣
1 Cup (226g) unsalted butter, room temperature⁣
3 1/2 Cups (420g) powdered sugar⁣
2 tsp pure vanilla extract⁣
Pinch of salt⁣

INSTRUCTIONS⁣
1. Combine the instant espresso/coffee with the whole milk and set aside. In the bowl of a stand mixer, beat the butter on high until creamy and smooth (about 5 minutes), scraping down the bowl and paddle a few times in between.⁣
2. Turn the mixer to low and add the powdered sugar a few cups at a time, scraping down the bowl and paddle between intervals. Add the vanilla, the coffee/espresso milk mixture, and salt. Mix on low until fully incorporated, about one minute.⁣

#coffeebuttercream #buttercream #frosting #coffeecake

Footer

On the Blog

  • Cake Basics
  • Recipes
  • Tutorials

Info

  • About
  • Privacy Policy & Disclosure

stay in the know

Copyright © 2026 · Theme by Sugar & Sparrow