• Cake
  • Frosting
  • YouTube
  • My Favorite Tools
  • Nav Social Icons

  • Skip to primary navigation
  • Skip to main content
  • Skip to primary sidebar
  • Skip to footer
  • Recipes
    • Cake
    • Cupcakes
    • Frosting
    • Ice Cream
    • Vegan
  • Cake Basics
  • Tutorials
  • Blog
  • About
  • Mobile Menu Widgets

    Connect

    Search

Sugar & Sparrow logo in script font

Sugar & Sparrow

Lifestyle and Cake from Portland Oregon

  • Cake Basics
  • Recipes
    • Cake
    • Cupcakes
    • Cookies & Bars
    • Filling
    • Frosting
    • Ice Cream
    • No-Bake
    • Small Batch
    • Vegan
  • Tutorials
  • Book
  • Blog
  • About

The Easiest Way to Make Rainbow Buttercream Colors

March 7, 2023 · In: Featured, Tutorials

I LOVE working with rainbow color palettes in my cake projects, whether the colors are pretty pastels or bright and bold. Over the years, I’ve learned a thing or two about making my buttercream colors cohesive, aka making sure the hues go together perfectly. When you’re mixing up a palette that has several colors in it, it can be really easy to go overboard and make some colors too dark, too bold, too warm, too cold, or otherwise just not the hues you were going for. To save you that stress, I’ve gathered my best tips for mixing perfect rainbow buttercream colors that go together flawlessly for decorating. 

Rainbow buttercream

The thing that makes this rainbow color palette extra cohesive is mixing up the primary colors first (pink, yellow, and blue), then mixing those colors together to make all the colors in between (orange, green, and purple). This process can help tie the color palette together better than mixing each of the 6 colors individually. You’re able to customize each color as you go along (add more pink to your purple to warm it up, add more blue to your green to cool it down, etc) without going overboard or making any color more vibrant than the rest. It helps to know a little bit about color theory for making adjustments, but even if you don’t know the first thing about color theory, this blog post should help.  

A Word About Color Gels + Buttercream

The color gels I love most for my cake projects are AmeriColor Soft Gel Pastes and the Wilton Color Right Performance Food Coloring System, and I always use them with American Buttercream. Note that if you’re using a different kind of buttercream, it may not take these color gels as easily. For meringue based buttercreams, I recommend using oil-based color gels like Colour Mill for best results. 

Before we get started with color mixing, here are a couple other blog posts that could really help with getting your buttercream just right, including my go-to buttercream recipe:

  • How to Make the Perfect Buttercream Consistency
  • A Guide to Coloring Buttercream Frosting
  • Vanilla Buttercream Recipe

Here’s a video of the entire rainbow color palette process in case you want to watch vs. read about it below: 

If you’re into cake videos like this one, be sure to check out my YouTube channel for further learning! I’m always rolling out new videos, so click the subscribe button while you’re there to ensure you never miss a new one. 

You Will Need

  • 2+ batches of vanilla buttercream (or other white-colored buttercream)
  • Blue color gel (I used AmeriColor Sky Blue)
  • Pink color gel (I used AmeriColor Deep Pink)
  • Yellow color gel (I used AmeriColor Egg Yellow)
  • Bowls and spoons for color mixing

Step 1: Mix the Primary Colors

Reserve 1-2 cups of buttercream (in case you need to tone any colors down), then divide the rest of the buttercream between three bowls. The primary colors are yellow, blue, and red (in this case, pink), so those are the colors we’ll mix first. 

how to mix primary colors with buttercream

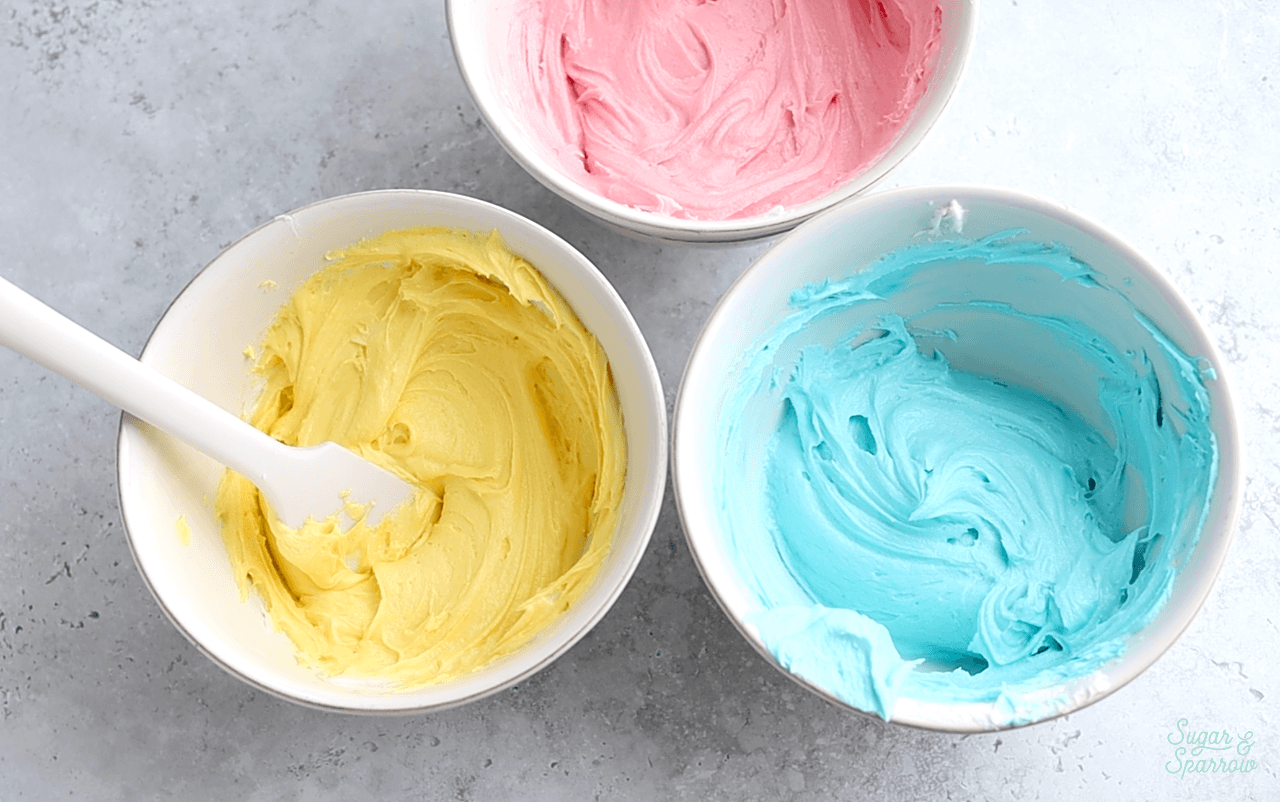
Add a few drops of pink or red into the first bowl, a few drops of blue into the second bowl, and a few drops of yellow into the third bowl. It’s best to start with a small amount and add more color gel from there, especially if you’re mixing a pastel color palette. Keep in mind that the colors will darken slightly with time. 

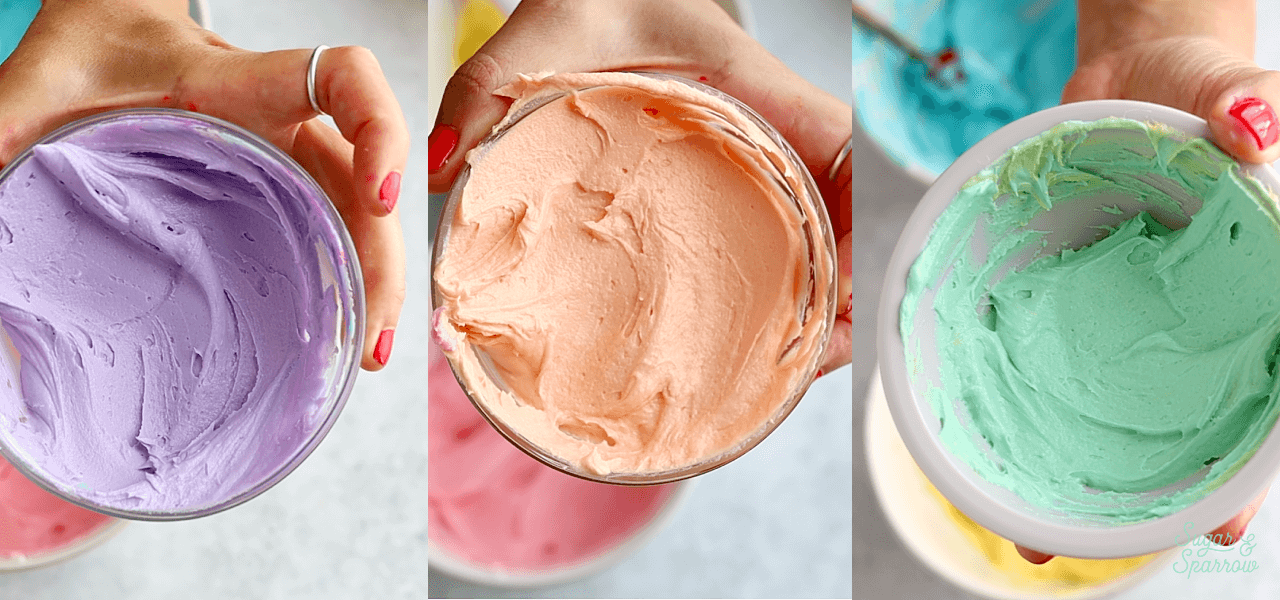
Step 2: Mix the Secondary Colors

Once you’ve got the perfect primary colors, it’s time to mix the secondary colors. When you mix together any two primary colors, the result is a secondary color: 

  • 1 part Red + 1 part Yellow = Orange
  • 1 part Yellow + 1 part Blue = Green
  • 1 part Blue + 1 part Pink = Purple 
color mixing chart primary and secondary colors buttercream

Use the formulas above to mix the primary colors together into three new bowls. Start with about ¼ Cup of each primary color and add more as needed in the next step. 

mixing secondary colors with buttercream

Step 3: Adjust Color Temperature as Needed 

At any point in your color mixing, you can customize any color by changing its temperature. For example, if your green is looking too yellow (or too warm), adding a little more blue can help cool it down. If your orange is looking too pink or red, add a little more yellow to balance it out. Here are some formulas (and a mixing chart!) to help you make the perfect tones:

  • Green + more Blue = Blue-Green (cooler)
  • Green + more Yellow = Yellow-Green (warmer)
  • Purple + more Blue = Blue-Purple (cooler)
  • Purple + more Red = Red-Purple (warmer) 
  • Orange + more Red = Red-Orange (cooler)
  • Orange + more Yellow = Yellow-Orange (warmer)
tertiary color mixing chart buttercream

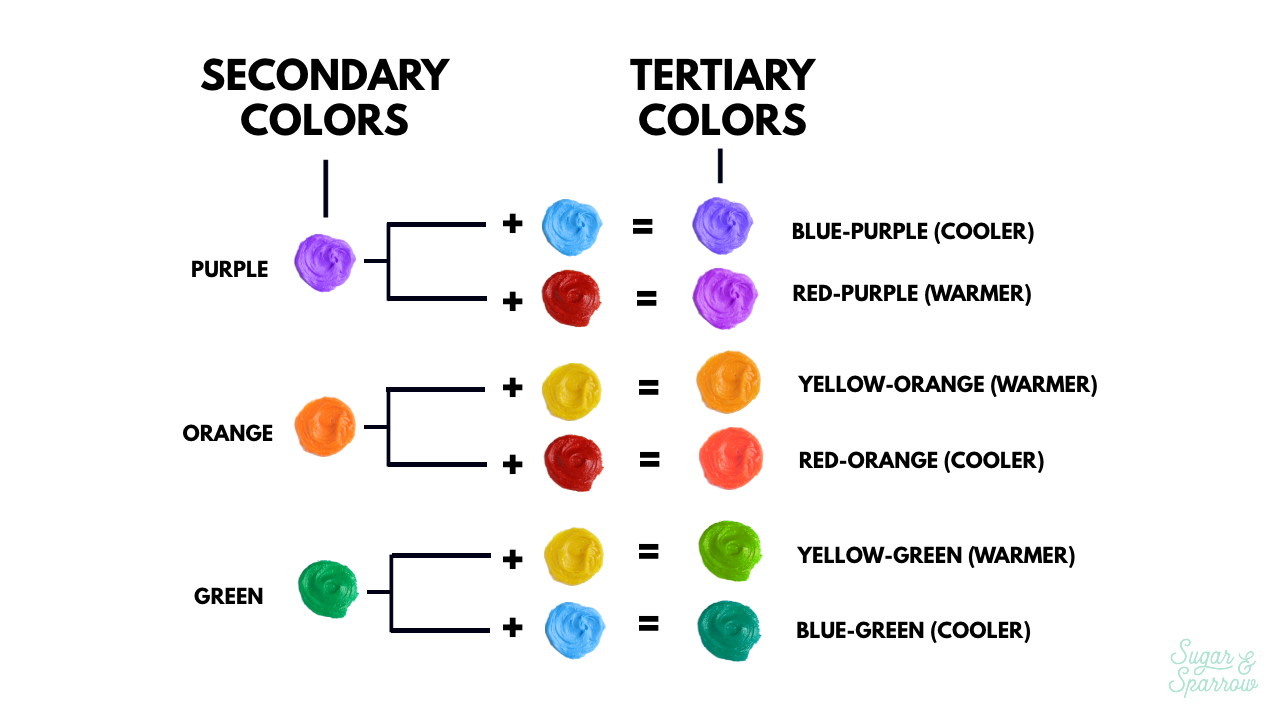
When adjusting your color temperature, start with 1 Tbsp of added primary color and add more from there if needed. Again, it’s best to start small. 

rainbow buttercream color mixing tutorial

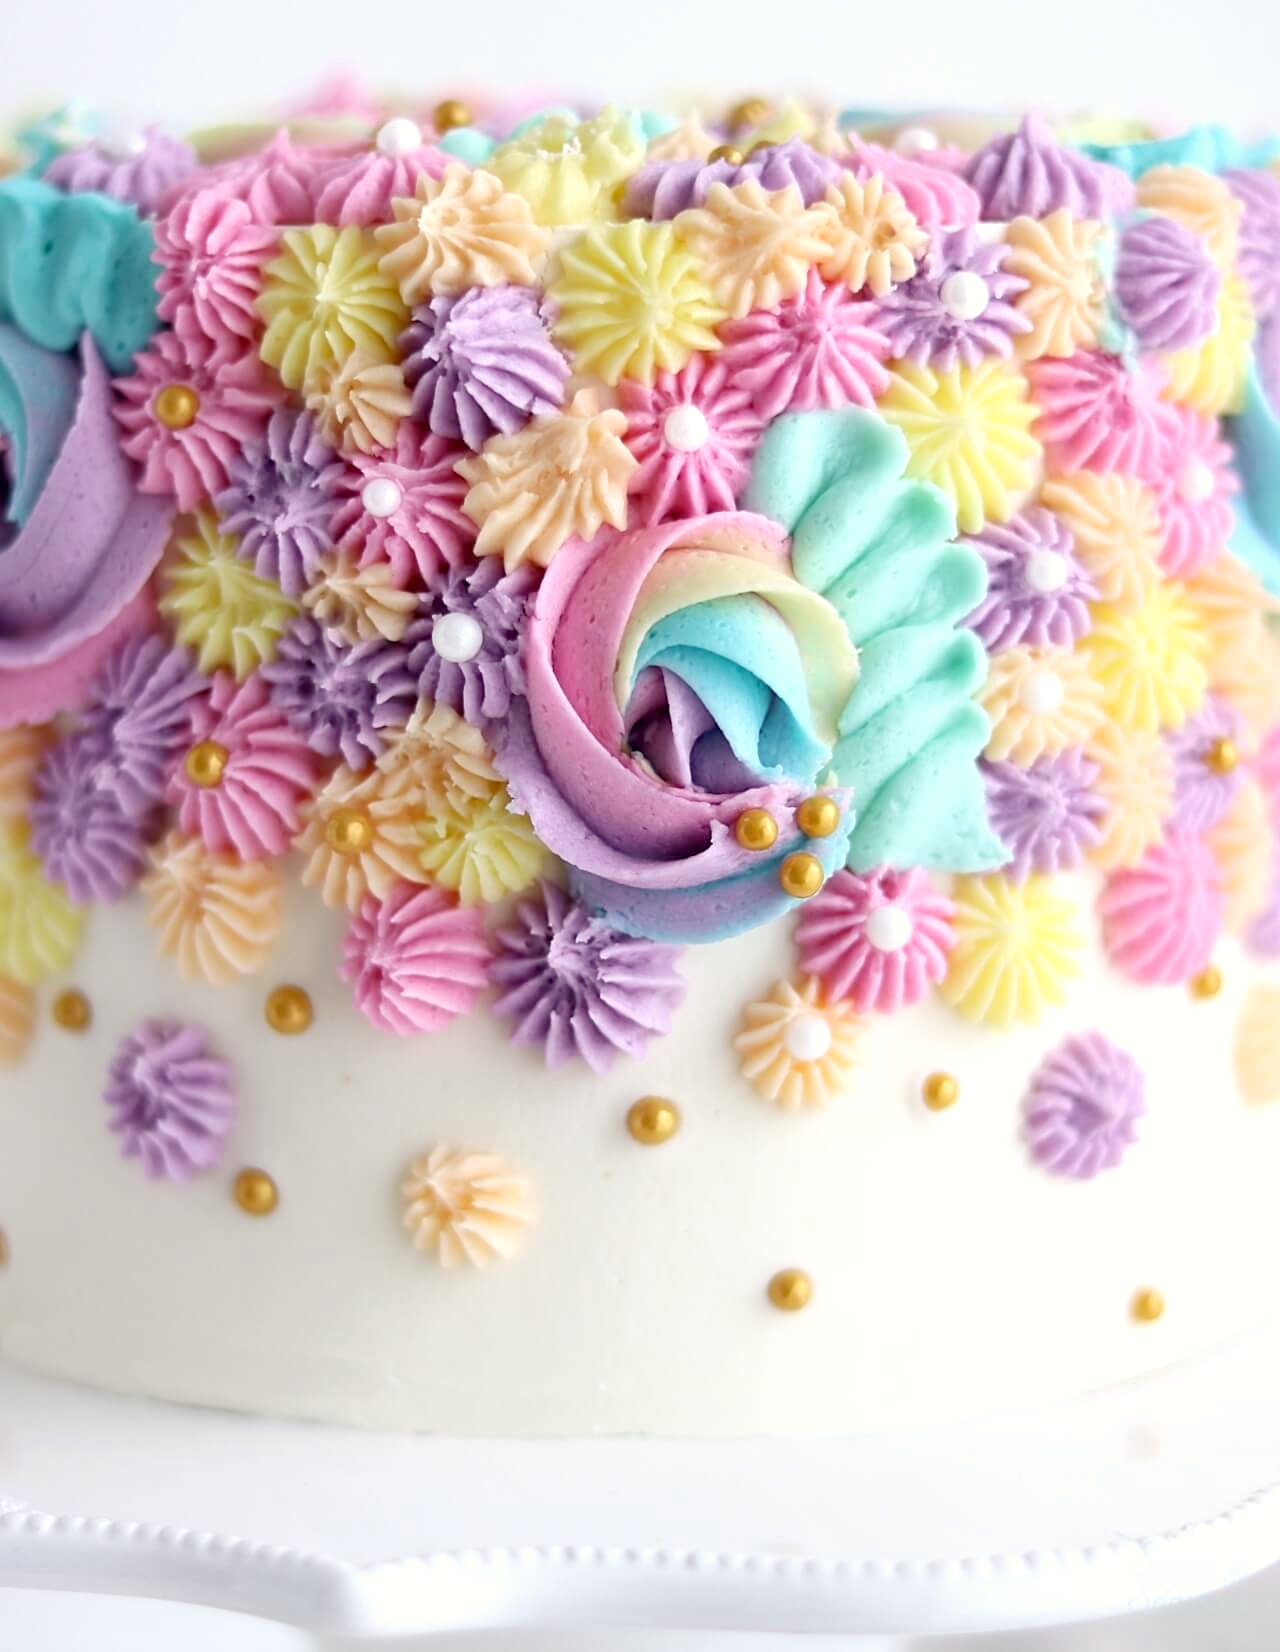
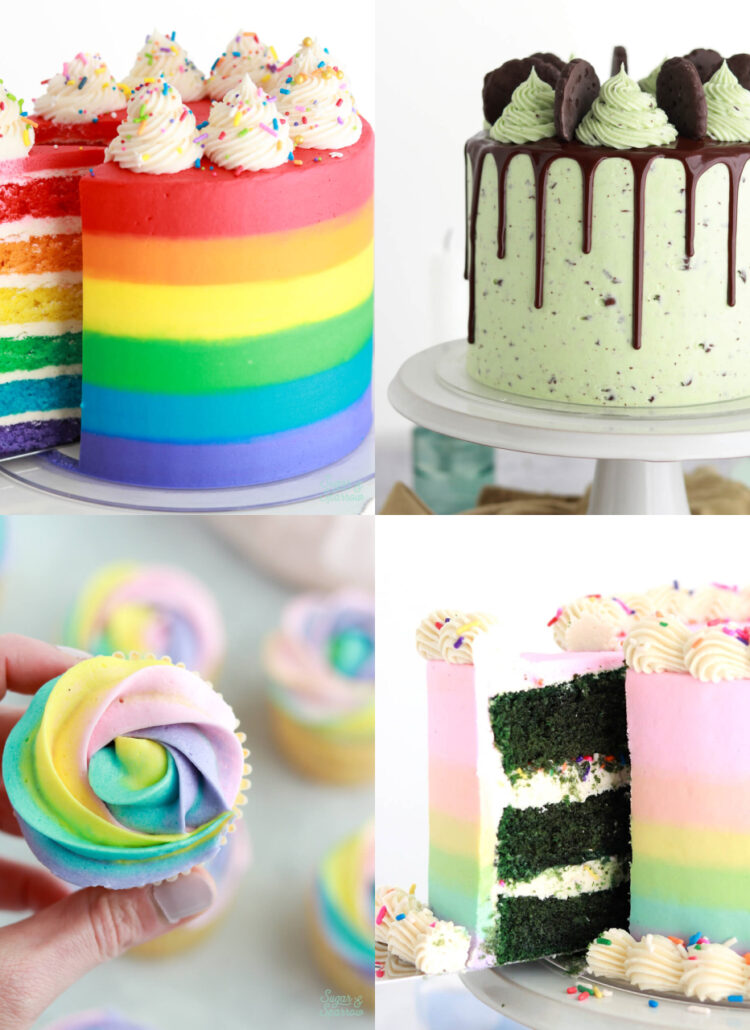
Once you’re happy with your rainbow color palette, you’re ready to start decorating! Here are some rainbow cake projects to inspire you: 

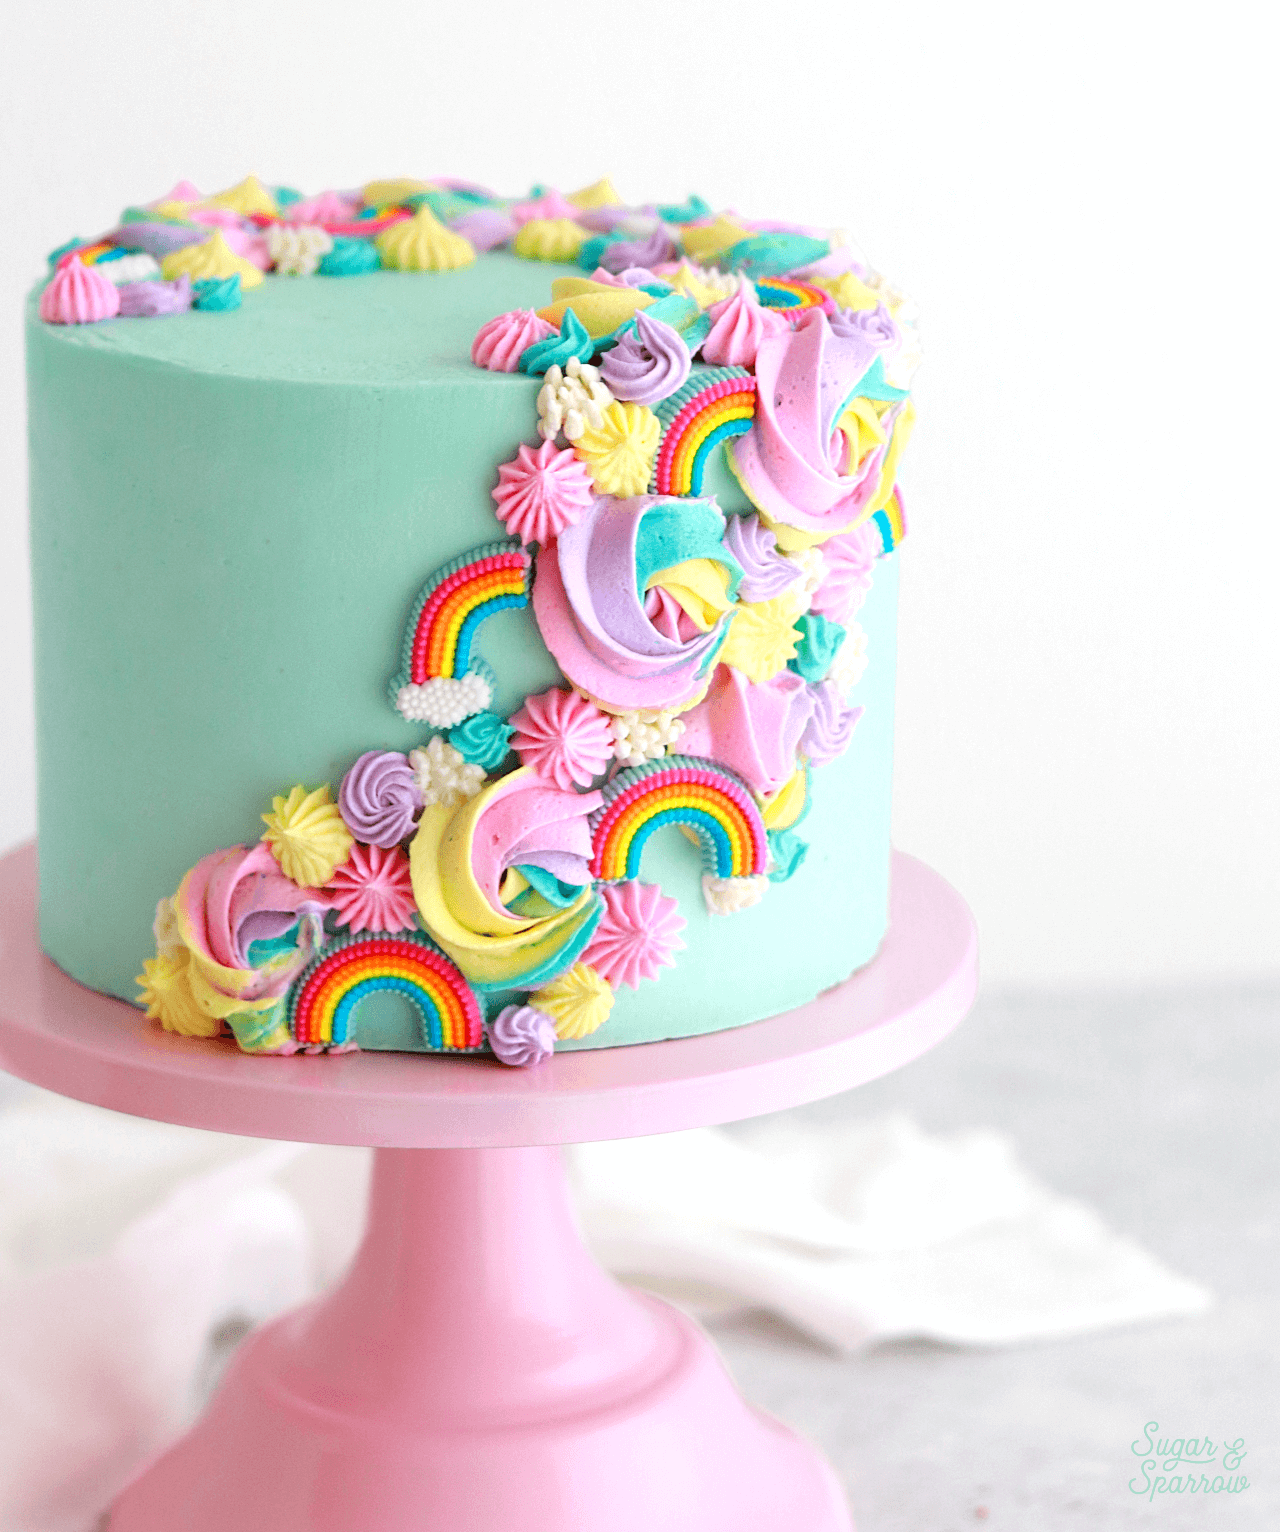
Pastel Rainbow Birthday Cake: I used a pastel rainbow color palette to create this pretty piped cake. The full tutorial is here.

pastel rainbow birthday cake

Cascading Rainbow Cake: I used the same piping techniques from this cascading cake + added these cute little icing rainbows I found from Wilton.

cascading rainbow cake by sugar and sparrow

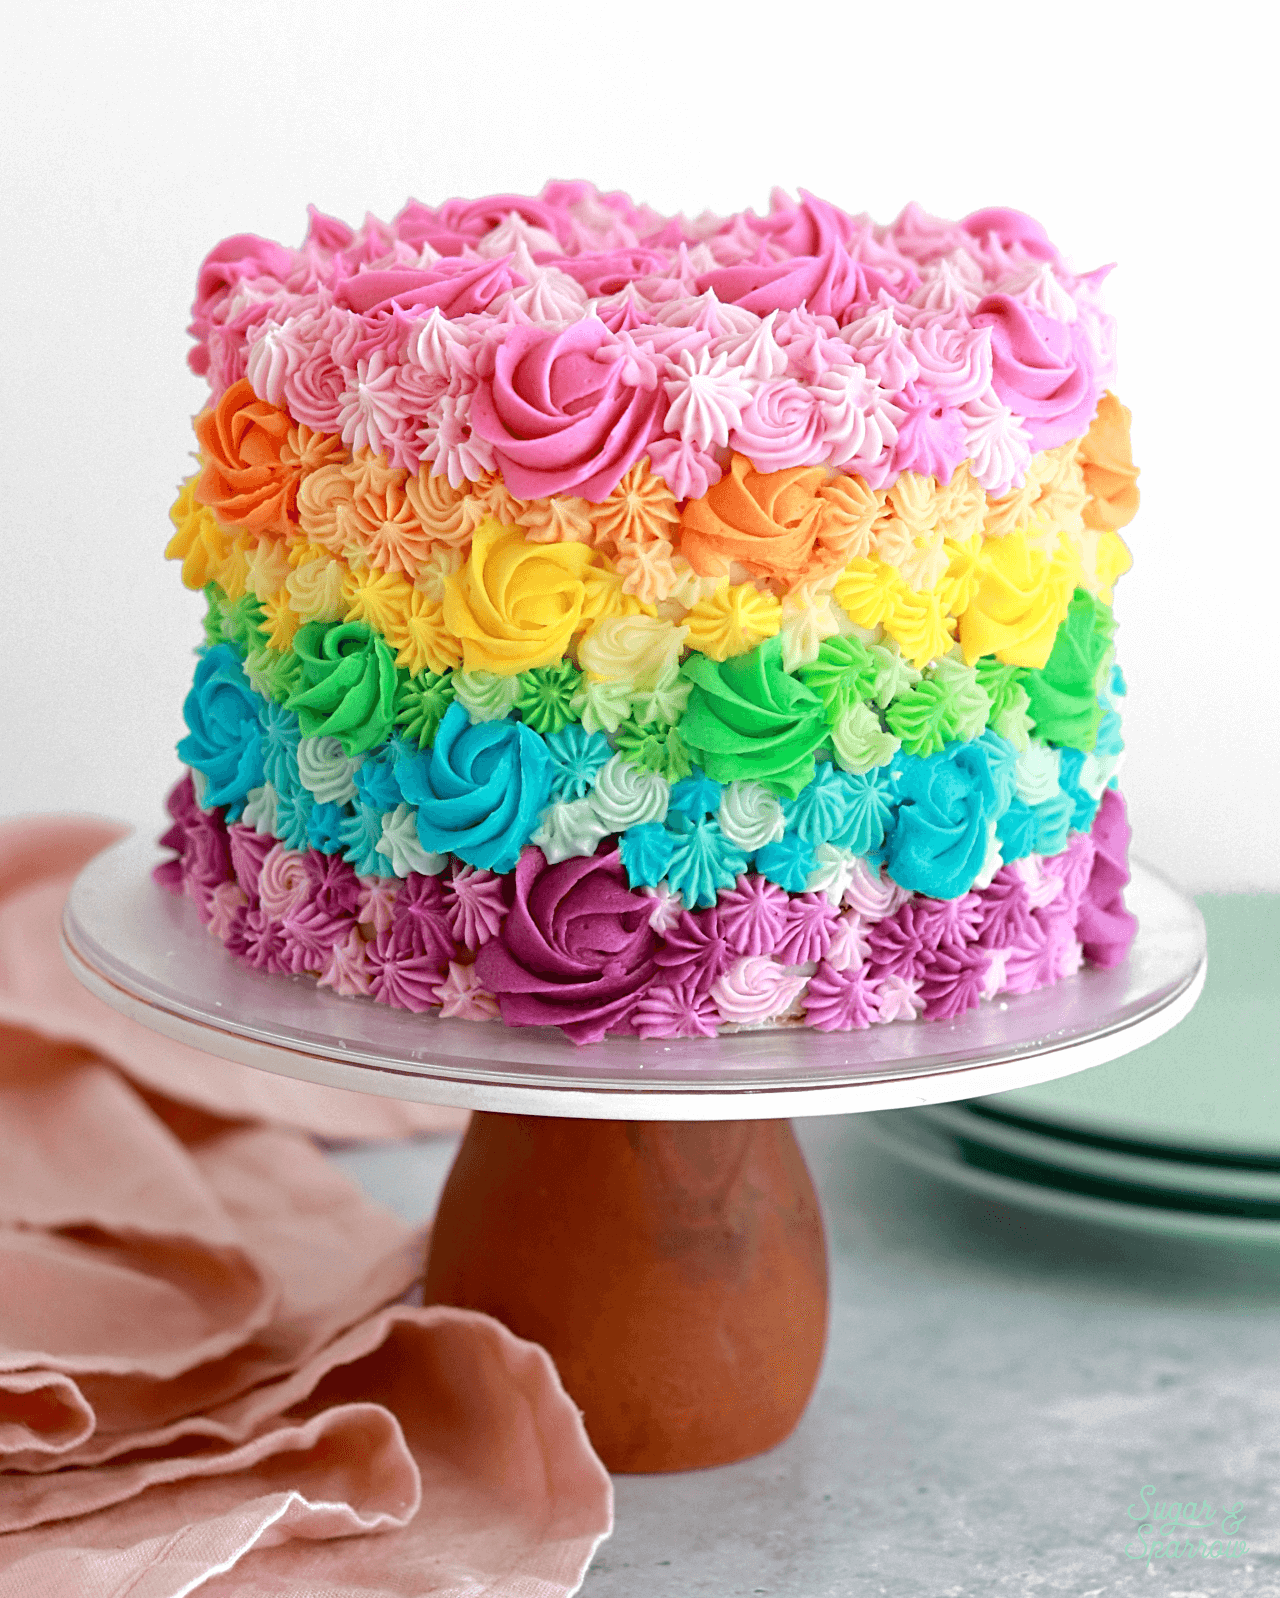
Piped Rainbow Ombrè Cake: I mixed three different shades of each rainbow color on this cake, then used Wilton Tips 1M, 32, and 16 to create the textures as I piped all the colors in an ombrè layout.

piped rainbow ombre cake by sugar and sparrow

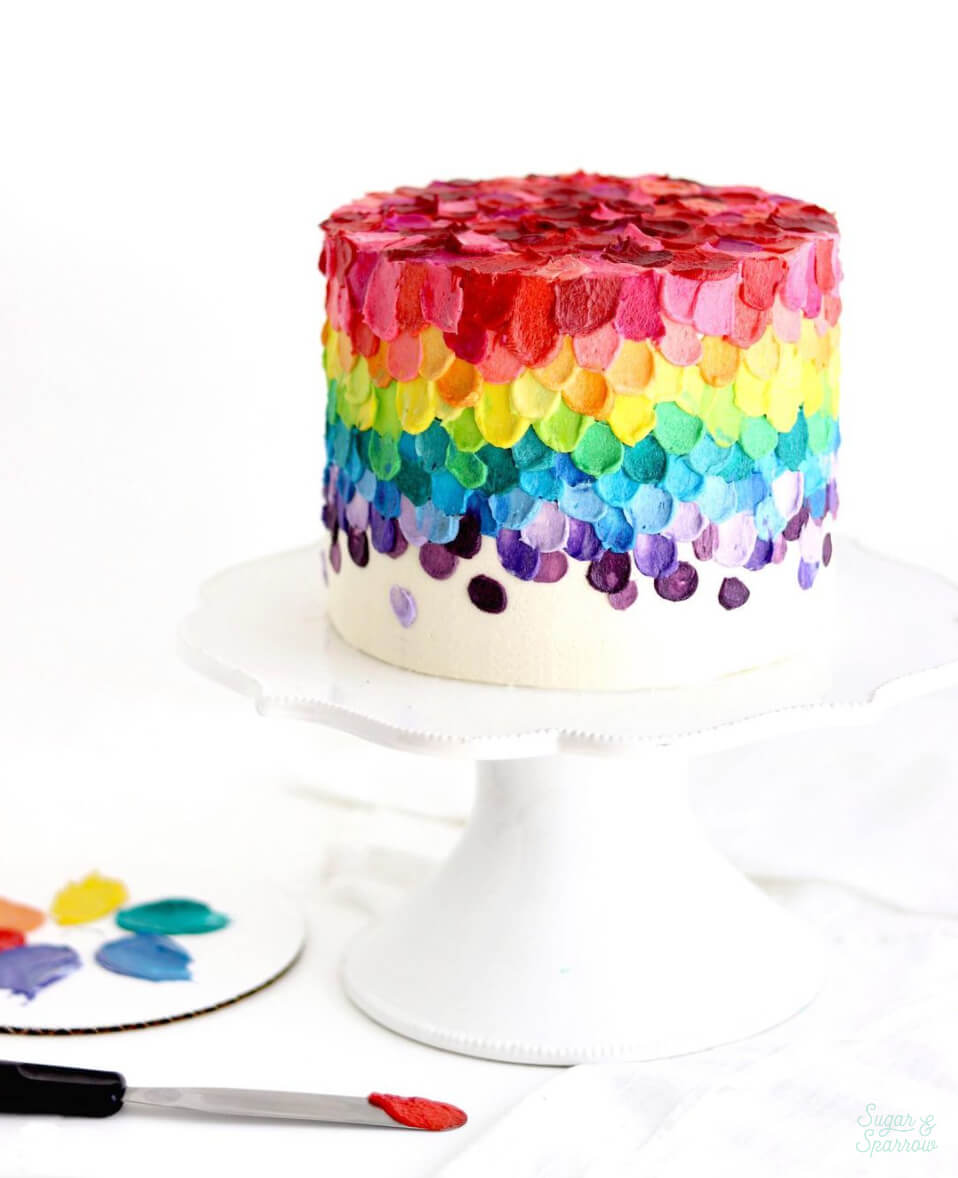
Spatula Painted Rainbow Cake: I mixed lots of different rainbow shades for this one and used this spatula painted technique to apply them as a gradient.

rainbow cake buttercream by sugar and sparrow

I’d love to see what you create with your rainbow color palette! Leave a comment below letting me know about your project or feel free to tag @sugarandsparrowco on Instagram to show me. I love to see what you create!

By: Whitney · In: Featured, Tutorials · Tagged: americolor, buttercream color mixing, cake basics, color mixing, color palettes, color theory, primary colors, rainbow buttercream, rainbow cake, rainbow frosting, secondary colors, tertiary colors, wilton color right

you’ll also love

Rainbow layer cake with rainbow frostingThe Ultimate Rainbow Cake (Inside and Out!)
st patricks day cake ideas by sugar and sparrowSt. Patrick’s Day Dessert Ideas
rainbow swirl cupcakes tutorialHow to Make Rainbow Swirl Cupcakes

Join the List

Stay up to date & receive the latest posts in your inbox.

Reader Interactions

Comments

  1. Ashley H says

    July 30, 2023 at 9:12 pm

    Your Spatula Rainbow Cake is gorg. I’m about to make my daughter’s melting ice cream sprinkle cake using alllll your amazing tips. Thank you!

    Reply
    • Whitney says

      August 8, 2023 at 10:41 am

      Yay, Ashley! I’m cheering you on!

      Reply

Leave a Reply Cancel reply

Your email address will not be published. Required fields are marked *

Recipe Rating


Next Post >

Anyone Can Cake is HERE!

Primary Sidebar

Welcome to Sugar & Sparrow

Welcome to Sugar & Sparrow

Helping you whip up pretty desserts with confidence and creativity. And hopefully sharing a few laughs with you along the way!

Learn More

Connect

let’s bake!

Get my very best recipes, baking tips, and decorating tutorials sent to your inbox

Featured Posts

oatmeal creme pie cake recipe

Oatmeal Creme Pie Cake

how to transport cakes safely

How to Package and Transport Cakes (with Minimal Stress!)

oreo cookies and cream cake

Oreo Layer Cake Recipe

Search

Archives

Follow Along

@sugarandsparrowco

STRAWBERRY SHORTCAKE ICE CREAM CAKE 🍓if Strawbe STRAWBERRY SHORTCAKE ICE CREAM CAKE 🍓if Strawberry Shortcake Ice Cream Bars make you nostalgic for your childhood ice cream truck days, you’re going to LOVE this easy ice cream cake version - no ice cream maker needed 🙌🏼 

Full recipe on my blog at https://sugarandsparrow.com/strawberry-shortcake-ice-cream-cake/

STRAWBERRY CRUNCH 
24 whole (280g) Golden Oreos, finely ground
3 Oz box strawberry jello
4 Tbsp unsalted butter, melted

ICE CREAM LAYERS
1/2 Cup (15g) freeze-dried strawberries
2 Cups heavy whipping cream, cold
1 Tbsp pure vanilla extract, divided
14 Oz sweetened condensed milk
1 1/2 tsp strawberry jam or preserves

1. Combine the strawberry crunch ingredients and bake on a lined cookie sheet at 350ºF for 4 min.
2. For the crust, combine 1 Cup of the strawberry crunch with 2 Tbsp melted butter. Press into the bottom of a 6-inch springform pan and line with an acetate collar. Place in the freezer while you move on.
3. Using a food processor, grind the freeze-dried strawberries into a fine powder. Set aside.
4. Add the heavy whipping cream and 2 tsp of vanilla extract into a chilled bowl, then whip it with a hand mixer to stiff peaks. Place in the refrigerator.
5. Divide the condensed milk between two medium bowls. To one bowl, add 1 teaspoon of vanilla. To the second bowl, add the finely strawberry powder and the jam/preserves. Whisk the ingredients together within each individual bowl.
6. Divide the whipping cream evenly between each of the two bowls you created in the previous step. Fold each sweetened condensed milk mixture together with the divided whipped cream to create the vanilla ice cream and strawberry ice cream.
7. Layer half of each of the ice creams on top of the strawberry crunch crust, sprinkle a layer of strawberry crunch on top, then repeat. Freeze for 6 hours and serve. 
#icecreamcake #strawberryshortcake #nochurnicecream #icecreamlover #strawberry
LEMON CUPCAKES 🍋 after about a dozen recipe tes LEMON CUPCAKES 🍋 after about a dozen recipe tests, this one is everything I could want in a lemon cupcake! Fluffy-yet-moist, bursting with natural lemon flavor, and absolutely irresistible topped with lemon cream cheese buttercream. 

Full recipe (with frosting) linked in my bio + at https://sugarandsparrow.com/homemade-lemon-cupcakes/

INGREDIENTS:
1 Cup (132g) all-purpose flour
1 tsp baking powder
1/4 tsp salt
1/4 Cup (60ml) whole milk, room temperature
3 Tbsp (45ml) lemon juice from 1 medium lemon
3/4 Cup (150g) granulated sugar
3 Tbsp (42g) unsalted butter, room temperature
2 Tbsp (30ml) vegetable oil
2 large eggs, room temperature
1 tsp pure vanilla extract

INSTRUCTIONS:
1. Preheat the oven to 350ºF (177ºF) and line a standard cupcake pan with 12 paper liners.
2. In a large bowl, whisk together the flour, baking powder, and salt. Set aside. 
3. In the bowl of a stand mixer fitted with the paddle attachment (or with a hand mixer and large bowl), add the lemon zest to the sugar and mix on low speed until fragrant and well combined, about 1 minute. Meanwhile, combine the lemon juice with the milk and set aside. 
4. Add the butter to the lemon-sugar mixture and cream on medium speed until and combined, about 2 minutes. Add the vegetable oil and beat until light and creamy, about 3 minutes. Scrape down the bowl and paddle as needed.
5. Mix in the eggs one at a time on low speed, then add the vanilla and turn the mixer to medium speed for one minute.
6. Turn the mixer off and add the flour mixture all at once. Mix on low speed until just combined, then slowly pour in the lemon-milk mixture. Mix until just combined, about 30 seconds.
7. Divide the batter equally between the liners and bake for 14-18 min. Cool, then top with frosting of your choice (link in bio for lemon cream cheese frosting)�
#lemoncupcakes #creamcheesefrosting #lemon #cupcakes #cupcakedecorating
April in my kitchen 🌸 I published 5 NEW recipes April in my kitchen 🌸 I published 5 NEW recipes on my site, baked my Oreo cupcake recipe for a fundraiser and found it was just as delicious as I remember, and filmed/photographed 3 recipes that will be on my blog in May (Lemon Cupcakes, Lemon Cream Cheese Buttercream, and No-Bake Marbled Strawberry Cheesecake) 🥰 

Comment “APRIL” to get all the available recipes and stay tuned for more! 

#bakersofinstagram #springbaking #cakedecorating #cupcakes #bakinglove
SHEET PAN COOKIE CAKE 🍪 slice it warm for a fud SHEET PAN COOKIE CAKE 🍪 slice it warm for a fudgy chocolate chip cookie OR let it settle into a moist and chewy cookie cake that’s perfect for decorating! My fave vanilla buttercream + sprinkles turn this giant chocolate chip cookie into the perfect birthday cake alternative at the end 🥳
⁣
Full recipe + decorating ideas at https://sugarandsparrow.com/sheet-pan-chocolate-chip-cookie-cake/
⁣
INGREDIENTS⁣
1 Cup (226g) unsalted butter, melted⁣
1 1/3 Cups (267g) packed light or dark brown sugar⁣
1/2 Cup (100g) granulated sugar⁣
3 large eggs⁣
1 Tbsp pure vanilla extract⁣
1 tsp baking soda⁣
1 tsp cornstarch⁣
1/2 tsp salt⁣
3 Cups (398g) all purpose flour⁣
2 Cups (350g) semi-sweet chocolate chips⁣
⁣
INSTRUCTIONS⁣
1. Preheat the oven to 350ºF (177ºC). Grease and line a 13×18 inch sheet pan.⁣
2. In a large bowl, add the brown sugar and granulated sugar. Melt the butter in the microwave and pour it over the top of the sugars. Whisk together until uniform. Add the eggs and vanilla, then continue whisking until uniform. Whisk in the baking soda, cornstarch, and salt.⁣
3. Add the flour and use a silicone spatula to fold it in until smooth cookie dough forms. Reserve 1/2 Cup of the chocolate chips and set them aside, then fold the remaining 1 1/2 Cups of chocolate chips into the cookie dough.⁣
4. Place the chocolate chip cookie dough onto the prepared sheet pan and use an offset spatula to spread it all the way to the edges in an even layer.⁣
5. Bake the cookie cake for 14-16 minutes, until it looks golden brown on the edges and set. 
6. Enjoy warm or let it cool and decorate with vanilla buttercream and sprinkles! ⁣
⁣
#cookiecake #chocolatechipcookies #sheetcake #birthdaycake #cakedecorating
STRAWBERRY CUPCAKES 🍓based on my beloved strawb STRAWBERRY CUPCAKES 🍓based on my beloved strawberry layer cake recipe, this cupcake version is just as moist yet fluffy and bursting with natural strawberry flavor! Between the mix of fresh strawberries in the cupcakes + freeze-dried strawberries in the frosting, the flavor is out of this world 🚀

Full recipe link in my bio (with strawberry buttercream) + at https://sugarandsparrow.com/strawberry-cupcakes/

STRAWBERRY CUPCAKES
Yield: 14 cupcakes

INGREDIENTS:
5 oz (143g) fresh or frozen strawberries
1/3 Cup (80ml) whole milk, room temp
1 1/2 Cups (158g) sifted cake flour
1 tsp baking powder
1/4 tsp baking soda
1/2 tsp salt
6 Tbsp (85g) unsalted butter, room temp
1 Cup (200g) granulated sugar
2 large eggs, room temp
3 Tbsp (45g) sour cream, room temp
1 tsp vanilla extract
1 drop pink food coloring (optional)

INSTRUCTIONS: 
1. Puree the strawberries using a food processor (you’ll have about 1/2 cup of puree), then place into a saucepan over medium-low heat. Bring to a simmer, then cook for 10-15 min, stirring occasionally, until you have 1/4 cup. Refrigerate until room temp.
2. Preheat oven to 350ºF (177ºC) and line a standard cupcake pan with liners.
3. Whisk together the sifted cake flour, baking powder, baking soda, and salt and set aside.
4. In a stand mixer w/ paddle attachment (or hand mixer + large bowl), whip the butter on high for 2 min. Add sugar and beat for 2 min, until light and fluffy. Turn the mixer to low and add the eggs one at a time, then add the vanilla and sour cream, turn the mixer to high and beat for 1 min. Meanwhile, whisk together the strawberry puree, whole milk, and food coloring (if using).
5. Turn the mixer off and add all of the dry ingredients at once. Mix on low until just combined, then add the strawberry milk mixture until just combined, about 30 seconds.
6. Fill the cupcake liners 2/3 full and bake for 14-18 minutes. Cool completely before topping with strawberry buttercream (full recipe linked above). 

#strawberrycupcakes #strawberrycake #pinkcupcakes #strawberry #cupcakes

Footer

On the Blog

  • Cake Basics
  • Recipes
  • Tutorials

Info

  • About
  • Privacy Policy & Disclosure

stay in the know

Copyright © 2026 · Theme by Sugar & Sparrow