
A few years ago, I created this Strawberry Lemonade cake that became an instant hit: cake flavored with fresh strawberries (pureed and reduced), filled with strawberry buttercream, topped with lemon buttercream – basically Summer in cake form! It’s been on my list to write an all-strawberry cake recipe ever since, and after getting a request for one via Instagram DM, I knew it was time. I took to the store for a pound of fresh strawberries and a package of freeze dried strawberries to give you the ultimate flavor profile. I promise, it’s as delicious as it is pretty to look at!

I know what you might be thinking: why fresh strawberries and freeze dried strawberries? After tons of testing, fresh strawberries are hands-down the best way to flavor a cake, while freeze-dried strawberries are hands-down the best way to flavor buttercream. Trust me, there is no way around it. The good news is that most groceries stores carry both, but if you have a hard time finding freeze-dried strawberries, you can always order them on Amazon (these are the ones I use, but I get them from my local Trader Joe’s).

When it comes to flavoring a cake with fresh strawberries, it’s not enough to just chop them up and add them to your batter (you’ll just have a vanilla cake with weird strawberry chunks). It’s also not enough to simply puree them, since the excess liquid tends to water down the flavor. Instead, you must puree and reduce the strawberries to intensify the strawberry flavor while evaporating most of the liquid.


For this fluffy and flavorful strawberry cake, I started with my favorite Vanilla Cake recipe as a base and adjusted the leavening agents to accommodate the acidity in the strawberries (aka I reduced the baking soda slightly). After the reduced strawberry puree hits room temperature, I whisked it together with the whole milk in the recipe and added it in at the end. Reducing the strawberries does make this recipe a little bit more involved, but it’s so worth it for the incredible flavor!

Remember how I said freeze-dried strawberries are best for flavoring the buttercream? This is because adding fresh (or even frozen) strawberries to buttercream will add way too much liquid and not enough flavor. As opposed to simply freezing strawberries, the process of freeze-drying eliminates all of the liquid from the berry, leaving only the intense flavor. After grinding those freeze-dried berries into a fine powder, adding them to buttercream is the only way (in my humble opinion) to get that refreshing, pure flavor you imagine when you think of strawberry buttercream.


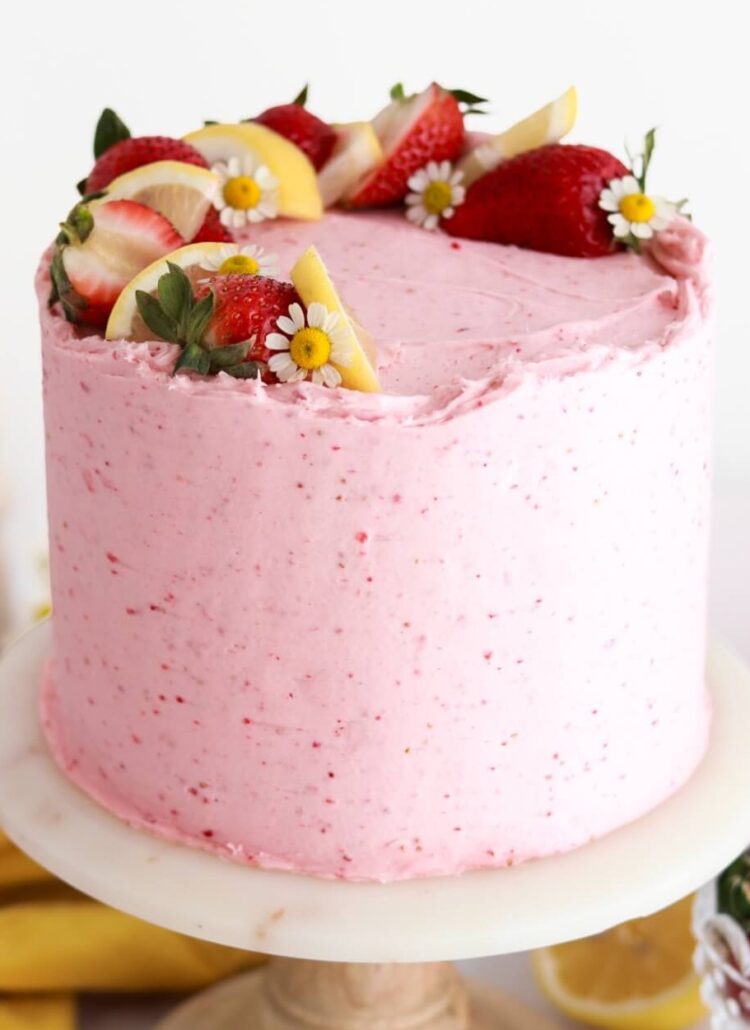
After filling and frosting these beautiful cake layers with tasty strawberry buttercream, I decorated with pretty piping (using Wilton Tips 1M for the rosettes and 4B for the stars), fresh strawberries, and chamomile flowers. The flowers were an impulse on the way out of the store – I couldn’t stop imagining them on my final cake design and felt safe to use them because they’re 100% edible (although I would not recommend eating them because they don’t taste the best). They did make this cake look extra cute though!

However you decorate, one thing is for sure – this cake is a strawberry lover’s dream! And bonus if that strawberry lover also is a big fan of the color pink.

Homemade Strawberry Layer Cake
Ingredients
Strawberry Layer Cake
- 11 oz (312g) fresh strawberries, stems removed
- 3/4 Cup (180ml) whole milk, room temperature
- 2 1/2 Cups (265g) sifted cake flour* DIY recipe in notes
- 2 tsp baking powder
- 1/4 tsp baking soda
- 1 tsp kosher salt
- 3/4 Cup (170g) unsalted butter, room temperature
- 1 2/3 Cups (330g) granulated white sugar
- 3 large eggs, room temperature
- 1/3 Cup (80g) sour cream, room temperature
- 2 tsp vanilla extract
- 1-2 drops pink food coloring, optional
Strawberry Buttercream
- 2 Cups (452g) unsalted butter, room temperature
- 1 1/2 Cups (34g) freeze dried strawberries**
- 6 Tbsp (90ml) whole milk, room temperature
- 2 tsp vanilla extract
- 7 Cups (840g) powdered sugar
- 1/4 tsp kosher salt
Instructions
Make the Strawberry Layer Cake
- Make the Strawberry Reduction: After cutting off the stems of the strawberries, puree them using a food processor. Afterwards, you should be left with 1 cup of puree. Place the strawberry puree into a saucepan over medium-low heat and simmer for 30-35 minutes, stirring occasionally. When you’re done with the reduction, you should have about 1/2 cup (if you have more, keep cooking!). Place the reduced puree into an airtight container and refrigerate it for at least 30 minutes, or until it reaches room temperature. Then, whisk it together with the whole milk and set aside.
- Preheat the oven to 350ºF and prepare three 6-inch or two 8-inch cake pans by spraying the sides with cooking spray and fitting the bottoms with wax or parchment paper circles.
- In a medium sized bowl, place the sifted cake flour, baking powder, baking soda, and salt. Whisk to combine and set aside.
- In the bowl of your stand mixer with the paddle attachment, whip the butter on high until creamy, 2 minutes. Add the granulated sugar and beat together with the butter at medium speed for 2 minutes, until light and fluffy. Turn the mixer to low and add the eggs one at a time, making sure each one is incorporated before adding the next. Add the vanilla and sour cream, then turn the mixer to high and beat for 1 minute.
- Keeping the mixer on low, add all of the dry ingredients at once until just combined, then add the strawberry milk mixture and pink food coloring (if using) until just combined, about 30 seconds. Give the batter a few stirs by hand to make sure everything is incorporated without over-mixing.
- Pour the batter evenly between the prepared cake pans and bake for 30-35 minutes, until a toothpick inserted comes out with just a few moist crumbs. Cool the cakes in the pan for five minutes, after which you can turn them out and continue to cool them on a wire rack or sheet pan for several hours.
Make the Strawberry Buttercream
- With a food processor, grind the freeze-dried strawberries into a fine powder and set aside. You'll have between 1/4 and 1/3 Cup of strawberry powder after grinding.
- Whip the butter using a stand mixer with a paddle attachment on medium speed until it’s creamy and light in color (5-10 minutes). Add vanilla, milk, and strawberry powder and continue to mix on medium for 1 minute.
- Add the powdered sugar a few cups at a time, scraping down the bowl and paddle after each addition. Add the salt and mix on low for another 30 seconds.
Assembly
- After cooling and leveling the strawberry cake layers, fill and frost with strawberry buttercream. To create the look pictured, create a smooth buttercream finish with the strawberry buttercream. Then, divide the remaining buttercream amongst two piping bags – one fitted with Wilton Tip 1M and one fitted with Wilton Tip 4B. Pipe rosettes and stars in a crescent moon shape on top of the cake and as accents on the side of the cake. Finish the look by garnishing with fresh sliced strawberries and chamomile flowers.
Notes
- You can make the reduced strawberry puree up to one week before using in the cake recipe and store in an airtight container in the refrigerator until you’re ready to make the cake. Just bring it back to room temperature by letting it sit on the counter for at least an hour.
- The cake layers can be made ahead and stored at room temperature, wrapped in plastic wrap, for up to two days. Alternatively, you can wrap them and store in the freezer for up to two months before thawing and decorating.
- The buttercream can be made ahead and stored in an airtight container in the refrigerator for up to two weeks. When you’re ready to use it, bring it back to room temperature and re-whip with your stand mixer on low for one minute to bring it back to frosting consistency.
Did you make this cake recipe? I want to know how it went! Leave me a comment below and feel free to tag @sugarandsparrowco on Instagram to show me. I love to see what you create!



What height do you suggest for the 6 inch pans? I used 2 inch and the batter overflowed, I followed recipe to a T but didn’t see what depth you use for cake pans or if you suggest putting them on different racks — wondering if that would have helped make a difference. Thanks!
Hi Kate! I’m so sorry the pans overflowed! I use 2 inch tall pans. It’s important to fill the pans no more than 2/3 full so there’s enough room for the cake to rise. It’s best practice to bake a cake on the middle rack, which is where the heat is most evenly distributed. Hope that helps!
I made this cake for my neighbors birthday and they said it was the best strawberry cake they had.
I am curious can you use substitute blueberries for the strawberries?
That’s amazing, Julie! So happy to hear this recipe was a hit! I have never tried substituting blueberries in this recipe but you could certainly give it a go!
Great recipe
Thank you so much, Teresa! I’m so happy you love this cake as much as I do!
I made this cake for my partner and my mom’s birthday. Your recipe and directions are impeccable! The cake is absolutely wonderful and very very delicious. I got comments from people that it is the best cake they’ve ever had. I’m not a big cake baker so the fact it came out so well is all due to your great recipe. Thank you for sharing!
Yay, Carrie! I’m so happy this recipe was such a big hit! That totally makes my day 🙂 thanks for taking the time to let me know!
How many times this recipe for 3 10×2 layers?
Hi Amy! I would double the recipe for that size.
Hola que tal soy de Perú, es hermoso tu trabajo meencanta lo que haces, una consulta aquí en Perú trabajamos mucho los pasteles con aceite vegetal,
Se puede reemplazar la mantequilla por aceite?? Cuanto seria la proporción??… gracias por la ayuda
Hi Milagros! I haven’t tried replacing the butter with oil in this recipe, so I’m not sure how it would turn out. You are certainly welcome to try it! If you do, let me know how it goes!
So I am in Australia and just made the cakes and am wondering if I used the wrong flour? I used plain, but should I have used self raising? Not sure if you are familiar with these terms in the US?
Hi Laura! Plain flour will make the cake more dense, which is why the recipe calls for cake flour (not self-rising). Here’s more info about cake flour and a diy recipe for making it using plain flour: https://sugarandsparrow.com/homemade-cake-flour
Made this cake to surprise a friend for her birthday and it was a huge hit!!! Thank you so much for a fabulous recipe and lots of inspiration.
Yay, Amy! So happy to hear that this recipe was so loved!!
Hi, is this a recipe you can simply halve for a sheet cake? Thanks!
Hi Janice! Yes, this recipe will make a beautiful sheet cake! Here’s everything you need to know about how to convert my layer cake recipes like this one into a sheet cake: https://sugarandsparrow.com/sheet-cake-recipes/
Hello! Do we have to use cake flour for this recipe? I feel like cake flour never works for me. I love all your recipes, btw. Thanks!
Hi Veronica! I do recommend using cake flour, as it’s what makes this recipe light and fluffy. If you don’t have cake flour on hand, this homemade version is the next best thing: https://sugarandsparrow.com/homemade-cake-flour
I made this strawberry cake for Valentine’s Day and covered it with chocolate frosting. It was fluffy and delicious. I made your vanilla cake today though, and the cake layers were quite tough, especially when compared to these fluffy strawberry layers. I made two 6-inch cake layers, and used the extra batter to make cupcakes. Interestingly, the cupcakes were light and fluffy, even though the cake layers were not. Do you think I could use this recipe as a vanilla cake if I were to increase the milk to 1 1/4 c. instead of using the strawberry purée? Thanks. I’ve had great results with multiple recipes on your blog.
Hi Sam! So happy you loved this strawberry cake recipe! That is a puzzler as to why the vanilla cake didn’t end up as fluffy – I used the vanilla cake recipe as a base when writing this strawberry cake recipe. You are welcome to try experimenting with omitting the puree in this recipe and increasing the milk though!
Thank you Whitney!! I started from scratch because I got too nervous about using the left over puree. Lol. Just came out of the oven, looks and smells amazing! It’s so helpful that you have not only measurements but also weights on your recipe. Very helpful. Your instructions are perfect!
Yay, Anna! So happy to hear the cakes were a success and you found the recipe + instructions helpful. Enjoy!
Sorry, also are frozen strawberries ok for the puree?
You can definitely use frozen strawberries!
Thanks Whitney! When you say reduce it do you mean cooking it down? I did that originally and just stored the leftovers in the refrigerator. Do you think I need to cook it down more? Or should I just start over?
Yes, exactly – by “reducing” I mean cooking it down. You can use those reduced puree leftovers, just make sure you bring it to room temperature before using it in the recipe!
Hi Whitney – I have strawberry puree (made from frozen strawberries) left over from a cake recipe that flopped. I would like to try your recipe. Do you think I can used my leftover puree in your recipe? Also, does this cake come out dense enough to stack?
Hi Anna! You can certainly use the puree you have left over. I would still reduce it as this recipe instructs. And yes, this cake is certainly stackable! Hope you enjoy this recipe!