• Cake
  • Frosting
  • YouTube
  • My Favorite Tools
  • Nav Social Icons

  • Skip to primary navigation
  • Skip to main content
  • Skip to primary sidebar
  • Skip to footer
  • Recipes
    • Cake
    • Cupcakes
    • Frosting
    • Ice Cream
    • Vegan
  • Cake Basics
  • Tutorials
  • Blog
  • About
  • Mobile Menu Widgets

    Connect

    Search

Sugar & Sparrow logo in script font

Sugar & Sparrow

Lifestyle and Cake from Portland Oregon

  • Cake Basics
  • Recipes
    • Cake
    • Cupcakes
    • Cookies & Bars
    • Filling
    • Frosting
    • Ice Cream
    • No-Bake
    • Small Batch
    • Vegan
  • Tutorials
  • Book
  • Blog
  • About

Thick Caramel Filling for Cakes

June 20, 2024 · In: Featured, Filling, Recipes

Jump to Recipe

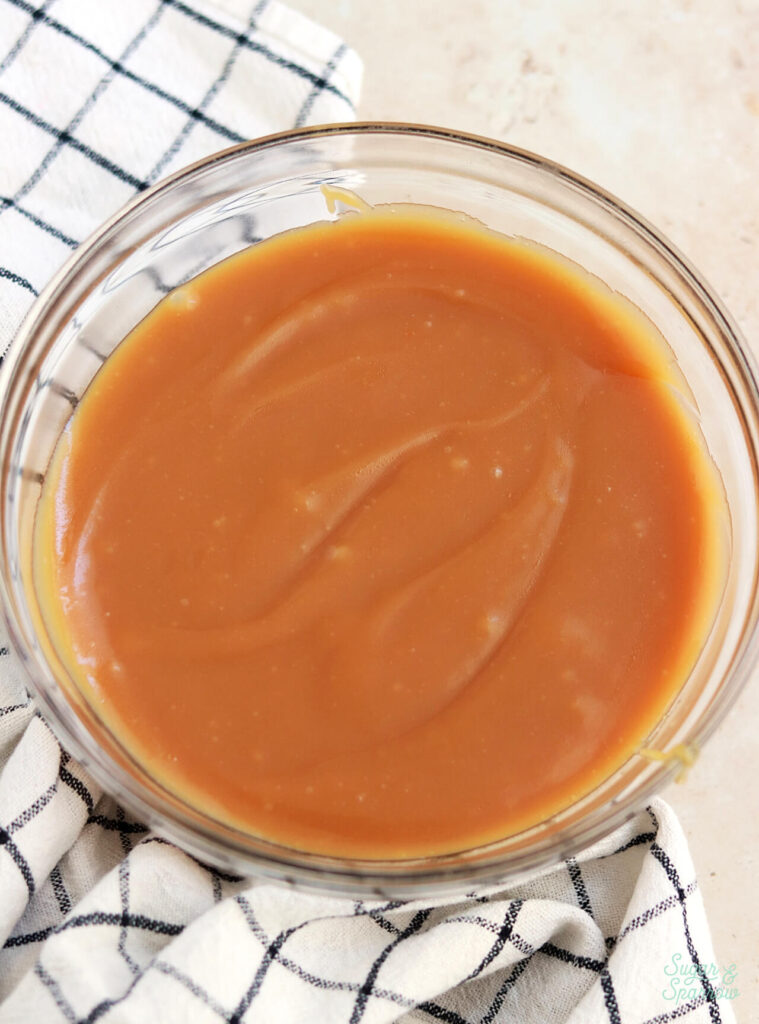
When I was recipe testing for my Twix cake, I knew I needed a caramel filling that was reminiscent of the candy bar. It had to be extra thick (but not too thick), creamy and spreadable, irresistibly gooey, with just the right vanilla-caramel flavor. So, I researched a lot and tested so many recipes, tweaking things until the caramel was exactly what I was imagining. If you’re looking for a thick caramel filling for cakes and cupcakes, this is it!

This post may contain affiliate links. For more information, see our disclosure policy.
thick caramel filling for cakes
thick caramel cake filling recipe

The Recipe Tests

I was originally planning on using my easy salted caramel recipe for my Twix cake. However, after making it I realized, while it was absolutely delicious and does make a great cake filling, it didn’t have the vanilla-based flavor profile I was looking for, nor the thick and gooey consistency. So I played around with a lot of different variables: brown sugar vs. white sugar, different amounts of heavy whipping cream, the temperature the caramel reached in the cooking process, so many combinations that I had to run back to the grocery store multiple times to get more ingredients and try again. 
caramel filling for cake recipe

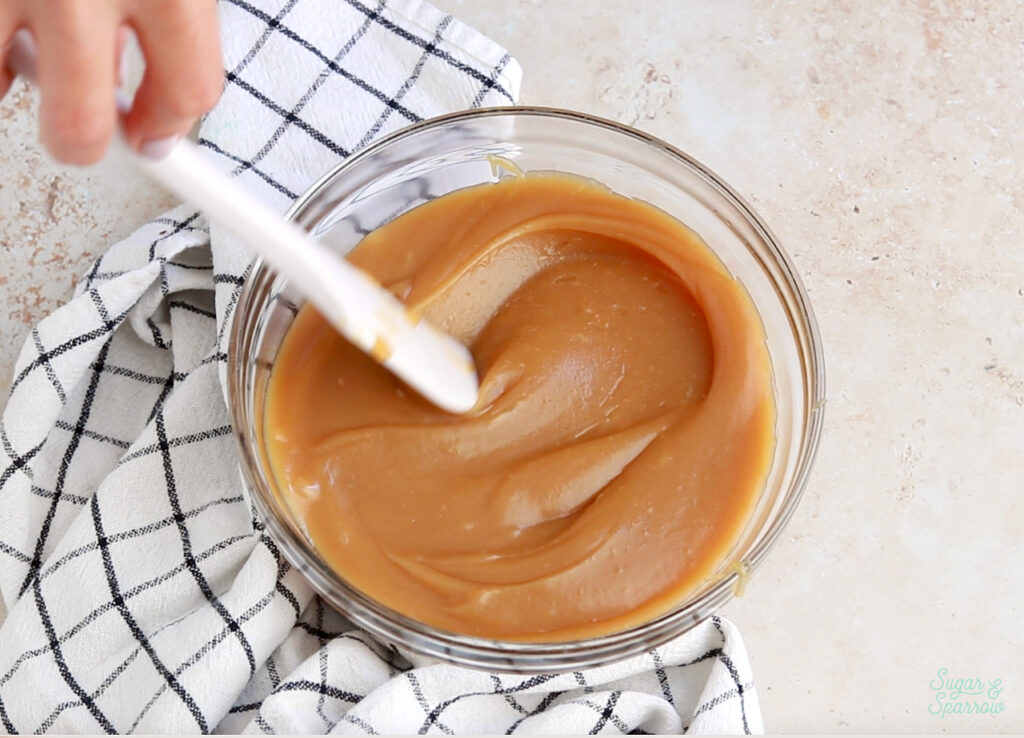
But after testing, tweaking, and lots of waiting for the experiments to come to room temperature so I could really see the consistency, I finally ended up with this recipe. In the end, this is so easy to make, thick and gooey, perfectly sweet, and ideal for filling cakes. 

Perfectly Thick Caramel Filling

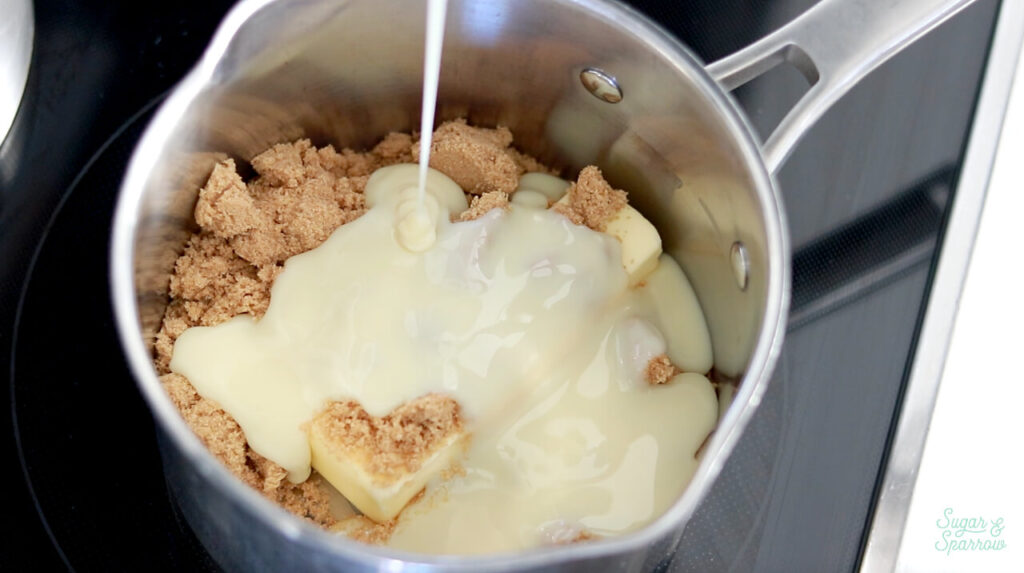
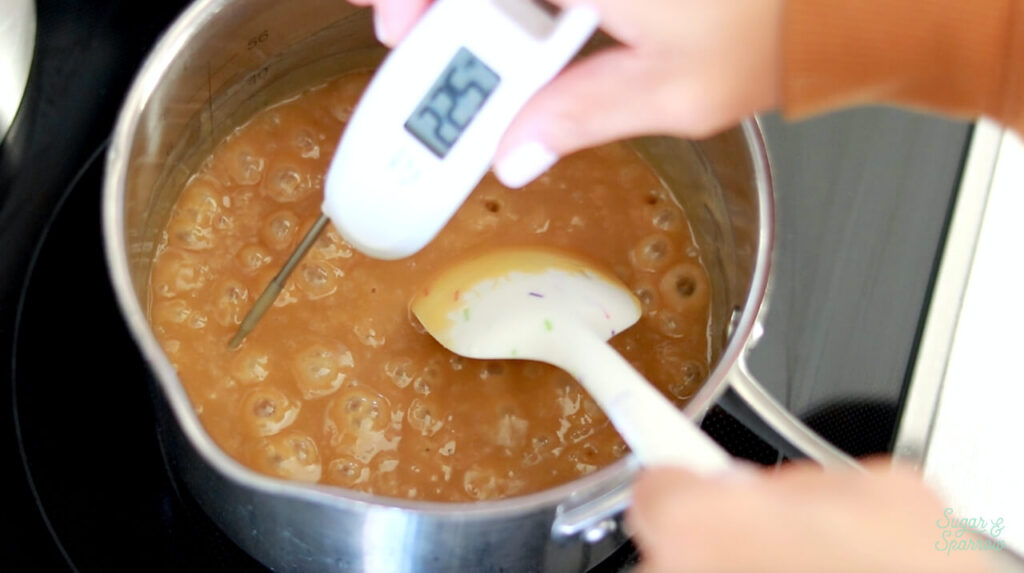
This caramel filling recipe couldn’t be easier to make. You essentially add all of the ingredients (except for the vanilla) into a large saucepan, melt them together, and cook them until the mixture boils and thickens. It helps to have a thermometer so that you can ensure the caramel reaches 225ºF/107ºC, but it’s not totally necessary so long as you follow the recipe timing in the instructions. It turns out that temperature matters a lot when it comes to the final outcome of the caramel – the higher the temperature reached in the cooking process, the firmer the caramel will set at room temperature.
easy caramel recipe by sugar and sparrow
thick caramel recipe for cake

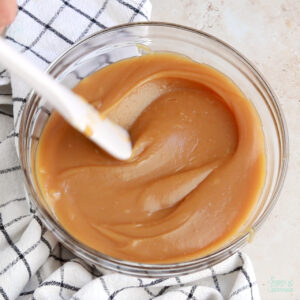
After all my testing, I think that 225ºF/107ºC makes the perfect spreadable filling consistency for this caramel. It will seem pretty thin right after you make it, but will thicken perfectly as it cools. 
thick caramel for cake filling

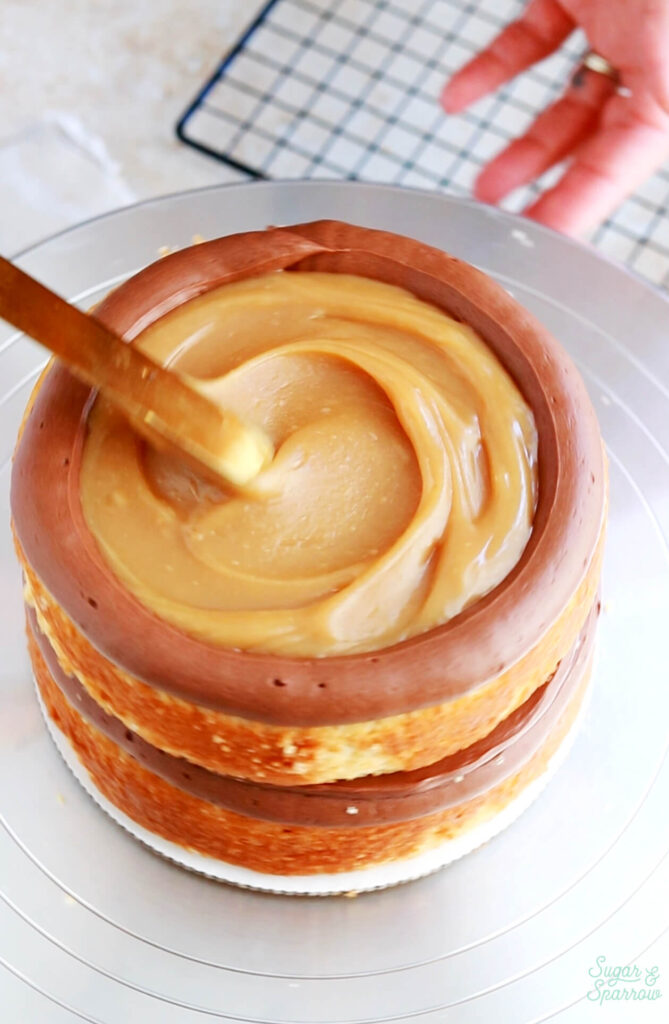
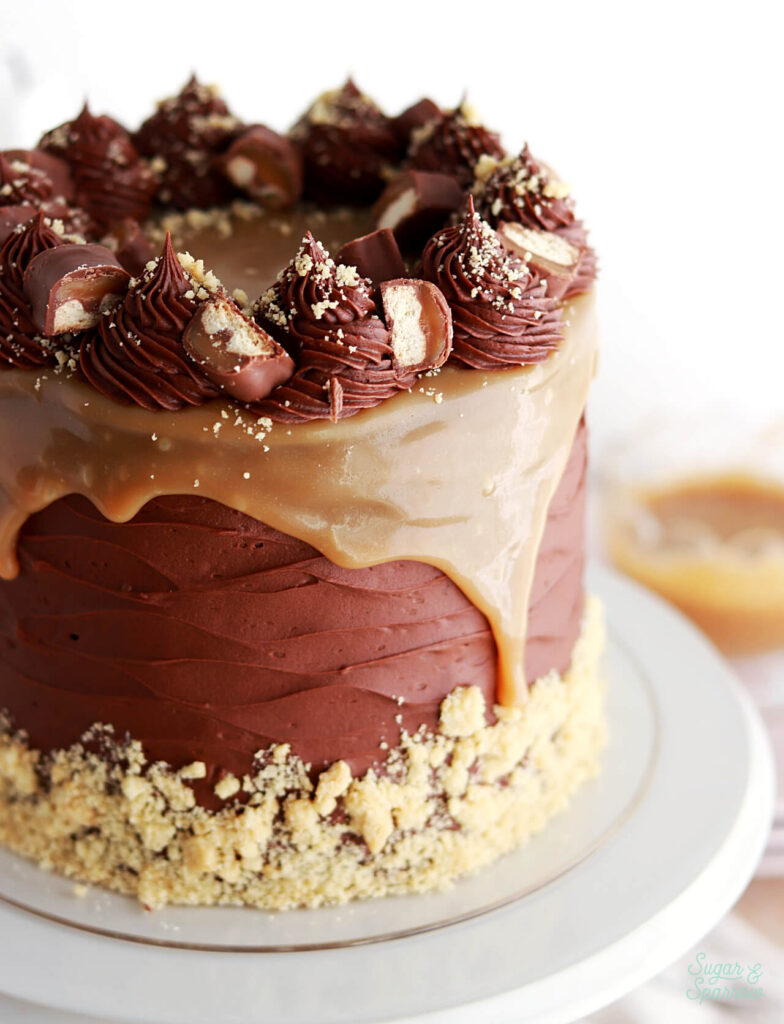
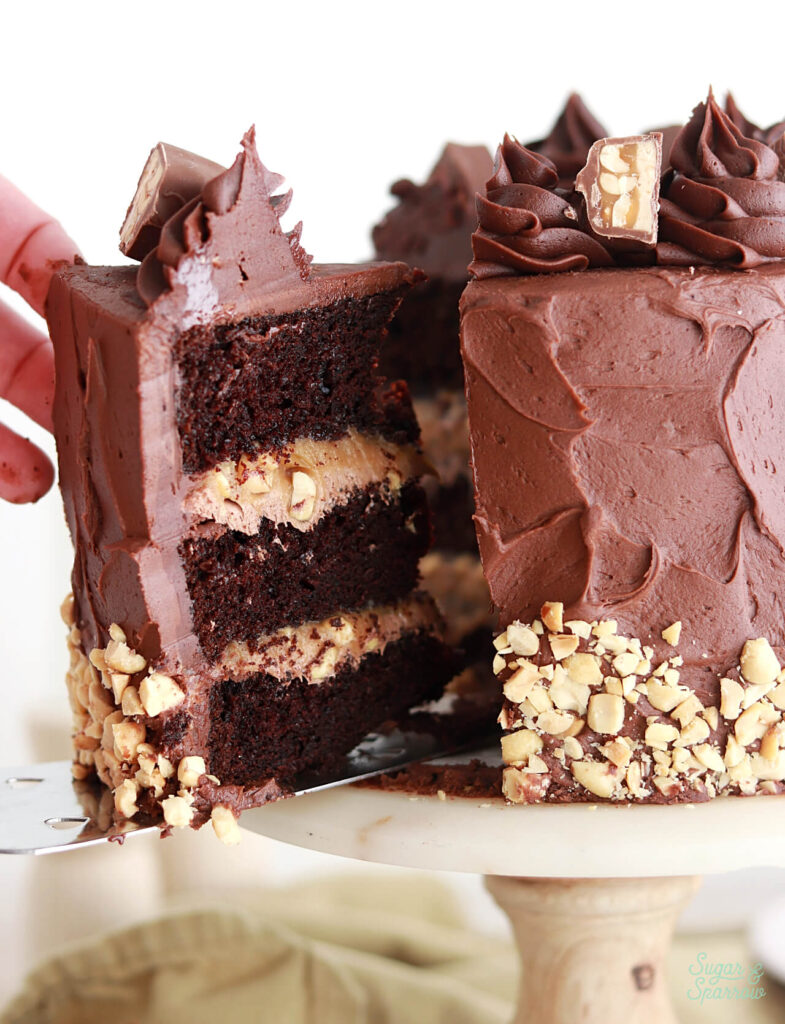
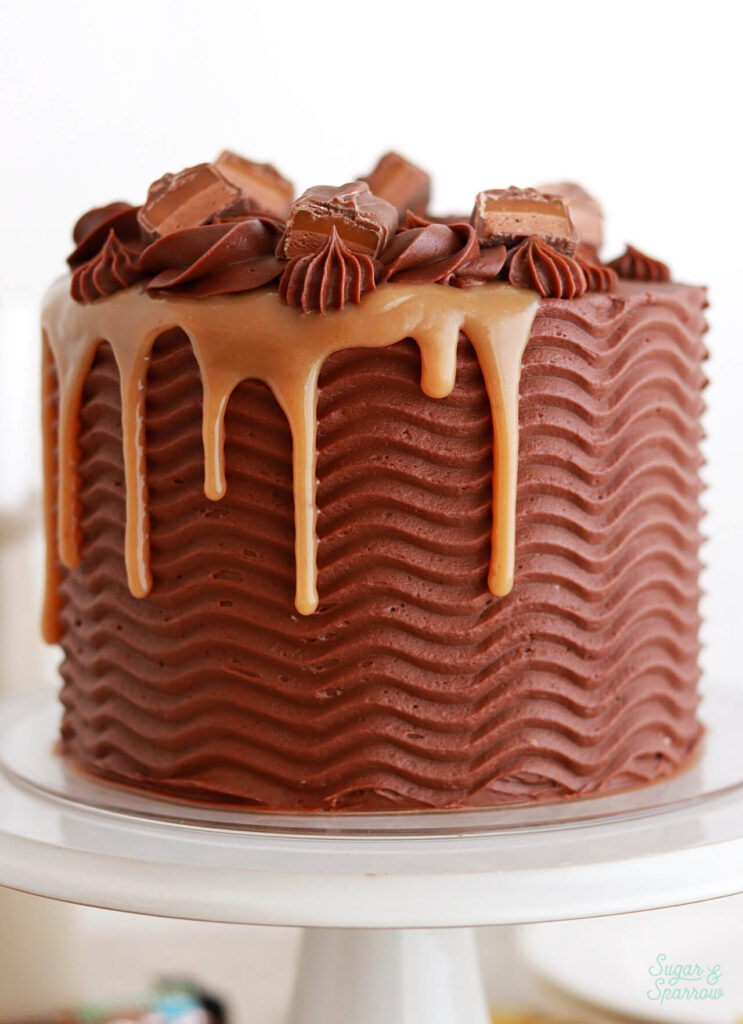
This recipe makes a little more than enough to fill a triple 6-inch or 8-inch layer cake, and as a bonus, you can also use it as a drip! At room temperature, it’s the perfect consistency to spread between cake layers, but it can also be heated slightly to make a beautiful (extra thick) caramel drip.
Twix cake recipe

Tips for Caramel Success

This recipe is extremely easy to make, but I do have a few tips that will make it fail proof:

  • Use a kitchen scale to measure the ingredients by weight. This will yield the most accurate measurements.
  • Stir the ingredients continuously with a silicone spatula throughout the entire recipe. My first attempts were done with a whisk and I wasn’t able to properly scrape the bottom of the bowl, which resulted in brown sugar getting trapped in the edges of the saucepan and burning.
  • Use a thermometer to check that the temperature of the caramel reaches 225ºF/107ºC. Any cooler and the caramel won’t be as thick when it sets, and hotter and the caramel will be too thick and chewy when it sets.
  • To make sure your caramel filling doesn’t bulge out from between cake layers, follow the soft fillings portion of this filling and stacking tutorial. It will help you add structure to your layer cake and keep all that glorious filling where it belongs.
millionaire's cake recipe inspired by disney world

Cake Recipes Featuring Thick Caramel Filling

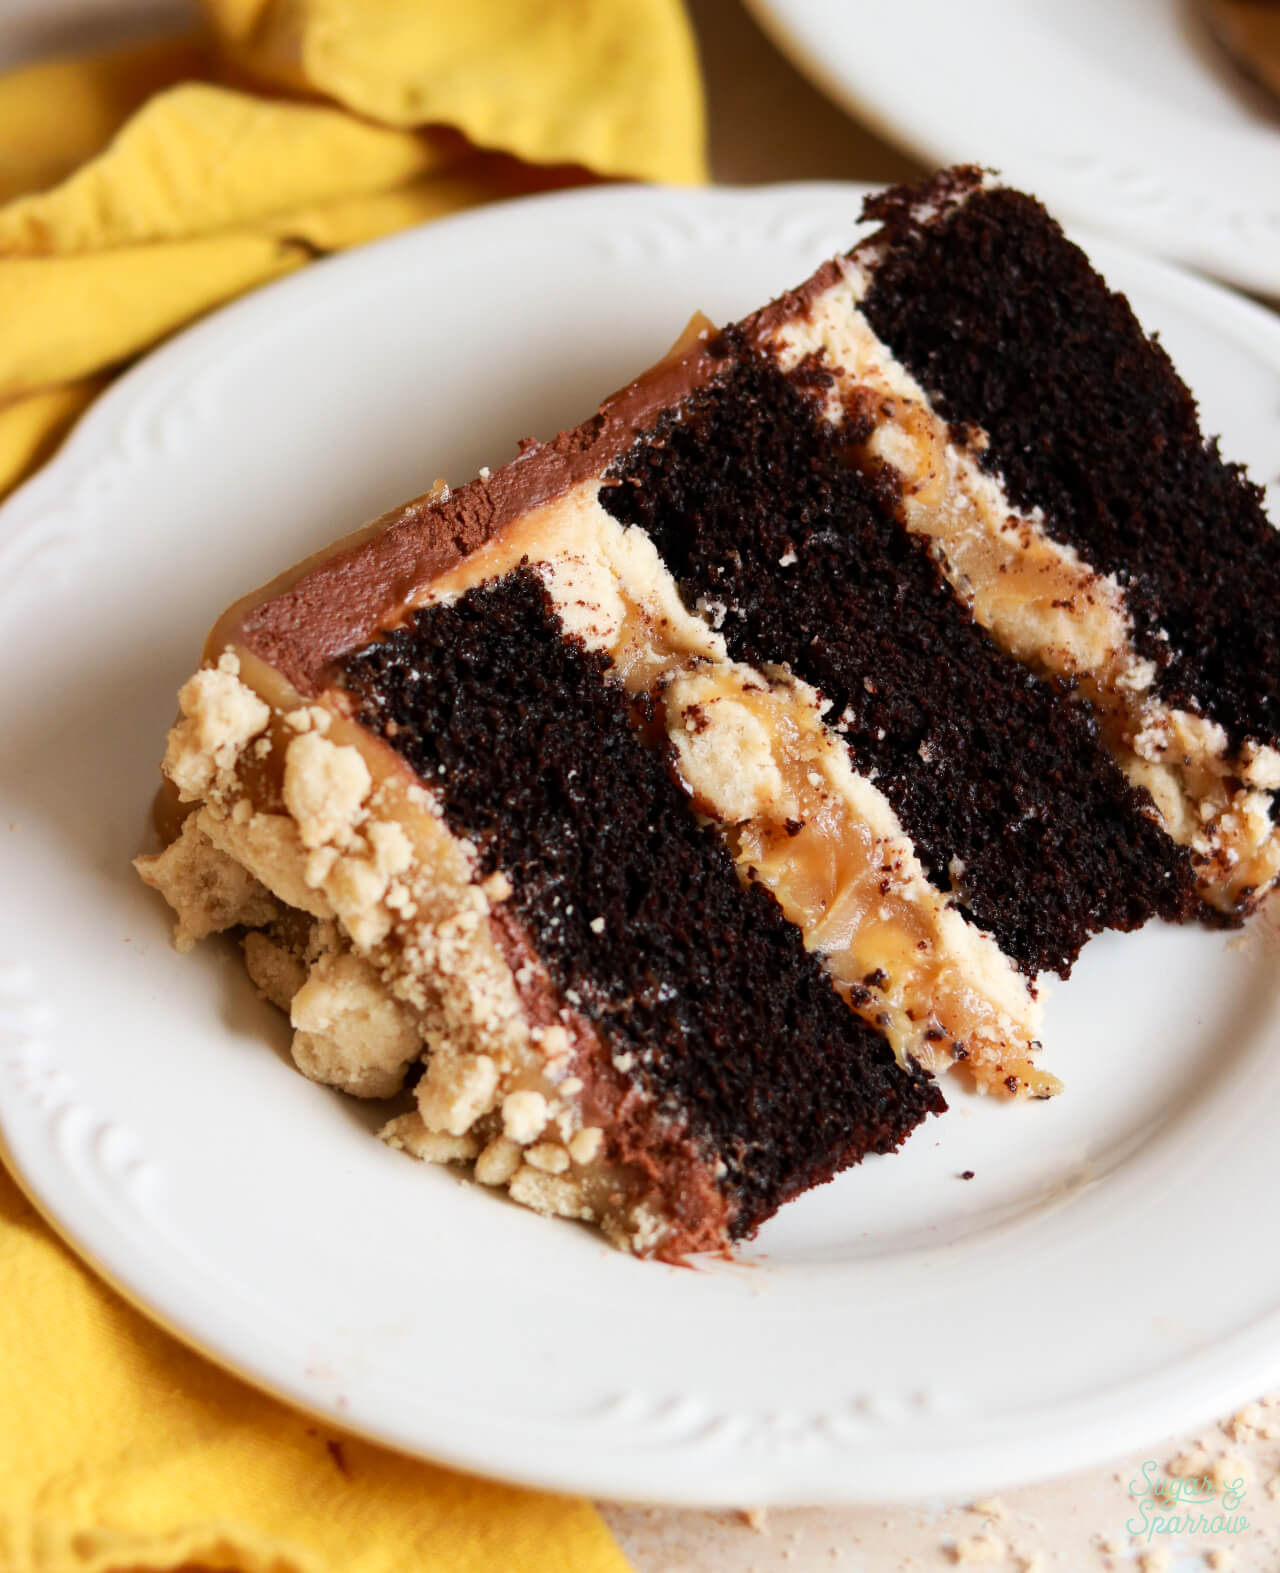
I’ve used this thick caramel filling in the following cake recipes, but you can truly pair it with anything that could use some caramel flavor:
  • Milky Way Cake
  • Twix Cake
  • Snickers Cake
  • Millionaire Cake
snickers cake recipe with peanut caramel and nougat filling
milky way cake recipe

Thick Caramel Recipe Video

Here’s a full video tutorial that walks you through the recipe:

If you love recipe videos like this one, be sure to check out my YouTube channel! I’ve got a growing collection of cake recipes, decorating tutorials, and Cake Basics over there. Hit the subscribe button on my page so you never miss a new video.
thick caramel filling recipe for cake

Thick Caramel Filling

5 from 10 votes
A thick yet soft and spreadable caramel that's the perfect consistency for using as a cake filling
Print Recipe Pin Recipe
Prep Time:5 minutes mins
Cook Time:15 minutes mins
Cooling Time:2 hours hrs
Total Time:2 hours hrs 20 minutes mins
Course: Dessert
Cuisine: American
Servings: 3 Cups

Ingredients

  • 1/2 Cup (113g) unsalted butter
  • 1 Cup (200g) packed brown sugar light or dark
  • 2/3 Cup (210g, 160ml) sweetened condensed milk
  • 1/3 Cup (80ml) light corn syrup or golden syrup
  • 5 Tbsp (75ml) heavy whipping cream
  • 1 tsp salt
  • 1 tsp pure vanilla extract

Instructions

  • In a large saucepan over medium heat, add the sweetened condensed milk, butter, brown sugar, corn syrup, heavy whipping cream, and salt. Stir with a rubber spatula constantly until the mixture is fully combined and begins to bubble, about 5 minutes.
  • Turn the heat to medium-low and continue stirring until the caramel begins to thicken, 6-7 minutes. If you have a candy thermometer, you’ll want to cook this until it reaches 225F/107C. That is the temperature that will thicken the caramel while keeping it nice and soft at room temperature.
  • Remove the caramel from the heat and mix in the vanilla extract. Pour into a separate container and let the caramel cool completely to room temperature before using it to fill the cake. You can either leave the container on the counter for about 2 hours or speed the cooling process slightly by placing the container in the refrigerator. It will thicken significantly as it cools.
  • Pro Tip: since this filling recipe is so soft, be sure to follow the soft fillings tutorial in this blog post to add structure to your layer cake in the filling and stacking process. This way you'll never have to worry about filling bulging out from between cake layers

Notes

To Make Ahead: store in an airtight container in the refrigerator for up to two weeks. When you’re ready to use it, bring the caramel back to room temperature by setting it out on the counter for an hour or so, or heating it in the microwave in 10-second increments until it’s spreadable. 
Yield: this recipe makes enough to fill and stack a triple layer 8-inch, with enough left over to add a drip to the cake as well. 


I hope you love this thick caramel filling as much as I do! If you do end up making it, let me know how it went in the comments below + be sure to tag @sugarandsparrowco on Instagram to show me. I love to see what you create!

By: Whitney · In: Featured, Filling, Recipes · Tagged: caramel, caramel filling, thick caramel

you’ll also love

sprinkled caramel applesHow To Make Sprinkled Caramel Apples
salted caramel buttercream recipe for cakes and cupcakesSalted Caramel Buttercream Recipe
monster shag cake by sugar and sparrowMonster Shag Cake Tutorial

Join the List

Stay up to date & receive the latest posts in your inbox.

Reader Interactions

Comments

  1. Amber A. says

    August 13, 2025 at 9:15 am

    5 stars
    I don’t normally leave comments on recipes, but I’ve tried to make caramel plenty of times before and I’ve never found a recipe with the correct texture that I was looking for or taste & this absolutely reached both of those points. It has the perfect texture and taste. I will definitely be saving this for repeatedly future use for my baking business orders. Thank you so much for sharing this.

    Reply
    • Whitney says

      August 13, 2025 at 10:00 am

      Yay, Amber!! That makes me so happy!

      Reply
  2. Riana says

    July 28, 2025 at 12:21 am

    Hi Whitney,

    Can this filling be whipped to pipe with for a whipped caramel? I have to make a caramel swirl gateau and I want to whip the caramel to pipe swirls with it.

    Reply
    • Whitney says

      August 1, 2025 at 8:41 pm

      Hi Riana! That sounds amaaazing. I haven’t tried it, so whipping the caramel would be an experiment. Let me know if you try it though, now I’m curious!

      Reply
  3. Mary says

    July 5, 2025 at 11:20 pm

    Hi, Whitney. Can I try this recile without corn syrup? Do you recommend a substitute for it? Thank you!

    Reply
    • Whitney says

      July 6, 2025 at 1:14 pm

      Hi Mary! The corn syrup is what keeps this caramel soft yet thick at room temperature. I haven’t tested any substitutes for it, so I can’t make any solid recommendations.

      Reply
  4. Whitney says

    June 12, 2025 at 4:39 pm

    Oh no, Ana! Is it rock hard when cold or at room temperature? And did you leave any ingredients out or substitute anything? If it’s hard when cold, all you’ll need to do is warm it up in 15 second increments in the microwave until spreadable.

    Reply
  5. Deidra says

    May 23, 2025 at 6:48 am

    All I have here is half and half. Will this work in place of the heavy cream?

    Reply
    • Whitney says

      May 23, 2025 at 9:42 am

      Hi Deidra! I haven’t tried it with half and half before, so it would be an experiment. My hunch is that it won’t be as thick. Hope that helps!

      Reply
  6. pattie bis says

    May 23, 2025 at 5:54 am

    I made this last night to use between carrot cake layers. Color and flavor are great. Its a bit thick. How do you recommend thinning this just a bit? Adding a little warm cream or swt cond milk? Or should I Add a little of my cream cheese frosting to it to thin it out?

    Reply
    • Whitney says

      May 23, 2025 at 9:39 am

      Hi Pattie! If you want it to be thinner I would add a little warm cream to it. Heat it in the microwave first so that it’s easy to mix the cream in, then let it cool down to room temperature again.

      Reply
  7. Malissa Spiropoulos says

    March 11, 2025 at 3:22 pm

    Wondering can you put this sauce on top of a crust, then add cheesecake filling and then bake the cheesecake? How do you think the caramel will do while baking?

    Reply
    • Whitney says

      March 11, 2025 at 9:39 pm

      Hi Malissa! I haven’t tried that but I have a feeling it would work and be absolutely delicious!

      Reply
  8. Ella Kammerath says

    January 14, 2025 at 5:28 am

    5 stars
    Hello 🙂
    I’ve just tried youe recipe and after the caramel was cold I’ve noticed I forgot to add the golden syrup. Do you think I could war everything up and add the brown syrup?
    Thank you in advance and best wishes,
    Ella

    Reply
    • Whitney says

      January 14, 2025 at 8:02 pm

      Hi Ella! Warming the caramel and stirring in the golden syrup is worth a try, although I’ve never done it that way before so I’m not sure exactly how it will go. I think the only risk is overcooking the caramel which can make it extra thick at room temperature, but it’s worth a shot unless you want to remake the whole recipe.

      Reply
  9. Kate says

    January 6, 2025 at 10:30 am

    Could I use this caramel to make caramel buttercream?

    Reply
    • Whitney says

      January 7, 2025 at 7:48 pm

      Hi Kate! Yes, you can use it in place of the salted caramel in this recipe: https://sugarandsparrow.com/salted-caramel-buttercream-recipe/

      Reply
  10. Kristy Jackson says

    November 25, 2024 at 6:33 am

    5 stars
    I made this and the taste and texture were perfect, but the color of mine wasn’t the beautiful amber color that your’s was. Mine was a very light pale tan. Any idea what my problem was? I cooked it until the candy thermometer read 225. How do I get the lovely amber color?

    Reply
    • Whitney says

      November 25, 2024 at 8:30 am

      Hi Kristy! It sounds like you did everything right. The only way to get a darker color is to cook it a little longer (the mixture usually plateaus at 225F and takes a few minutes to rise above that) or try using dark brown sugar next time. That will give the flavor even more depth and also darken the color slightly. Hope that helps!

      Reply
  11. Addie says

    November 10, 2024 at 5:01 am

    Hey Whitney!! This looks SO good. I want to double the recipe and put it in a three-layer eight-inch cake. If there are leftovers, can I microwave or heat it over a double boiler like you would for ganache then use it as a drip?? Thanks!

    Reply
    • Whitney says

      November 10, 2024 at 8:42 pm

      Hi Addie! This recipe makes enough to fill a three layer 8-inch cake with leftovers for drip as-is, so no need to double! And yes, you can definitely heat the leftovers in 5-10 second intervals until it’s ideal drip consistency. Enjoy!

      Reply
  12. Chris says

    November 3, 2024 at 8:00 am

    Need a caramel filling for chocolate cupcakes and every recipe I’ve tried, the caramel is absorbed into cake..even when put in fridge. I need a sauce that will stay thick inside the cupcake so gooey when bitten into. Will your recipe keep that consistency? Thank you.

    Reply
    • Whitney says

      November 3, 2024 at 9:18 pm

      Hi Chris! Yes, this caramel stays nice and soft even when refrigerated, but so thick that it won’t get absorbed into the cake. I hope you love it!

      Reply
  13. Linda m says

    October 31, 2024 at 8:18 pm

    Can I use lily white corn syrup. I don’t have light and can I use 18% coffee cream

    Reply
    • Whitney says

      November 2, 2024 at 10:24 pm

      Hi Linda! Yes, lily white corn syrup will work. I’m not sure about the 18% coffee cream since I’ve never tried anything but heavy whipping cream (aka double cream) in this recipe. It would be an experiment!

      Reply
  14. Dawn Nudi says

    September 26, 2024 at 2:06 pm

    5 stars
    Used it for cupcake filling and added some to buttercream for a chocolate salted caramel cupcake. Holy cow! So delicious. It’s perfect for what I needed!!!

    Reply
  15. Karen E Strauss says

    August 14, 2024 at 2:08 pm

    5 stars
    Would this work for macaron filling without a buttercream or ganache dam? Thank you.

    Reply
    • Whitney says

      August 17, 2024 at 8:43 am

      Hi Karen! It will work beautifully as a macaron filling. Enjoy!

      Reply
Newer Comments »

Leave a Reply Cancel reply

Your email address will not be published. Required fields are marked *

Recipe Rating


Next Post >

The Best Baking Deals for Prime Day 2024

Primary Sidebar

Welcome to Sugar & Sparrow

Welcome to Sugar & Sparrow

Helping you whip up pretty desserts with confidence and creativity. And hopefully sharing a few laughs with you along the way!

Learn More

Connect

let’s bake!

Get my very best recipes, baking tips, and decorating tutorials sent to your inbox

Featured Posts

strawberry swirled no-bake cheesecake topped with strawberries

No-Bake Marbled Strawberry Cheesecake

nutella buttercream recipe by sugar and sparrow

Nutella Buttercream Recipe

peach filling recipe for cakes and cupcakes

Perfectly Thick Peach Filling

Search

Archives

Follow Along

@sugarandsparrowco

SALTED CARAMEL BUTTERCREAM ✨I could eat this salty SALTED CARAMEL BUTTERCREAM ✨I could eat this salty-sweet caramel frosting by the spoonful but it’s absolutely delicious on cakes, cupcakes, macarons, and more 🙌🏽 I use my homemade EASY salted caramel recipe here but you can use any salted caramel sauce that you love.⁣

✨Full recipe (including homemade salted caramel) + cake pairing suggestions are on my blog at https://sugarandsparrow.com/salted-caramel-buttercream-recipe/ 
⁣
SALTED CARAMEL BUTTERCREAM⁣
Yield: 2.5 Cups ⁣
⁣
INGREDIENTS⁣
1 Cup (226g) unsalted butter, room temperature⁣
3 1/2 Cups (420g) powdered sugar⁣
2 tsp vanilla extract⁣
1/2 Cup (120ml) salted caramel sauce, room temperature⁣
Pinch of salt⁣
⁣
INSTRUCTIONS:⁣
1. In a stand mixer fitted with the paddle attachment, whip the butter on high until it’s creamy and light in color, 5-6 minutes. ⁣
2. Turn the mixer to low and add the powdered sugar a few cups at a time, scraping down the bowl and paddle after each interval.⁣
3. With the mixer still on low, mix in the vanilla extract, salted caramel, and a pinch of salt. Continue mixing on low speed until fully combined. ⁣
⁣
#saltedcaramel #caramel #cakedecorating #frosting #buttercream
NO-CHURN BERRY CRISP ICE CREAM✨you don’t need any NO-CHURN BERRY CRISP ICE CREAM✨you don’t need any fancy equipment to whip up this delicious ice cream that tastes JUST like berry crisp a la mode! I layered my favorite 3-ingredient no-churn vanilla ice cream base with ribbons of homemade berry filling + buttery oat streusel in every bite. Even if you’ve never made ice cream from scratch before, I promise you can master this recipe!! 
 
🍦Full recipe linked in my bio or find it at https://sugarandsparrow.com/no-churn-berry-crisp-ice-cream/

#nochurnicecream #icecream #icecreamlover #berries #summerdessert
STRAWBERRY SHEET CAKE 🍓based on my favorite strawb STRAWBERRY SHEET CAKE 🍓based on my favorite strawberry layer cake recipe, this sheet cake version is so fun to decorate + such a crowd pleaser! I love using a combination of fresh and freeze-dried strawberries to create the most powerful authentic flavor ✨
 
🍓Full recipe (with strawberry buttercream) at https://sugarandsparrow.com/strawberry-sheet-cake-recipe/
⁣ 
STRAWBERRY SHEET CAKE⁣ 
Serves 24
⁣ 
INGREDIENTS⁣ 
1 Cup (12oz) fresh strawberries, pureed ⁣ 
3/4 Cup (180ml) whole milk, room temp⁣ 
2 1/2 Cups (265g) sifted cake flour⁣ 
2 tsp baking powder⁣ 
1/4 tsp baking soda⁣ 
1/2 tsp salt⁣ 
3/4 Cup (170g) unsalted butter, room temp⁣ 
1 2/3 Cups (350g) granulated sugar⁣ 
3 large eggs, room temp⁣ 
1/3 Cup (75g) sour cream, room temp⁣ 
2 tsp pure vanilla extract⁣ 
1-2 drops pink food coloring (optional)⁣ 
⁣ 
INSTRUCTIONS⁣ 
1. Simmer the strawberry puree in a saucepan over medium-low heat for 30-35 minutes, stirring occasionally. At this point the puree should have reduced from 1 Cup to 1/2 Cup (if you have more, keep cooking!). Refrigerate until room temp, then whisk together with the whole milk and set aside.⁣ 
2. Preheat the oven to 350ºF. Grease and line a 13×9 inch baking pan. 
3. In a medium bowl, whisk together the sifted cake flour, baking powder, baking soda, and salt. Set aside. ⁣ 
4. In the bowl of a stand mixer with the paddle attachment, whip the butter on high until creamy, 2 min. Add the sugar and beat with the butter until light and fluffy, 2 min. Turn the mixer to low and add the eggs one at a time. Add the vanilla and sour cream, then turn the mixer to high and beat for 1 minute.⁣ 
5. With the mixer on low, add all of the dry ingredients at once until just combined, then add the strawberry milk mixture and pink food coloring (if using) until just combined. Give the batter a few stirs by hand to make sure everything is incorporated without over-mixing. ⁣ 
6. Pour batter into the prepared cake pan and bake for 35-40 minutes. ⁣ Cool completely to room temperature before topping with strawberry buttercream (full recipe at the li
COOKIES & CREAM ICE CREAM CAKE 🤎 If you’re an Oreo COOKIES & CREAM ICE CREAM CAKE 🤎 If you’re an Oreo lover, this is your sign to make an ice cream cake this summer: no-churn cookies & cream ice cream set on an Oreo cookie crust, topped with hot fudge and whipped cream frosting. The perfect amount of Oreos in EVERY BITE! 

Full recipe link in my bio + at https://sugarandsparrow.com/cookies-and-cream-ice-cream-cake/ 

OREO CRUST
22 Oreo cookies
5 Tbsp melted butter

ICE CREAM LAYER
2 Cups (480ml) heavy whipping cream, cold
2 tsp pure vanilla extract
14 Oz sweetened condensed milk
15 Oreo cookies, roughly chopped

TOPPINGS
12.8 Oz jar of hot fudge
Whipped cream frosting (see full recipe link)
4 Oreo cookies, chopped

INSTRUCTIONS
1. Mix together the Oreo crust ingredients and pack tightly into the bottom of a 9-inch springform pan. Freeze while you make the ice cream.
2. In a chilled bowl, whip the heavy cream and vanilla to stiff peaks. Fold in the sweetened condensed milk until uniform, then fold in the chopped Oreos. Pile the ice cream on top of the Oreo crust, smooth it down, cover and freeze overnight.
3. When the ice cream layer is set, top with the hot fudge, whipped cream frosting, and more chopped Oreos. Store in the freezer until ready to serve! 

#oreocake #icecreamcake #nochurnicecream #birthdaycake #cookiesandcream
EASY OREO ICEBOX CAKE (recipe below) 🤎 You only ne EASY OREO ICEBOX CAKE (recipe below) 🤎 You only need 4 ingredients for this recipe and it sets into the perfect summer dessert in the refrigerator overnight! It’s 7 alternating layers of Oreos and homemade whipped cream + every bite tastes like a perfect milk-dunked Oreo in the very best way ✨
 
Full recipe at https://sugarandsparrow.com/oreo-icebox-cake/ 
 
INGREDIENTS: 
2 Cups (480ml) cold heavy whipping cream 
1/4 Cup (30g) powdered sugar 
1 tsp pure vanilla extract 
36 Oreo cookies 
 
INSTRUCTIONS: 
1. Add the heavy whipping cream, powdered sugar, and vanilla extract into a chilled mixing bowl. Using the whisk attachment on your stand mixer or a hand mixer, beat the ingredients until stiff peaks form. 
2. Line a loaf pan with plastic wrap, then add a thin layer of the whipped cream onto the bottom of the pan. Add a layer of Oreo cookies on top (cut some of the Oreos to fit as needed). 
3. Add 1/3 of the remaining whipped cream on top of the Oreo layer, followed by a second layer of Oreos. Repeat until you have seven total layers, ending with whipped cream. 
4. Cover the cake and refrigerate overnight, then enjoy!  
 
#oreocake #vintagecake #nobakecake #oreo #nobake

Footer

On the Blog

  • Cake Basics
  • Recipes
  • Tutorials

Info

  • About
  • Privacy Policy & Disclosure

stay in the know

Copyright © 2026 · Theme by Sugar & Sparrow