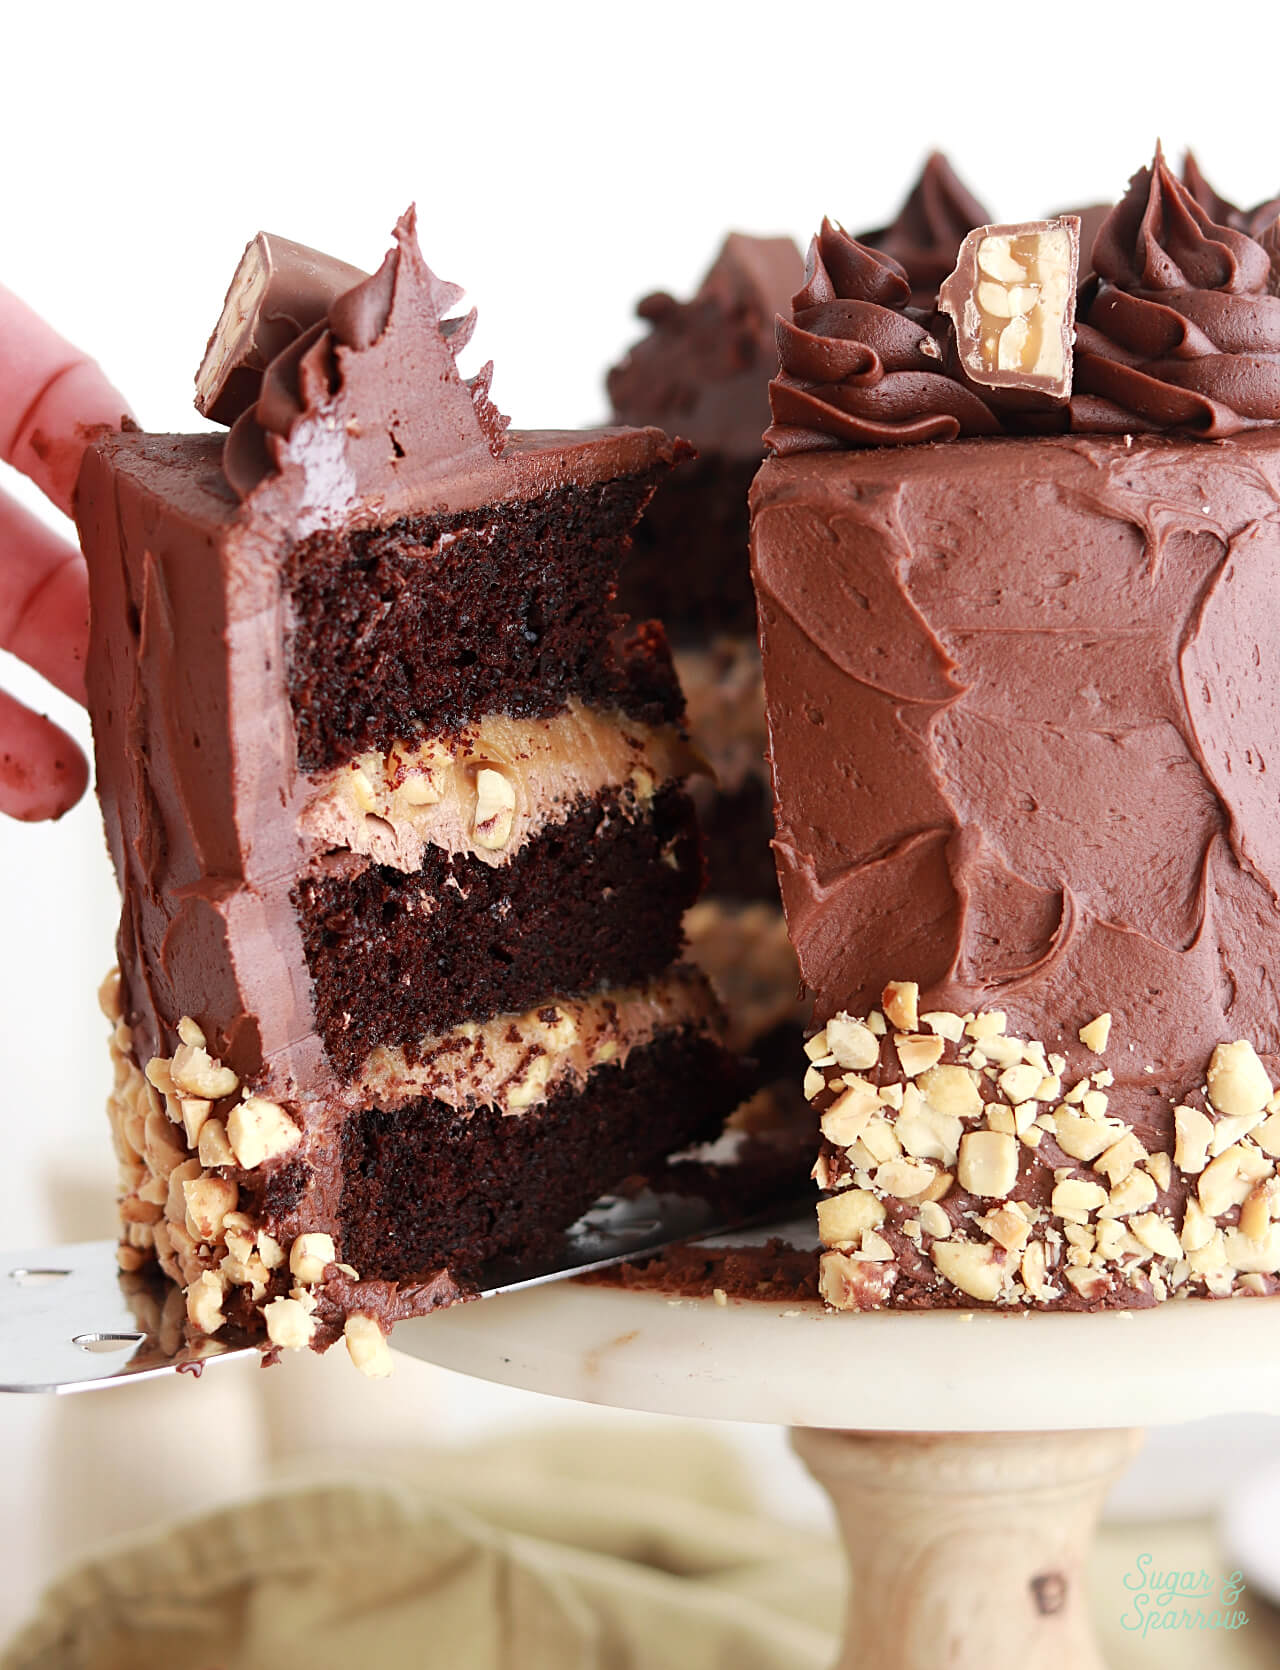
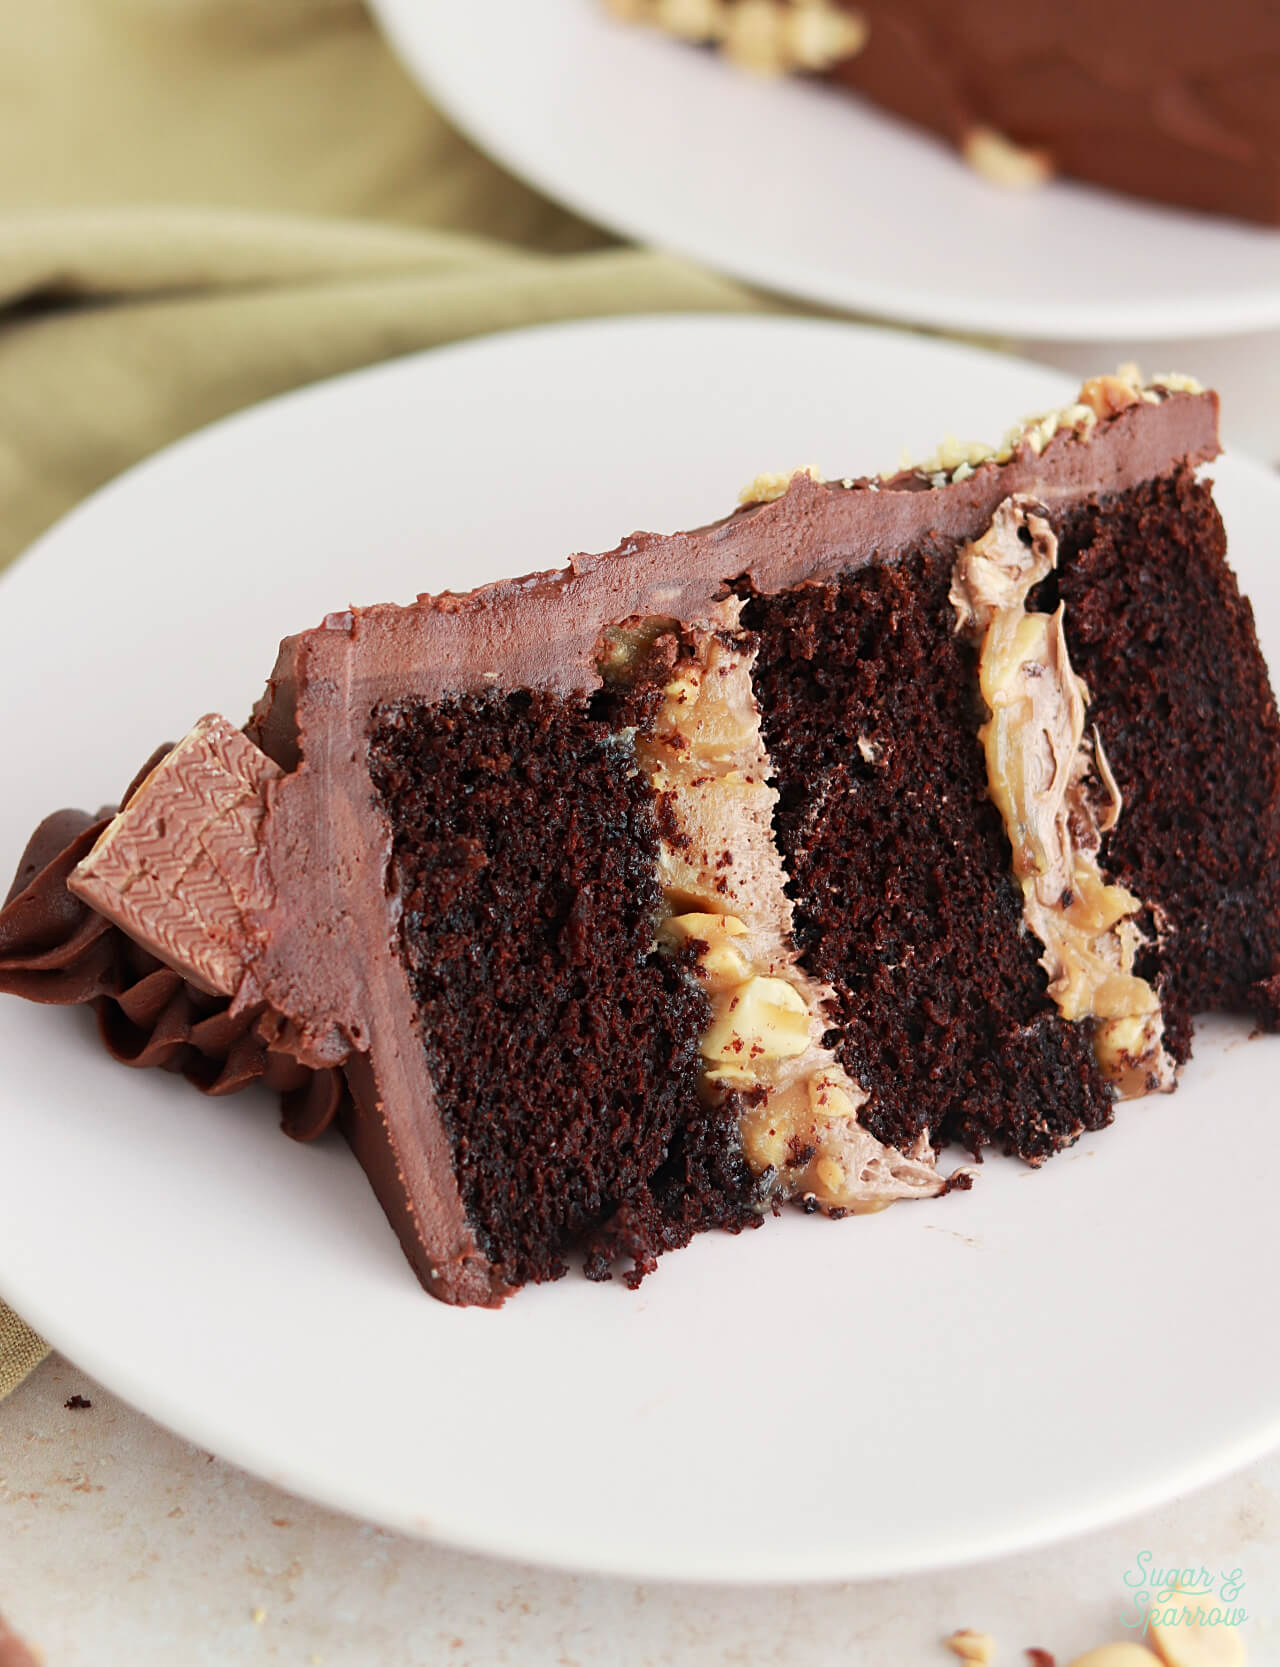
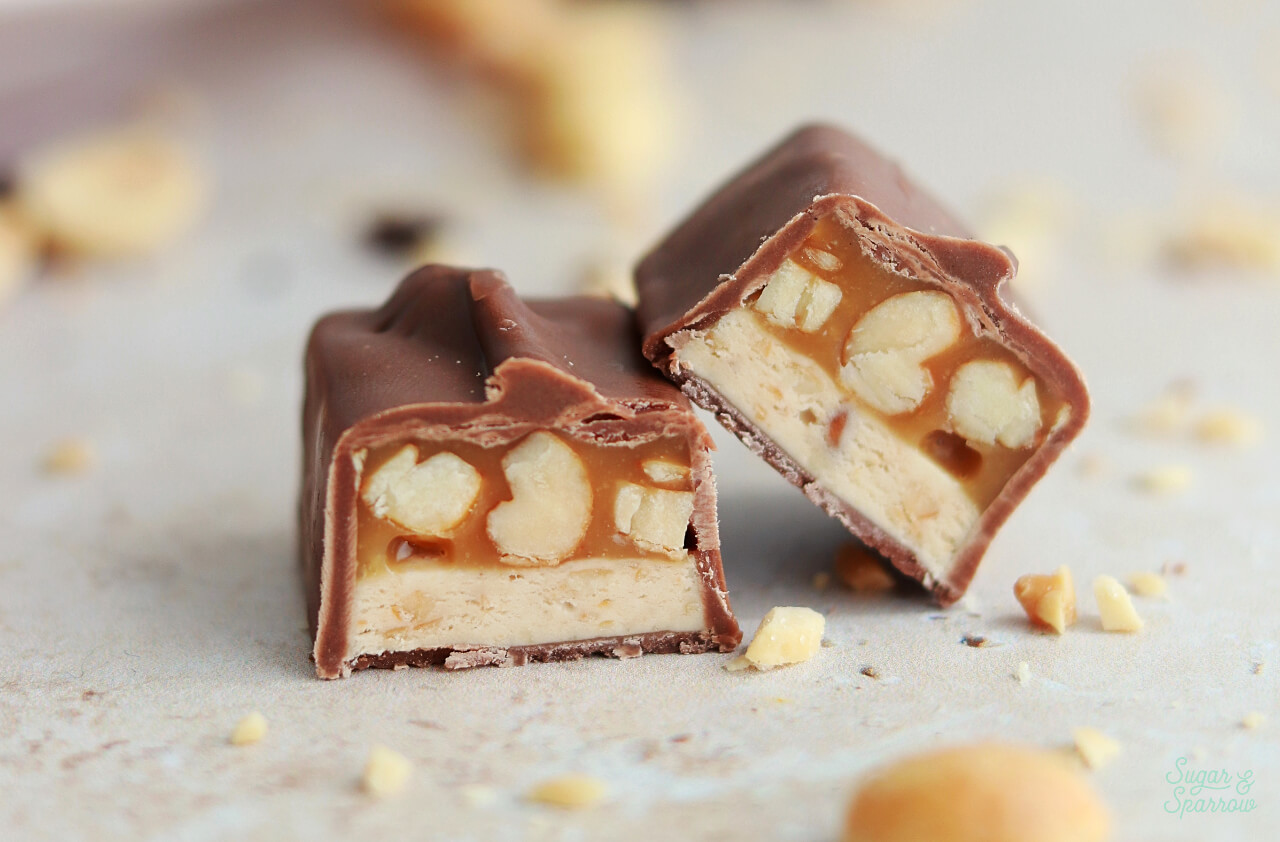
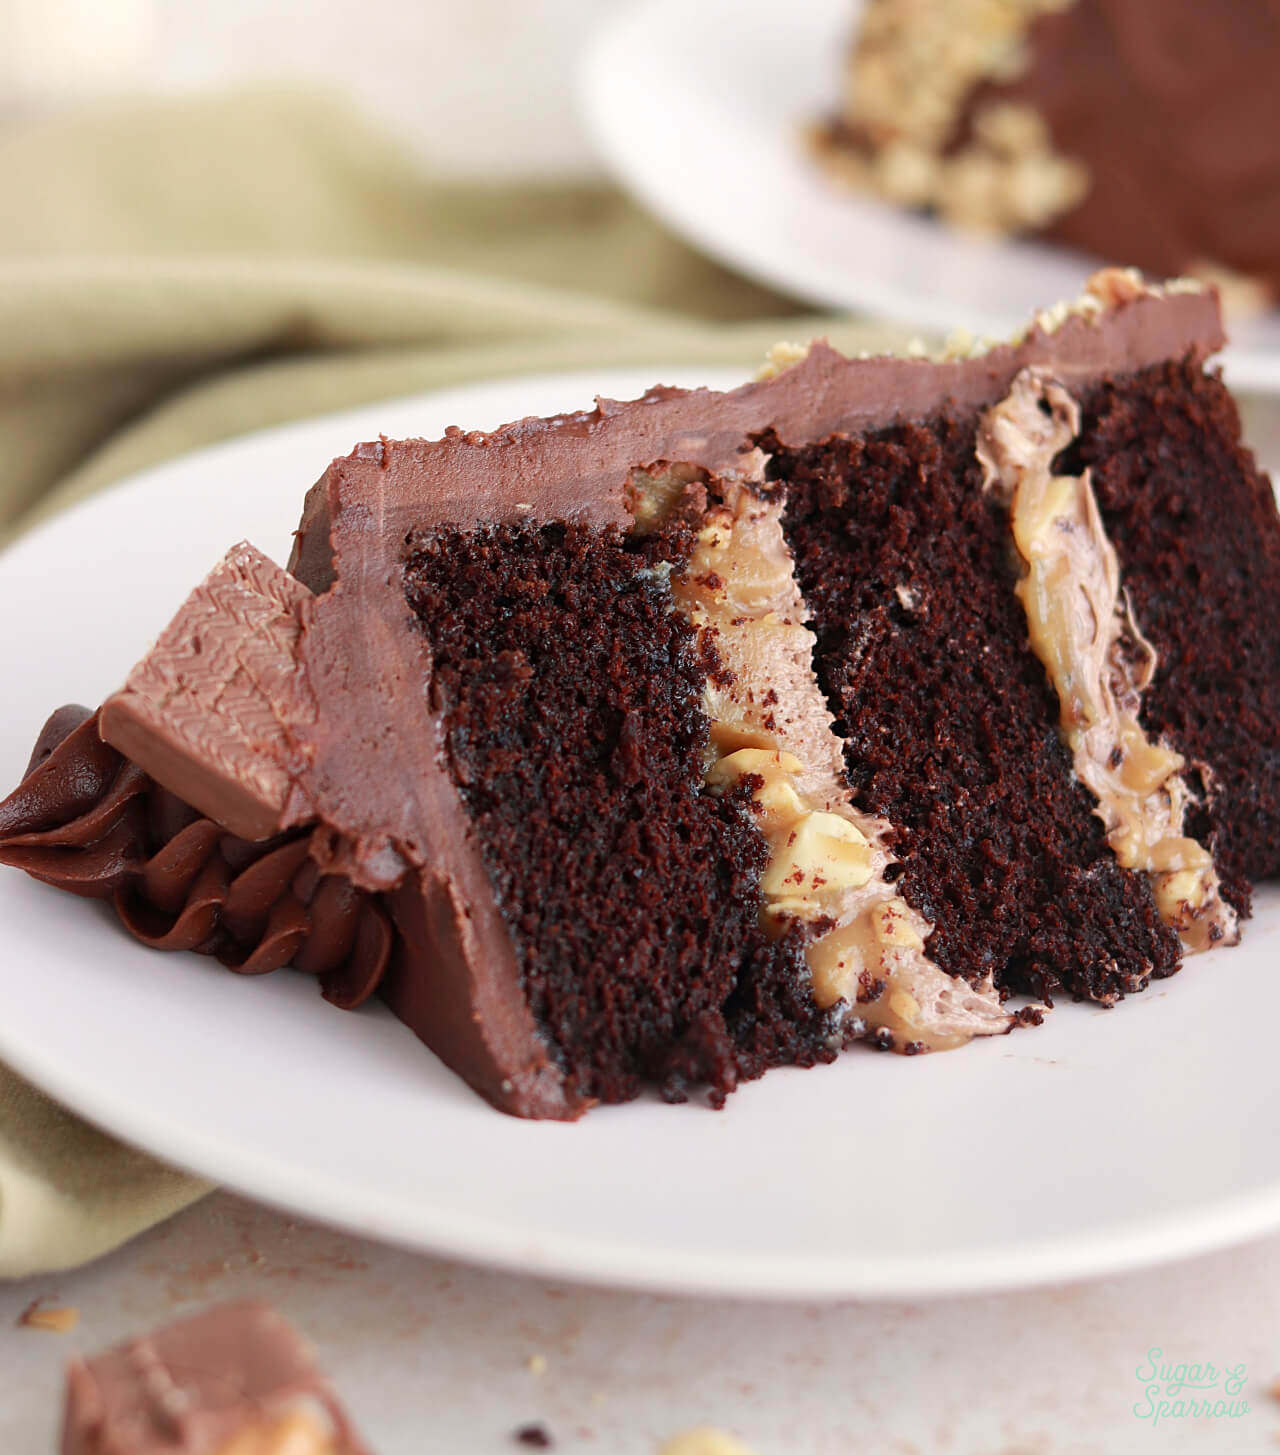
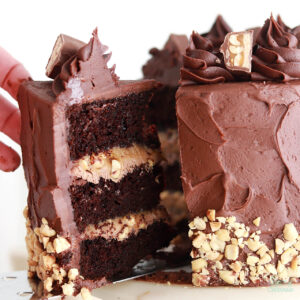
Let me get right to the point: this Snickers cake is my favorite cake flavor I’ve ever made thus far. I am truly obsessed! It’s layers of moist chocolate cake, chocolate peanut butter nougat, and thick peanut caramel, all wrapped up in chocolate buttercream frosting. For the layers, I took inspiration directly from a Snickers bar cross-section and with all of the elements together, this tastes just like Snickers in cake form. It’s sure to satisfy any Snickers lover!
Moist & Decadent Chocolate Cake Layers
This Snickers cake starts with my favorite one-bowl chocolate cake recipe which is my forever go-to. It’s soft and moist, packed with rich chocolate flavor, and so easy to make with ingredients you probably already have in your pantry. This cake lends a beautiful chocolate flavor as a base for this Snickers cake and the most wonderful texture.
If you need an egg-free or vegan version, I do have this eggless chocolate cake recipe that would work wonderfully as well!
Homemade Peanut Caramel + Soft Chocolate Peanut Butter Nougat Fillings
Just like you’d see if when you bite into a Snickers bar, on top of the chocolate peanut butter nougat is a layer of thick caramel filling that’s studded with salted peanuts. I used my thick caramel filling recipe as a base for this before folding in some roughly chopped salted peanuts and the results were just perfect. I love this recipe because it’s really easy to make and results in a caramel that’s nice and thick for filling cakes and holds its shape well between the cake layers, yet stays soft even when refrigerated. Ideal!
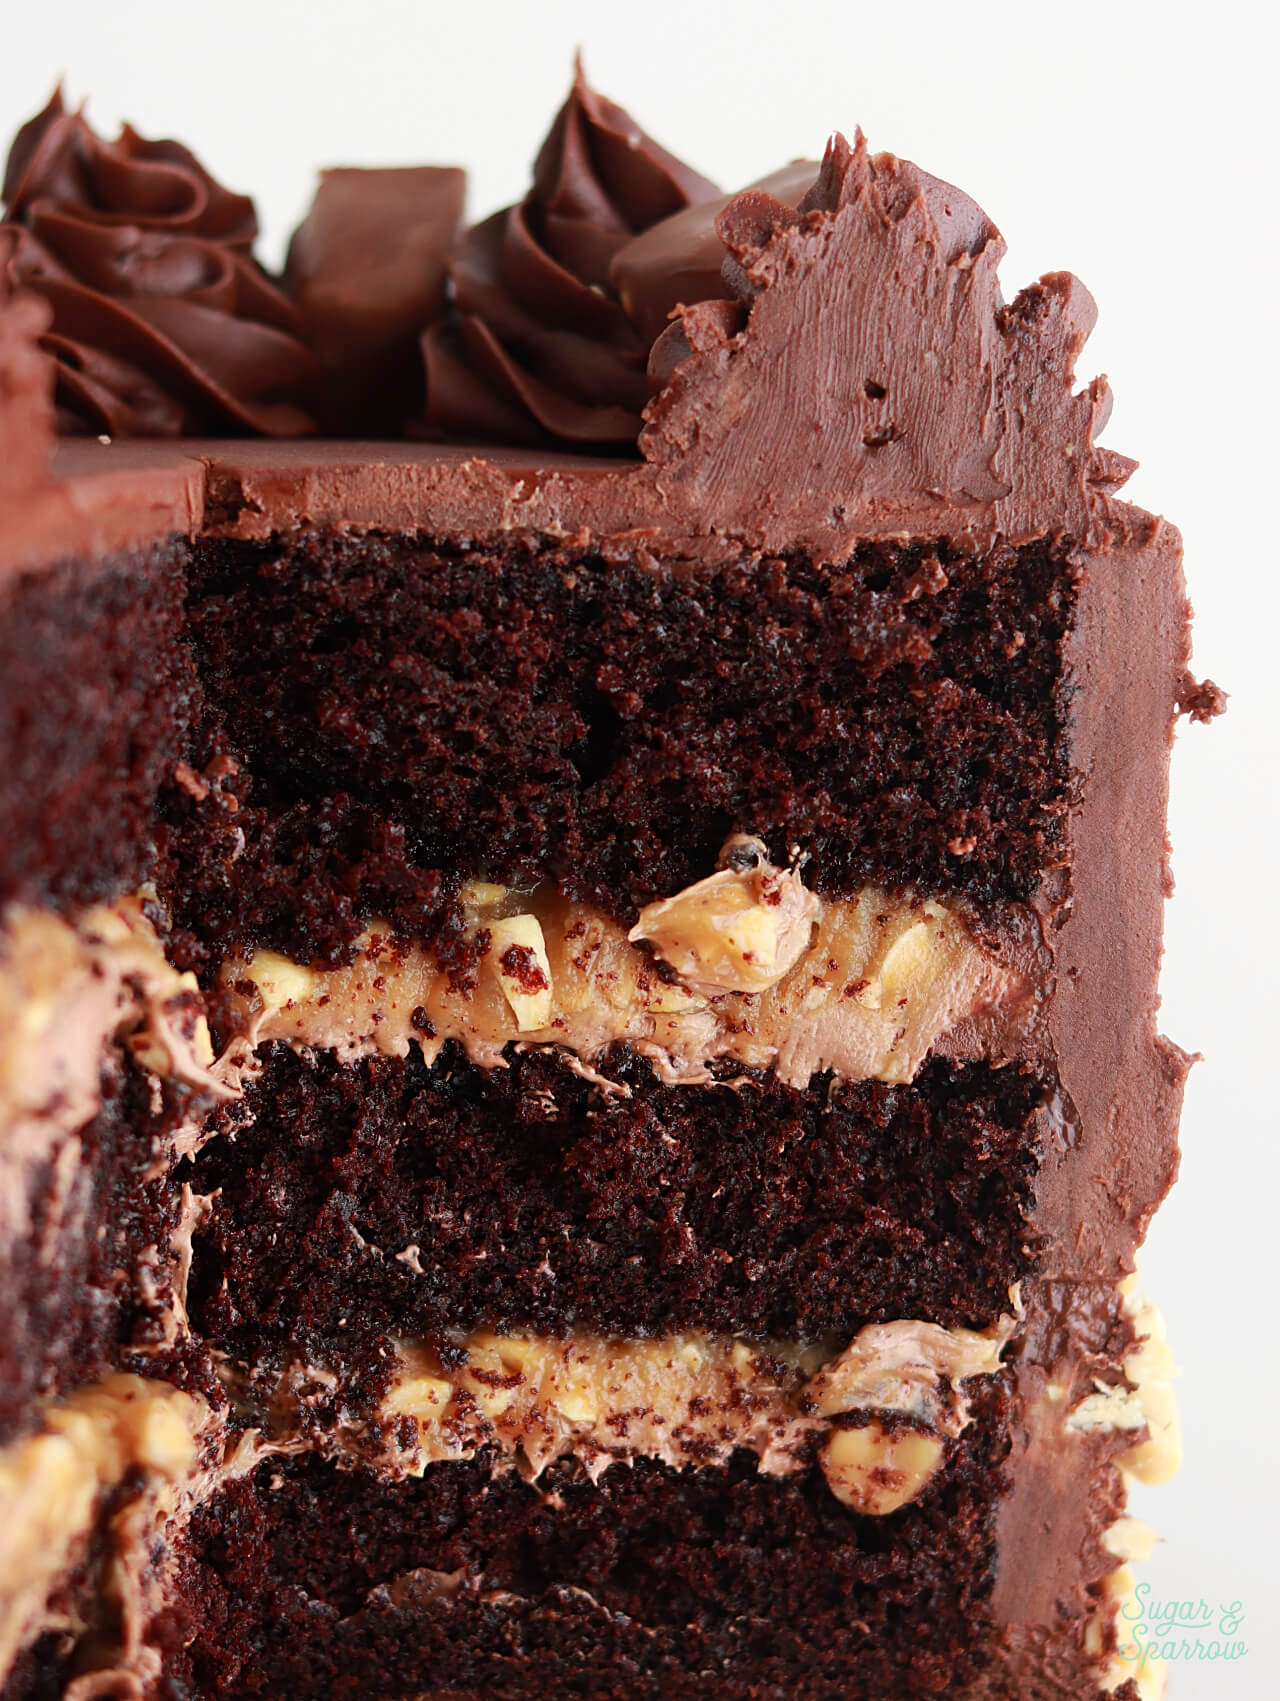
For the nougat layer, I already knew I wanted to use the chocolate nougat filling recipe I created for my Milky Way Cake. It’s a simple recipe that’s similar to buttercream, but with marshmallow creme added for an amazing nougat texture and flavor. There’s also a little bit of cocoa powder to add the slightest hint of chocolate. With this recipe as a base, I added a few tablespoons of peanut butter to make a chocolate peanut butter flavor and when I tasted it during testing I pretty much danced around the kitchen. It is so, so good! And really sets the stage for the peanut caramel layer.
How to Assemble a Snickers Cake
Here’s how to create the perfect layers with all of these Snickers cake elements:
First, create a buttercream dam using the chocolate buttercream. This means adding the buttercream into a piping bag, snipping off about ½ inch opening, and piping a circle around the edge of the cake. I like to add another circle on top to make the dam higher.
Next, add a layer of chocolate peanut butter nougat, filling the dam about half way and smoothing it down.
Add a layer of peanut caramel on top and smooth that down until it’s level with the top of the buttercream dam. Place the next cake layer on top.
Repeat the process of piping the dam and adding the fillings with any additional layers before placing the final cake layer on top, upside down.
To make sure your fillings don’t overflow and your layers don’t shift while you’re decorating, I recommend wrapping the cake in plastic wrap at this point and refrigerating it for about 20-30 minutes to let the fillings firm up. Then you can crumb coat and decorate, resting assured that your fillings are safe inside.
I will admit I didn’t do the plastic wrap step and it was a little stressful crumb coating the cake while the layers were trying to get lopsided on me. Everything turned out in the end, but to save you that stress, don’t skip the plastic wrap step!
How to Decorate a Snickers Cake
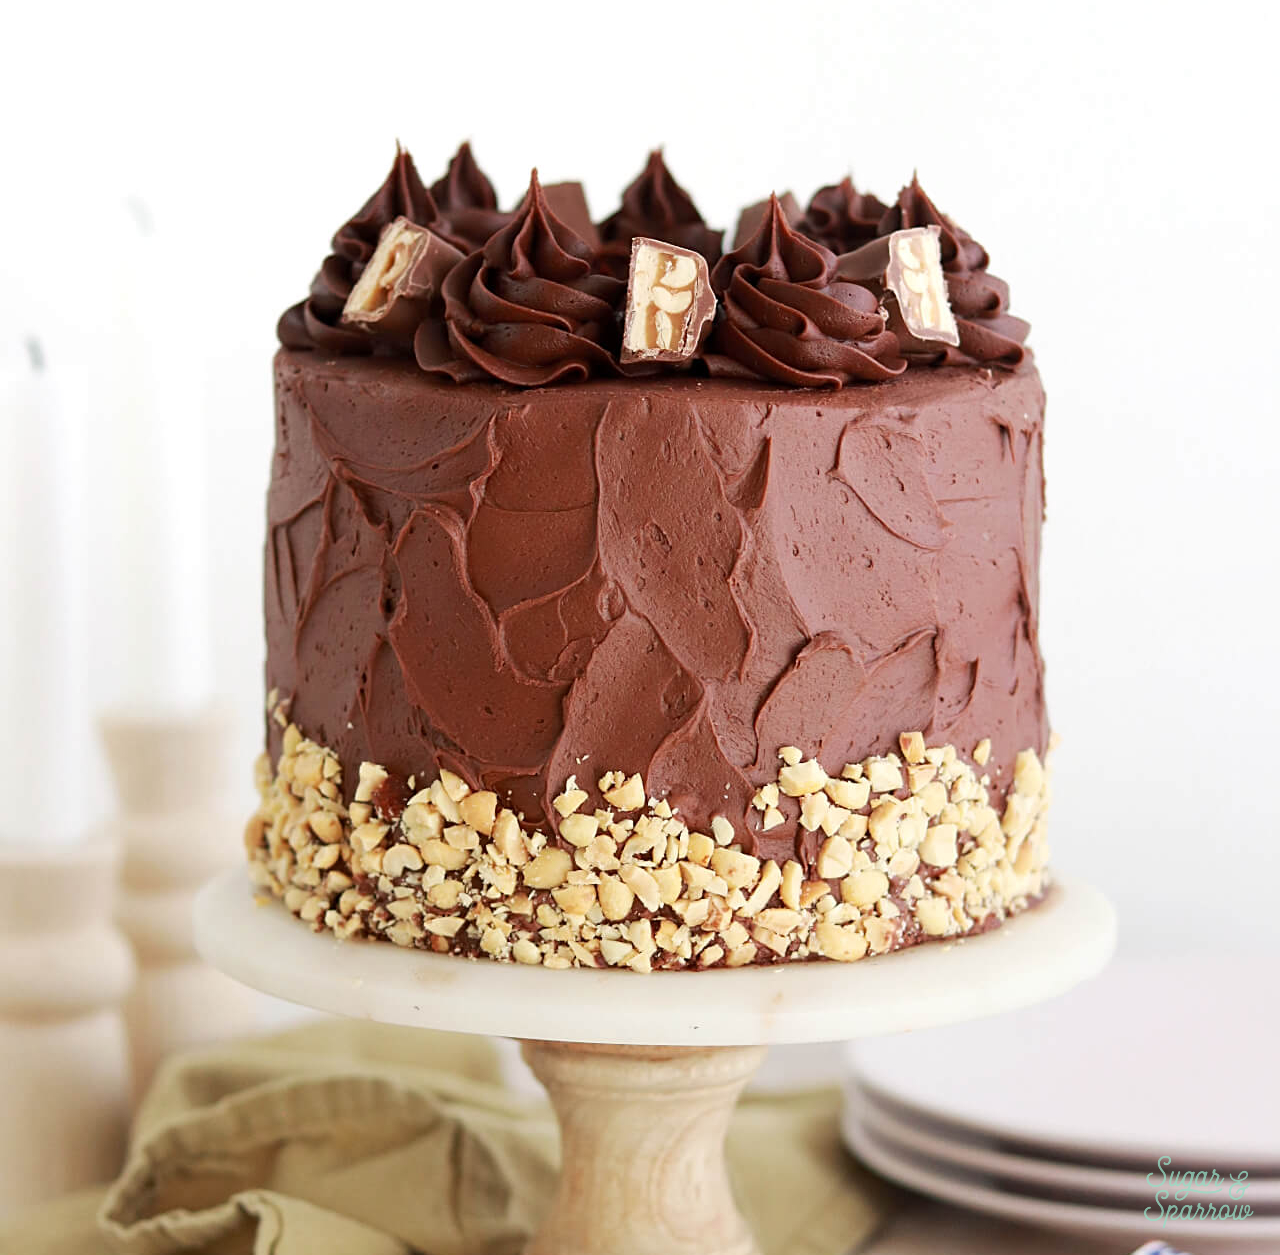
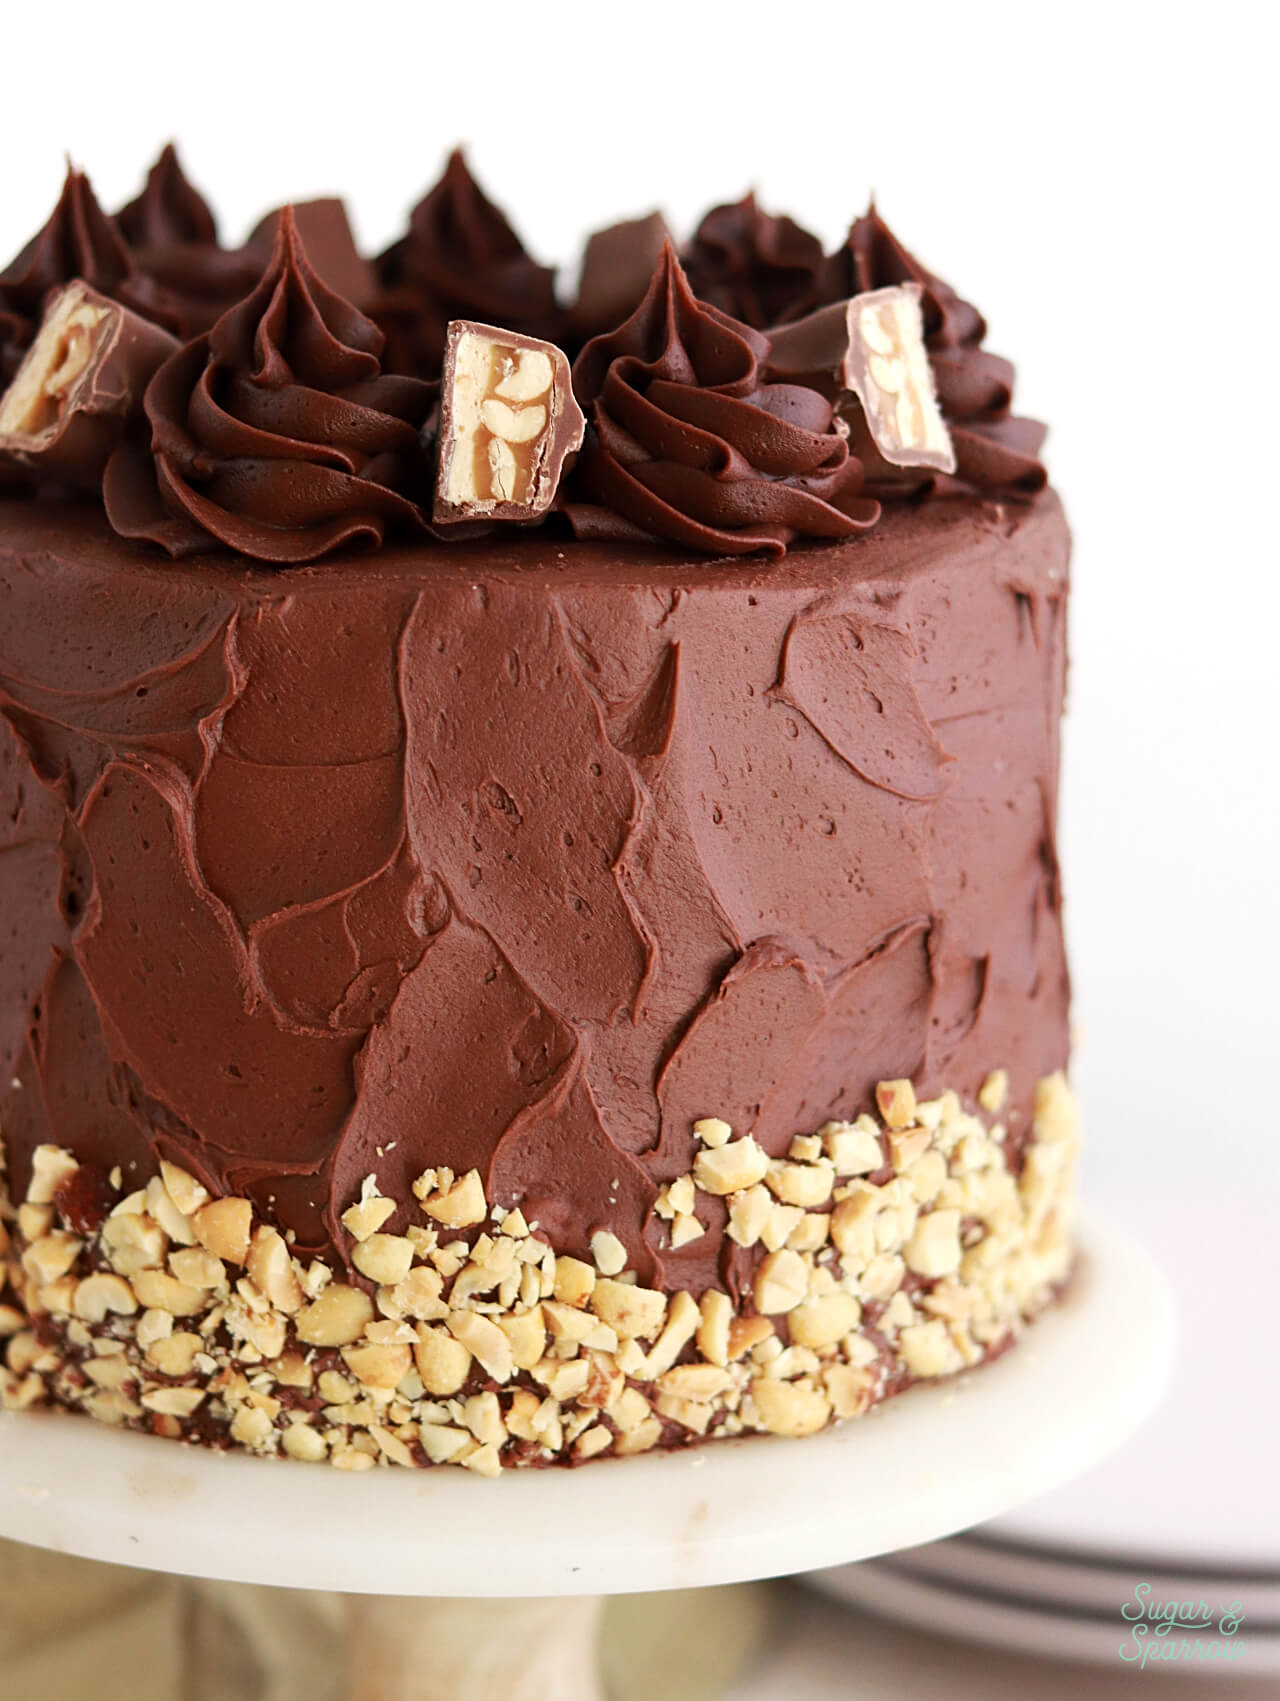
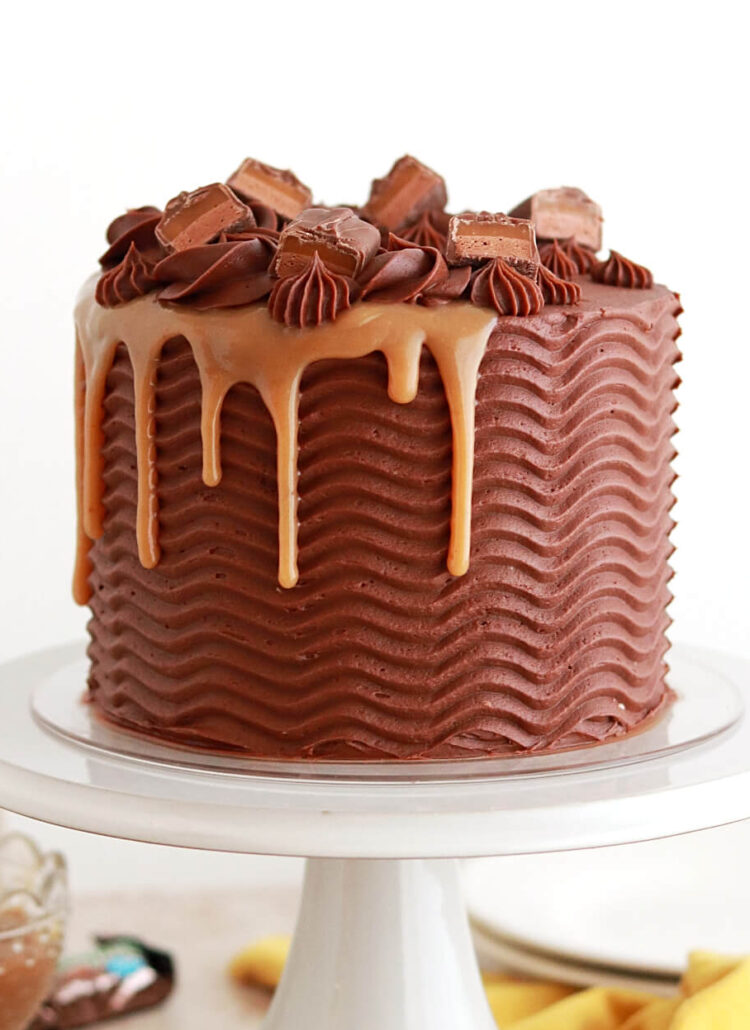
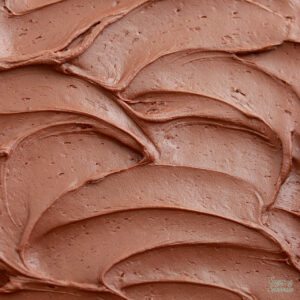
Once I crumb coated the cake with chocolate buttercream and refrigerated it until firm, I used the chocolate buttercream to frost the cake with a rustic finish using a small icing spatula. I thought about adding more caramel on top but ultimately decided against it. I didn’t want it to look too much like my Twix cake.
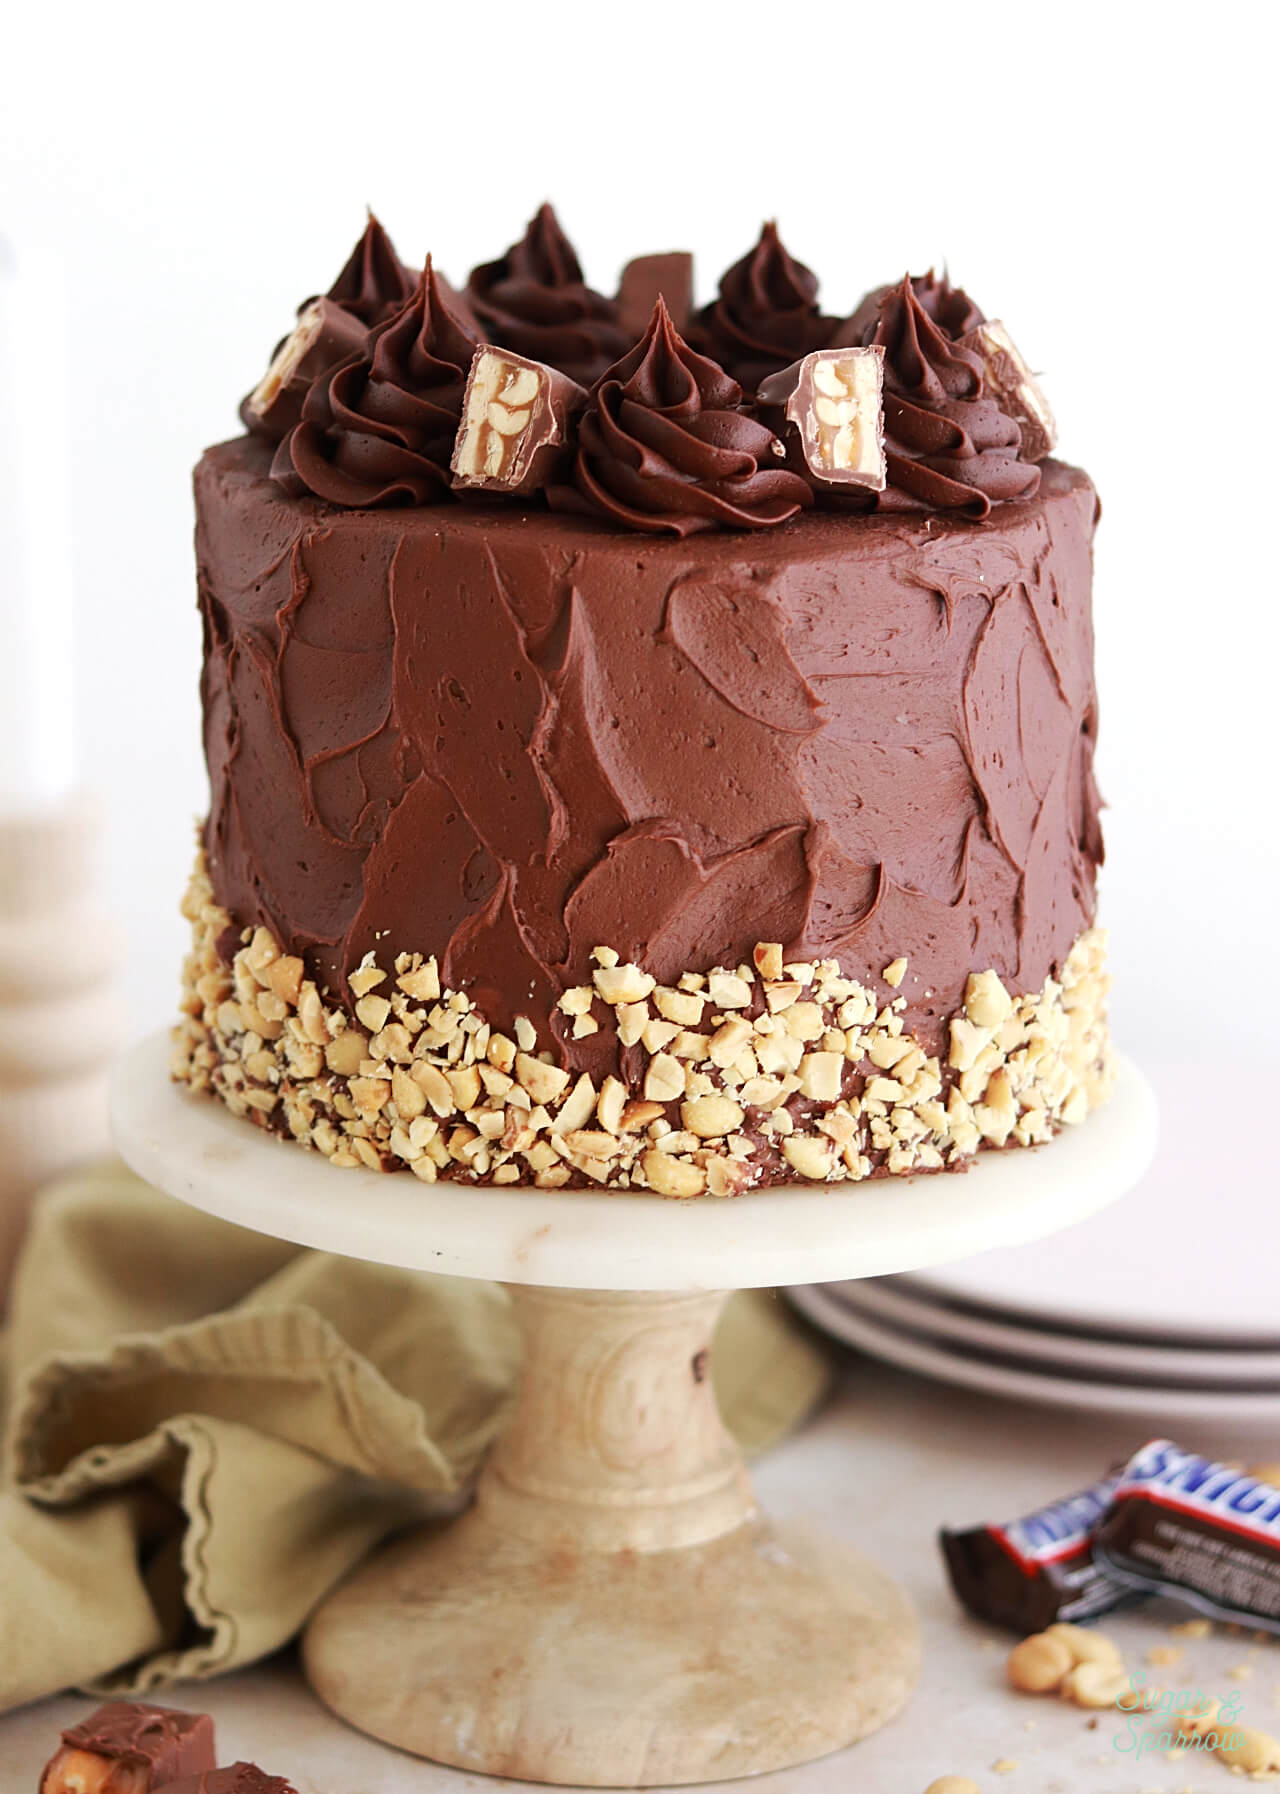

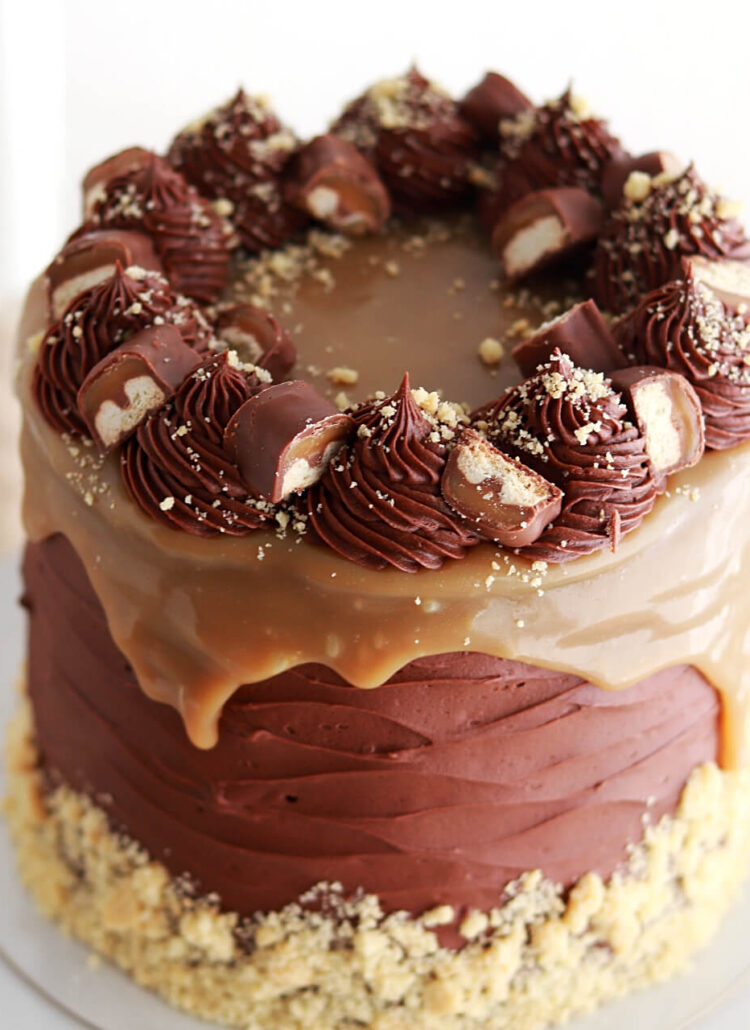
Instead, I added some chopped peanuts around the base of the cake and topped it with some halved Fun-Size Snickers Bars and buttercream swirls which I piped with Wilton Tip 1M.
Other Candy Bar Cake Recipes to Try
If you end up loving this Snickers cake (trust me, you will!), I’ve got more candy bar cakes that are worth adding to your baking list! I love candy bars, and it’s been so much fun to start translating the flavors into cake. Here are my favorites so far:
What candy bar cake do you think I should make next? Let me know in the comments below!
The Ultimate Snickers Cake
Ingredients
Chocolate Cake
- 2 Cups (265g) all-purpose flour
- 1 2/3 Cups (340g) granulated sugar
- 2/3 Cup (60g) unsweetened natural cocoa powder
- 2 tsp baking soda
- 1 tsp baking powder
- 1/2 tsp salt
- 1/2 Cup (120ml) vegetable oil
- 2 large eggs, room temperature
- 1 1/2 tsp pure vanilla extract
- 1 Cup (240ml) full-fat buttermilk* DIY recipe in notes
- 1 Cup (240ml) hot coffee or hot water
Peanut Caramel Filling
- 1/4 Cup (57g) unsalted butter
- 1/2 Cup (100g) packed light brown sugar
- 1/3 Cup (105g, 80ml) sweetened condensed milk
- 2 Tbsp (30ml) light corn syrup or golden syrup
- 3 Tbsp (45ml) heavy whipping cream
- 1/2 tsp pure vanilla extract
- 1/2 tsp salt
- 1/2 Cup (73g) salted peanuts, chopped
Chocolate Peanut Butter Nougat Filling
- 4 Tbsp (56g) unsalted butter, room temperature
- 2/3 Cup (70g) powdered sugar
- 2 Tbsp (10g) unsweetened natural cocoa powder
- 1/2 Cup (132g) Jet-Puffed Marshmallow Creme
- 2 Tbsp creamy peanut butter
- 1/2 tsp pure vanilla extract
Chocolate Buttercream Frosting
- 1 1/2 Cups (339g) unsalted butter, room temperature
- 4 1/2 Cups (540g) powdered sugar
- 3/4 Cup (68g) natural unsweetened cocoa powder
- 1/4 Cup (60ml) whole milk, room temperature
- 1/4 tsp salt
- 1 Tbsp pure vanilla extract
Additional Garnish
- 3 fun-sized Snickers candy bars, halved
- 1/2 Cup (73g) salted peanuts, chopped
Instructions
Make the Chocolate Cake
- Preheat the oven to 350ºF and prepare three 6-inch or two 8-inch cake pans by spraying the sides with cooking spray and fitting the bottoms with a wax paper or parchment cake circle.
- Place all of the dry ingredients into the bowl of a stand mixer and stir on low for 30 seconds to fully combine them. Add the vegetable oil, eggs, vanilla, and buttermilk and mix on low until just combined. With the mixer still on low, add the hot water in a slow stream, then turn the mixer to medium and beat until smooth, about 2 minutes. The batter will be very thin.
- Pour into prepared cake pans no more than 2/3 full and bake for 32-36 minutes, until a toothpick inserted comes out clean. Cool completely before filling and frosting.
Make the Peanut Caramel Filling
- In a large saucepan over medium heat, add the sweetened condensed milk, butter, brown sugar, corn syrup, heavy whipping cream, and salt. Stir with a rubber spatula constantly until the mixture is fully combined and begins to bubble, about 5 minutes.
- Turn the heat to low and continue stirring until the caramel begins to thicken, 5-7 minutes. If you have a candy thermometer, you’ll want to cook this until it reaches 225F/107C. That is the temperature that will thicken the caramel while keeping it nice and soft at room temperature.
- Remove the caramel from the heat and mix in the vanilla extract, then fold in the chopped peanuts. Pour into a separate container and let the peanut caramel cool completely to room temperature before using it to fill the cake. You can either leave the container on the counter for about 2 hours or speed the cooling process slightly by placing the container in the refrigerator. It will thicken significantly as it cools.
Make the Chocolate Peanut Butter Nougat Filling
- In the bowl of a stand mixer with the paddle attachment or using a hand mixer, whip the butter on high speed until smooth and creamy, about 3 minutes. Add the powdered sugar, cocoa powder, marshmallow creme, peanut butter, and vanilla. Mix on low speed until fully combined, about 2-3 minutes, scraping down the bowl and paddle as needed.
Make the Chocolate Buttercream
- In a stand mixer fitted with a paddle attachment, whip the butter on medium-high speed until creamy and light in color, 4-5 minutes.
- Scrape down the bowl and paddle, then add powdered sugar, cocoa powder, milk, salt, and vanilla extract. Cover the mixer with a clean kitchen towel (to prevent ingredients flying out of the bowl), then turn the mixer to low and mix until all ingredients start to come together.
- Remove the kitchen towel, scrape down the bowl and paddle, then continue mixing on low speed until uniform and smooth, 2-3 minutes.
Assembly
- Once the chocolate cake layers have cooled completely, level and torte each layer to your desired height. Add about 1.5 Cups of chocolate buttercream into a piping bag and snip off about 1/2 inch opening.
- Place the first layer on a turntable and pipe a circle of chocolate buttercream around the edge of the cake layer, then pipe another circle of buttercream on top of the first to make it slightly taller. Fill in the center halfway with the nougat filling and smooth it down. Then, fill nearly to the top of the chocolate buttercream circle dam with the peanut caramel filling. Here's a detailed tutorial on this filling method in case this is your first time working with soft fillings.
- Place the next cake layer on top and repeat the process of piping the chocolate buttercream circle and filling in the center with the nougat and peanut caramel fillings. Place the final layer on top, upside down so that the bottom of the cake layer is the top of the cake. For extra stability, wrap the sides of the cake in plastic wrap and place it in the refrigerator for about 20 minutes to let the fillings and the buttercream dam firm up.
- To create the look pictured, crumb coat the cake with a thin layer of chocolate buttercream and refrigerate for another 10-15 minutes to let the frosting firm up. Then, use the chocolate buttercream to frost a rustic textured finish with a small icing spatula. Add chopped peanuts around the base of the cake, then add the rest of the chocolate buttercream into a piping bag fitted with Wilton Tip 1M and pipe swirls around the top of the cake. Place a halved Fun-Size Snickers Bar between each swirl.
Notes
- The chocolate cake layers can be made ahead and stored at room temperature, covered tightly in plastic wrap, for up to two days. Alternatively, you can cover with plastic wrap and store in the freezer for up to two months before thawing to room temperature.
- The peanut caramel filling can be made ahead and stored in an airtight container in the refrigerator for up to two weeks. When you’re ready to use it, bring the caramel back to room temperature by setting it out on the counter for an hour or so, or heating it in the microwave in 10-second increments until it’s spreadable.
- The chocolate peanut butter nougat filling can be made ahead and stored in an airtight container in the refrigerator for up to two weeks. When you’re ready to use it, bring back to room temperature and re-mix until smooth.
- The chocolate buttercream can be made ahead and stored in an airtight container at room temperature for up to 1 day. Alternatively, you can store it in an airtight container in the refrigerator for up to two weeks. When you’re ready to use it, bring it back to room temperature and rewhip with your stand mixer to bring back to frosting consistency.
Did you make this Snickers cake recipe? Let me know what you think in the comments below, or by tagging me on Instagram! I love to see your creations and hear your feedback.

This cake is insanely good, best I’ve ever had! Thank you so much for the recipe, will be making on repeat for special occasions! Only problem I had was my caramel hardened up too much and I had to microwave before using each time (I left it to cool on the counter) – did I do something wrong here?
I’m so happy this cake was a hit, Lauren! With the caramel, if it boils past 225ºF it will harden more at room temperature. You’ll want to remove the caramel from the heat immediately after it reaches this temperature for best results. Hope this helps for next time!
Once completed, does this cake need to be stored in the refrigerator, or can it be left at room temp for a couple of days?
Hi Jade! This cake should be fine at room temperature for a few days. Enjoy!
Made this cake and it’s delicious and so cute! I ended up putting the cake in the fridge after each layer to firm up the fillings and the dam before adding next layer. It added extra time but saved my cake from bulging and leaking. I already have a request to make this cake for my nieces birthday. Thanks for a great recipe. And BTW I could eat the peanut caramel filling and nougat filling by themselves, they are dangerously good!
I’m so happy you loved this recipe, Tiphanie! And I wholeheartedly agree about the peanut caramel and nougat!
Recipe looks delicious. Can the peanut butter be substituted with something else? I am allergic to peanuts. I can substitute pecans for the peanuts but was wondering about the nougat.
Hi Lynn! You can actually omit the peanut butter and still have a delicious nougat filling! Without the peanut butter, it’s the same chocolate nougat filling I use for my Milky Way Layer Cake: https://sugarandsparrow.com/milky-way-cake-recipe/ enjoy!
Hi! We don’t have marshmallow creme in the UK however we do have Marshmallow fluff. Is that the same ?
Hi Zita! Marshmallow Fluff can definitely be used as a substitute for the marshmallow creme. It’s not exactly the same but similar enough. Enjoy!
It was delicious!
Yay, Patty! I’m so happy to hear that you loved this one!
hey!
what can i use instead of marshmallow creme. is it possible to not use it at all?
Hi there! The marshmallow creme is what makes this nougat-like in consistency. Omitting it will change the texture dramatically. You could substitute it for a homemade version of marshmallow creme like this: https://sugarandsparrow.com/marshmallow-meringue-frosting-recipe/ or swap that entire filling out for something else.
Hi
What brand of cocoa powder did you use in this recipe?
I used Hershey’s cocoa powder but any brand will work (including Dutch process)
Hi! If switching out for Dutch process, do you suggest adjusting the baking soda?
Hi Sandy! There’s no need to adjust the baking soda in this recipe if using Dutch process cocoa. Since there’s baking powder present it doesn’t affect the rise.
This cake looks phenomenal – and I can’t wait to try it!