Of all the candy bars in the world, I have always gravitated toward Twix. It makes a lot of sense since I’m a huge fan of chocolate-caramel anything, and I kindof can’t believe it took me six years to even think of writing a Twix cake recipe. Better late than never, because it turned out absolutely delicious and I’m so proud of the work that went into this recipe. I couldn’t stop opening the fridge a hundred times just to look at it.
This post may contain affiliate links. For more information, see our disclosure policy.
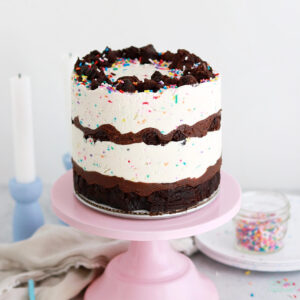
A Twix Bar in Layer Cake Form
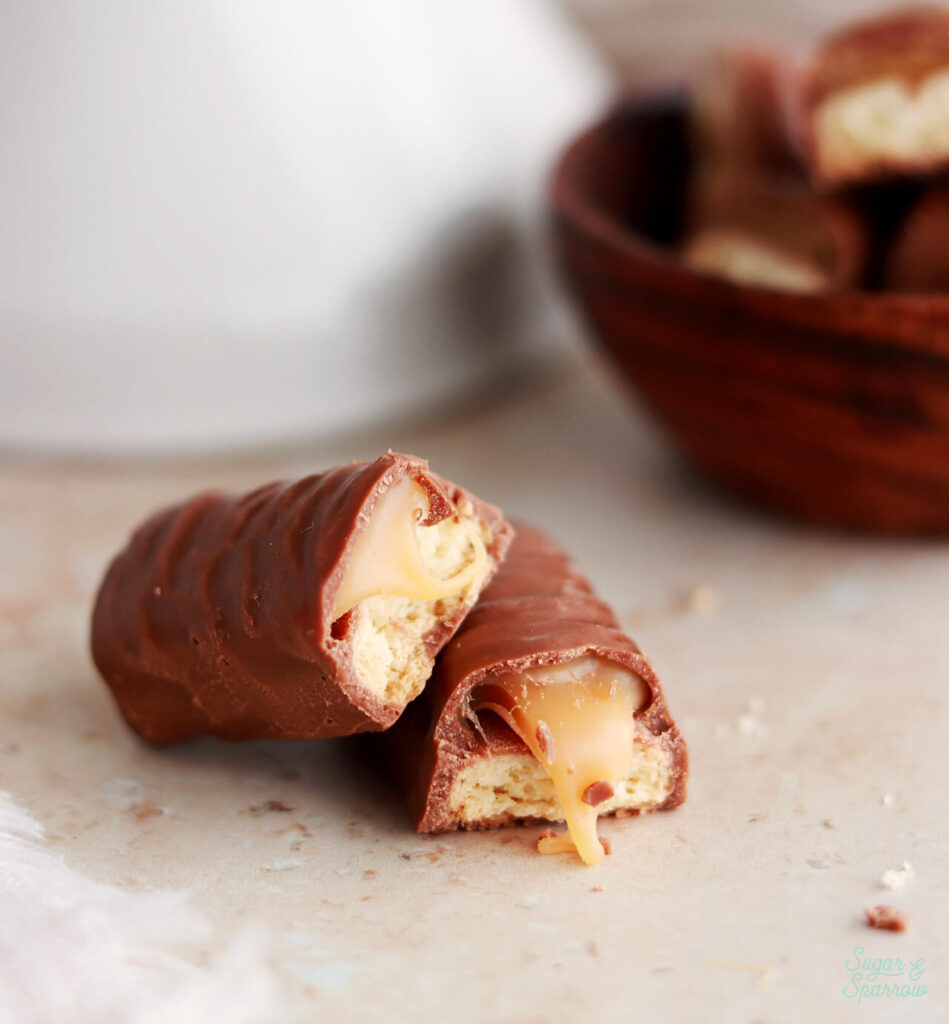
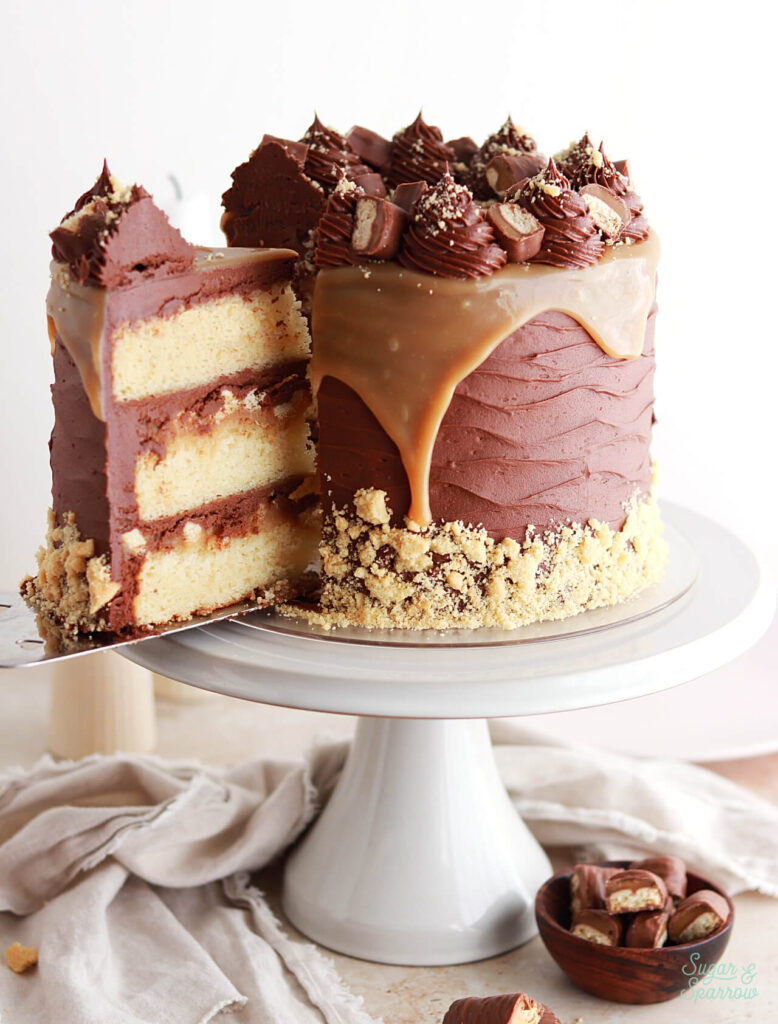
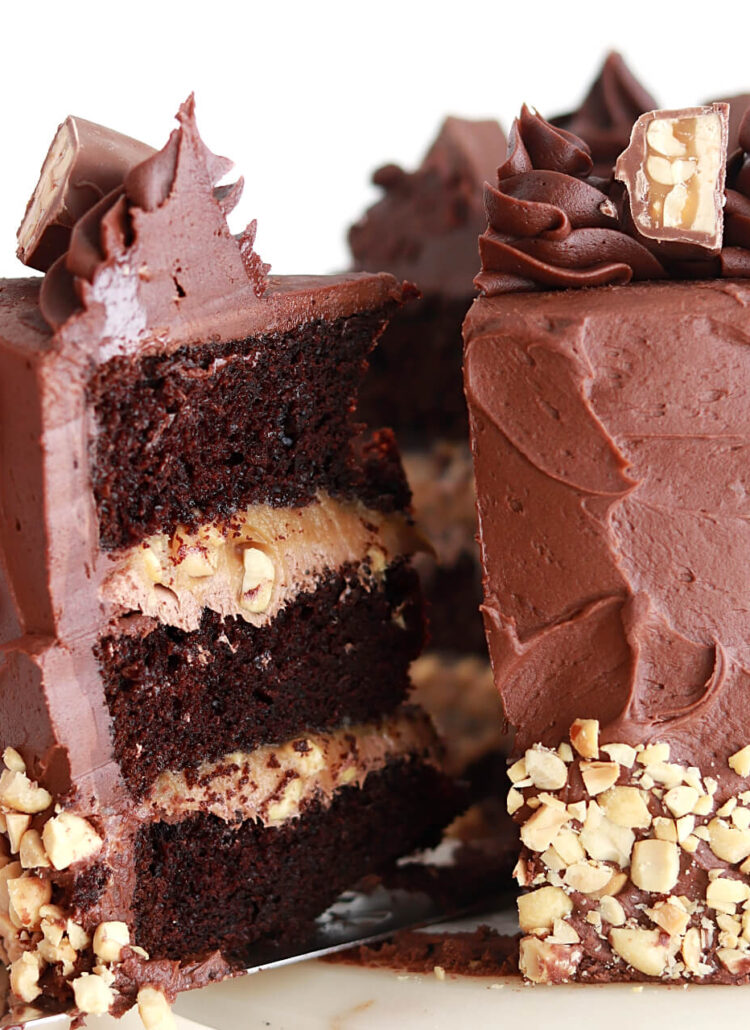
To make this a Twix cake, I wanted to really capture the flavor and texture of a Twix candy bar. It needed the crunch and buttery taste of shortbread cookies, thick and creamy caramel filling, and plenty of chocolate. With all of that in mind, I came up with elements that are simple yet so effective: soft vanilla cake layers, a thick and gooey caramel filling, crumbled shortbread cookies, and lots of my favorite chocolate buttercream.
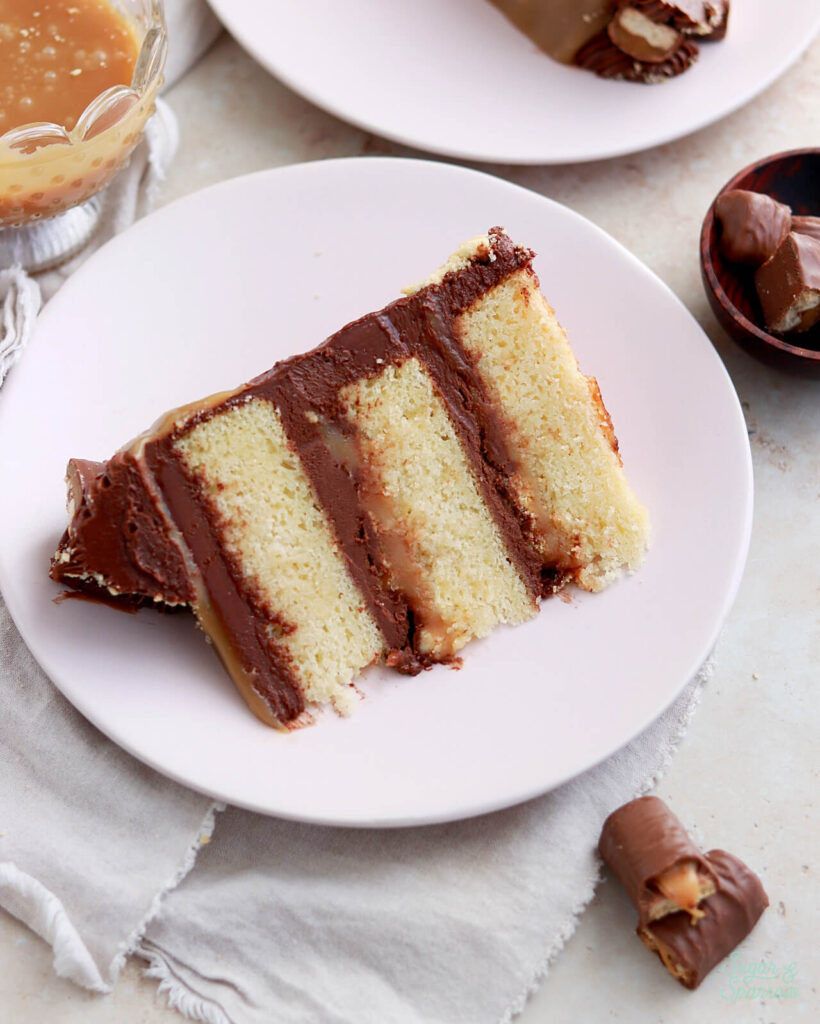
Altogether, these layers have the perfect balance of textures and flavors. To make sure you get a little bit of crunch in every bite, don’t skimp on the shortbread cookie crumbs. More is more when it comes to those (and the caramel, of course).
Thick Caramel Filling
Sometimes I nail a cake recipe on the first try, other times it takes a lot of recipe testing to bring my vision to life. In this case, I wanted this Twix cake to have gooey, thick caramel filling that stays soft (but not chewy) at room temperature and reminded me of the sweet caramel in the candy bar. So I researched a lot and tested recipes, tweaking things until the caramel was exactly how I imagined. I played around with temperature, brown sugar vs. white sugar, different amounts of heavy whipping cream, so many combinations that I had to run back to the grocery store multiple times to get more ingredients and try again.
In other words, I was obsessed with writing the perfect thick caramel cake filling recipe. And guess what? It was worth it!
This caramel filling is super easy to make (nearly fail proof), perfectly sweet, thick and gooey, and ideal for filling cakes. It will seem thin right after you make it, but will thicken into an amazing consistency as it cools. And it’s versatile: it spreads easily in between cake layers and can be thinned slightly to become a beautiful caramel drip for the cake exterior. It’ll be my new go-to any time I need a thick caramel cake filling!
Decorating the Twix Cake
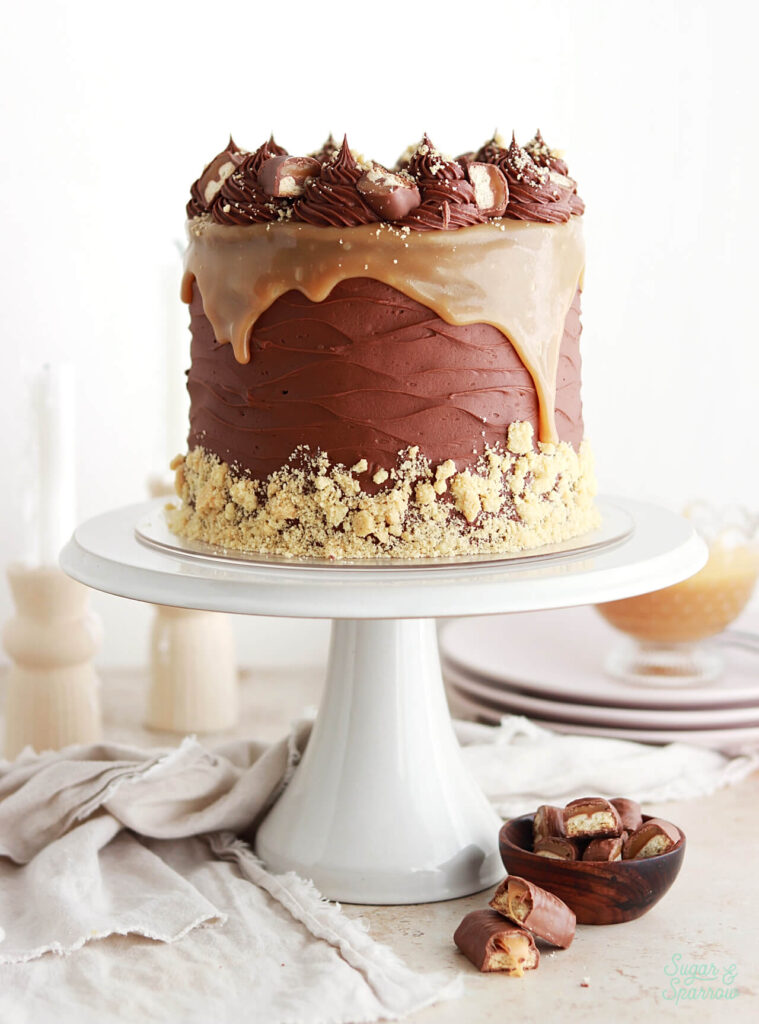
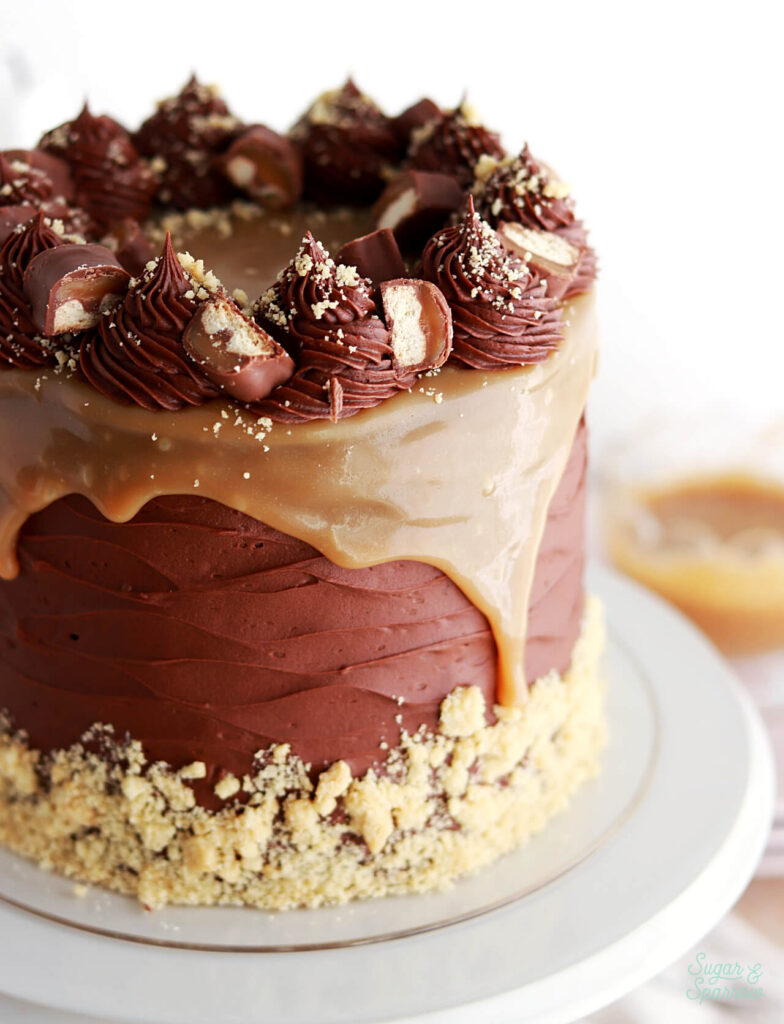
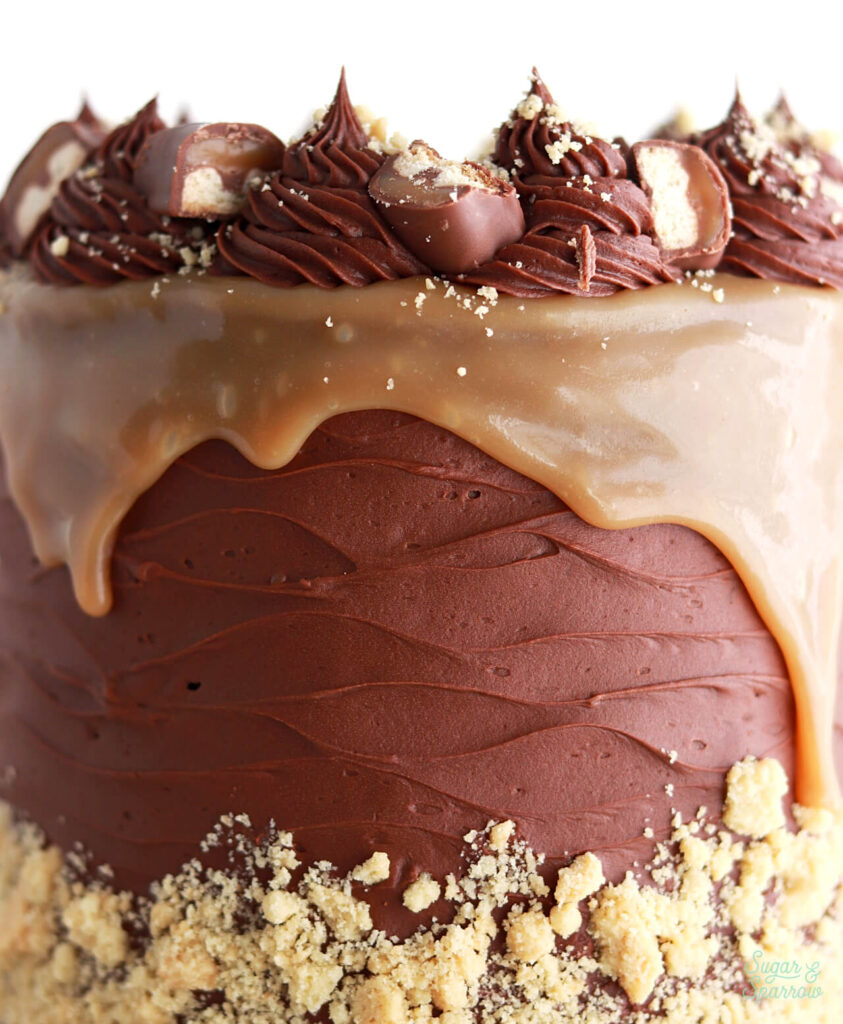
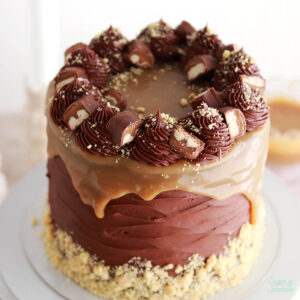
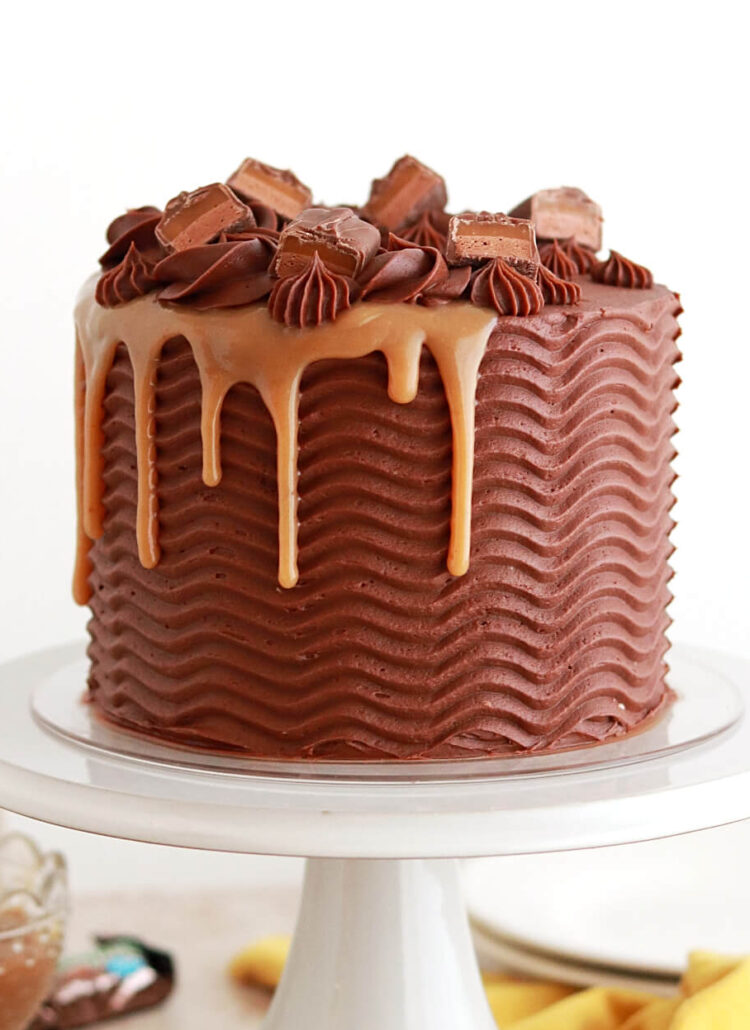
I wanted this cake to look reminiscent of a Twix bar, so I recreated the rippled texture of the chocolate candy bar on the cake exterior. To do so, I frosted the cake with chocolate buttercream. Then I held a small angled spatula against the cake and moved it slightly up and down while turning the cake on the turntable, working from the bottom of the cake to the top. I absolutely love how it turned out!

After frosting the cake with the rippled chocolate buttercream, I pressed some crushed shortbread cookies around the bottom of the cake, then added a thick caramel curtain drip on top. I will say that I had some doubts about the caramel being too thick for a drip, but it ended up being a beautiful consistency after reheating it in the microwave until it was just slightly above room temperature. Be sure to do a test drip before you commit to that curtain drip if you want it to look perfect!
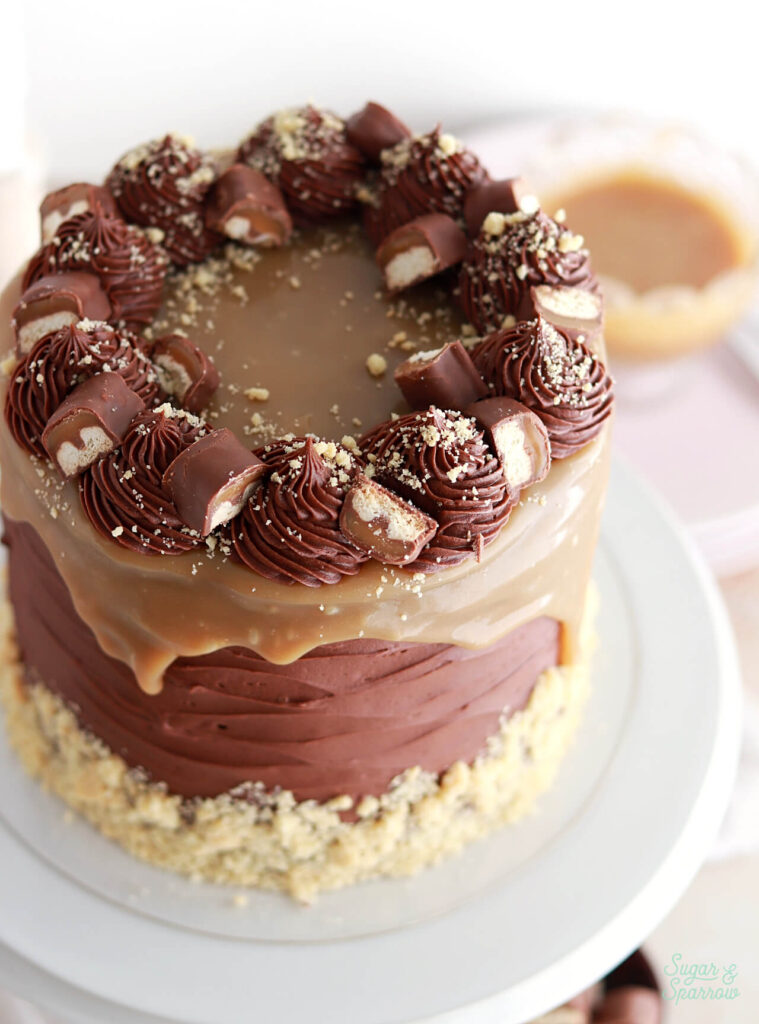

I finished the look with some swirls of chocolate buttercream using Wilton Tip 4B, more crumbled shortbread cookies, and some chopped Twix bars. Totally delicious inside and out.
Twix Cake
Ingredients
Vanilla Cake
- 2 3/4 Cups (290g) sifted cake flour* DIY version in notes
- 2 tsp baking powder
- 1/2 tsp baking soda
- 1 tsp salt
- 3/4 Cup (170g) unsalted butter, room temperature
- 1 1/2 Cups (300g) granulated sugar
- 2 large eggs + 2 large egg whites, room temperature
- 1/2 Cup (120g) sour cream, room temperature
- 1 Tbsp pure vanilla extract
- 1 Cup (240g) whole milk, room temperature
Thick Caramel Filling
- 2/3 Cup (210g, 160ml) sweetened condensed milk
- 1/2 Cup (113g) unsalted butter
- 1 Cup (200g) packed light brown sugar
- 1/3 Cup (80ml) light corn syrup
- 5 Tbsp (75ml) heavy whipping cream
- 1 tsp salt
- 1 tsp pure vanilla extract
Chocolate Buttercream
- 2 Cups (452g) unsalted butter, room temperature
- 6 Cups (720g) powdered sugar
- 1 Cup (90g) natural unsweetened cocoa powder
- 6 Tbsp whole milk, room temperature
- 4 tsp pure vanilla extract
- 1/2 tsp salt, or to taste
Additional Fillings + Toppings
- 1/2 Cup (75g) shortbread cookies, crushed
- 1 package (1.79g) Twix bars, chopped into squares mini size works fine too!
Instructions
Make the Vanilla Cake
- Preheat the oven to 350°F. Prepare three 6-inch or two 8-inch cake pans by spraying the sides with a cooking spray (Baker's Joy is my favorite) and fitting a parchment paper circle to the bottom of the pan.
- Sift the cake flour and then measure by spooning and leveling it in your measuring cup. Add the cake flour, baking powder, baking soda, and salt into a bowl and whisk to combine. Set aside.
- In the bowl of your stand mixer (a handheld mixer works fine too!), beat the butter on high for two minutes until it's light and creamy. Add in the sugar and continue to mix on medium-high for another two minutes. Turn the mixer to low and add the eggs and egg whites, one at a time, mixing until just combined and scraping down the bowl and paddle as needed. Add the vanilla and sour cream, turn the mixer to high, and beat for one full minute. It will look curdled at this point, but don’t worry – it will become smooth cake batter at the end.
- Add in the dry ingredients all at once and turn the mixer to low speed. Mix until just combined, then slowly pour in the milk. Continue to mix on low speed until just combined, about 30 seconds. Scrape down the sides and bottom of the bowl and give it a few stirs with a whisk to make sure there are no lumps. The batter will be slightly thick.
- Pour the batter evenly into the prepared cake pans and bake for 30-35 minutes. They're done when they spring back to the touch and a toothpick inserted into the middle comes out clean. Let the cakes cool in the pan for five minutes before turning them out onto a wire rack for an additional few hours of cooling. Make sure they're entirely room temperature before applying any frosting.
Make the Thick Caramel Filling
- In a large saucepan over medium heat, add the sweetened condensed milk, butter, brown sugar, corn syrup, heavy whipping cream, and salt. Stir with a rubber spatula constantly until the mixture is fully combined and begins to bubble, about 5 minutes.
- Continue stirring until the caramel begins to thicken, 6-7 minutes. If you have a candy thermometer, you’ll want to cook this until it reaches 225F/107C. That is the temperature that will thicken the caramel while keeping it nice and soft at room temperature.
- Remove the caramel from the heat and mix in the vanilla extract. Pour into a separate container and let the caramel cool completely to room temperature before using it to fill the cake. You can either leave the container on the counter for about 2 hours or speed the cooling process slightly by placing the container in the refrigerator. It will thicken significantly as it cools.
Make the Chocolate Buttercream
- In a stand mixer fitted with a paddle attachment, whip the butter on medium-high speed until creamy and light in color, 4-5 minutes.
- Scrape down the bowl and paddle, then add the powdered sugar, cocoa powder, milk, salt, and vanilla extract. Cover the mixer with a clean kitchen towel (to prevent ingredients flying out of the bowl), then turn the mixer to low and mix until all ingredients start to come together.
- Remove the kitchen towel, scrape down the bowl and paddle, then continue mixing on low speed until uniform and smooth, 2-3 minutes.
Assembly
- Once the vanilla cake layers have cooled completely, level and torte each layer to your desired height. Add about 1.5 Cups of chocolate buttercream into a piping bag and snip off about 1/2 inch opening.
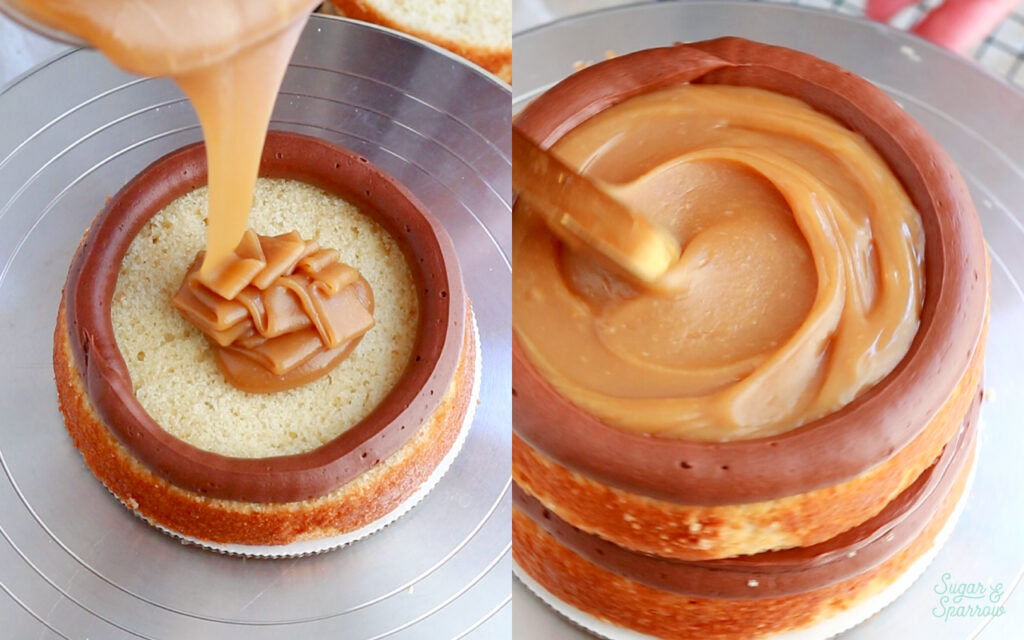
- Place the first layer on a turntable and pipe a circle of chocolate buttercream around the edge of the cake layer. Fill in the center (about 3/4 of the height of the chocolate buttercream) with thick caramel filling. Here's a detailed tutorial on this filling method in case this is your first time working with a soft filling. Fill the rest of the space with shortbread cookie crumbles, then pipe a little chocolate buttercream on top and spread it in a thin layer over the cookie crumbles.
- Place the next cake layer on top and repeat the process of piping the chocolate buttercream circle and filling in the center with caramel and shortbread cookie crumbles, followed by a thin layer of chocolate buttercream. Place the final layer on top, upside down so that the bottom of the cake layer is the top of the cake. Crumb coat the cake with chocolate buttercream and place it in the refrigerator for at least 20 minutes to let everything set up.
- To create the look pictured, frost the cake with chocolate buttercream and use a small icing spatula to create a textured finish. I held the icing spatula against the cake and moved it slightly up and down while rotating the turntable to mimic the texture of the chocolate on a Twix bar. Place the cake into the refrigerator for 10-20 minutes to let the frosting chill while you prepare the caramel drip.
- To Create the Caramel Drip: Add about 1/2 Cup of thick caramel filling into a microwave safe bowl and microwave in 5-10 second increments until it's slightly above room temperature and ideal drip consistency. Pour onto the top of the chilled cake and then use an angled spatula to gently push the caramel over the edges and create a curtain drip. Place the cake back into the refrigerator for 5-10 minutes to let the drip set.
- To finish to look, pipe a swirl border on top of the cake with Wilton Tip 4B. Top with shortbread cookie crumbs and chopped Twix bars.
Notes
- The vanilla cake layers can be baked, cooled, wrapped in plastic wrap, and left out at room temperature up to two days ahead of decorating. Unfrosted cake layers can be wrapped tightly in plastic wrap and stored in the freezer for up to two months before thawing and frosting.
- The caramel filling can be made ahead and stored in an airtight container in the refrigerator for up to two weeks. When you’re ready to use it, bring it back to room temperature before using as filling. It should be spreadable consistency at room temperature, but if you need it to be easier to spread you can microwave it in 5-10 second increments.
- The chocolate buttercream can be made ahead and stored in an airtight container at room temperature for up to 1 day. Alternatively, you can store it in an airtight container in the refrigerator for up to two weeks. When you’re ready to use it, bring it back to room temperature and rewhip with your stand mixer to bring back to frosting consistency.
Did you make this Twix Cake recipe? I’d love to hear what you think in the comments below, or show me a pic by tagging me on Instagram!
Hi
I made this cake on two 8inch tins, half of the mix on each, but they haven’t risen a lot….
Are they supposed to be like that?
The sponge is soft and spongy, just not high.
Hi Susana! How tall are your pans? These layers should rise to about 1.5 inches tall.
This looks amazing! I will be making it for my son’s birthday because he loves Twix! I was wondering if you could substitute half and half for the heavy whipping cream in the caramel sauce?
Hi Jill! I’m excited for you to make this cake for your son’s birthday! You technically can substitute half and half in for the heavy whipping cream, but the caramel may not be as thick as intended. It will still be delicious though, so if you’re in a pinch you could totally try it! But if you want it to be as thick as the caramel pictured I’d recommend going with the heavy whipping cream.
Hi there. I love cakes but am playing around with different cupcake recipes lately. I think this recipe would be fun as a cupcake. Does this cake recipe translate well into cupcakes? Thanks so much!
Hi Jackie! Yes, this recipe could totally work as cupcakes! Fill the tins no more than 2/3 full and bake at 350F for 14-18 minutes. I would fill each cupcake with the thick caramel filling, frost with chocolate buttercream, and top with shortbread crumbs. You could also garnish them with mini Twix bar pieces. Hope that helps!
thank you. I made this for my son’s 22nd and it came out great. As I was making 2 tiers not 3, I halved the buttercream recipe as it seemed like a lot, and half was more than enough. I definitely recommend allowing time for all the chilling as the recipe suggests when decorating – I didn’t, and the warm caramel created a bit of a landslide with the decorations! But all worked out in the end and tastes delicious. Thank you.
Hi Whitney, what’s the bake time for the 2 8″ layers rather than the 3 6″ ones please?
Hi Lisa! The bake time is the same, 30-35 minutes. Enjoy!
Hi Whitney, I’m planning on making this cake for my daughters 13th birthday this year. Twix is her favorite candy bar and this cake looks amazing.
I am wondering what you would recommend for making this a 3 layer with 9″ pans (it’s going to be a larger gathering I need to have enough). Should i just double it?
thanks!
Hi Jason! How fun! For three 9-inch layers, I would recommend doubling the recipe. It will give you a little more than enough batter so just be sure to fill the pans no more than 2/3 full so they don’t overflow in the oven!
Hi Whitney! Do you have a recipe for a gluten free cake? Is there a gluten free flour you might recommend? Thanks!
Hi Helen! I am no expert in GF baking, but I’ve had people report that they’ve subbed the flour in my cake recipes for GF all-purpose flour with success. I hear good things about King Arthur GF All Purpose flour, so that’s what I’d recommend. Hope that helps!
Hi Whitney, I wanted to say I have loved your book and given several copies to some cake friends. I also wanted to say I love the Twix cake. Out of all of your cakes I have made ( I lost count) this one was my favorite.
I was wondering if you’ve seen the movie Burnt. In it there is a stunning birthday cake. I was thinking you should re-create that cake and give it to your fans to try at home.
Thanks for all the wonderful inspiration and easy to follow guidance. In have had a great time in the kitchen with you and your cakes.
Sincerely, Christine J
That makes my day, Christine! Thanks so much for letting me know how much you’ve been loving my book and this recipe. And yes, I have seen the movie Burnt. That’s such a fun idea!