• Cake
  • Frosting
  • YouTube
  • My Favorite Tools
  • Nav Social Icons

  • Skip to primary navigation
  • Skip to main content
  • Skip to primary sidebar
  • Skip to footer
  • Recipes
    • Cake
    • Cupcakes
    • Frosting
    • Ice Cream
    • Vegan
  • Cake Basics
  • Tutorials
  • Blog
  • About
  • Mobile Menu Widgets

    Connect

    Search

Sugar & Sparrow logo in script font

Sugar & Sparrow

Lifestyle and Cake from Portland Oregon

  • Cake Basics
  • Recipes
    • Cake
    • Cupcakes
    • Cookies & Bars
    • Filling
    • Frosting
    • Ice Cream
    • No-Bake
    • Small Batch
    • Vegan
  • Tutorials
  • Book
  • Blog
  • About

Holiday Floral Buttercream Cake Tutorial

December 3, 2018 · In: Featured, Holiday, Seasonal, Tutorials

I’ve been in the Holiday spirit since before Thanksgiving, which is about the time all the cute decorations hit the shelves and the Christmas music started flooding the radio stations. I can’t help but have hundreds of ideas for festive cake decorating this time of year, especially because creative prints and fun color schemes are everywhere I look! It really is the most wonderful time of the year.

One of my favorite cake decorating techniques I learned over the last year is how to to use icing spatulas and piping tips to create floral print patterns on buttercream cakes. So when my friends over at Wilton asked me to create a cake for their Holiday campaign, (after squealing) I instantly thought of recreating the buttercream floral print look with a Holiday theme! It’s easier than it looks with the right tools, a great color scheme, and some inspiration from your favorite Holiday florals and foliage (think Poinsettias, pine sprigs, snowberries, holly, and all the flowers that make you think of this festive season).
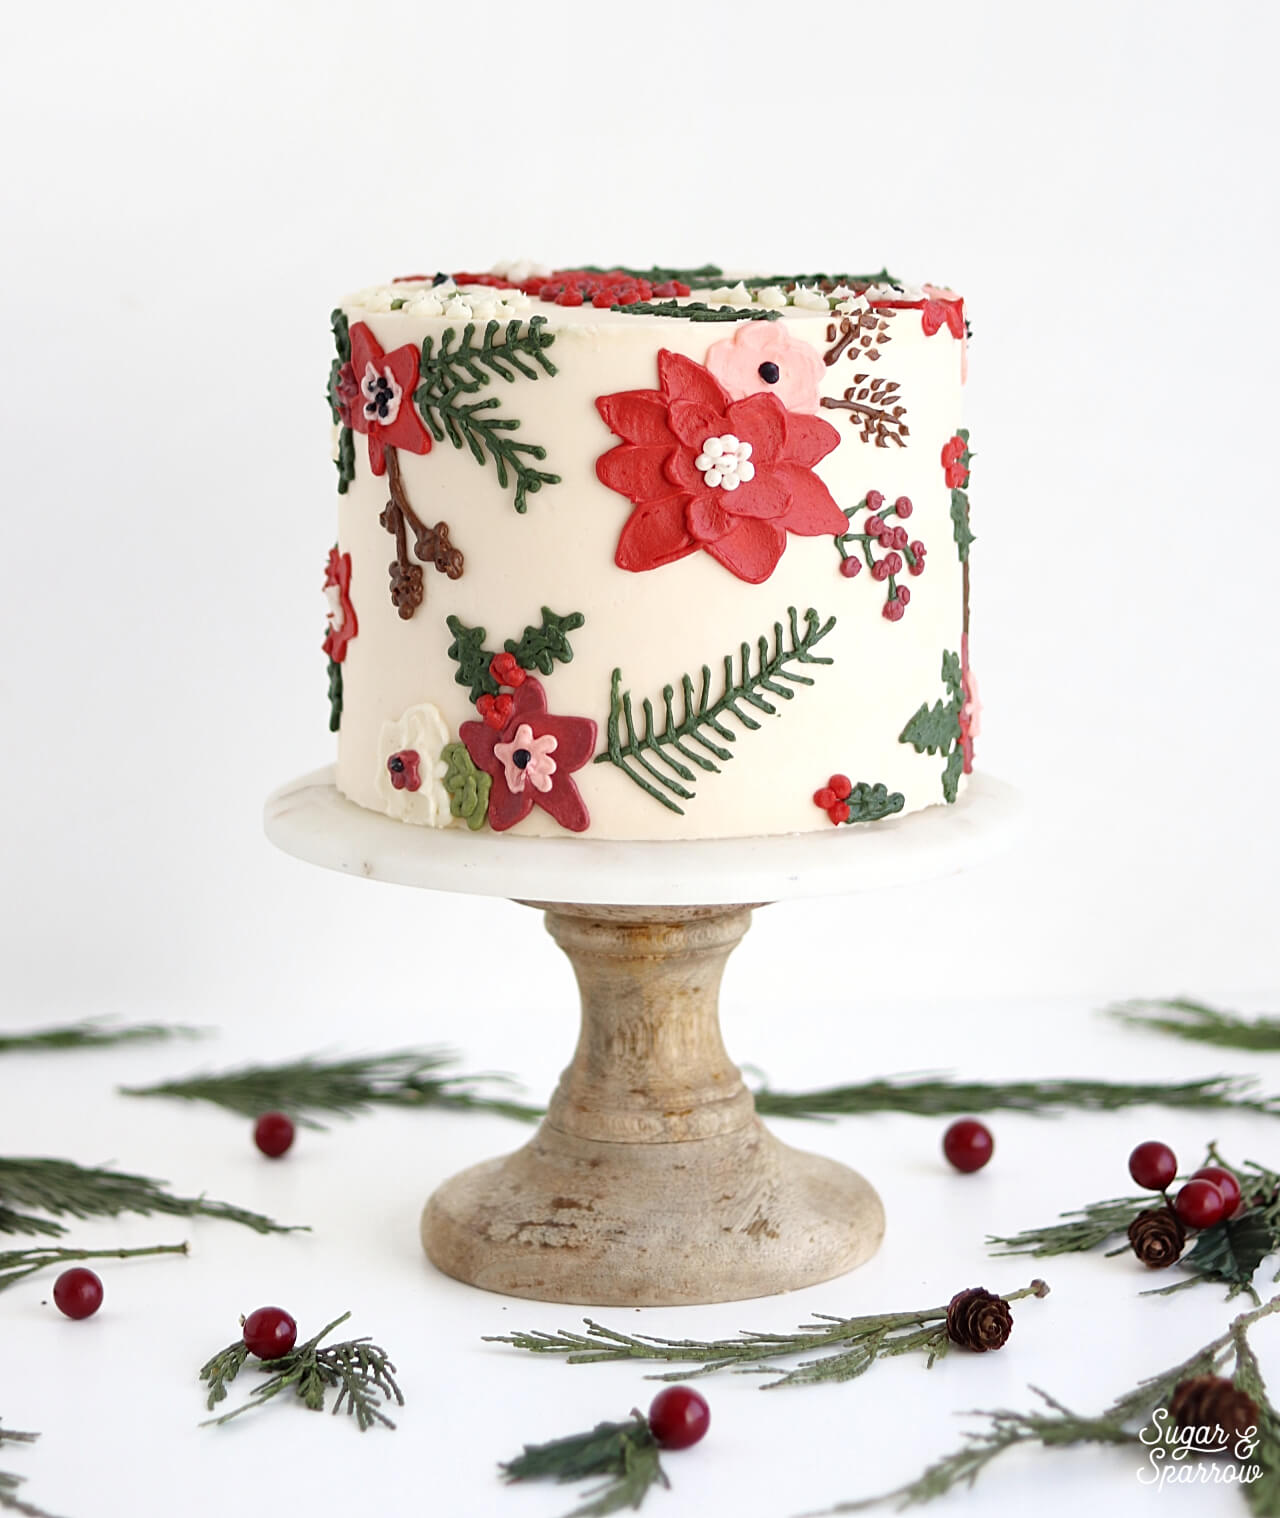
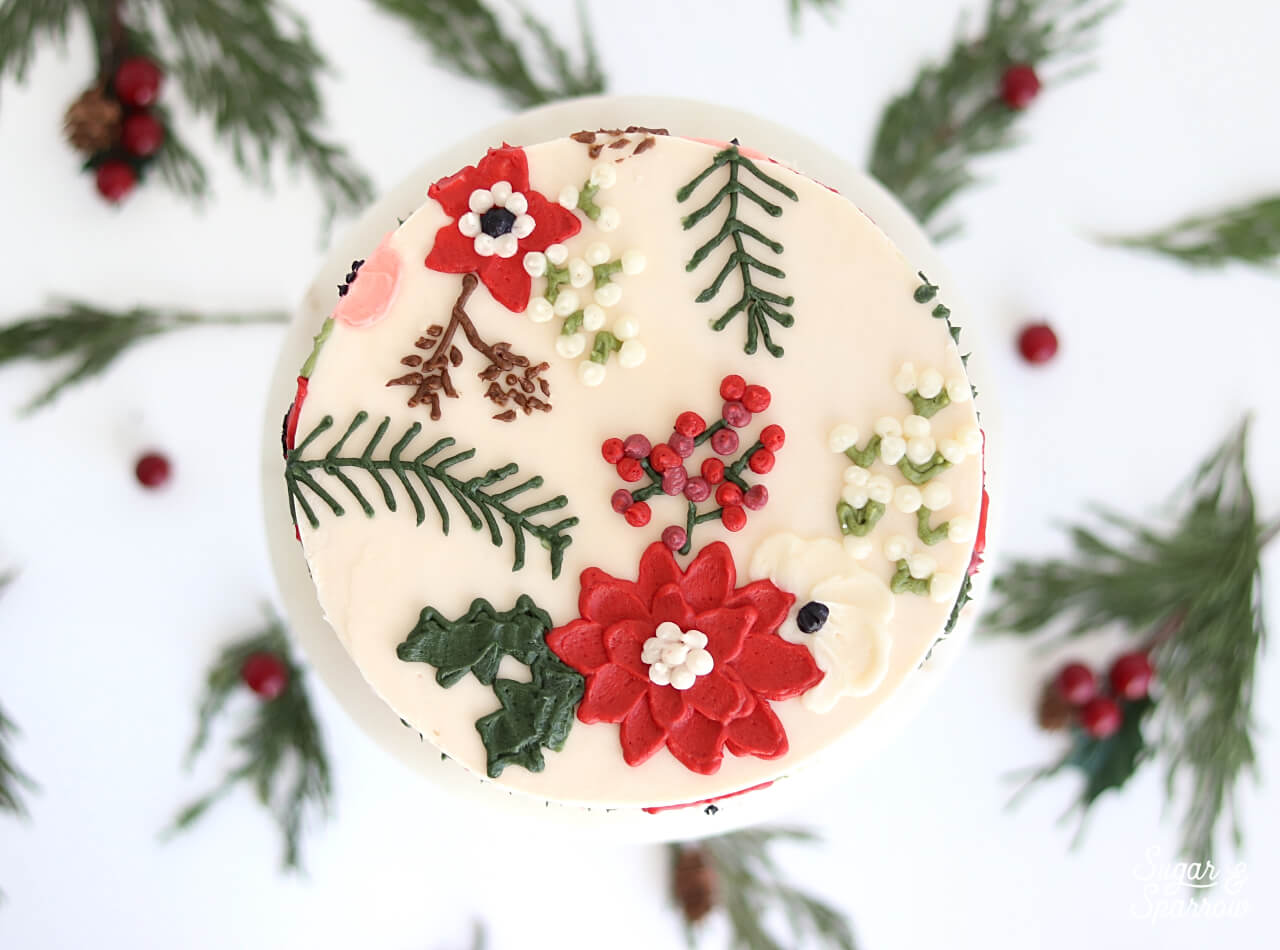
christmas floral cake by sugar and sparrow

buttercream cake with holiday flowers by sugar and sparrow

Although I already had the essential Wilton piping tips and icing spatula on hand, Wilton was kind enough to send me the perfect Icing Color Gels and decorating brush set to create the ultimate festive cake!
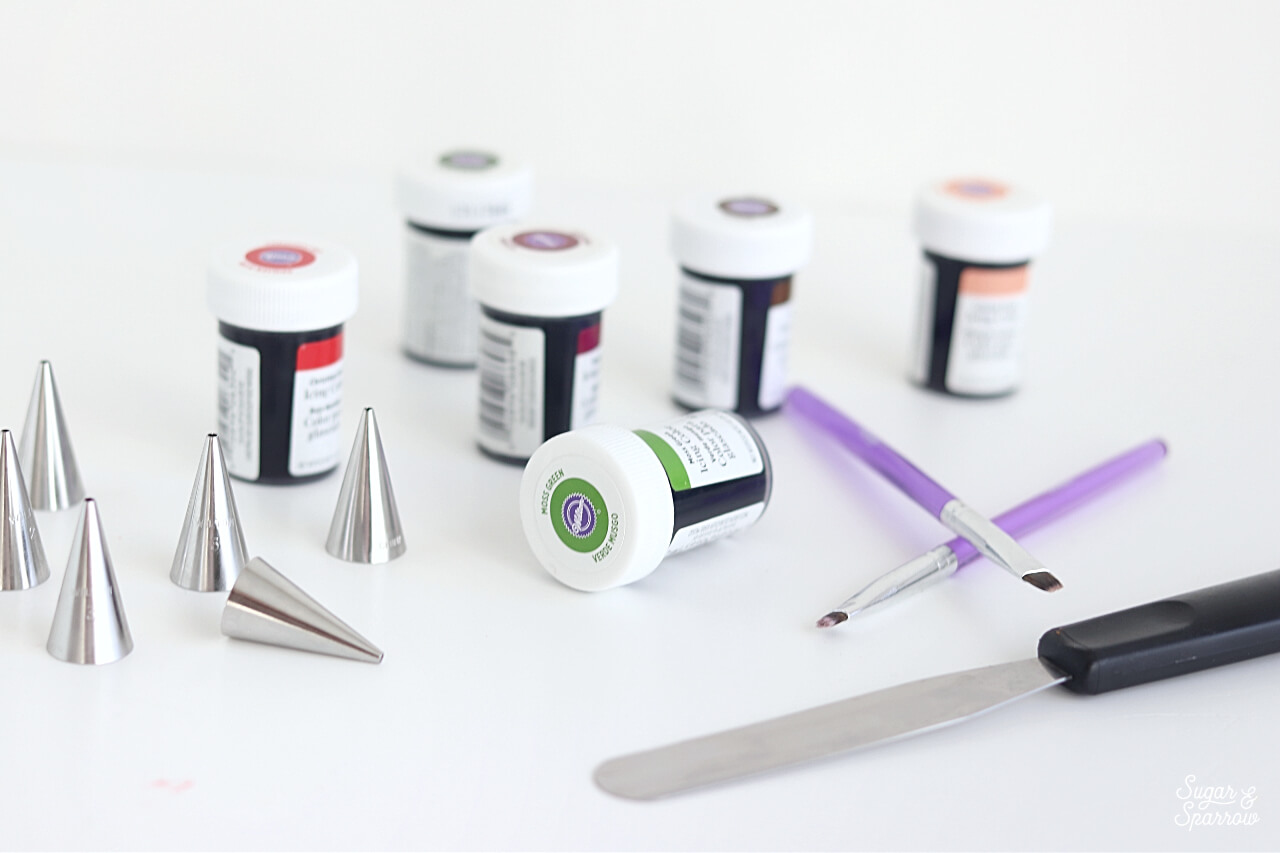
wilton cake decorating supplies

Here’s a video to see the techniques and step-by-step in action, and I’ll walk you through every detail below:

You Will Need:

  • A cake frosted with smooth buttercream
  • 1 batch of vanilla buttercream (or other light colored buttercream)
  • Wilton Icing Color Gels (or color gels of your choice)
  • Toothpicks
  • Bowls and spoons for color mixing
  • Piping bags
  • Several Wilton Piping Tip 2 (one for each color you’re using)
  • A small icing spatula
  • Floral designs for tracing + wax paper and a pencil (optional)
  • Wilton decorating brushes
  • A small dish of water

Step 1: Chill Your Buttercream Cake  

It’s essential that you begin this technique with a cold buttercream cake as your canvas. That way, you won’t have to worry about accidentally smudging your smooth buttercream as you create the floral patterns.
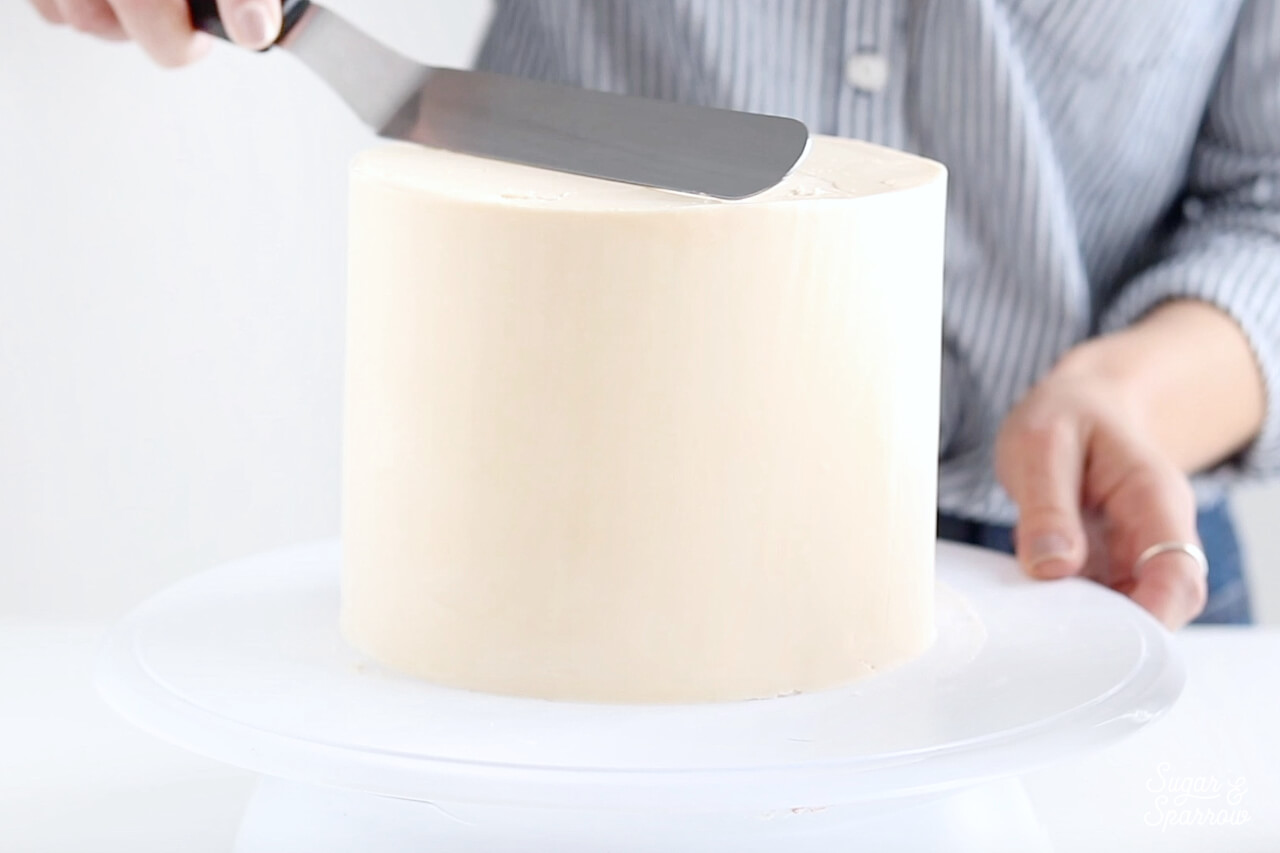
how to frost smooth buttercream cake

After frosting (I’ve used a tiny amount of Wilton’s Creamy Peach to get this subtle cream shade for my backdrop), chill the cake for at least 30 minutes, or until the buttercream is firm to the touch.

Step 2: Prepare Your Buttercream Color Palette

While your cake is chilling, divide your buttercream into separate bowls (one for each color). Dip a toothpick into the Wilton Icing Color Gel of your choice and apply it to the first bowl of buttercream. Mix with a spoon and continue adding color until it’s the perfect shade, then repeat with the other colors. The color palette for this specific cake is Creamy Peach, Christmas Red, Juniper Green, Moss Green, Brown, Burgundy, White (non-colored vanilla buttercream), and Black.
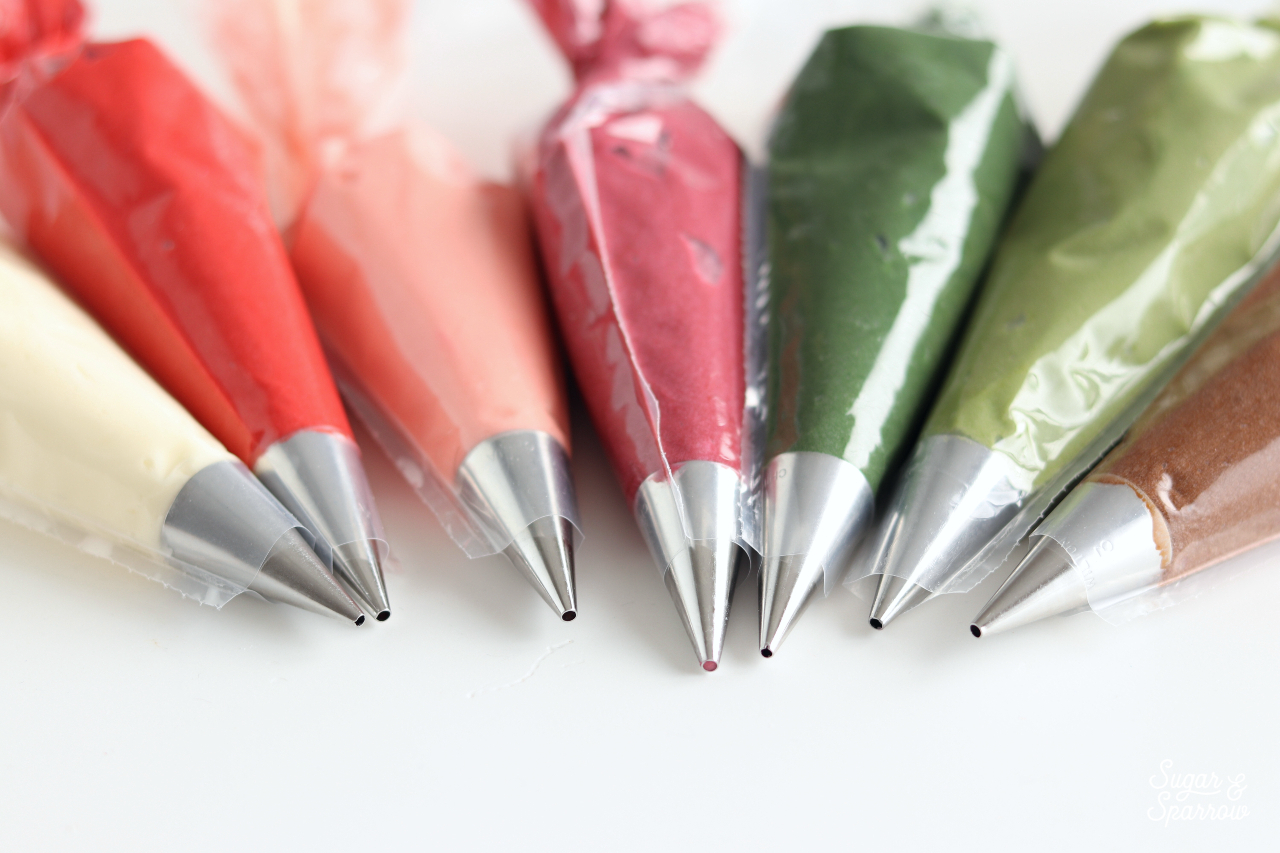
wilton tip 2 piping on buttercream

When your icing color palette is looking perfect, prepare your piping bags by snipping off the end and fitting each one with a Wilton Tip 2. This will give you a small, perfectly circular opening for more precise piping. Fill each piping bag with your buttercream colors and marvel at how pretty they look all together!

Step 3: Create Floral Pattern Tracings (optional)

Since I am an ultra-perfectionist, I like to know what my floral patterns are going to look like on the cake and give myself a guide by tracing the patterns on prior to piping. I created and printed out templates of simple floral patterns and traced them onto wax paper, then used the dull end of a wooden skewer to imprint the patterns onto my cold buttercream cake.
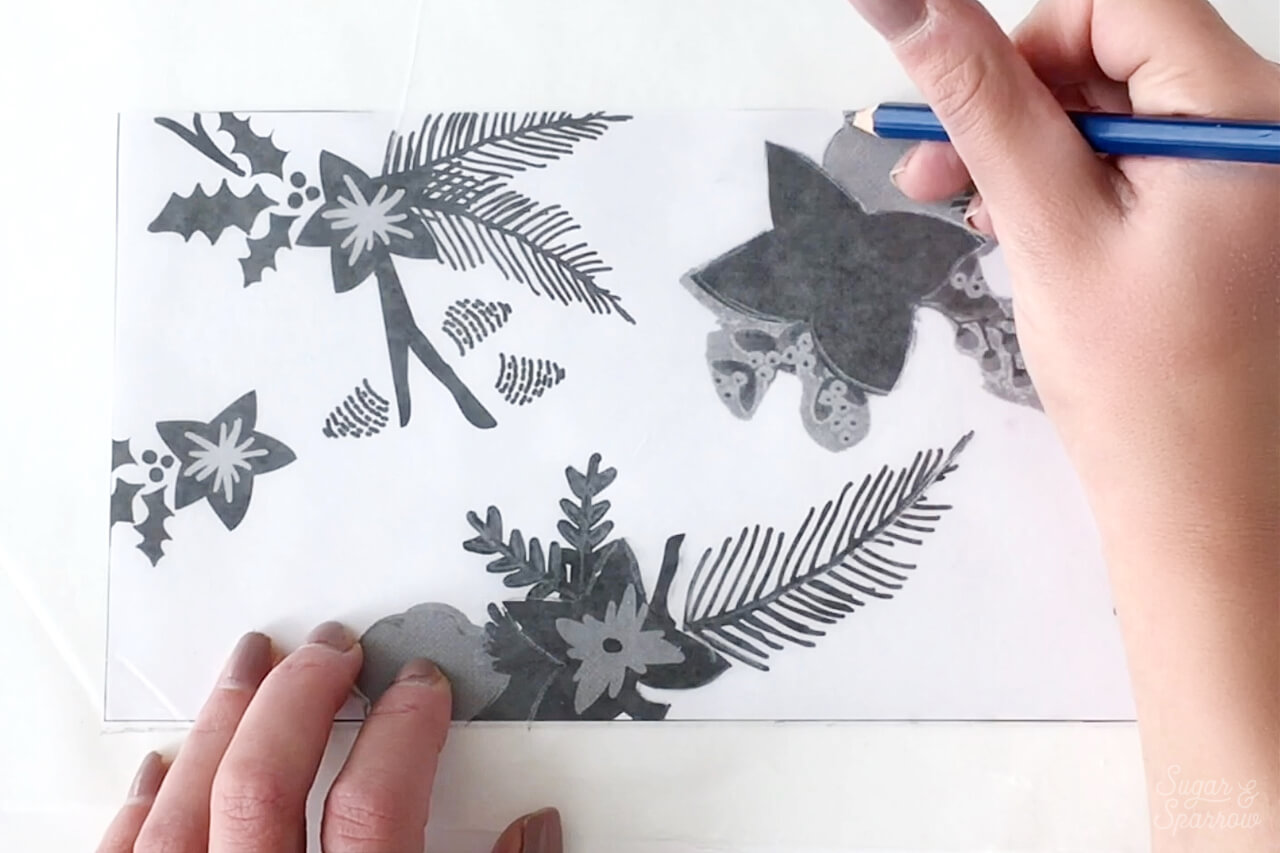
how to create floral patterns for cakes

how to trace patterns onto buttercream cakes

For the tracings, you could also use floral designs from wrapping paper or doing an online search for Holiday floral patterns. If you’re more of a go-with-the-flow type of cake decorator, feel free to improvise the patterns as you go!

Step 4: Pipe Your Patterns Onto The Cake

Now for the fun part – piping the designs! Using your piping bags, outline the floral pattern tracings one by one. You’ll find that some designs (like the fir tree branches) will only require outlines, while other designs (like pinecones and snowberries) require dots. The Wilton Tip 2 is perfect for either of these techniques, as it allows you to drag the buttercream in precise lines or dot the buttercream on for circular textures.
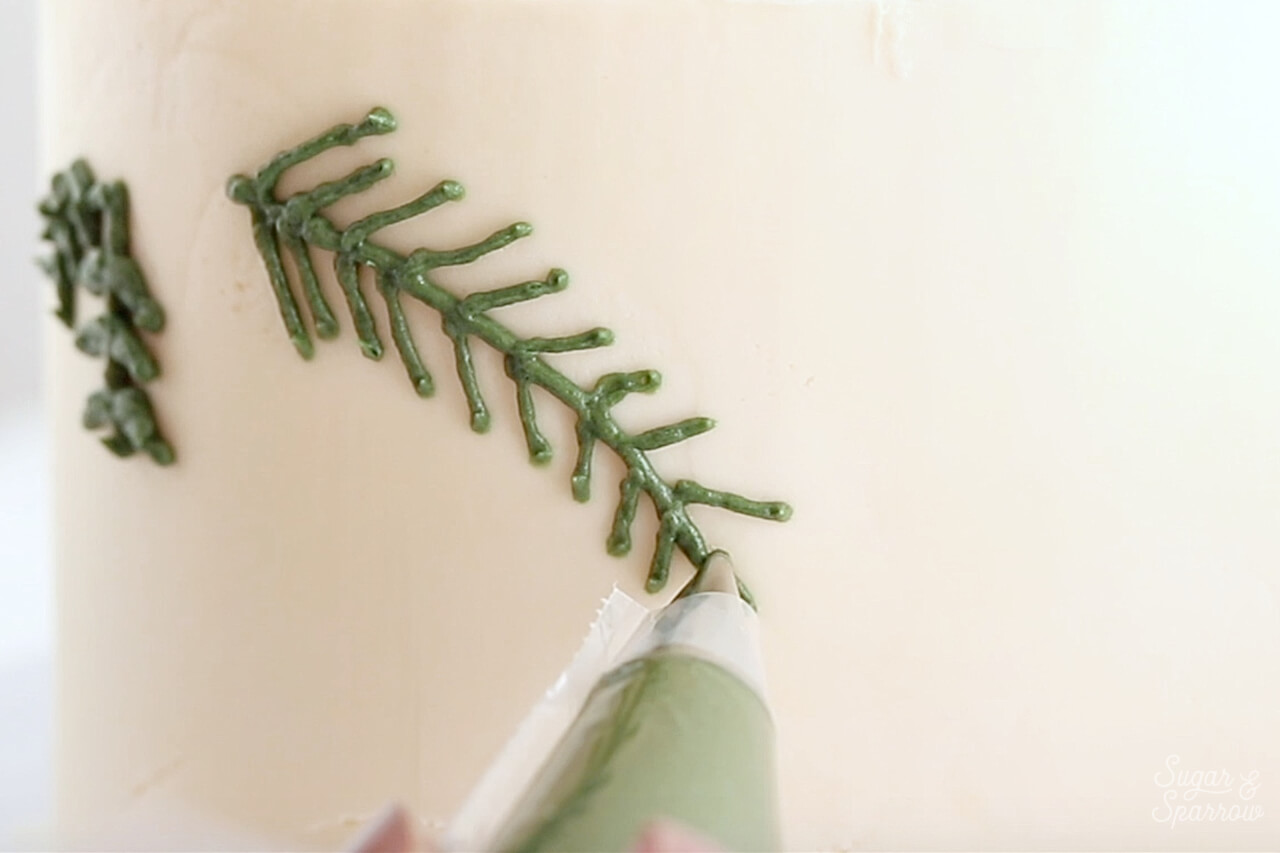
how to pipe flowers onto buttercream cakes

For the flower designs, pipe the outline of the flower before filling a little bit of buttercream inside the petals. Use a small icing spatula to swipe the buttercream inward and create the look of petals.
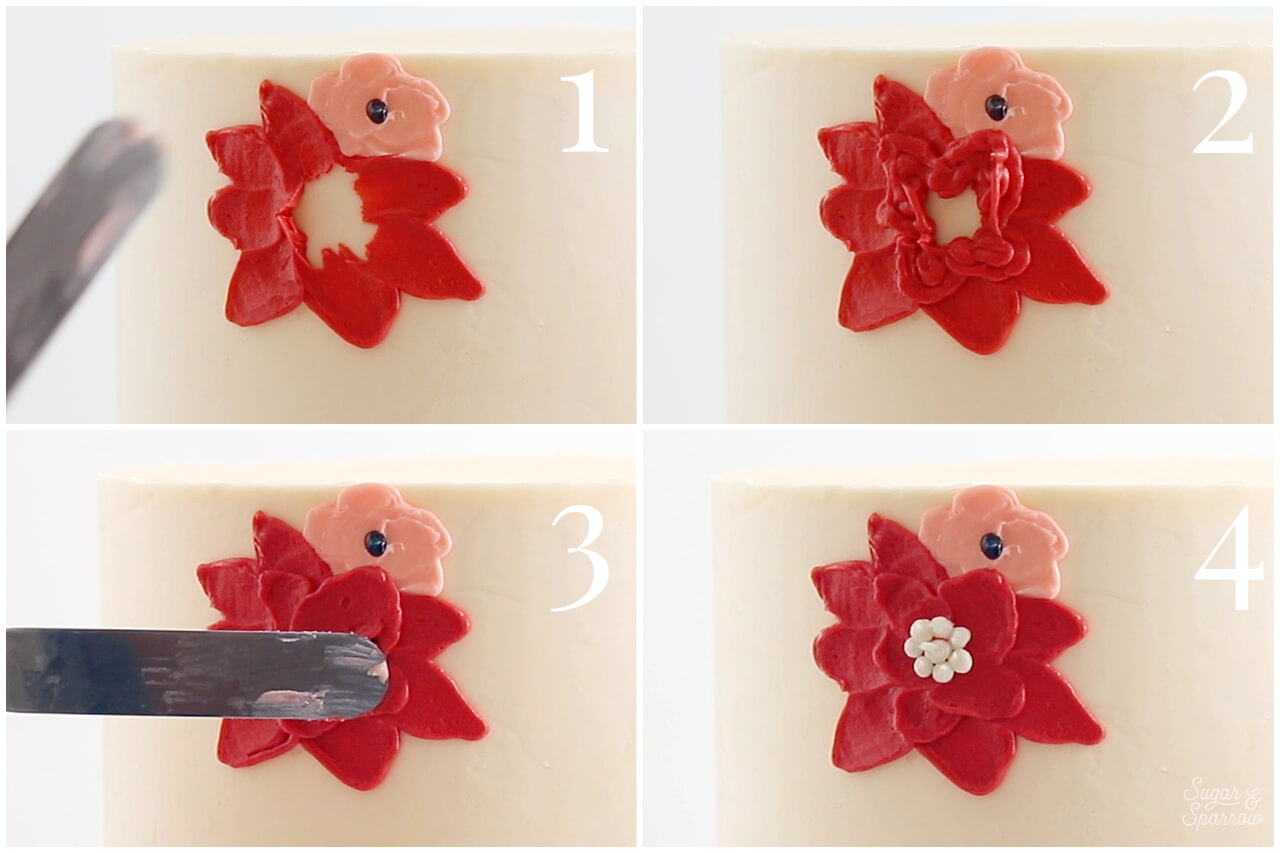
how to make buttercream poinsettia

Repeat the process of piping and spatula painting until your entire cake is patterned with holiday florals.
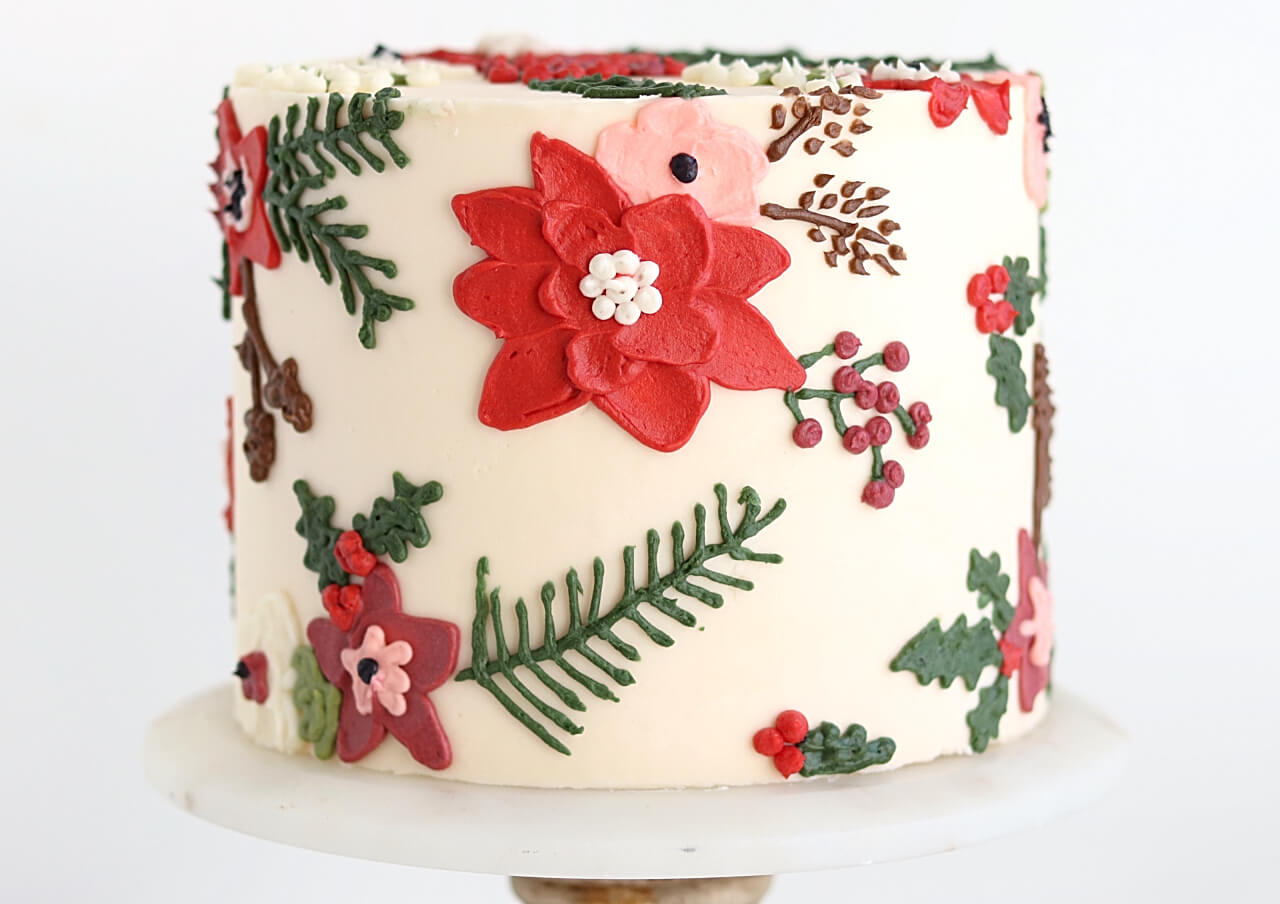
how to paint flowers onto buttercream

Depending on the look you’re going for, you can have as many or as little designs as you’d like!

Step 5: Smooth With Paint Brushes

After all of your piping is complete, it’s time to do a tiny bit of finish work to make everything look smooth and uniform. It’s essential to have a few paintbrushes handy (I’m using Wilton’s 5 Piece Decorating Brush Set) and a small bowl of water for this part. 
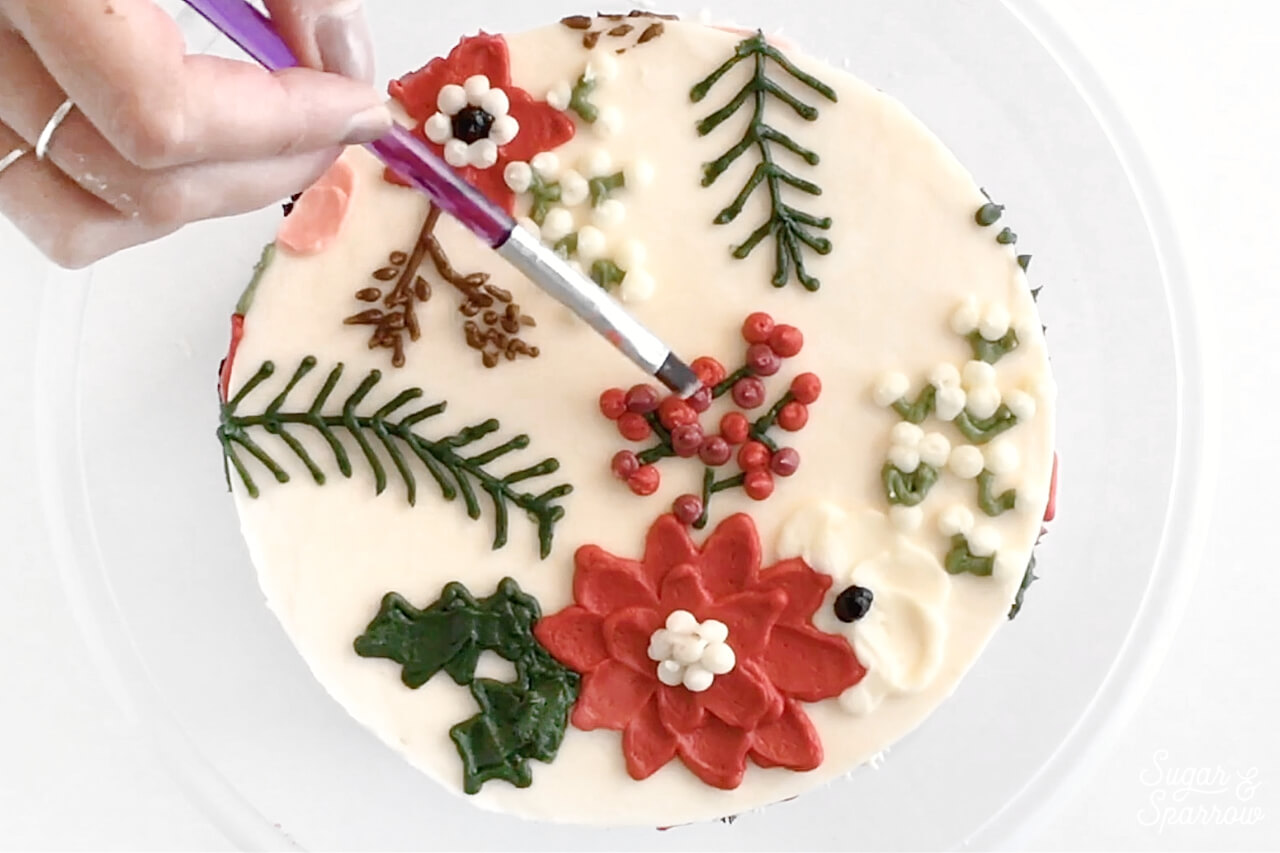
how to smooth buttercream piping paintbrush

Dip your paintbrush into a tiny bit of water and gently press down on any places on the cake where sharp peaks have formed. This technique helps flatten and smooth designs like branches, berries, and anywhere your piping is peaking.

I couldn’t be happier with how this Holiday Floral Cake turned out! Wilton had the perfect paint brushes and Icing Color Gels for this palette and I am so happy to add them to my already-vast collection of Wilton cake decorating products.
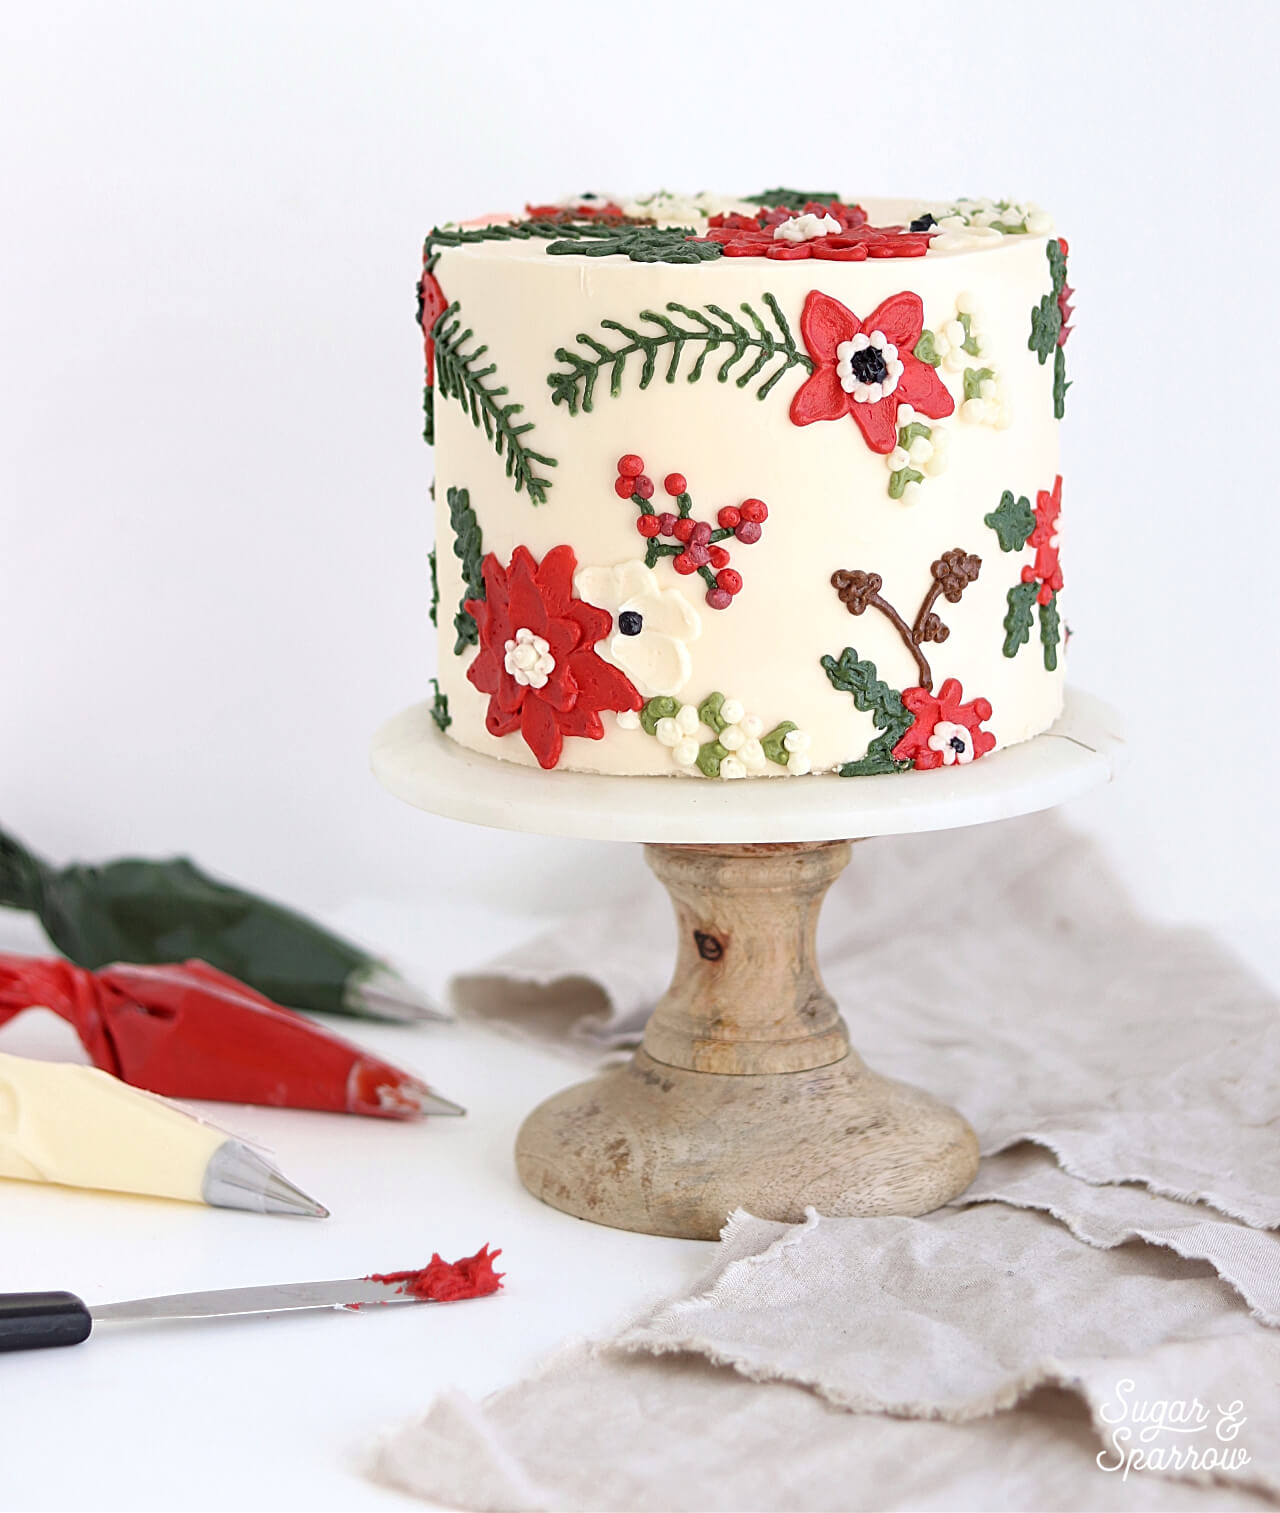
christmas cake by sugar and sparrow

What kind of festive cakes are you planning this season? There are a TON of brilliant Holiday cake ideas like this one over on Wilton’s Christmas Ideas page, so be sure to check it out for some inspiration! And if you try this buttercream floral pattern technique, be sure to tag me on Instagram so I can see your creativity in action. Happy Holiday season to you and yours!

By: Whitney · In: Featured, Holiday, Seasonal, Tutorials · Tagged: buttercream piping, cake decorating, cake decorating tutorial, cake tutorial, christmas cake, holiday cake, poinsettia cake, spatula painted cake, tutorial, vanilla buttercream

you’ll also love

the best vanilla cupcakes recipeThe Perfect Vanilla Cupcake Recipe
pumpkin layer cake recipe by sugar and sparrowPerfect Pumpkin Layer Cake Recipe
oreo cookies and cream cakeOreo Layer Cake Recipe

Join the List

Stay up to date & receive the latest posts in your inbox.

Reader Interactions

Comments

  1. Amanda LeJeune says

    December 15, 2020 at 1:14 pm

    What consistenty do you use for the frosting decorations?

    Reply
    • Whitney says

      December 15, 2020 at 9:18 pm

      Hi Amanda! I just use my vanilla buttercream recipe as-is for the frosting decorations: https://sugarandsparrow.com/vanilla-buttercream-recipe/ If you feel that you’d like the buttercream to be thicker you can always add an extra 1/2 cup to stiffen it.

      Reply
  2. Sara Brown says

    July 25, 2020 at 2:47 pm

    I love this so much! You inspired me to be able to tackle a similar cake today wish I could attach a photo. I especially appreciated the tips about 1)actually using a tip (I’m a tip less bag lover, but sometimes you just need a tip!) and 2) pulling “in” with the spatula. Thanks so much!

    Reply
    • Whitney says

      July 25, 2020 at 9:59 pm

      Yay, Sara! So happy to hear you found this tutorial helpful! I’d love to see your cake, if you’ve got Instagram try tagging me in a post or sending a pic to me there!

      Reply
  3. Sash says

    March 31, 2019 at 7:04 am

    Splendid and thank you so much for your precise explanation. I really wish to bake something smilies for my daughter’s 10 th birthday .
    Thank you !!

    Reply
    • Whitney says

      April 1, 2019 at 8:58 am

      Thank you, Sash! I hope you end up making something like this for your daughter’s birthday! This design would make an awesome birthday cake 🙂

      Reply
  4. Annie Maier says

    December 12, 2018 at 3:40 pm

    This is gorgeous, and I love that you didn’t use fondant! Your precise and detailed instructions make me think I could actually pull this off. 😀

    Reply
    • Whitney says

      December 12, 2018 at 3:56 pm

      Thanks so much, Annie! You can totally pull this off!!

      Reply
  5. Gabby says

    December 5, 2018 at 10:07 am

    Where can I find the floral document? Thanks!

    Reply
    • Whitney says

      December 5, 2018 at 12:39 pm

      Hi Gabby! My husband actually whipped up the floral graphics for me inspired by some Rifle Paper Co Holiday designs, found here: https://riflepaperco.com/shop/occasions/

      You can totally print those out and use them as a template, or do a quick search for “holiday floral prints” to see what you like!

      Reply

Trackbacks

  1. Fun Christmas Desserts - Wilton says:
    March 14, 2022 at 9:46 pm

    […] Sugar and Sparrow’s love of baking is evident in this decadent and impressive Christmas cake with a buttercream floral print inspired by seasonal flowers and foliage! Find the Recipe Here. […]

    Reply

Leave a Reply Cancel reply

Your email address will not be published. Required fields are marked *

Recipe Rating


Next Post >

Chocolate Caramel Pecan (Turtle) Cupcakes

Primary Sidebar

Welcome to Sugar & Sparrow

Welcome to Sugar & Sparrow

Helping you whip up pretty desserts with confidence and creativity. And hopefully sharing a few laughs with you along the way!

Learn More

Connect

let’s bake!

Get my very best recipes, baking tips, and decorating tutorials sent to your inbox

Featured Posts

chai bundt cake recipe by sugar and sparrow

Spiced Chai Bundt Cake

sugar and sparrow coffee layer cake

Coffee Layer Cake With Vanilla Espresso Buttercream

easy cookie cake for birthday

Sheet Pan Chocolate Chip Cookie Cake

Search

Archives

Follow Along

@sugarandsparrowco

PUMPKIN CUPCAKES 🧡 topped with spiced cream cheese PUMPKIN CUPCAKES 🧡 topped with spiced cream cheese frosting to give every bite the most heavenly pumpkin spice flavor! The perfect cupcakes to kick off your fall baking 🍂

Comment RECIPE and I’ll send it right to you!

You can also find the link in my bio (or google ‘Sugar and Sparrow Pumpkin Cupcakes’) 

#pumpkinspice #pumpkincake #pumpkinseason #falldesserts #creamcheesefrosting
OATMEAL CREME PIE CAKE 🙌🏼 I’m always thinking abou OATMEAL CREME PIE CAKE 🙌🏼 I’m always thinking about this cake during back-to-school season because Oatmeal Creme Pies take me right back to my elementary school days! It’s layers of tender brown sugar oatmeal cake with the gooiest homemade marshmallow filling and tastes just like the real deal in cake form – perfect party cake for an Oatmeal Creme Pie lover! 

Full recipe linked in my bio + at https://sugarandsparrow.com/oatmeal-creme-pie-cake/ 
 
#oatmealcremepie #vintagecake #layercake #partycake #cakedecorating
NO-BAKE BISCOFF CHEESECAKE ✨this is the perfect EA NO-BAKE BISCOFF CHEESECAKE ✨this is the perfect EASY no-bake dessert for Fall and I cannot get over the incredible spiced caramel flavor!! I added Biscoff cookie butter to my favorite no-bake cheesecake base, piled it onto a Biscoff cookie crust, then topped it with a melted cookie butter drip + tons of crunchy cookie crumbs.  
 
🤎Full recipe linked in my bio + at https://sugarandsparrow.com/no-bake-biscoff-cheesecake/ 
 
BISCOFF CRUST: 
1 8.8oz package Biscoff cookies (250g) 
1/3 Cup (75g) unsalted butter, melted 
 
FILLING: 
16 Oz (452g) full-fat brick-style cream cheese, room temp 
1/4 Cup (50g) powdered sugar 
3/4 Cup (210g) creamy Biscoff cookie butter 
1 tsp ground cinnamon 
1 tsp pure vanilla extract 
1 Cup (240ml) heavy whipping cream, cold 
 
INSTRUCTIONS: 
1. Combine the Biscoff crust ingredients until the mixture resembles wet sand, then press firmly into the bottom of a 9-inch springform pan.  
2. In a large bowl, whip the cream cheese until smooth, then add the powdered sugar, cookie butter, cinnamon, and vanilla and mix until smooth.  
3. In a separate medium bowl, whip the heavy whipping cream to stiff peaks, then fold into the cream cheese mixture until no streaks remain. 
4. Add the filling on top of the Biscoff crust, cover, and refrigerate for at least 8 hours. 
5. Once set, top with melted cookie butter and crushed Biscoff cookies. 
 
#biscoff #biscoffcheesecake #nobakecheesecake #biscoffcake #nobake 
A mini pumpkin spice latte cake to celebrate my SI A mini pumpkin spice latte cake to celebrate my SIL 🥳 two 6-inch layers of spiced pumpkin cake with the most delicious coffee buttercream + a little vintage piping for good measure ☕️ making a birthday cake for my family and friends will always be my favorite love language!!

👩🏽‍🍳 Recipes: perfect pumpkin layer cake + coffee buttercream (both found at sugarandsparrow.com) or you can find a dedicated PSL cake recipe in my book! 
✨ Piping Tips: @wiltoncakes tip 3 for the writing + tip 4B for the borders
☕️ Garnish: chocolate covered espresso beans

#pumpkincake #birthdaycake #pumpkinspicelatte #minicake #cakedecorating
BROWN BUTTER CREAM CHEESE FROSTING 🤎🧈 brown butter BROWN BUTTER CREAM CHEESE FROSTING 🤎🧈 brown butter is the KEY to making cream cheese frosting even better! You get the tang of cream cheese but with rich, nutty caramelized notes of brown butter and it’s HEAVENLY on any Fall cake 🙌🏼 I paired with my carrot cake recipe here but it’s also incredible with spice cake, pumpkin cake, chocolate cake, and more! 

Full recipe + all my favorite cake pairing suggestions in my bio and here: https://sugarandsparrow.com/brown-butter-cream-cheese-frosting/

BROWN BUTTER CREAM CHEESE FROSTING 
YIELD: 3.5 Cups  
 
INGREDIENTS 
1/2 Cup (113g) unsalted butter 
8 Oz (226g) full-fat brick-style cream cheese, room temperature NOT the spread 
4 Cups (480g) powdered sugar 
1 tsp pure vanilla extract 
pinch of salt, or to taste 
 
INSTRUCTIONS 
1. Brown the butter: Add the butter into a large frying pan and cook over medium heat until the butter melts, stirring occasionally. Continue cooking for 3-5 minutes while stirring constantly. First it will foam, then bubble as little white particles of milk solids separate, then the white specks will caramelize and turn medium-brown and smell deliciously nutty. Remove from heat, transfer to a glass container, and cool until it re-solidifies and is the consistency of softened butter (about 45 minutes in fridge).  
2. Add the cooled brown butter into the bowl of your stand mixer fitted with a paddle attachment and add the cream cheese. Mix on medium-high until fluffy and light in color, 5 min, scraping down the bowl and paddle as needed. 
3. Turn the mixer to low speed and add the powdered sugar a few cups at a time, scraping down the bowl and paddle after mixing in each addition. Add the vanilla and salt and continue mixing on low speed until smooth and uniform. 
 
#brownbutter #creamcheesefrosting #creamcheese #buttercream #cakedecorating

Footer

On the Blog

  • Cake Basics
  • Recipes
  • Tutorials

Info

  • About
  • Privacy Policy & Disclosure

stay in the know

Copyright © 2026 · Theme by Sugar & Sparrow