• Cake
  • Frosting
  • YouTube
  • My Favorite Tools
  • Nav Social Icons

  • Skip to primary navigation
  • Skip to main content
  • Skip to primary sidebar
  • Skip to footer
  • Recipes
    • Cake
    • Cupcakes
    • Frosting
    • Ice Cream
    • Vegan
  • Cake Basics
  • Tutorials
  • Blog
  • About
  • Mobile Menu Widgets

    Connect

    Search

Sugar & Sparrow logo in script font

Sugar & Sparrow

Lifestyle and Cake from Portland Oregon

  • Cake Basics
  • Recipes
    • Cake
    • Cupcakes
    • Cookies & Bars
    • Filling
    • Frosting
    • Ice Cream
    • No-Bake
    • Small Batch
    • Vegan
  • Tutorials
  • Book
  • Blog
  • About

Sprinkle Drip Cake Tutorial

January 6, 2020 · In: Featured, Seasonal, Tutorials, Valentines

This was originally a guest post I wrote for SprinklePop’s blog. It’s too good not to share here, because sprinkle drip cakes are so much fun to make with any sprinkle mix!

There are drip cakes, and then there are sprinkle drip cakes. And let me tell you, while both are pretty to look at, the sprinkle version is so much more fun! The sprinkle drip cake trend was popularized by one of my favorite cakers to follow on Instagram, @brittanymaycakes. To my knowledge, she’s the little genius behind putting sprinkles on top of a ganache drip, and I just had to give it a go because it looks so stunning – especially with this Bewitched sprinkle mix by SprinklePop.
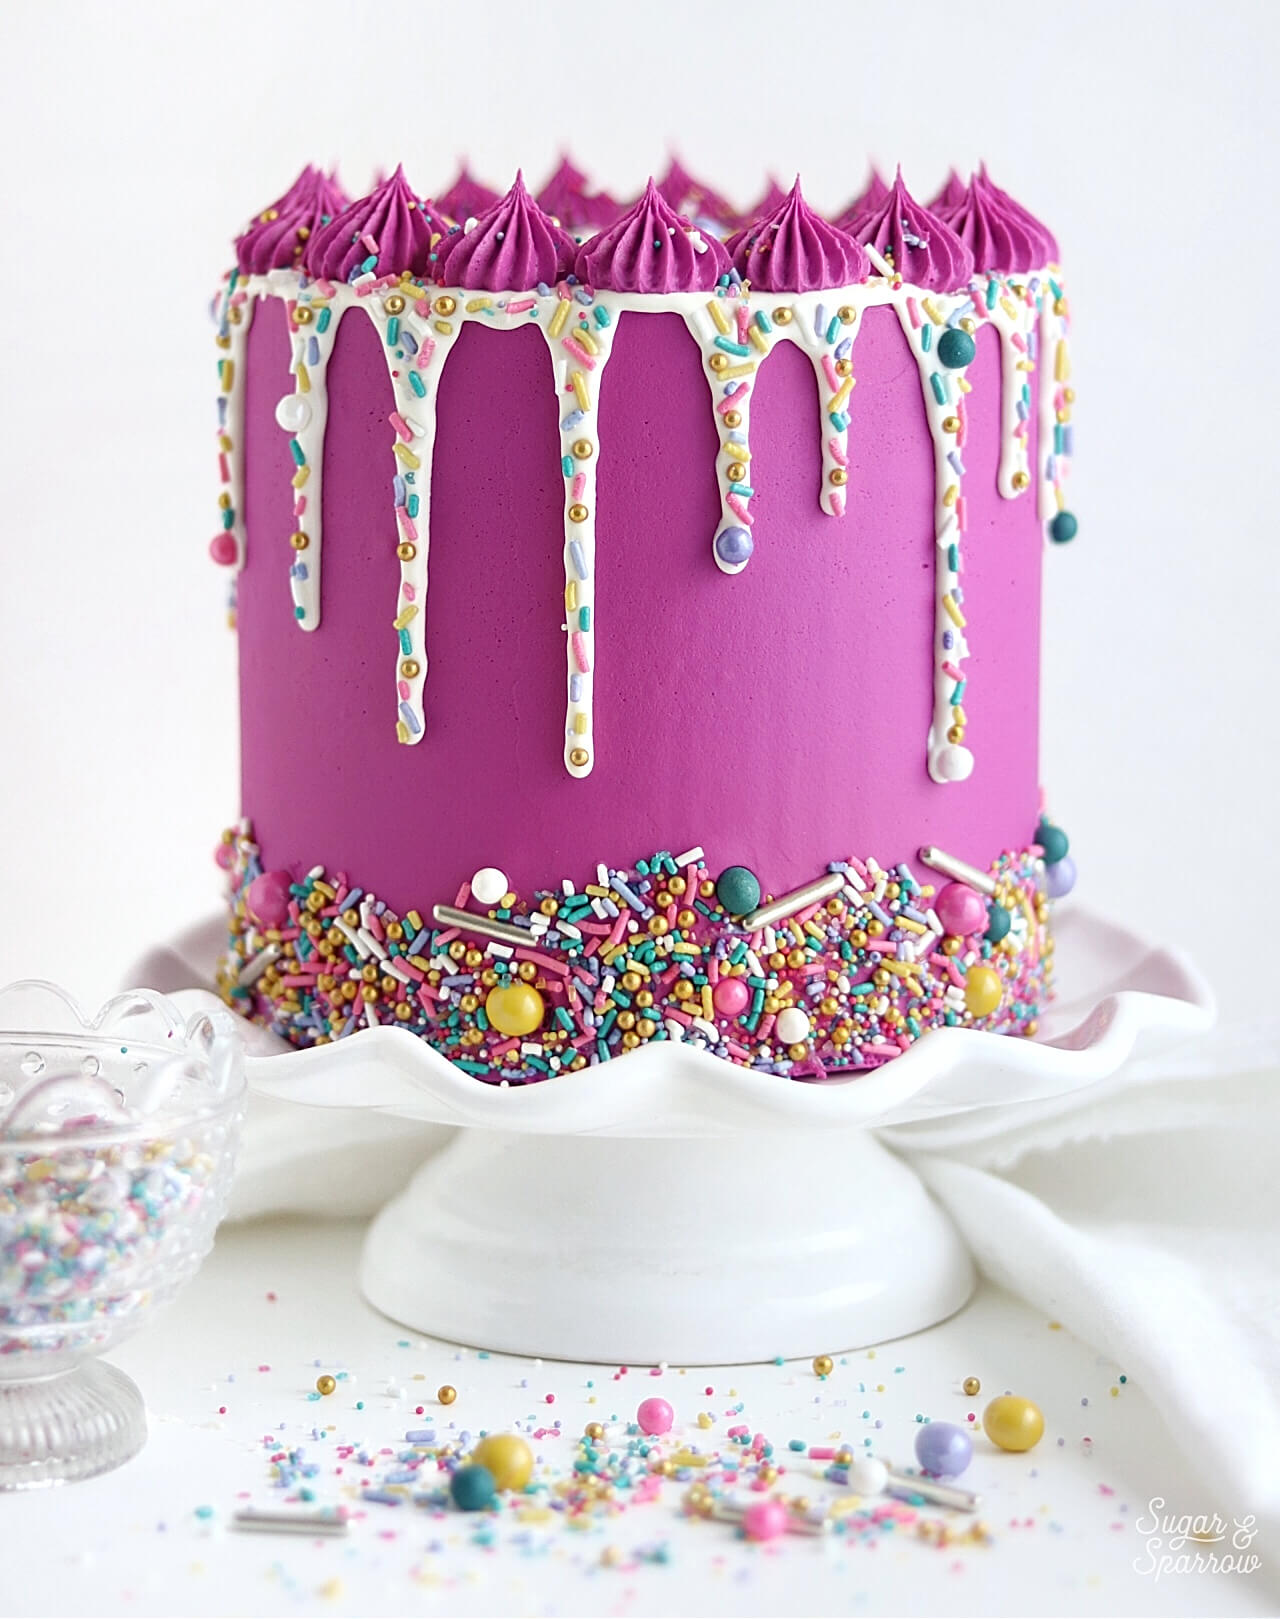
add sprinkles to ganache drip cake

While any sprinkle mix will do for creating a sprinkle drip cake, I was really drawn to the vibrant color scheme of Bewitched. It’s a magical blend of pink, purple, teal, and yellow jimmies and spheres, plus gold and silver dragees to give it some extra bling. I decided to color the buttercream backdrop a deep fuschia (with Americolor soft gel past in Fuschia) to really compliment all of the sprinkle colors, but they’d look pretty on all sorts of buttercream hues. Just look at how pretty they are:
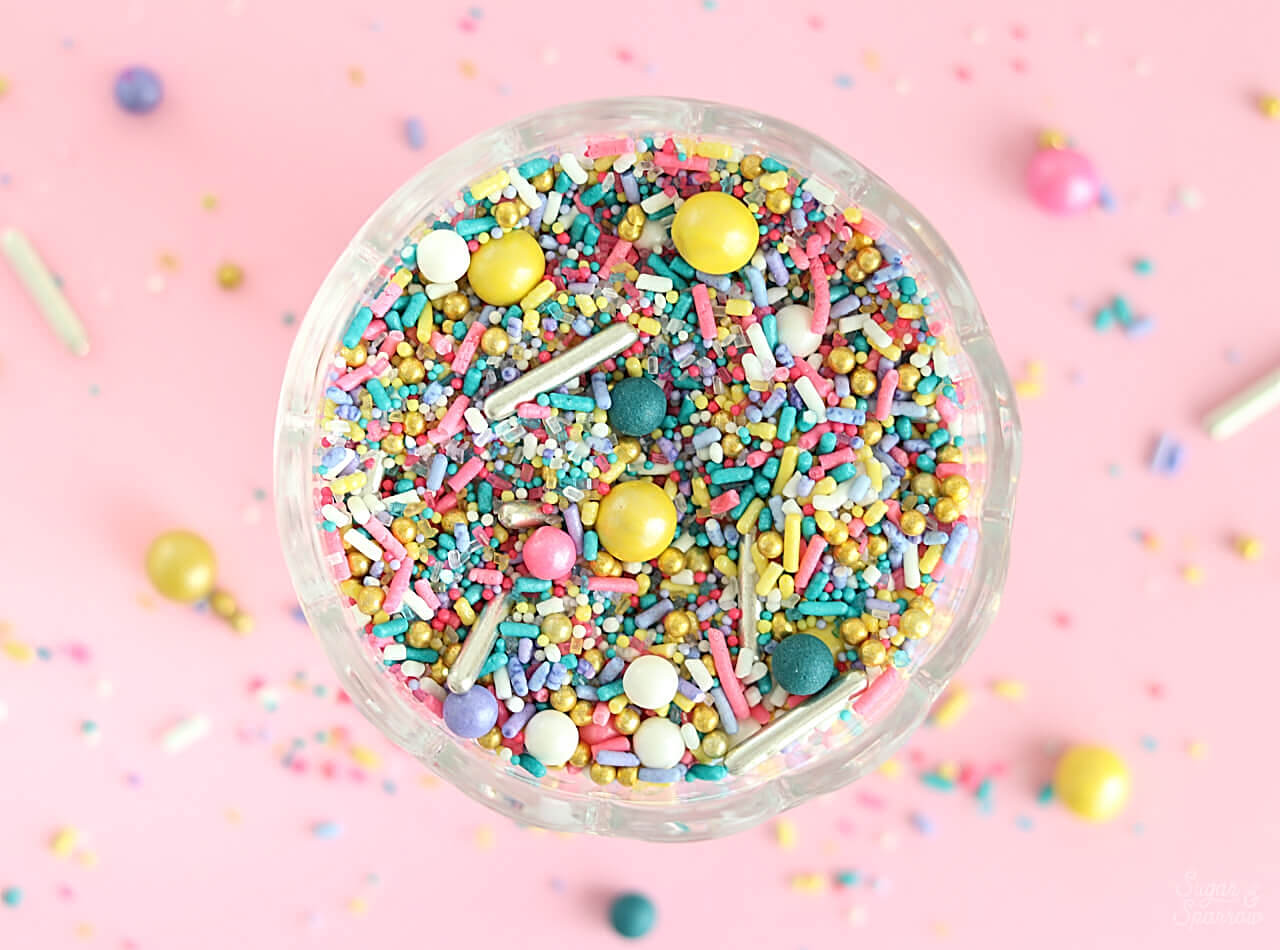
Betwitched sprinkles by sprinklepop

The essentials you’ll need for this look are a good pair of tweezers, the perfect sprinkle mix, and a great chocolate ganache recipe. I’ve got the perfect chocolate ganache recipe and white chocolate ganache recipe at the links below, with all the tips you need for successful drips. The tweezers make it easier to perfectly place the sprinkles (as opposed to using your fingers). And it’ll look incredible with any of SprinklePop’s gorgeous sprinkle mixes! Just pick your favorite and follow along the tutorial below:

You Will Need:

  • A chilled buttercream cake
  • 1 batch of chocolate ganache or white chocolate ganache
  • 8 oz bottle of Bewitched sprinkles (or other favorite sprinkle mix)
  • Tweezers

Step 1: Do A Test Drip

Before you get too crazy dripping your ganache, I always think it’s a great idea to do a test drip on your chilled buttercream cake. Make sure your ganache is room temperature and good drip consistency first, create one drip on the side of your cake, and wait until it stops traveling.
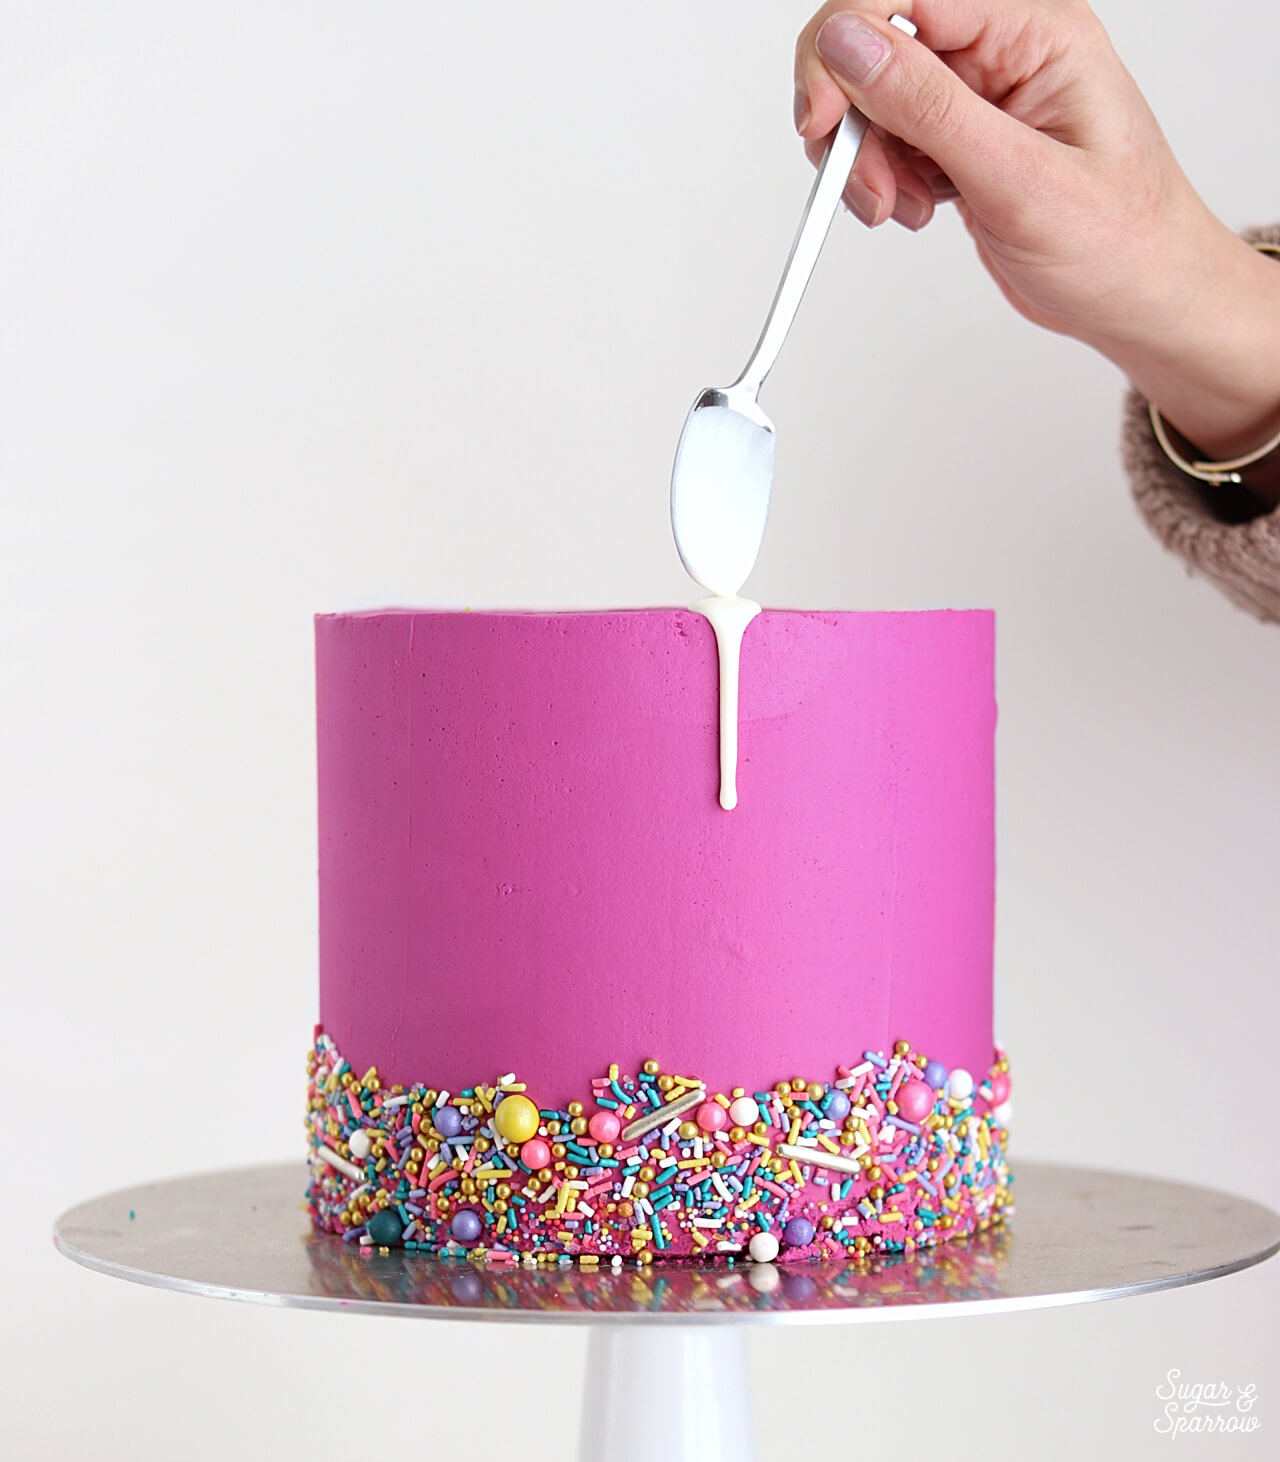
how to drip cake with white chocolate ganache

If your ganache is too runny or warm, it will travel all the way to the bottom of the cake quickly. If it’s too cold and thick, it won’t travel much at all. Adjust the consistency and temperature of your ganache if need be, and only continue the process of dripping your cake once you’re satisfied with the look of the drips.

Step 2: Drip The Sides Of The Cake

Once your ganache has passed the first drip test, continue dripping your ganache down the sides using either a squeeze bottle or the spoon method.
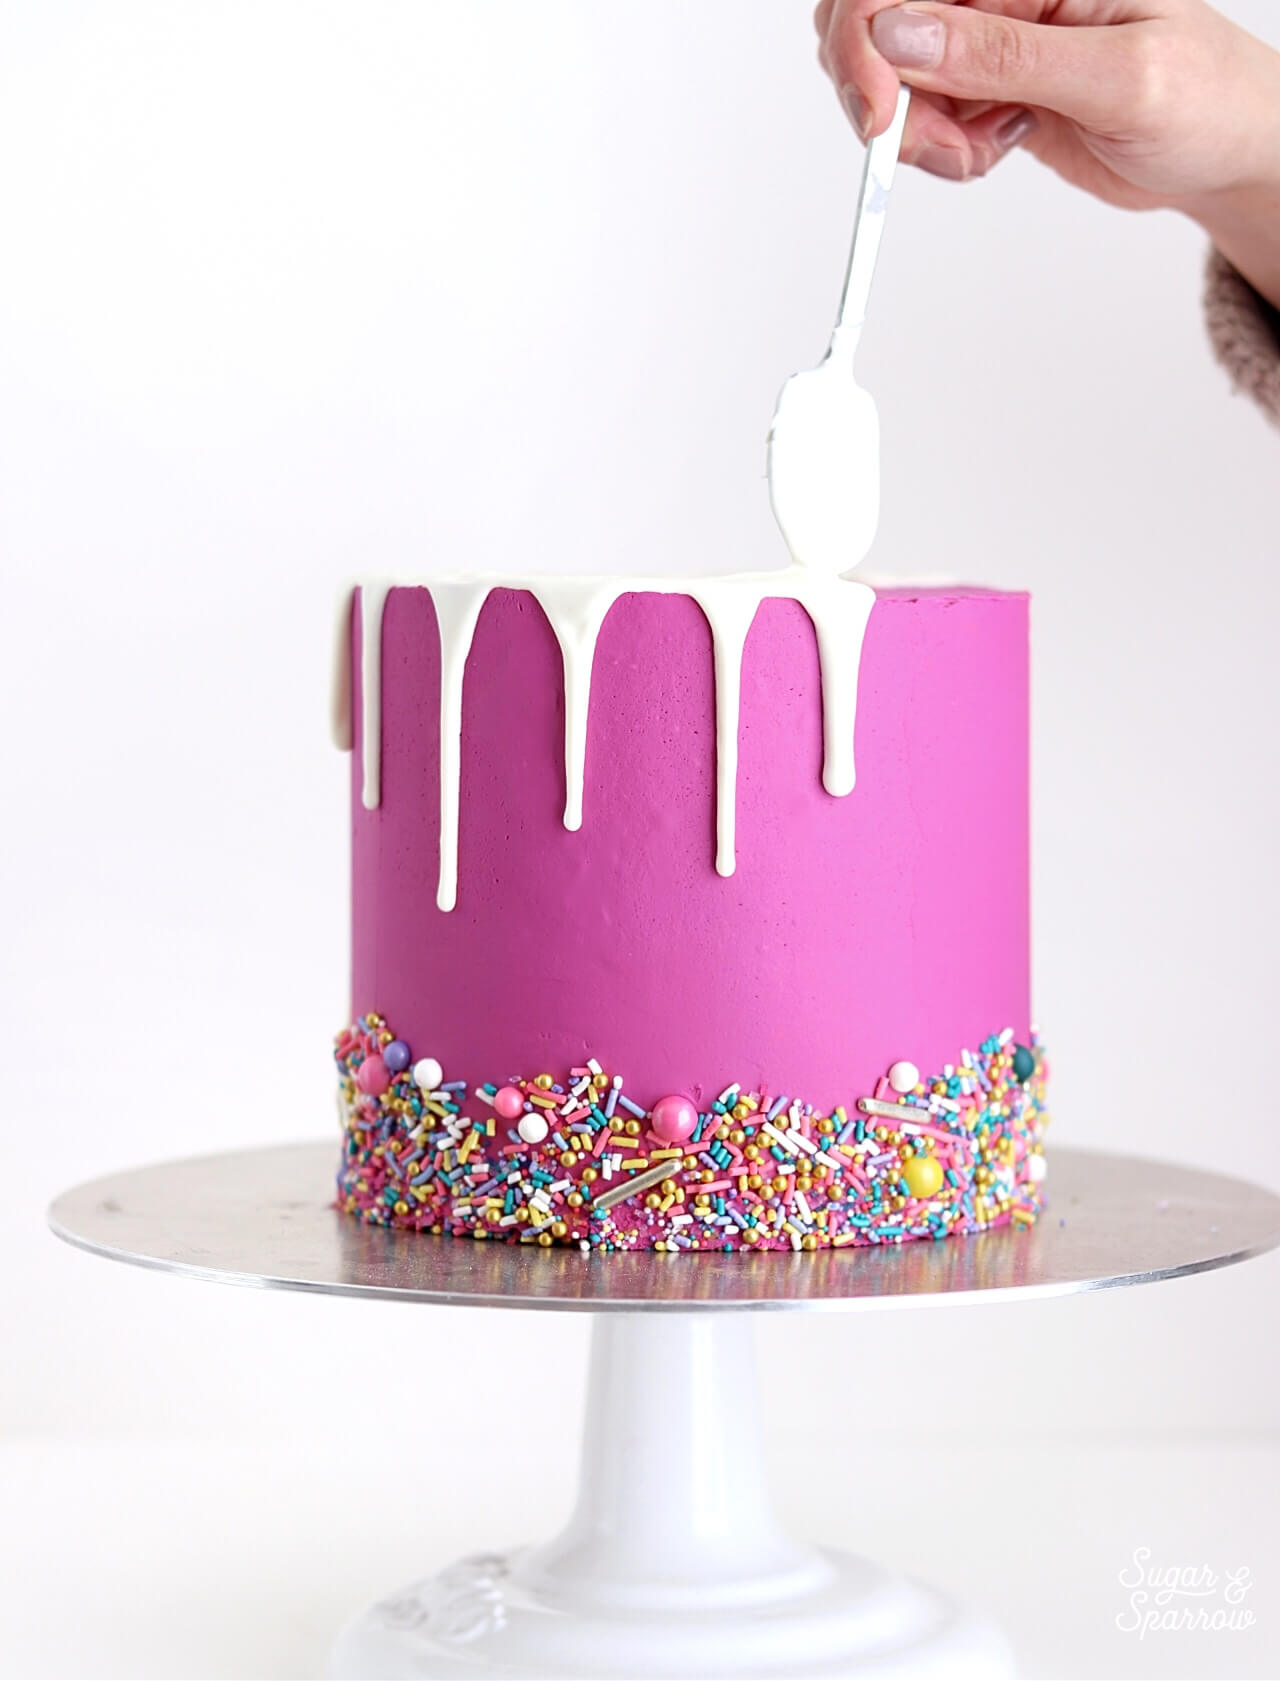
white chocolate ganache drip cake tutorial

It’s best to start by dripping every side before moving on to the top of the cake. This way you can better control the look of the drips from the side view and only fill what’s necessary on the top.

Step 3: Fill In The Top Of The Cake

When all the sides have been dripped, pour a small amount of ganache on the top of the cake and smooth it with an icing spatula or the back of your spoon.
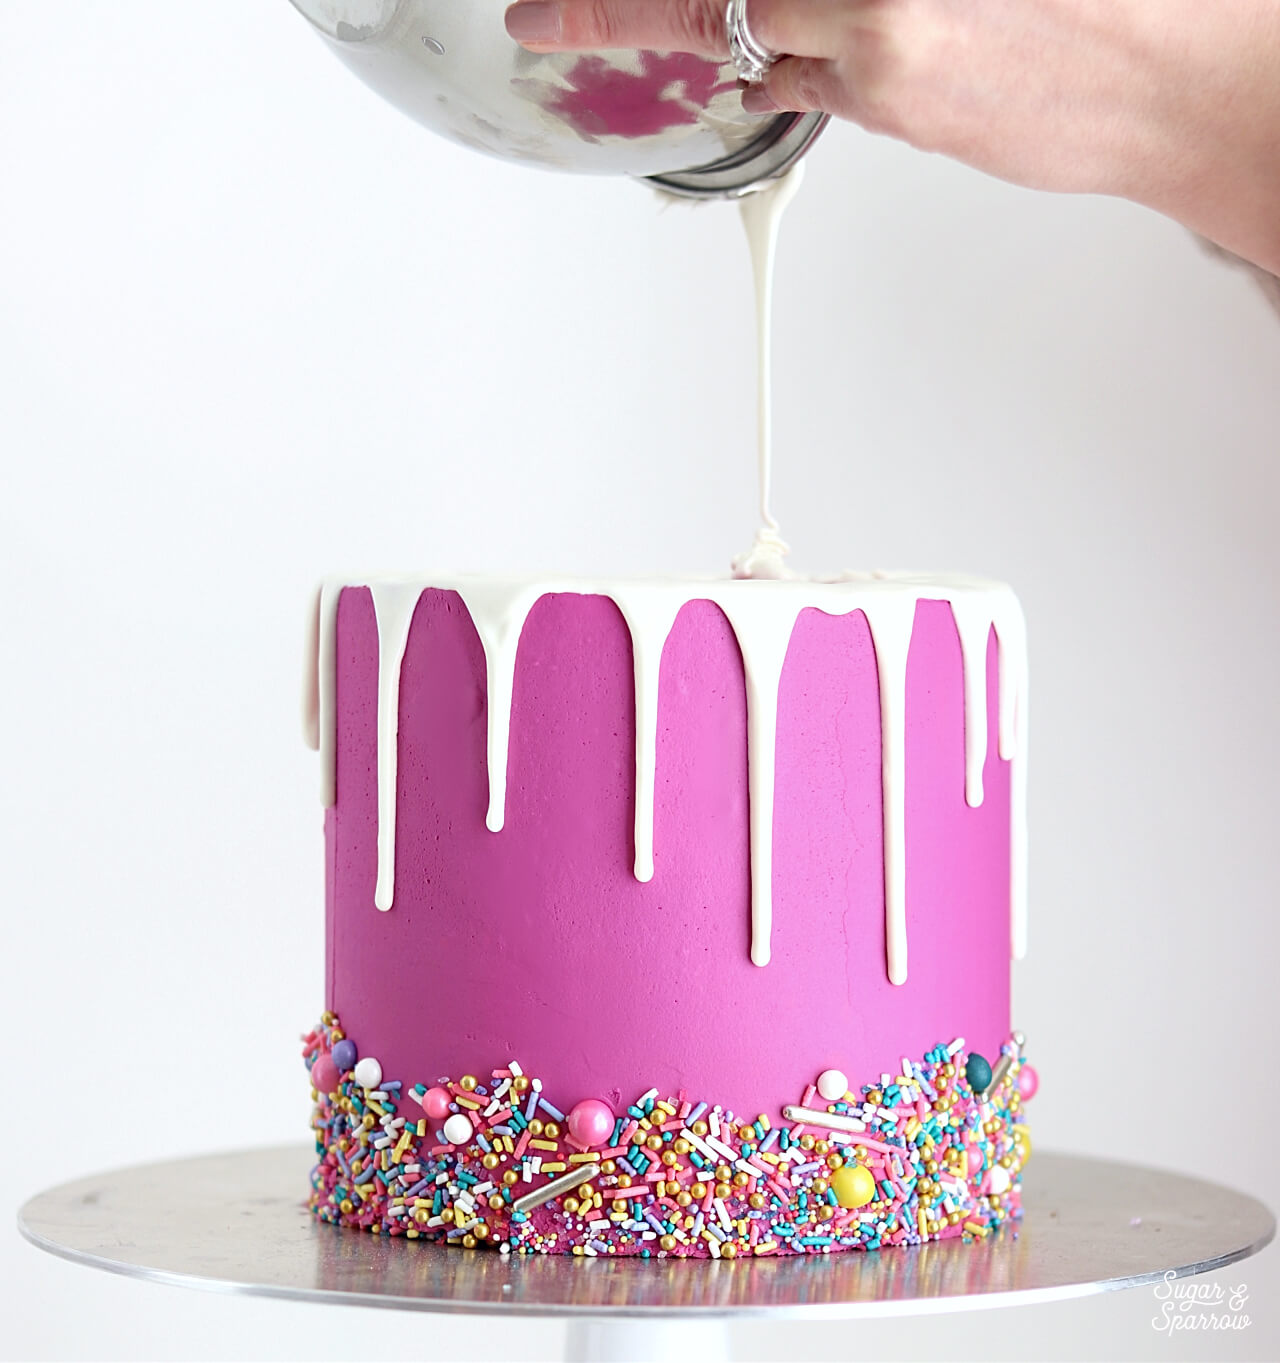
white chocolate ganache drip cake tutorial

Be sure to only fill in the space that’s not yet covered with ganache, because adding too much might make your drips travel farther than you’d like. I always spread the ganache on top until it just reaches where the drips have started to cover on the top of the cake.

Step 4: Place The Sprinkles

Let the ganache rest in the refrigerator for about five minutes while you pour the sprinkles into a small bowl. After refrigerating for just those few minutes, the ganache drips should be sticky, but set enough to ensure that adding sprinkles won’t drag them down.
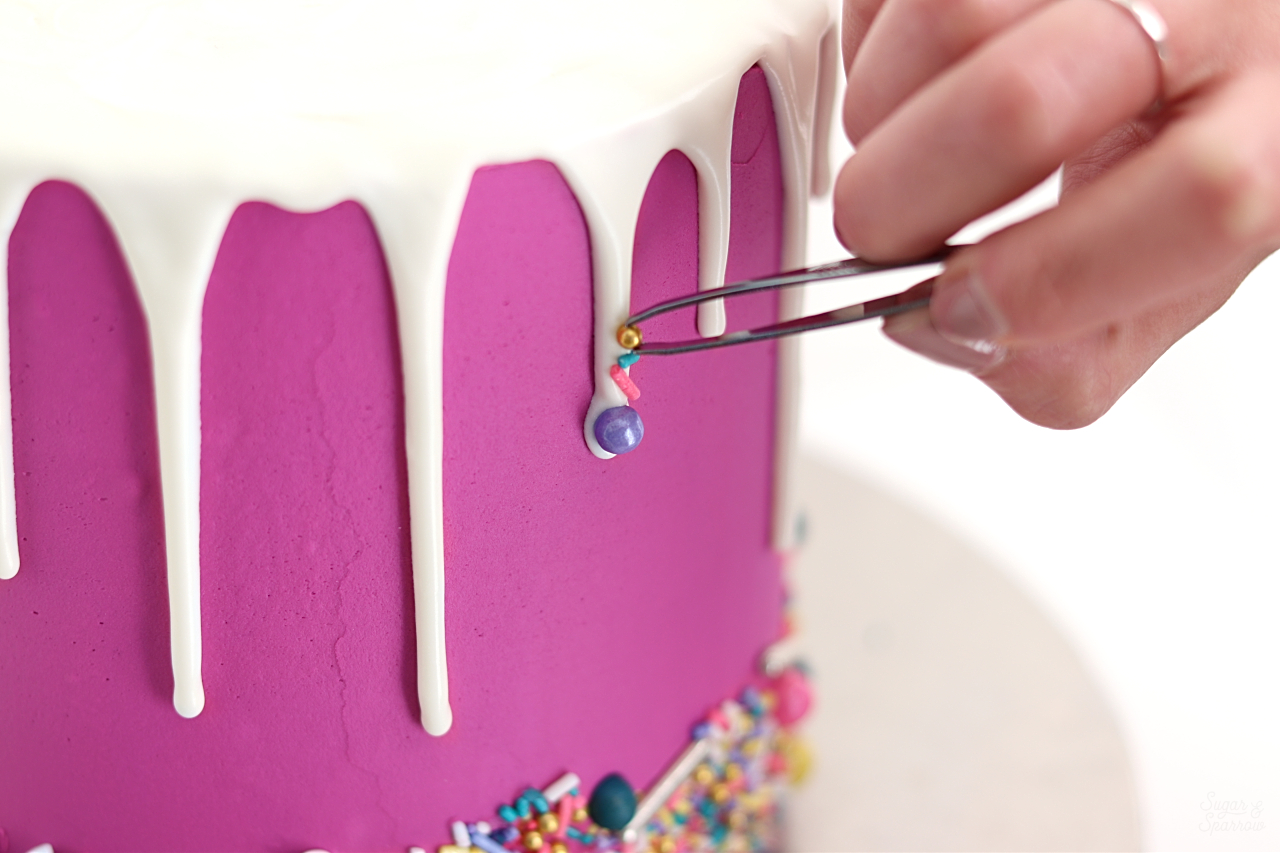
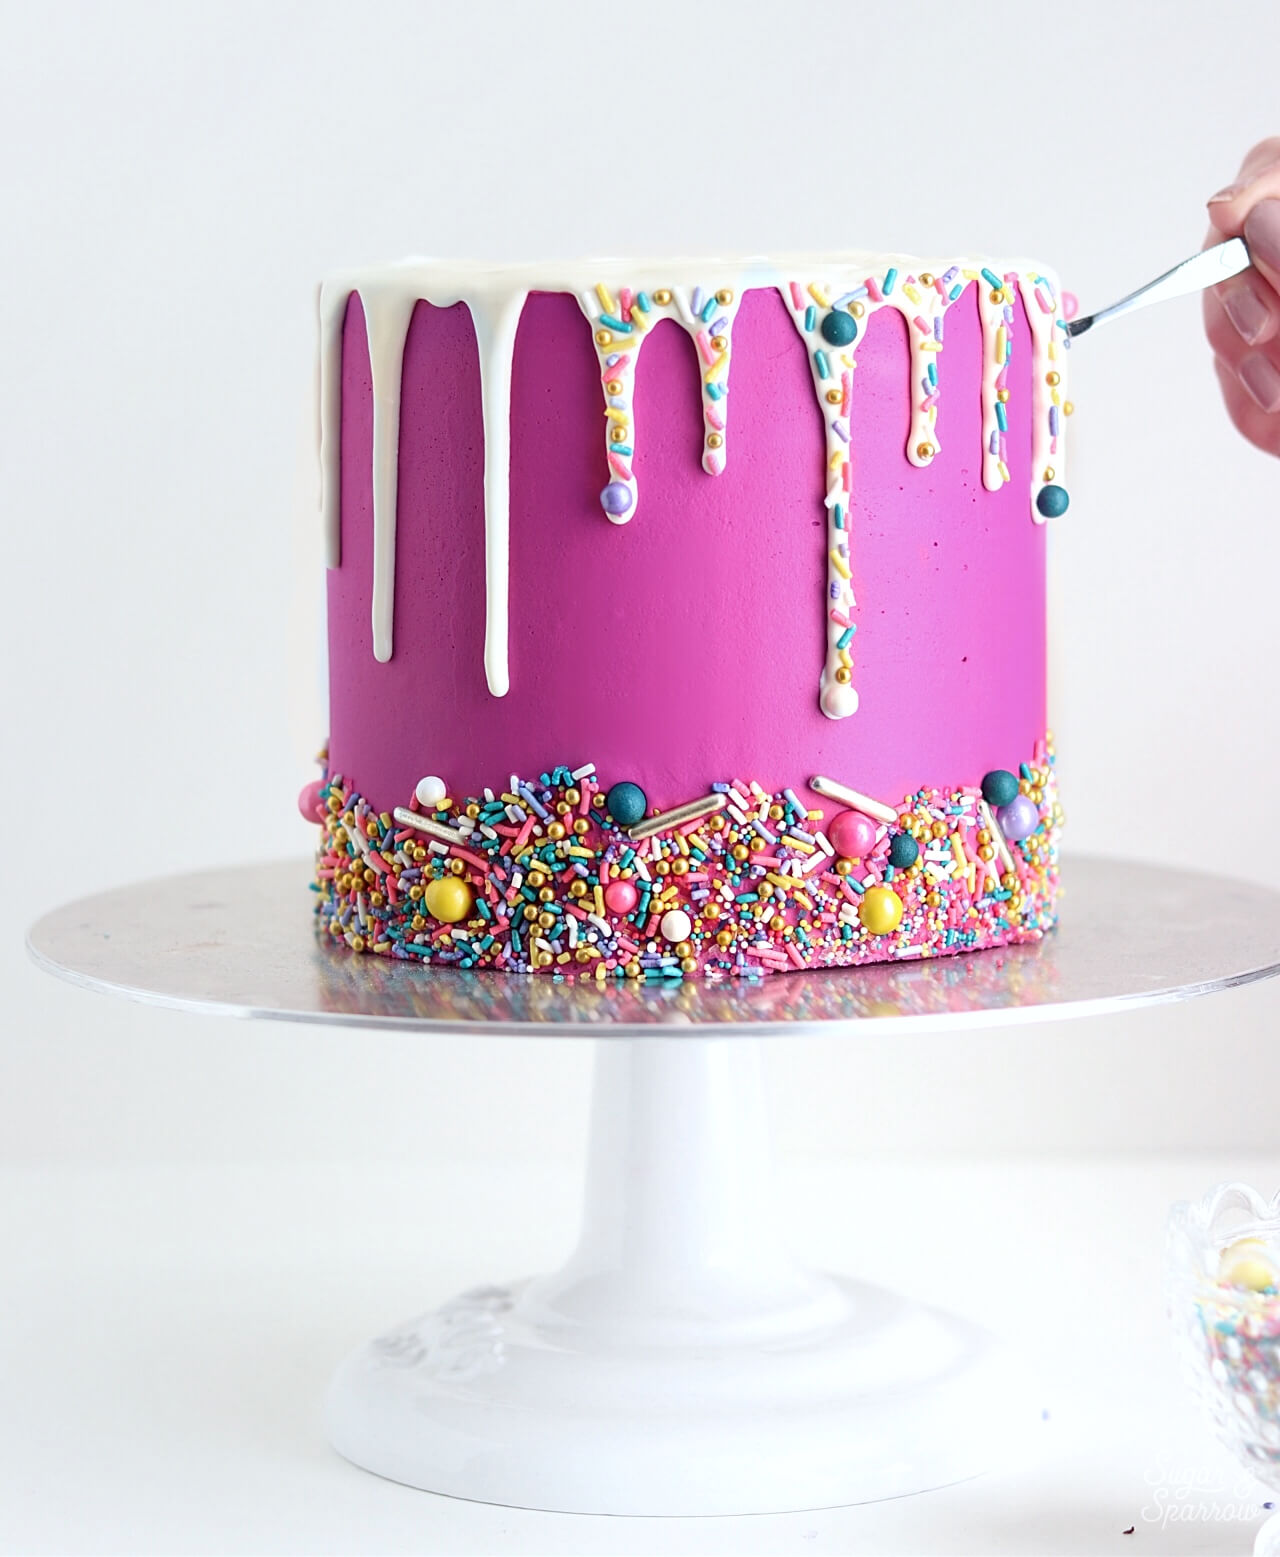
adding sprinkles to drip cake
adding sprinkles to white chocolate ganache

Using your tweezers, place the sprinkles onto the ganache one by one until you achieve the look you’re going for. This could take anywhere from 20-30 minutes, depending on how precise you want to be, but trust me. It’s so worth it!

Step 5: Keep On Decorating

While you can stop after you’ve created your sprinkle drip, I believe that when it comes to SprinklePop sprinkles, more is more!
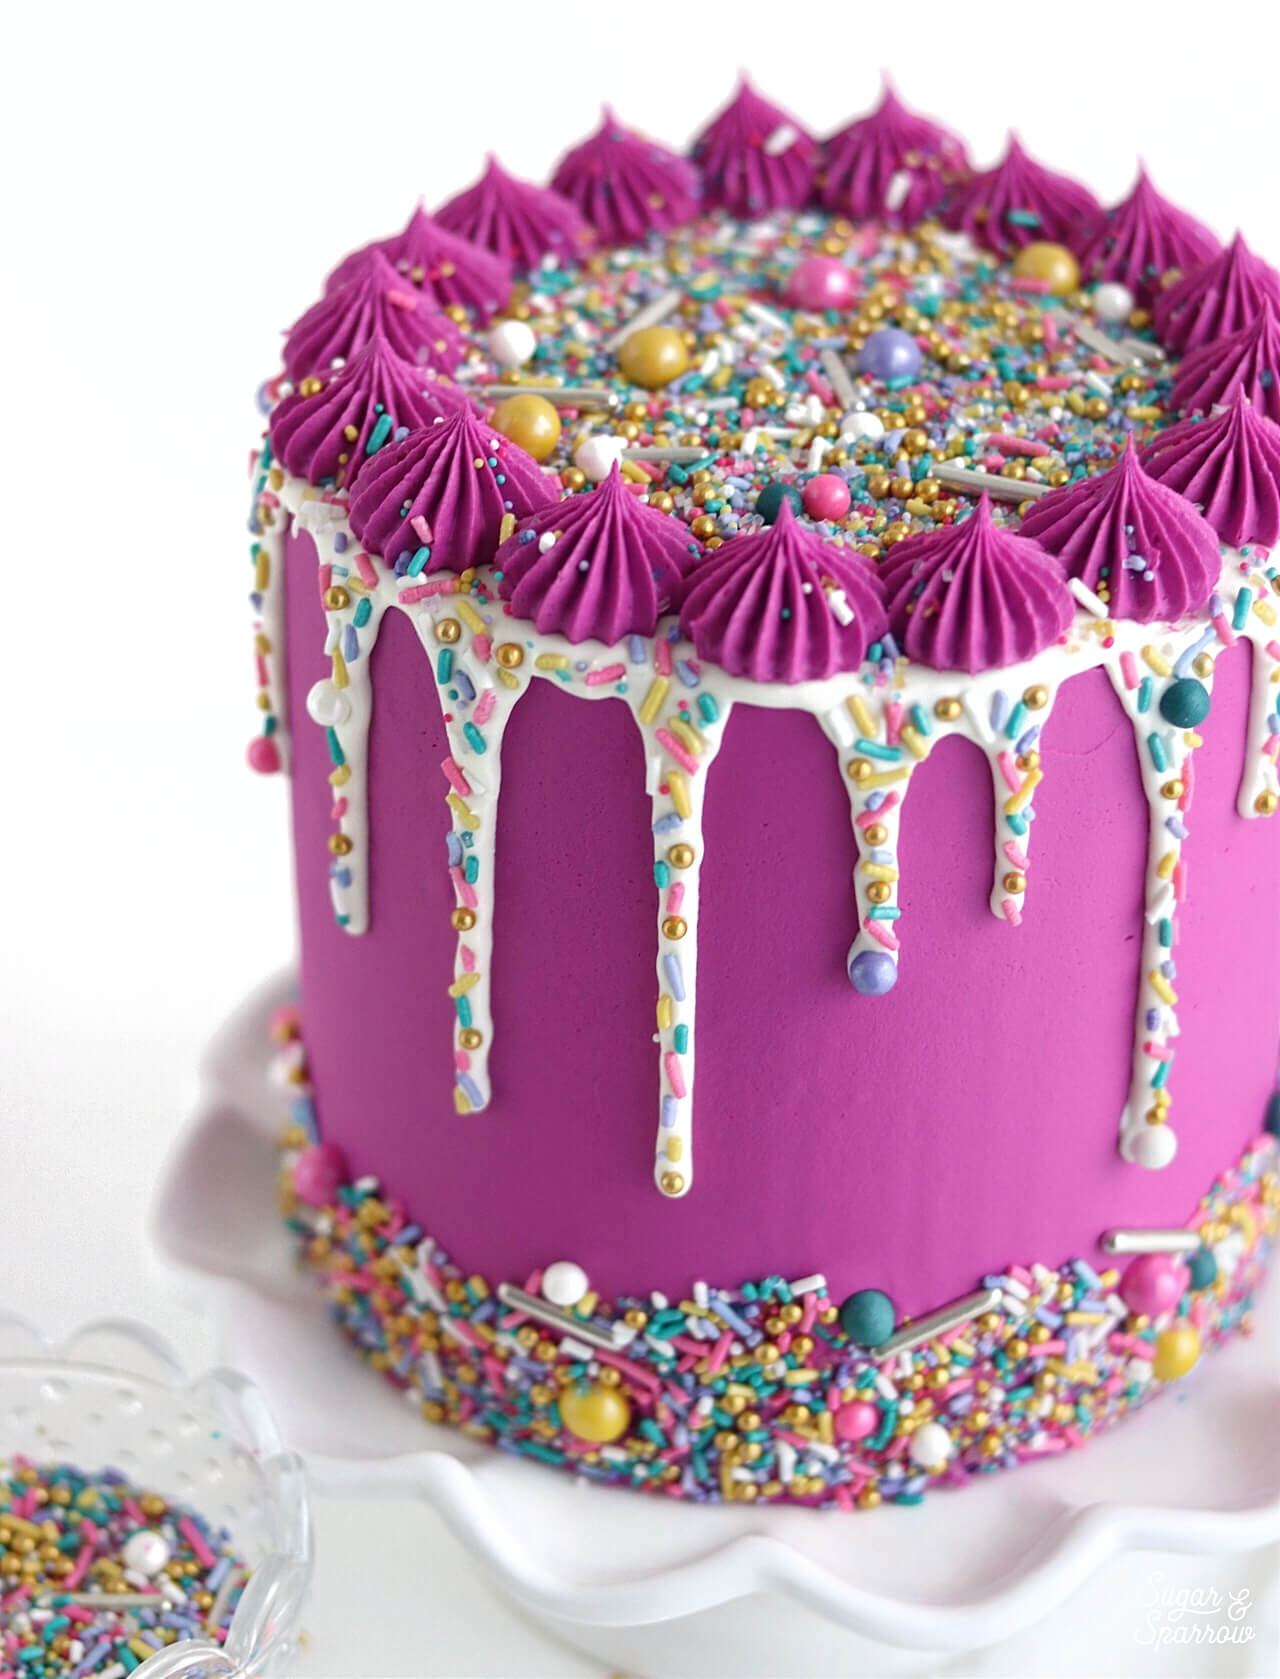
sprinkle drip cake by sugar and sparrow

Before I dripped the cake, I added a border of Bewitched sprinkles to the bottom edge, and after creating the sprinkle drip I added a buttercream border to the top of this cake using Wilton Tip 6B, then filled in the entire top of the cake with even more sprinkles. So fun!
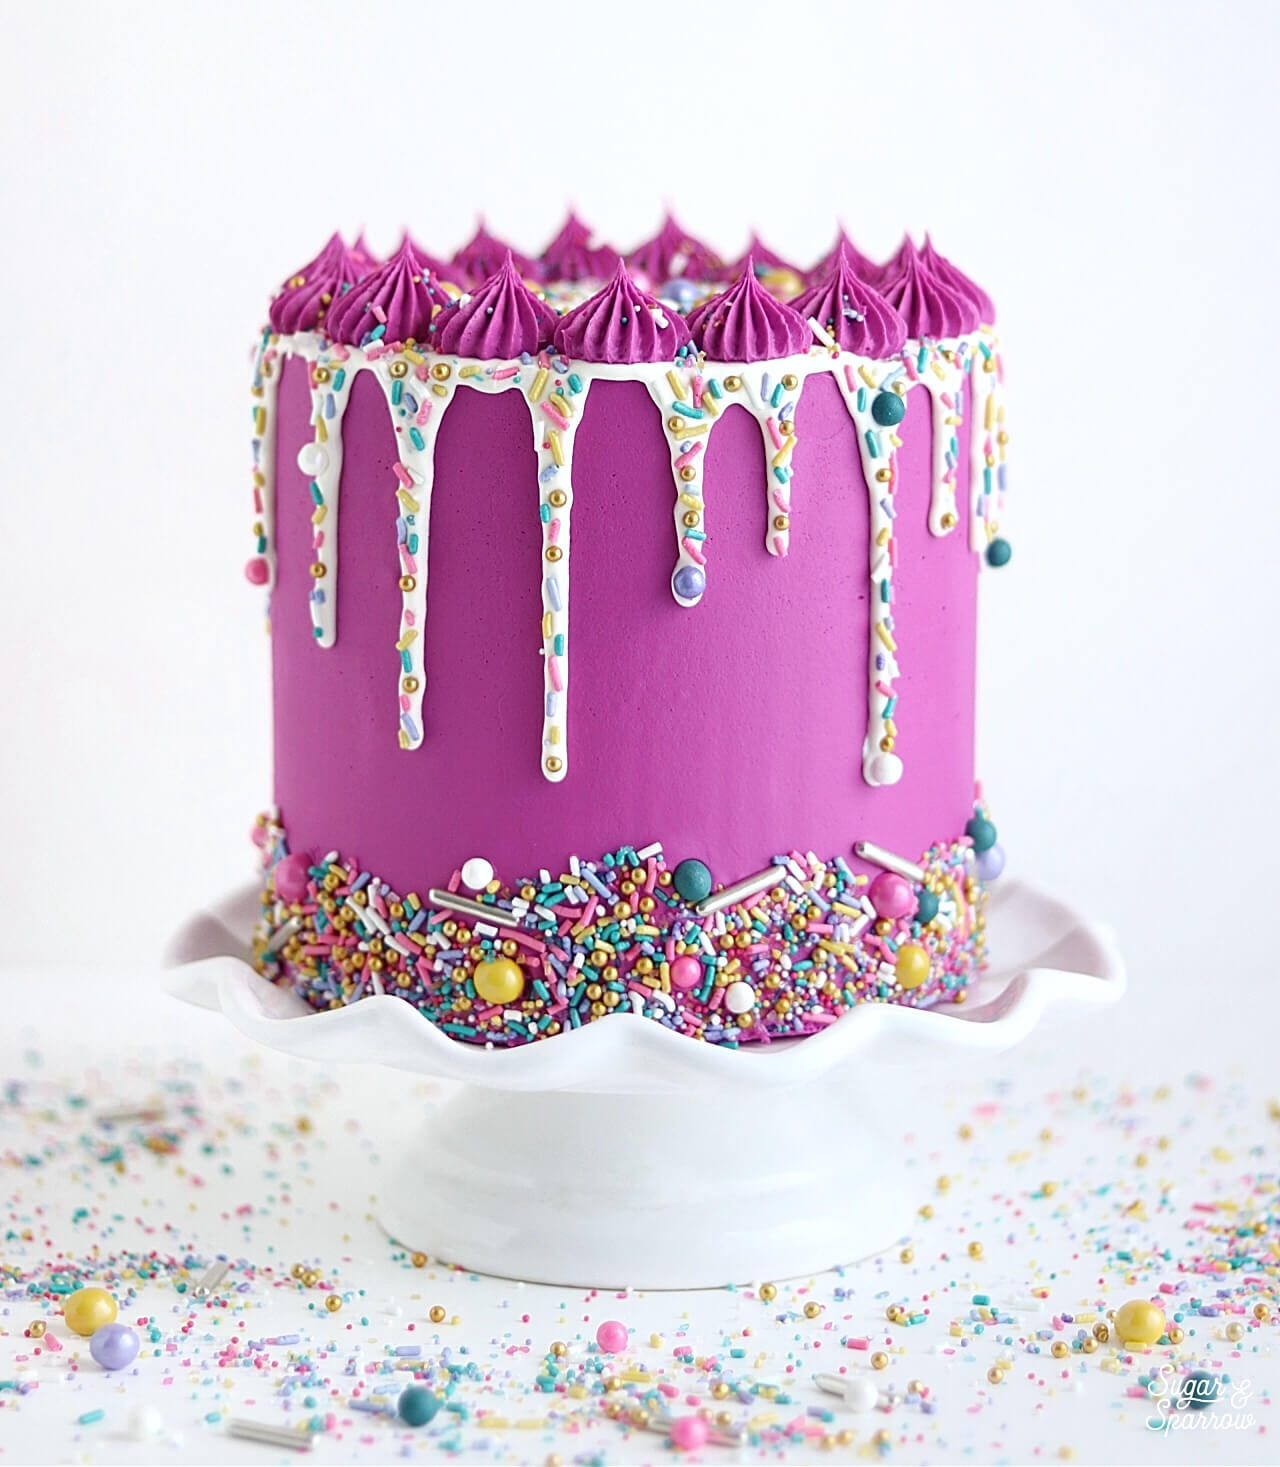
drip cake with sprinkles

Ready to create your very own sprinkle drip cake? Just grab a bottle of your favorite sprinkles and let the fun begin!  

By: Whitney · In: Featured, Seasonal, Tutorials, Valentines · Tagged: cake decorating, cake tutorial, cake with sprinkles, colorful cake, ganache drip cake, pink cake, sprinkle drip cake, sprinkle ganache drip, sprinklepop, sprinkles, sugar and sparrow, white chocolate ganache

you’ll also love

the best vanilla cupcakes recipeThe Perfect Vanilla Cupcake Recipe
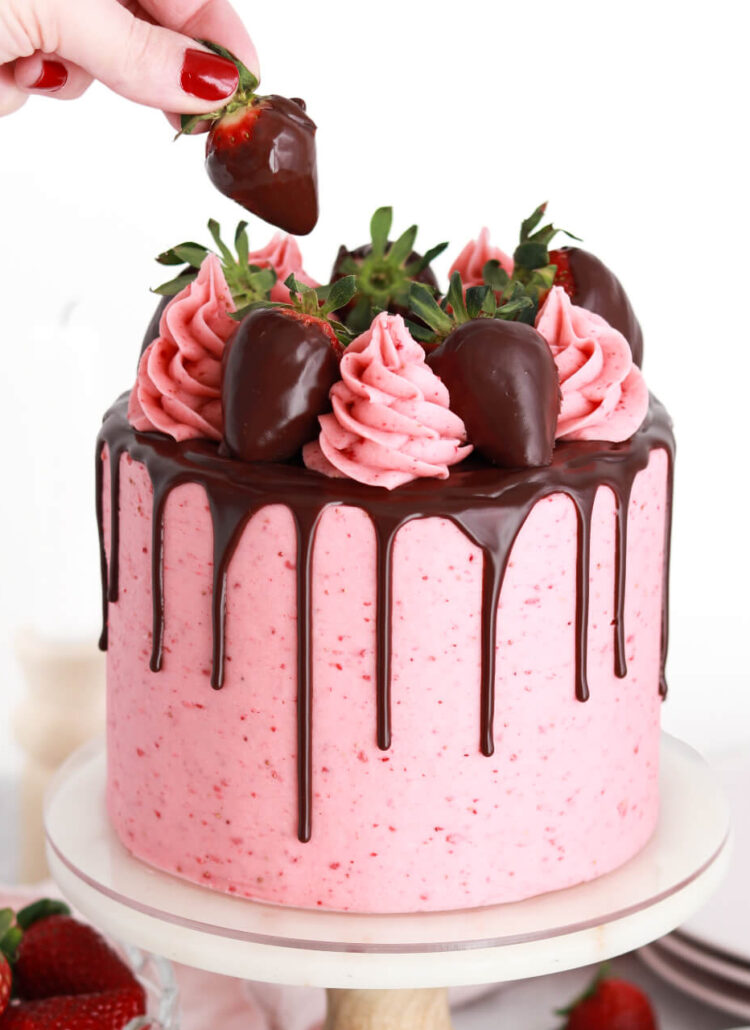
chocolate strawberry cake recipe by sugar and sparrowChocolate Covered Strawberry Cake
pumpkin layer cake recipe by sugar and sparrowPerfect Pumpkin Layer Cake Recipe

Join the List

Stay up to date & receive the latest posts in your inbox.

Reader Interactions

Comments

  1. Heather Beaver says

    January 26, 2023 at 10:56 am

    I love your cakes and tutorials! Quick question though, how do you do a drip cake on a 2 tiered cake? I’m doing a drip on the first cake and then on the additional 6 inch cake tier I’m putting on top. Just wondering if I place the 2nd cake on top before filling in the center area of the drip on the base cake?

    Reply
    • Whitney says

      February 5, 2023 at 8:35 pm

      Hi Heather! I’ve never dripped a two tiered cake before BUT I did find this video from my friend Georgia who has: https://www.youtube.com/watch?v=7bKS5BfH3SQ hope that helps!

      Reply
  2. Sharon says

    December 5, 2020 at 5:06 pm

    Hi! I love your site 🙂 I had done little cakes and dipped them in chocolate ganache (1.5 cream to 1 part chocolate ratio). After waiting a bit, I put my sprinkles on top. I used sprinkles with natural colouring. To my horror, after an hour or so, the sprinkles seem to have “lost” their colour!? Is it due to the natural colouring? The ganache wasnt too warm went I put them on. I think I have to remake the entire batch but dont know how to put on the sprinkles then, cos they would have faded by the time they get to the client.

    Reply
    • Whitney says

      December 7, 2020 at 3:39 pm

      Hi Sharon! I’m so sorry to hear that! It must have something to do with the natural coloring of the sprinkles fading when they come in contact with the wetness of the ganache. I have only ever tried this technique with sprinkles that have a waxy coating over their colors, I think that coating helps lock the color in. I would try the technique again with sprinkles that have that protective layer.

      Reply
  3. Crystal says

    August 5, 2020 at 5:05 pm

    Hello,

    I used your recipe for the white chocolate ganache but I only had half and half and it was super thin. Does the heavy cream really make that much of a difference? Or maybe it was too warm or not enough white chocolate chips? The drips were not pretty like yours. Thank you

    Reply
    • Whitney says

      August 6, 2020 at 11:15 am

      Hi Crystal! Yes, the additional fat in heavy cream is essential for thickening the ganache. It won’t set up right with half and half, so next time be sure to use heavy whipping cream!

      Reply
  4. Sharon Baskin says

    March 1, 2020 at 7:00 am

    This cake is a phenomenal design! Could you please tell me what buttercream you used and how you got that fabulous color? Thanks So much!

    Reply
    • Whitney says

      March 2, 2020 at 11:30 am

      Thank you, Sharon! I used my Vanilla Buttercream Recipe (https://sugarandsparrow.com/vanilla-buttercream-recipe/) and used Americolor Fuschia to achieve that rich color: https://amzn.to/32HAqpz

      Reply
      • Rachel Creegan says

        September 24, 2022 at 10:41 pm

        This is such a beautiful cake, I love the color! It’s so vibrant and fun, I want to make one right now!!

        Reply
        • Whitney says

          September 27, 2022 at 11:04 am

          Thanks so much, Rachel!

          Reply
  5. Cathy Eccersley says

    January 11, 2020 at 4:01 am

    Fab tutorial which I can’t wait to try out! Do you know if Hersheys cookie and creme chocolate should be classed as white or milk, for ratio purposes? Thank you.

    Reply
    • Whitney says

      January 13, 2020 at 9:28 am

      Hi Cathy! I would classify the Hershey’s Cookies & Creme Chocolate as white chocolate, since that’s what’s used as the base. I’ve never turned a chocolate bar with bits like oreo inside into a ganache recipe before, but it sounds heavenly and I hope it turns out well!

      Reply
  6. Susan says

    March 1, 2019 at 10:02 am

    Omg – could you tell me where to find the butter cream cake recipe?!!!!!

    Reply
    • Whitney says

      March 1, 2019 at 2:44 pm

      Hi Susan! My vanilla buttercream recipe can be found here: http://www.sugarandsparrow.com/vanilla-buttercream-recipe I used Americolor Fuschia to color it.

      Reply
      • Susan says

        March 4, 2019 at 8:36 pm

        Thank you! I’m having your cake made for my 50th! I’m super excited!!!

        Reply
        • Whitney says

          March 5, 2019 at 2:27 pm

          How fun!! Happy birthday!!

          Reply
      • Michaeline says

        March 22, 2021 at 5:34 pm

        Isn’t that bitter?

        Reply
        • Whitney says

          March 22, 2021 at 9:24 pm

          If you’re wondering about the color gel used for the buttercream, it’s not bitter at all. The reason I love AmeriColor is because it produces rich colors without altering the taste of what you’re coloring!

          Reply
  7. Aimee says

    February 12, 2019 at 8:13 am

    Your cakes are fabulous! I bought these sprinkles to make my daughters cake this past weekend, and I thought putting the sprinkles on the bottom of the cake would be the easiest! I was wrong — I made a huge mess! I know you use tweezers for the sprinkles on the drip, but what about the bottom. I used my fingers, but, yet, I know I must have done it wrong!!!! Thank you so much if you have a moment to help me out!

    Reply
    • Whitney says

      February 12, 2019 at 10:13 am

      Hi Aimee! Sprinkles are a messy job for sure! I usually put a baking sheet underneath the cake turntable to collect the extra sprinkles, and for applying them to the bottom border of the cake I use my hands as well. I always make sure that the buttercream is still sticky before I apply sprinkles to it (not chilled or anything) and use the palm of my hand to gently press the sprinkles onto the side of the cake.

      Reply
  8. Claudia Machado says

    January 28, 2019 at 4:16 pm

    Ola que prazer imenso poder estar te enviando esta mensagens belíssimo teu trabalho vou continuar trabalhando e quem sabe um dia

    Reply
    • Whitney says

      January 29, 2019 at 9:12 am

      Olá Claudia! Muito obrigado! Você é tão gentil.

      Reply

Leave a Reply Cancel reply

Your email address will not be published. Required fields are marked *

Recipe Rating


Next Post >

Painted Buttercream Cake Tutorial

Primary Sidebar

Welcome to Sugar & Sparrow

Welcome to Sugar & Sparrow

Helping you whip up pretty desserts with confidence and creativity. And hopefully sharing a few laughs with you along the way!

Learn More

Connect

let’s bake!

Get my very best recipes, baking tips, and decorating tutorials sent to your inbox

Featured Posts

strawberry sheet cake recipe

Strawberry Sheet Cake Recipe

buttercream terrazzo cake tutorial

Buttercream Terrazzo Cake Tutorial

apple sheet cake with spiced buttercream

Spiced Apple Sheet Cake

Search

Archives

Follow Along

@sugarandsparrowco

HOMEMADE COOKIE DOUGH ICE CREAM 🍪🍦(recipe below) t HOMEMADE COOKIE DOUGH ICE CREAM 🍪🍦(recipe below) turns out that making cookie dough ice cream from scratch is not only EASY with the no-churn method, it also ensures you get the ideal amount of soft chocolate chip cookie dough in every single bite 🙌🏼

🍦Recipe link in my bio + at https://sugarandsparrow.com/no-churn-cookie-dough-ice-cream/ 

COOKIE DOUGH BITES
1 Cup (132g) all-purpose flour, heat-treated
1/4 Cup (57g) unsalted butter, room temp
1/4 Cup (50g) granulated sugar
1/3 Cup (67g) packed light brown sugar
1 tsp pure vanilla extract
2 Tbsp (30ml) whole milk
1/4 tsp salt
1/2 Cup (90g) mini chocolate chips

INSTRUCTIONS:
1. Line a cookie sheet with parchment, add the flour in a single layer, and bake at 350ºF (177ºC) for 5 minutes, until the flour has reached 160ºF (71ºC). Cool to room temp. 
2. Cream together the butter, granulated sugar, and brown sugar using a hand mixer or stand mixer. Add the vanilla, milk, and salt and mix until combined. Mix in  the (cooled) heat-treated flour on low speed, then mix in the chocolate chips.
3. Use 1/2 tsp measuring spoon to measure out the cookie dough bites and refrigerate.

NO-CHURN ICE CREAM
2 Cups (480ml) heavy whipping cream, cold
14 Oz sweetened condensed milk
2 tsp vanilla extract
pinch of salt
1/2 Cup (90g) mini chocolate chips

INSTRUCTIONS: 
1. Add the cold heavy whipping cream into a large chilled metal bowl. Beat with a hand mixer (or whisk attachment on your stand mixer) until stiff peaks form, about 2-4 minutes. 
2. In a separate medium bowl, whisk together the sweetened condensed milk, vanilla, and salt. Pour the vanilla condensed milk mixture into the large bowl of whipped cream and fold together until fully combined.
3. Reserve about 1/4 cup of the cookie dough bites and a few tbsp mini chocolate chips, then fold the rest of the chocolate chips and cookie dough into the vanilla ice cream mixture. Add the cookie dough ice cream into a loaf pan, sprinkle the reserved cookie dough and chocolate chips on top. Cover and freeze for 6-8 hours, after which the ice cream should be semi-firm, scoop-able, and ready to enjoy!

#cookiedoughicecream #cookiedough #nobake #icec
MILKY WAY CAKE 🍫✨this tastes JUST like a Milky Way MILKY WAY CAKE 🍫✨this tastes JUST like a Milky Way candy bar, but in cake form! It’s layers of decadent chocolate cake filled with homemade chocolate nougat and gooey caramel, then topped with chocolate buttercream. A MUST try if you love Milky Way 😍
 
Comment RECIPE and I’ll send it straight to your inbox or find it at https://sugarandsparrow.com/milky-way-cake-recipe/ 
⁣ 
#milkywaycake #caramel #chocolatecake #chocolatecaramelcake #cakesofinstagram
PEACHES AND CREAM CAKE 🍑 I have not been able to s PEACHES AND CREAM CAKE 🍑 I have not been able to stop thinking about how tender this cake is (even when chilled!) + every bite has the most refreshing, creamy peach flavor 🙌🏼 it’s layers of extra soft vanilla cake, homemade peach syrup, brown sugar peach filling, and cloud-like whipped cream frosting. Best use of your late summer peaches imo!

Comment “PEACH CAKE” and I’ll send the recipe straight to you 💌 or find the recipe at https://sugarandsparrow.com/peaches-and-cream-cake/

#peachesandcream #peachcake #whippedcreamcake #peaches #cakedecorating
OREO CAKE 🖤 with black cocoa powder in those moist OREO CAKE 🖤 with black cocoa powder in those moist chocolate cake layers (same main ingredient in Oreo cookie shells!) + cookies and cream buttercream, the flavor profile of this cake is so spot on!! Make this for the Oreo lover in your life 😍
  
Get the recipe at https://sugarandsparrow.com/oreo-cake-recipe/
  
#cookiesandcream #oreocake #oreo #blackvelvet #chocolatecake 
EASY FUDGE BROWNIE ICE CREAM 🤎 (recipe below) the EASY FUDGE BROWNIE ICE CREAM 🤎 (recipe below) the easiest no-churn chocolate ice cream with gooey brownies + ribbons of fudge in every bite!! Even if you’ve never made ice cream before, you’ll be amazed at how easy this is to make without an ice cream maker 

🍦Full recipe at https://sugarandsparrow.com/no-churn-fudge-brownie-ice-cream/ + more no-churn ice cream recipes linked in my bio 

INGREDIENTS
2 cups (480ml) heavy whipping cream, cold
3/4 cup (4oz, 135g) semi-sweet chocolate chips
14 oz sweetened condensed milk
1/3 cup (30g) cocoa powder 
1 tsp vanilla
pinch of salt
2 cups brownie chunks (store bought or homemade) 
6 oz hot fudge sauce

INSTRUCTIONS
1. In a large chilled bowl, beat the heavy whipping cream with a hand mixer (or stand mixer w/ whisk attachment) until stiff peaks form, about 2-4 minutes. Place into refrigerator.
2. Heat the chocolate chips in the microwave in 30-second increments, stirring after each one, until melted and smooth.
3. In a separate medium bowl, whisk together the sweetened condensed milk and melted chocolate, then whisk in the cocoa powder, vanilla, and salt. 
4. Fold 1 cup of the whipped cream into the chocolate condensed milk mixture. Then, pour the chocolate mixture into the remaining whipped cream and fold together until combined. Fold in the brownie chunks. 
5. Scoop large spoonfuls of the brownie ice cream mixture into a loaf pan along with a few smaller spoonfuls of the hot fudge sauce. Use a wooden skewer or butter knife to swirl the hot fudge and create ribbons as you go. Continue adding and swirling until all of it is in the loaf pan.
6. Press the reserved brownies into the top of the ice cream, then cover with plastic wrap or aluminum foil. Freeze for 6-8 hours, after which the ice cream should be semi-firm, scoop-able, and ready to enjoy!

#nochurnicecream #brownieicecream #chocolateicecream #nobake #icecreamlover

Footer

On the Blog

  • Cake Basics
  • Recipes
  • Tutorials

Info

  • About
  • Privacy Policy & Disclosure

stay in the know

Copyright © 2026 · Theme by Sugar & Sparrow