
I have an ongoing list of cake flavors I want to make, and this golden milk cake recipe has been on it for two whole years! I just love golden milk lattes and thought a layer cake version would be a fun flavor to try in cake form. So when I was killing time on baby watch in my final weeks of pregnancy, I decided to break out the turmeric and get a little creative in the kitchen. Not only did I learn some surprising things in the testing process, but the end result was so tasty and timely for Fall baking. Whether you’re a turmeric tea lover or just looking for something different than your average tea cake, this one’s for you!

The thing I love most about a golden milk latte is the spice blend, so I made sure to incorporate a good amount of spice in this recipe with turmeric, cinnamon, and ginger. And since my milk of choice for a golden milk latte is always coconut milk, I decided to use it as the liquid in this cake and the buttercream. Not only did coconut milk complement the flavor profile perfectly, it added a great amount of moisture to the cake without making it dense at all. I usually add sour cream to my cake recipes for moisture, but with the coconut milk, this recipe doesn’t need any extra moisture! From the taste to the texture, this Golden Milk Cake is exactly what I was hoping for.
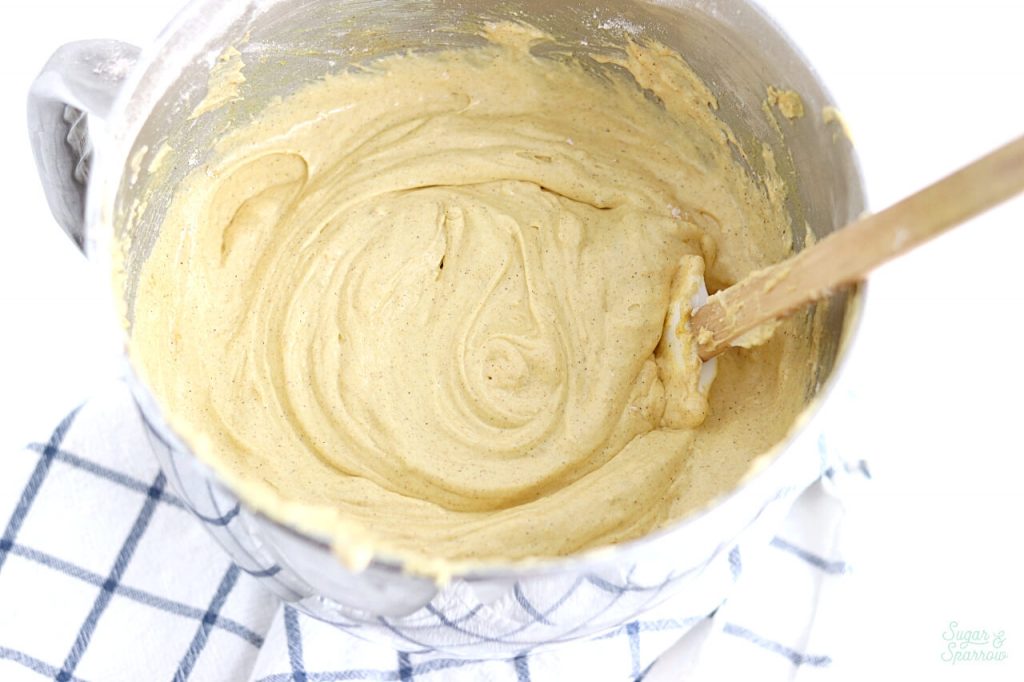
Let’s talk about the color of this cake, because I learned some science-y things about that in my recipe testing. In my first trial, I used baking powder and baking soda as leavening agents, and while the cake rose beautifully and tasted great, the color was reddish orange instead of the classic turmeric yellow color I was envisioning. It looked like a sweet potato cake!
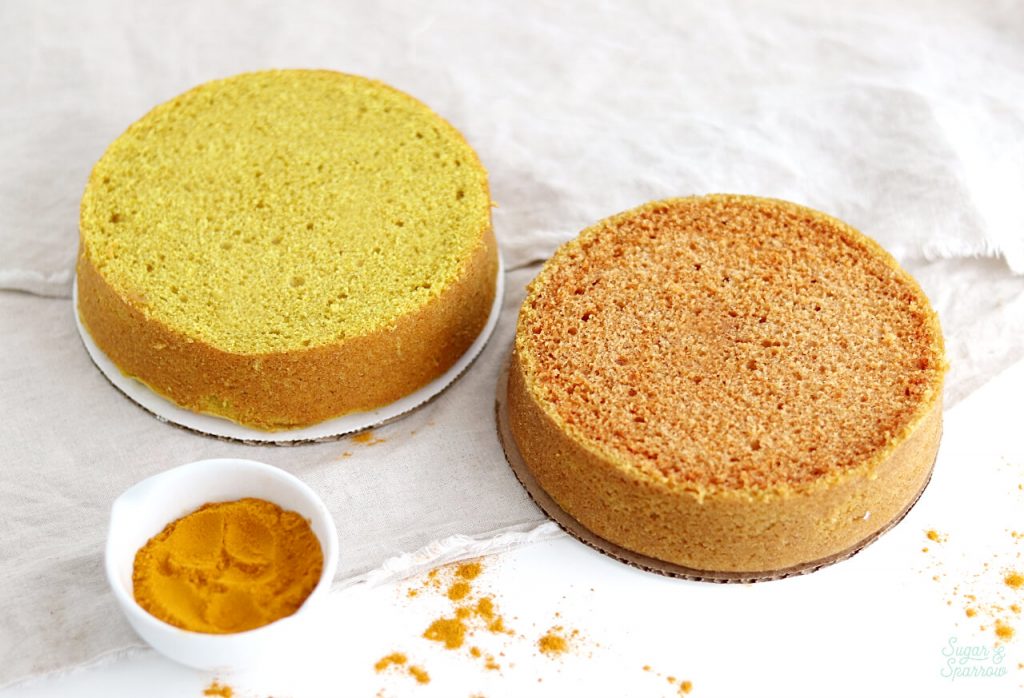
After doing a little research, I realized that when turmeric comes into contact with alkaline (or base) solutions like baking soda, it turns the end result red. Being the perfectionist I am, I just couldn’t settle for a Golden Milk Cake that was not a golden yellow color, so I tweaked the recipe to omit the baking soda and include more baking powder. The result: a tasty Golden Milk Cake that is perfectly turmeric colored!
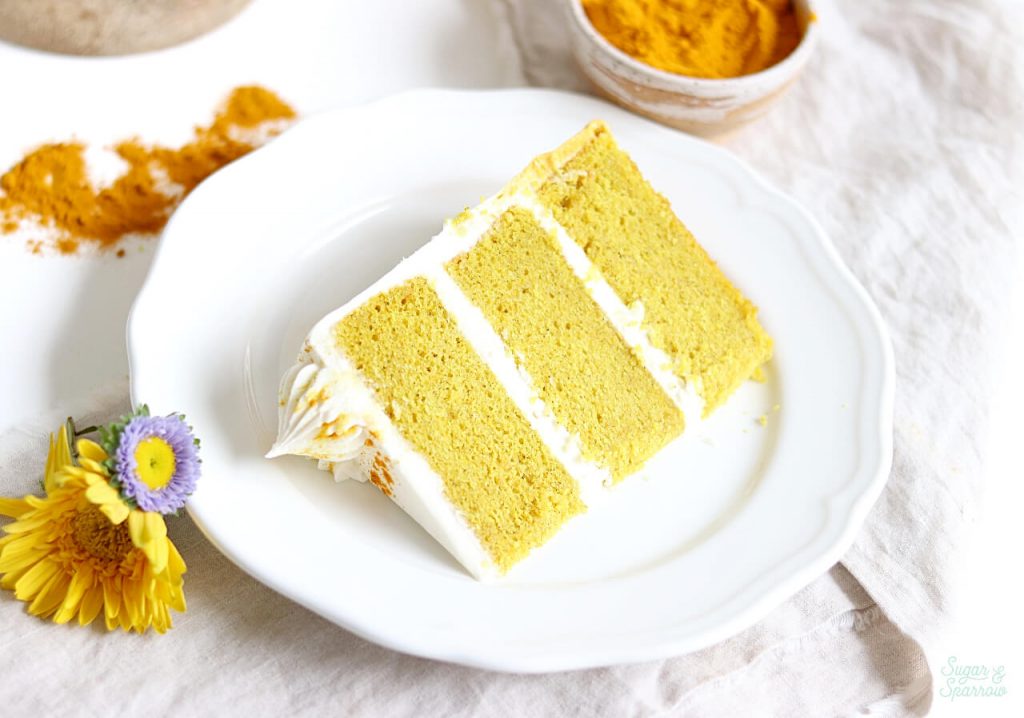
One important side note about turmeric though: it can stain things. Be careful not to get it on your clothes or kitchen towels!
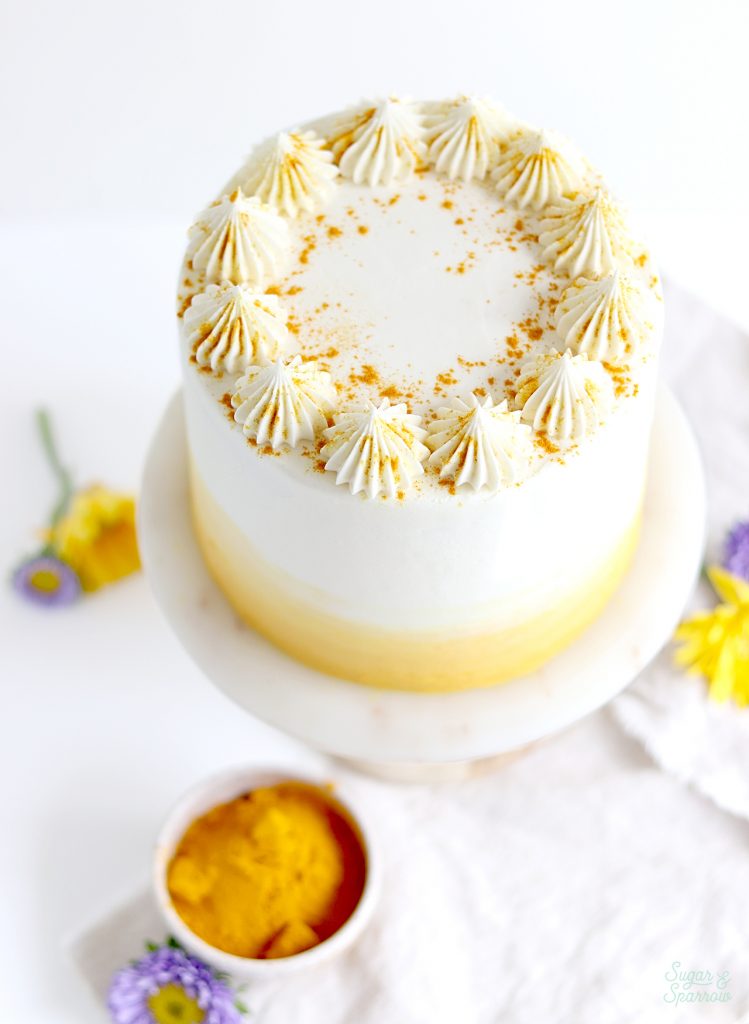
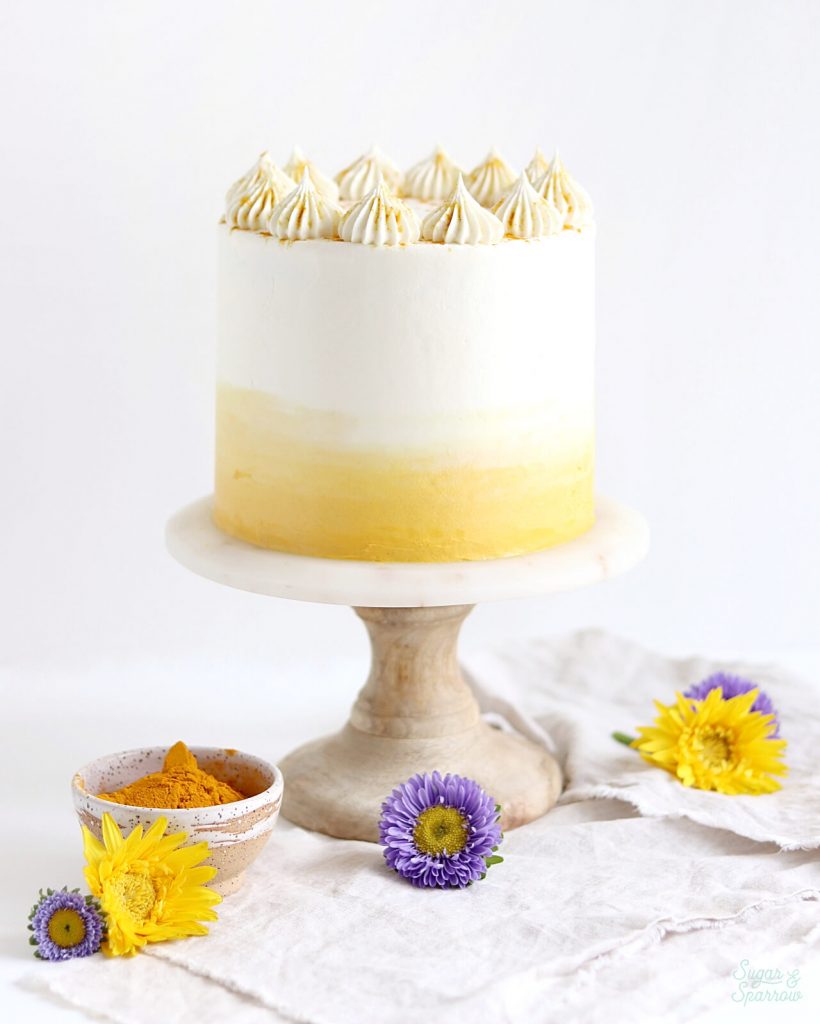
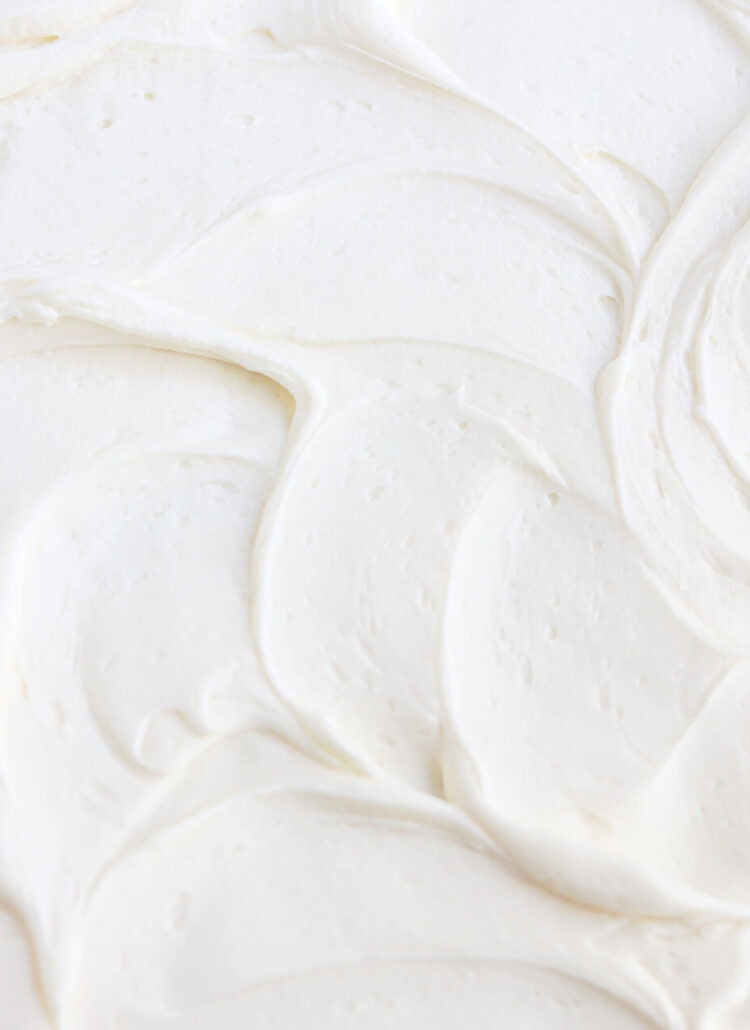
I decided to fill and frost this Golden Milk Cake with Coconut Buttercream just because the sweetness of the coconut pairs so perfectly with the spices in the cake. Like I mentioned before, coconut milk is my milk of choice when it comes to an actual golden milk latte, so incorporating the flavor of coconut was a no-brainer for me. If you’d rather use my Vanilla Buttercream recipe, I’m certain that it would be a great flavor pairing as well. But trust me, the Coconut Buttercream takes this cake beyond.

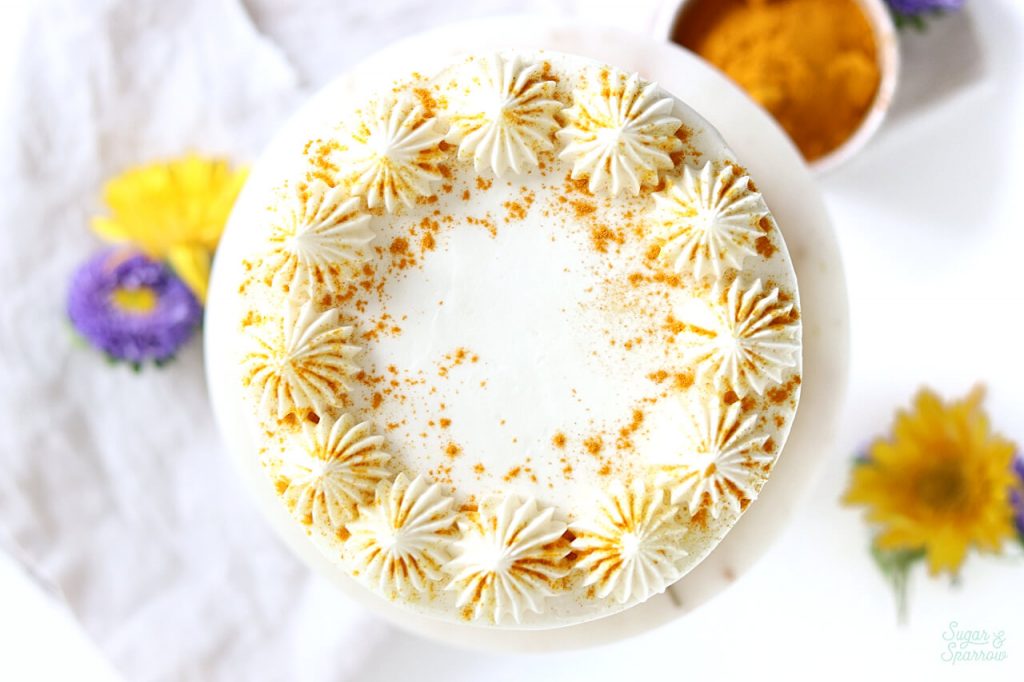
Since I love the color of turmeric so much, I tinted some of the Coconut Buttercream with a custom mix of Americolor Dijon + Lemon Yellow + Orange until I ended up with the perfect turmeric hue. Then, I used it to create an ombrè of color that goes from turmeric to white, piped an open star border with Wilton Tip 6B, and sprinkled some turmeric over the top for an extra pop of color. Any way you end up decorating this cake, I can assure you that it’s delicious if you’re a golden milk latte lover like me! Enjoy!
Golden Milk Latte Cake
Ingredients
Golden Milk Cake
- 2 3/4 Cups (290g) cake flour, sifted before measuring
- 2 3/4 tsp baking powder
- 1 Tbsp ground turmeric
- 1 1/2 tsp ground cinnamon
- 1/2 tsp ground ginger
- 1 1/4 tsp salt
- 1 Cup (226g) unsalted butter, room temperature
- 1 3/4 Cups (360g) granulated white sugar
- 3 large eggs, room temperature
- 1 Tbsp pure vanilla extract
- 1 1/4 Cups (296ml) full fat coconut milk
Coconut Buttercream
- 2 Cups (452g) unsalted butter, room temperature
- 7 Cups (840g) powdered sugar
- 2 tsp pure vanilla extract
- 1 1/2 tsp pure coconut extract
- 3 Tbsp coconut milk, room temperature
- 1/4 tsp salt
Instructions
Make the Golden Milk Cake
- Preheat the oven to 350°F. Prepare three 6-inch or two 8-inch cake pans by spraying the sides with a cooking spray (Baker's Joy is my favorite) and fitting a wax or parchment paper circle to the bottom of the pan. Alternatively, you can grease and lightly flour the pans.
- Sift the cake flour and then measure by spooning and leveling it in your measuring cup. Add the cake flour, baking powder, turmeric, cinnamon, ginger, and salt into a bowl and whisk to combine. Set aside.
- In the bowl of your stand mixer (a handheld mixer works fine too!), cream the butter for on high for two minutes until it's light and fluffy. Add in sugar and continue to mix on medium-high for another two minutes, scraping down the bowl and paddle as needed. Add the eggs one at a time, mixing thoroughly after each addition. Add the vanilla and mix for one minute on high, scraping down the bowl and paddle once more.
- With the mixer on low speed, add in the dry ingredients and mix until just combined. Then, add the coconut milk slowly and mix until just incorporated. Scrape down the sides and bottom of the bowl and give it a few stirs to make sure there are no lumps (without over-mixing). The batter will be slightly thick, but pourable.
- Pour batter evenly into prepared cake pans (no more than 2/3 of the way full) and bake for 30-35 minutes. They're done when they spring back to the touch and a toothpick inserted into the middle comes out clean. Let the cakes cool in the pan for five minutes before turning them out onto a wire rack for an additional few hours of cooling. Make sure they're entirely room temperature before applying any frosting.
Make the Coconut Buttercream
- With a hand mixer or paddle attachment on your stand mixer, cream the butter on medium-high until it’s creamy and light (almost white) in color. About 7 minutes.
- With the mixer on low, add the powdered sugar a few cups at a time, scraping down after each addition and making sure each addition is fully incorporated before adding the next one.
- Add vanilla extract, coconut extract, coconut milk, and salt and mix on medium-low for another two minutes until fully incorporated.
Assembly
- Once the Golden Milk Cake layers have cooled completely, fill and frost with Coconut Buttercream. To create the design pictured, tint one cup of buttercream a deep yellow color with the food color gels of your choice (I used a mix of Americolor Dijon + Lemon Yellow + Orange until I ended up with the perfect turmeric hue). Mix a lighter yellow shade by combining the darker yellow with some uncolored buttercream and create a messy ombrè by adding the darkest yellow on the bottom third of the cake, followed by the lighter yellow until finally adding the uncolored buttercream to the top third and top of the cake. Keep adding and smoothing until you like what you see.
- Pipe a star border around the top of the cake with the uncolored Coconut Buttercream using Wilton Tip 6B, then sprinkle with ground turmeric.
Notes
- The Golden Milk Cake layers can be made ahead and stored, wrapped in plastic wrap, at room temperature for up to two days. Alternatively, you can store the wrapped cake layers in the freezer for up to 2 months before thawing and frosting.
- The Coconut Buttercream can be made ahead and stored in an airtight container in the refrigerator for up to two weeks. When you’re ready to use it, bring it back to room temperature and re-whip in your stand mixer to bring back to smooth buttercream consistency.
Did you make this cake recipe? I want to know how it went! Let me know in the comments below and feel free to tag @sugarandsparrowco in a photo on Instagram to show me – I love to see what you create with my recipes!

Can you add a fruit/jam filling to this the Golden Milk cake? If so what would you recommend?
Hi Danielle! You could totally use jam to fill this cake. I bet it would taste great with raspberry jam! Here’s a tutorial on how to fill a cake with soft fillings like jam: https://sugarandsparrow.com/fill-and-stack-cake-layers/
You must be a cake “whiz” lol. How genius of you to come up with such neat flavor creations. I have never seen a Golden Milk cake before. I like Golden Milk. I will need to look for an excuse to make this cake.
Thanks so much, Rebecca! I just love golden milk tea so much, and I always try to turn the flavors I love into cake 🙂
Hi, Do you have any tips for using this recipe to make cupcakes? How many do you think it would make? Thanks so much!
Hi Janice! You can absolutely make this recipe as cupcakes! Be sure to fill the tins no more than 2/3 full and bake at 350F/177C for 15-18 minutes, or until a toothpick inserted comes out clean. Enjoy!
This looks delicious! Is the coconut milk you use the canned coconut milk or the refrigerated coconut milk beverage?
Hi Kristin! I used canned coconut milk.
Hi, I have absolutely loved all the cake recipes I’ve tried from you! Do you have any tips for using this recipe to make cupcakes? How many do you think it would make? Thanks so much!
Hi! I’d like to make this but prefer sweetening with honey, have any tips? I’m wondering if I can reduce the amount of sweetener added and add a little more flour or something..
Hi Katy! I’ve never tried sweetening my cakes with honey, so I would do some research on how that works before attempting. Let me know if you try it!
I was so intrigued by this cake – had to make it. So glad I did – absolutely delicious. The only thing I changed was the frosting. Went with a coconut IBC that turned out incredibly smooth and silky. Thanks for a great recipe. Will definitely be making again!
Yay, Jacqueline! I’m so happy to hear that you loved this recipe as much as I do!
this cake is just what i’m looking for for my boyfriend’s birthday! I will absolutely try it out. I’m wondering, have you ever made this with fresh turmeric (and ginger) instead of ground???? Also wondering if you’ve scaled up to 10” cake pans before. If not i’ll report back and let you know how it goes 🙂 thank you for the recipe!
Hi Aubs! I haven’t made it with fresh turmeric or fresh ginger before, but I’m sure it would work! And I haven’t scaled up to 10 inch pans before. I would probably keep the oven temp at 350 and check the cakes at 30 minutes to gauge how much more time they’d need. Let me know how it all goes!
I have to say this cake is DELICIOUS! After rekindling my love for golden milk over the last few weeks and wanting to incorporate a little more turmeric into my diet, I decided baking with it might be a good idea. What a tasty treat! I did have to modify the recipe a little to work for myself due to a gluten intolerance and some food allergies, but the spices and flavorings remained the same and they are absolutely wonderful! The bit of spice in it is reminiscent of a carrot cake, minus the carrots. I love it! Thank you for taking the time to come up with such a sweet treat!
That’s so wonderful to hear, Misty! I’m so happy you were able to alter this recipe to your needs. Thanks so much for taking the time to let me know!
All recepies are super but please give alternative for eggs
Hi Anjali! Thanks for the kind words. I have never adapted any of my recipes to be eggless before, so I’m not sure how it works. I’ll certainly let you know if I experiment to find a good egg sub for these recipes but until then you are welcome to research substitutes for eggs in cake recipes and try them with my recipes!
I made this cake for my sister’s birthday party and it was a hit! The cake itself is not too sweet and has just enough spice to make it interesting but not like a spice cake, if that makes sense. It got rave reviews from friends and family and it will definitely get added into my cake rotation. Next up, the Almond Joy cake, also for my sister’s birthday, this time the family party.
Yay, Shellie! I am so happy to hear that this recipe was a hit! I can’t wait for you to try the almond joy cake. Your sister is a lucky gal to be celebrated with so many cakes!!
Thanks so much for this recipe; I have to ask can we replace cake flour with All purpose flour ?
Hi Tobi! You can sub in all purpose flour for the cake flour in this recipe, but the cake won’t be as light and fluffy (it will be more dense). Instead, I recommend making your own cake flour using all purpose flour: https://sugarandsparrow.com/homemade-cake-flour
Could coconut milk be used in place of sour cream in some of your other cake recipes?
Hi Davida! I just learned that coconut milk is a wonderful way to add moisture to vanilla based cakes! For any of my recipes that call for sour cream + use whole milk as the liquid, you can omit the sour cream and sub in full fat coconut milk for the whole milk.
Oh also, when I scroll over your beautiful pictures the pinterest button doesn’t come up. I would love to pin some of your cakes.
Hi Kinga! I’ll see about adding that feature to my site. In the meantime, you can add a Pinterest plugin to your browser so that you can Pin any image from anywhere.
What an interesting idea! I have never seen turmeric in a cake before. The colour is perfect. Your cakes look so amazing. I can’t decide which to try.
Thank you so much! Excited for you to try my recipes!