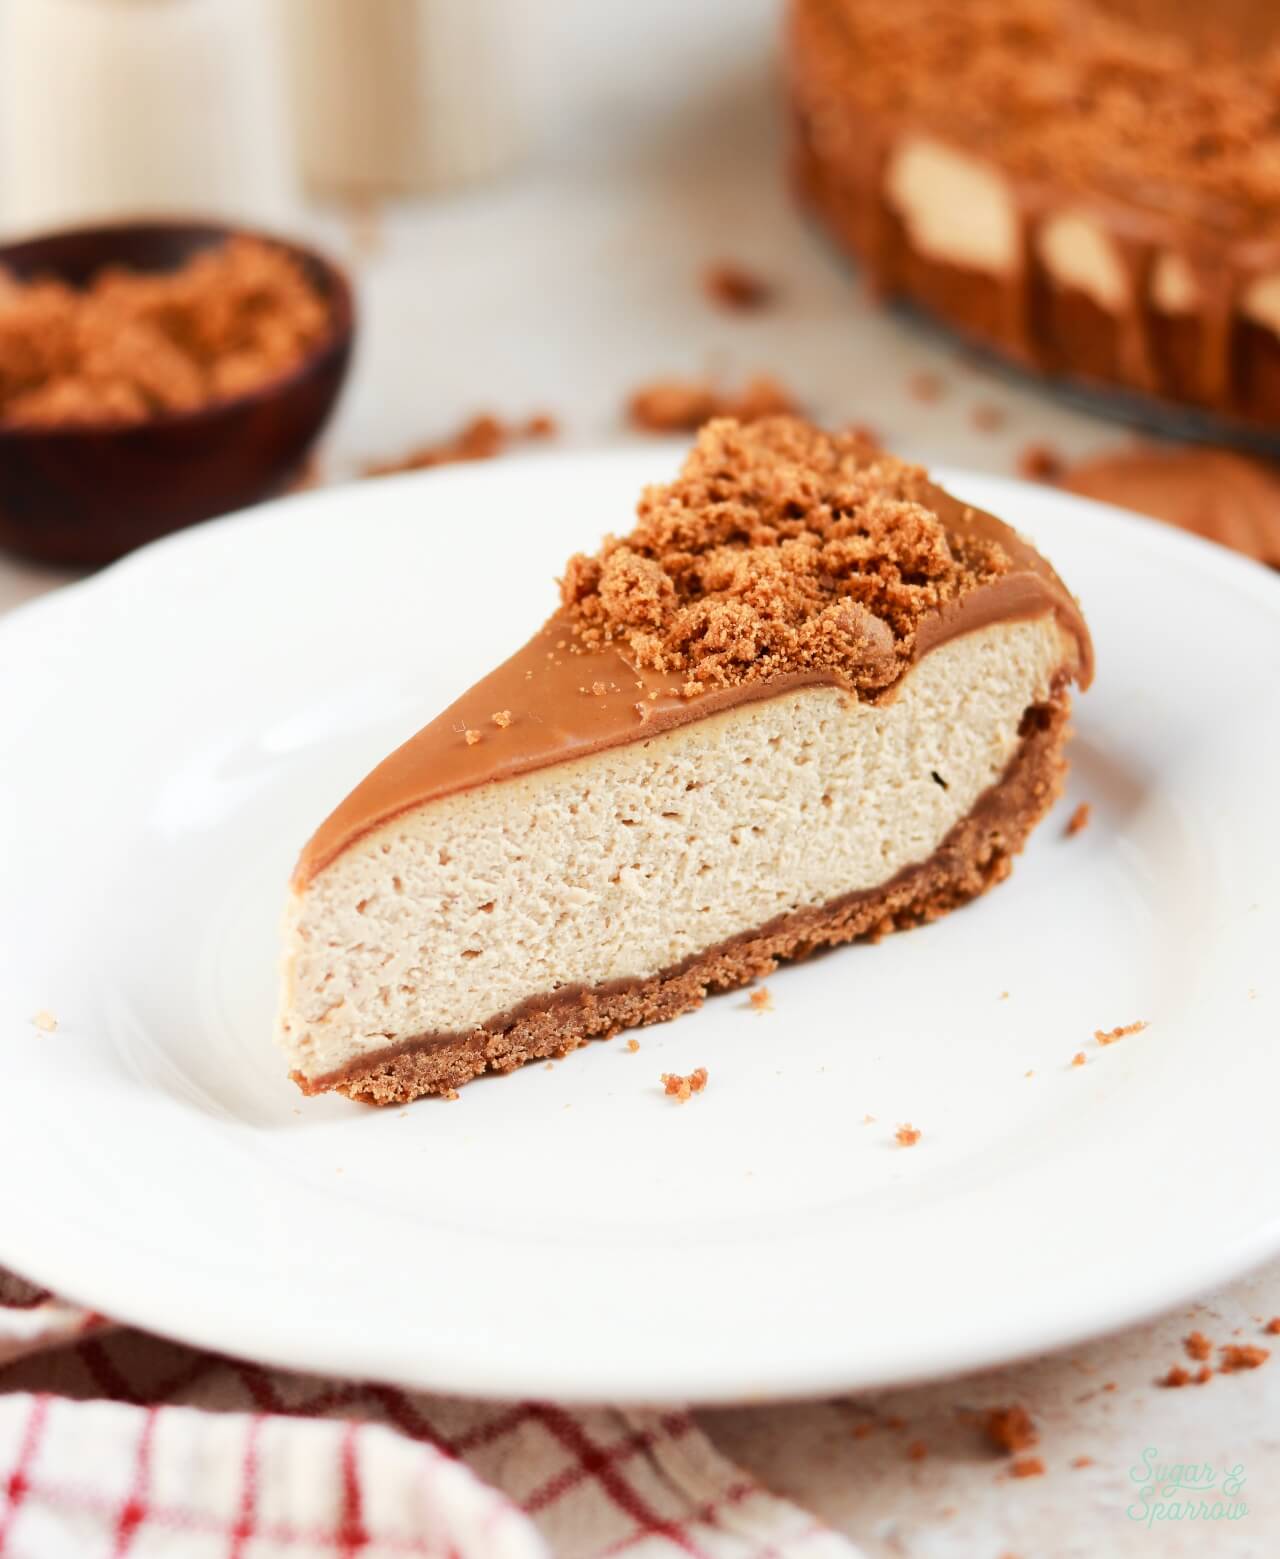
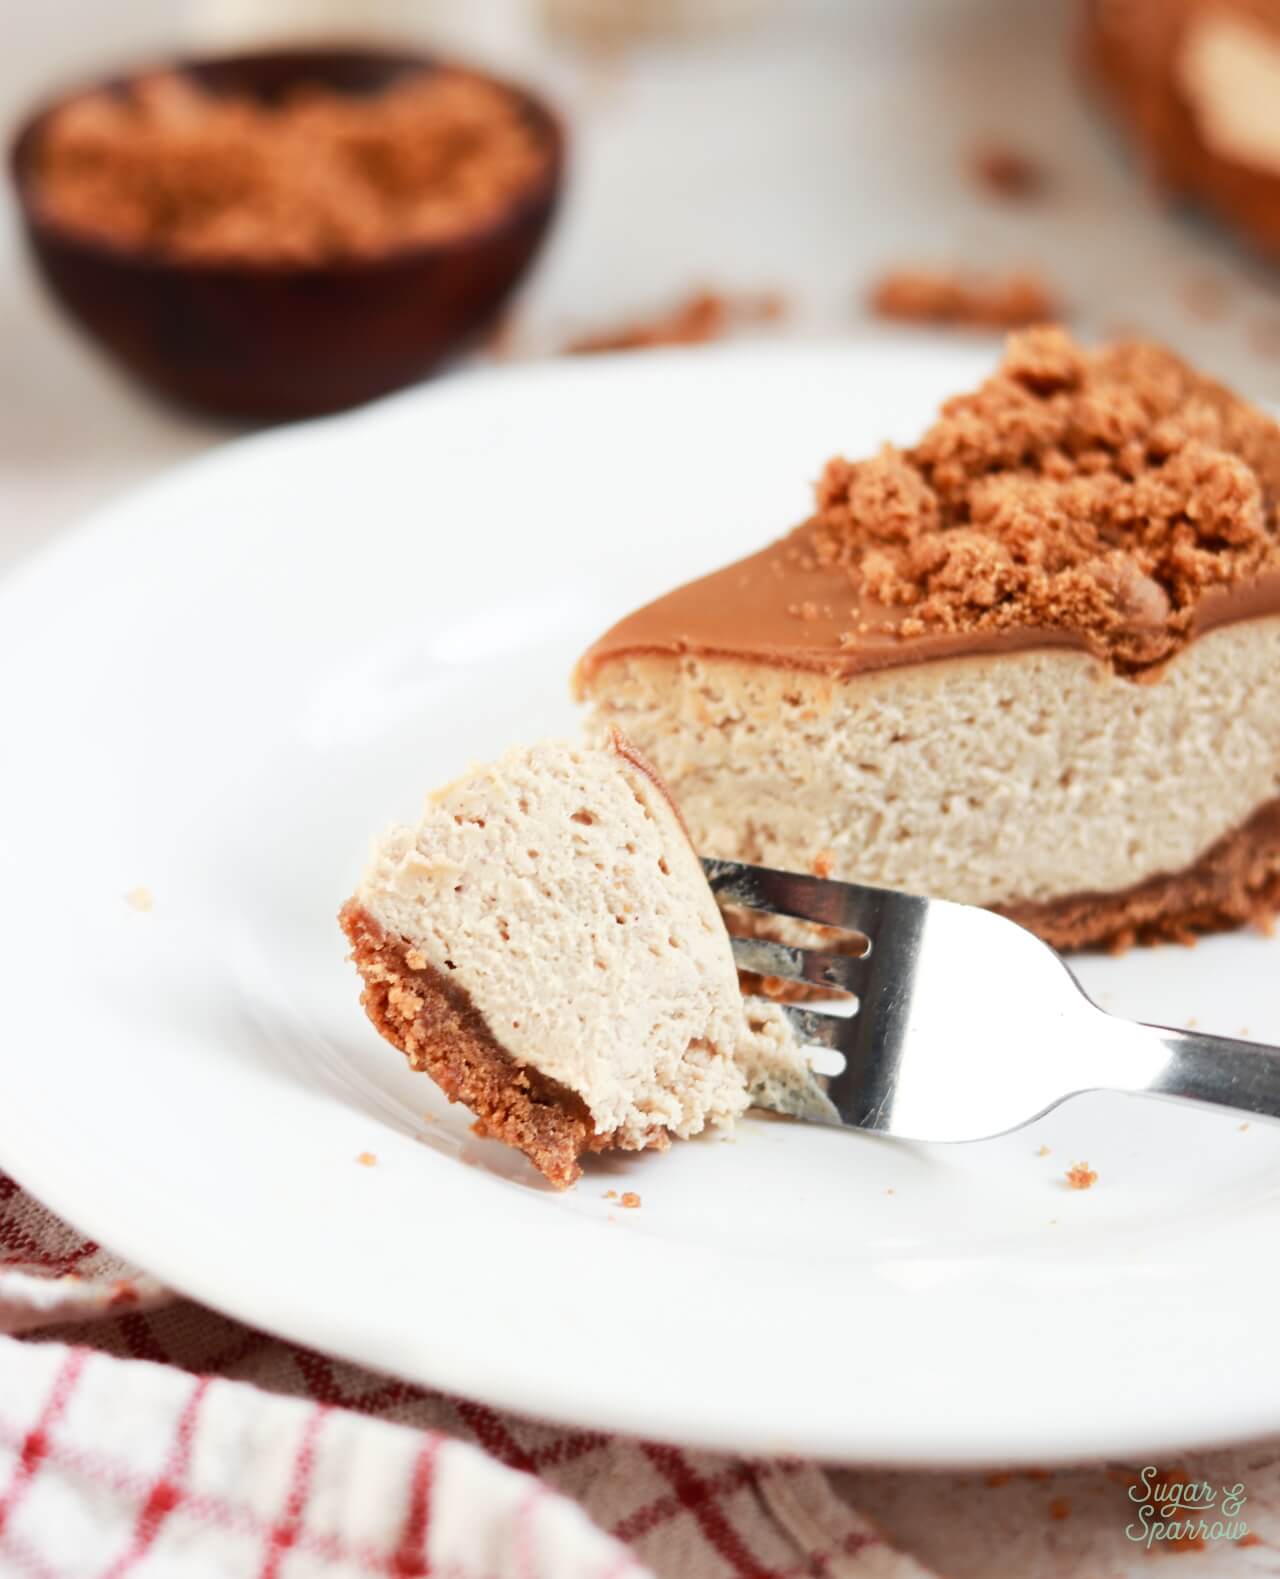
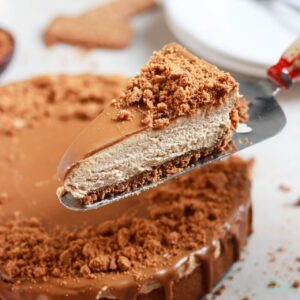
If the idea of making a cheesecake sounds daunting, allow me to suggest the no-bake cheesecake! I’ve loved this technique for years and have used it to create all sorts of flavors, but this Biscoff cheesecake might be my new favorite. Set on a buttery Biscoff cookie crust, this no-bake cheesecake has the dreamiest mousse-like texture and the perfect spiced caramel flavor due to the Biscoff cookie butter in the filling. It sets perfectly in the refrigerator before getting topped with melted Biscoff cookie butter and crushed cookies, which takes the flavor beyond! This is the ideal make-ahead dessert that everyone will LOVE.
No-Bake Biscoff Cheesecake Ingredients
Here are all the ingredients that go into this cheesecake, from the Biscoff cookie crust to the filling and topping:
- Biscoff Cookies. You’ll grind 8.8oz (250g) of Biscoff cookies into crumbs to create the Biscoff cookie crust, plus a few more for crushing up as the topping.
- Melted Butter. This is what you’ll mix with the Biscoff cookie crumbs to create the cookie crust.
- Cream Cheese. This is where most of the cheesecake flavor comes from, along with the base structure for the filling. It’s really important to use full-fat brick-style cream cheese here. The spreadable kind in tubs and the low-fat versions contain too much liquid content and preservatives to set up properly. In other words, you’ll end up with cheesecake soup unless you use the full-fat brick-style kind.
- Biscoff Cookie Butter. This is basically a Biscoff cookie spread that comes in a jar. You should be able to find it at your local grocery store, but if not, it’s also available on Amazon. You’ll be mixing half of the cookie butter into the cheesecake filling to create the Biscoff cookie flavor. Once the filling is set, you’ll melt the rest to pour over the top of the cheesecake.
- Powdered Sugar. This helps sweeten and stabilize the no-bake cheesecake filling.
- Ground Cinnamon. Adding a little ground cinnamon helps amplify the Biscoff cookie flavor (aka spiced caramel flavor) in the filling.
- Pure Vanilla Extract. A little vanilla helps round out the flavor perfectly. You can use either extract or vanilla bean paste.
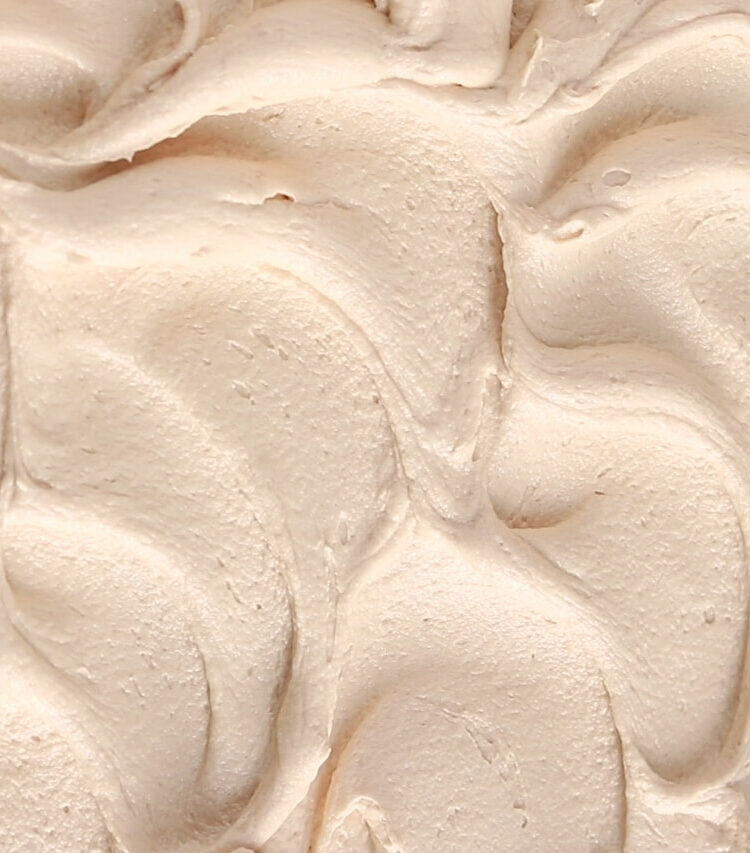
- Heavy Whipping Cream. After mixing together the ingredients above, you’ll whip the heavy whipping cream (or double cream) to stiff peaks and fold it into the mixture to create the filling. This technique creates a super velvety mousse-like texture in the filling.
How to Make a No-Bake Biscoff Cheesecake
Here’s how to make this no-bake Biscoff cheesecake from start to finish:
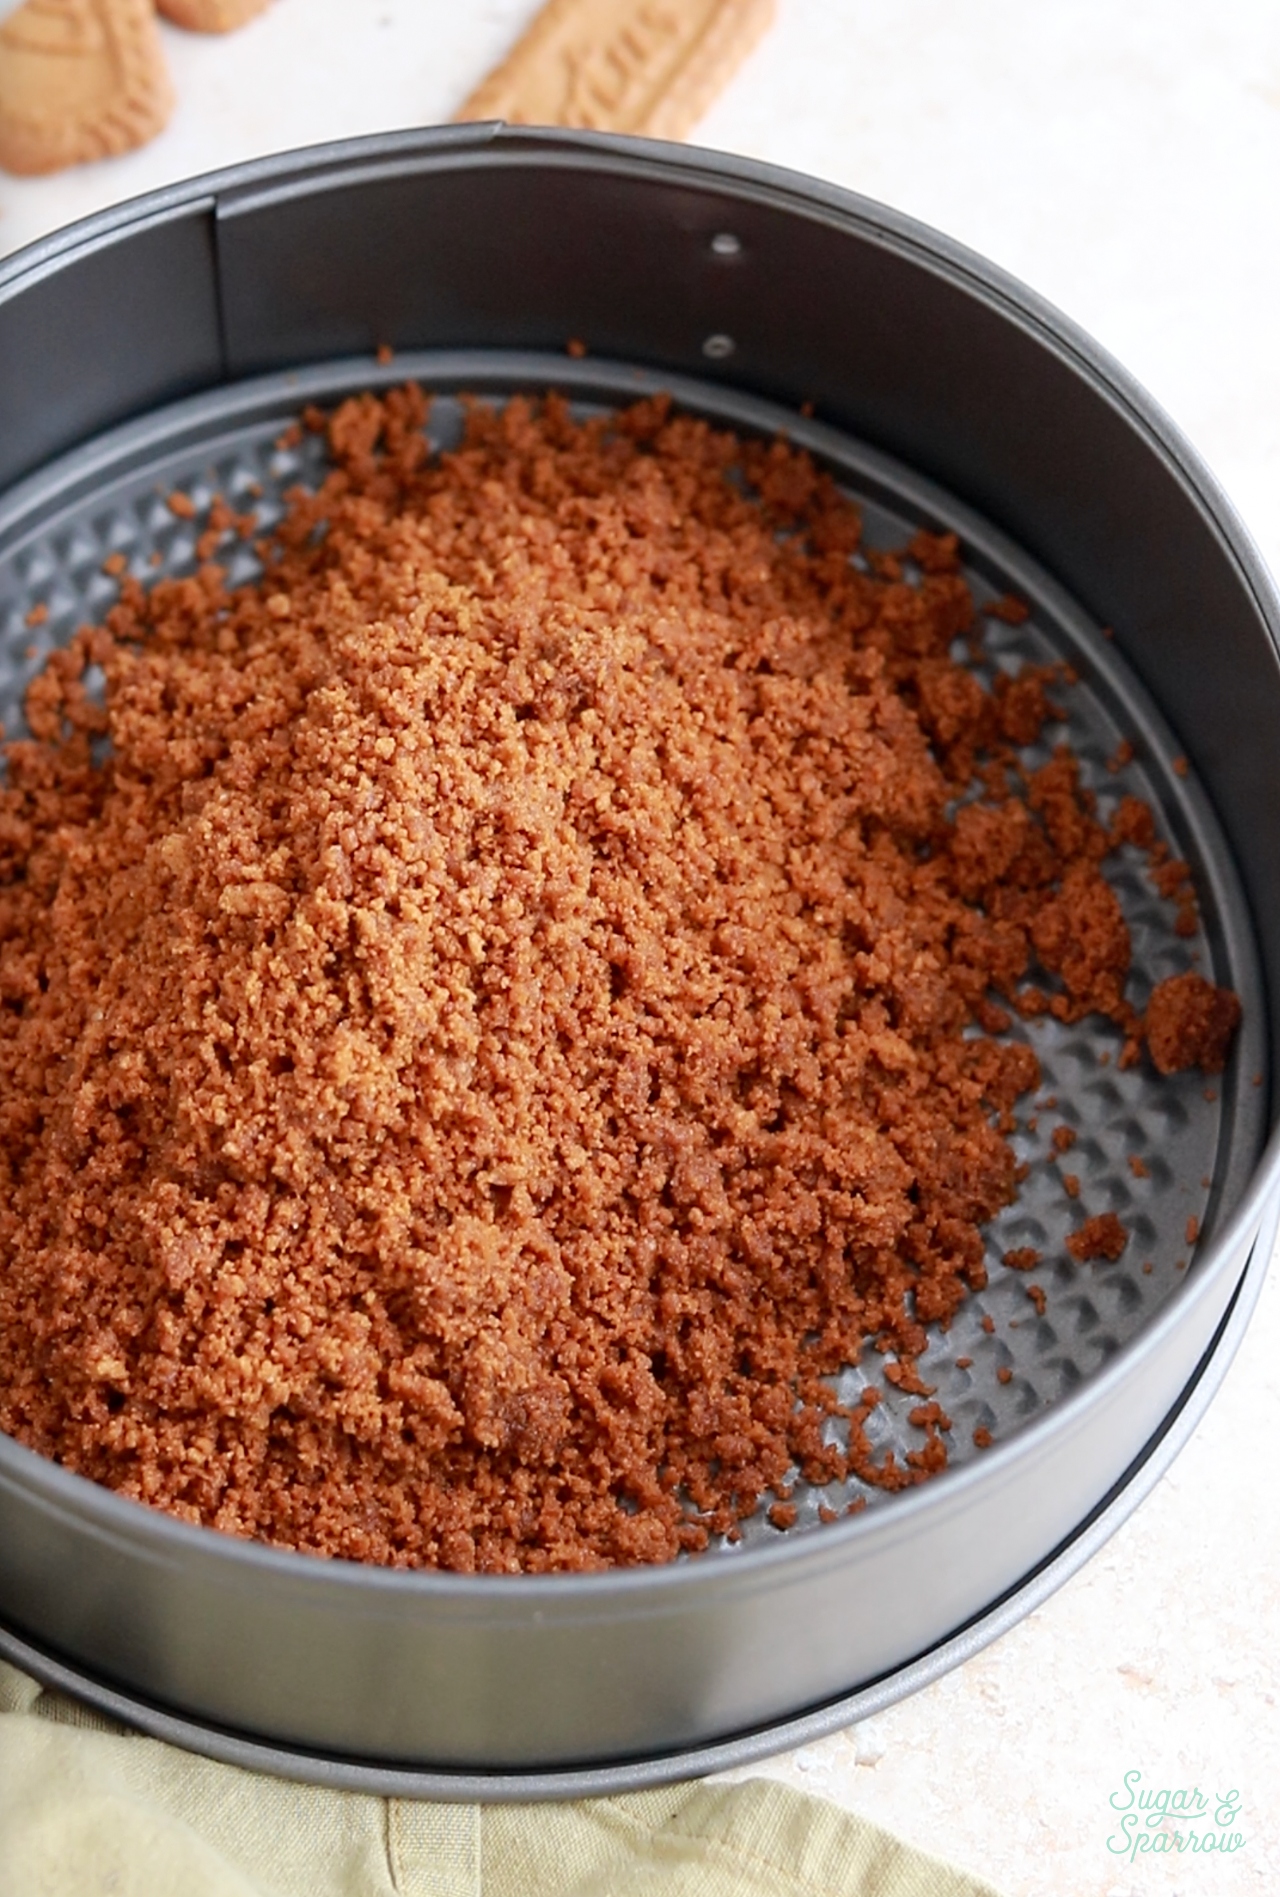
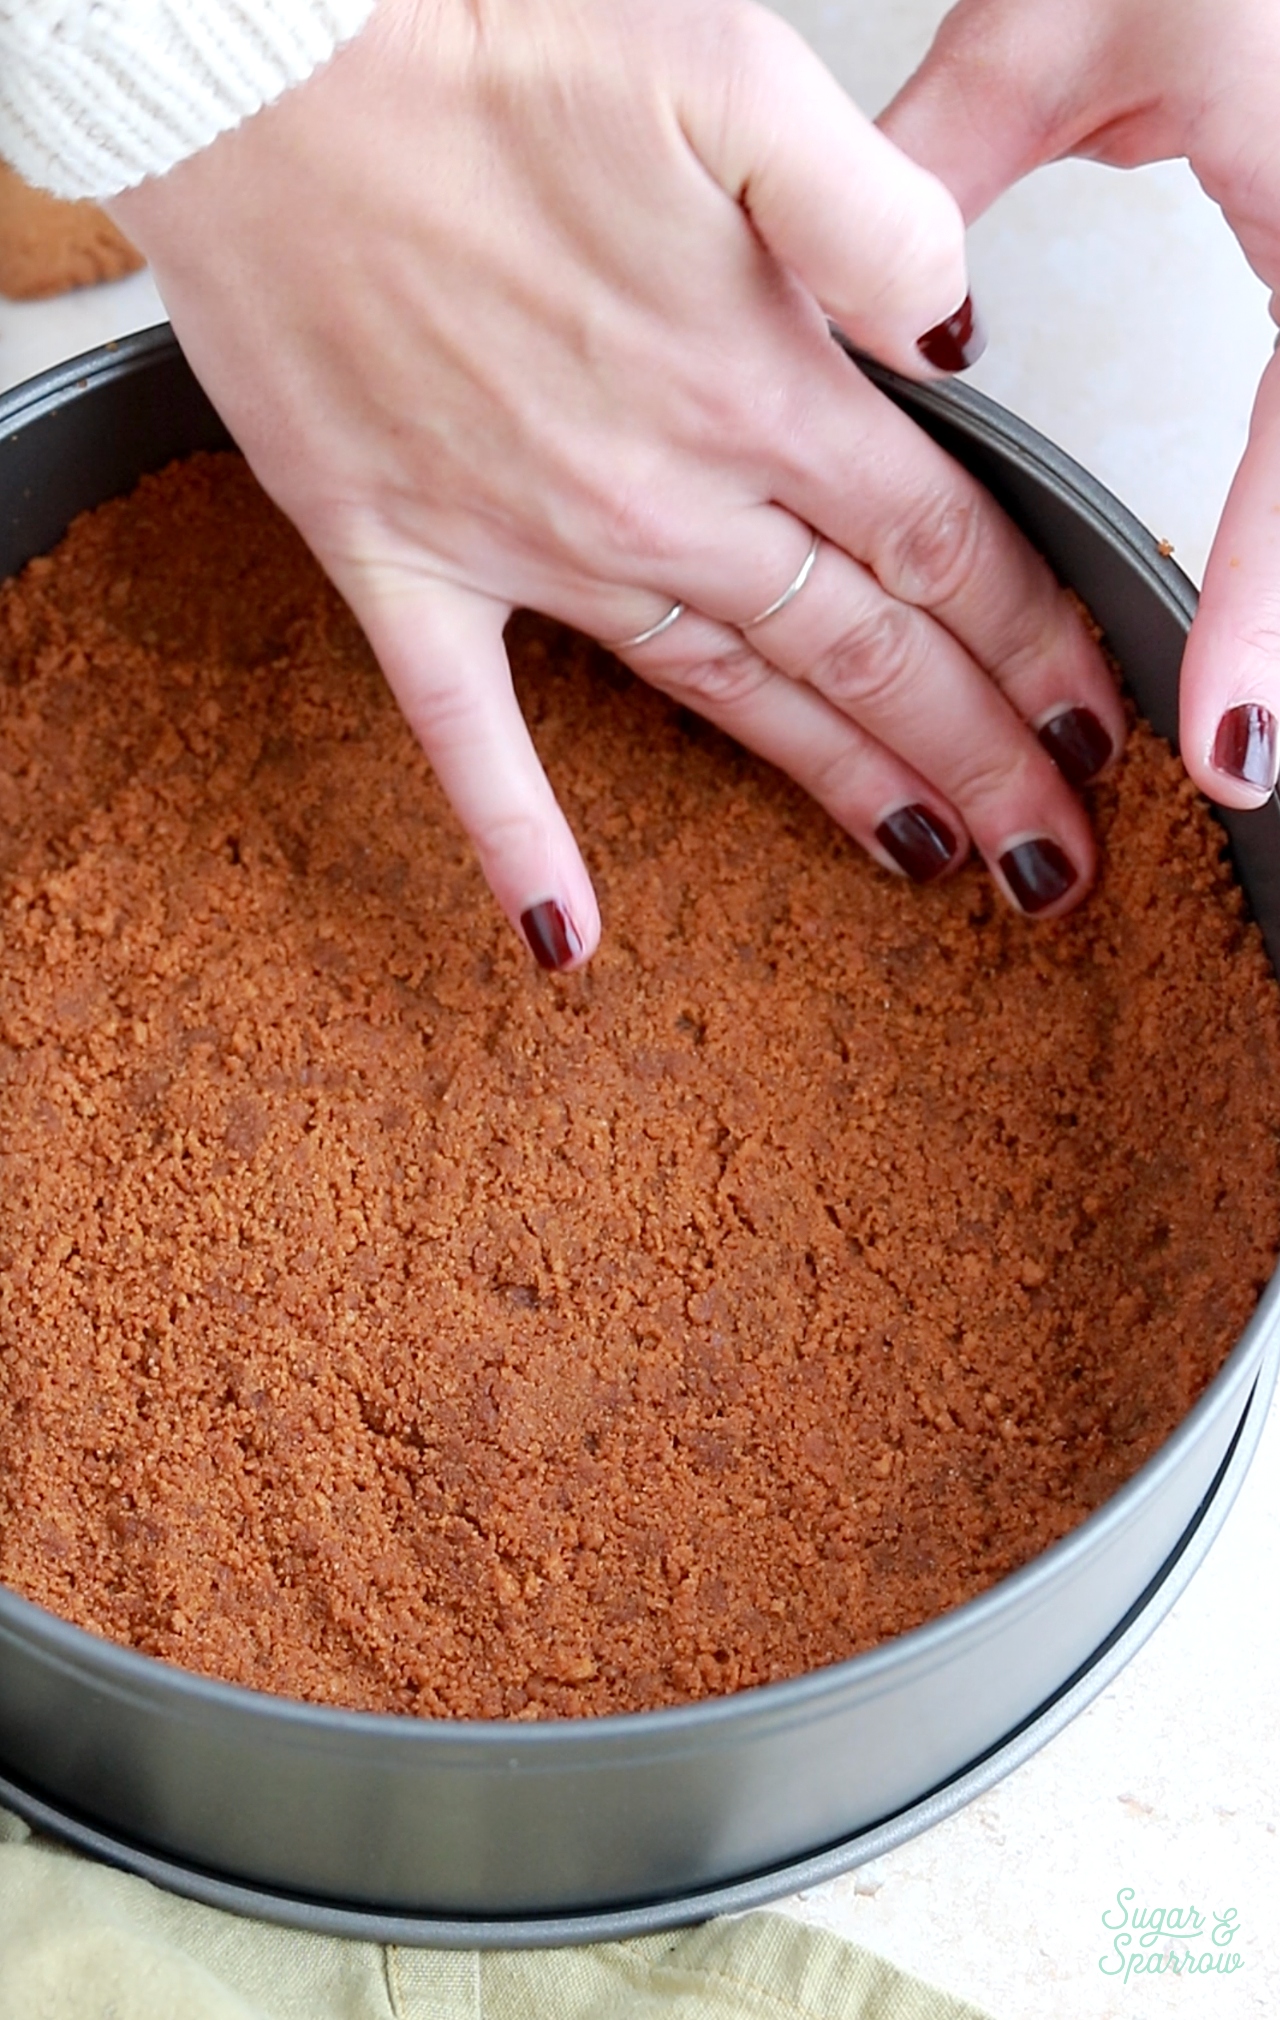
Step 1: Make the Biscoff Cookie Crust. Mix together Biscoff cookie crumbs and melted butter until it resembles wet sand, then press it into a 9-inch springform pan or 10-inch springform pan and freeze it while you prepare the filling.
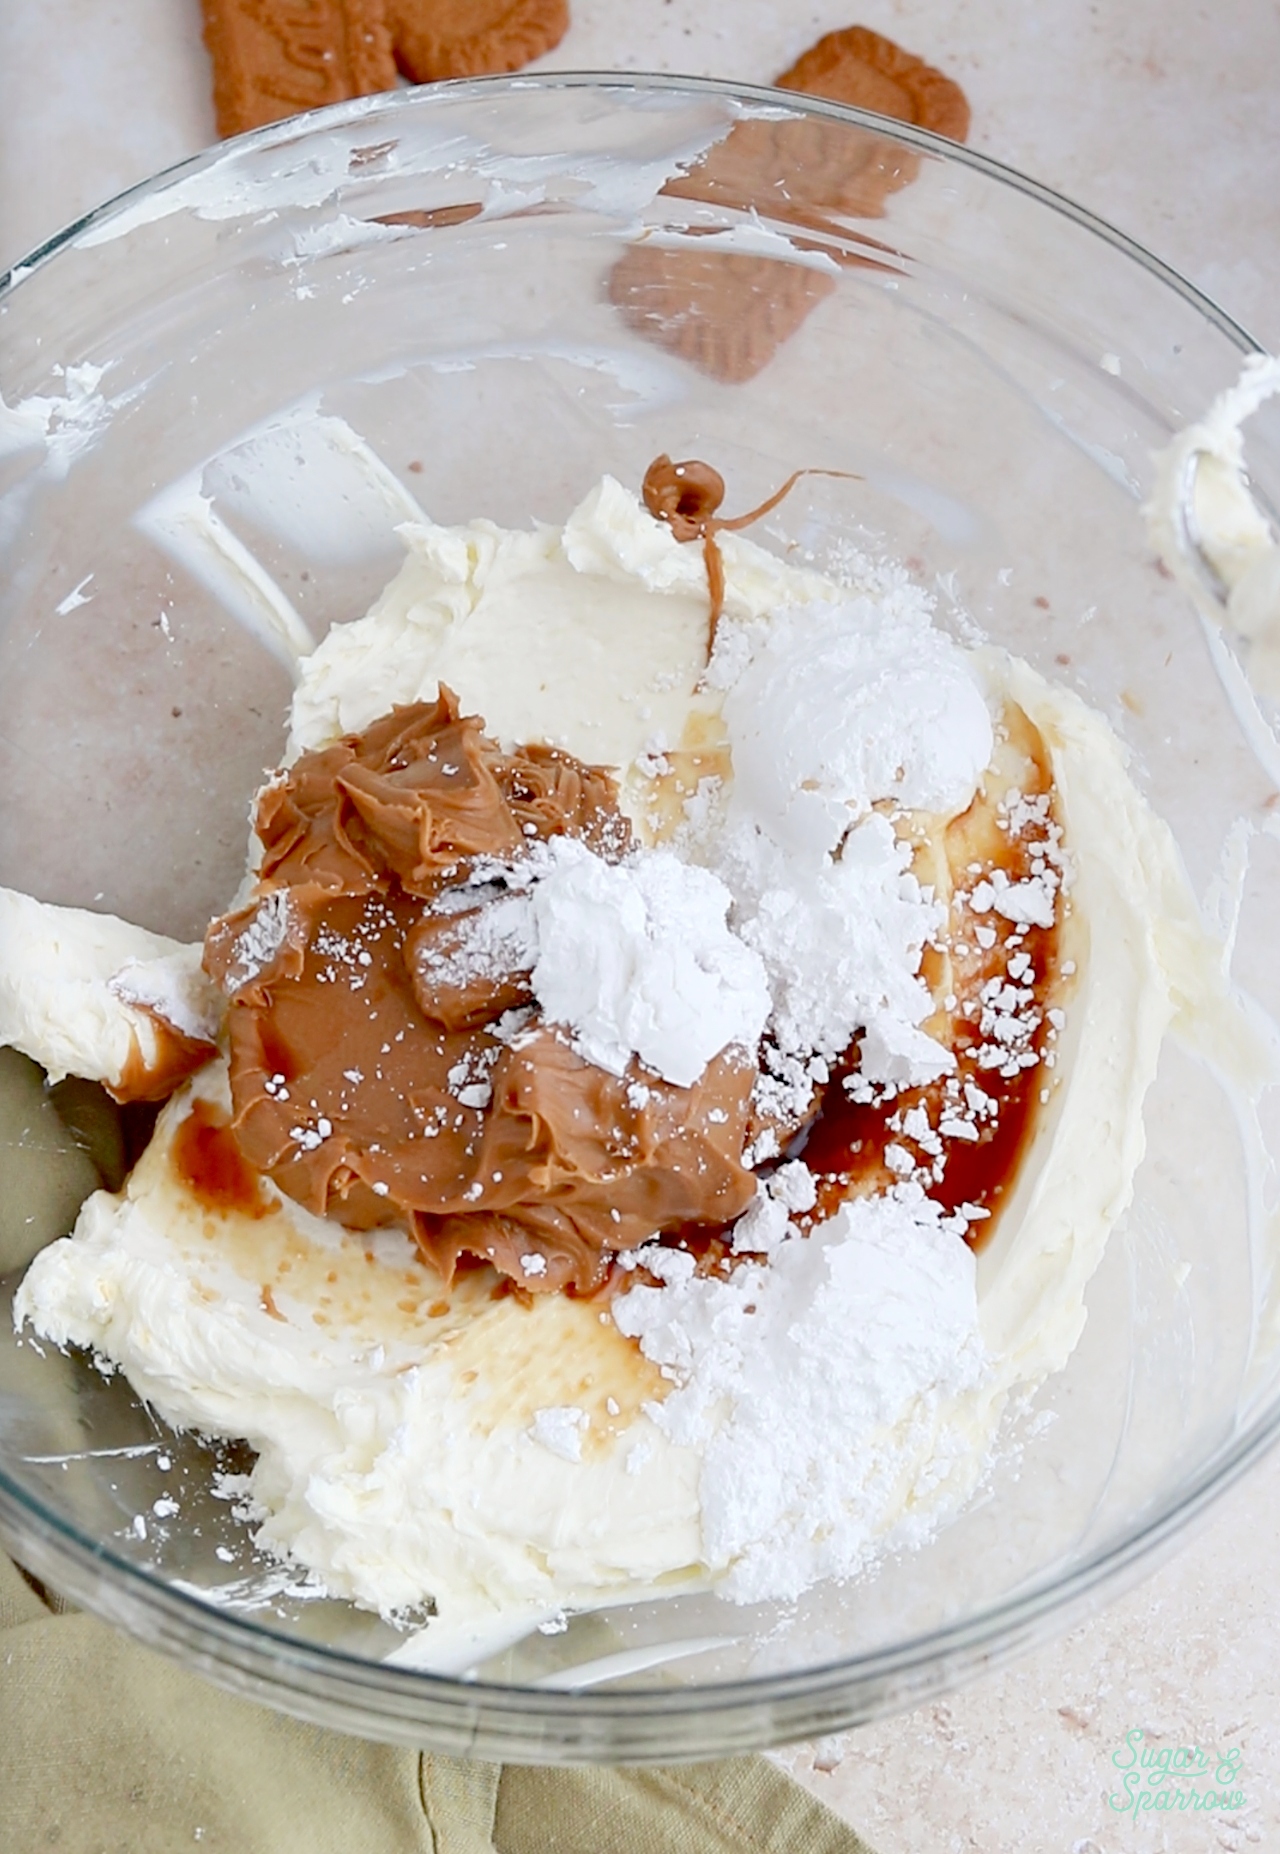
Step 2: Mix the Filling Ingredients. In a large bowl, combine the cream cheese, cookie butter, powdered sugar, cinnamon, and vanilla.
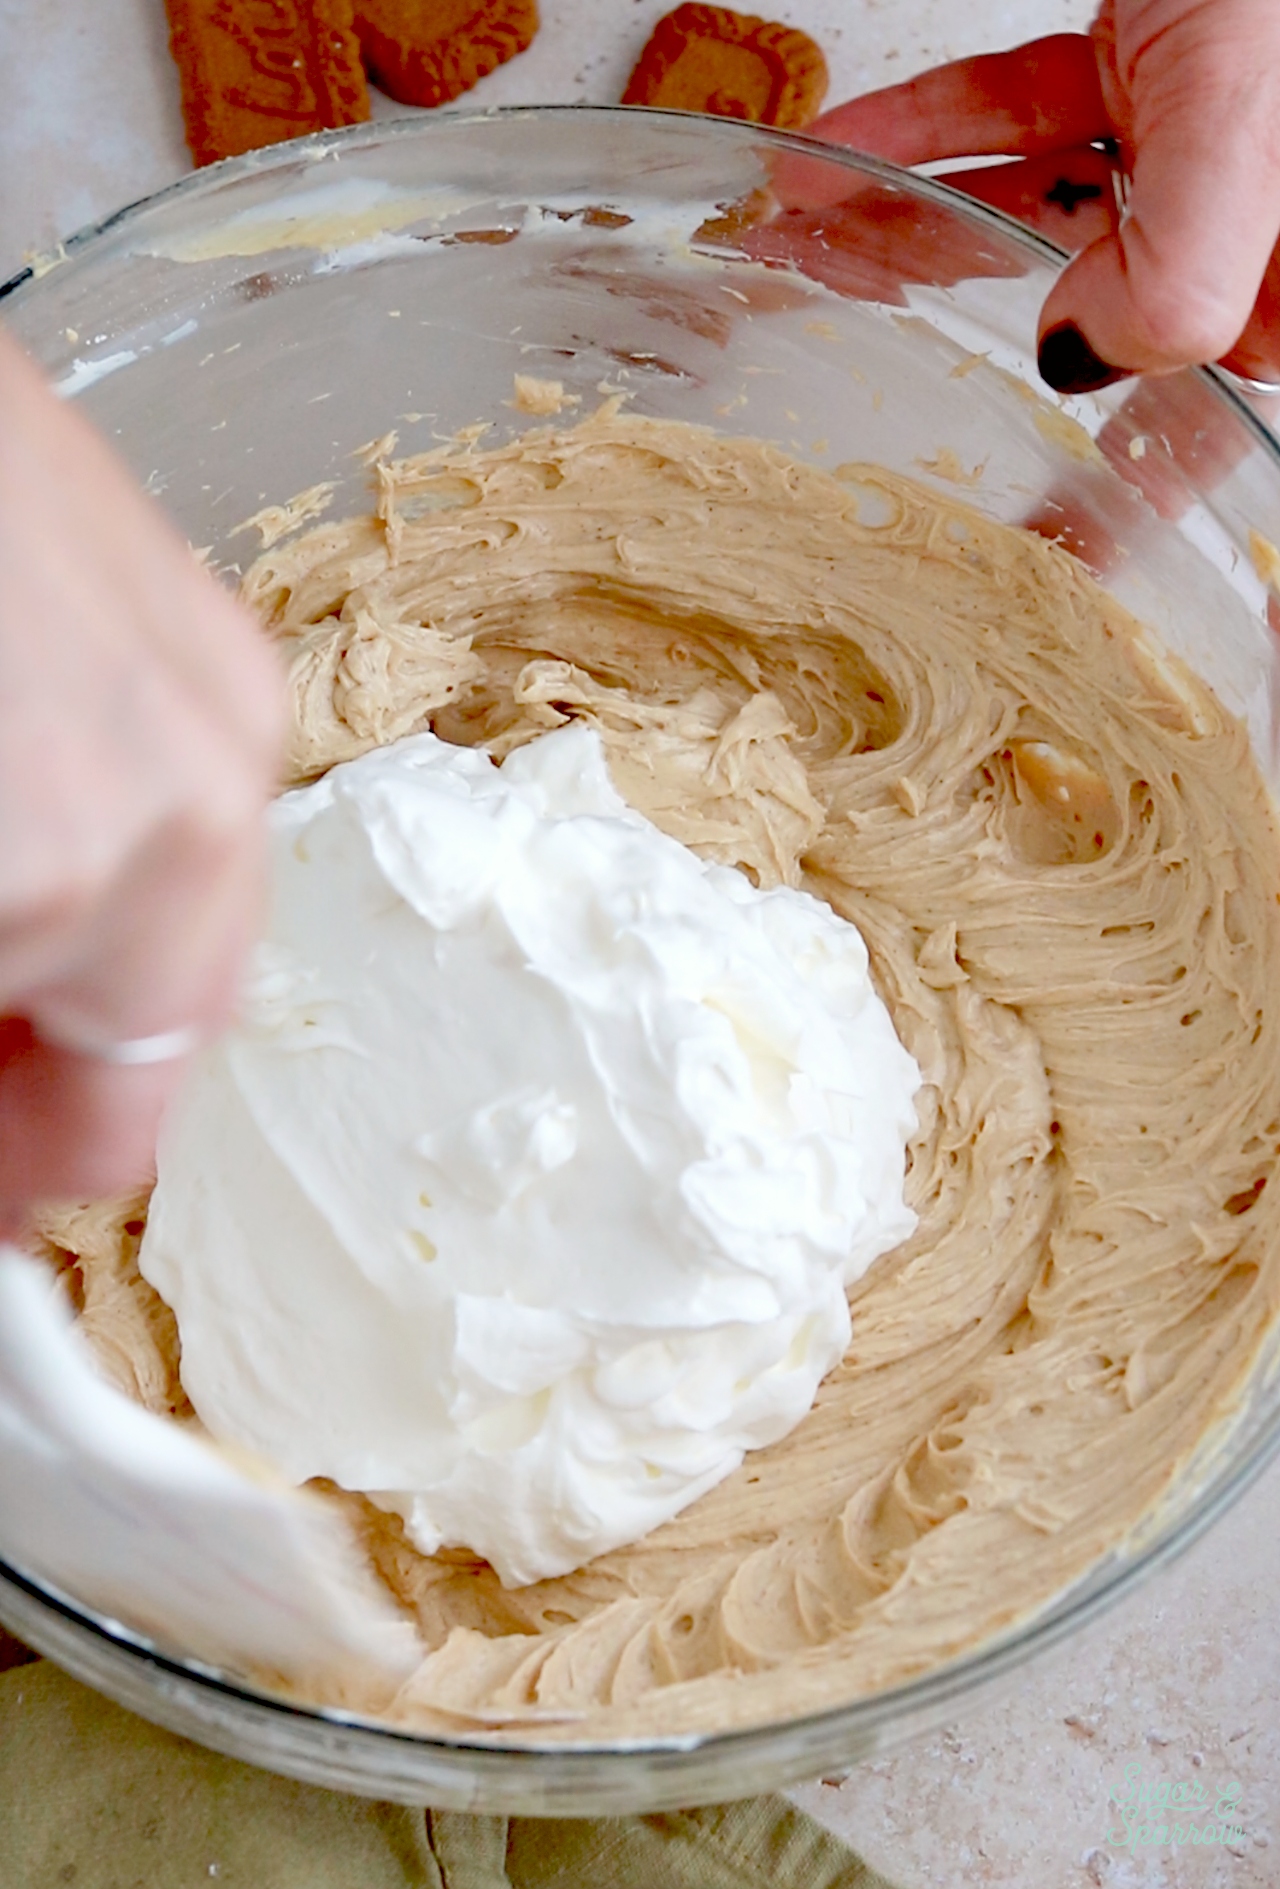
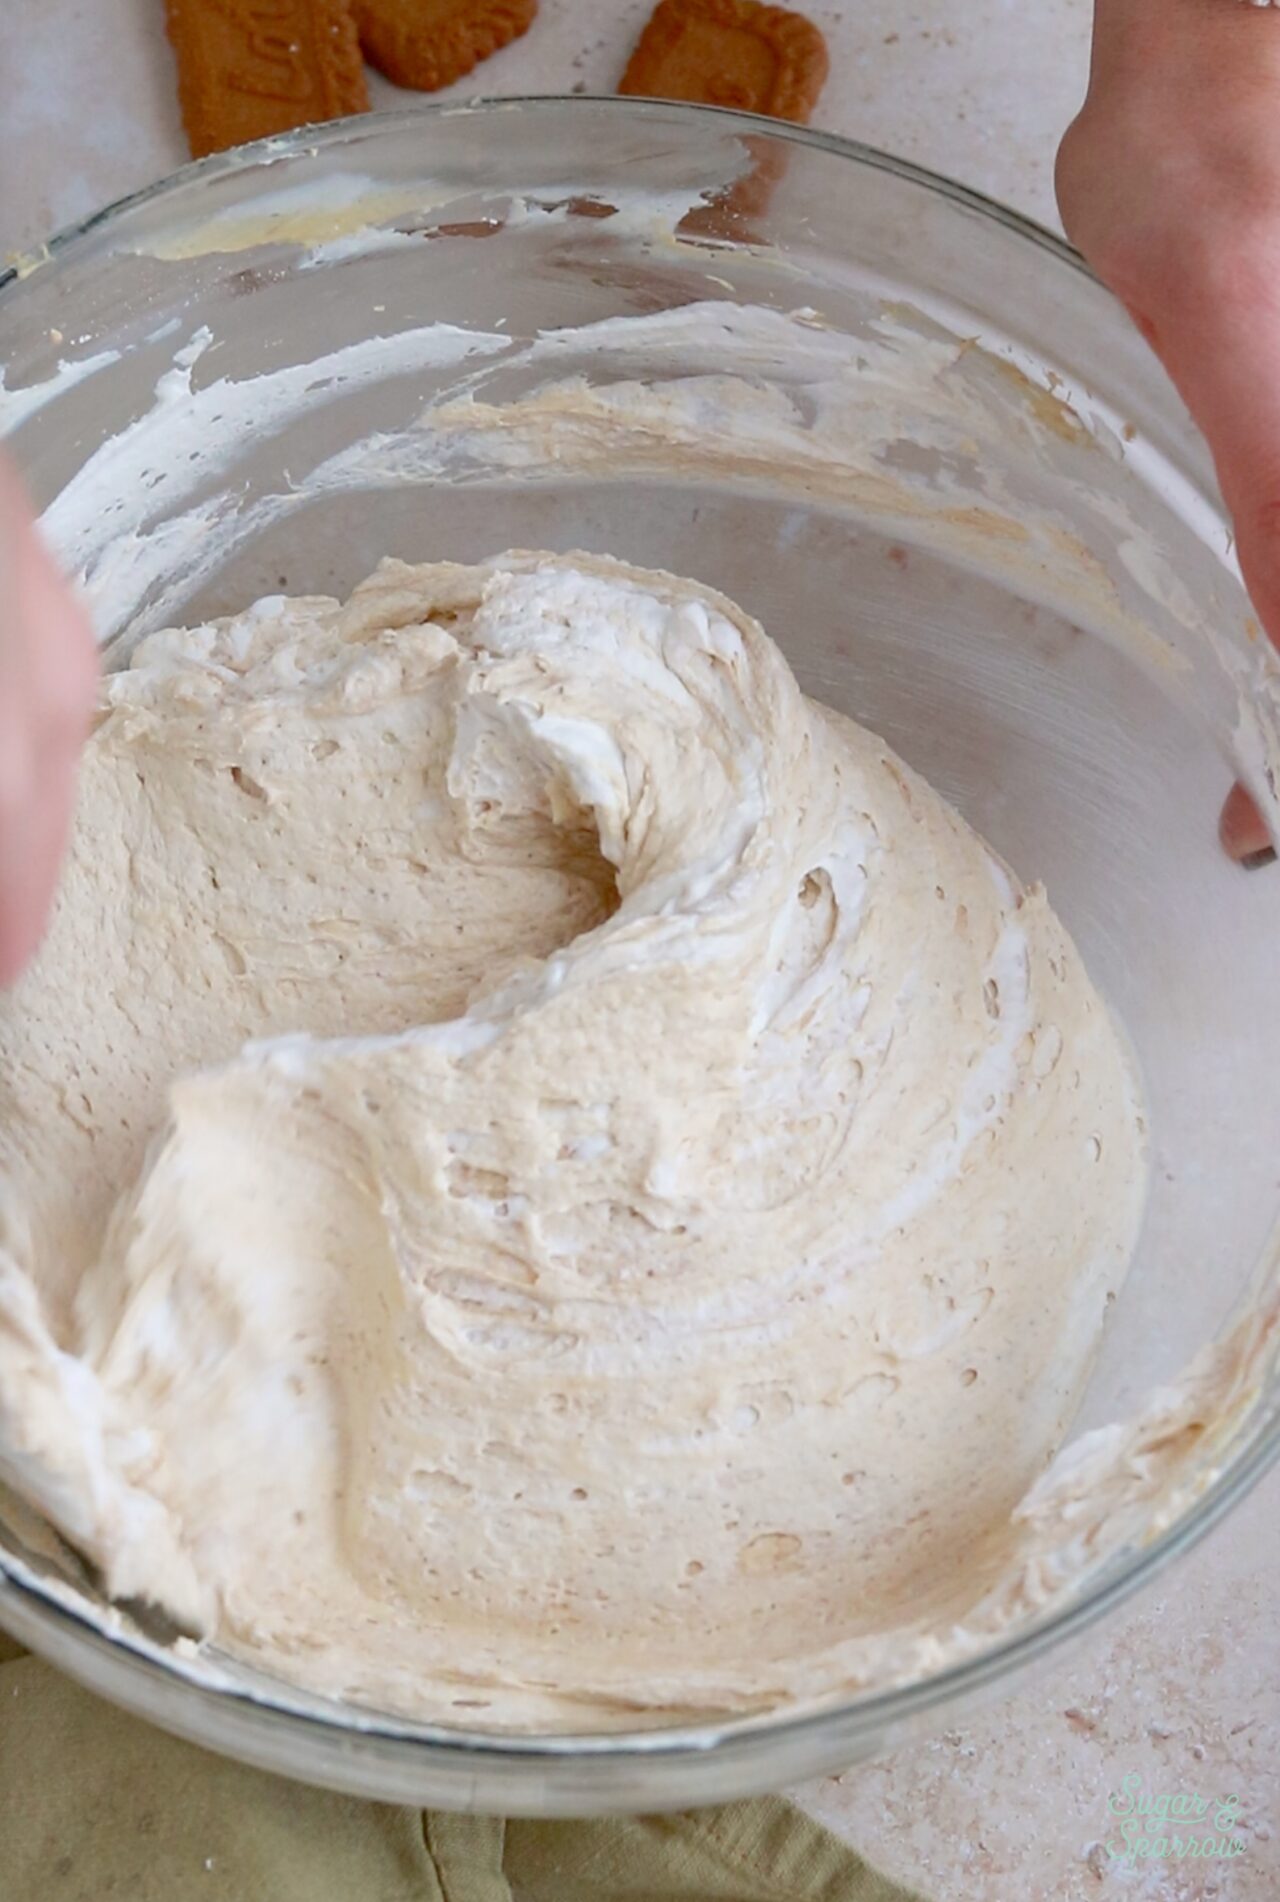
Step 3: Add the Heavy Whipping Cream. In a separate medium bowl, whip the heavy whipping cream until it reaches stiff peaks, then fold it into the filling mixture.
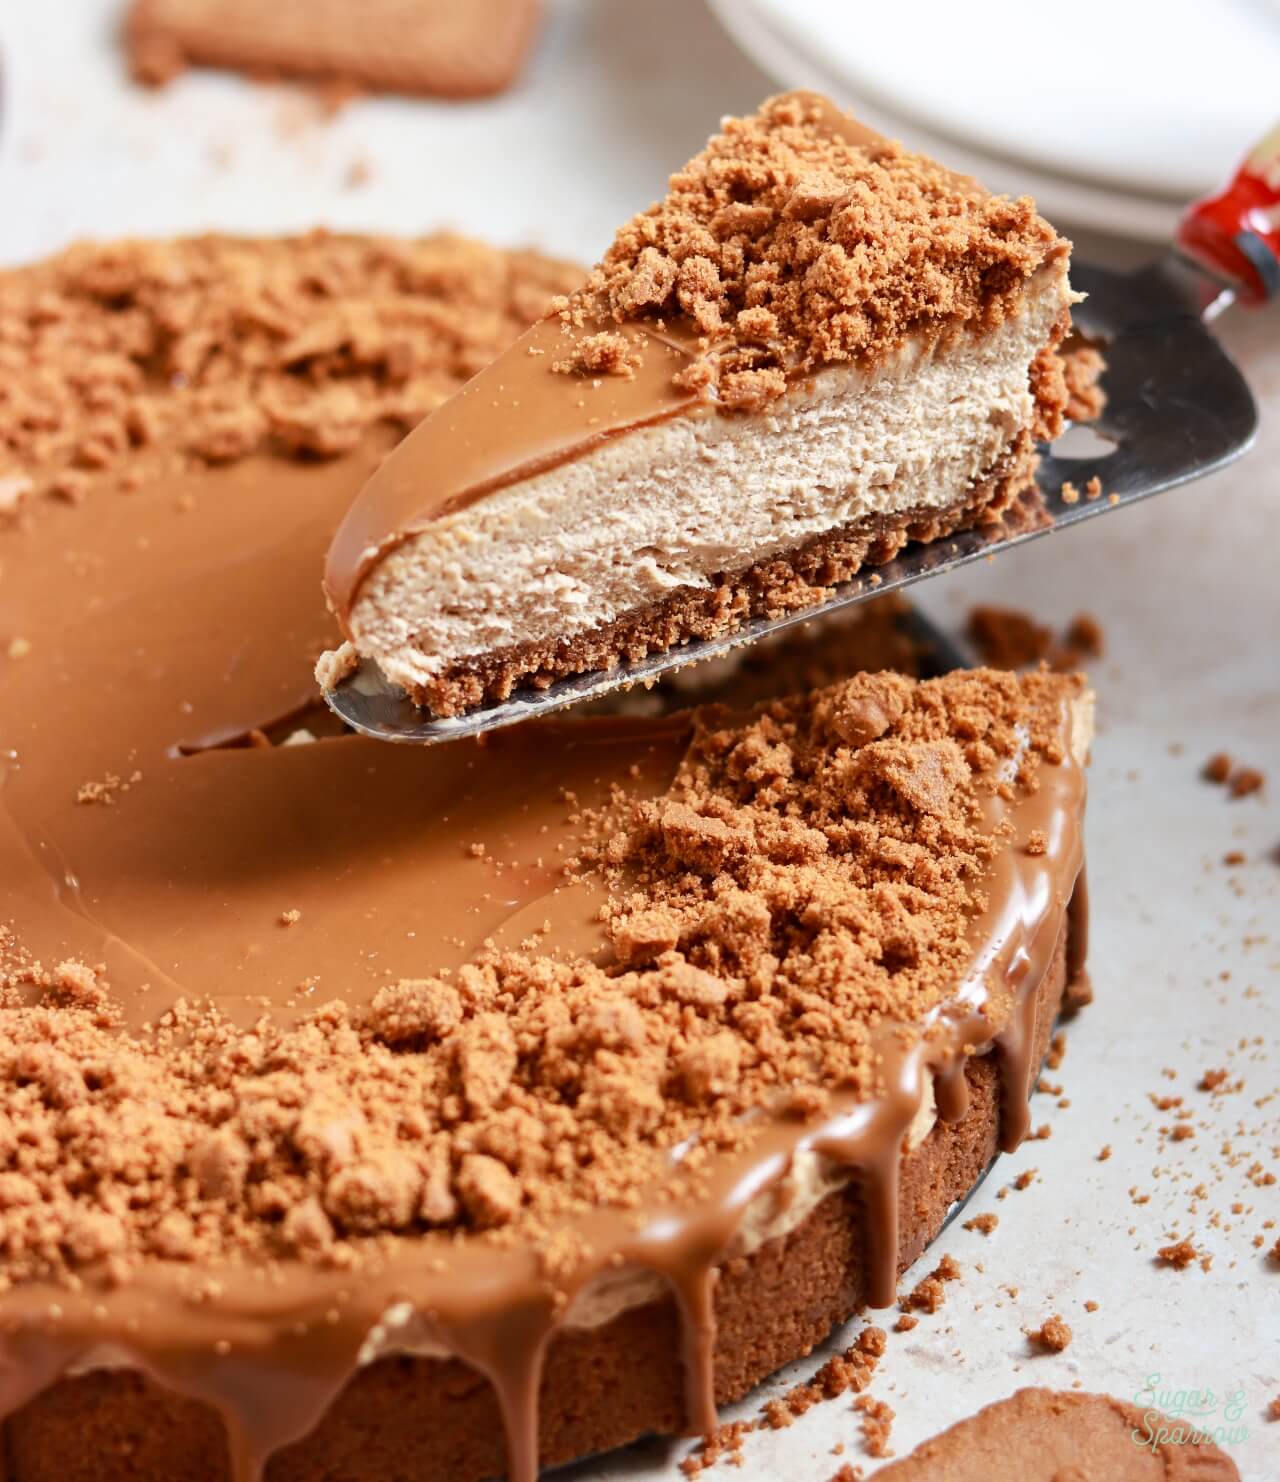
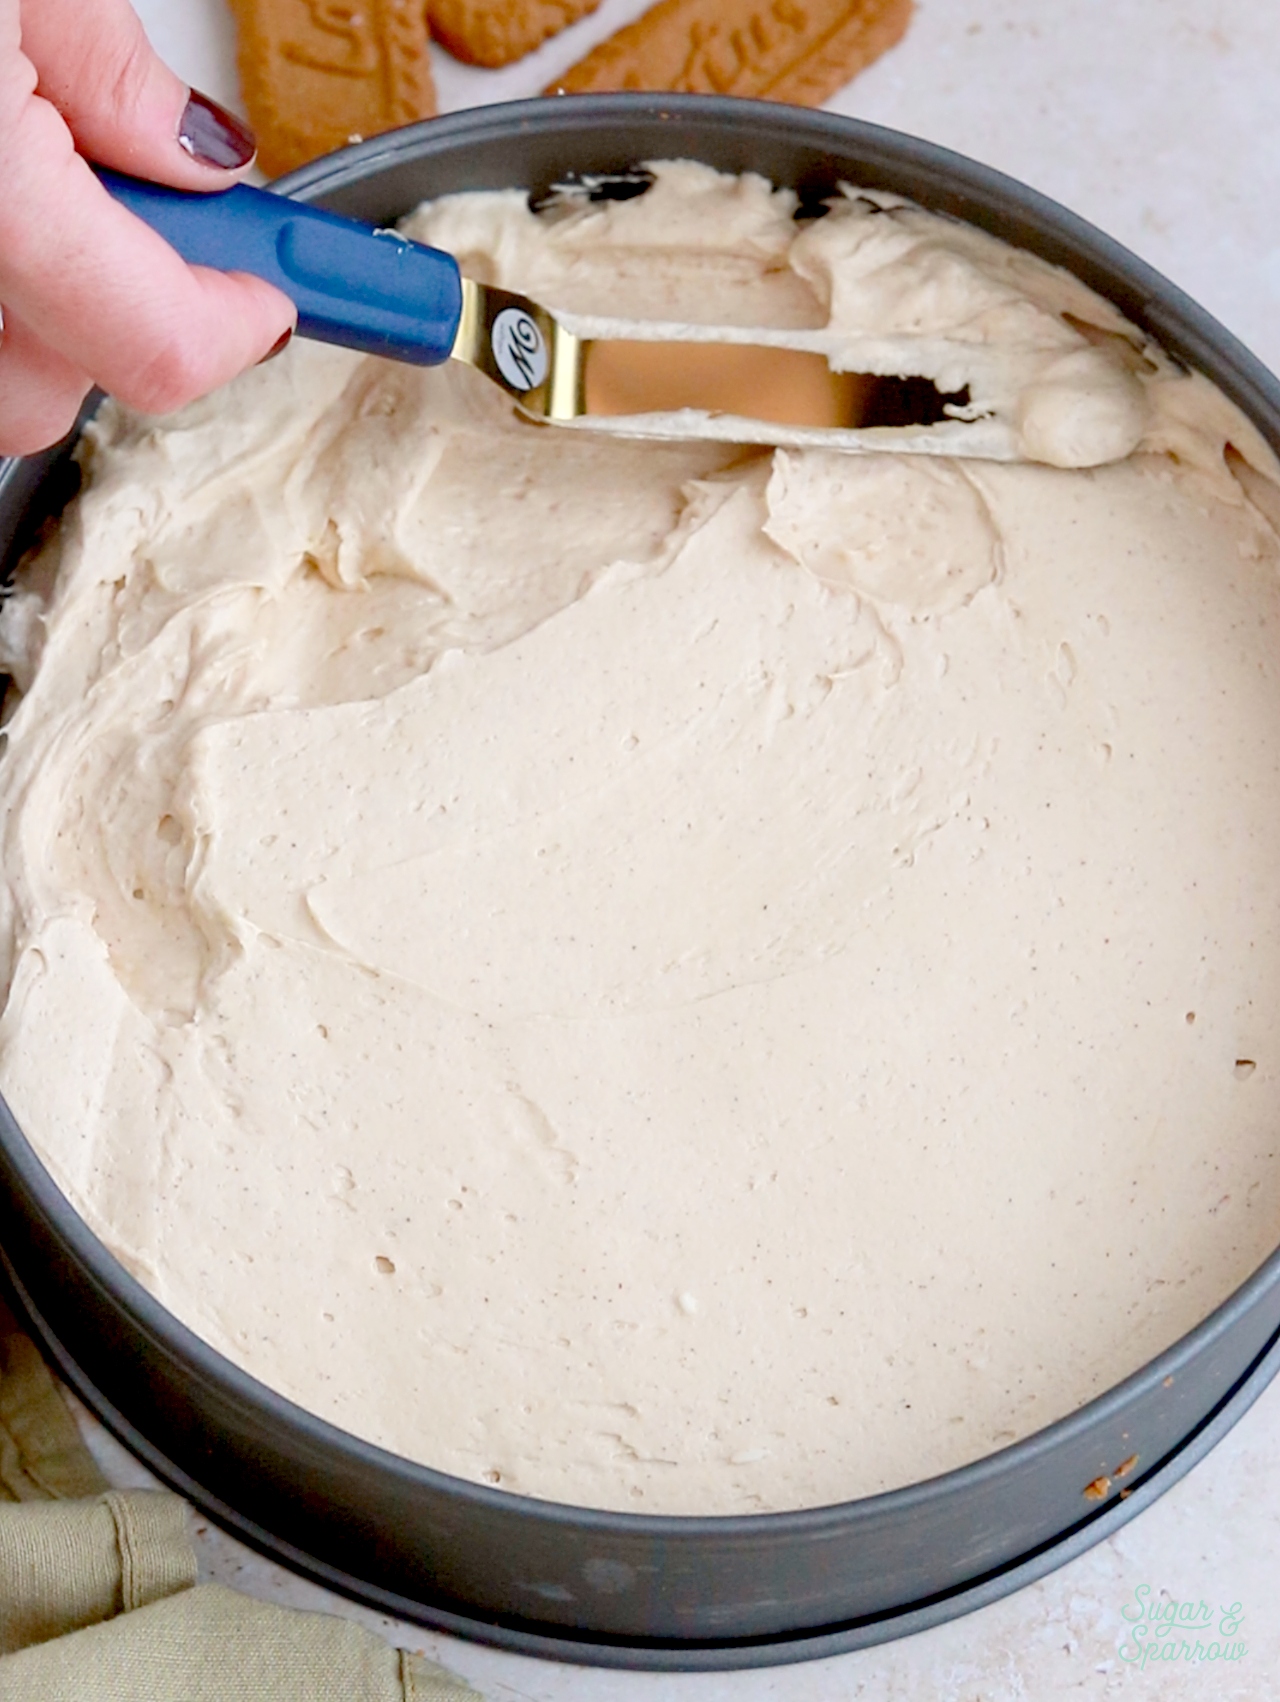
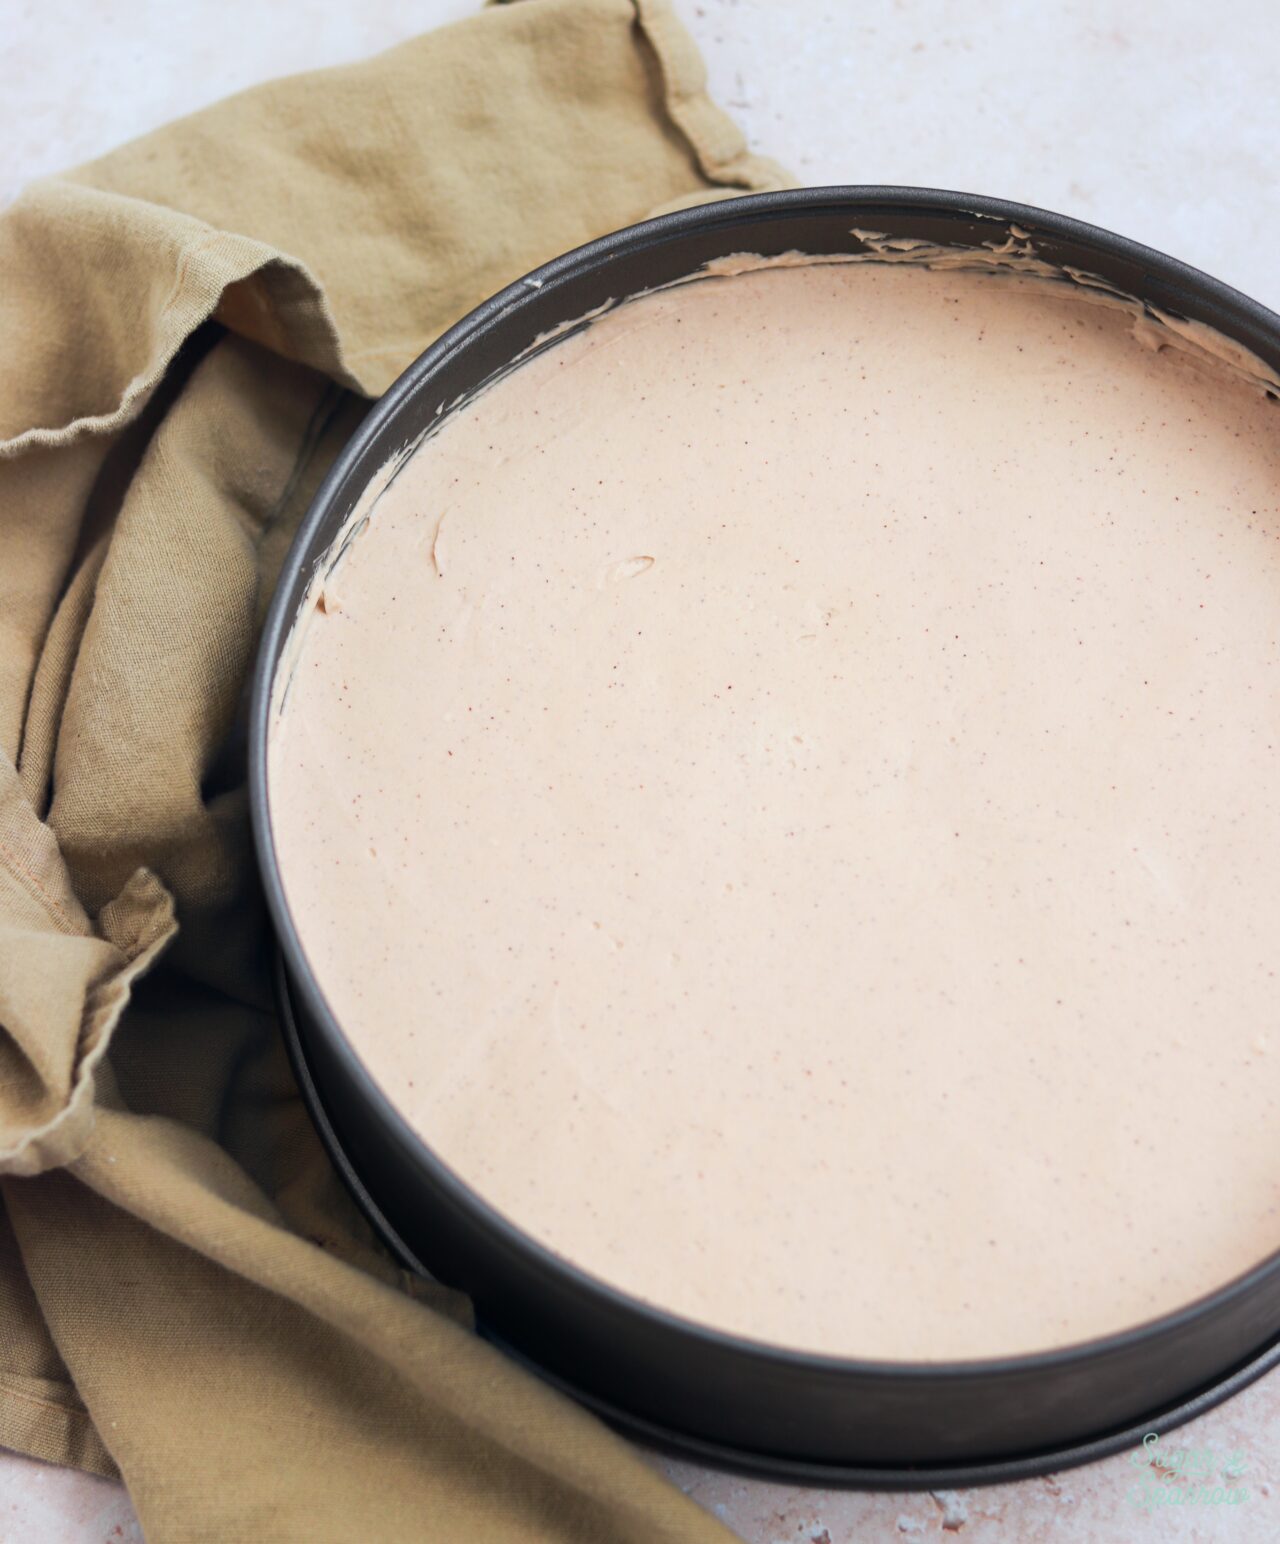
Step 4: Assemble and Refrigerate. Add the Biscoff cheesecake filling onto the Biscoff cookie crust and use an angled spatula to smooth it down. Then, cover with aluminum foil and refrigerate overnight.
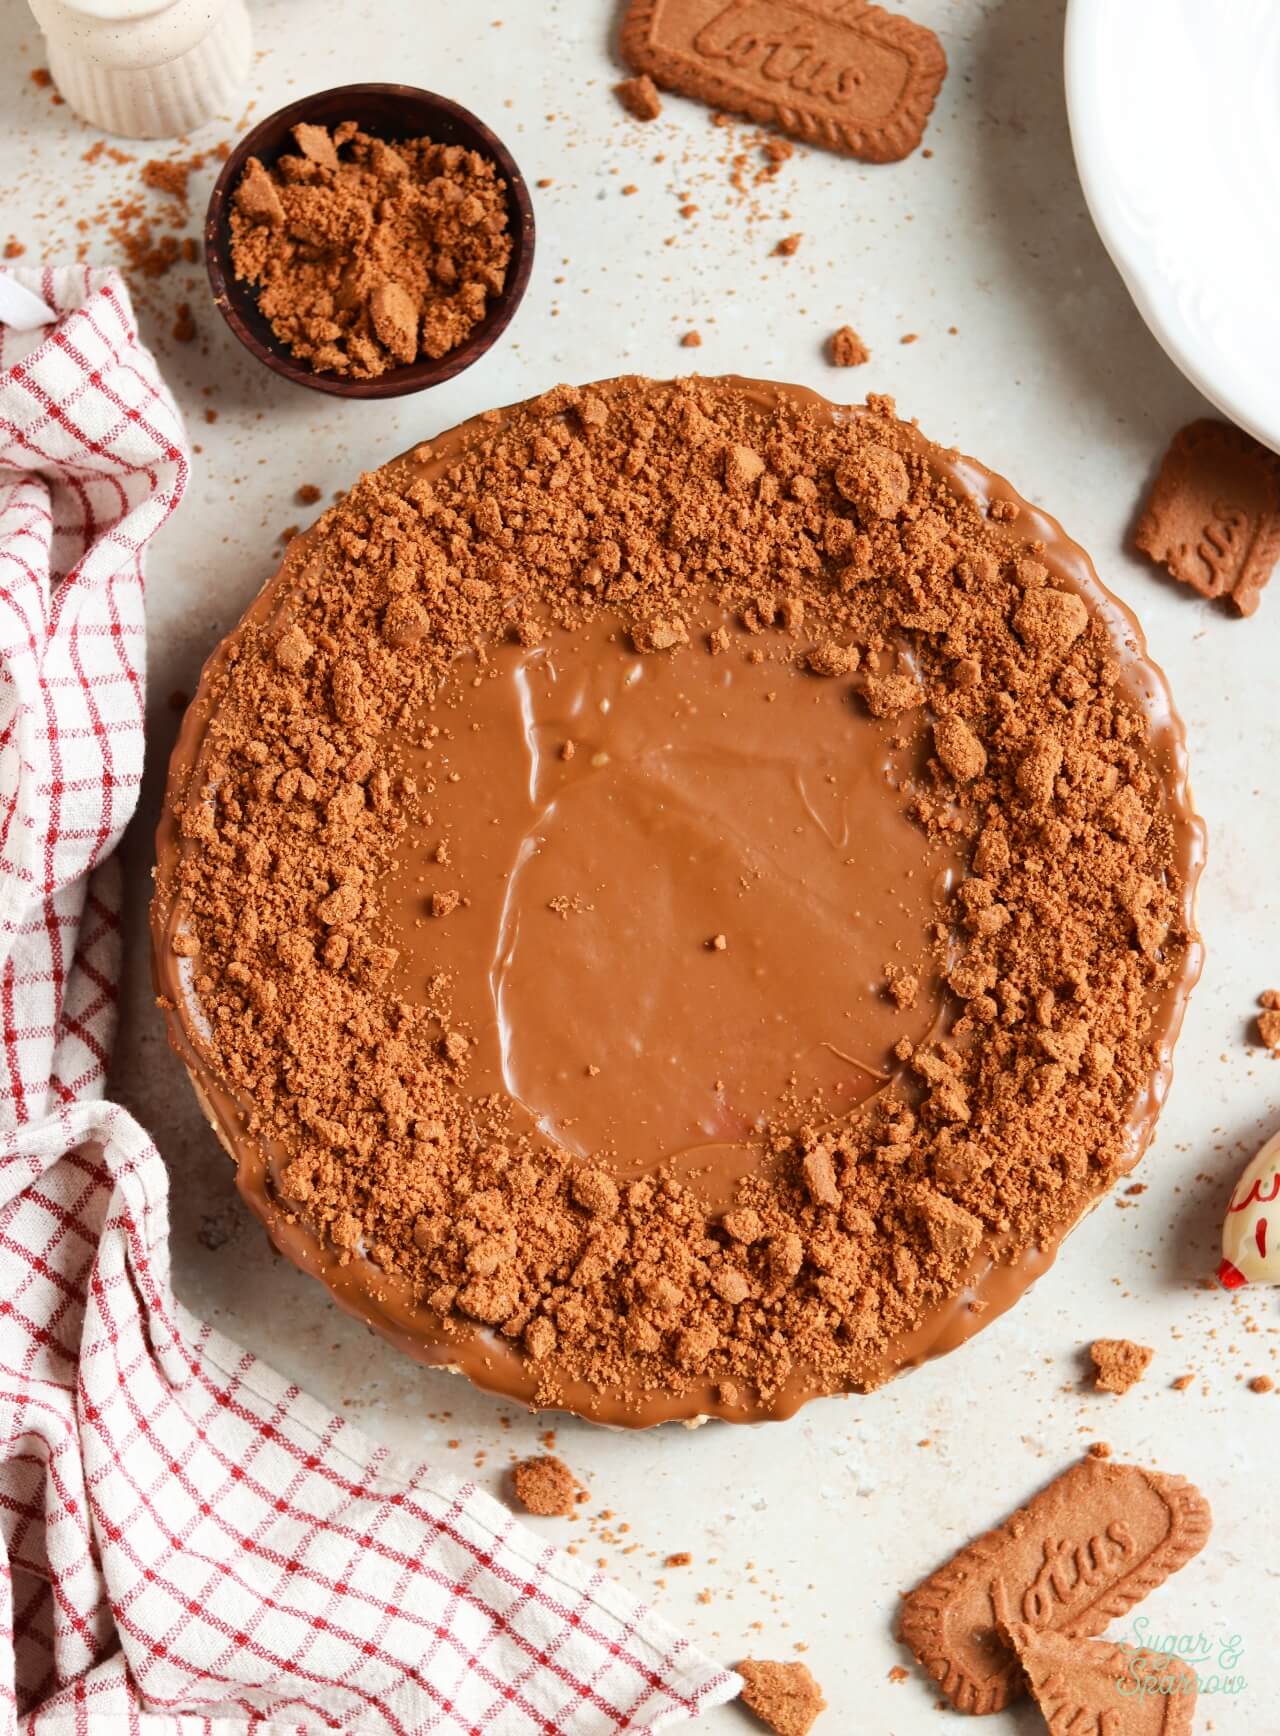
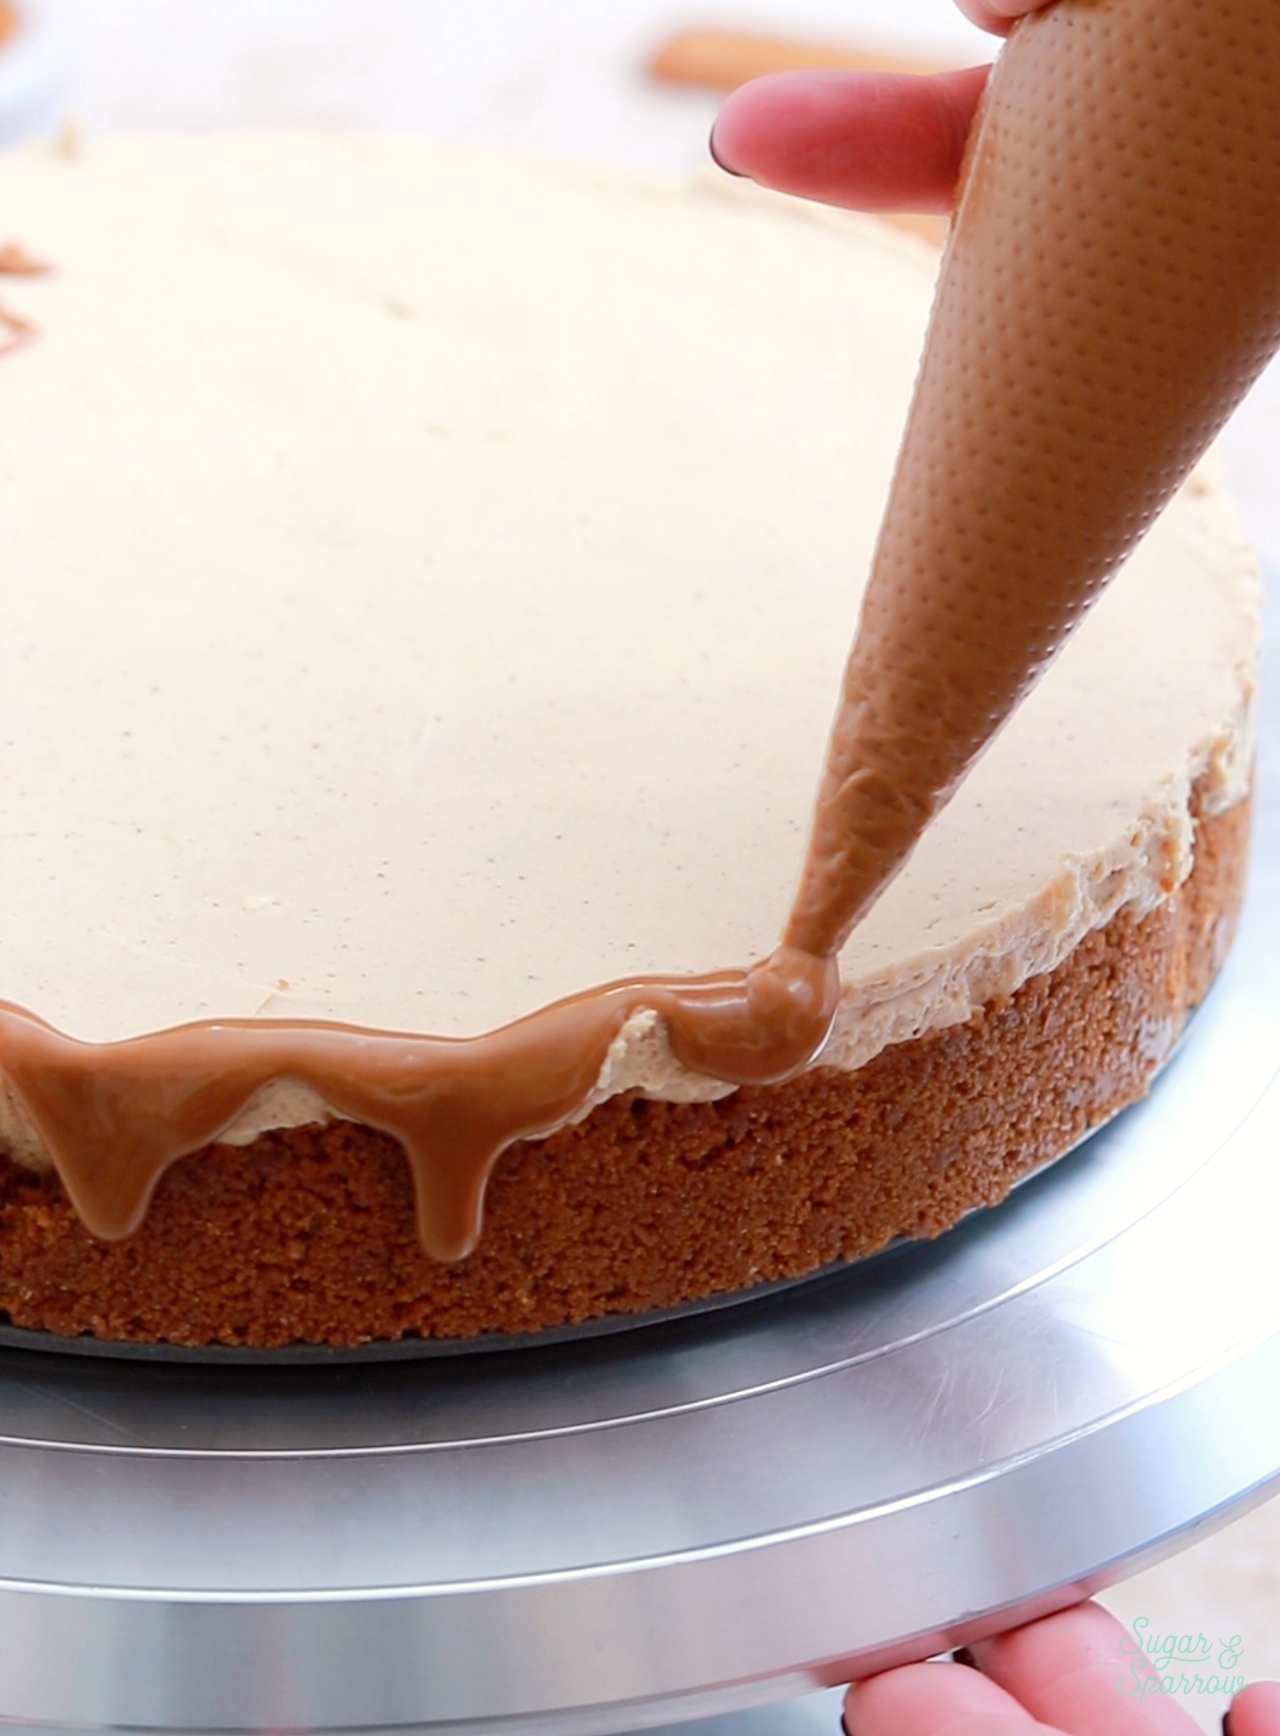
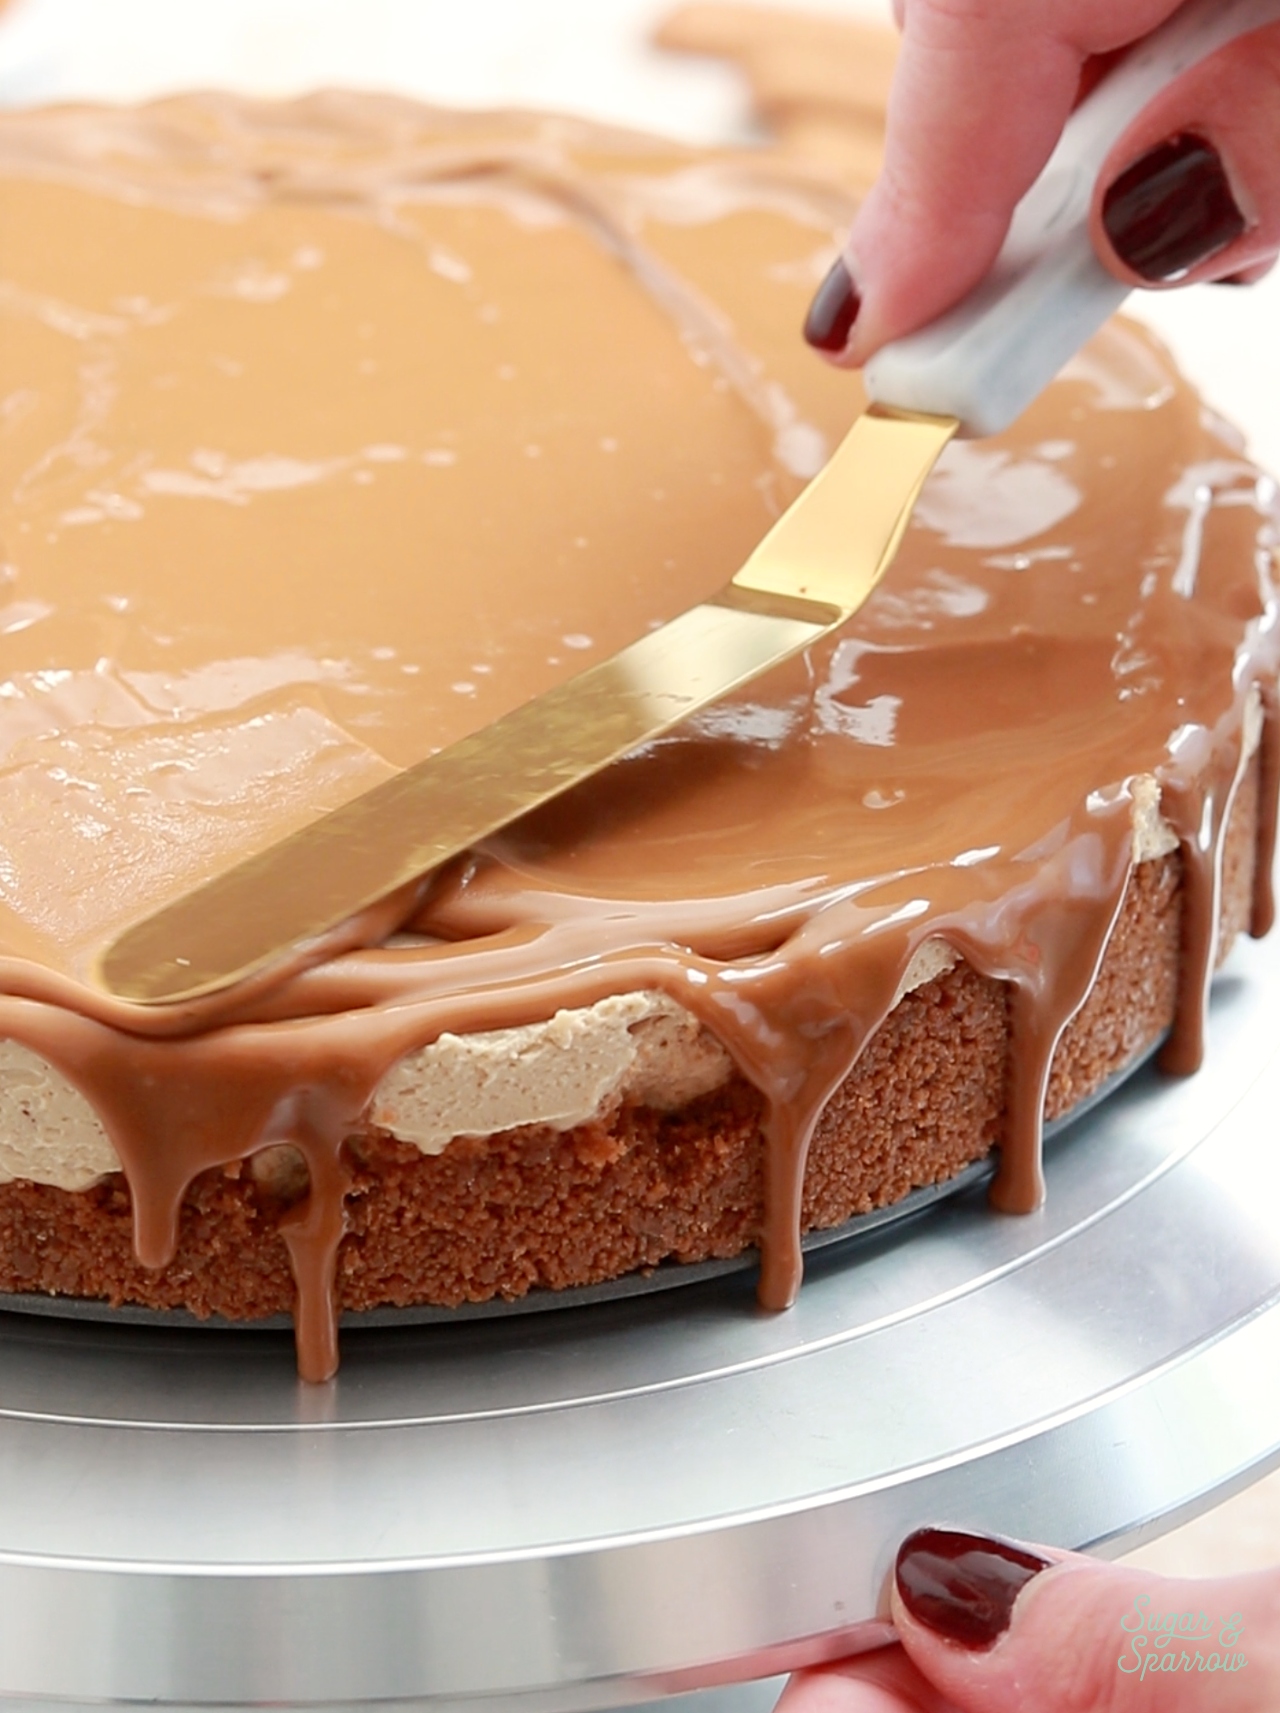
Step 5: Decorate. Once the filling is set, remove the collar from the springform pan. Gently melt the rest of the Biscoff cookie butter in the microwave until it’s room temperature but liquid. Add it into a piping bag and create drips around the edges of the cheesecake before filling in the center.
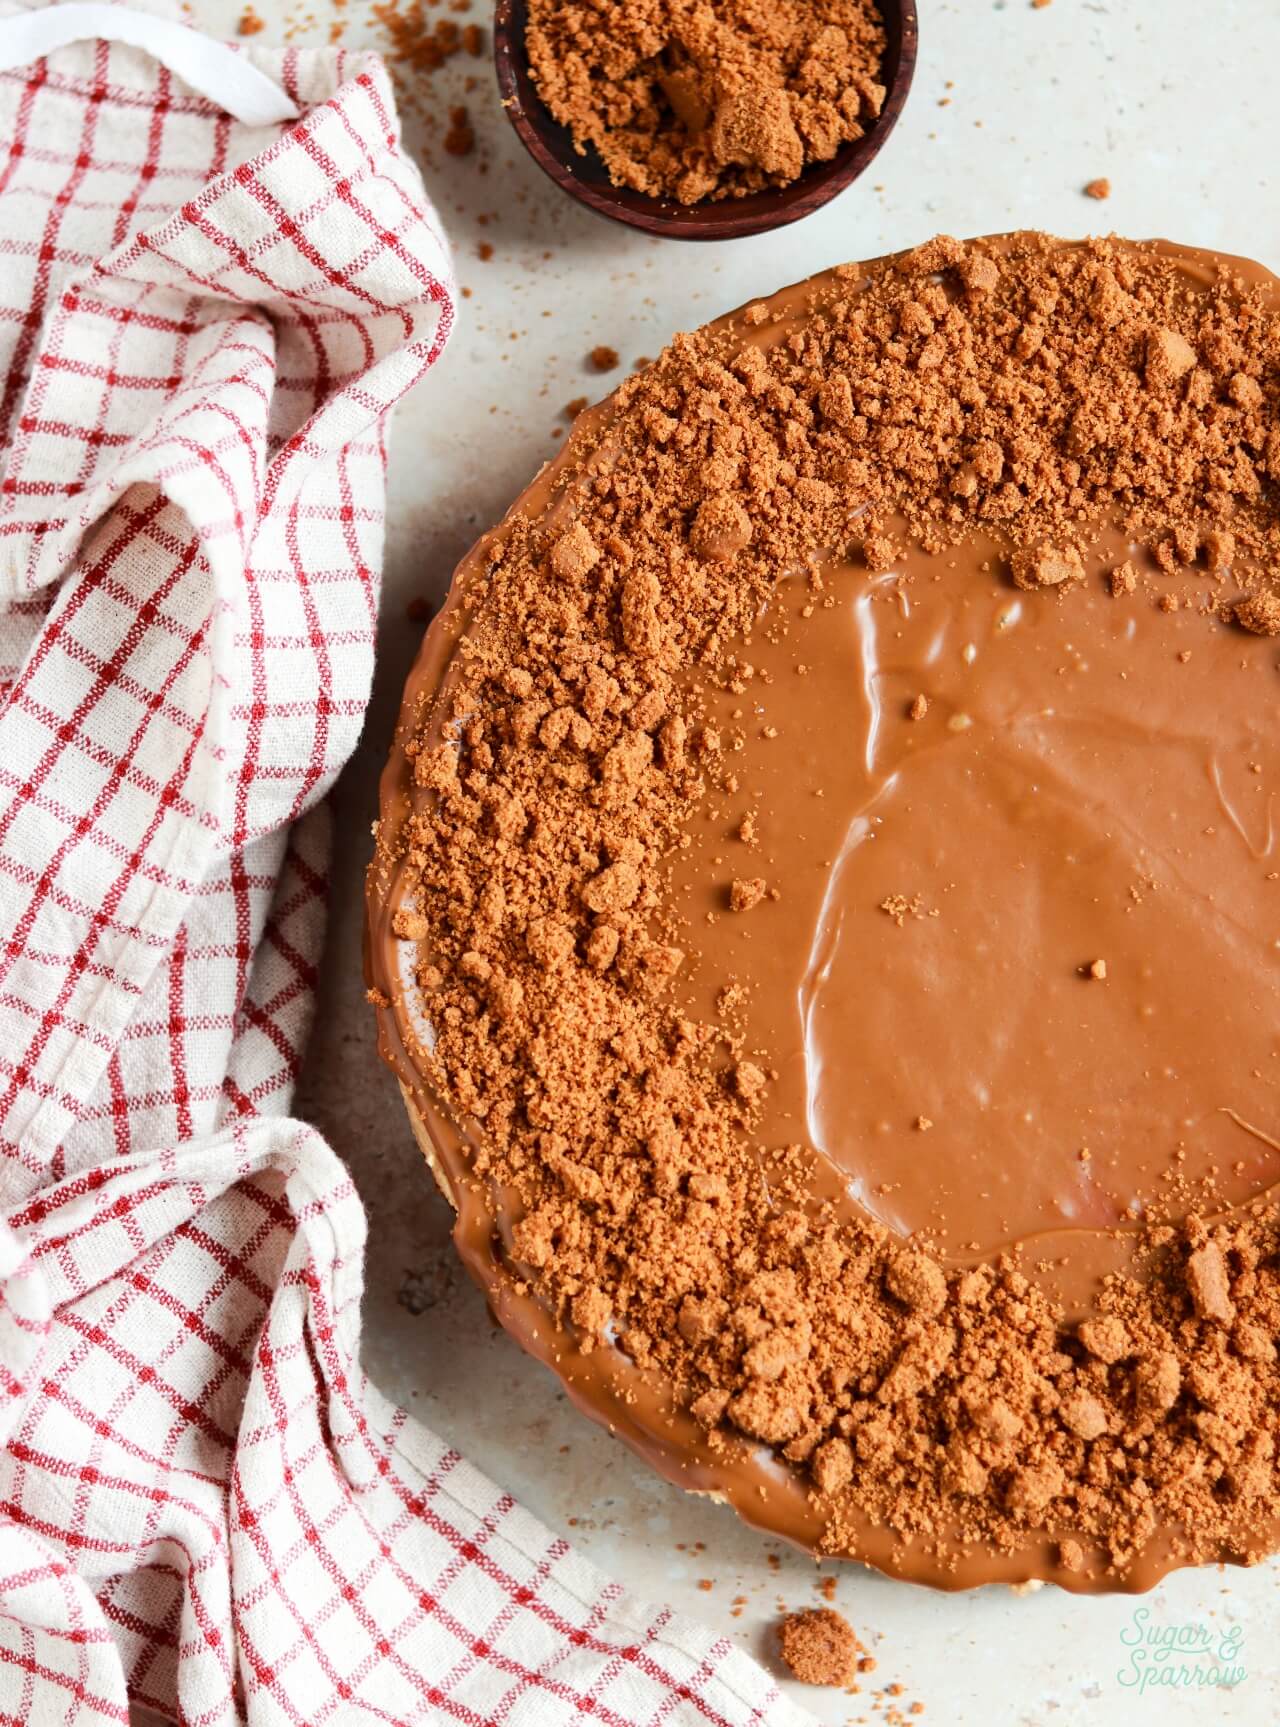
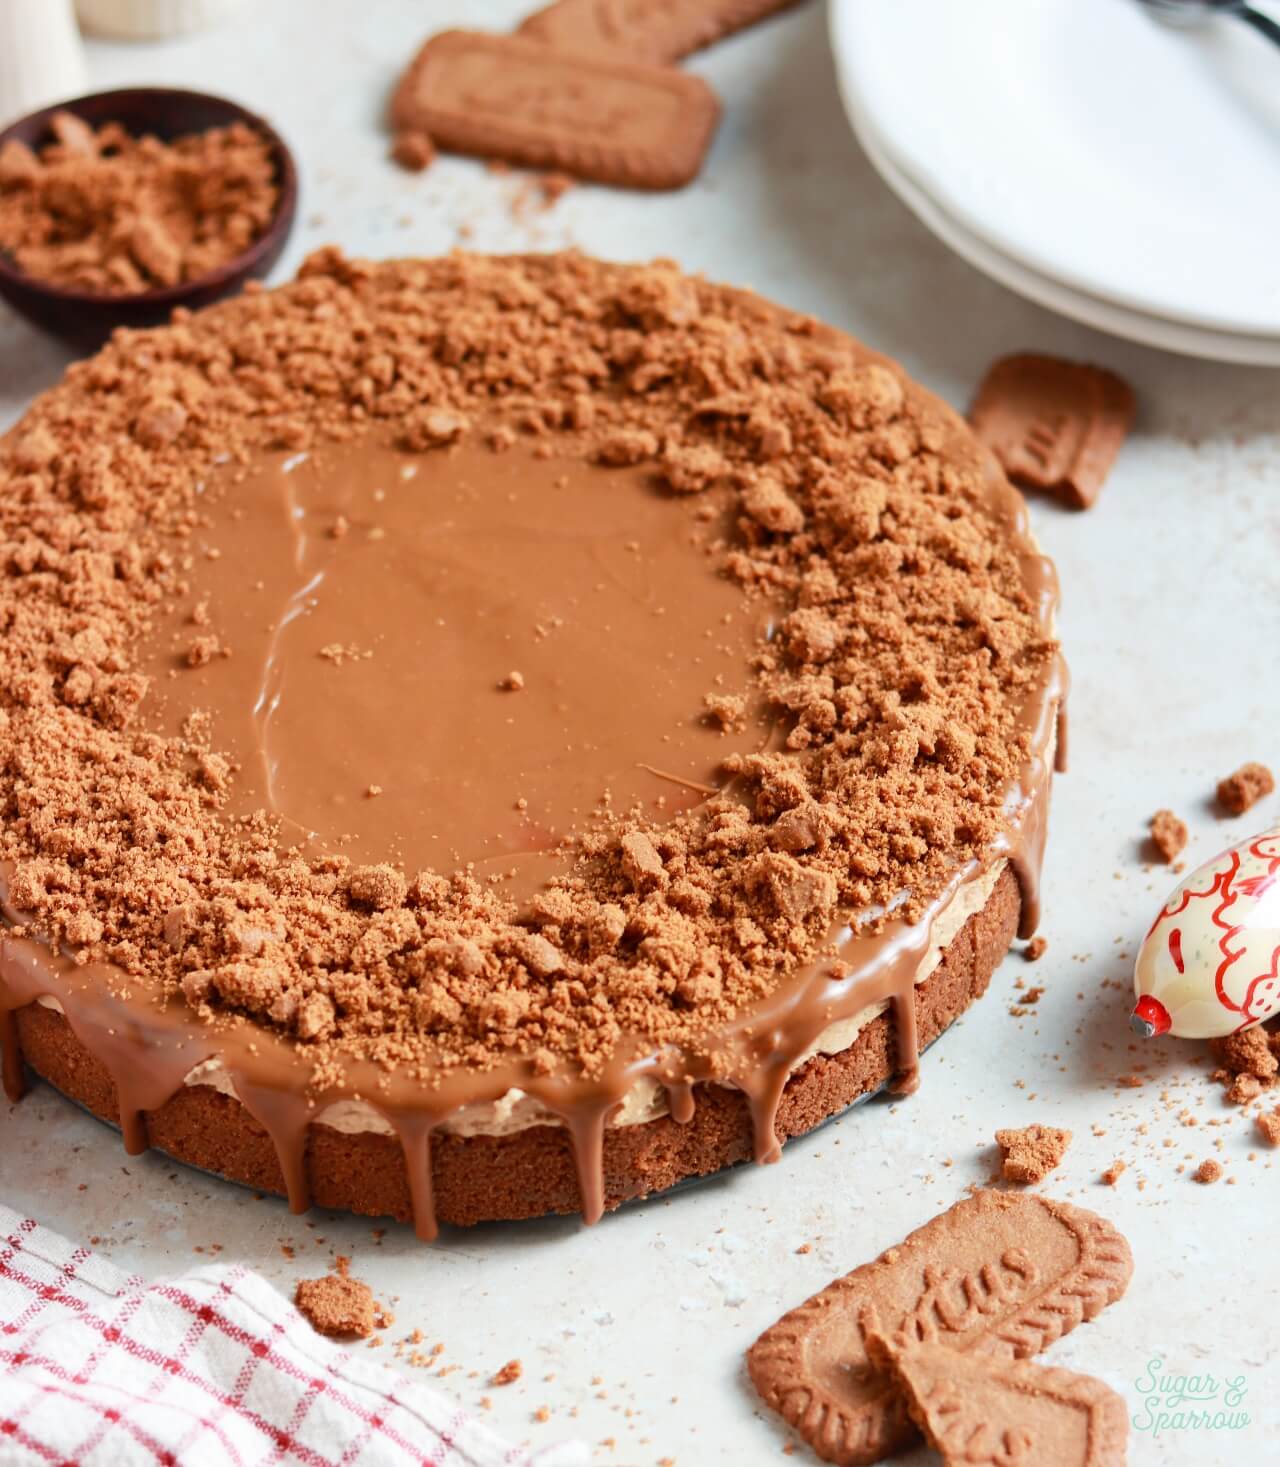
Finally, top with crushed Biscoff cookie crumbs.

No-Bake Cheesecake FAQs
What is a no-bake cheesecake? It’s essentially a velvety mousse-like filling made with cream cheese, flavoring, and whipped cream, set on a crust that doesn’t require baking. Instead of baking in the oven like a traditional cheesecake, the no-bake version sets up in the refrigerator.
What does Biscoff taste like? Biscoff are crunchy cookies with the flavor of spiced caramel. They have notes of cinnamon, nutmeg, and ginger. Super cozy!
How far in advance can I make this cheesecake? This no-bake cheesecake is best made 1-2 days ahead of serving. You can also freeze the cheesecake for up to three months if you need to.
What if I don’t have a springform pan? You can use a 9-inch or 10-inch standard cake pan or pie dish, but it might be difficult to remove from the pan unless you create a parchment paper or acetate collar to help lift it out. If you’re using a non-springform pan, I would recommend keeping it in the pan after the filling sets and decorating it like that, so you don’t risk breaking the cheesecake apart when you’re trying to lift it out.
Can I use other kinds of cookies or cookie butter? Certainly! This recipe should work with any other kind of crunchy cookie and creamy cookie butter as substitutes. Let me know if you experiment in the comments section below, I’d love to know what you did!
Other No-Bake Cheesecake Recipes You’ll Love
I love this no-bake cheesecake technique so much that I’ve used it to make a handful of other flavors and don’t plan on stopping any time soon! Here are the flavors I’ve made so far:
- No-Bake Oreo Cheesecake
- No-Bake Cheesecake (Plain)
- No-Bake Pumpkin Cheesecake
- No-Bake Eggnog Cheesecake
- No-Bake Mango Cheesecake
I hope you love this no-bake Biscoff cheesecake as much as I do! Let me know if you make it in the comments below and feel free to tag @sugarandsparrowco on Instagram to show me if you post a photo. I love to see what you create with my recipes!
No-Bake Biscoff Cheesecake
Equipment
Ingredients
Biscoff Cookie Crust
- 1 8.8oz package Biscoff cookies (250g)
- 1/3 Cup (75g) unsalted butter, melted
Biscoff Cheesecake Filling
- 16 Oz (452g) full-fat brick-style cream cheese, room temperature not the spread
- 1/4 Cup (50g) powdered sugar
- 3/4 Cup (210g) creamy Biscoff cookie butter
- 1 tsp ground cinnamon
- 1 tsp pure vanilla extract
- 1 Cup (240ml) heavy whipping cream, cold
Toppings
- 2/3 Cups (190g) creamy Biscoff cookie butter
- 5 Biscoff cookies, crushed (40g)
Instructions
Make the Biscoff Cookie Crust
- Using a food processor, grind the Biscoff cookies into a fine crumb. You can alternatively place the Biscoff cookies in a large Ziploc bag and use a rolling pin to crush them into crumbs.
- Add the Biscoff cookie crumbs into a medium bowl and pour the melted butter on top. Mix until uniform, then press the mixture into the bottom and up the sides of a 9-inch springform pan or 10-inch springform pan. Use a round glass or jar to pack the crust as tightly as possible (this helps keep it together when you cut the cheesecake slices later). Freeze the Biscoff cookie crust in the pan for 10-20 minutes while you prepare the cheesecake filling.
Make the Biscoff Cheesecake Filling
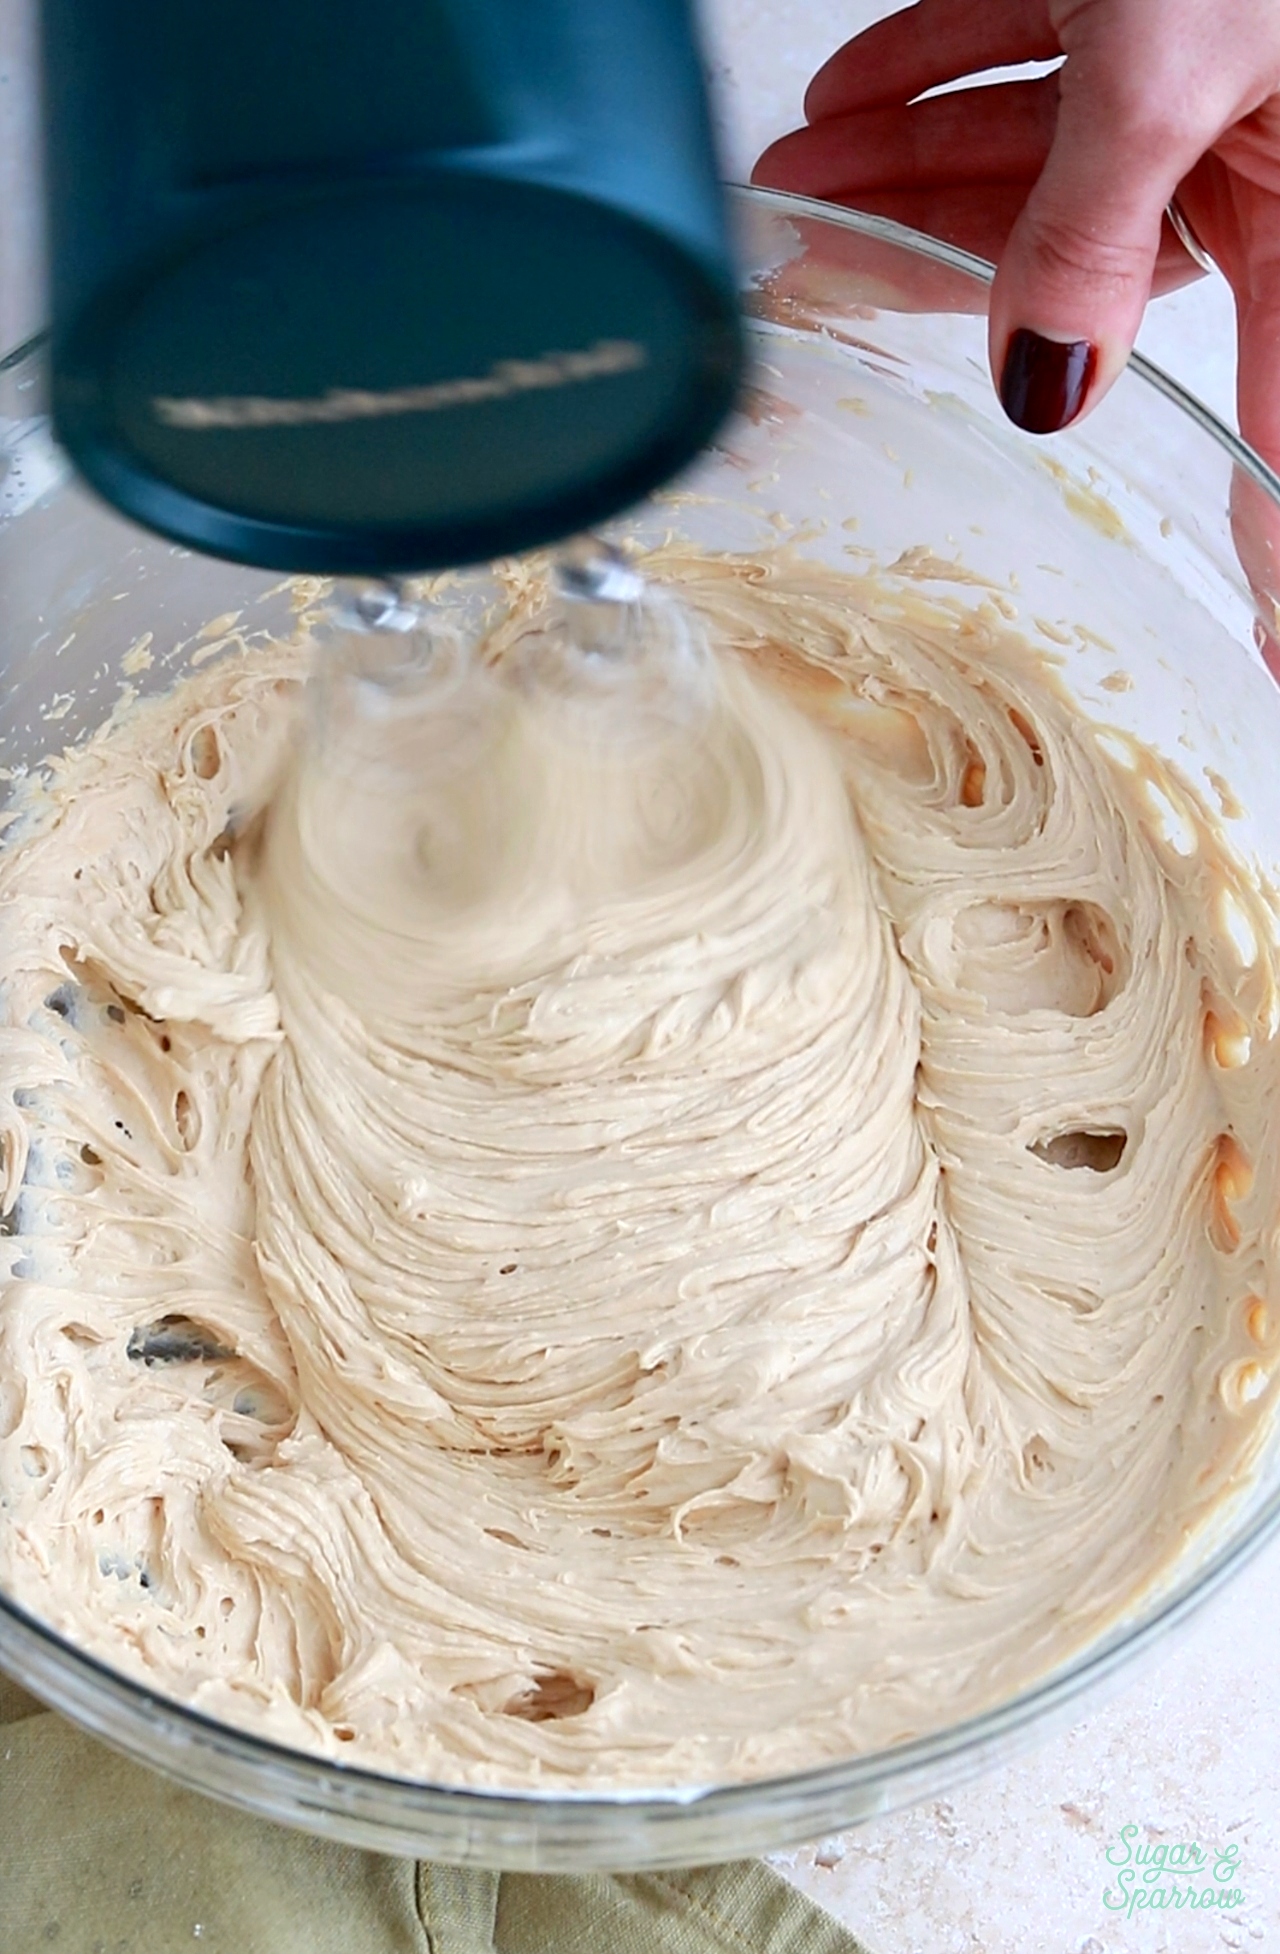
- In a large bowl (either with a hand mixer or stand mixer), beat the cream cheese on medium until creamy, about 2 minutes. Scrape down the bowl and paddle and add the powdered sugar, Biscoff cookie butter, cinnamon, and vanilla. Beat on medium-high speed until smooth and combined (no lumps), about 2–3 minutes.
- In a separate medium bowl with a hand mixer or in a stand mixer fitted with a whisk attachment, whip the cold heavy cream on medium-high speed until stiff peaks form, about 3-5 minutes.
- Use a rubber spatula to gently fold the whipped cream into the cheesecake filling until combined.
- Remove the Biscoff cookie crust from the freezer and add the Biscoff cheesecake filling into it. Spread the filling to the edges of the crust and smooth the top using an angled spatula, then cover it tightly with plastic wrap or aluminum foil. Refrigerate for at least 8 hours and up to 2 days. For best results, chill the cheesecake overnight. This will yield the most set filling.
Decorate
- Make sure the no-bake Biscoff cheesecake filling is set, then remove the collar from the springform pan. Add the remainder of the Biscoff cookie butter into a microwave safe bowl and microwave in 5-10 second intervals, until the cookie butter is melted but still room temperature.
- Add the melted Biscoff cookie butter into a piping bag and snip off a small opening, then use it to add drips around the edges of the cheesecake. Fill in the center of the top of the cheesecake with the rest of the cookie butter in the piping bag and use an angled spatula to smooth it down and spread it to the edges. Garnish with crushed Biscoff cookie crumbs.
Notes
- After making and freezing the Biscoff cookie crust, it can be covered and stored in the refrigerator until you add the filling (1-2 days ahead is best for the freshest flavor).
- You can make and assemble the no-bake Biscoff cheesecake up to 2 days in advance, stored in the refrigerator and covered in aluminum foil or plastic wrap. You can alternatively freeze the cheesecake for up to 3 months after it’s set in the refrigerator. Be sure to cover well if freezing. I recommend one layer of plastic wrap and one layer of aluminum foil.

Leave a Reply