First birthday parties are my absolute favorite, mostly because it’s so much fun to watch a little babe figure out how to eat cake for the first time! My tiniest niece turned one a few weeks ago, and I was so delighted to get to make her smash cake. It got me thinking about sharing my best tips on smash cakes with all of you, since they’re super easy to make and the perfect DIY project if you’re planning a first birthday for your little one (or in charge of the cake for someone else’s babe). From the perfect sized cake pans to a great vanilla cake recipe and decorating ideas, I’ve got you covered!
The Perfect Smash Cake Size
Since babies are so tiny and cute, celebrating them with their own mini cake makes their first birthday that much sweeter. Yes, you could give them a cupcake to smash, but in my humble opinion a tiny layer cake is so much more fun! To bake the perfect sized layers, you’re going to need a set of 4-inch cake pans. I absolutely love these cake pans because they’re the perfect size and have removable bottoms for easy release.
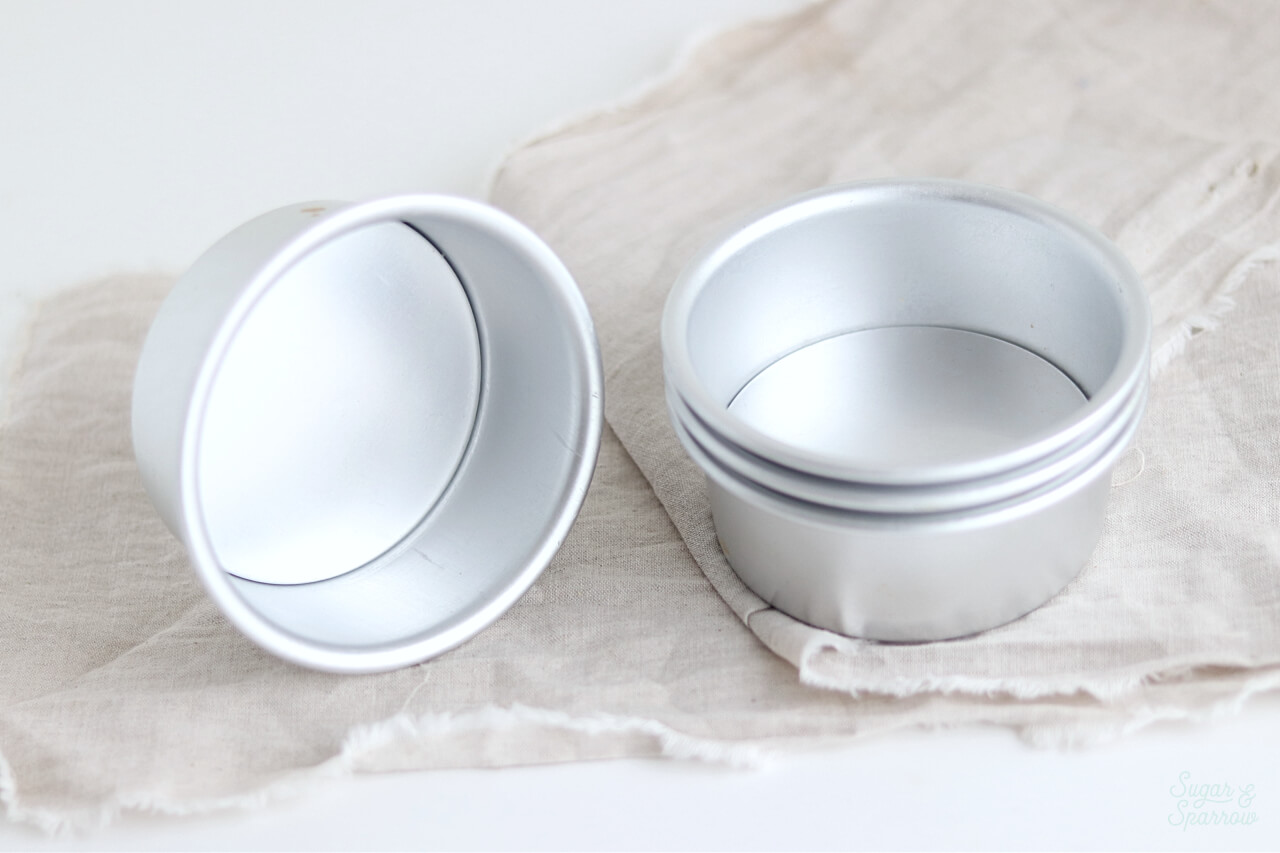
I typically bake three 4-inch layers for smash cakes, but this recipe can also be made as a single layer 6-inch cake if you’d rather make the baking and decorating process easier.
Vanilla Smash Cake Recipe
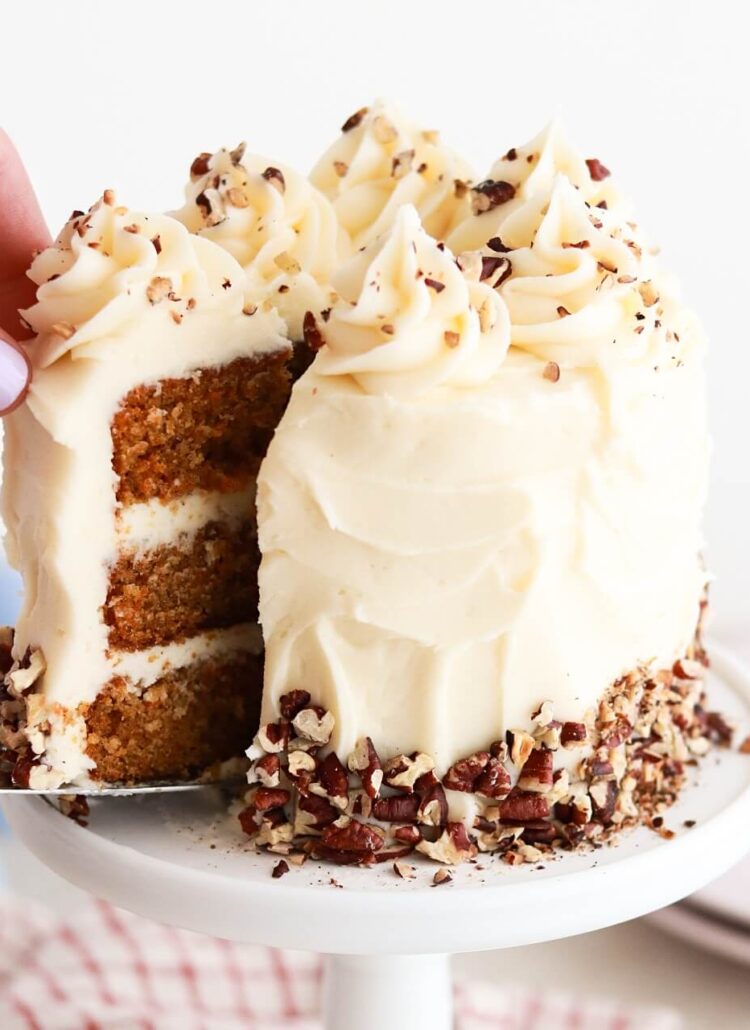
You don’t have to get crazy with a recipe for your smash cake. In fact, vanilla cake with vanilla buttercream is the perfect starter cake for a baby. It’s simple, classic, and pretty universally loved. I’ve got a great, easy vanilla cake + vanilla buttercream recipe modified for those 4-inch cake pans below. Here’s what it looks like on the inside:

Since it’s an adapted version of my vanilla cake recipe, it’s totally tasty! As in, you’re probably gonna want to finish off whatever your little one doesn’t.
Update 2024: I realized this cake recipe initially made too much batter, so I scaled it down slightly to make just enough for three 4-inch layers or one 6-inch layer. Same great recipe, but the perfect amount of batter!
Vanilla Smash Cake Recipe
Ingredients
Mini Vanilla Cake
- 3/4 Cup (79g) sifted cake flour
- 1 tsp baking powder
- 1/4 tsp salt
- 1/4 Cup (57g) unsalted butter, room temperature
- 1/2 Cup (100g) granulated white sugar
- 1 large egg, room temperature
- 2 Tbsp (30g) sour cream, room temperature
- 1 tsp pure vanilla extract
- 1/3 Cup (80ml) whole milk, room temperature
Vanilla Buttercream
- 1/2 Cup (113g) unsalted butter, room temperature
- 1 1/2 Cups (180g) powdered sugar
- 1 tsp pure vanilla extract
- 1 Tbsp whole milk or heavy whipping cream, room temperature
- pinch of salt, or to taste
Instructions
Make the Mini Vanilla Cake
- Preheat the oven to 350ºF and prepare three 4-inch or one 6-inch cake pan by spraying the sides with cooking spray and fitting the bottom(s) with a wax paper or parchment paper cake circle.
- In the bowl of your stand mixer (a handheld mixer works fine too!), cream together the butter and sugar on medium-high until light and fluffy, about 3 minutes. Turn the mixer to low and add the egg, mixing until just combined and scraping down the bowl and paddle as needed. Add the vanilla and sour cream, turn the mixer to high, and beat for one full minute. It may look a little curdled at this point, but don’t worry – it will become smooth cake batter by the end.
- Turn the mixer to low speed and add the dry ingredients all at once. Mix until just combined, then slowly pour in the milk. Continue to mix on low speed until just combined, about 30 seconds. Scrape down the sides and bottom of the bowl and give it a few stirs with a whisk to make sure there are no lumps. The batter will be slightly thin.
- Pour the batter evenly between the prepared cake 4-inch pans (or all into one 6-inch cake pan). If using 4-inch cake pans, bake for 18-22 minutes. If using a 6-inch cake pan bake for 24-28 minutes. The cake is done when it springs back to the touch and a toothpick inserted comes out clean. Cool completely before assembling and decorating.
Make the Vanilla Buttercream
- With a hand mixer or paddle attachment on your stand mixer, cream the butter on medium-high until it’s creamy and light (almost white) in color. About 5 minutes.
- With the mixer in the off position, add the powdered sugar, vanilla, milk, and salt. Turn the mixer to low speed and mix until fully combined and uniform, scraping down the bowl and paddle as needed, 2-3 minutes.
Assembly
- Once the mini vanilla cake is completely cooled, frost and decorate with the vanilla buttercream. To create a mini layer cake, level the cake layers to your desired height. Add a swipe of vanilla buttercream onto a cardboard cake circle and place the first cake layer on top. Fill and stack the cake with vanilla buttercream, then crumb coat the cake with vanilla buttercream. Place the crumb coated cake in the refrigerator for at least 30 minutes to let the buttercream set firm. Use the remaining frosting to decorate as you please. There are some ideas and tutorials below!
Notes
- The small batch vanilla cake layer(s) can be made ahead and stored at room temperature, covered tightly in plastic wrap, for up to two days. Alternatively, you can cover with plastic wrap and store in the freezer for up to two months before thawing to room temperature.
- The vanilla buttercream can be made ahead and stored in an airtight container at room temperature for up to 1 day. Alternatively, you can store it in an airtight container in the refrigerator for up to two weeks. When you’re ready to use it, bring it back to room temperature and rewhip with your stand mixer to bring back to frosting consistency.
Smash Cake Decorating Ideas
The best thing about smash cakes is they’re going to get totally destroyed. That means you don’t have to get too intricate with your cake decorating or fret about design flaws. While you can decorate the cake any way you want, here are a few of my favorite ideas (with tutorial links to help you get the look!):
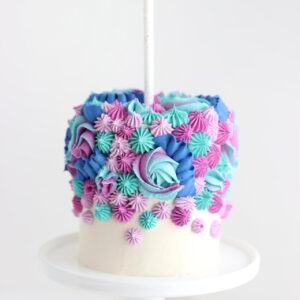
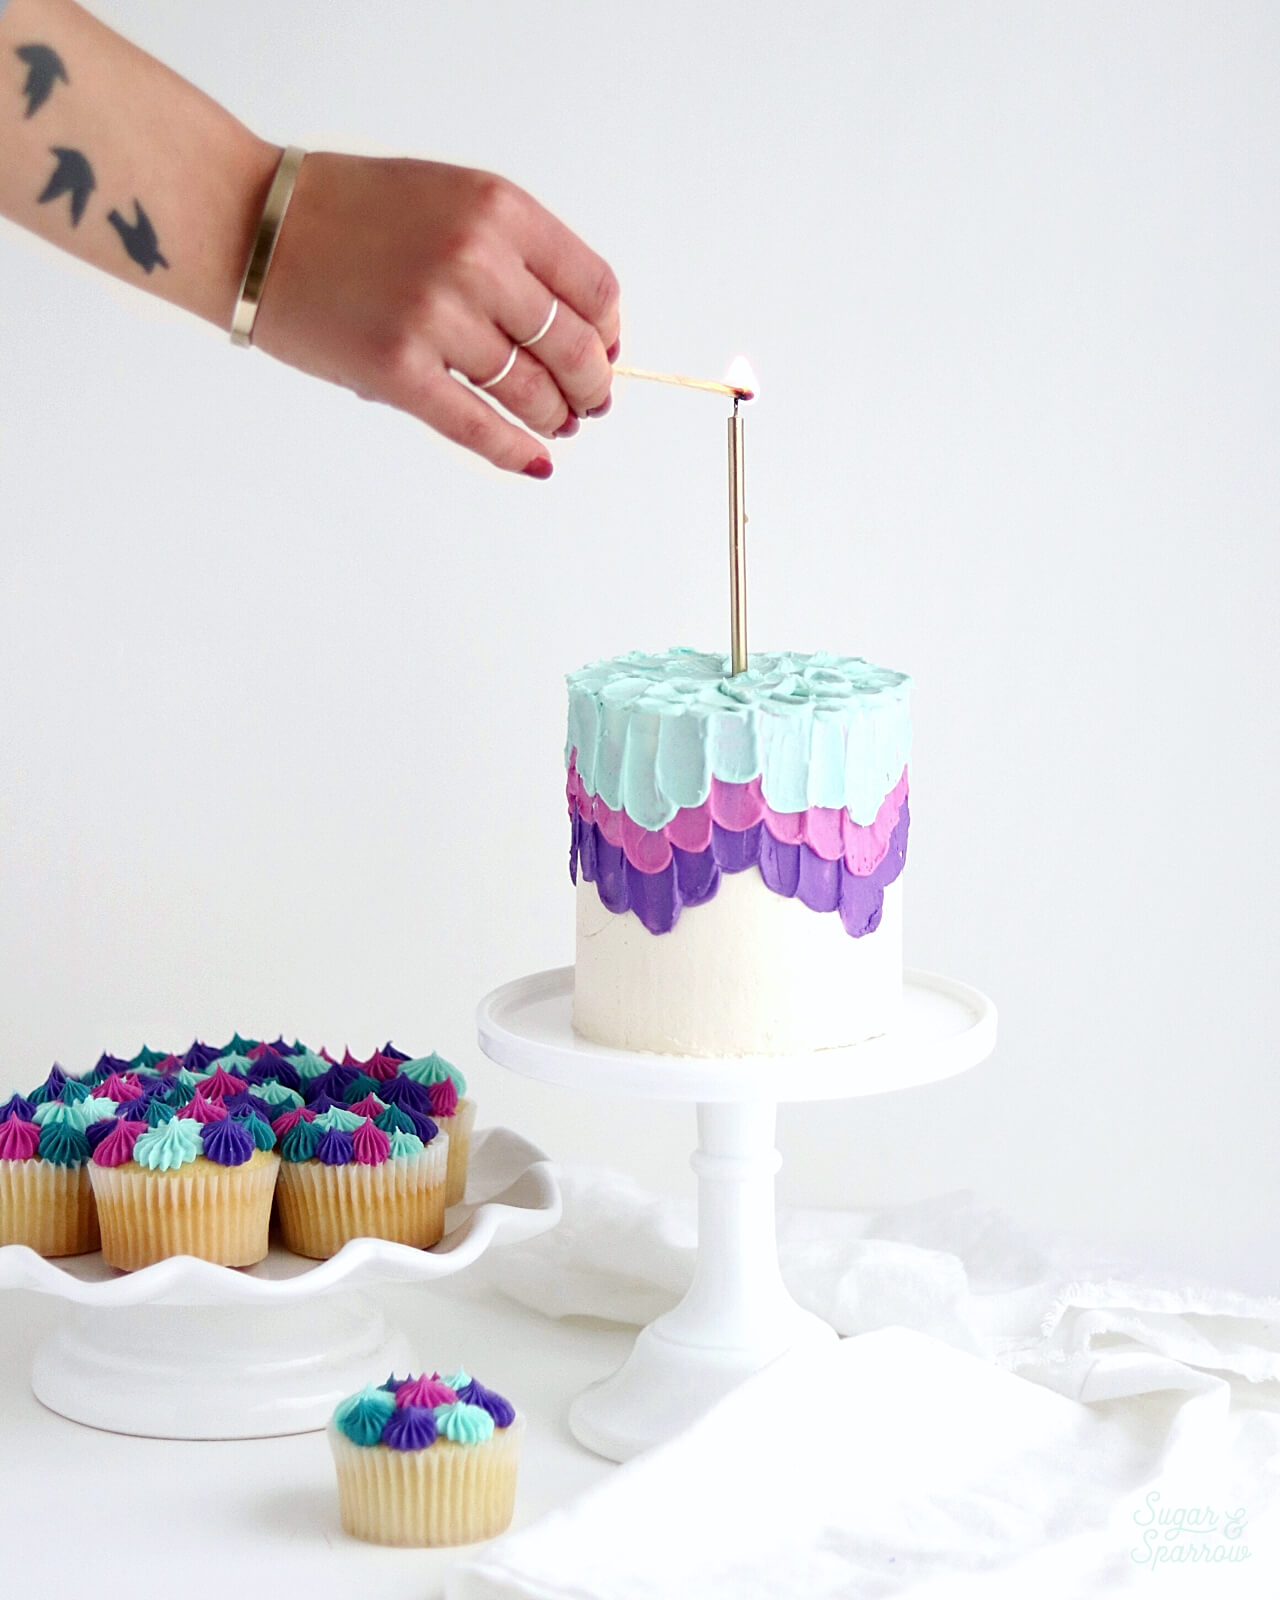
Smash Cake With Pretty Piping
This is one of my favorite easy looks for smash cakes, and the same design I created for my little niece! All you need is a few of your favorite piping tips and a smooth frosted cake.
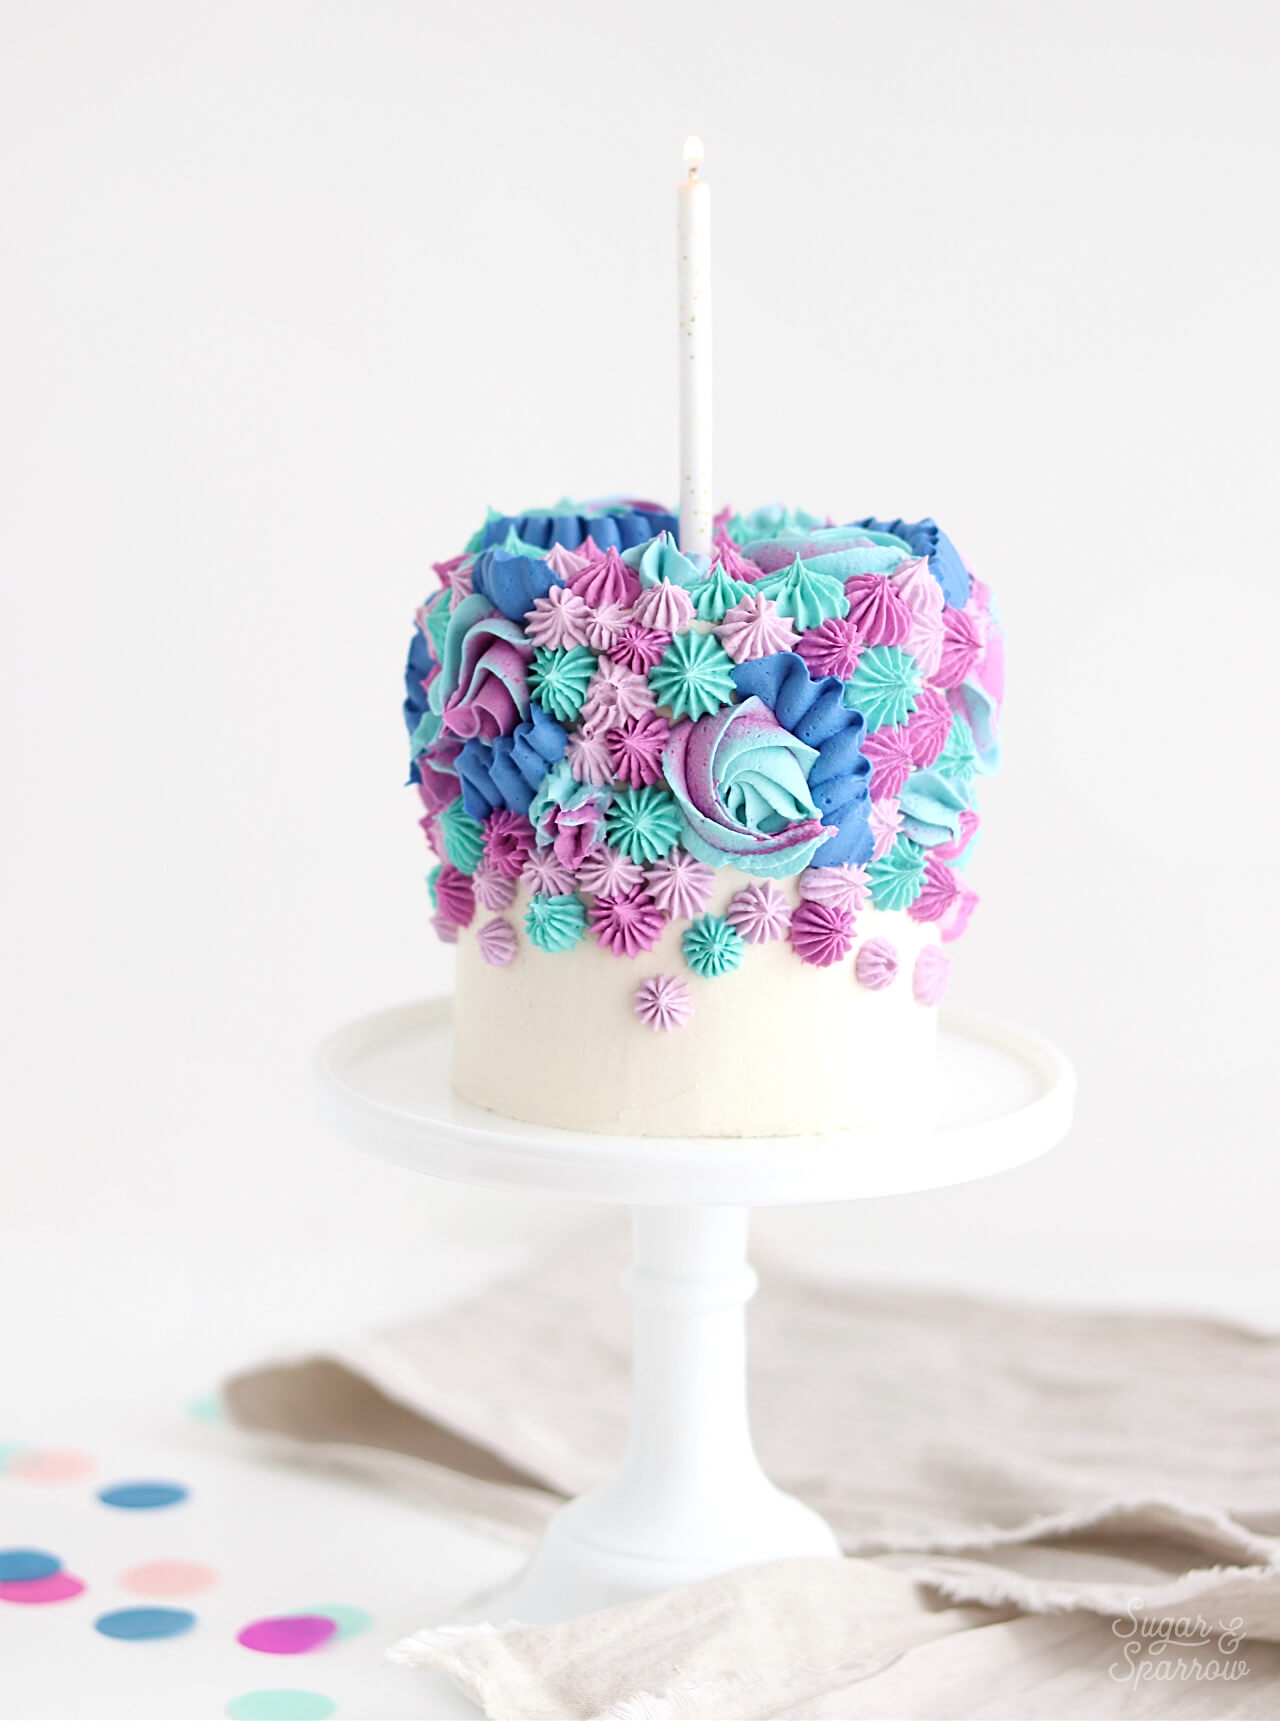
After frosting the cake with buttercream, I chilled it for thirty minutes while I mixed up a buttercream color palette (there are five different colors on this beauty). Then, I piped rosettes with Wilton Tip 1M, ruffles with Wilton Tip 104, and filled the rest in with Wilton Tip 4B to create open stars.
Spatula Painted Smash Cake
If you’re wanting something colorful, yet super simple, this spatula painted technique is perfect! All you need is a color palette with three or more colors and a small icing spatula.
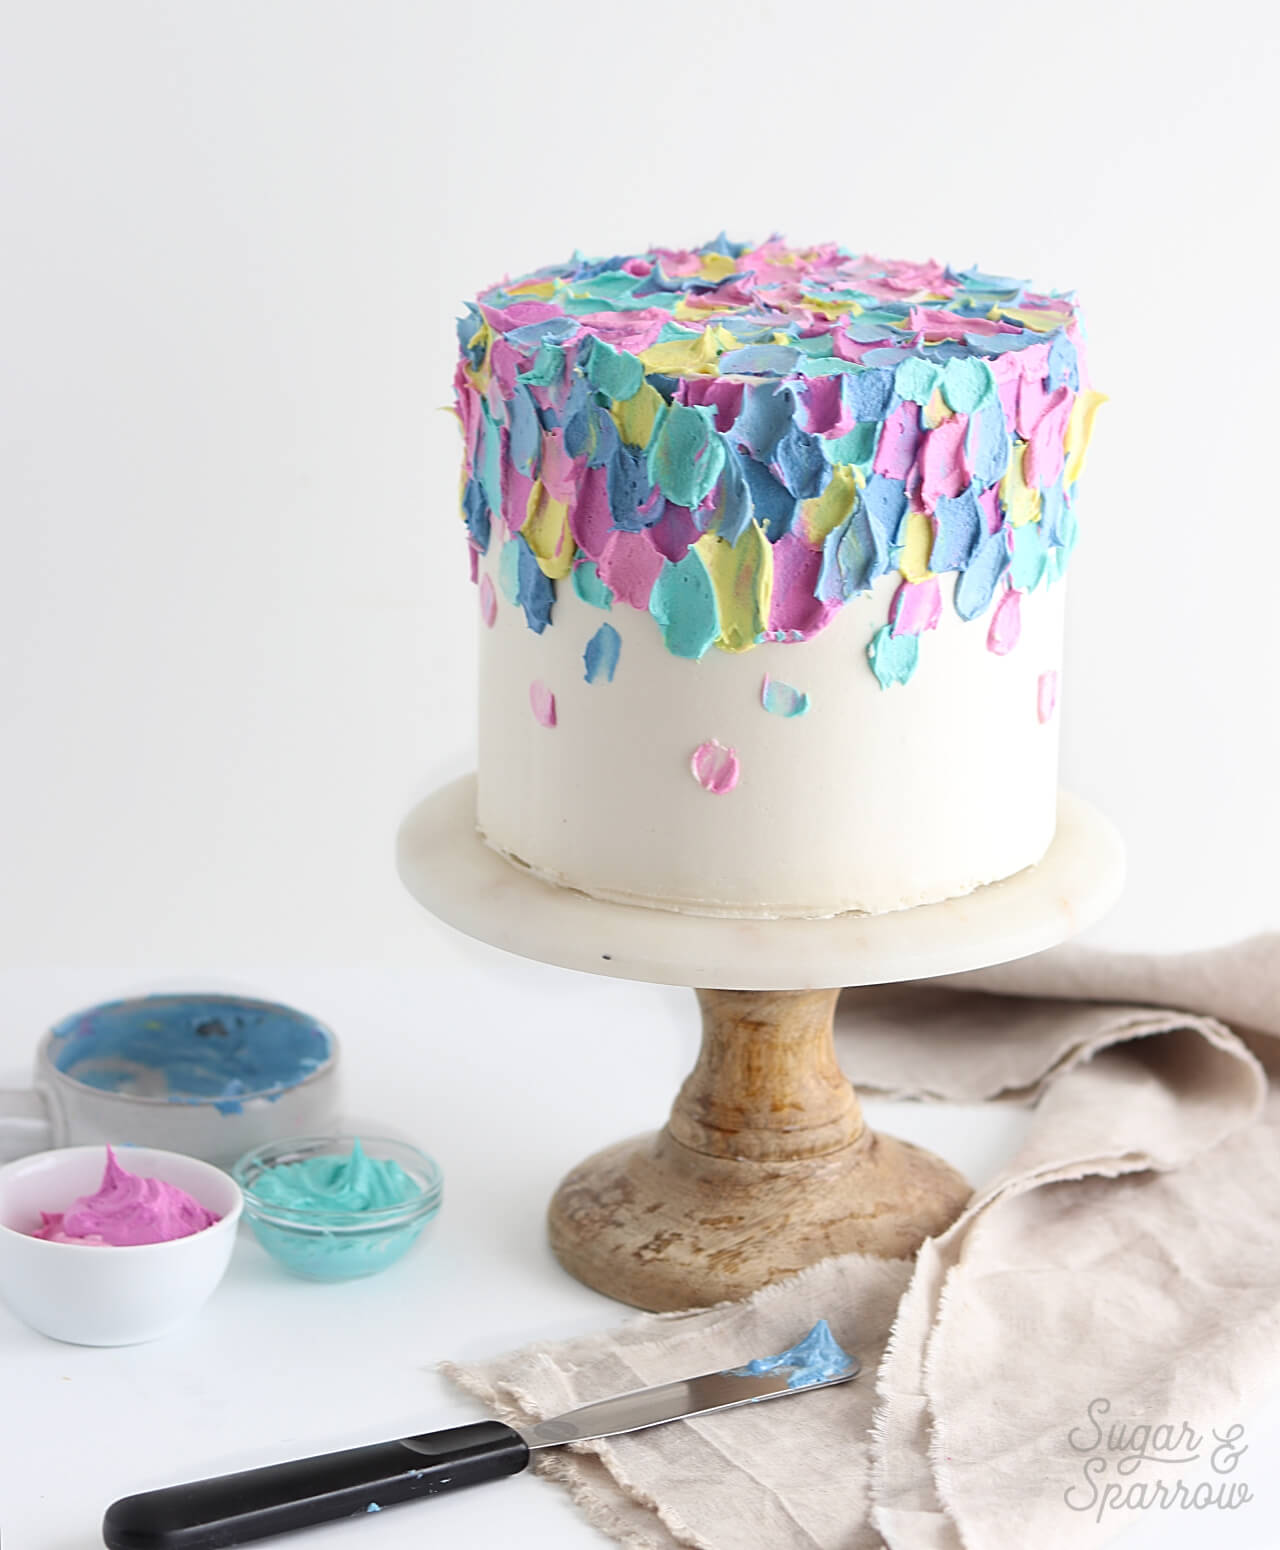
To get the look, fill and frost the cake and chill it in the refrigerator for thirty minutes while you mix up your buttercream color palette. Then, apply the colored buttercream to the cake by swiping it on with your icing spatula in a random pattern. There’s a full tutorial with additional tips here. You could also use the same technique to create longer spatula swipes for a look like this:
Smash Cake With Ganache Drip
This was a smash cake I created for an elegant first birthday party and I love the look so much! It’s a simple semi-naked cake design topped with white chocolate ganache drips.
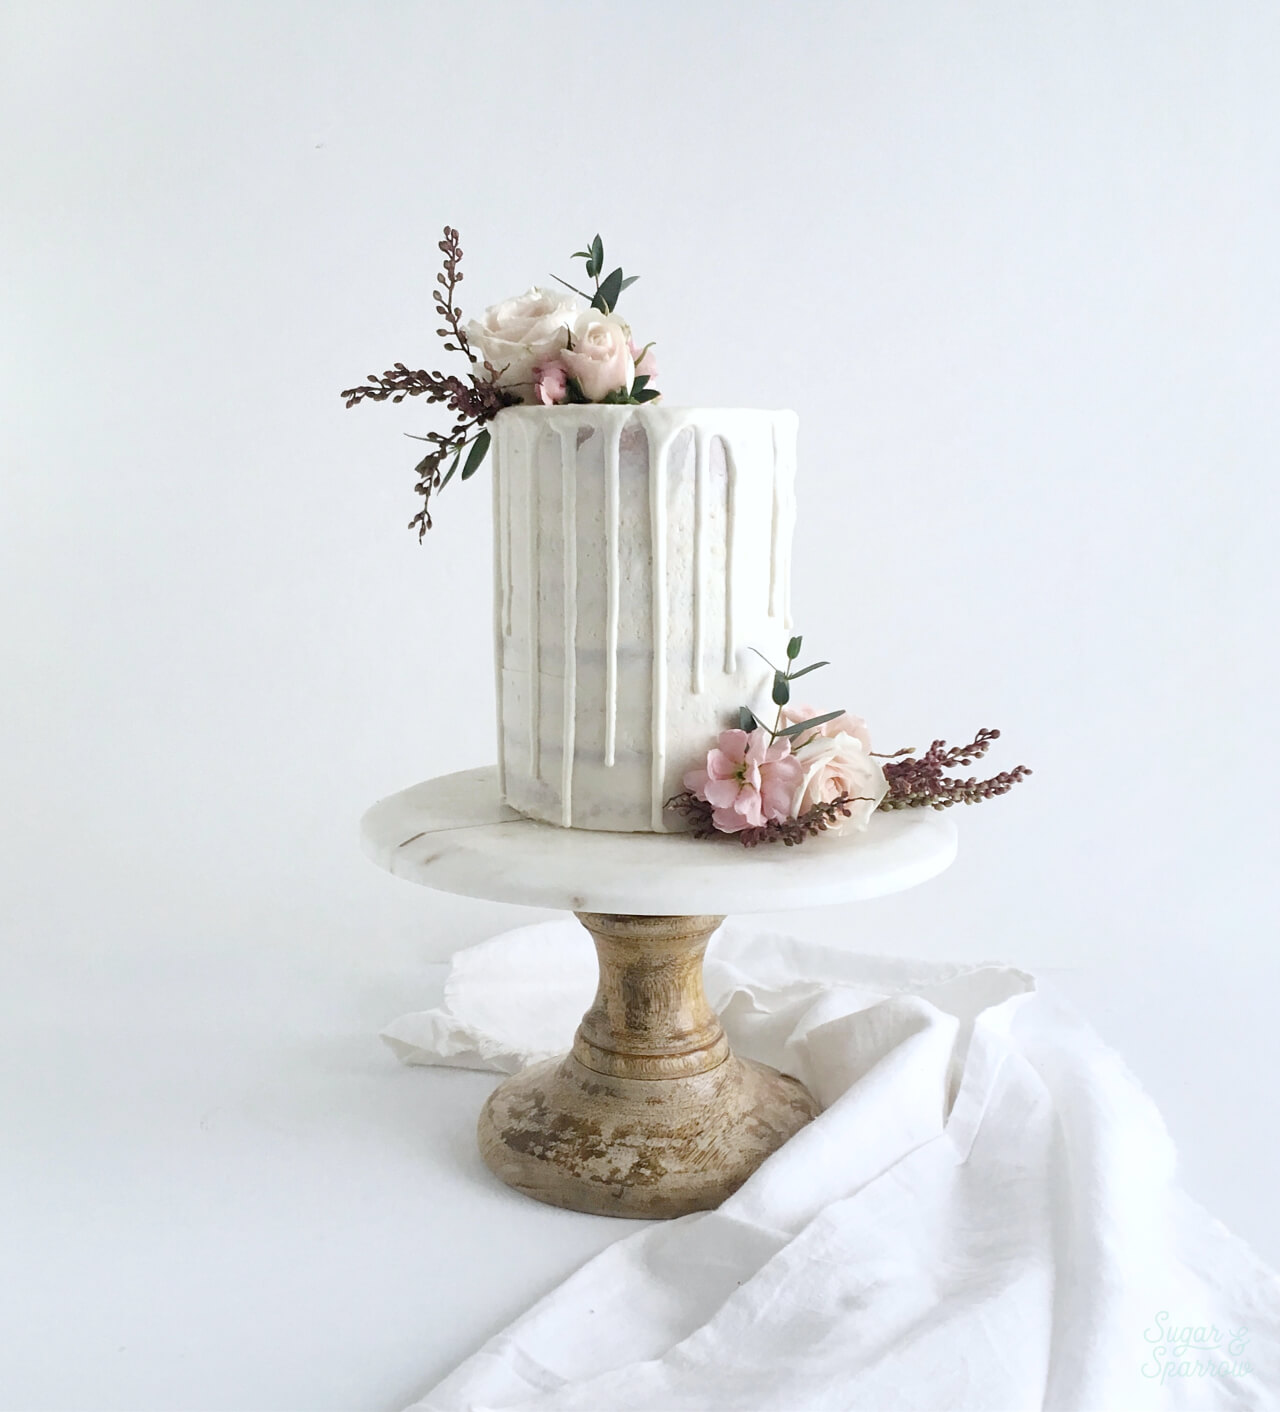
If you want to top a cake like this with fresh flowers, be sure to check out this blog post first. You’ll want to be sure to choose flowers that are either edible or food-safe (non-poisonous) and prepare them properly before placing them on the cake. When your little one is ready to smash it up, remove the flowers and let them go crazy!
However you decide to decorate, this vanilla smash cake recipe is sure to be baby approved. Let me know if you end up trying it in the comments below, or tag me on Instagram so I can see what you whipped up!


Hi there! Is there any possible way I could get the original version of this recipe before the 2024 update? That version was PERFECT for the smash cake sizes I made for family (5” pans) and it never, ever failed. This scaled down version requires me to double and then I have too much batter leftover. I know it involved an egg and then an additional yolk or something so I know just 1.5ing it may not be 100% accurate.
Yes! Sorry about that! I did find that the older version made too much batter for 3 4-inch pans. But that makes sense that it works for 5 inch pans. Here are the other measurements and you can follow the same instructions above:
1 ¼ cups (130g) cake flour
1 tsp baking powder
¼ tsp baking soda
½ tsp salt
⅓ cup (77g)unsalted butter, room temperature
¾ cup (155g) granulated white sugar
1 egg + 1 egg yolk
¼ cup sour cream, (60g)room temperature
1 ½ tsp vanilla extract
½ cup whole milk, room temperature
Hello,
I’m planning on making my daughter’s smash cake, but could you still make your own cake flour with gluten free flour and cornstarch? We try to be gluten free as much as possible due to health reasons.
Hi Emily! I’ve heard of people subbing in gf flour in my cake recipes with success but I have never tried it with this recipe. It would be an experiment! But I think it would work.
Hi! I am looking to make this recipe and have a few questions if that’s okay, I have scoured your website and many comment sections trying to figure a few of these out, thought I’d just ask!
1. I’m thinking about making this cake on Thursday for a birthday Sunday. I’m in a bit of a time crunch around the weekend and want to make ahead when I have time, which is Thursday. I was thinking of doing the cake layers + crumb coat and popping in the freezer, then thawing on saturday to decorate, then pop in fridge once fully decorated. However I’m wondering, would I be able to FULLY decorate this, piping and all, pop in freezer* Thursday and then that sunday morning with no issues or would that ruin he frosting? Basically have seen conflicting information around being able to freeze a fully frosted & flower piped cake. Also, since it’s for a 1yr old baby, not too worried about taste – just want it to look good for photos! I would love to get it all done Sunday but seems a bit challenging.
Also. from what I’ve read doesn’t sound like I can keep a fully decorated cake in the fridge from Thurs – Sun (everything says 2 days max) but let me know if otherwise.
2. I only have three 6″ pans, I’m thinking this cake would make enough batter for two 6″ layers alright, do you agree?
Thank you for taking the time to help, appreciate it loads! I also ordered your book, very excited to try and want to make sure my buttercream decorations look good & smooth!!
Hi Kimberly! I’m so sorry about how long it took me to get to your comment! Here are answers to your questions in case they’re still helpful:
1. Although it’s possible to freeze a fully decorated cake, I wouldn’t risk it because it could cause extra condensation in the thawing process which could ruin the final appearance. Your original timeline of baking/crumb coating on thursday, freezing, thawing to continue decorating on Saturday, and keeping in the refrigerator until Sunday sounds like a better plan.
2. This recipe will only make enough for one 6 inch layer but I do have a larger batch of this recipe that makes 3 6-inch layers here: https://sugarandsparrow.com/vanilla-cake-recipe/
So happy for you to get the book and I hope all went well with this cake!
Good recipe, but I think you forgot to include when to add the milk in the directions.
Hi there! The addition of milk is in step 3 of the instructions 🙂
Hi Whitney,
What is the height of the four inch baking pans that you used? I just tried this recipe with the cakes in the oven now. I also used 4in baking pans but only had enough batter for 2 and a 1/2 cakes.
Hi Amanda! My 4 inch pans are 2 inches tall. Are yours taller than that? I usually have enough for four layers!
Hi! I’m planning to make this for my daughter’s first birthday next month. It’s just beautiful! Can you tell me how you made the colors? How much food coloring for each one? This may be a silly question but I’m a major amateur.
Thanks!
Hi Tina! I never measure out the amount of food coloring I use but the colors I used on this cake were AmeriColor Fuchsia, Navy, and Teal. After frosting the cake with white buttercream I divided the remaining buttercream into four different bowls and colored two of the bowls Fuchsia (one pastel and one vibrant), one bowl a light Navy, and one bowl Teal. I have a post on how to color buttercream here that should help with eyeballing those colors: https://sugarandsparrow.com/how-to-color-frosting/
Would I beable to use this same mixture for cupcakes?
Hi Kat! You can. This recipe would make a small batch of cupcakes, maybe 10-12. If you need more cupcakes than that, you can use this vanilla cupcake recipe (same recipe, just scaled up to make more): https://sugarandsparrow.com/vanilla-cupcake-recipe/
Thank you so much!
I plan on making this recipe for my daughter’s first birthday coming up. After making and decorating the cake, does it need to be stored in the fridge until serving or can it sit out at room temperature? Thank you!
Hi Jansen! It’s up to you – it doesn’t require refrigeration but I always like to refrigerate my cakes until a few hours before serving just to keep all the details intact. Happy birthday to your little one!
I used this recipe and substituted the sugar for Truvia Sweet Complete (I was going for a smash cake that wouldn’t be high in sugar and too sweet but would be enjoyed by all of us and this was a winner! I will definitely be using this recipe again in the future. I made a sugar free swiss buttercream to go with it.
Yay, Jennifer! So happy to hear that this recipe was a hit and that subbing in Truvia worked!
How much buttercream frosting do I need for this cake? Thanks
Hi Jan! One batch of this vanilla buttercream recipe will be enough for filling, frosting, and decorating a cake of this size: https://sugarandsparrow.com/vanilla-buttercream-recipe/
Hi Whitney!
I’m about to start making this cake, but I only have 1 cup of unsalted butter (and still need to make the buttercream icing!)
Can I use salted butter and omit the .5 tsp of salt?
Thank you so much!!!
Hi Meagan! I believe it will work to use the salted butter and omit the added salt in this recipe, but I’ve never tried it before so I can’t say for sure. Let me know how it goes if you end up trying it with salted butter!
Planning on making two of these, one for my son’s first bday on the 11th and one for his smash cake photos this weekend. Do you use kosher sea salt or a different kind? Can I double the vanilla buttercream recipe so I can store the extra in the fridge for the following week?
Trying to plan out how I want to make the 2 cakes, tips are appreciated, thank you!
Hi Christy! I just use regular Kosher Salt (not Kosher Sea Salt), but I think any salt of your choice will be just fine. This is the brand I use: https://amzn.to/3dLaVrk. Yes, you can certainly double the vanilla buttercream recipe and store half in the fridge for the following cake. When you’re ready to use it, just bring it back to room temp and re-whip it with your stand mixer on low for about 30 seconds to bring it back to frosting consistency. Excited for you to make these and celebrate your son’s first birthday! So fun!!