• Cake
  • Frosting
  • YouTube
  • My Favorite Tools
  • Nav Social Icons

  • Skip to primary navigation
  • Skip to main content
  • Skip to primary sidebar
  • Skip to footer
  • Recipes
    • Cake
    • Cupcakes
    • Frosting
    • Ice Cream
    • Vegan
  • Cake Basics
  • Tutorials
  • Blog
  • About
  • Mobile Menu Widgets

    Connect

    Search

Sugar & Sparrow logo in script font

Sugar & Sparrow

Lifestyle and Cake from Portland Oregon

  • Cake Basics
  • Recipes
    • Cake
    • Cupcakes
    • Sheet Cakes
    • Cookies & Bars
    • Filling
    • Frosting
    • Ice Cream
    • No-Bake
    • Small Batch
    • Vegan
  • Tutorials
  • Book
  • Blog
  • About

White Chocolate Milk Splash Tutorial

May 30, 2018 · In: Decorations & Garnishes, Featured, Recipes, Tutorials

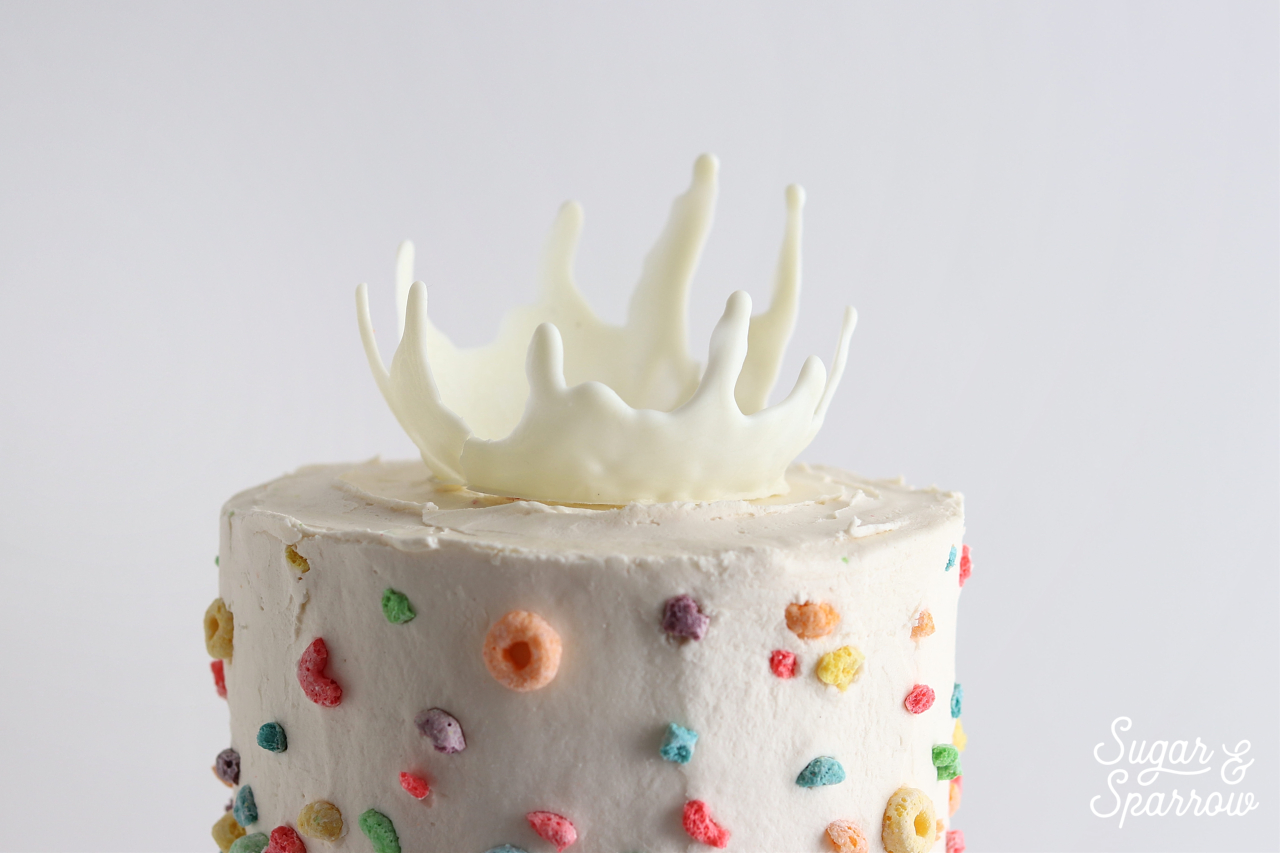
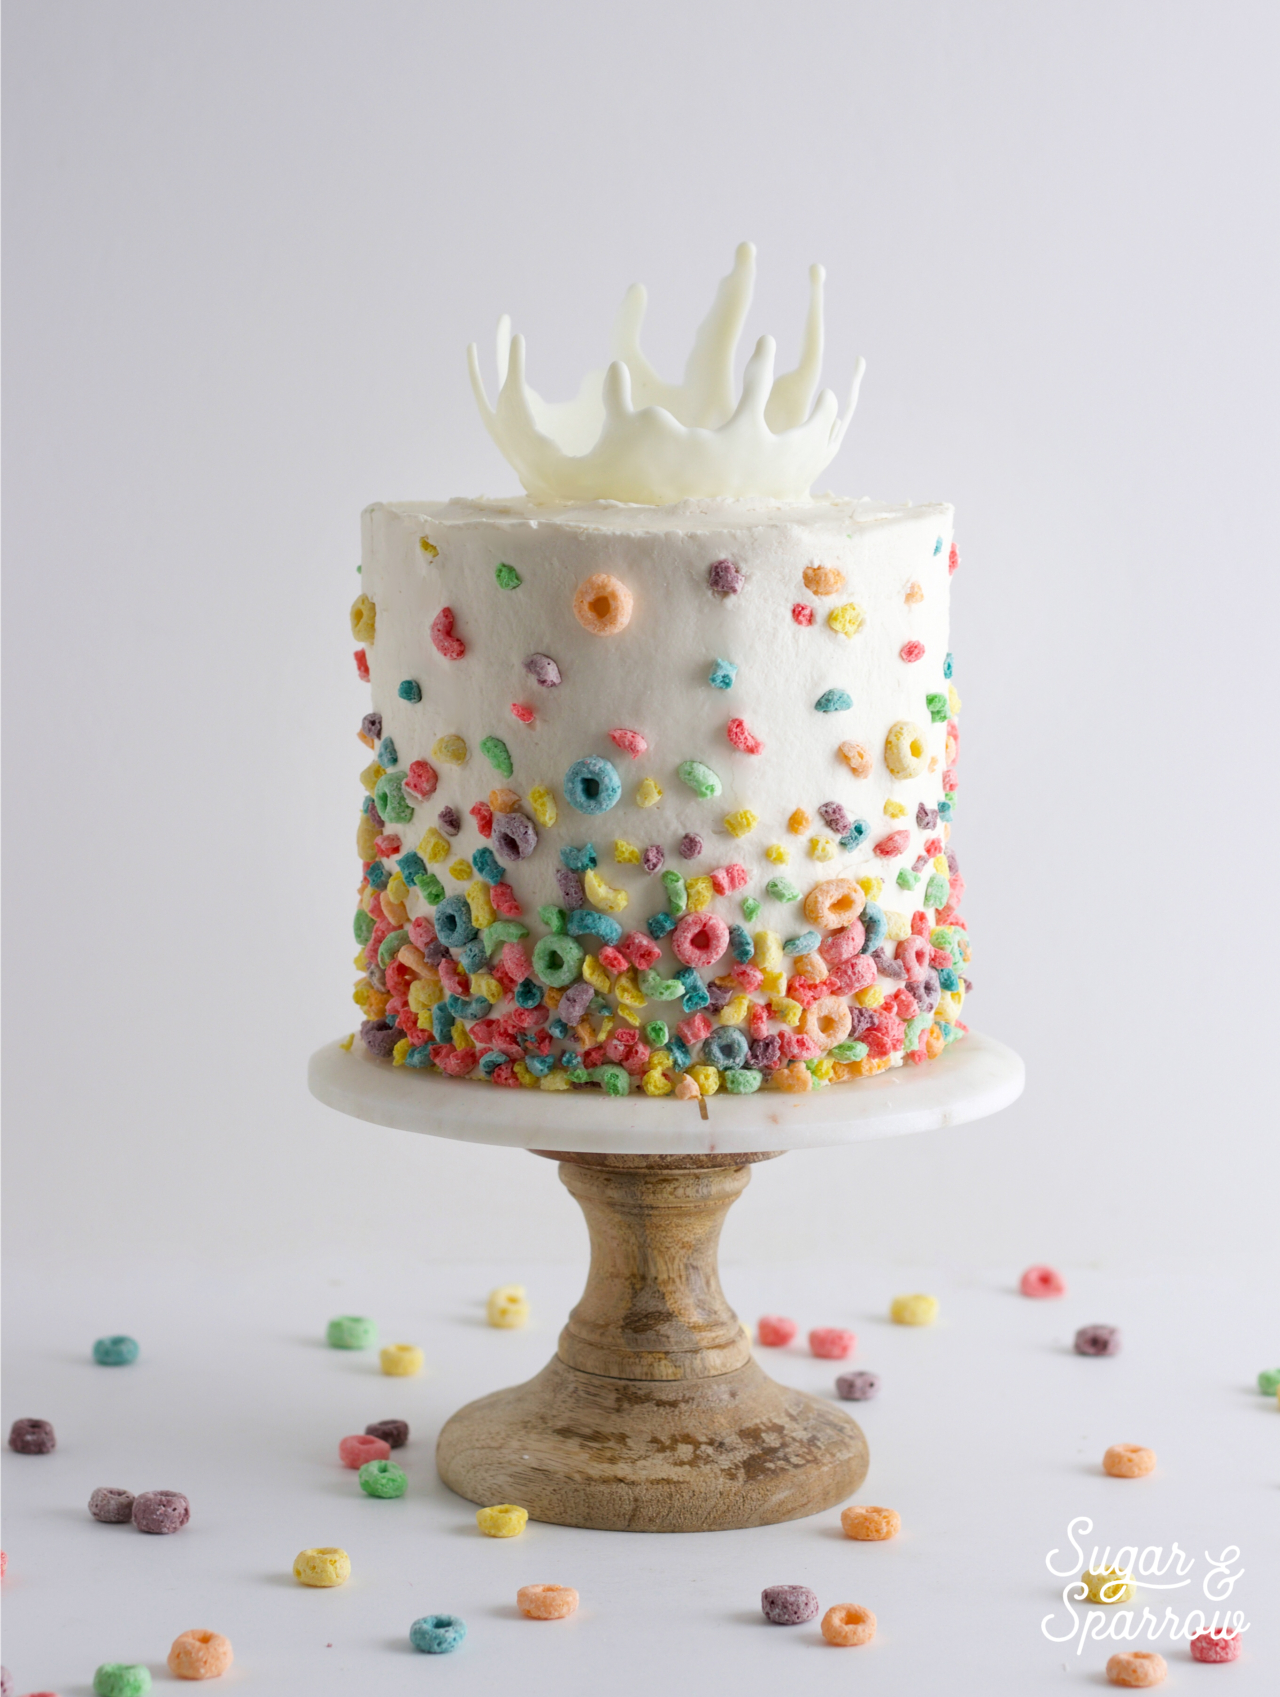
As the topper for my Milk and Cereal Cake, I ended up creating a white chocolate “milk splash” to make it look like cereal milk was coming up out of the cake. Bringing the idea to life definitely took a few tries, because the techniques I initially thought would work ended up being complete disasters. After researching chocolate techniques, studying milk splash photography, and watching a few YouTube videos, I discovered a way to replicate the look with white chocolate. And now you’ll be able to get the look too!
milk and cereal cake by sugar and sparrow

The idea came to me while sketching the design concepts for the Milk and Cereal cake, which is typically my starting point with all of my cakes. I originally planned on creating white chocolate brushstrokes to look like little splashes of milk coming up the side of the cake, and when I showed my graphic designer husband, he stared for a second and said, “why don’t you just figure out how to do a big milk splash on top?” I loved the idea, sketched it out, and proceeded to study milk splash photography to figure out how to approach the design.
milk and cereal milksplash cake by sugar and sparrow

For the first attempt, I tried wrapping a bowl with saran wrap (face down) and pouring tempered white chocolate over it. After letting it set in the fridge, it would not release. The saran wrap stuck firmly to the bowl and all of the drips of the splash ended up breaking off. Next, I tried to do the same technique on the inside of the bowl so that I could simply lift the saran wrap upward to release the white chocolate. That didn’t work either.
how to make a white chocolate milk splash cake

What finally worked was pouring cooled white chocolate over a small balloon. I’d seen a few YouTube videos on how to make bowls out of chocolate this way, and I figured it was the smartest way to get the job done. Here’s how to get the look: 

What You’ll Need

  • A few small (5 inch) balloons
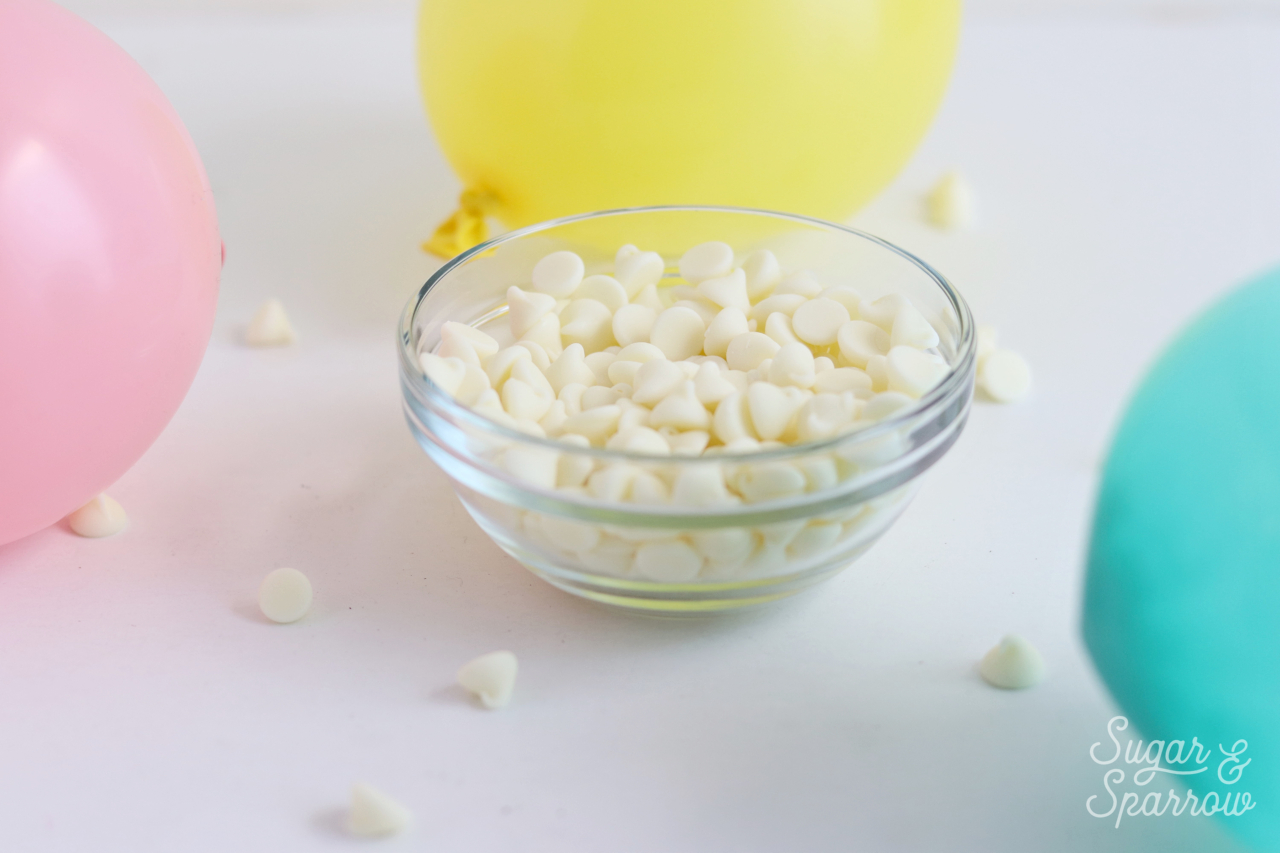
  • 1 cup (183g) white chocolate chips
  • Microwave or double boiler for melting chocolate
  • A few small bowls for holding balloons upright
  • Cooking spray
  • A piping bag
  • Palette knife or small metal spatula
  • Safety pin
  • Frying pan

Step 1: Blow Up Balloons

This part’s the easiest. Blow up your balloons to the circumference you’re wanting and place then into small bowls to keep them upright.

chocolate bowls balloon tutorial

Step 2: Temper And Cool The Chocolate

Place the white chocolate chips into a microwave safe bowl and reserve ¼ of the chips to use as the “seed”. Microwave the chocolate (without the seed) in 30-second intervals, stirring after each round, until it’s melted and has reached 116 degrees fahrenheit.

how to temper white chocolate

When the white chocolate has reached that point, stir in the reserved seed until those chips have melted and the temperature drops to 86 degrees.

Step 3: Create The Milk Splash

Spray a little cooking spray onto the tops of each balloon (helps the chocolate releasing process), then place the melted chocolate into a piping bag and snip off a small opening. Take the balloons, one by one, out of their holder bowls. Use one hand to hold the balloon and the other hand to pipe a milk splash design onto the balloon, covering the top of the balloon (which will be the bottom of the milk splash) and creating drips around the sides to give the splash effect.

white chocolate milksplash tutorial

When you’re finished piping each milk splash, place the balloon back into the holder bowl. Be careful with this step, since the balloons will become top heavy with the added weight of the white chocolate. Place the balloons into the refrigerator to set for at least 15-20 minutes.

Step 4: Pop The Balloons

Once the white chocolate has fully set, use a palette knife to carefully slide between the balloon and each drip so that the more delicate parts of your milk splash are pre-released. Then use a safety pin or other sharp object to make a small incision in the balloon. You’ll want it to pop slowly so that it doesn’t snap off your chocolate drips.

white chocolate milk splash tutorial by Sugar and Sparrow

If you find that the balloon has stuck to the white chocolate in areas, very gently release those parts by hand. The balloon should come away from the white chocolate with a little elbow grease.

Step 5: Shape The Milk Splash

With a frying pan or other type of shallow pan over Medium-Low heat on your stovetop, gently hold the bottom of your milk splash over the heated surface. This will cause the rounded bottom to melt away, leaving you with more of a crown-like topper. This extra step makes the milk splash look more realistic when it’s on the cake.

how to make a white chocolate milksplash

Be super careful not to melt the chocolate too quickly, and keep the stove setting closer to Low than Medium. Slow and steady wins the race with this one.

If you happen to break any of the drips during the process of creating the milk splash (like I totally did!) you can use the heated pan to melt one end of the drip and “glue” it back where it belongs. The chocolate will bind together and set, and you probably won’t even notice the repair!

Step 6: Assembly

After the milk splash is set, shaped, and ready to go, all you have to do is place it on top of your cake. I filled mine with a little cereal to make it look like I threw cereal onto the top of the cake to cause the milk splash. Feel free to get creative with the way you use yours!
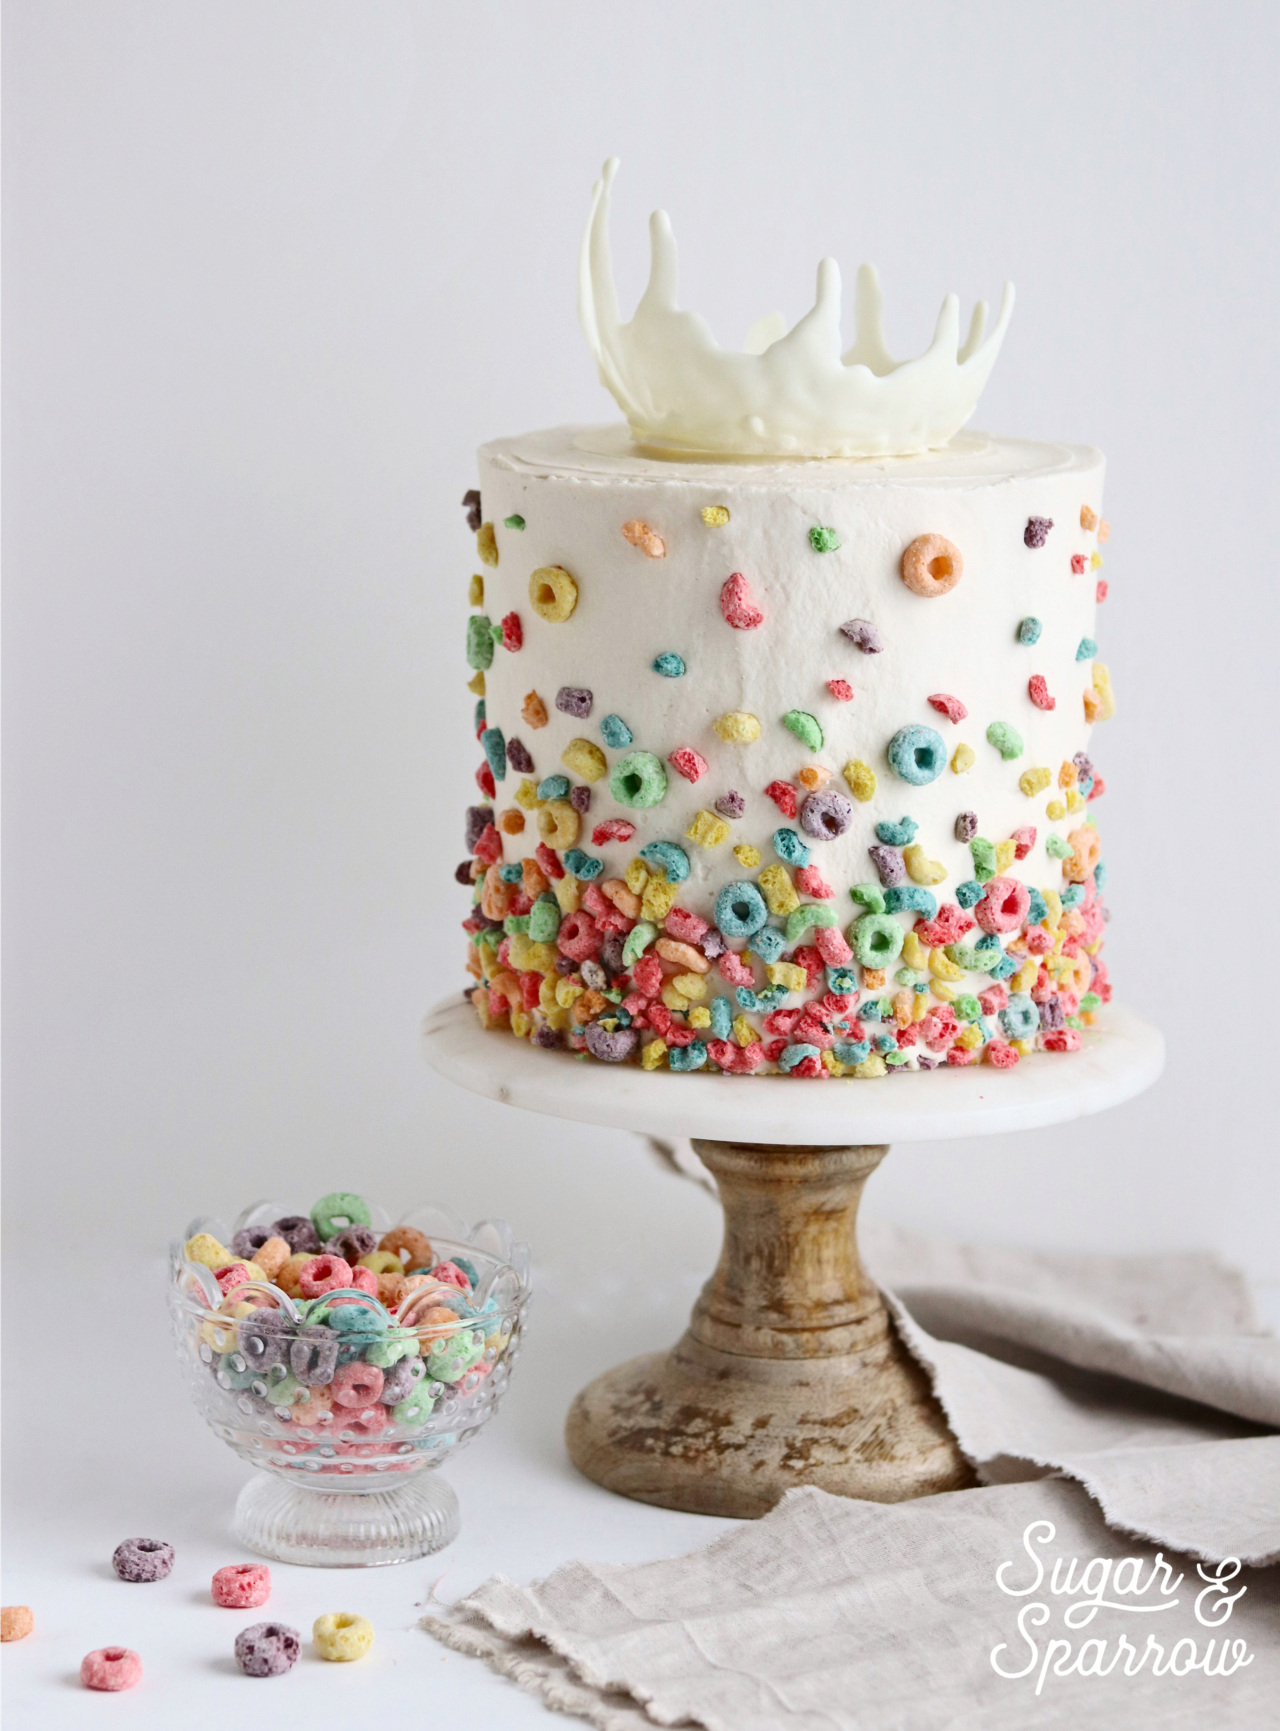
cereal cake with white chocolate milk splash by Sugar and Sparrow

By: Whitney · In: Decorations & Garnishes, Featured, Recipes, Tutorials · Tagged: cake decorating, cake tutorial, milk and cereal cake, milk splash, milk splash cake, milk splash photography, white chocolate milk splash

you’ll also love

almond joy cake recipe by sugar and sparrowAlmond Joy Cake
the best vanilla cupcakes recipeThe Perfect Vanilla Cupcake Recipe
pumpkin layer cake recipe by sugar and sparrowPerfect Pumpkin Layer Cake Recipe

Join the List

Stay up to date & receive the latest posts in your inbox.

Reader Interactions

Comments

  1. Cassidy Reinholtz says

    September 30, 2023 at 4:48 pm

    I was trying to do this but I don’t have a microwave so I was doing a double broiler method. The chocolate just clumped up and wouldn’t melt into a smooth consistency

    Reply
    • Whitney says

      October 3, 2023 at 9:42 pm

      Hi Cassidy! Is it possible that some water got into the chocolate? Or that the boiling water beneath the bowl came in contact with the bottom of the bowl? It sounds like your white chocolate seized, which can happen in either scenario. Here’s a quick youtube video to troubleshoot that in case that’s what happened: https://www.youtube.com/watch?app=desktop&v=cV-T9-H90pA

      Reply
  2. Hilary says

    October 5, 2021 at 2:28 pm

    If using lucky charms marshmallows on the cake, do the colors bleed onto the frosting? And if so, about how much time do I have before they bleed? Thinking when I can place the marshmallows. Thank you!

    Reply
    • Whitney says

      October 6, 2021 at 7:56 am

      Hi Hilary! I have made this Milk & Cereal cake with marshmallows before and haven’t had any issues with the colors of the marshmallows bleeding. You should be able to place the marshmallows up to a day ahead.

      Reply
  3. Heather says

    June 8, 2021 at 2:21 pm

    Amazing! Thanks for sharing. Hoping to use this on top of a mermaid cake for my daughter. Fingers crossed!

    Reply
    • Whitney says

      June 12, 2021 at 9:32 am

      Yay, Heather! What a fun idea!

      Reply
« Older Comments

Leave a Reply Cancel reply

Your email address will not be published. Required fields are marked *

Recipe Rating


Next Post >

Milk And Cereal Cake Recipe

Primary Sidebar

Welcome to Sugar & Sparrow

Welcome to Sugar & Sparrow

Helping you whip up pretty desserts with confidence and creativity. And hopefully sharing a few laughs with you along the way!

Learn More

Connect

let’s bake!

Get my very best recipes, baking tips, and decorating tutorials sent to your inbox

Featured Posts

chocolate ganache drip cake recipe sugar and sparrow

Chocolate Ganache Drip Cake Recipe + Tutorial (with Video!)

pips chai cake

Pip’s “Heart of Gold” Coconut Chai Cake Recipe

marbled chocolate sail tutorial

Marbled Candy Melt Chocolate Sail Tutorial

Search

Archives

Follow Along

@sugarandsparrowco

THICK CARAMEL CAKE FILLING ✨this is the BEST caram THICK CARAMEL CAKE FILLING ✨this is the BEST caramel  filling recipe for cakes and cupcakes that’s extra thick, creamy and spreadable, and irresistibly gooey with just the right vanilla-caramel flavor. I’ve used it in recipes like my Millionaire Cake, Milky Way Ccake, Snickers Cake (with peanuts added!), and Twix cake, but it will pair well with any cake flavor that could use some gooey caramel in between the layers.

Find this recipe in my bio + all the cake recipes mentioned at https://sugarandsparrow.com/thick-caramel-filling/

THICK CARAMEL FILLING 
Yield: 2 Cups (enough to fill a triple layer cake + use as a drip) 

INGREDIENTS 
1/2 Cup (113g) unsalted butter 
1 Cup (200g) packed brown sugar 
2/3 Cup (210g, 160ml) sweetened condensed milk 
1/3 Cup (80ml) light corn syrup 
5 Tbsp (75ml) heavy whipping cream 
1 tsp salt 
1 tsp pure vanilla extract 

INSTRUCTIONS 
1. In a large saucepan over medium heat, add the sweetened condensed milk, butter, brown sugar, corn syrup, heavy whipping cream, and salt. Stir with a rubber spatula constantly until the mixture is fully combined and begins to bubble, about 5 minutes. 
2. Turn the heat to medium-low and continue stirring until the caramel begins to thicken, 6-7 minutes. If you have a candy thermometer, you’ll want to cook this until it reaches 225F (107C). That is the temperature that will thicken the caramel while keeping it nice and soft at room temperature. 
3. Remove the caramel from the heat and mix in the vanilla extract. Pour into a separate container and let the caramel cool completely to room temperature before using it to fill the cake. After pouring mine into a 2-cup measuring cup and refrigerating, it took about 2 hours to cool but it will thicken significantly.

#caramel #caramelcake #cakes #cakedecorating #homebaked
ALMOND JOY CAKE 🤎🥥 this tastes just like an Almond ALMOND JOY CAKE 🤎🥥 this tastes just like an Almond Joy candy bar in cake form: layers of soft, fluffy coconut cake with silky chocolate ganache, sliced almonds, and the dreamiest coconut-almond buttercream! 

Comment RECIPE and I’ll send it on over! Or find it linked in my bio + at https://sugarandsparrow.com/almond-joy-cake-recipe/

#almondjoy #coconutcake #almondcake #cakedecorating #candycake
You butter believe I made myself the Halloween cos You butter believe I made myself the Halloween costume of my dreams!! 🧈 

#diyhalloweencostume
#foodcostume #halloweencostume #handmadecostume #bakerlife
MELTED CANDLE CUPCAKES 🖤🕯give me a few cupcakes, s MELTED CANDLE CUPCAKES 🖤🕯give me a few cupcakes, some dye-free black buttercream, and black chocolate ganache and watch me transform them into the spookiest edible centerpiece! 

Full tutorial is linked in my bio + at https://sugarandsparrow.com/melting-candle-cupcakes/ but I have a condensed version below: 
 
SUPPLIES: ⁣ 
-9 cupcakes⁣  (made these with my small batch black velvet cake recipe!) 
-1 batch of dye-free black buttercream 
-boba straws or skewers (for stabilizing the taller candles) ⁣ 
-icing smoother + turntable ⁣ 
-black ganache for dripping⁣ 
-3 birthday cake candles⁣ 
-matches ⁣ to light them
⁣ 
INSTRUCTIONS: ⁣ 
1. Fill and stack the cupcakes: one stack of 2 cupcakes, one stack of 3 cupcakes, and one stack of 4 cupcakes. For the two taller cupcakes I inserted a boba straw through the middle to stabilize the stack for frosting. ⁣ 
2. Frost the stacked cupcakes with smooth buttercream and keep the top edge raw. Refrigerate for 20 minutes to let the frosting firm up. ⁣ 
3. Transfer the frosted cupcake candles  onto a small plate and pipe ganache around the edges and tops to look like melted wax. ⁣ 
4. Insert a birthday cake candle into each cake candle (keep the wick about 1/4 inch from the cake surface) and light! ⁣ 
⁣ 
#candlecake #halloweencake #cupcakes #blackvelvetcake #blackbuttercream
BISCOFF COOKIE BUTTERCREAM 🤎 this delicious frosti BISCOFF COOKIE BUTTERCREAM 🤎 this delicious frosting is flavored with Biscoff cookie butter and goes with literally ANY Fall cake recipe 🙌🏼 So far my favorite cake flavors to pair it with are pumpkin cake, banana cake, chocolate cake, coffee cake, and spice cake, but I am also testing a full-on Biscoff cake this week!! 

Full recipe + my favorite cake pairing suggestions are at https://sugarandsparrow.com/biscoff-buttercream/ 
⁣⁣ 
INGREDIENTS⁣⁣ 
1 Cups (226g) unsalted butter, room temperature⁣⁣ 
1/2 Cup (94g) Biscoff cookie butter⁣⁣ or spread
3 Cups (360g) powdered sugar⁣⁣ 
1 tsp pure vanilla extract⁣⁣ 
2 Tbsp whole milk, room temperature⁣⁣ 
1/4 tsp salt, or to taste⁣⁣ 
⁣⁣ 
INSTRUCTIONS⁣⁣ 
1. Cream the butter and Biscoff cookie butter together in the bowl of a stand mixer fitted with the paddle attachment (or you can use a hand mixer and large bowl). Mix on medium-high until creamy and well combined, about 5 minutes, scraping down the bowl and paddle as needed.⁣⁣ 
2. Turn the mixer to low speed and add the powdered sugar a few cups at a time, scraping down the bowl and paddle after mixing in each addition. Add the vanilla, milk, and salt and continue mixing on low speed until smooth and combined, 1-2 minutes.⁣ 
⁣⁣ 
#biscoffcake #biscoff #buttercream #frosting #cakedecorating

Footer

On the Blog

  • Cake Basics
  • Recipes
  • Tutorials

Info

  • About
  • Privacy Policy & Disclosure

stay in the know

Copyright © 2026 · Theme by Sugar & Sparrow