• Cake
  • Frosting
  • YouTube
  • My Favorite Tools
  • Nav Social Icons

  • Skip to primary navigation
  • Skip to main content
  • Skip to primary sidebar
  • Skip to footer
  • Recipes
    • Cake
    • Cupcakes
    • Frosting
    • Ice Cream
    • Vegan
  • Cake Basics
  • Tutorials
  • Blog
  • About
  • Mobile Menu Widgets

    Connect

    Search

Sugar & Sparrow logo in script font

Sugar & Sparrow

Lifestyle and Cake from Portland Oregon

  • Cake Basics
  • Recipes
    • Cake
    • Cupcakes
    • Sheet Cakes
    • Cookies & Bars
    • Filling
    • Frosting
    • Ice Cream
    • No-Bake
    • Small Batch
    • Vegan
  • Tutorials
  • Book
  • Blog
  • About

White Chocolate Brushstroke Cupcakes Tutorial

March 19, 2018 · In: Decorations & Garnishes, Recipes, Tutorials

Over the years I’ve learned that, aside from fondant, white chocolate is one of the best mediums for creating cake toppers. It’s great for making fun geometric shapes, 3D art (I hope to master the white chocolate sphere someday!), and one of my favorite techniques: painting with white chocolate to create brush strokes. It’s one of the easiest techniques ever, and when you get a little creative with your colors the results can be breathtaking. Let me show you how it’s done:

You will need:

  • 1 cup (183g) white chocolate chips
  • Food color gels of your choosing 
  • A clean, dry paintbrush
  • Parchment paper
  • Baked and frosted cupcakes

Step 1: Temper Your Chocolate

Even though white chocolate isn’t a “true” chocolate (it’s made primarily of cocoa butter), it still needs to be tempered to keep it from getting flimsy and looking dull once it’s dry. To start, measure out one cup of white chocolate chips and pour them into a microwave safe bowl. Reserve ¼ of the chips (so in this case, ¼ cup) and set them aside. These reserved chips are what’s called a “seed” that will be mixed into the melted white chocolate to quickly decrease the overall temperature.
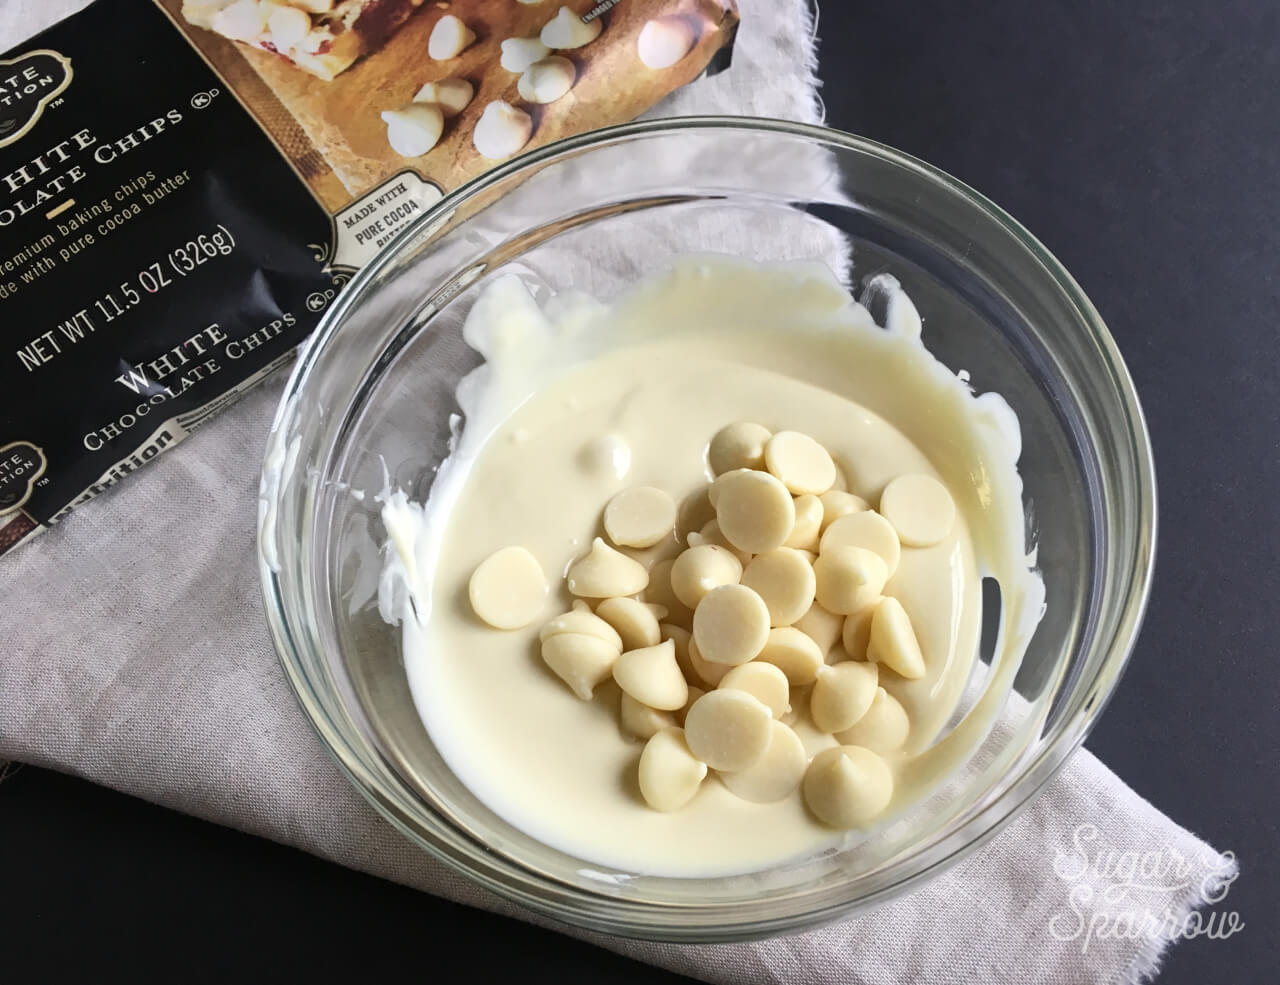
how to temper white chocolate

Microwave your white chocolate (minus the seed) in increments of 30 seconds, stirring after each interval, until the chips are melted. In my case, it only took 2 intervals to get the white chocolate nice and melted. Then stir in the seed until those chips are melted and you have uniform consistency.
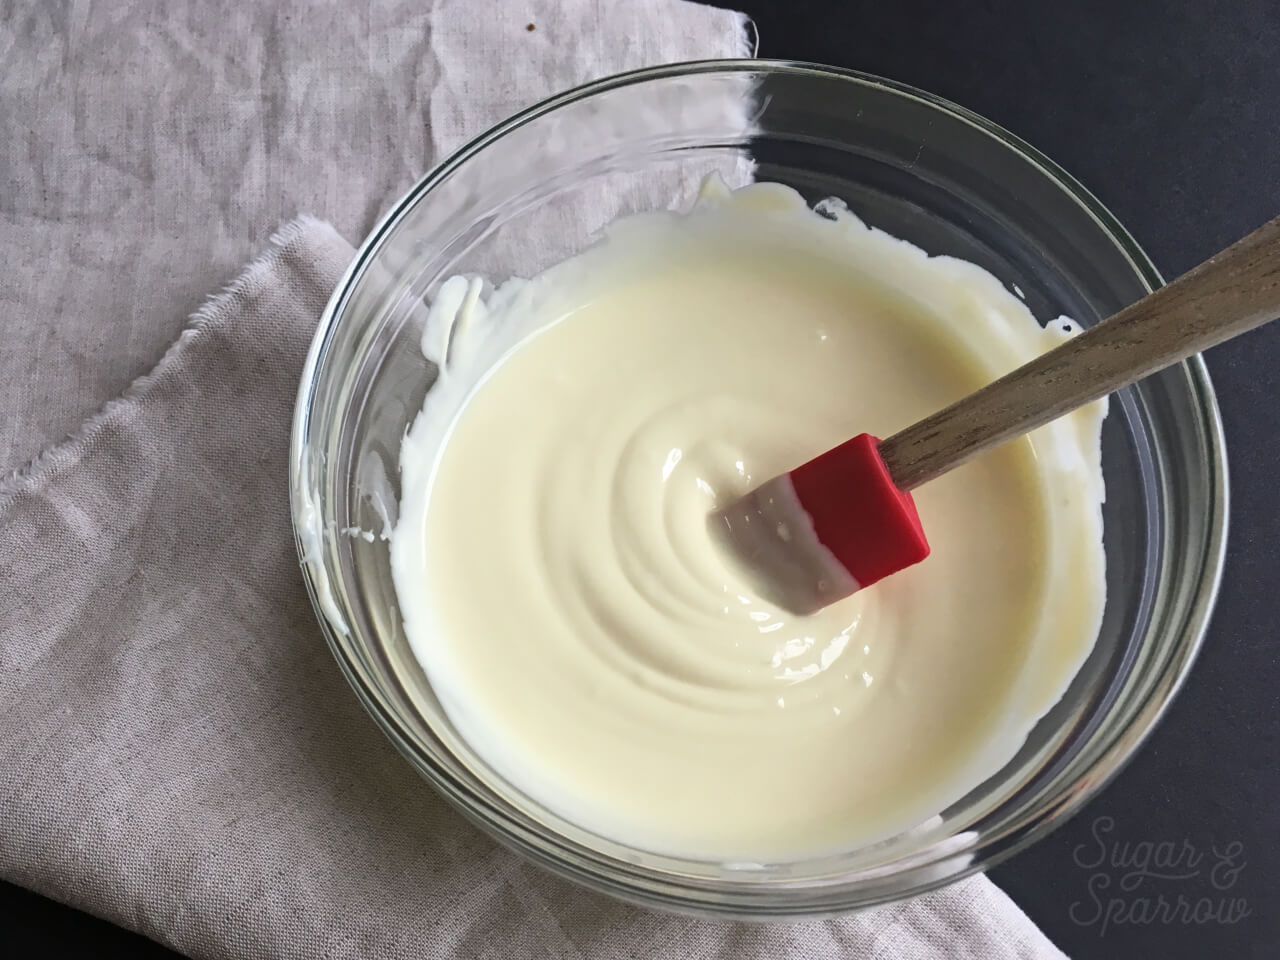
how to temper chocolate in the microwave

Step 2: Give It Some Color

When you’ve got a nice smooth finish, it’s time to color – my favorite part. I separated my melted white chocolate into three bowls and started adding some Wilton Color gel until I achieved these three colors.
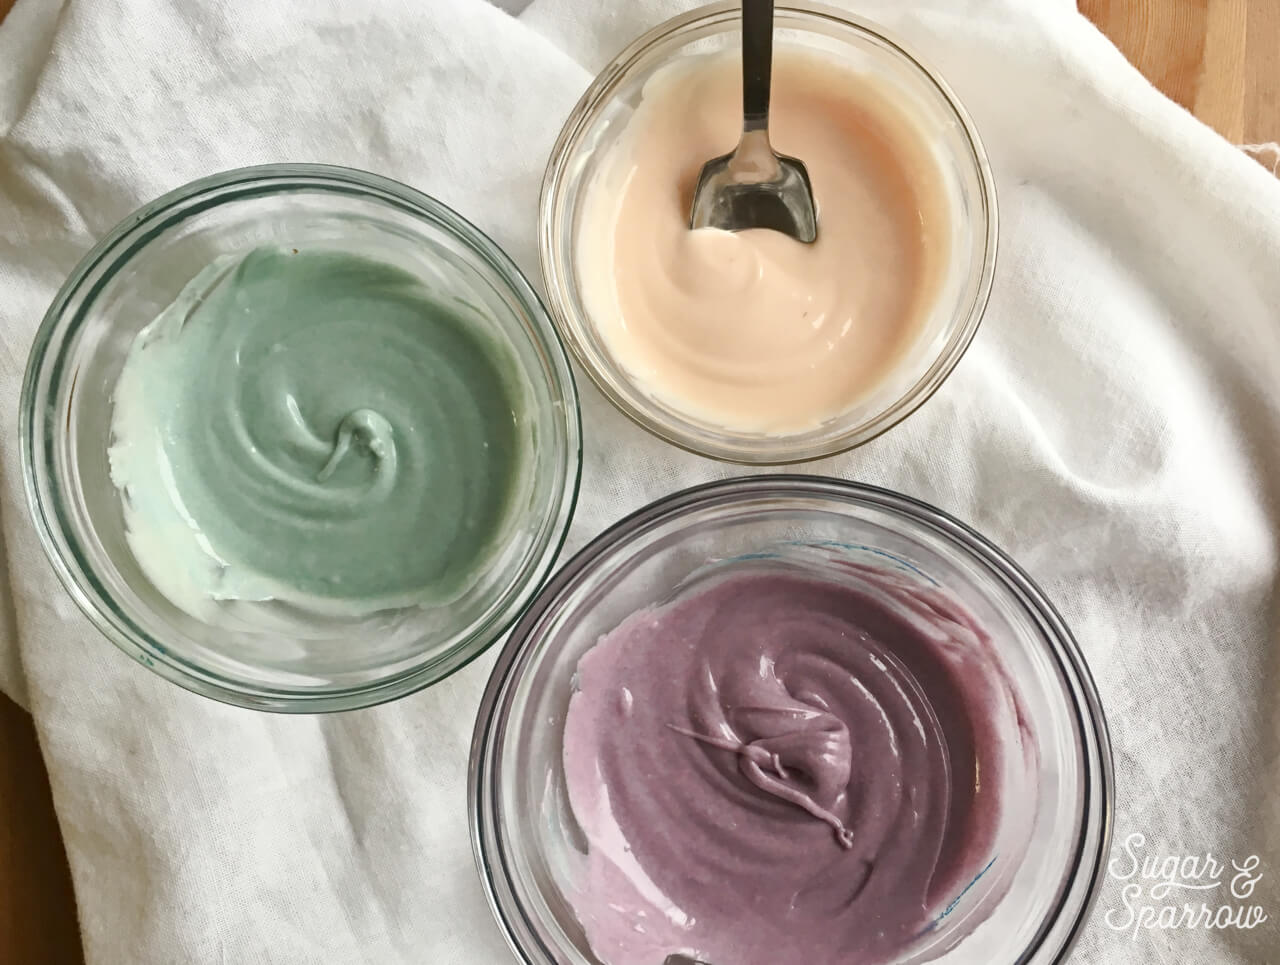
how to color white chocolate

I’ll be honest, I usually start with an idea of what colors I want and then fly by the seat of my pants until I get there. There’s no real method to my coloring madness. For the seafoam, I used a little Sky Blue, for the peach, a little Pink, and for the purple, a combination of Sky Blue and Rose. When these colors mixed with the natural creamish yellow tone of the white chocolate, they ended up being perfect.

Step 3: Paint Your White Chocolate Brushstrokes

Now for the fun. Grab your paint brush, dip it into the white chocolate, and start brushstroking the white chocolate onto a sheet of parchment paper. A single brushstroke will usually do, as long as you’ve got enough white chocolate on the brush.
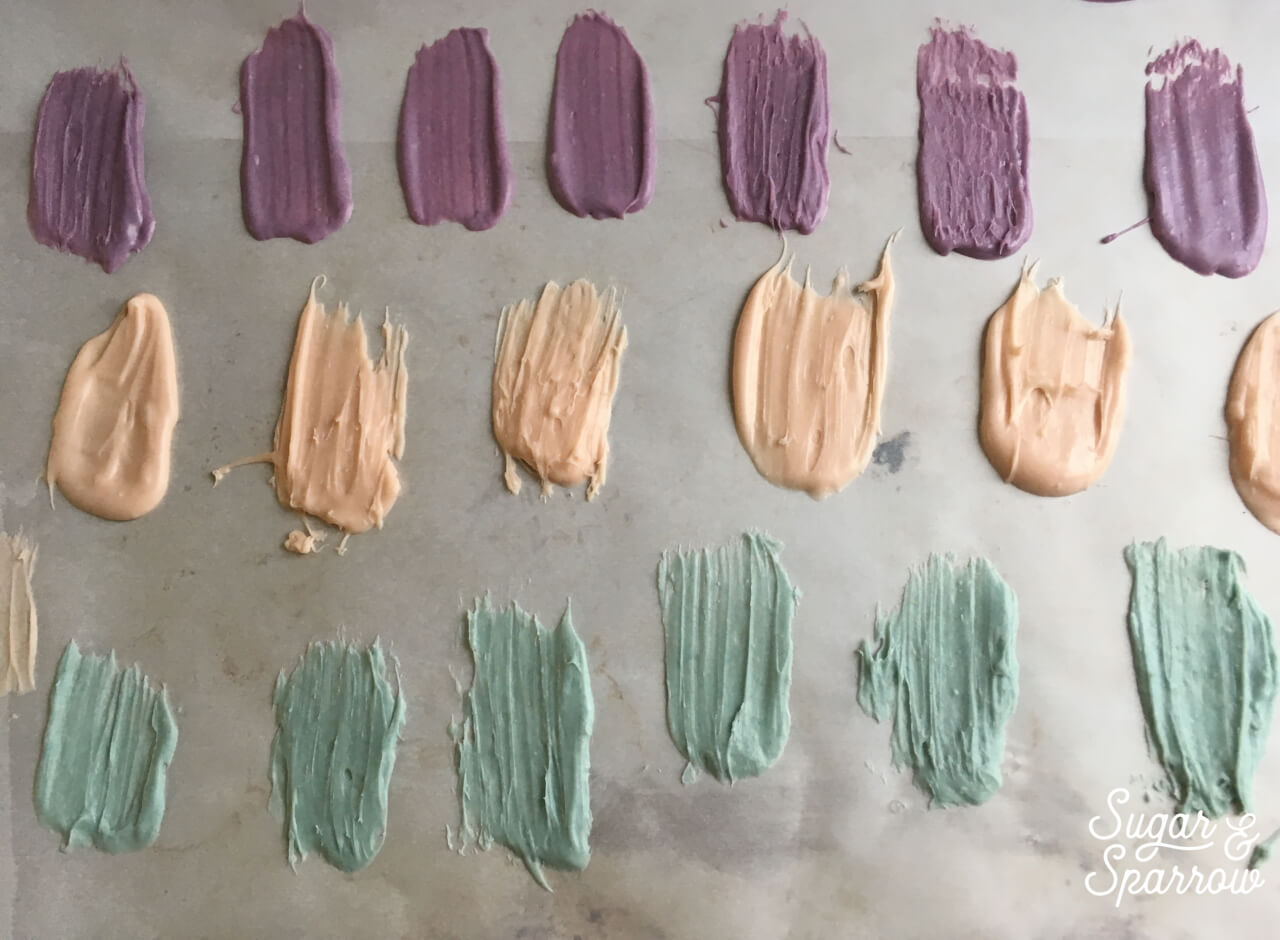
how to make white chocolate brushstrokes

The brushstrokes dry in about 20 minutes at room temp and are ready to use! If you live in a particularly humid environment, you can pop your brushstrokes into the fridge for about 10 minutes and they’ll firm right up.

Step 4: Assemble Your Designs

After your white chocolate brushstrokes are nice and dry, all that’s left to do is add them on top of some frosted cupcakes. For these, I piped a swirl of buttercream onto each cupcake using Wilton Tip 1M, then simply stuck a few brushstrokes into the swirl.
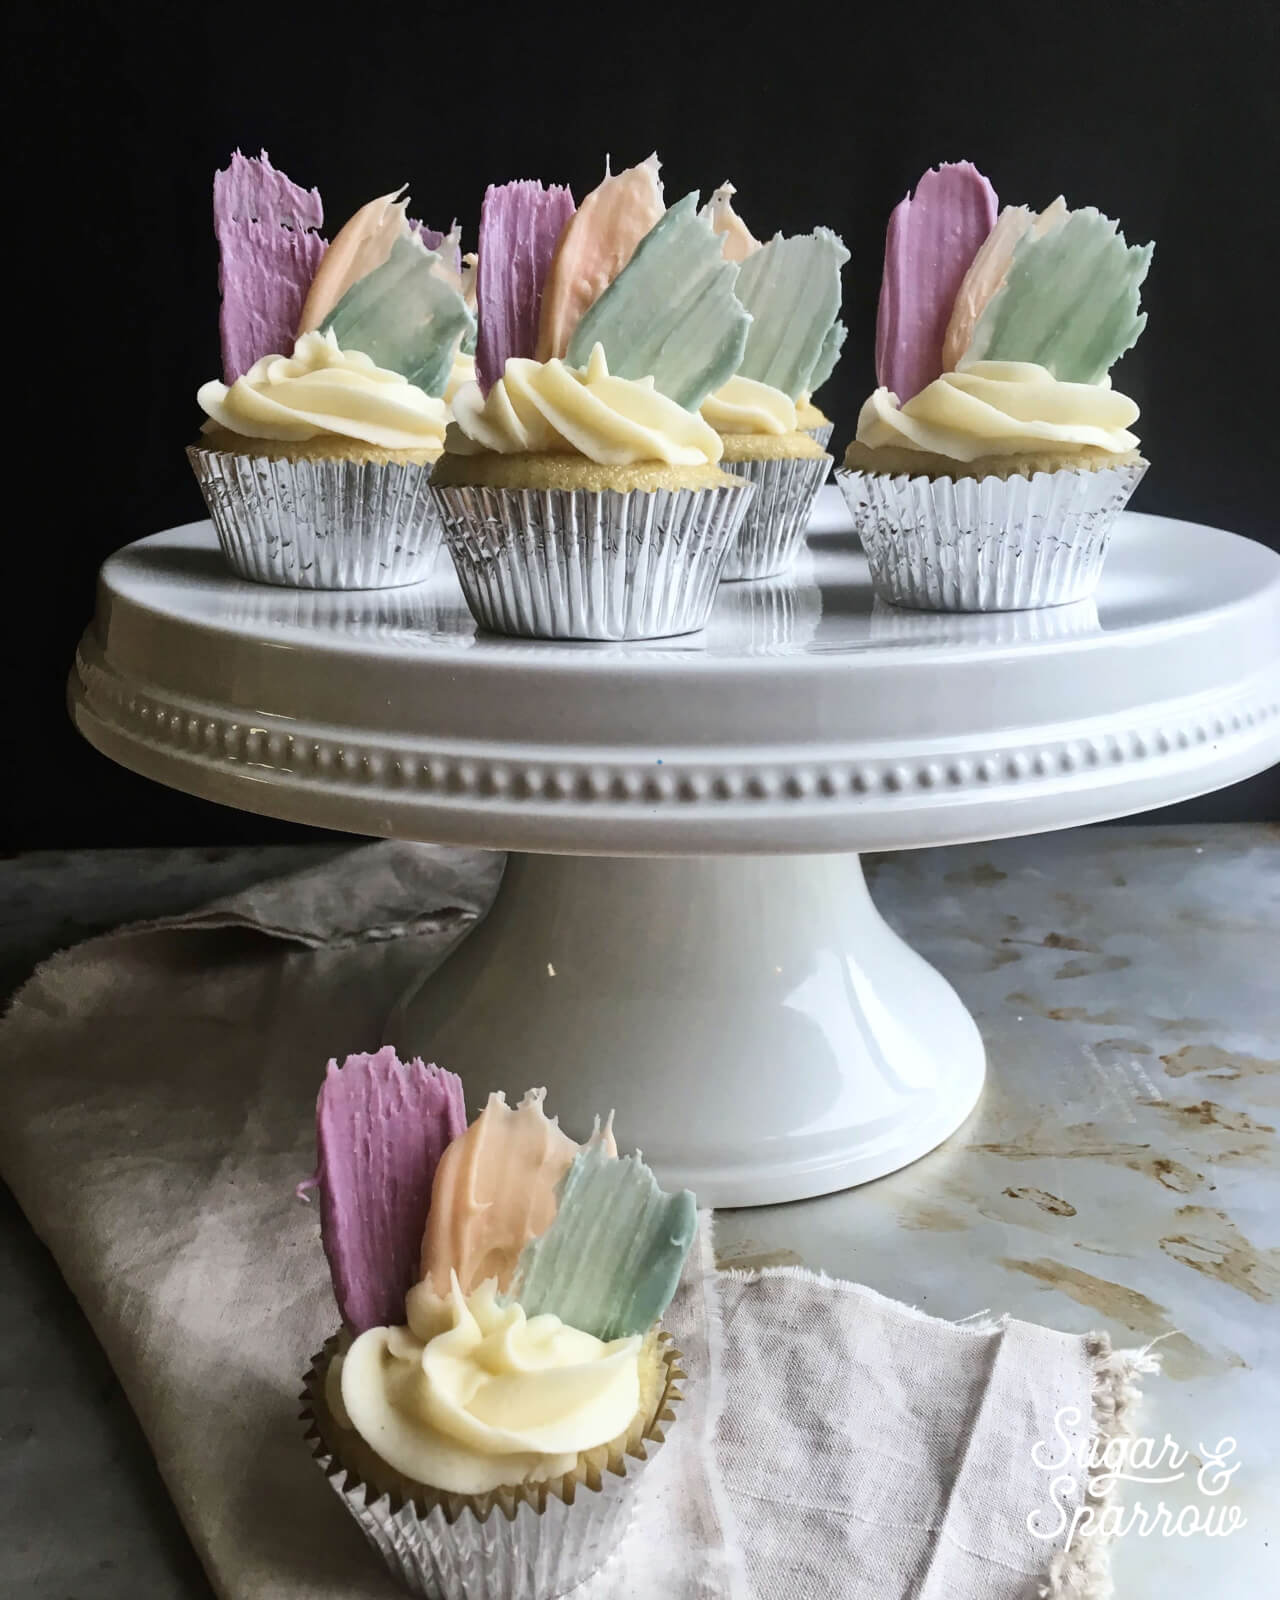
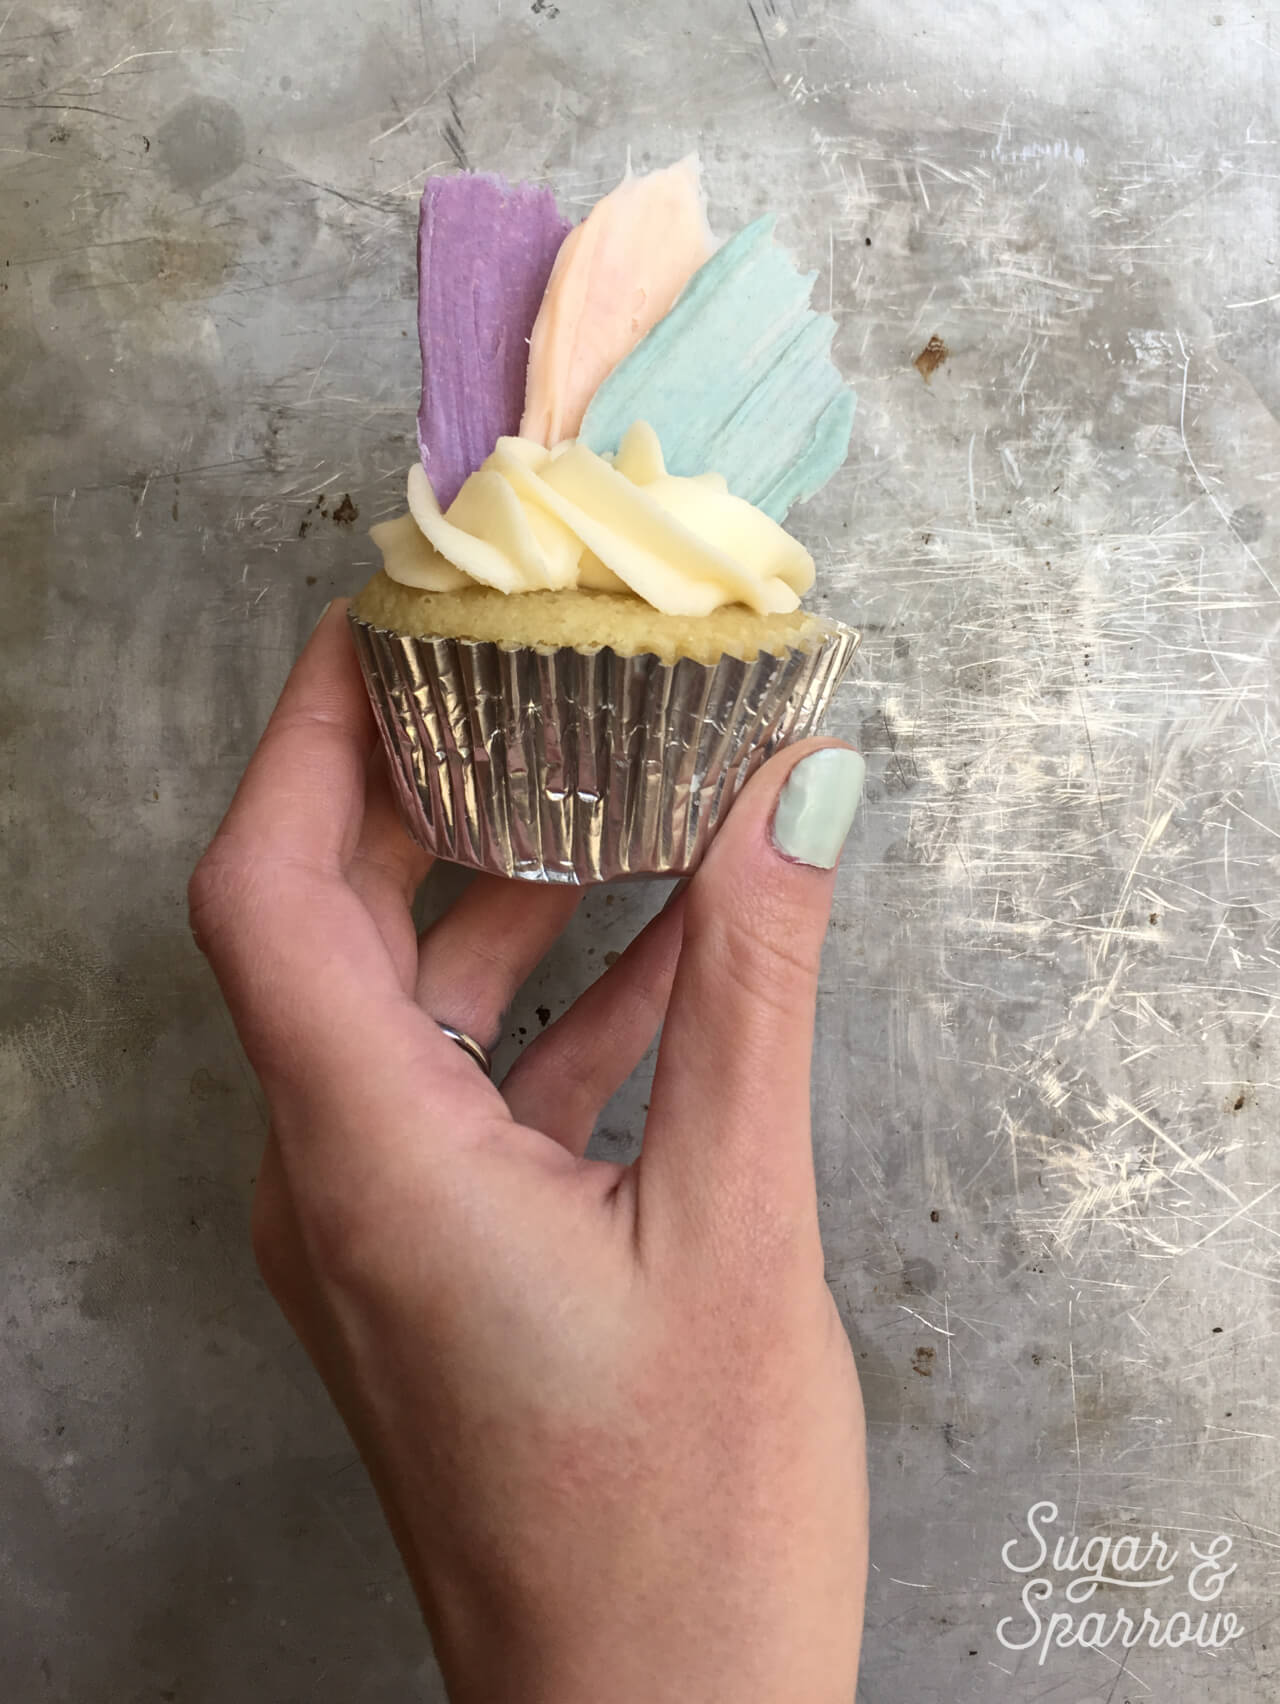
brushstroke cupcakes by sugar and sparrow

white chocolate brushstroke cupcakes by sugar and sparrow

These white chocolate brushstrokes would also look incredible on top of a cake, or stuck to the side of a cake using some buttercream as adhesive. I have yet to try the brushstroke technique on a cake, but I’ve definitely been Pinning a few inspiring looks and hope to try it someday. Follow me on Pinterest to see some of the looks I’m loving!

By: Whitney · In: Decorations & Garnishes, Recipes, Tutorials · Tagged: brushstroke cupcakes, cake tutorial, chocolate, cupcake tutorial, tutorial, white chocolate, white chocolate brushstrokes

you’ll also love

white chocolate ganache recipe for drip cakesWhite Chocolate Ganache Drip Cake Recipe + Tips [Video Included!]
layered ombre buttercream cake tutorialLayered Ombrè Buttercream Cake Tutorial
raspberry chocolate cake recipeRaspberry Chocolate Cake Recipe

Join the List

Stay up to date & receive the latest posts in your inbox.

Reader Interactions

Comments

  1. Georgia says

    June 18, 2019 at 5:14 am

    Hi these look lovely – do you know how long I can store them for? Want to prep ahead of making a lot of cupcakes!

    Reply
    • Whitney says

      June 18, 2019 at 10:51 am

      Hi Georgia! You can create the brushstrokes about a week ahead of time and store them in an airtight container until you’re ready to use them. Let me know how it goes!

      Reply

Leave a Reply Cancel reply

Your email address will not be published. Required fields are marked *

Recipe Rating


Next Post >

My Favorite Piping Tip: Wilton 4B

Primary Sidebar

Welcome to Sugar & Sparrow

Welcome to Sugar & Sparrow

Helping you whip up pretty desserts with confidence and creativity. And hopefully sharing a few laughs with you along the way!

Learn More

Connect

let’s bake!

Get my very best recipes, baking tips, and decorating tutorials sent to your inbox

Featured Posts

scoops of no churn chocolate ice cream in a loaf pan

No-Churn Chocolate Ice Cream (with Video!)

chocolate cake with nutella frosting and nutella ganache

Fudgy Chocolate Nutella Cake

carrot cake recipe small batch

Small Batch Carrot Cake

Search

Archives

Follow Along

@sugarandsparrowco

ALMOND JOY CAKE 🤎🥥 this tastes just like an Almond ALMOND JOY CAKE 🤎🥥 this tastes just like an Almond Joy candy bar in cake form: layers of soft, fluffy coconut cake with silky chocolate ganache, sliced almonds, and the dreamiest coconut-almond buttercream! 

Comment RECIPE and I’ll send it on over! Or find it linked in my bio + at https://sugarandsparrow.com/almond-joy-cake-recipe/

#almondjoy #coconutcake #almondcake #cakedecorating #candycake
You butter believe I made myself the Halloween cos You butter believe I made myself the Halloween costume of my dreams!! 🧈 

#diyhalloweencostume
#foodcostume #halloweencostume #handmadecostume #bakerlife
MELTED CANDLE CUPCAKES 🖤🕯give me a few cupcakes, s MELTED CANDLE CUPCAKES 🖤🕯give me a few cupcakes, some dye-free black buttercream, and black chocolate ganache and watch me transform them into the spookiest edible centerpiece! 

Full tutorial is linked in my bio + at https://sugarandsparrow.com/melting-candle-cupcakes/ but I have a condensed version below: 
 
SUPPLIES: ⁣ 
-9 cupcakes⁣  (made these with my small batch black velvet cake recipe!) 
-1 batch of dye-free black buttercream 
-boba straws or skewers (for stabilizing the taller candles) ⁣ 
-icing smoother + turntable ⁣ 
-black ganache for dripping⁣ 
-3 birthday cake candles⁣ 
-matches ⁣ to light them
⁣ 
INSTRUCTIONS: ⁣ 
1. Fill and stack the cupcakes: one stack of 2 cupcakes, one stack of 3 cupcakes, and one stack of 4 cupcakes. For the two taller cupcakes I inserted a boba straw through the middle to stabilize the stack for frosting. ⁣ 
2. Frost the stacked cupcakes with smooth buttercream and keep the top edge raw. Refrigerate for 20 minutes to let the frosting firm up. ⁣ 
3. Transfer the frosted cupcake candles  onto a small plate and pipe ganache around the edges and tops to look like melted wax. ⁣ 
4. Insert a birthday cake candle into each cake candle (keep the wick about 1/4 inch from the cake surface) and light! ⁣ 
⁣ 
#candlecake #halloweencake #cupcakes #blackvelvetcake #blackbuttercream
BISCOFF COOKIE BUTTERCREAM 🤎 this delicious frosti BISCOFF COOKIE BUTTERCREAM 🤎 this delicious frosting is flavored with Biscoff cookie butter and goes with literally ANY Fall cake recipe 🙌🏼 So far my favorite cake flavors to pair it with are pumpkin cake, banana cake, chocolate cake, coffee cake, and spice cake, but I am also testing a full-on Biscoff cake this week!! 

Full recipe + my favorite cake pairing suggestions are at https://sugarandsparrow.com/biscoff-buttercream/ 
⁣⁣ 
INGREDIENTS⁣⁣ 
1 Cups (226g) unsalted butter, room temperature⁣⁣ 
1/2 Cup (94g) Biscoff cookie butter⁣⁣ or spread
3 Cups (360g) powdered sugar⁣⁣ 
1 tsp pure vanilla extract⁣⁣ 
2 Tbsp whole milk, room temperature⁣⁣ 
1/4 tsp salt, or to taste⁣⁣ 
⁣⁣ 
INSTRUCTIONS⁣⁣ 
1. Cream the butter and Biscoff cookie butter together in the bowl of a stand mixer fitted with the paddle attachment (or you can use a hand mixer and large bowl). Mix on medium-high until creamy and well combined, about 5 minutes, scraping down the bowl and paddle as needed.⁣⁣ 
2. Turn the mixer to low speed and add the powdered sugar a few cups at a time, scraping down the bowl and paddle after mixing in each addition. Add the vanilla, milk, and salt and continue mixing on low speed until smooth and combined, 1-2 minutes.⁣ 
⁣⁣ 
#biscoffcake #biscoff #buttercream #frosting #cakedecorating
DYE-FREE BLACK VELVET CUPCAKES 🖤 These all black c DYE-FREE BLACK VELVET CUPCAKES 🖤 These all black cupcakes use black cocoa powder (and NO food coloring!) to achieve that rich black color for the cupcakes + black buttercream. That means they won’t turn anyone’s mouth black AND they taste like Oreo cookies in deliciously moist cupcake form 👻

✨Full recipe (with dye-free black buttercream) is linked in my bio + at https://sugarandsparrow.com/black-velvet-cupcakes/ 

BLACK VELVET CUPCAKES
Yield: 14 cupcakes

1 Cup (132g) all purpose flour
3/4 Cup (150g) granulated sugar
1/3 Cup (38g) black cocoa powder
1 tsp baking soda
1/2 tsp baking powder
1/4 tsp salt
1/4 Cup (60ml) vegetable oil
1 large egg, room temperature
1/2 tsp pure vanilla extract
1/2 Cup (120ml) full-fat buttermilk*
1/2 Cup (120ml) hot coffee or hot water

INSTRUCTIONS:
1. Preheat the oven to 350°F (177°C). Line a muffin pan with cupcake liners and set aside.
2. Place all of the dry ingredients into a large bowl and whisk together to combine. Add the vegetable oil, eggs, vanilla, and buttermilk and whisk until combined. With the mixer still on low, add the hot coffee (or hot water) and whisk until smooth, about 2 minutes. The batter will be very thin. 
3. Pour the batter into the prepared cupcake liners (no more than ⅔ full) and bake for 15-18 minutes, until a toothpick inserted comes out with just a few moist crumbs on it. Cool completely before frosting with dye-free black buttercream (full recipe linked in my bio).

*If you don’t have buttermilk on hand (I rarely do!), use 1/2 Cup whole milk mixed with 1 1/2 tsp vinegar or lemon juice. 

#blackcupcakes #blackbuttercream #blackcocoapowder #halloweencupcakes #halloweenbaking

Footer

On the Blog

  • Cake Basics
  • Recipes
  • Tutorials

Info

  • About
  • Privacy Policy & Disclosure

stay in the know

Copyright © 2026 · Theme by Sugar & Sparrow