• Cake
  • Frosting
  • YouTube
  • My Favorite Tools
  • Nav Social Icons

  • Skip to primary navigation
  • Skip to main content
  • Skip to primary sidebar
  • Skip to footer
  • Recipes
    • Cake
    • Cupcakes
    • Frosting
    • Ice Cream
    • Vegan
  • Cake Basics
  • Tutorials
  • Blog
  • About
  • Mobile Menu Widgets

    Connect

    Search

Sugar & Sparrow logo in script font

Sugar & Sparrow

Lifestyle and Cake from Portland Oregon

  • Cake Basics
  • Recipes
    • Cake
    • Cupcakes
    • Sheet Cakes
    • Cookies & Bars
    • Filling
    • Frosting
    • Ice Cream
    • No-Bake
    • Small Batch
    • Vegan
  • Tutorials
  • Book
  • Blog
  • About

Galaxy Cake Tutorial

September 11, 2019 · In: Tutorials

If you were offered a ticket to space, would you go? I totally would (even though I’d be terrified) because I have always been captivated by all things space. The planets, the stars, the crazy colors, the final frontier – it would all be worth floating around in a spaceship and eating weird food just so I could see it all up close! So far, the closest I can get is channeling my love for space into an out of this world Galaxy Cake!
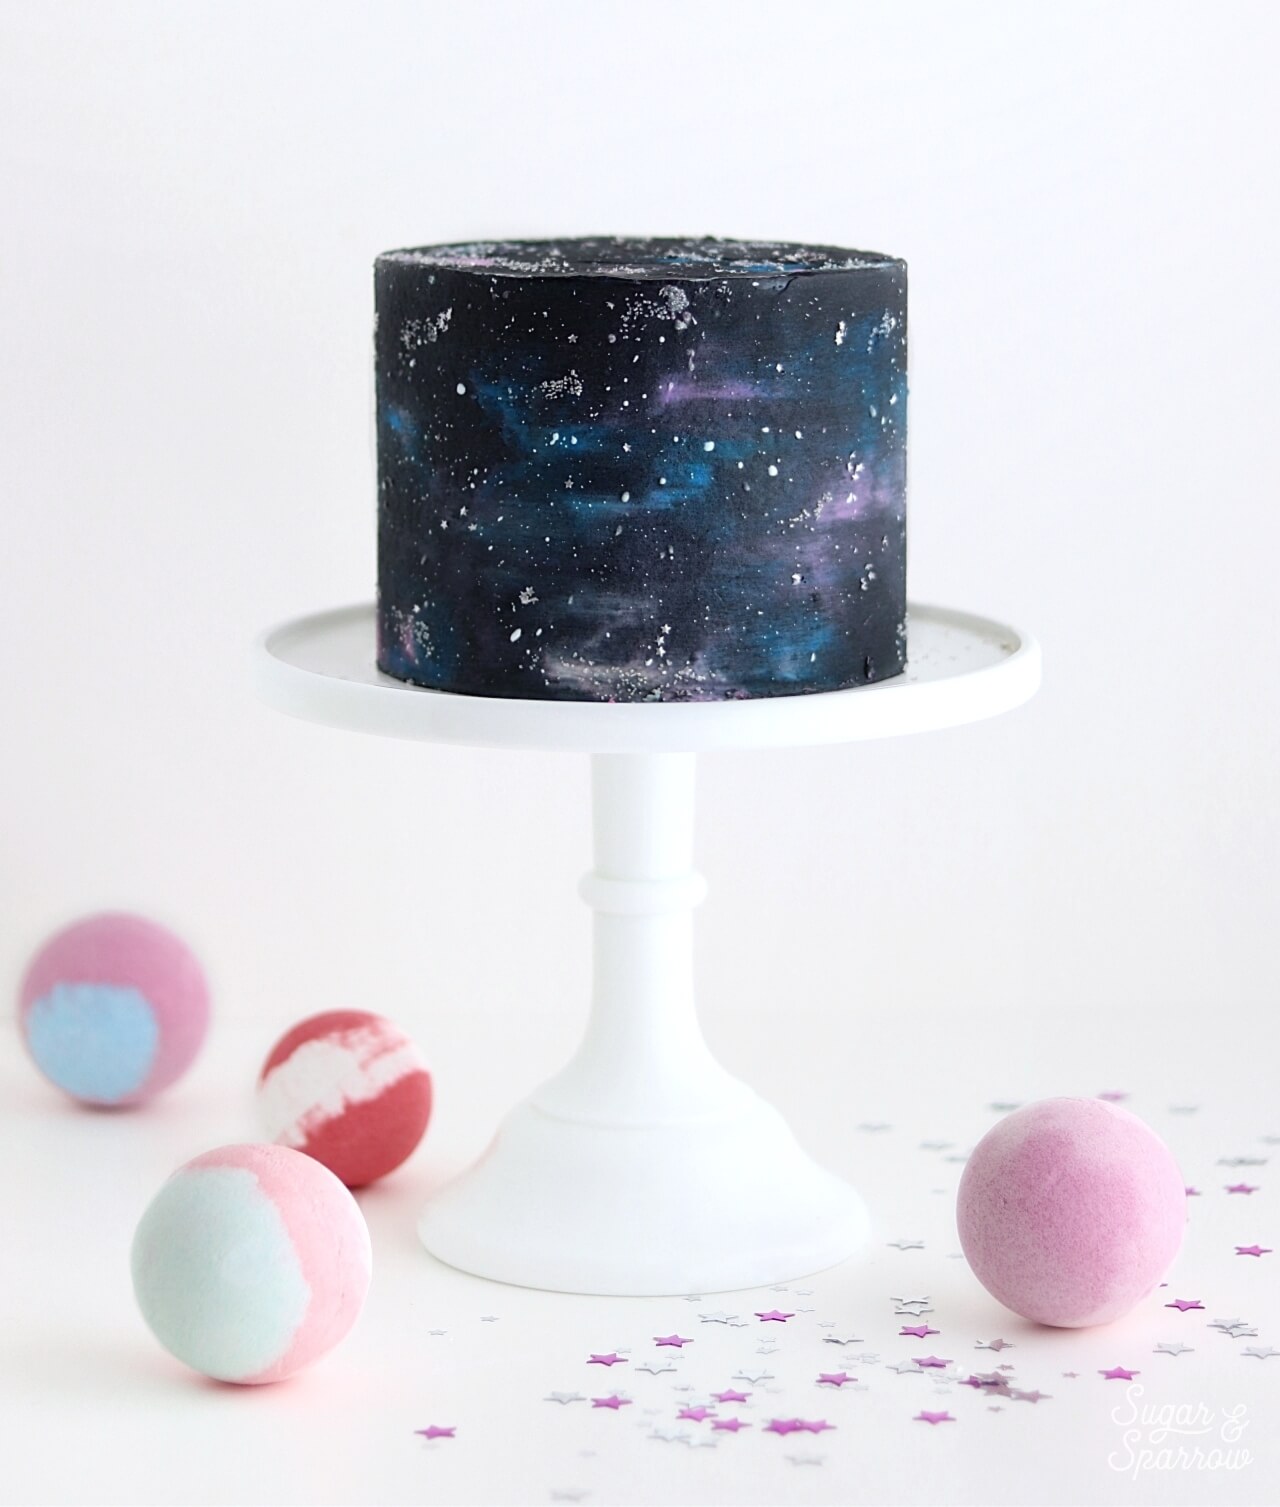
buttercream galaxy cake tutorial

Cool, right?! Whether you’re needing a buttercream backdrop for your next Star Wars cake or other space-themed creation, this technique was so quick and easy with a few supplies I picked up at my local JOANN store. From the space-colored buttercream to the star textures and sprinkle accents, I found everything I needed to get the look in a one-stop shop!

UPDATE 2025: JOANN has (sadly!!) gone out of business, so I have slightly changed these product links.
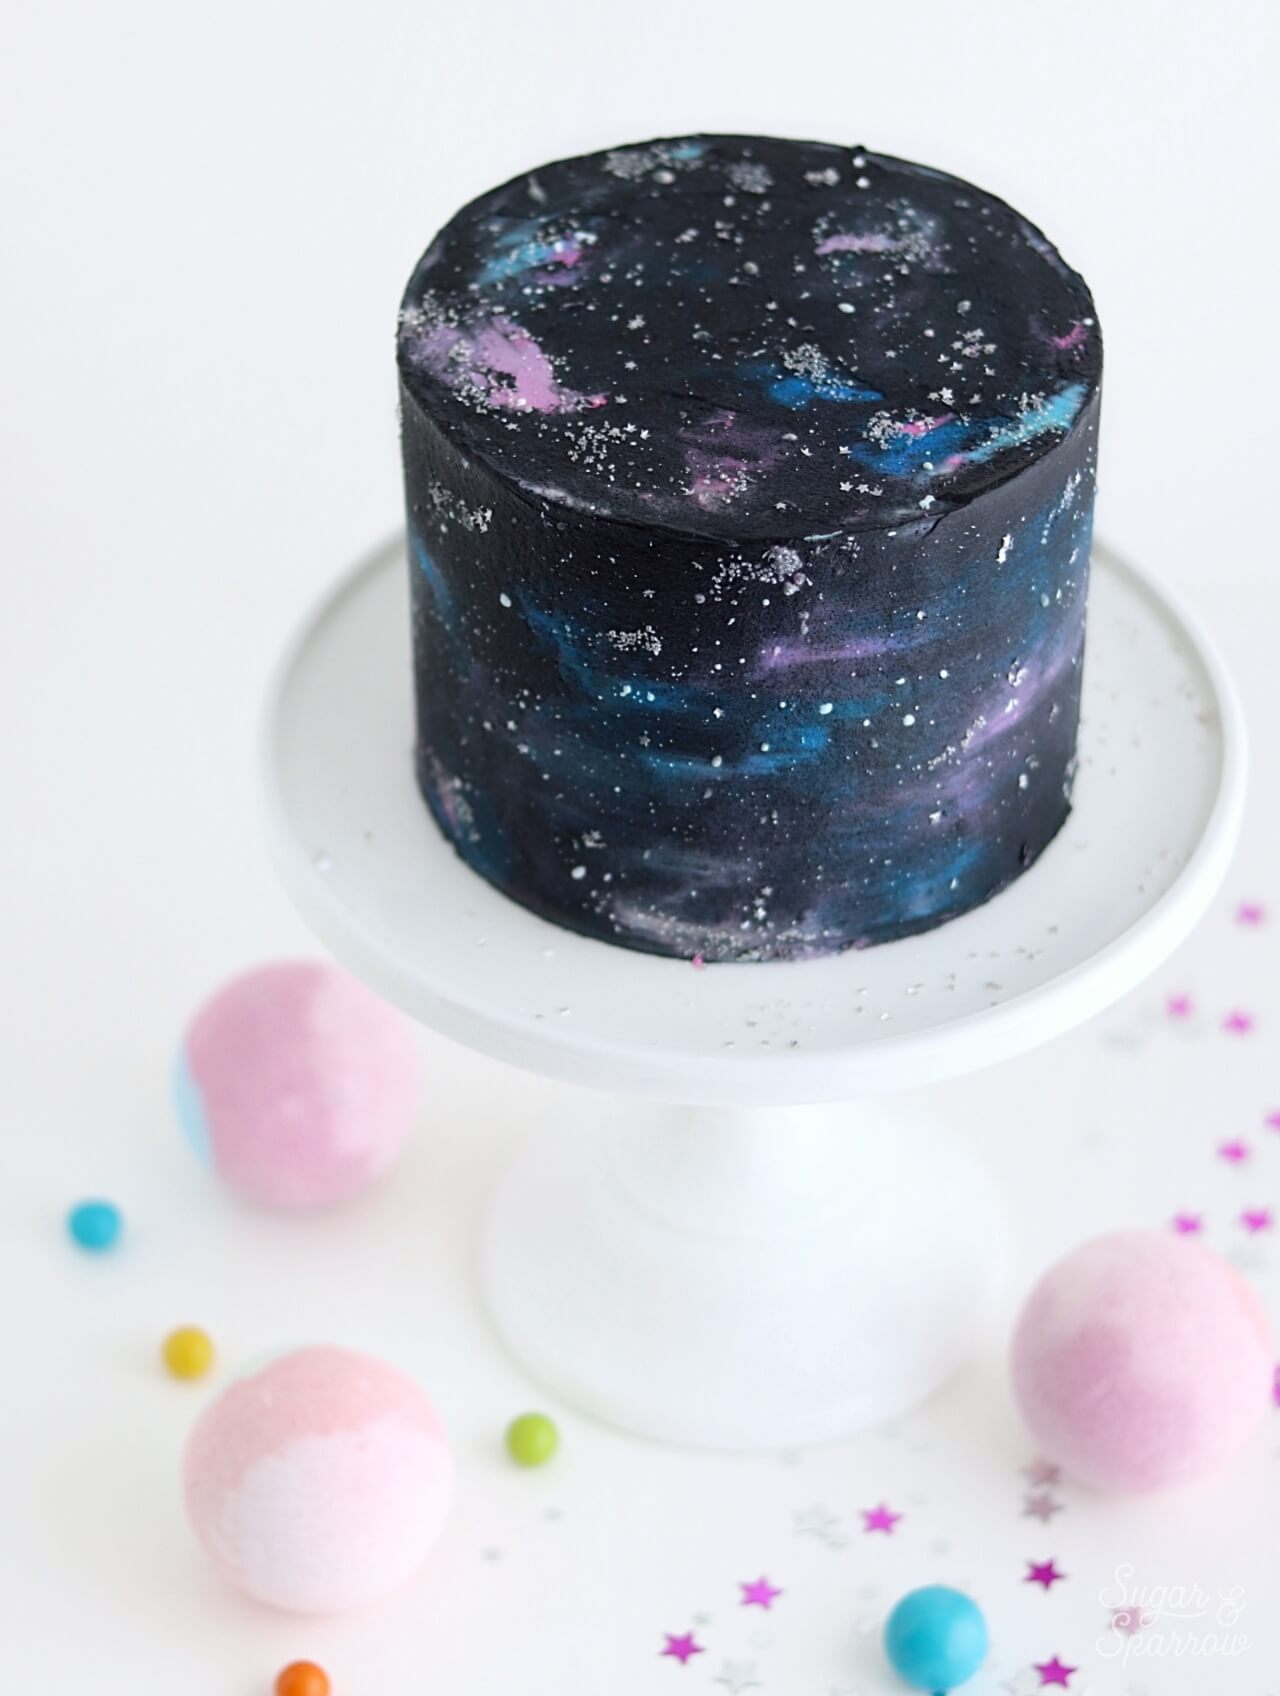
space cake by sugar and sparrow

This Galaxy Cake all starts with a watercolor buttercream technique in a spacey colored palette: pink, blue, purple, and black. I first frost the pink, blue, and purple colors before adding the black over the top, which makes it so that you (surprisingly!) don’t need to use a lot of black frosting. In fact, it’s only about 1/2 Cup of black frosting that you can make with either a few drops of black food color gel or black cocoa powder if you don’t mind a little chocolate flavor.

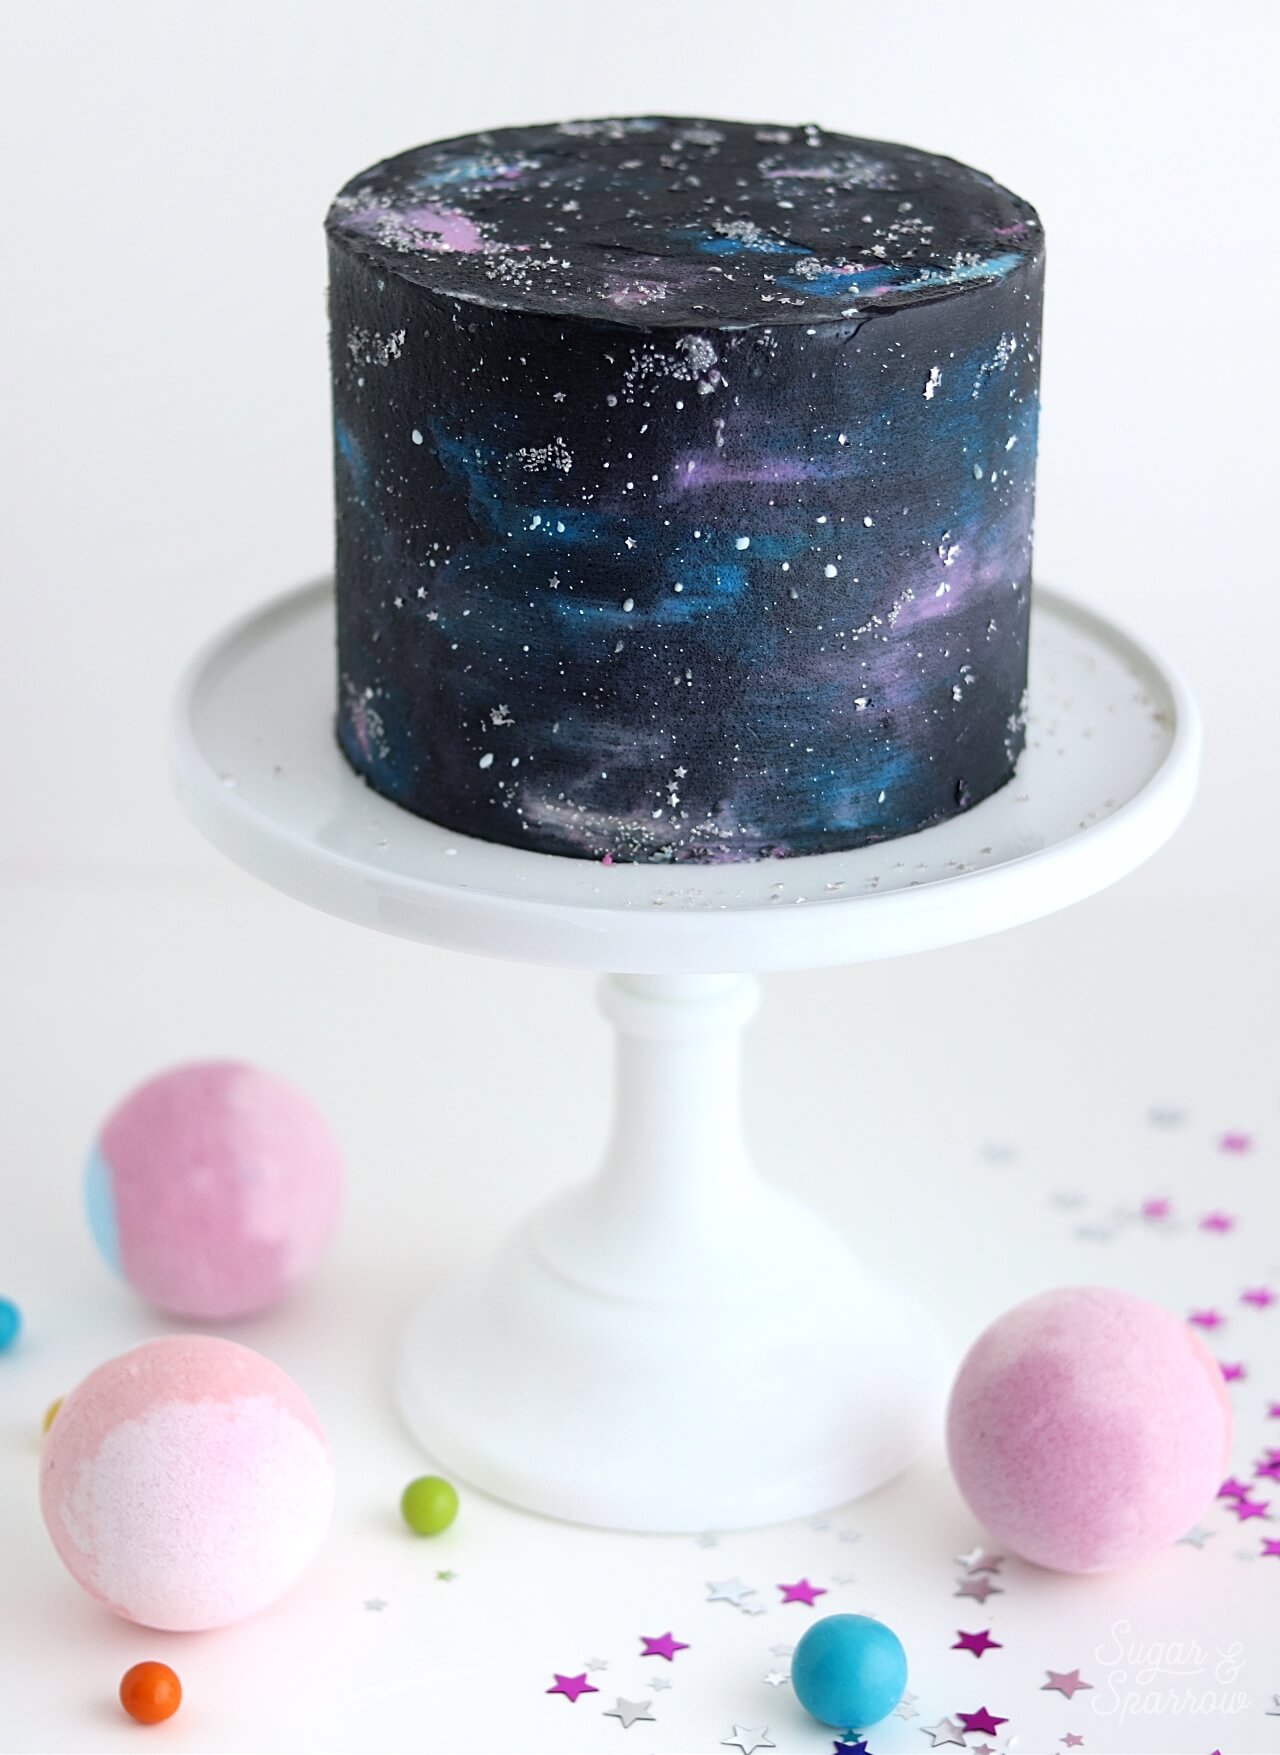
To really enhance the look of a star-filled galaxy, I splatter painted the cake with diluted vanilla buttercream, added these gorgeous Silver Edible Glitter Stars, and topped it all off with a few clusters of these Silver Sprinkles. It turned out so galactic!
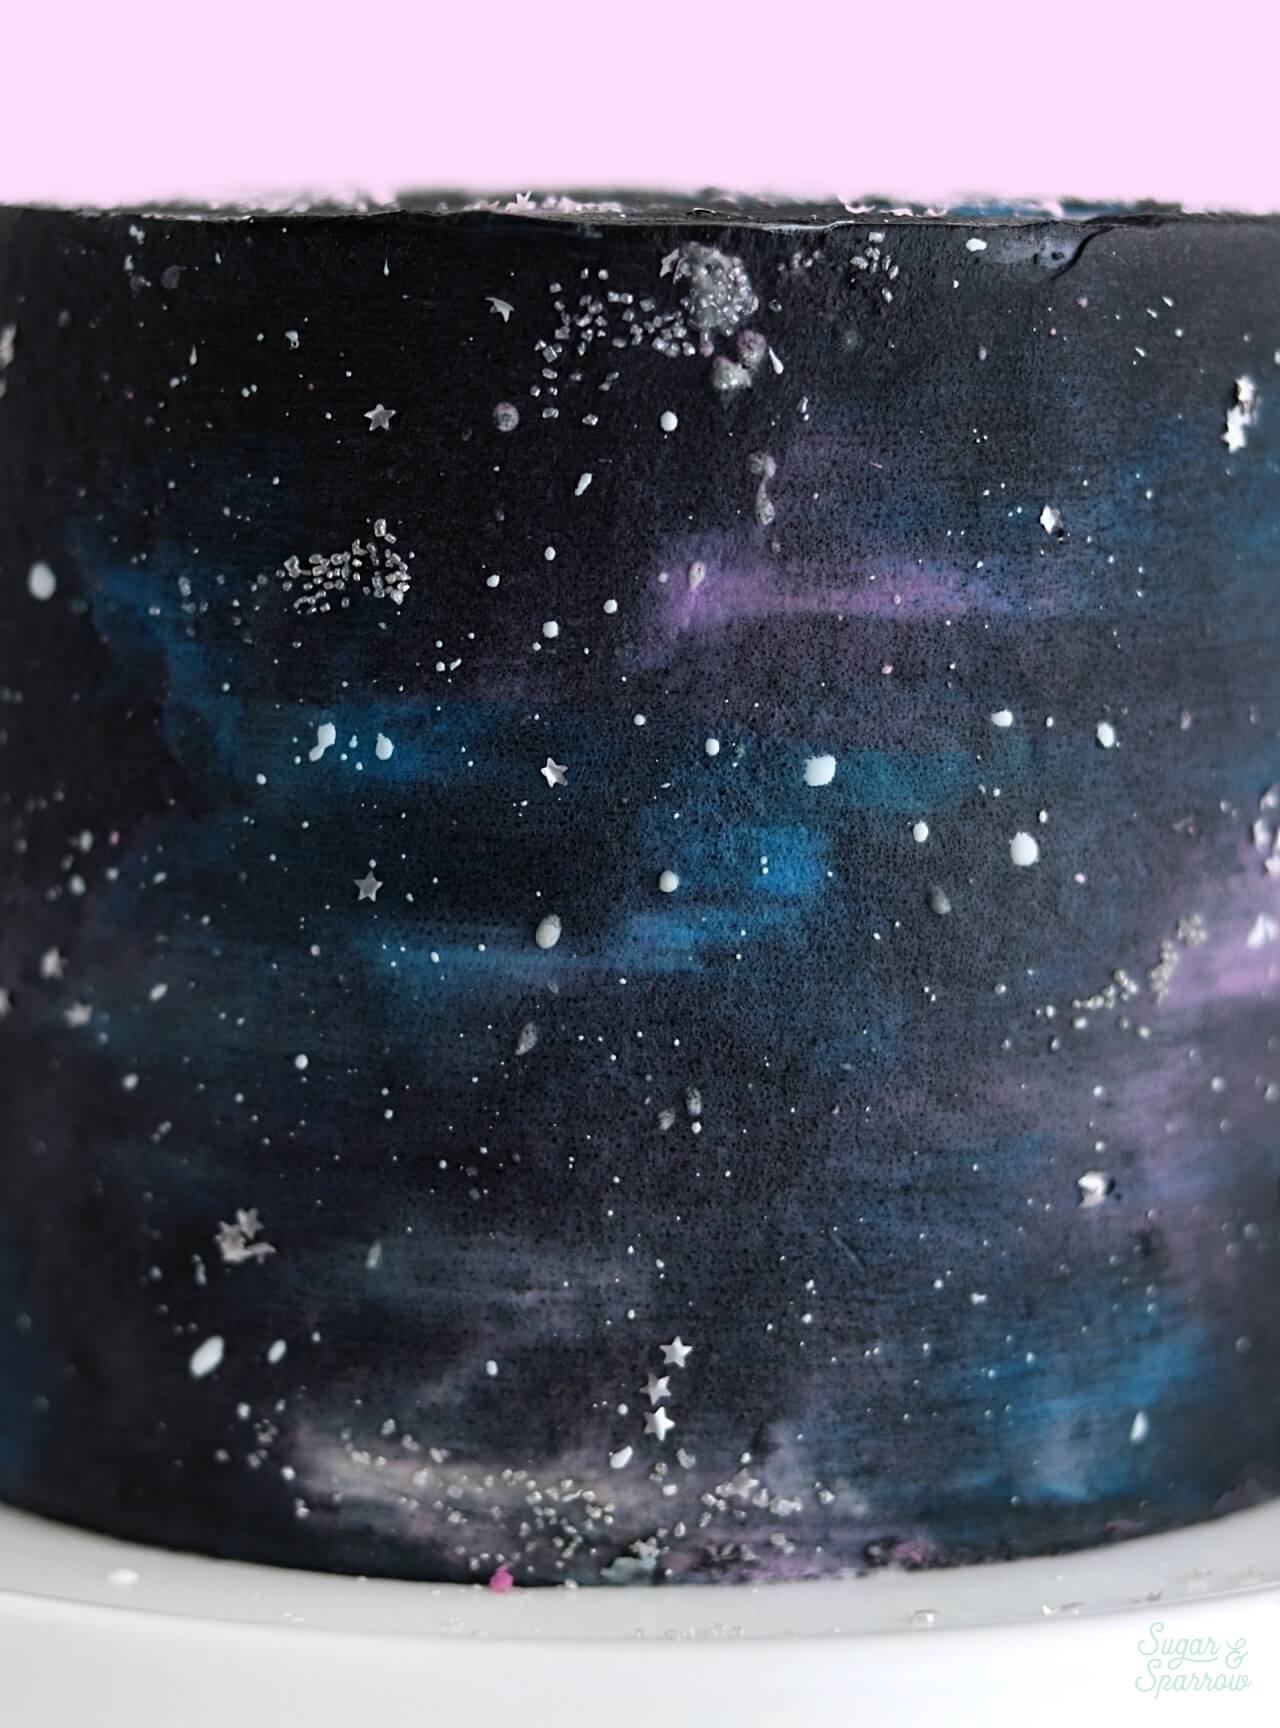
buttercream galaxy cake
black buttercream galaxy cake

Here’s a quick video of the process so you can see all of the techniques in action before you read all about it below:

If you love tutorial videos like this one, be sure to check out my YouTube channel! I’ve got a growing collection of cake recipes, decorating tutorials, and Cake Basics over there. Hit the subscribe button on my page so you never miss a new video.

You Will Need:

  • A 6-inch round cake that’s been crumb coated and chilled
  • Cake turntable 
  • 1.5 batches of vanilla buttercream
  • Food color gels in pink, purple, blue, and black (or black cocoa powder)
  • Bowls and spoons for color mixing
  • Angled Spatula
  • Icing Smoother
  • Food-Grade Paint Brush
  • Wilton Silver Edible Glitter Stars
  • Wilton Silver Sprinkles
  • AmeriColor Bright White color gel

Step 1: Frost The Cake

With your crumb coated and chilled cake on the turntable, frost a thin layer of vanilla buttercream onto the top of the cake and smooth it down with your angled spatula.
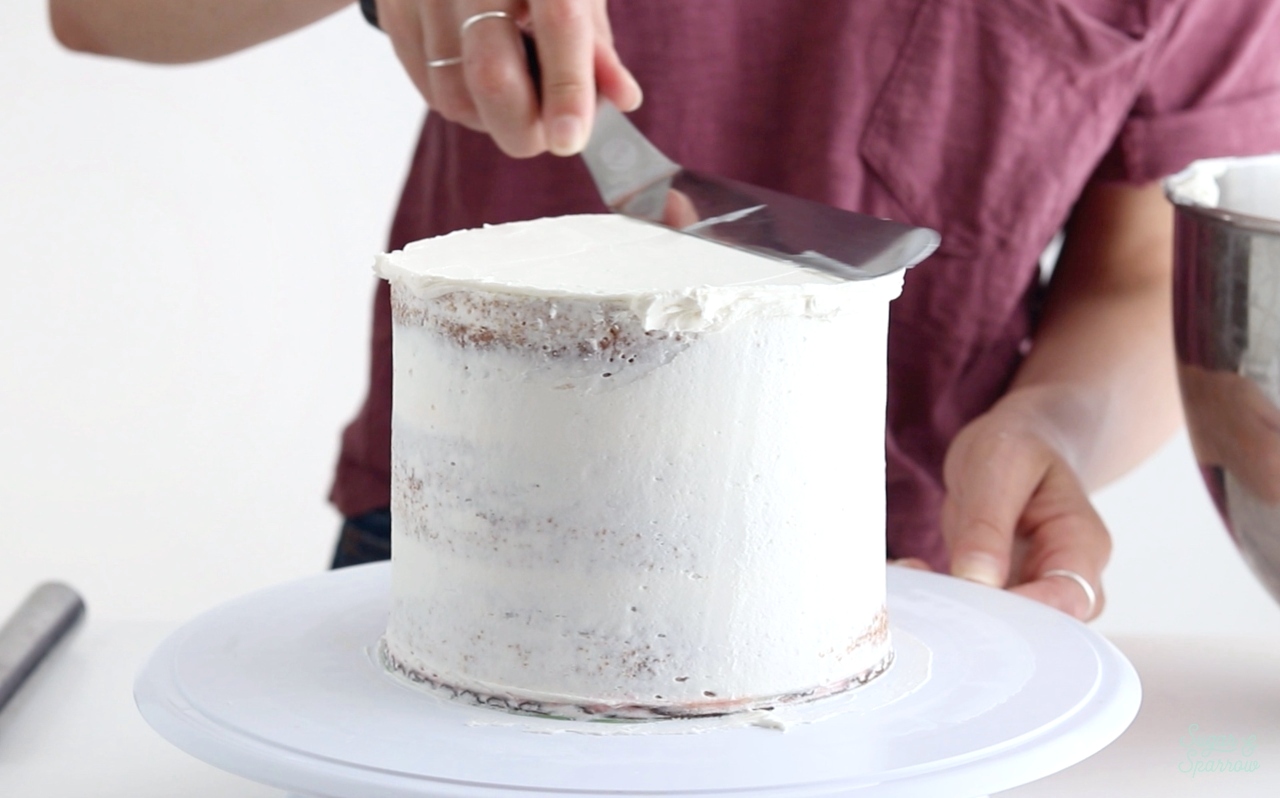
how to frost a smooth buttercream cake

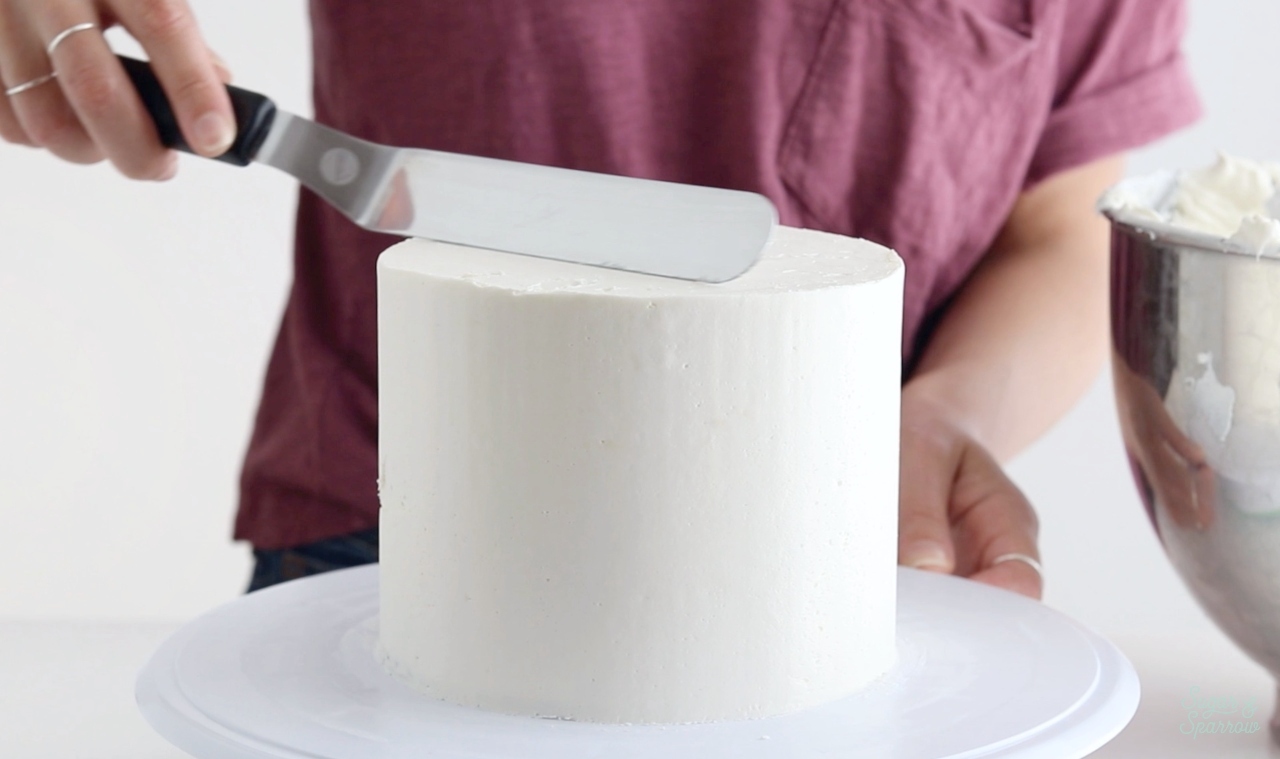
Add a thin layer of vanilla buttercream to the sides of the cake and smooth it with your icing scraper until the sides are smooth and even. Then, swipe the crown of buttercream that appears around the top edges of the cake inward to create sharp edges.
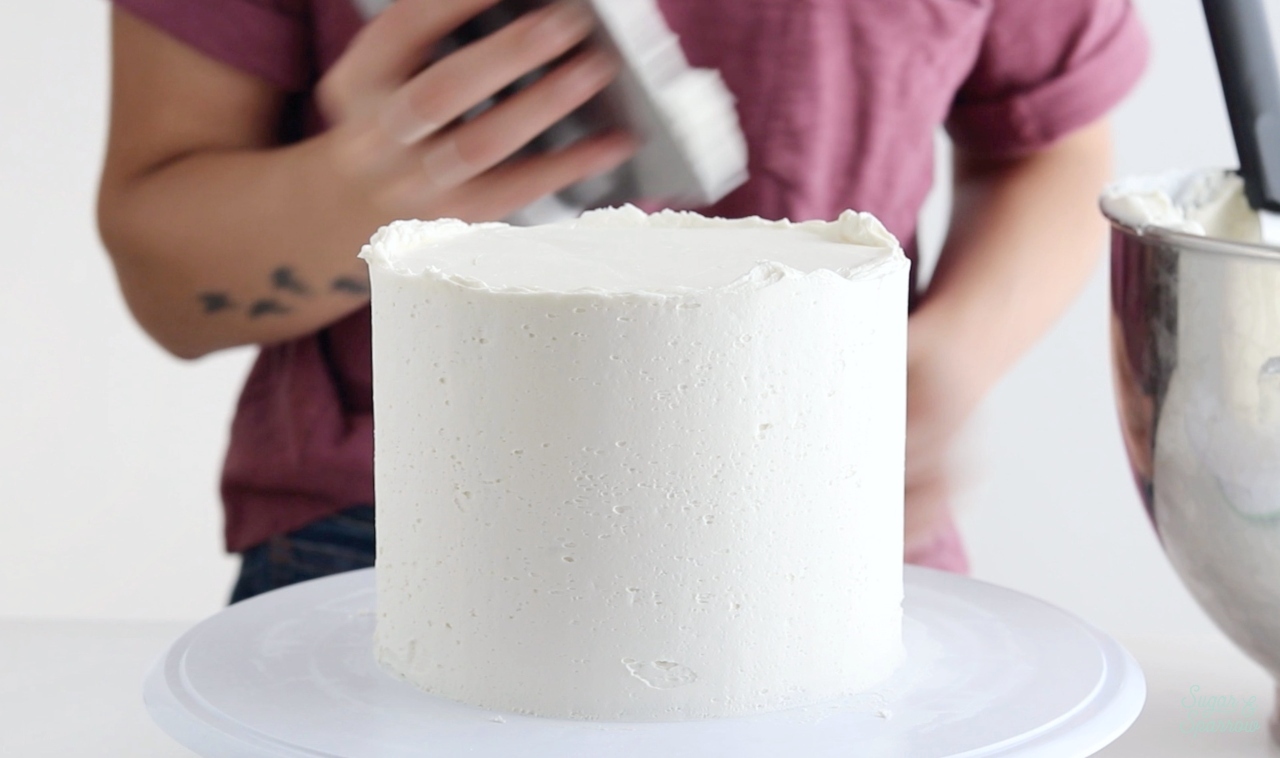
frosting smooth buttercream sides
sharp buttercream edges

At this point, I like to chill the frosted cake for about 20 minutes to let the buttercream set up. Frosting white buttercream underneath the galaxy finish saves on the amount of black buttercream you’ll need to use to cover it. Aka, no black stained teeth once you get to eat it!

Step 2: Color The Buttercream 

While the frosted cake is chilling in the refrigerator, it’s time to mix up your space-themed color palette. Divide the remaining buttercream into four separate bowls.
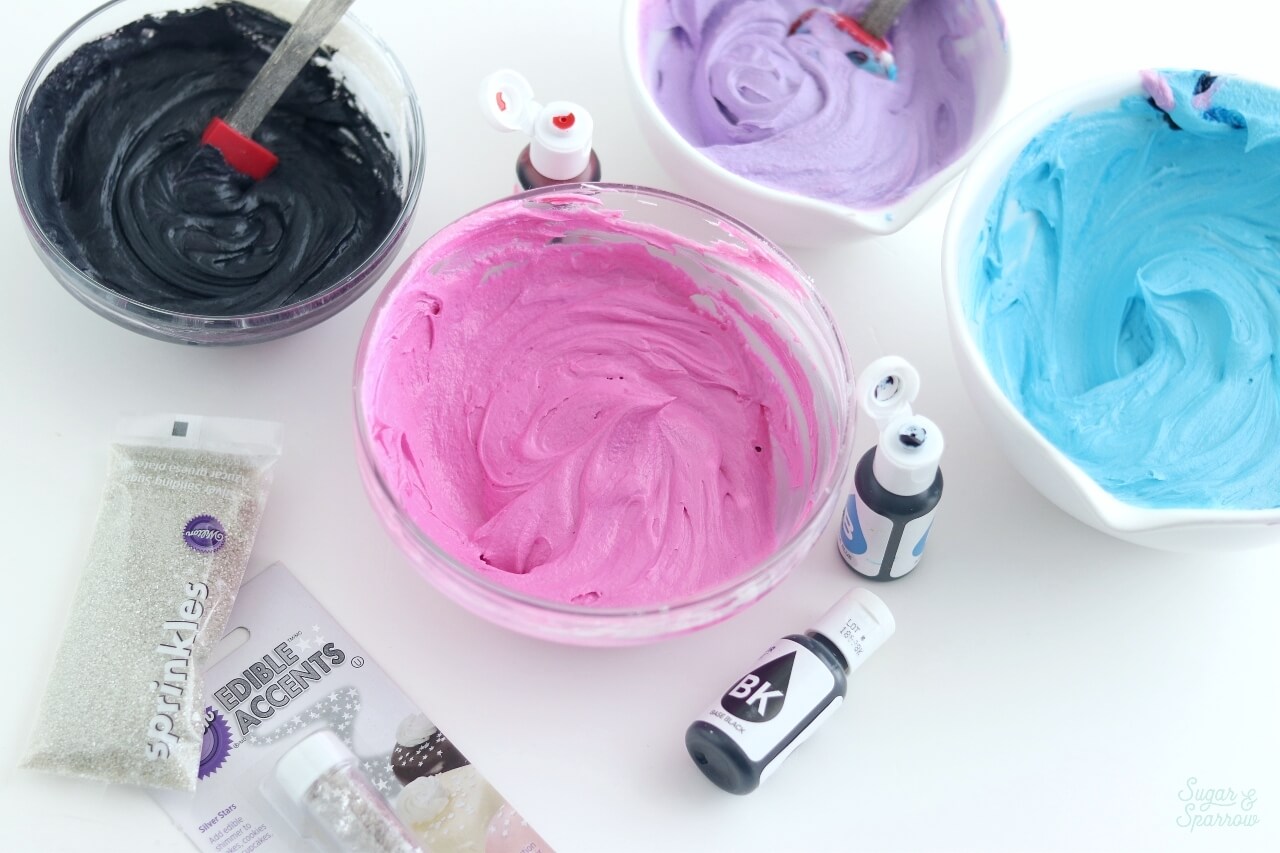
buttercream colors for galaxy cake

Using the mix a little pink food color gel into one bowl, a little blue into another, and purple into the third bowl. In the last bowl, add a few drops of black food color gel or black cocoa powder and mix it up until you’ve got a deep black tone.

Step 3: Create The Galaxy Buttercream Finish

On your frosted and chilled cake, add a few dabs of the pink buttercream to the sides and top of the cake with your angled spatula, then smooth it all with your icing scraper.
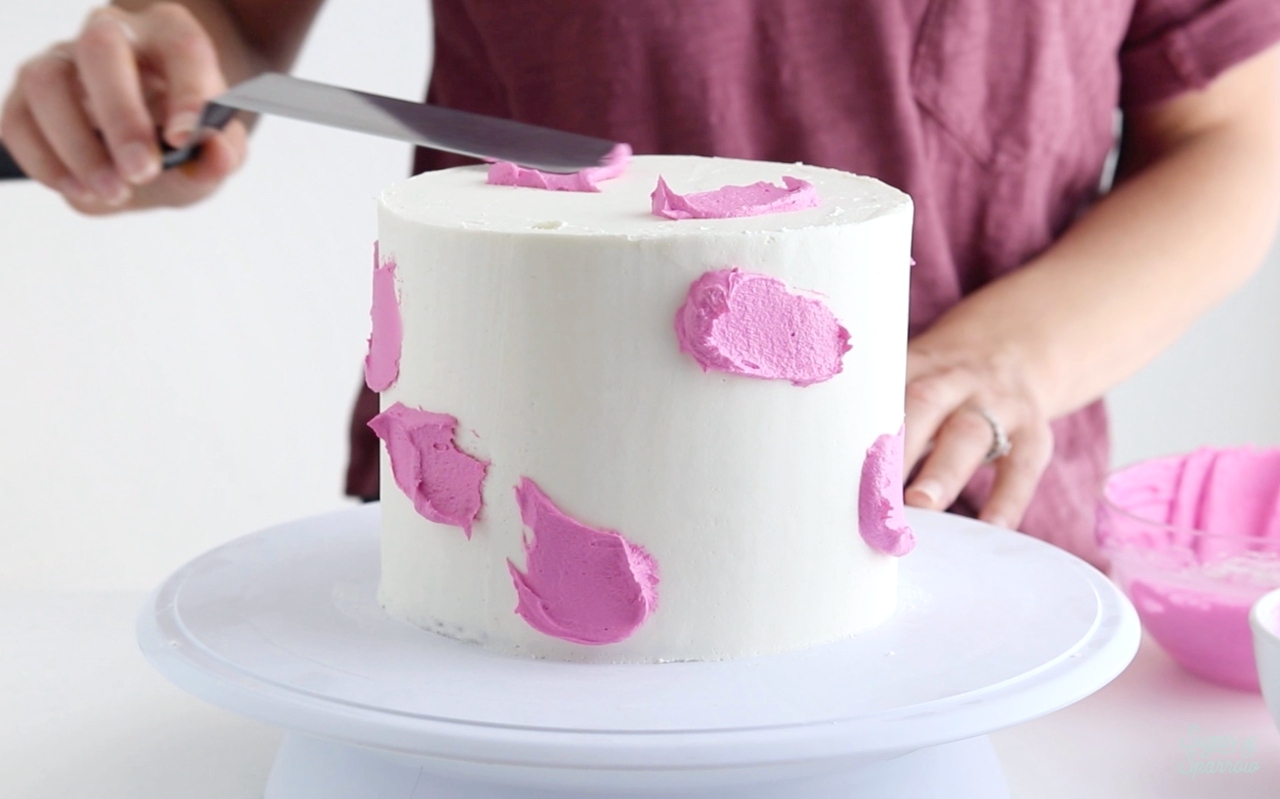
watercolor buttercream tutorial
watercolor buttercream pink

Next, add a few dabs of purple buttercream to the sides and top of the cake and smooth it with your icing scraper. Repeat this process with the blue buttercream until you’ve got a nice watercolor finish on your cake. No need to refrigerate these colors in between applications – we want them to blend together a little.
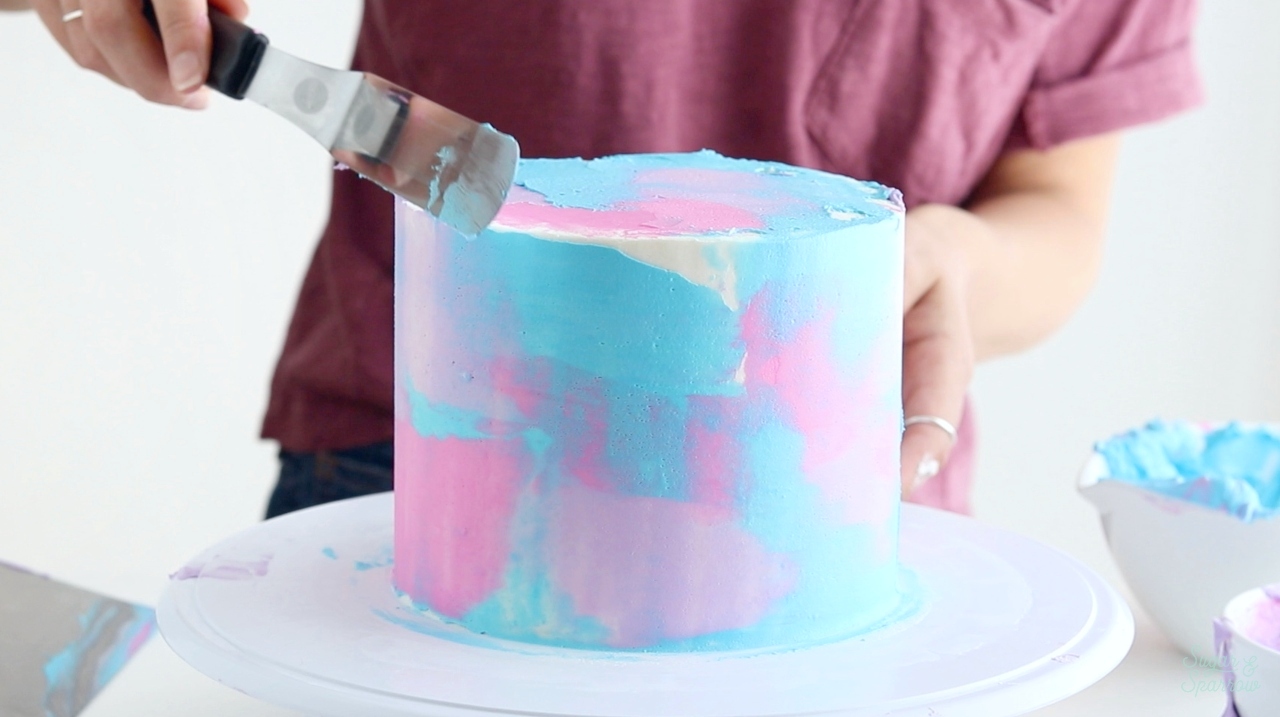
galaxy cake buttercream tutorial

Finally, add the black buttercream over the top of everything and smooth it with your icing scraper. Continue to add and smooth the black buttercream until the colors underneath peek through just a little.
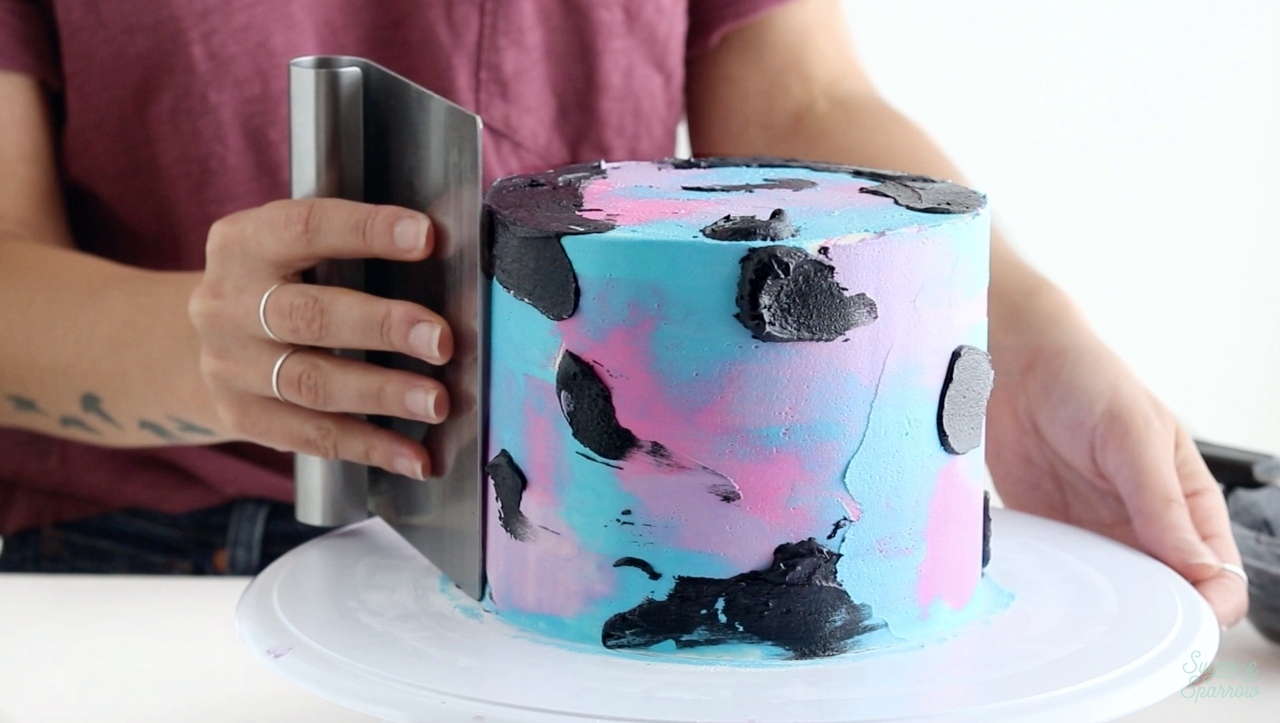
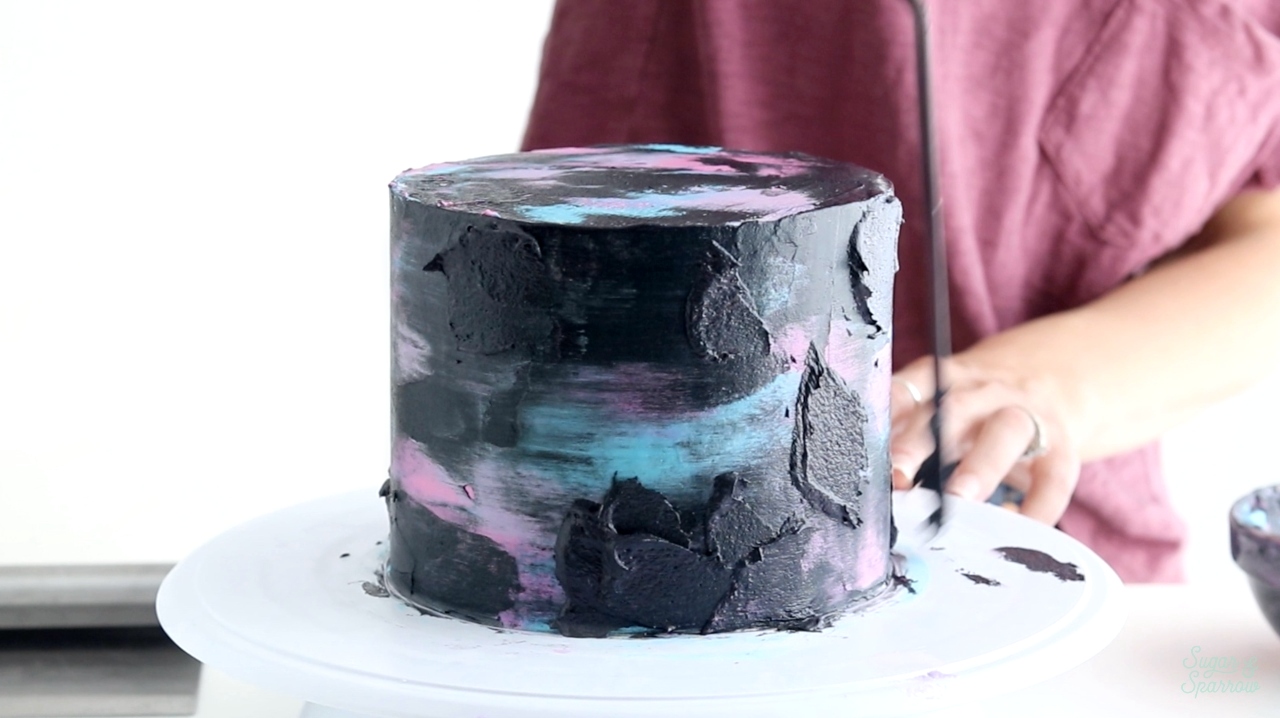
how to make a galaxy cake
how to make a buttercream galaxy cake
how to frost a galaxy cake

When you’re finished, pop the cake back into the refrigerator for another 15 minutes to let everything set up. 

Step 4: Splatter Paint The Stars

In a small bowl, add about 1/2 teaspoon of AmeriColor Bright White or other liquid icing whitener. Dip your food grade paintbrush into it and use it to splatter paint it all over the cake to create the look of stars. 
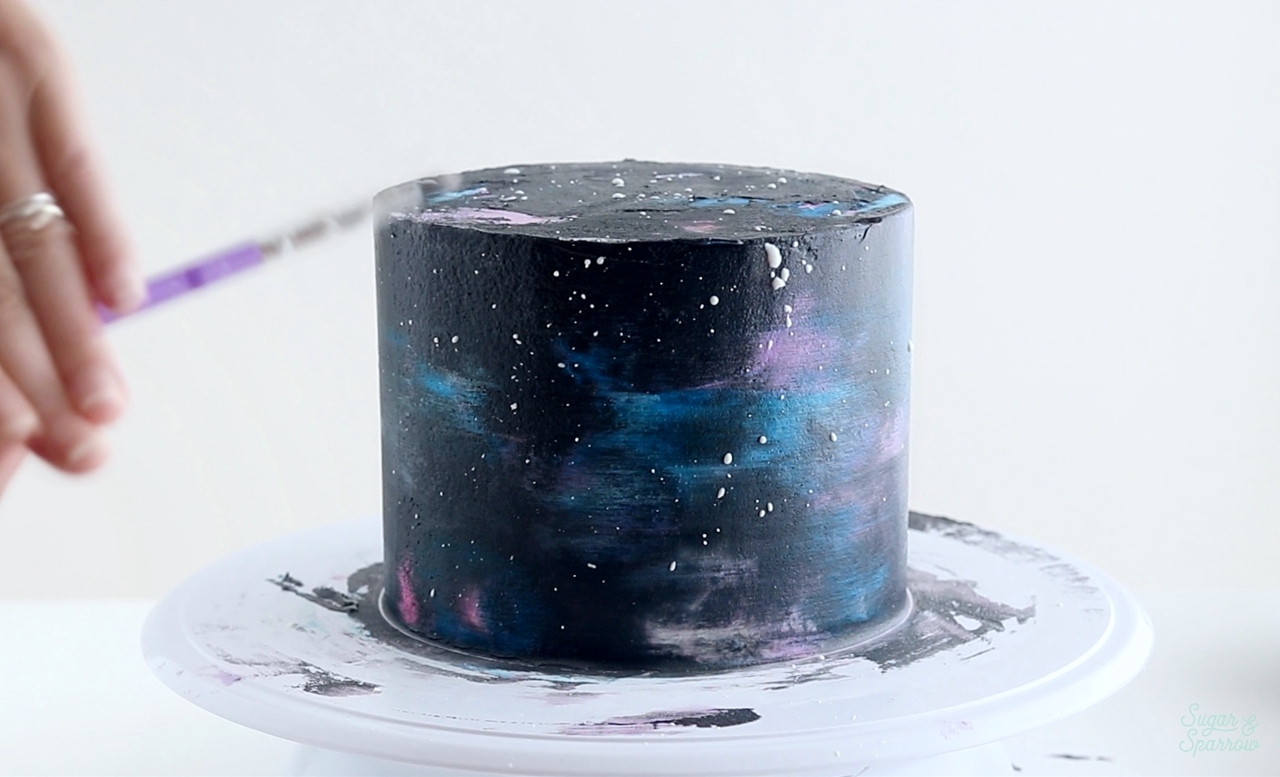
splatter painted galaxy cake

Step 5: Add Glitter Stars And Sprinkles 

Finally, add some Glitter Stars wherever your heart desires in your galaxy. It’s best to place a few on your finger and gently press them onto the cake. Use that same technique to add some clusters of Silver Sprinkles to your galaxy cake. Simply dip your finger into the sprinkles to get a nice finger-full, then gently press them onto the cake.
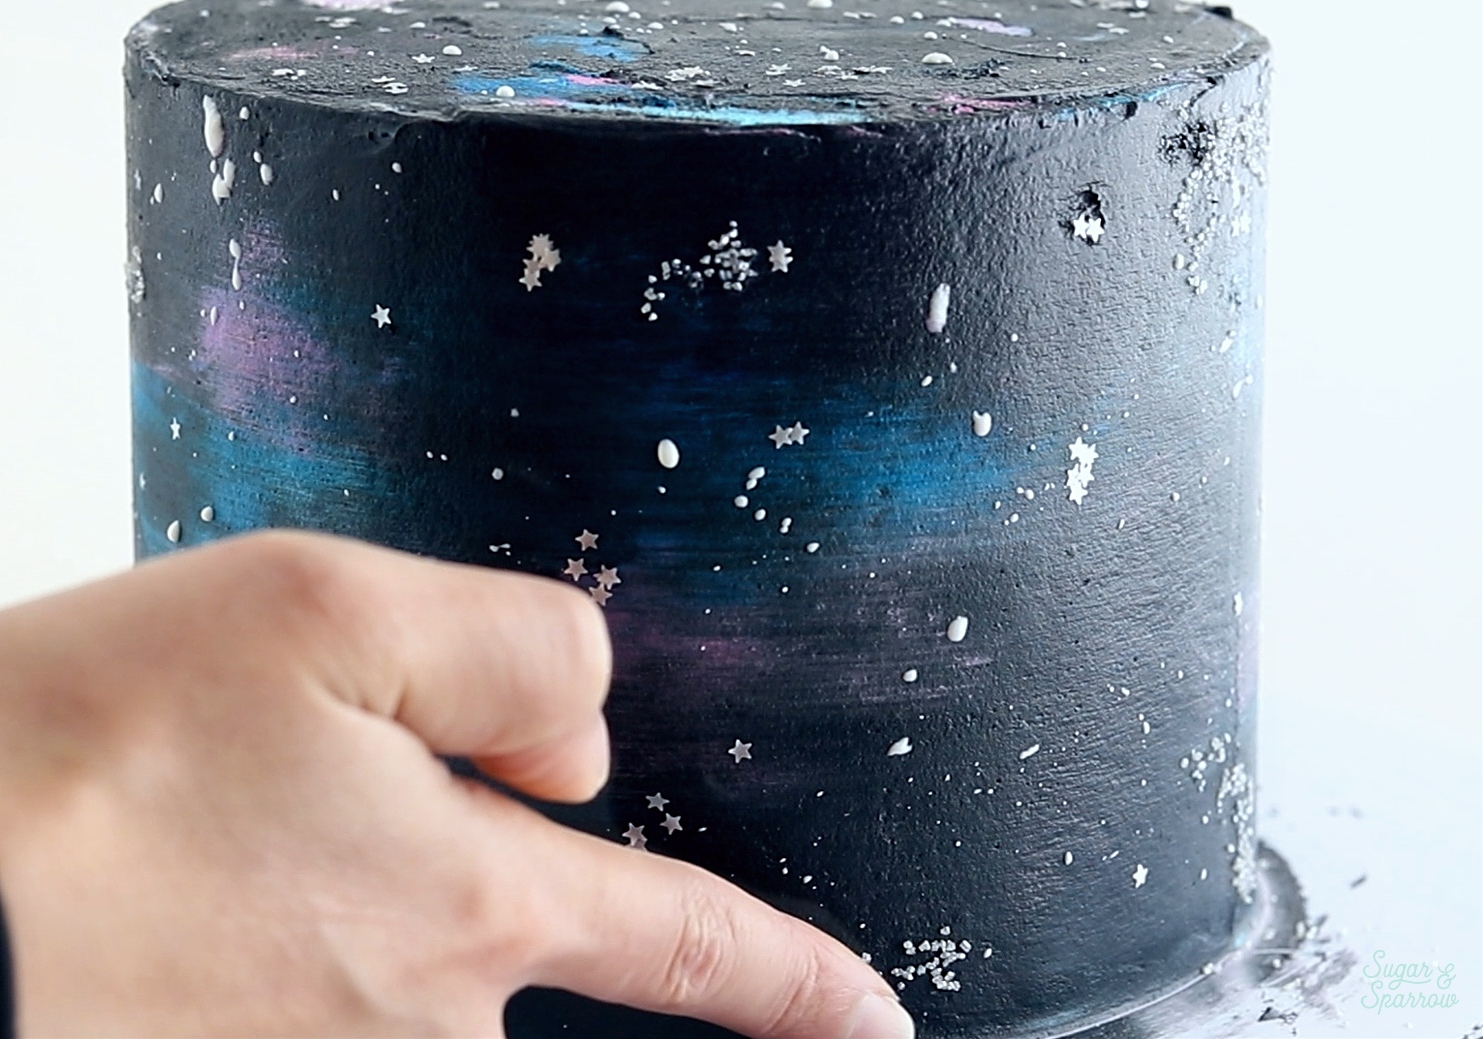
adding sprinkle stars to galaxy cake

And there you have it! When you’re all done with your Galaxy Cake, feel free to turn on “Intergalactic” by Beastie Boys and dance around the kitchen. It’s only fitting!
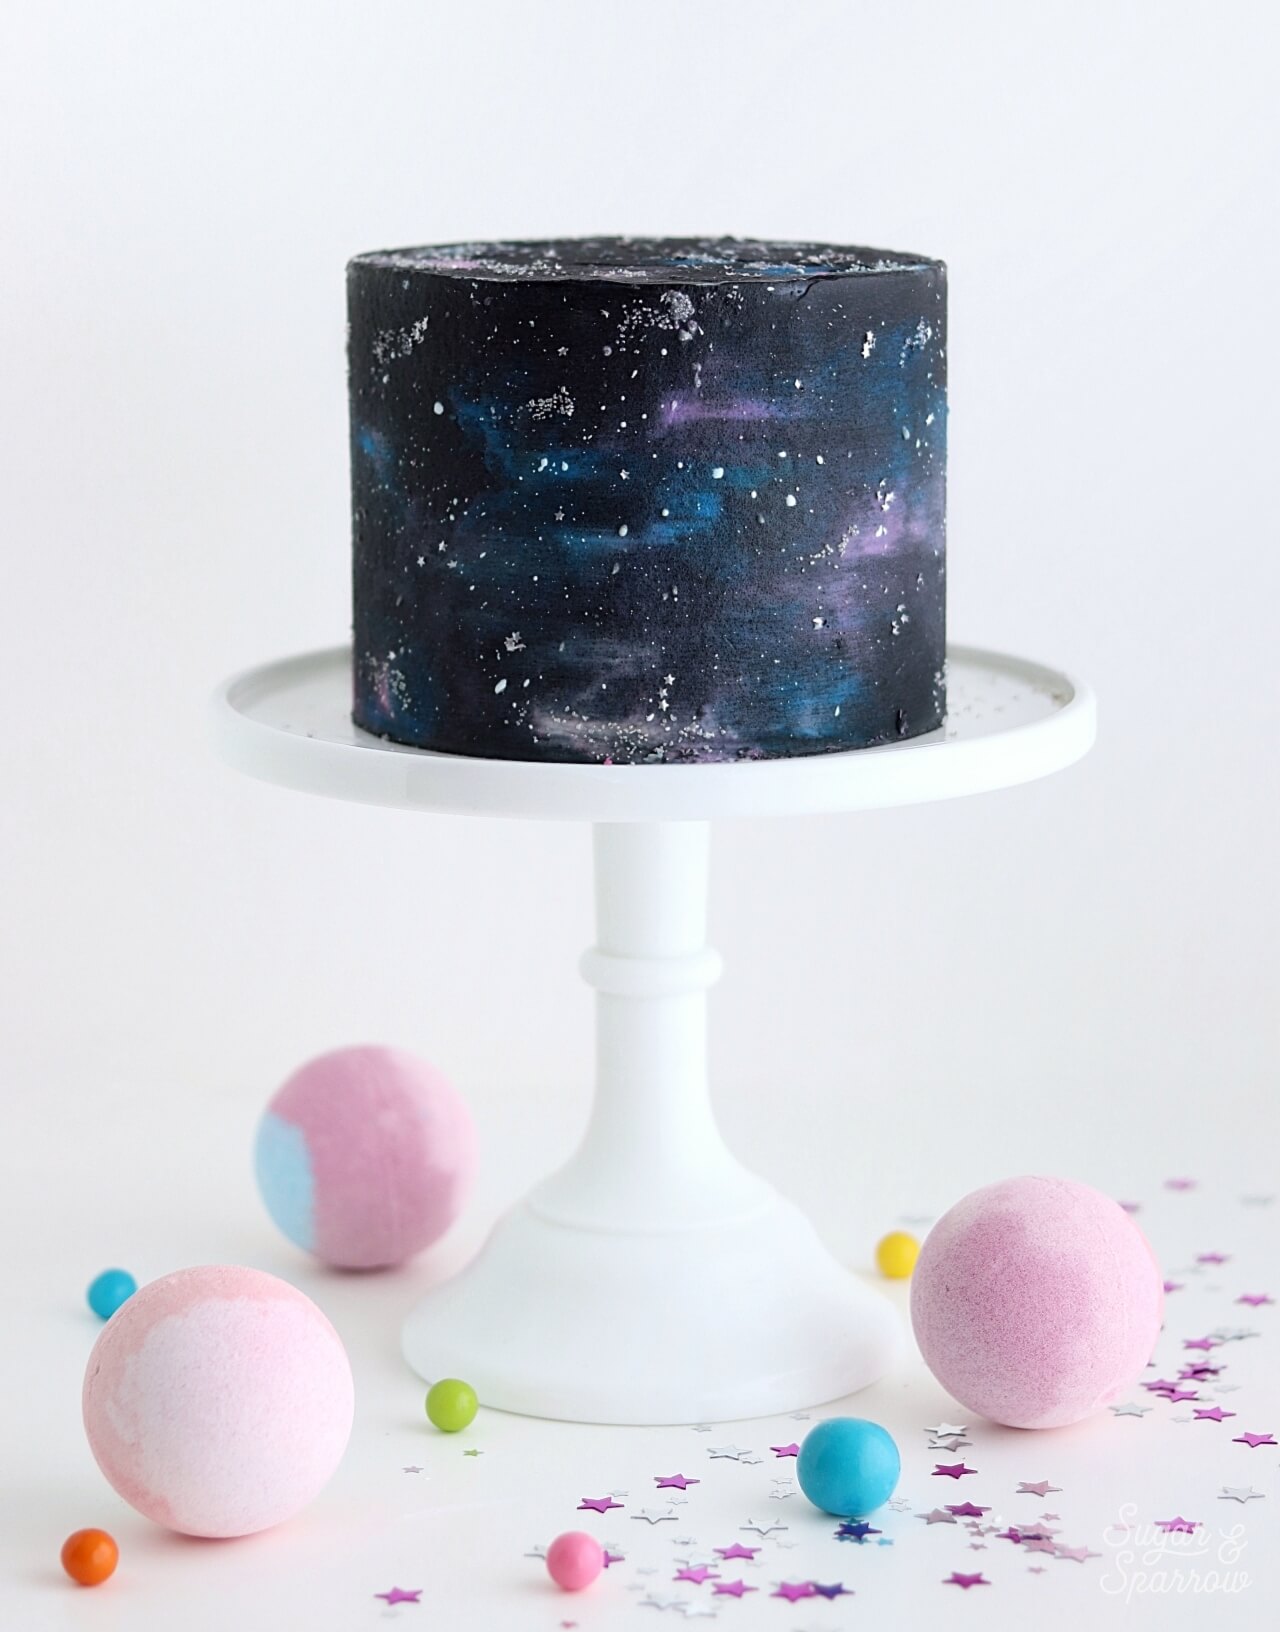
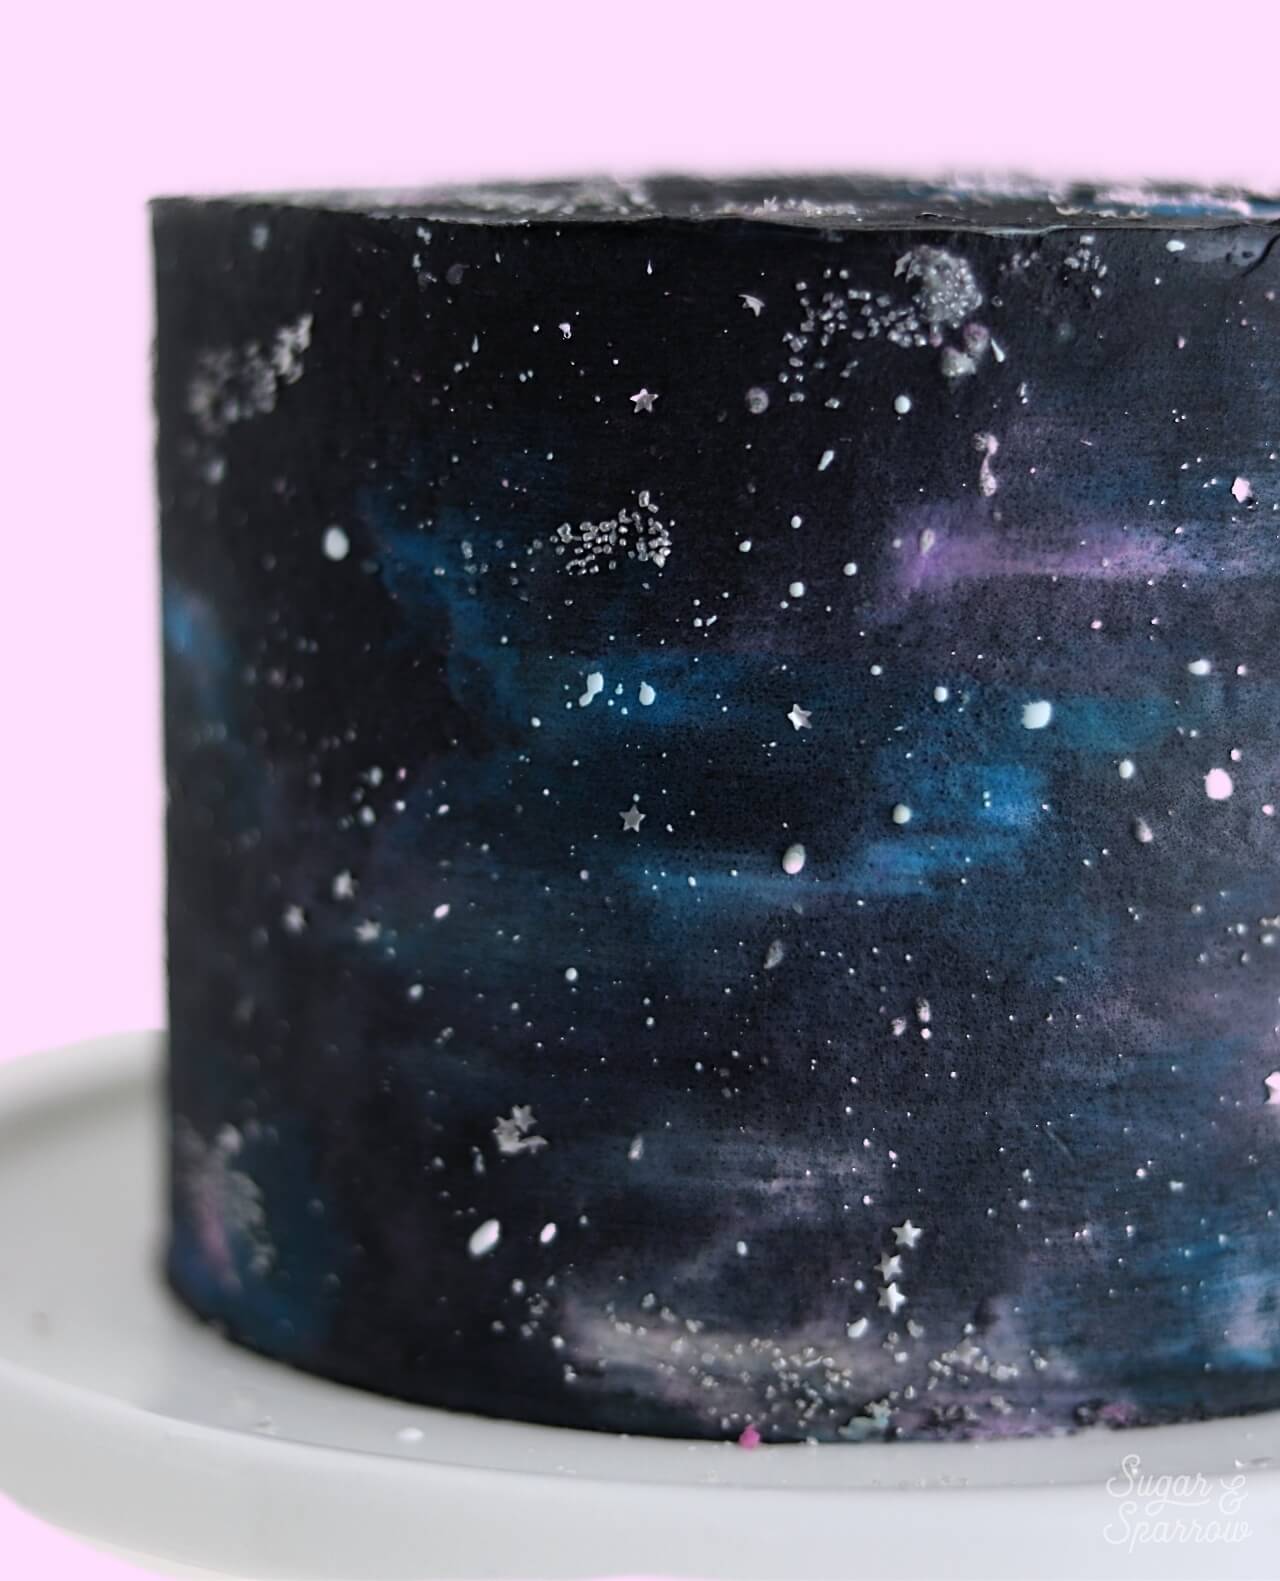
galaxy cake with stars
galaxy cake finish with silver star sprinkles

Disclaimer: I was compensated by JOANN for my work of creating this project, styling, filming, photographing, and writing about their products. As always, all opinions are honest and my own. Thank you for supporting brands that support Sugar & Sparrow.
By: Whitney · In: Tutorials · Tagged: black buttercream, cake ideas, cake tutorial, galaxy buttercream, galaxy cake, galaxy cake tutorial, JOANN, space buttercream, space cake, space cake tutorial, star sprinkles, star wars cake, watercolor cake

you’ll also love

black velvet cake plant basedVegan Black Velvet Cake (Dye-Free!)
black velvet cupcakes recipe by sugar and sparrowBlack Velvet Cupcakes (Dye-Free and Delicious!)
dye free black buttercream easy recipeEASY Dye-Free Black Buttercream Recipe

Join the List

Stay up to date & receive the latest posts in your inbox.

Reader Interactions

Comments

  1. Libby McCleskey says

    October 7, 2026 at 1:26 pm

    Hello! I love al of your recipes an dI make your cakes for every birthday and holiday, they are truly amazing!! I made this galaxy cake for my son’s 6th Star Wars birthday party this week and I combined it with your cotton candy cake recipe as well. Amazing combination and it turned out amazing! Thank you again for all of your inspiration!

    Reply
    • Whitney says

      October 7, 2026 at 8:01 pm

      What a fun combination, Libby! I’m so happy that the cake recipe and the decorating tutorial were a success. That’s the perfect cake for a Star Wars birthday party!

      Reply
« Older Comments

Leave a Reply Cancel reply

Your email address will not be published. Required fields are marked *

Recipe Rating


Next Post >

A Cactus Cake With Major Desert Vibes

Primary Sidebar

Welcome to Sugar & Sparrow

Welcome to Sugar & Sparrow

Helping you whip up pretty desserts with confidence and creativity. And hopefully sharing a few laughs with you along the way!

Learn More

Connect

let’s bake!

Get my very best recipes, baking tips, and decorating tutorials sent to your inbox

Featured Posts

coffee buttercream recipe by sugar and sparrow

Coffee Buttercream Frosting Recipe

halloween costume tutorial: cake costume

DIY Cake Costume Tutorial (with Video!)

layered ombre buttercream cake tutorial

Layered Ombrè Buttercream Cake Tutorial

Search

Archives

Follow Along

@sugarandsparrowco

EASY MUMMY CUPCAKES 👀 this classic Halloween cupca EASY MUMMY CUPCAKES 👀 this classic Halloween cupcake design is so easy to make with chocolate cupcakes, googly eye sprinkles, vanilla buttercream, and one piping tip! Here’s how:

Full tutorial (with recipes for the cupcakes and buttercream!) is linked in my bio + at https://sugarandsparrow.com/mummy-cupcakes/

MUMMY CUPCAKES SUPPLIES: 
-Baked chocolate cupcakes
-Vanilla buttercream
-Googly eye sprinkles
-Piping bag
-Small flat piping tip or basket weave tip

INSTRUCTIONS: 
1. Press two googly eye sprinkles on top of the chocolate cupcake.
2. Starting on the edge of the cupcake, pipe a straight line to the opposite edge, avoiding the googly eye sprinkles. If you’re using a basket weave tip, make sure the grooved edge is face down.
3. Continue piping lines that connect the edges, overlapping the lines until the surface of the cupcake is covered (aside from the googly eyes) and the piping looks like mummy cloths.

#halloweencupcakes #halloweenbaking #chocolatecupcakes #cupcakedecorating #cupcakes
HALLOWEEN CANDY BUCKET CAKE 🎃🍫🍬 this jack-o-lanter HALLOWEEN CANDY BUCKET CAKE 🎃🍫🍬 this jack-o-lantern cake is SO fun to make with two bundt cakes frosted with buttercream to look like a pumpkin candy bucket + lots of Halloween candy to fill it with. The perfect Halloween party cake!! 
 
A condensed tutorial is below but you can find the full tutorial link (with recipes I used!) in my bio + on my blog at  https://sugarandsparrow.com/halloween-candy-bucket-cake-tutorial/
 
🎃 Candy Bucket Cake Tutorial: 
 
1.  Bake two bundt cakes. I doubled my one-bowl chocolate cake recipe and divided it between two 9.5-inch bundt cake pans, then baked at 350F for 35 minutes.  
2. Fill and crumb coat the cakes in the shape of a pumpkin. I used my dye-free black buttercream recipe for this, but any flavor will do.  
3. Frost the cake. I used my vanilla buttercream recipe tinted with @americolor Electric Orange for the frosting. A flexible plastic smoother is KEY to shaping the roundness of the pumpkin (I got mine on Amazon) + I made my own little tool for the grooves from a leftover yogurt container. After I chilled the cake I hand-smoothed the finish with a little parchment paper to iron out the imperfections.  
4. Carve the jack-o-lantern. I chilled the frosting until it was firm to the touch, then used an X-acto knife to cut out the eyes and mouth. 
5. Add the handle. I inserted some crafting wire into hollow black licorice to create the candy bucket handle before sticking it into the cake.  
6. Fill with your favorite Halloween candy!  
 
#halloweencake #pumpkincake #partycake #cakedecorating #bundtcake
These are 10 of the Halloween cake and cupcake rec These are 10 of the Halloween cake and cupcake recipes I’d make for a spooky party! 👻

Comment “HALLOWEEN” and I’ll send all of these recipes and cake decorating tutorials + even more from my Halloween baking archives – spooky classics like my dye-free black velvet cake and pumpkin cake with cream cheese frosting, plus Halloween party cake tutorials and easy Halloween cupcake designs. 

https://sugarandsparrow.com/halloween-cakes-cupcakes-treats/

#halloweencake #halloweencupcakes #cakedecorating #halloweenbaking #halloweenpartyideas
DYE-FREE BLACK VELVET SHEET CAKE 🖤👀 if you’re look DYE-FREE BLACK VELVET SHEET CAKE 🖤👀 if you’re looking for a black cake that won’t stain your teeth, look no further! This sheet cake version of my favorite black velvet cake recipe uses black cocoa powder to create the dark black color for this whole cake without ANY food coloring, and it tastes just like Oreo cookies (but in deliciously moist cake form). Top that black buttercream with googly eyes for the perfect easy Halloween cake 👻

Comment RECIPE and I’ll send it to you or find it linked in my bio + at https://sugarandsparrow.com/black-velvet-sheet-cake/

You can also use the same ingredients and amounts for my black velvet layer cake recipe from a few Reels back! Just lower the oven temp to 325F and bake in a 9x13 pan for 30-35 min 🖤

#blackbuttercream #blackcake #blackvelvetcake #halloweencake #sheetcake
SNICKERS CAKE 🤎🥜 this truly tastes like a sweet an SNICKERS CAKE 🤎🥜 this truly tastes like a sweet and salty Snickers bar, but in cake form: decadent chocolate cake layers filled with soft chocolate peanut butter nougat and thick, gooey peanut caramel, all wrapped up in chocolate buttercream. Make this for the Snickers lover in your life!! 
⁣ 
Comment ‘RECIPE’ and I’ll send it right to you, or find it linked in my bio + at https://sugarandsparrow.com/snickers-cake-recipe/ 
⁣ 
#snickerscake #chocolatecake #caramel #birthdaycake #cakedecorating

Footer

On the Blog

  • Cake Basics
  • Recipes
  • Tutorials

Info

  • About
  • Privacy Policy & Disclosure

stay in the know

Copyright © 2026 · Theme by Sugar & Sparrow