• Cake
  • Frosting
  • YouTube
  • My Favorite Tools
  • Nav Social Icons

  • Skip to primary navigation
  • Skip to main content
  • Skip to primary sidebar
  • Skip to footer
  • Recipes
    • Cake
    • Cupcakes
    • Frosting
    • Ice Cream
    • Vegan
  • Cake Basics
  • Tutorials
  • Blog
  • About
  • Mobile Menu Widgets

    Connect

    Search

Sugar & Sparrow logo in script font

Sugar & Sparrow

Lifestyle and Cake from Portland Oregon

  • Cake Basics
  • Recipes
    • Cake
    • Cupcakes
    • Cookies & Bars
    • Filling
    • Frosting
    • Ice Cream
    • No-Bake
    • Small Batch
    • Vegan
  • Tutorials
  • Book
  • Blog
  • About

A Guide to Coloring Buttercream Frosting

September 10, 2020 · In: Cake Basics, Featured, Tutorials

I think one of the coolest things about cake is how artistic it can be, and a big part of that comes from the freedom to create any buttercream color you could possibly imagine! In fact, when planning out my cakes I love to nerd out on the color palette and get a real thrill when the colors turn out exactly how I pictured. As with anything, getting my buttercream shades just right has come with tons of practice and finding products I love to help make it happen. 
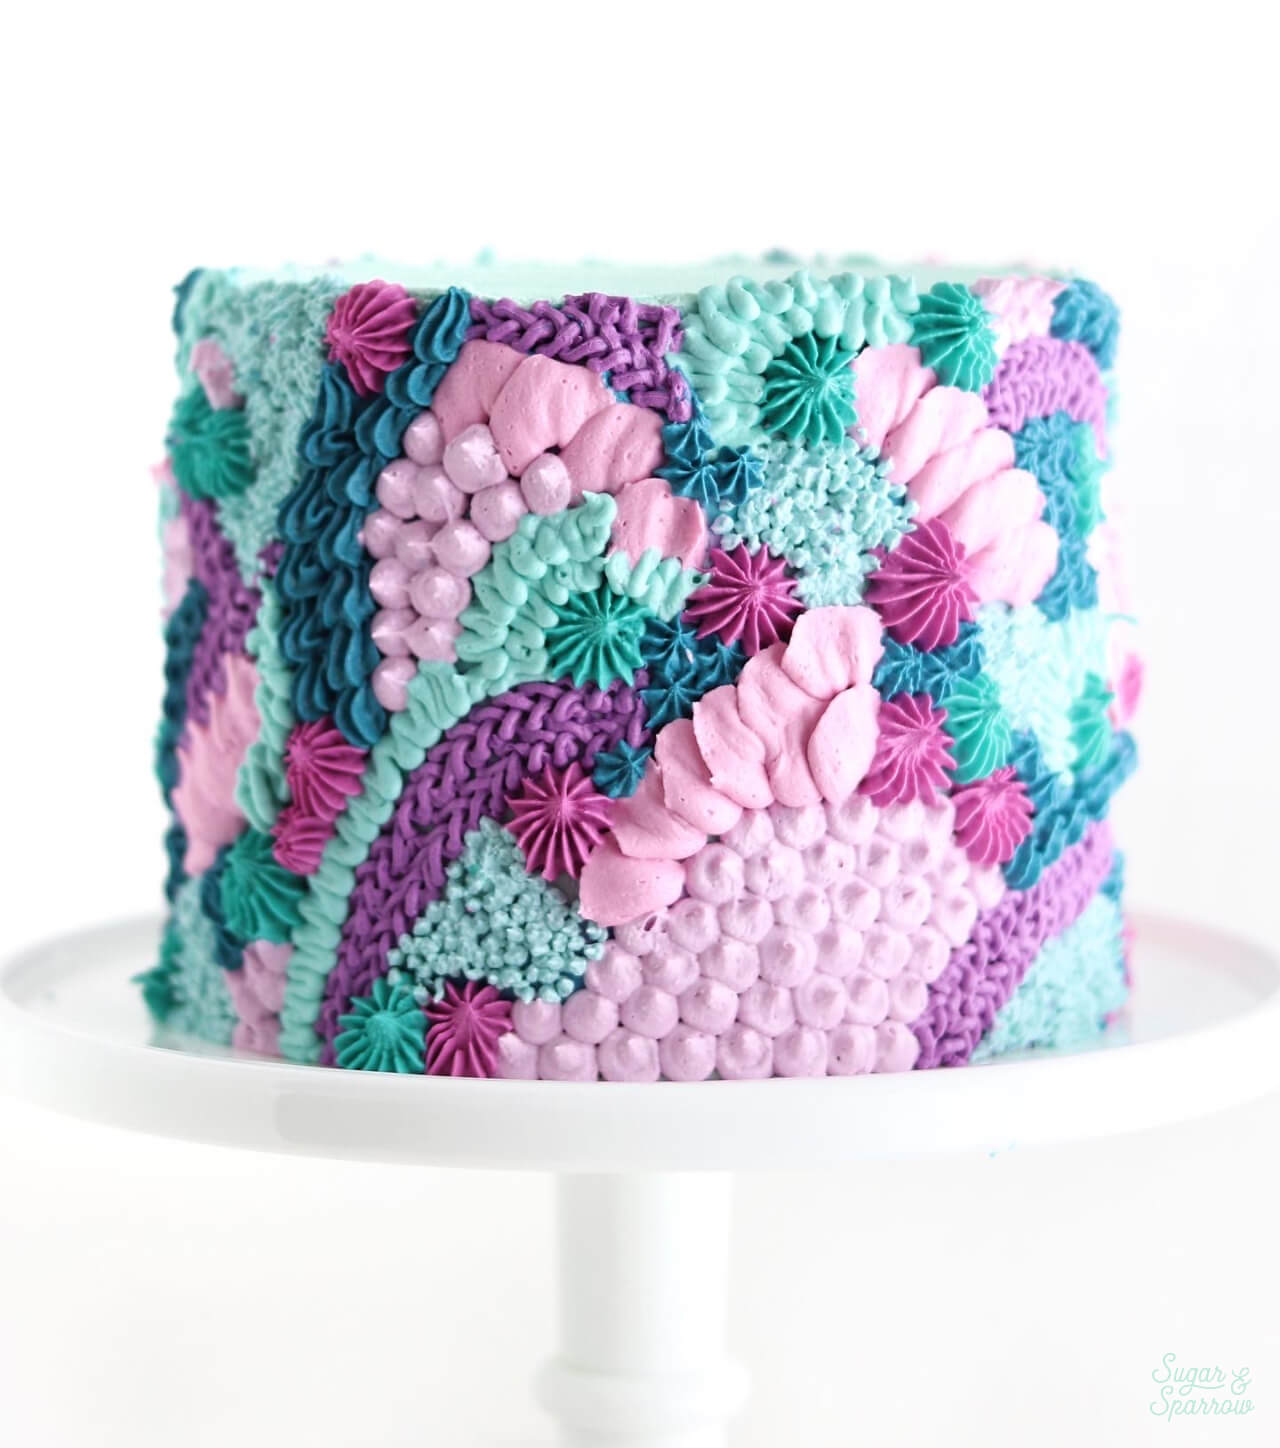
colorful buttercream cake by sugar and sparrow

I’m excited to share everything I know about coloring buttercream with you, especially because how I achieve buttercream colors has been one of my most frequently asked questions over the years. I’ve got all the info you need below, but first, here’s a video to walk you through all of the products I love and helpful tips for getting those colors spot on: 

Want to see more Cake Basics videos like this one? Head to my YouTube Channel to see the growing collection. You’ll also find tons of cake recipes and decorating videos there to inspire you and broaden your skill set – be sure to hit the subscribe button so you never miss a new one!

My Favorite Products:

Although I definitely started out with those liquidy primary food colors you can get in the baking aisle of any grocery store, over the years I’ve learned that using gel-based food colors make a world of difference. Here are the ones I have come to depend on and will be taking about throughout this post:

Americolor Soft Gel Paste Kits: these water-based gels are the best there is (in my opinion). They’re super concentrated, so you don’t need to use a whole lot to get rich colors. They also don’t affect the taste or consistency of your buttercream, and they come in pretty much every color you could imagine – you won’t ever have to worry about mixing custom colors. 
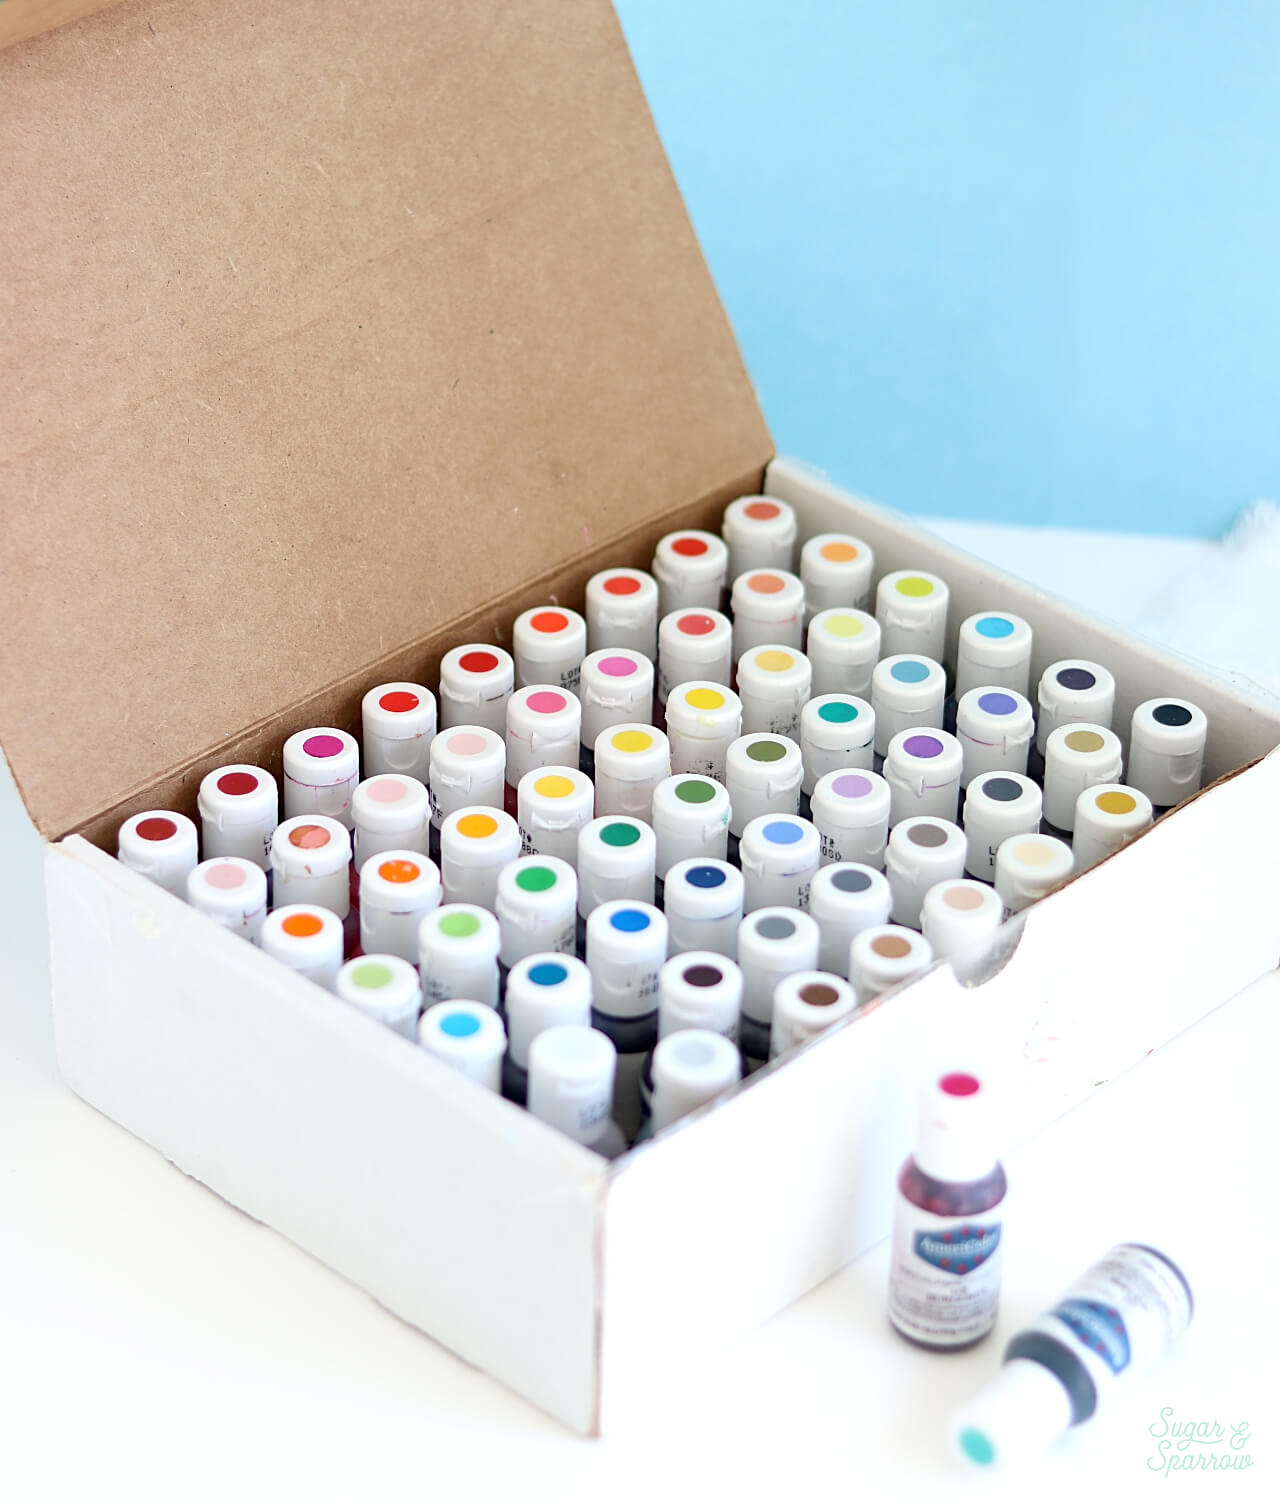
Americolor Heavenly Seventy Kit

If you’re serious about your buttercream color palettes, I highly recommend getting either the Nifty Fifty Kit or Heavenly Seventy Kit. Like the names suggest, the Nifty Fifty comes with 50 gel colors and the Heavenly Seventy comes with 70 gel colors. Of course, you can purchase any Americolor gel on its own (they come in a few different sized bottles), but it’s always ideal and inspiring to have an entire kit full of color gels on hand. 

Americolor Bright White: whether I want my buttercream to be extra white for frosting a cake or I need to whiten it before adding color (we’ll get to the importance of that below), my favorite icing whitener is hands-down Americolor Bright White. If you’ve ever struggled with buttercream that is too yellow for your liking, I recommend keeping a big bottle of this on hand. 
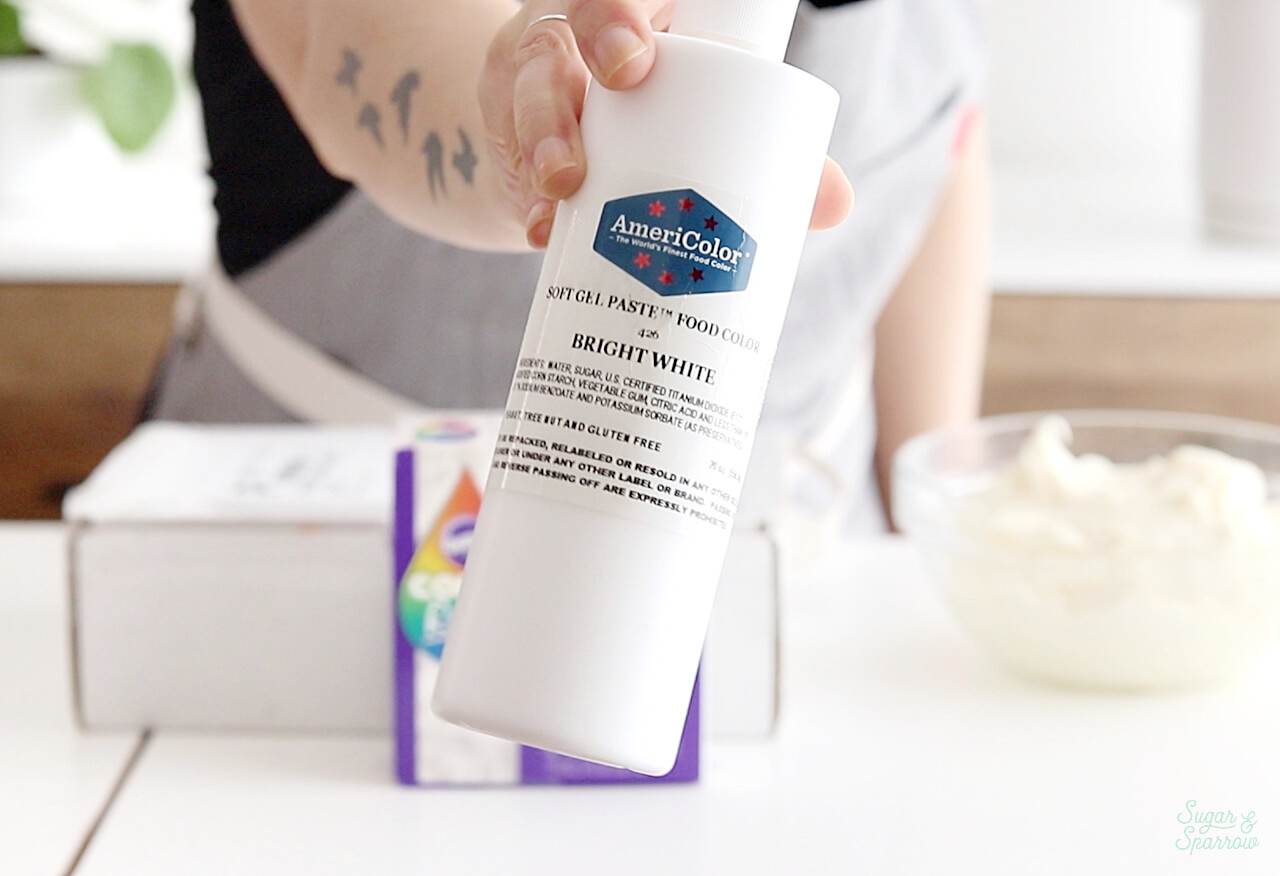
how to whiten icing with americolor bright white

Wilton Color Right Food Coloring System: If you’re not ready to invest in a big kit of Americolor gels and don’t want to keep buying colors one-by-one, the Wilton Color Right Food Coloring System is wonderful. It comes with eight water-based gels that you can mix with one another to create custom colors. Again, these are super concentrated and don’t affect the taste of your buttercream. The only thing I’ll mention with these is that you’ll need to know some basic color theory to achieve the colors you want (I’ll give you a mini lesson below!). 
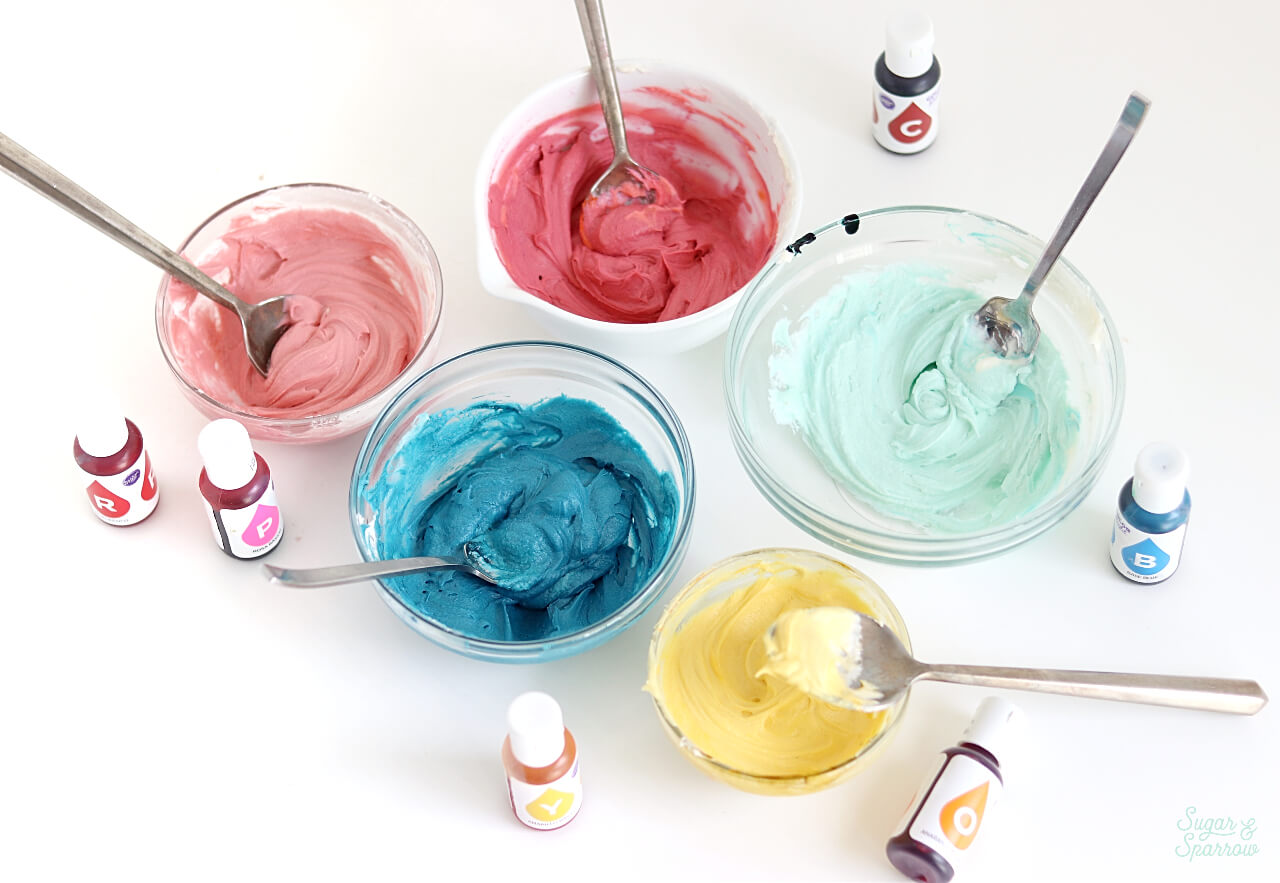
how to color buttercream

I do realize there are other brands and types of food coloring products out there, but the ones above are the ones I reach for on the daily and are responsible for all the color palettes I’ve been able to create. So with these in mind, read on for everything I know about creating colorful buttercream. 

My Best Tips for Getting the Colors You Want:

1. Consider Your Buttercream Type

First, let’s talk about the type of buttercream I’m using, because that makes a huge difference in the outcome of the color. I use this buttercream recipe for everything I do, which is an American buttercream. Of all the buttercream types, American buttercream is the easiest to color and achieve rich, dark hues with minimal product. 

american vanilla buttercream recipe

Other types of buttercream, such as Swiss Meringue or other meringue-based buttercreams, don’t take color as easily due to the high fat content not being as compatible with water-based gels. This may mean either the need to use more product, use different types of product (such as oil-based gels), wait longer for the color to develop and deepen, or use alternative methods of coloring the buttercream. I’ve never worked with any other type of buttercream before, so if Swiss Meringue (or another type) is your go-to, you may need to research the best methods and products to use for what you’re working with. 

2. Start with the Right Base Color 

Remember those elementary school lessons about colors? Yellow + blue = green and so on? Well along these same lines, when coloring buttercream it’s important to know that whatever color your buttercream is to start with (aka the base color) will mix with any color you add, which has a huge effect on the final color. To get the purest color palettes, you’ll want to start with a white buttercream, because white + any color = that same color (which intensifies as you add more color).

vanilla buttercream recipe for cakes

My go-to vanilla buttercream recipe is pretty pale in tone to begin with and easy to mix with colors, but if you’re starting with a more yellow-toned buttercream, that yellow color will mix with whatever color you add to it. To combat this, you’ll need a good icing whitener like the Americolor Bright White mentioned above. I add a teaspoon or two to each batch of my buttercream at the very end of the recipe, make sure it’s mixed in well, and just look at the difference it makes: 
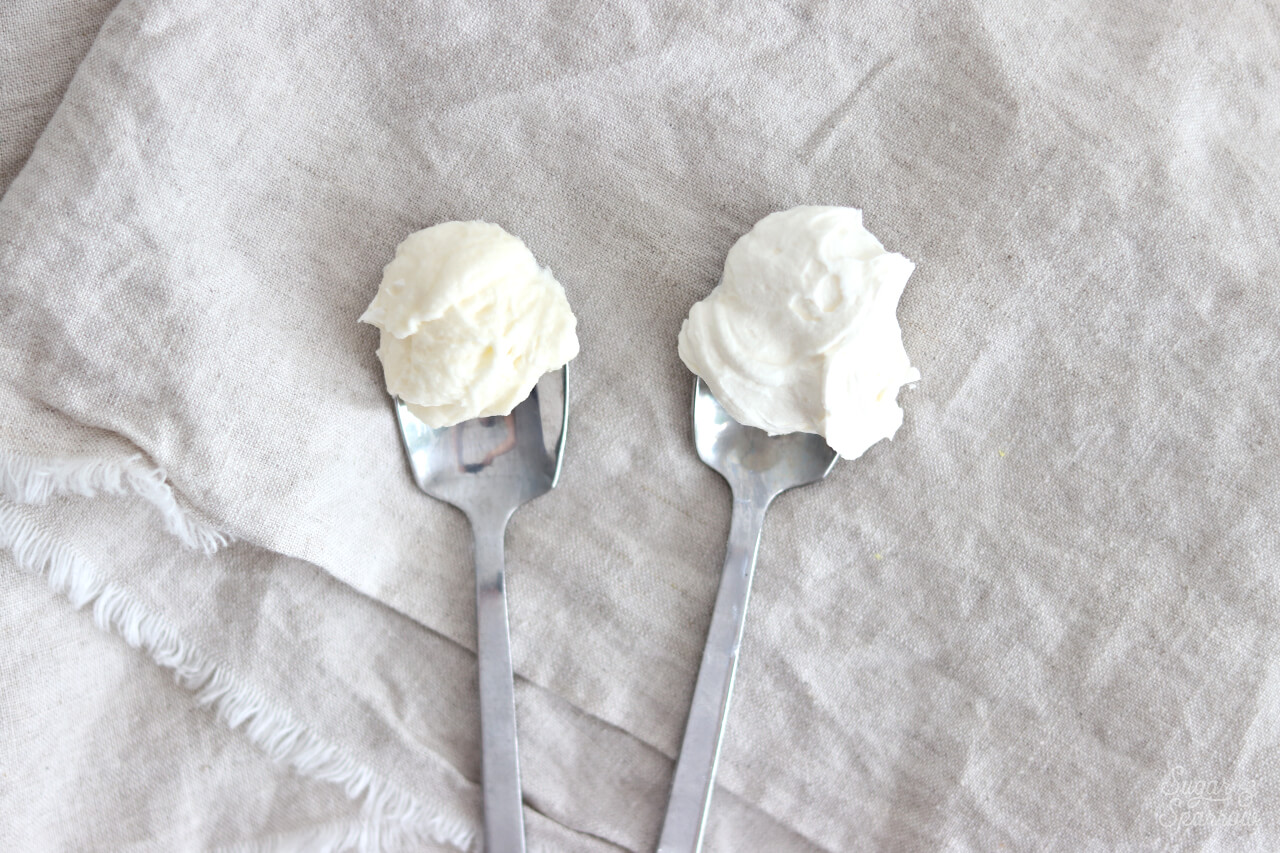
how to whiten buttercream frosting with Americolor Bright White

It’s totally fine to start with yellowish buttercream if the end result of your coloring session will be in the yellow-toned family (yellow, orange, lime green, etc), but just keep in mind that the base color will affect the end result. Other than that, the only time I recommend not starting with white buttercream is if you need to achieve the colors black, deep burgundy, or dark brown. In those cases, always start with chocolate buttercream because it’s much easier to go from brown to black (and so on) than it is to go from white to black. 

3. Start Small

It takes practice to know how much buttercream you’ll need for different scenarios – what amount is ideal for filling and frosting a cake? Or for the final frosting layer on top of a crumb coated cake? Or for just a few buttercream flowers? Because those amounts vary so greatly, it’s almost impossible to come up with a “recipe” (or how many drops to use) for different color intensities.

how to color icing for cake

I will say that the smaller the amount of buttercream you start with, the smaller the amount of color gel you’ll need to use to get a rich color. That being said, if you’re going for a pastel color and starting with a small amount, it’s also easy to add too much color gel and go overboard. Once you have the amount of buttercream measured out, the best way to approach coloring buttercream is start with a small amount of gel to see what color you end up with and go from there. 

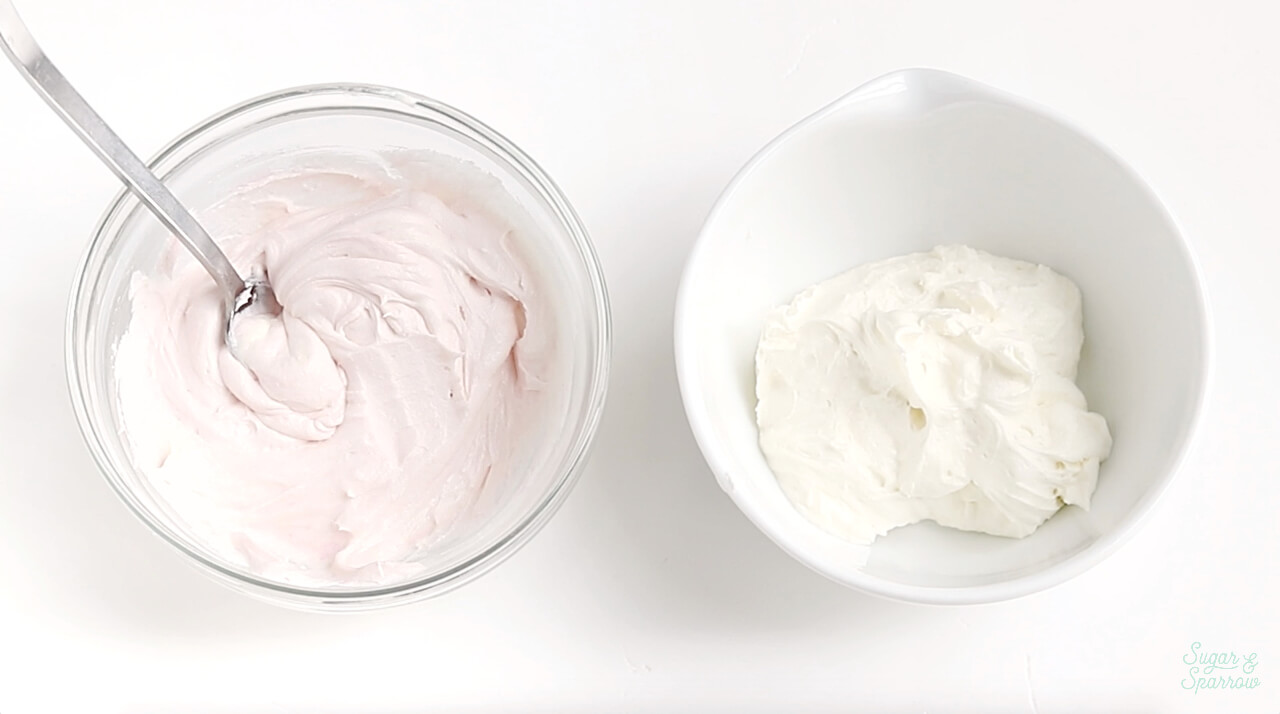
To demonstrate, I’ve got two bowls here with about ½ Cup of buttercream each. I’ll start by adding about half a drop of Fuchsia color gel to the bowl on the right and mixing it all together. 
how to make pastel buttercream frosting

After mixing it all together, I can see we end up with a super slight pink color and can feel more comfortable adding one more drop to achieve a Fuchsia pastel.

how to make pink buttercream frosting

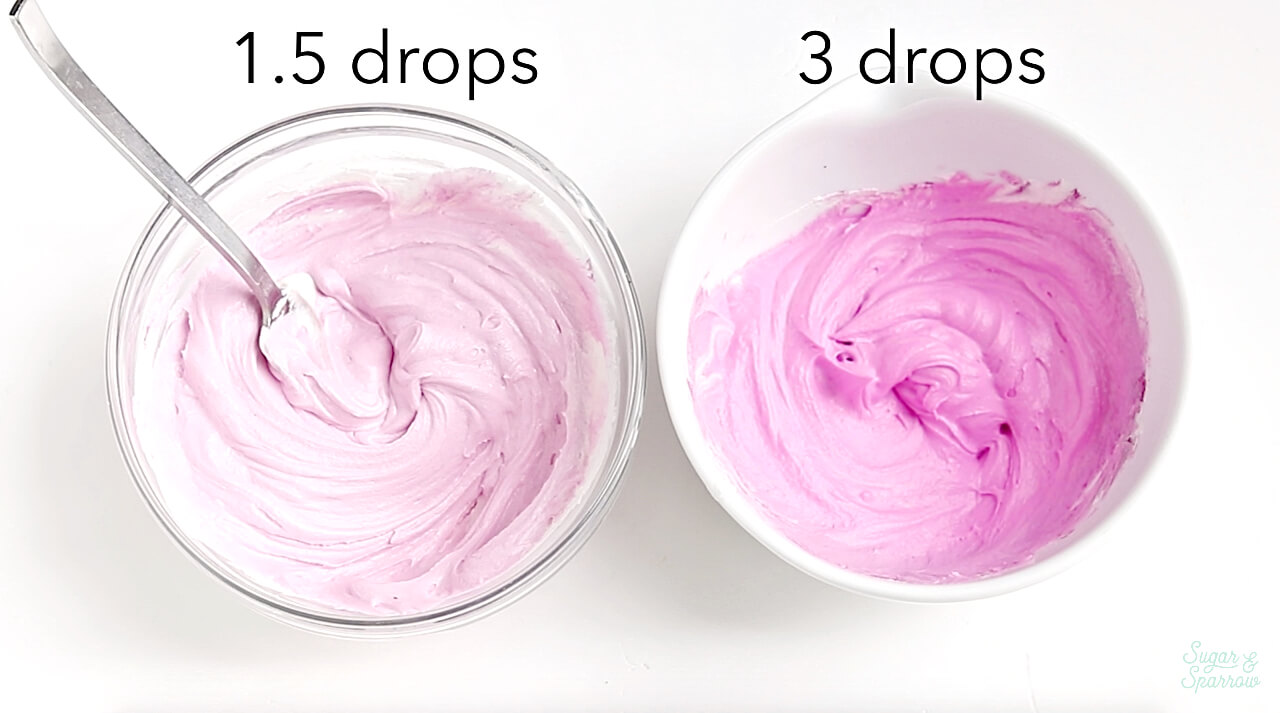
Now I’ll double the amount (so, three drops) to the bowl on the left to show you how quickly this color can intensify. 
how to color buttercream pink

The more buttercream you have, the more drops you’ll need to use to intensify or darken the color. Because of this, you’ll just need to practice and be sure to always start with a tiny bit of gel unless you want a super dark color to begin with. 

4. Allow Time for Colors to Deepen

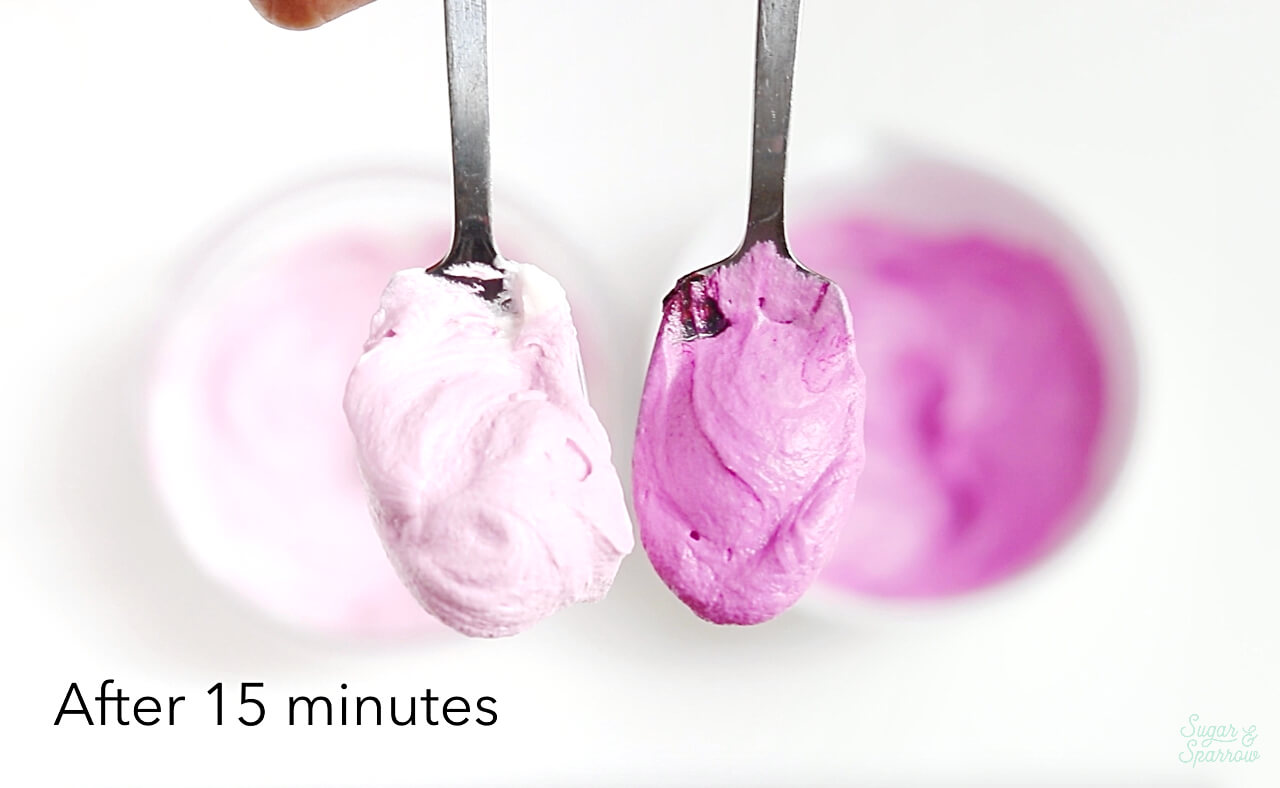
Not only does the color get richer and richer the more color gel you add, it’s also important to know that these colors will actually darken a little more over time. Again, this is going to take some practice and patience, but just look at how these Fuchsia colors from the above example have darkened after 15 minutes:
how to tint buttercream frosting

And then after 30 minutes: 

buttercream colors darken over time

So whether you’re going for a dark color or not, be sure to factor in that the color will most likely get a little bit darker over time. 

5. Study Up on Color Theory

Especially if you’re mixing custom colors, knowing a thing or two about color theory will make you so much more confident. Here’s a great article that covers the basics, like what happens when you mix certain colors together and how to make a color warmer or cooler. The Wilton Color Right Food Coloring System that I mentioned in my “favorite products” section above comes with eight different color gels that you can mix together to create certain shades. It even comes with a handy little guide on how to make certain colors, but I still think it’s really important to know color theory, because sometimes the color you mix up is just a little off and knowing color theory will help you learn how to fix it. 

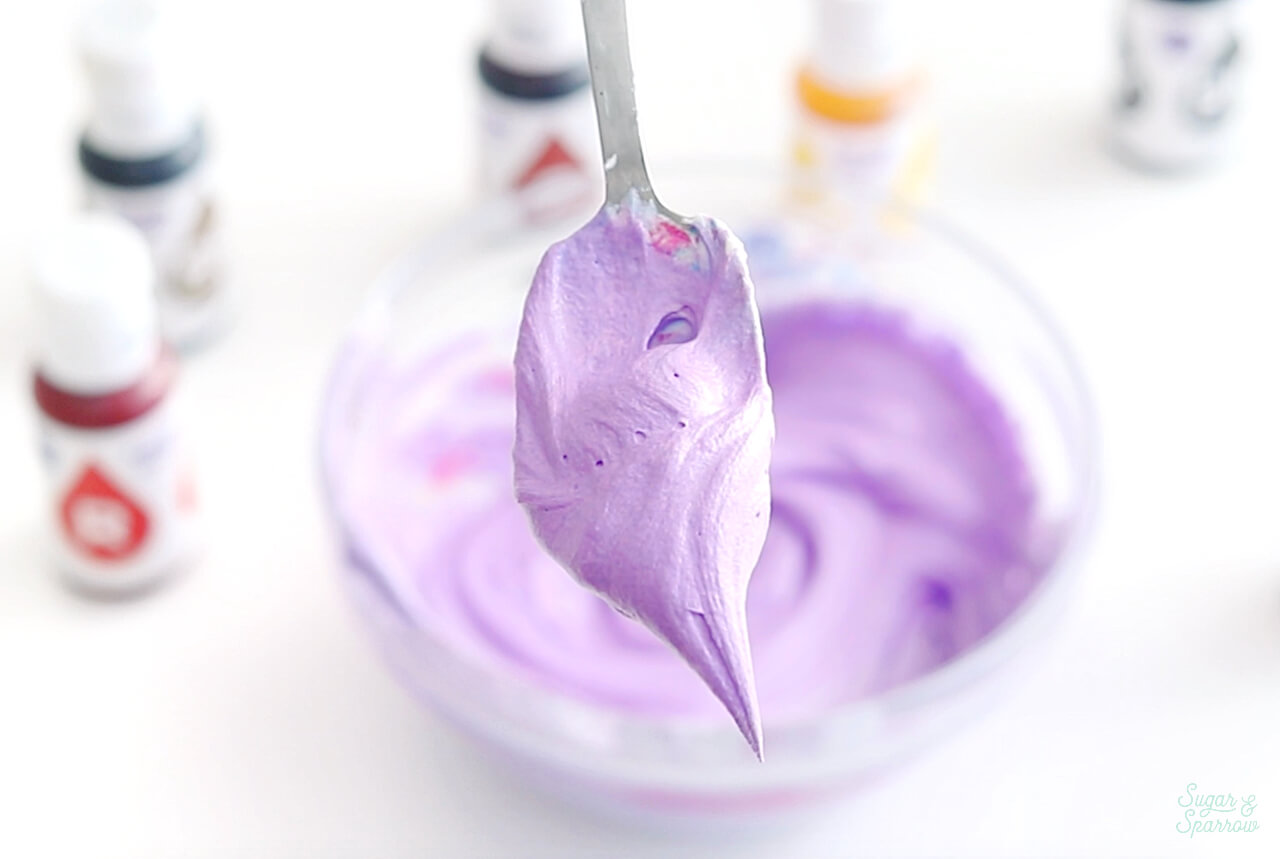
To demonstrate, I’ll show you how I would create a few different variations of purple buttercream starting with one drop of pink and one drop of blue. Notice that we end up with a cool-toned purple pastel color: 

how to make purple frosting

The more blue you add to this color, the cooler it will be and the more pink you add, the warmer it will be. I want a warmer toned purple, so I’m going to add another drop of pink. See how the tone of the color changes? 

how to use wilton color right food coloring system

Now that I have a sort of “recipe” for this color, I can darken it by adding another round – one drop of blue and two drops of pink. I’ll keep doing this, adjusting the tone as necessary, until I end up with the color I’m going for – all the while knowing that time will intensify the color. 
wilton icing colors

If you’re ever stumped on how to mix a certain color, you can always Google how to make it as well. There are a lot of painting and art websites that will note the different colors that make up a turquoise blue or a forest green, so if you just Google things like “how to mix (name of color)” the results may be art-related but so helpful! 

6. Learn How to Lighten Colors 

Just in case you made a color and realized that after time it’s too dark or not right in some other way, having a little extra white buttercream or Americolor Bright White around is a life saver. Mixing in a little bit of white buttercream or icing whitener will help lighten the color so you can achieve the shade you were wanting to begin with instead of having to start from scratch. 

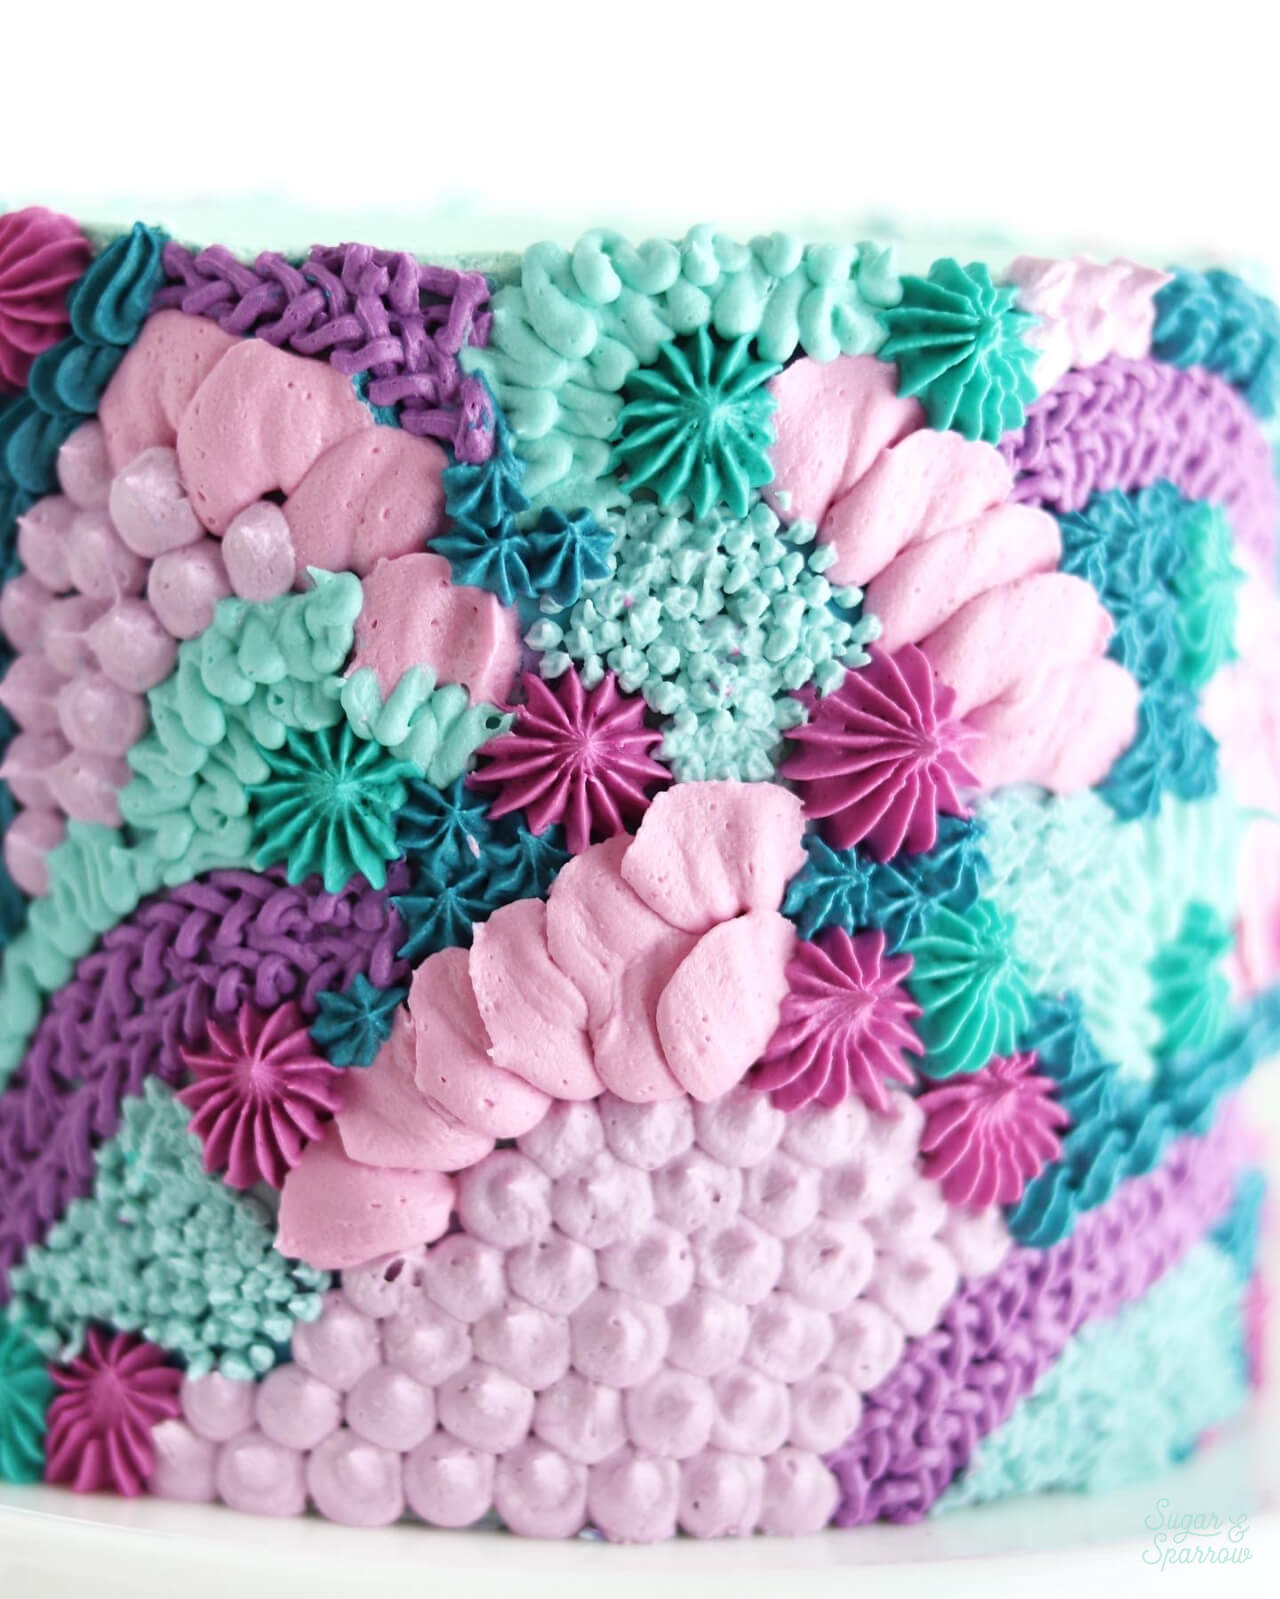
I hope all of this is helpful for your buttercream color palettes! It really does open up a whole new world of creativity when you have a great buttercream recipe, the right products, and know how to use them. So excited for you to explore some new possibilities with colors! 
how to mix buttercream colors

Want more Cake Basics? Head here to see all of the posts and learn the methods of caking I’ve come to love over the years. I’m cheering you on every step of the way!

By: Whitney · In: Cake Basics, Featured, Tutorials · Tagged: americolor, americolor bright white, americolor fuchsia, americolor gels, buttercream, color palette, coloring buttercream, coloring frosting, coloring icing, frosting, how to color icing, icing, icing colors, nifty fifty kit, white frosting, wilton, wilton color right food coloring system

you’ll also love

pumpkin layer cake recipe by sugar and sparrowPerfect Pumpkin Layer Cake Recipe
strawberry buttercream frosting recipeFresh Strawberry Buttercream Recipe
how much frosting do I need for cakeHow Much Buttercream Do I Need? Helpful Chart Included!

Join the List

Stay up to date & receive the latest posts in your inbox.

Reader Interactions

Comments

  1. Elizabeth says

    June 12, 2024 at 12:51 pm

    I recently made your vanilla cake with vanilla buttercream and I had to use A LOT of americolor to get the buttercream remotely close to white. And I’m not sure if that’s why, but my buttercream developed air bubbles. My butter was on the yellower side so definitely was starting from a more yellow base than how your un-colored vanilla buttercream looks. Do you have a go-to butter that will produce a lighter buttercream color? And could the heavy amount of americolor white have controbuted to the air bubbles or just overmixing?

    Reply
    • Whitney says

      June 16, 2024 at 2:52 pm

      Hi Elizabeth! Did you whip the butter on high speed for the full 7 minutes before adding the powdered sugar? That is the first secret to getting whiter buttercream. The whipping process should significantly lighten the color to almost white. The butter brand I use is any generic unsalted butter (Costco, Kroger, etc). As for the air bubbles, it’s most likely from overmixing or mixing on too high of a speed after the powdered sugar step. Everything from that point on should be the lowest speed. To fix it, you can let your buttercream rest in an airtight container for about 30 minutes or more, then re-mix it on low speed in your stand mixer. Hope that helps!

      Reply
      • Elizabeth says

        June 20, 2024 at 2:19 pm

        I did whip the butter for the full 7 minutes, maybe longer? Could longer have been a problem? The butter I used was pasture raised organic stuff so definitely on the yellower side. Regarding air bubbles: I incorporated sugar on low. I have a kitchenaid stand mixer, by low do you mean “stir” (I.e. level 1) or level 2? I just tried your bubble removal method for another batch I had air bubbles with too but it didn’t work. I will try again when I bring the buttercream back to room temp when I frost in a couple days. It’s still very tasty though 🙂 might just have to cover the cake in sprinkles if I can’t get it smooth

        Reply
        • Whitney says

          June 20, 2024 at 2:28 pm

          Hi Elizabeth! Yes, by low I do mean the “stir” setting. It shouldn’t be a problem to whip the butter for longer than 7 minutes, although that might be incorporating more air into your buttercream from the get go. The color must be a matter of the butter you’re using, that’s the only variable that is different than what I use.

          I left a response on your other comment regarding the air bubbles but will leave it here too: If you’re still finding air bubbles in your frosting after letting it rest and remixing it on low (stir), it might need more milk added to thin out the consistency. Try adding room temperature whole milk, 1 tsp at a time, while the buttercream mixes on low/stir. That should get rid of any remaining air bubbles and leave you with a smooth buttercream frosting.

          Reply
  2. Susan R. says

    March 5, 2024 at 4:48 pm

    Hi,
    Great tutorial and thank you for the information provided .
    Can you please tell me the ratio for a Robins Egg Blue/Tiffany Blue? I have read simply to mix blue and green but also to try blue, red and yellow.
    I was never very good at color theory!
    Thank you for your time and I just love the image of the purple and blue/green icing cake!

    Reply
    • Whitney says

      March 8, 2024 at 8:55 pm

      Hi Susan! I would use equal parts blue + teal and then add a little bit of brown or grey to mute. This paint mixing video seems really helpful for those colors: https://www.youtube.com/watch?v=HDiJplbnZ88

      Reply
  3. Melissa says

    April 22, 2023 at 4:05 am

    I have an odd question – I made 100 cookies for a friend yesterday for her child’s birthday. Half were buttercream and half were royal icing. 3 colors were used, all straight from the gel color containers, none mixed to make other colors. The colors were pink, teal, and lavender. They looked great annd tasted even better! And then we set them outside for the party… We noticed after a few minutes that the lavender buttercream ones had turned baby blue once they were set outside. The lavender royal icing stayed lavender. None of the other colors did this. Any ideas why?

    Reply
    • Whitney says

      April 22, 2023 at 8:00 pm

      Hi Melissa! I’ve never had that happen before but I did find this thread online that it might have to do with direct sunlight and/or the brand of color gel. Take a look and see if anything jumps out! https://www.cakecentral.com/forum/t/603447/lavendar-butter-cream-keeps-turning-blue-help

      Reply
  4. Amy says

    December 22, 2022 at 10:25 am

    Hey! If I’m going to make my vanilla buttercream a few days ahead, is it better to colour it before refrigerating or after thawing? Thanks!

    Reply
    • Whitney says

      December 23, 2022 at 9:34 am

      Hi Amy! It doesn’t matter a whole lot, but I will say that if you color it before refrigerating the color will deepen to its true color in the refrigerator, vs. if you color it after thawing it will take about 30 min or so to reach it’s true color. Hope that helps!

      Reply
  5. Emily says

    July 17, 2022 at 7:30 pm

    Amateur here! I used the bright white as above to help lighten my icing prior to color. The white never really mixed in, it looked grainy but wasn’t. I wish I could post a pic! It’s such a weird explanation. Any tips or suggestions to what went wrong??

    Reply
    • Whitney says

      July 25, 2022 at 12:26 pm

      Hi Emily! What kind of frosting were you using with the icing whitener? I use American Buttercream for everything I do, which tends to take color easily, but some frostings don’t take color as easily and end up looking freckled. Let me know and I can see how to help troubleshoot for next time!

      Reply
  6. Clare says

    May 20, 2022 at 6:23 am

    Thank you for the tips. How long would you say it takes for the colour to stop deepening so I know that I have the correct and final colour please?

    Reply
    • Whitney says

      May 22, 2022 at 8:35 pm

      Hi Clare! It depends on the color you’re making. If it’s a pastel color, it should only take a few minutes. If it’s a more saturated color (like red or forest green) it could take up to 30 minutes. If it’s a super dark color like black it can take up to 24 hours. Hope that helps!

      Reply
  7. Maddie says

    May 16, 2022 at 11:01 am

    Hi!

    I add my gel food coloring after the buttercream is done and notice that as I mix in the color, the frosting starts getting way too soft (especially if I need to add a few more rounds of coloring). Is there a way to fix the problem (i.e throw it back in the fridge to firm up) or should I add my coloring earlier on in the process?

    Reply
    • Whitney says

      May 16, 2022 at 9:46 pm

      Hi Maddie! If the buttercream starts getting soft as you add coloring, you can thicken it back up by adding more powdered sugar or cornstarch (1-2 Tablespoons at a time) until the desired consistency is reached. Hope that helps!

      Reply
  8. Kelly says

    March 19, 2022 at 4:15 pm

    If im trying to make the Vanilla buttercream Frosting and im trying to use a black gel color or if I add the Cocoa Powder to get a Midnight black powder will it come out black??

    Reply
    • Whitney says

      March 22, 2022 at 7:07 pm

      Hi Kelly! I recommend following this method: https://sugarandsparrow.com/black-buttercream-recipe/. Hope that helps!

      Reply
  9. Amanda says

    March 6, 2022 at 7:38 am

    First of all, I Found your blog last weekend and quickly became obsessed! Such great insight and talent living in these pages.

    I plan on making my cake and buttercream a week ahead of time. Should I color the buttercream first then store in an airtight container in the fridge… or should I color it once I take it out to get back to room temp, when I start to assemble things? Thanks!

    Reply
    • Whitney says

      March 6, 2022 at 3:02 pm

      Hi Amanda! I’m so happy my blog has been helpful 🙂 You could go either way, but coloring the buttercream beforehand will give it time to reach it’s true color intensity since it gets darker over time, so that way when you go to assemble it the color palette will be at its darkest already. Hope that helps!

      Reply
  10. Liz Ramos says

    March 15, 2021 at 10:45 am

    Hello, I love how detailed you are. THANK YOU. Could you please tell me what you used to achieve those 3 different pinks in the first picture under #3. I am looking to mix up some colors to get sort of BLUSH color buttercream?

    Any hints would be great.

    Thank you

    Reply
    • Whitney says

      March 15, 2021 at 8:33 pm

      So happy to help, Liz! For those pink colors in that photo I used Americolor Dusty Rose + Peach. I don’t have an exact “recipe” per se (I never do!) but just start with equal amounts of each of those colors and add more as needed to make the color darker. Hope that helps!

      Reply
  11. Ashley says

    March 4, 2021 at 8:48 am

    These videos and tutorials are wonderful. You are very talented, not just at decorating but instructing as well! Question- let’s say I have liquid food coloring. Is it best to stick with gel? If I use liquid will it impact the consistency in any way or do I need to make any adjustments for that?

    Reply
    • Whitney says

      March 5, 2021 at 10:34 am

      Thanks so much, Ashley! Liquid food coloring is fine to use in small amounts, but it will start to affect the consistency of your buttercream if you use a lot. I do recommend gel based colors because they don’t affect the consistency or taste of the buttercream.

      Reply
  12. Srimathi says

    January 21, 2021 at 7:58 pm

    Hi Whitney! Loved your entire Cake Basics series. 🙂 I’ve learnt so much!! So I was wondering if there is a recommended duration of sorts, to wait for color development with American Buttercream. Also, as a general rule of thumb is it always better to color lighter than the shade we have in mind so as to allow for the development? And if at all the shade is still lighter than what was intended, what would a good timeframe to add more color?

    Reply
    • Whitney says

      January 22, 2021 at 10:52 am

      So happy to hear that the Cake Basics series has been helpful Srimathi! Yes – it’s a good rule of thumb to color a little bit lighter than the color you’re going for if you’re needing an exact shade. It usually takes about 20-30 minutes for the color to fully develop. If the shade is too light within that time frame, it’s a good idea to add more. Hope that helps!

      Reply
  13. Amy says

    December 30, 2020 at 11:53 am

    I love your blog! So pretty to look at and so helpful for a novice baker! Found you on YouTube and quickly checked out your blog! Thanks for the great tips! I’m making my granddaughter’s birthday this weekend and plan on using some of your awesome techniques!

    Reply
    • Whitney says

      December 31, 2020 at 9:21 am

      Yay, Amy! So happy to hear that my blog has been helpful and thank you for taking the time to let me know 🙂 happy birthday to your granddaughter! Cheering you on in your cake making!

      Reply
  14. Hailey says

    November 21, 2020 at 10:37 am

    Hi Whitney, I used sky blue Americolor gel paste on my Swiss meringue buttercream, the color turned out to be a dull blue color. I just did what my baking teacher was doing, but hers turned out to be beautiful color and mine went dull. Do you have any clue? She used egg white liquid and I used fresh egg white. Was that the problem? Thank you!

    Reply
    • Whitney says

      November 23, 2020 at 9:35 am

      Hi Hailey! As specified in this post, I work primarily with American buttercream because it’s so easy to color. I’ve actually never worked with swiss meringue buttercream before but I hear that the method for achieving bold colors with it requires a totally different method. I would either ask your baking teacher what she did differently (maybe try the egg white liquid if that’s the only difference?) and also research proper methods for coloring swiss meringue buttercream. Hope that helps!

      Reply
  15. Vickie says

    September 11, 2020 at 9:52 am

    I never thought to color chocolate buttercream before! *Mind blown* Thank you for another great tutorial, I have LOVED your cake basics series!

    Reply
    • Whitney says

      September 11, 2020 at 4:41 pm

      Yay, Vickie! Haha I felt the same way when I learned that hack! So happy to hear you’re loving these Cake Basics!

      Reply
  16. Adriana says

    September 10, 2020 at 9:37 am

    Another great video and post! Thank you! I can’t wait to try a black cake. 🙂

    Reply
    • Whitney says

      September 10, 2020 at 6:08 pm

      Yay, Adriana! So happy this post was helpful and can’t wait for you to try black buttercream!

      Reply

Leave a Reply Cancel reply

Your email address will not be published. Required fields are marked *

Recipe Rating


Next Post >

Our Sweet Baby Boy is Here!

Primary Sidebar

Welcome to Sugar & Sparrow

Welcome to Sugar & Sparrow

Helping you whip up pretty desserts with confidence and creativity. And hopefully sharing a few laughs with you along the way!

Learn More

Connect

let’s bake!

Get my very best recipes, baking tips, and decorating tutorials sent to your inbox

Featured Posts

lemon layer cake with lemon buttercream by sugar and sparrow

My Favorite Lemon Layer Cake

pumpkin spice syrup recipe

Homemade Pumpkin Spice Syrup

Christmas Sweater Sheet Cake Tutorial

Search

Archives

Follow Along

@sugarandsparrowco

WHIPPED MASCARPONE FROSTING ✨silky smooth, delicio WHIPPED MASCARPONE FROSTING ✨silky smooth, deliciously light, and the perfect consistency for cake decorating (including filling layer cakes + piping)! Imagine a whipped cream frosting with notes of rich mascarpone cheese and that’s what this frosting tastes like. It’s a DREAM on my orange poppyseed cake and I can’t stop thinking of other Spring/Summer cake flavors I want to try it with! 

Full recipe with cake pairing suggestions at https://sugarandsparrow.com/whipped-mascarpone-frosting/ 

INGREDIENTS:
1 Cup (8oz, 227g) mascarpone cheese, cold
2 tsp pure vanilla extract
1/8 tsp salt
1 Cup (240ml) heavy whipping cream, cold
2 Cups (240g) powdered sugar

INSTRUCTIONS:
1. With the whisk attachment on a stand mixer (or hand mixer with a large bowl), beat the mascarpone, vanilla, and salt together at medium speed until creamy, 1-2 min
2. Turn the mixer to low and add the heavy whipping cream slowly, then turn the mixer to medium speed and beat until soft peaks form, which could take less than 1 min (keep an eye on it!). You should be able to dip a spatula into the mixture and see a peak that slightly droops when held upright. 
3. Add the powdered sugar all at once and mix on low speed until incorporated, then turn the mixer to medium speed and whip for about 30 seconds longer, until the frosting is thick and silky. Use right away or refrigerate for up to 4 days.

#mascarpone #mascarponecream #whippedcreamfrosting #whippedcreamcake #cakedecorating
BERRY CHANTILLY CAKE 🍓🫐fully inspired by the iconi BERRY CHANTILLY CAKE 🍓🫐fully inspired by the iconic Whole Foods Chantilly cake (iykyk 🙌🏼) and every bit as delicious! My homemade version is layers of extra soft and fluffy vanilla cake, berry jam, Chantilly cream frosting with rich notes of mascarpone and a hint of almond, and fresh berries throughout. It’s the idealideal berries and cream cake and ALWAYS a hit!! 
⁣
Full recipe is linked in my bio (or at https://sugarandsparrow.com/berry-chantilly-cake-recipe/)

PS: I also have a sheet cake version of this recipe! Google “sugar and sparrow berry Chantilly sheet cake” to find it! 

#chantillycake #whippedcreamcake #berrycake #cakedecorating #vanillacake
STRAWBERRY SHORTCAKE SHEET CAKE 🍓aka classic straw STRAWBERRY SHORTCAKE SHEET CAKE 🍓aka classic strawberry shortcake toppings on a fluffy vanilla sheet cake and ideal for a crowd! It’s my favorite bakery-style white cake that’s so soft and moist, topped with silky whipped cream cheese frosting and thick homemade strawberry sauce. So easy to throw together with simple ingredients + a total showstopper ✨

Grab the recipe link in my bio or find it at https://sugarandsparrow.com/strawberry-shortcake-sheet-cake/ 

#strawberrycake #strawberryshortcake #sheetcake #whippedcreamfrosting #cakedecorating
ORANGE POPPYSEED CAKE 🍊this cake is unbelievably d ORANGE POPPYSEED CAKE 🍊this cake is unbelievably delicious with whipped mascarpone frosting!! The cake layers are soft and moist, packed with fresh citrus flavor, and has the satisfying crunch of poppy seeds in every bite. The mascarpone frosting keeps it light and refreshing and I love that it comes together in just about 5 minutes with minimal effort. A fancy cake that’s secretly simple!

Grab the recipe link in my bio or find it at https://sugarandsparrow.com/orange-poppyseed-cake-with-mascarpone-frosting/

#poppyseedcake #layercake #mascarpone #whippedcreamfrosting #cakedecorating
VANILLA SHEET CAKE (recipe below) 🥳 this cake is p VANILLA SHEET CAKE (recipe below) 🥳 this cake is packed with vanilla flavor, SO soft and fluffy, fun to decorate, and ideal for feeding a crowd. It makes me so nostalgic for my childhood birthday cakes!! 
 
Full recipe (w/ frosting!) at https://sugarandsparrow.com/vanilla-sheet-cake-recipe/
 
INGREDIENTS: 
2 1/2 Cups (265g) sifted cake flour
2 tsp baking powder 
1/2 tsp baking soda 
1 tsp salt 
3/4 Cup (170g) unsalted butter, room temp 
1 3/4 Cup (340g) granulated sugar 
3 large eggs, room temp 
1/2 Cup (120g) sour cream, room temp
1 Tbsp pure vanilla extract 
1 Cup (240ml) whole milk, room temp
 
INSTRUCTIONS: 
1. Preheat the oven to 325°F. Grease and line a 9×13 baking dish. 
2. Add the sifted cake flour, baking powder, baking soda, and salt into a medium bowl and whisk to combine. Set aside. 
3. In the bowl of your stand mixer fitted with the paddle attachment (or with a hand mixer and large bowl), beat the butter on high speed for two minutes until creamy. Add the sugar and continue to beat on high speed until light and fluffy, about 2 minutes. Scrape down the bowl and paddle as needed. Add the eggs one at a time, mixing for about 10-15 seconds after each addition. Add the vanilla and sour cream and mix for one minute on high speed. 
4. Turn the mixer off and add the dry ingredients all at once. Mix on low speed until just combined, then add the milk in a steady stream and mix until just incorporated. 
5. Pour the batter into the prepared baking dish and bake for 30-35 minutes, or until the cake springs back to the touch and a toothpick inserted into the middle comes out clean. Let the cake cool in the baking dish until room temperature, then frost with vanilla buttercream. 
 
#vanillacake #sheetcake #birthdaycake #vanilla #cakedecorating

Footer

On the Blog

  • Cake Basics
  • Recipes
  • Tutorials

Info

  • About
  • Privacy Policy & Disclosure

stay in the know

Copyright © 2026 · Theme by Sugar & Sparrow