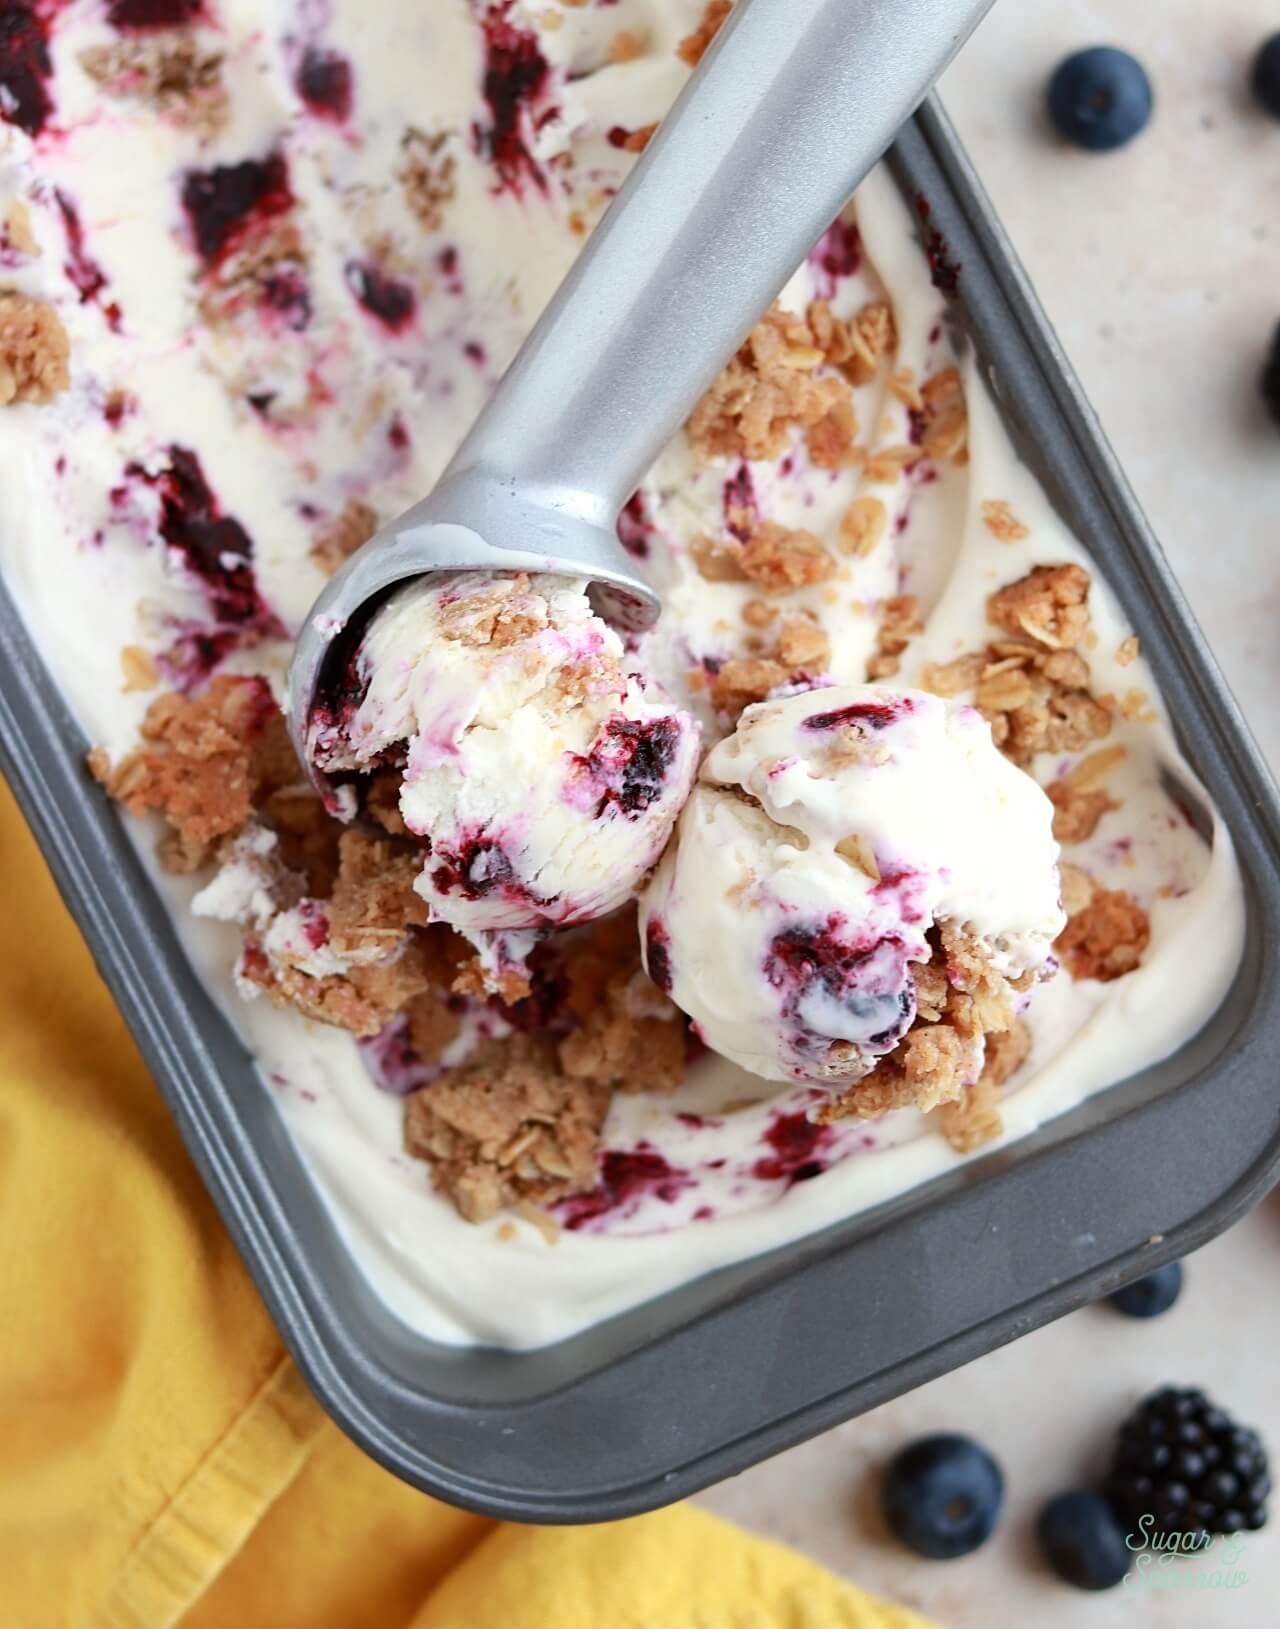
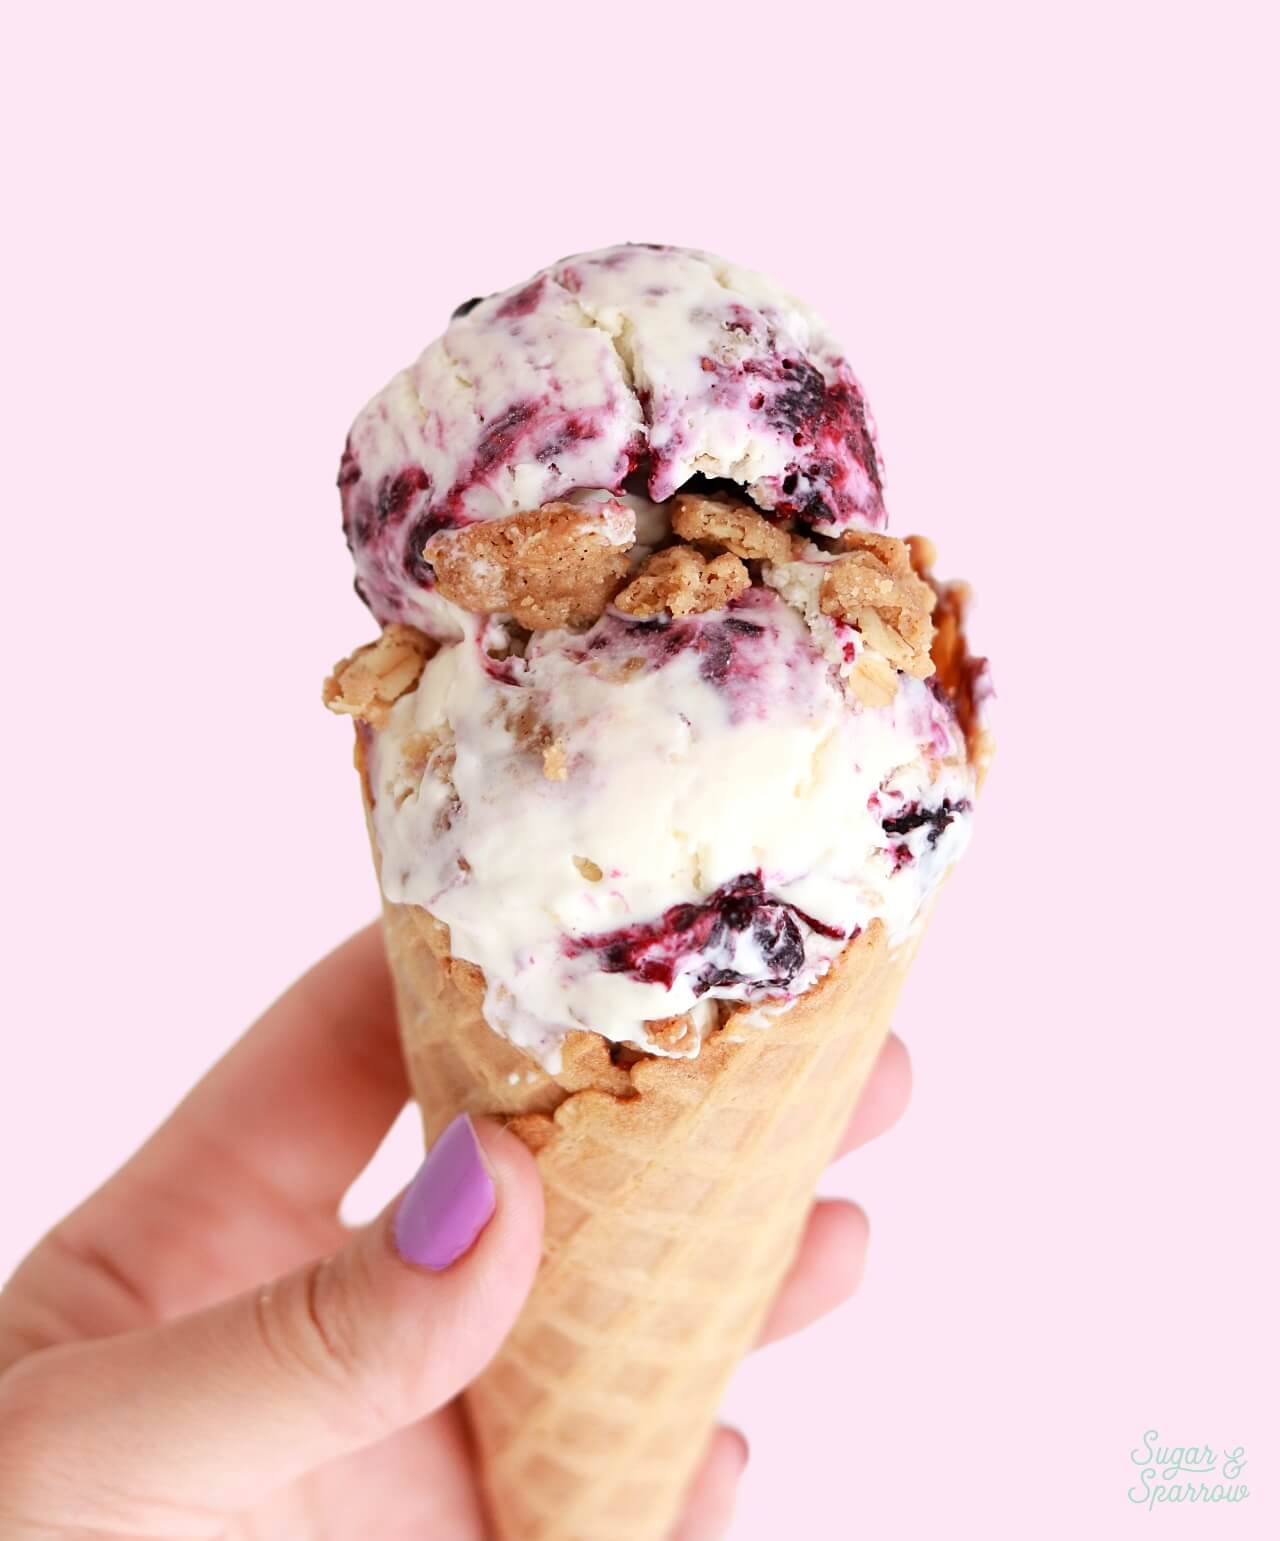
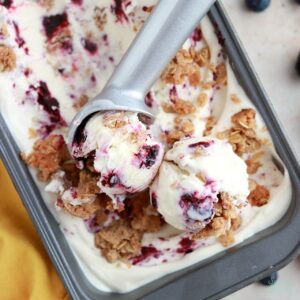
Inspired by my love for berry crisp a la mode, this berry crisp ice cream is smooth no-churn vanilla ice cream with ribbons of berry filling and buttery oat streusel clusters! There’s no fancy equipment necessary – using the no-churn method, you simply whip up a 3-ingredient vanilla ice cream base, layer it in a loaf pan with the toppings, and let it set into the perfect ice cream consistency in the freezer. Whether you serve it in a bowl or a cone, this is the perfect summer treat and every bite tastes like the perfect ratio of berry crisp and ice cream.
One Reader, Chelsea, says: “This was absolutely perfect. The consistency was creamy and just the right firmness, the bit of tart from the berries, the crunch from the oatmeal…. everyone in my family raved AND it was so easy.” ★★★★★
3-Ingredient No-Churn Vanilla Ice Cream
All you need for this vanilla ice cream base are three ingredients and a hand mixer or stand mixer:
- Heavy Whipping Cream. Also known as double cream, this makes the ice cream rich and creamy while creating tons of volume.
- Sweetened Condensed Milk. Not only does this sweeten the ice cream, it helps it set into the perfect creamy consistency. It plays a similar role to the custard base in a traditional ice cream recipe.
- Pure Vanilla Extract. This adds the perfect vanilla flavor to the ice cream. You can use an equal amount of vanilla bean paste instead of extract if you wish.
How to Make Berry Crisp No-Churn Ice Cream
Here’s the whole process of making and assembling this berry crisp ice cream from start to finish:
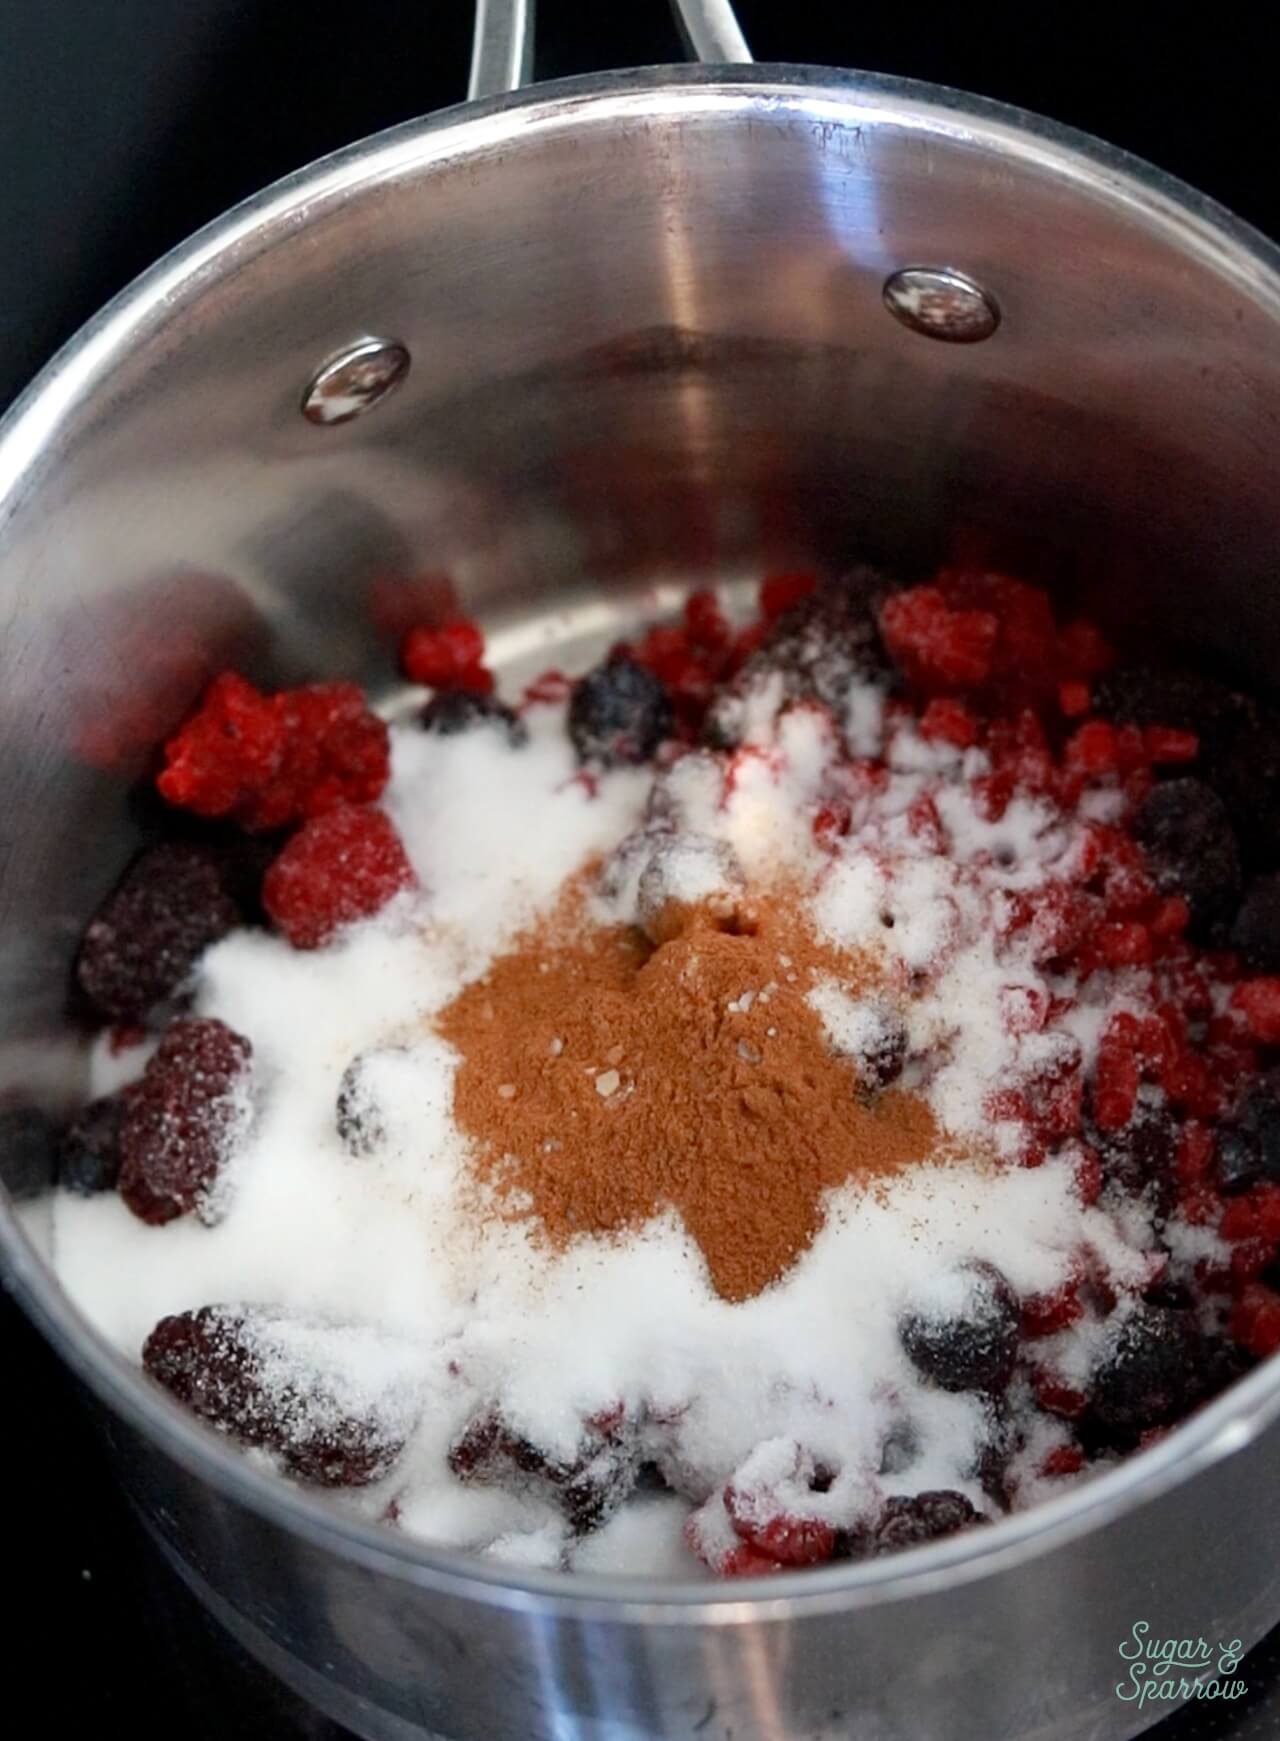
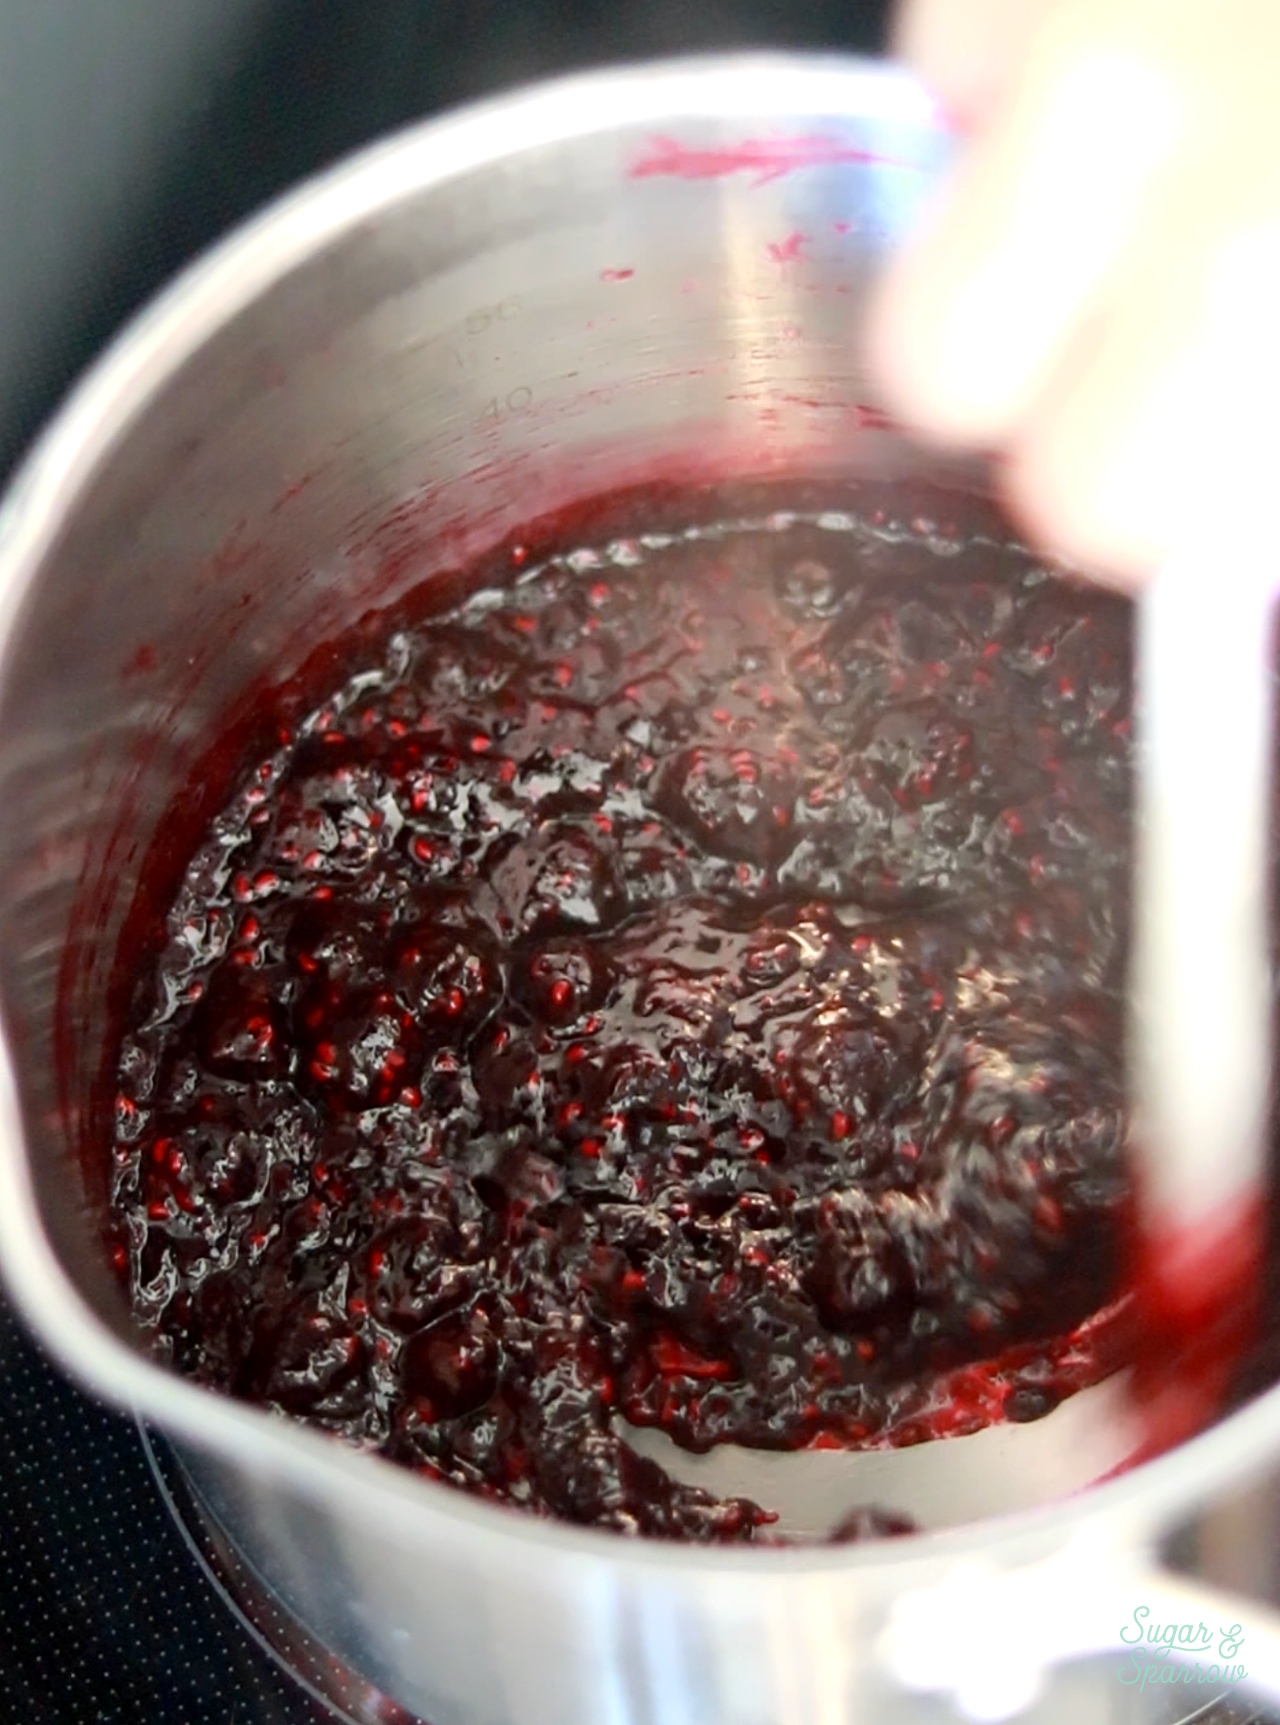
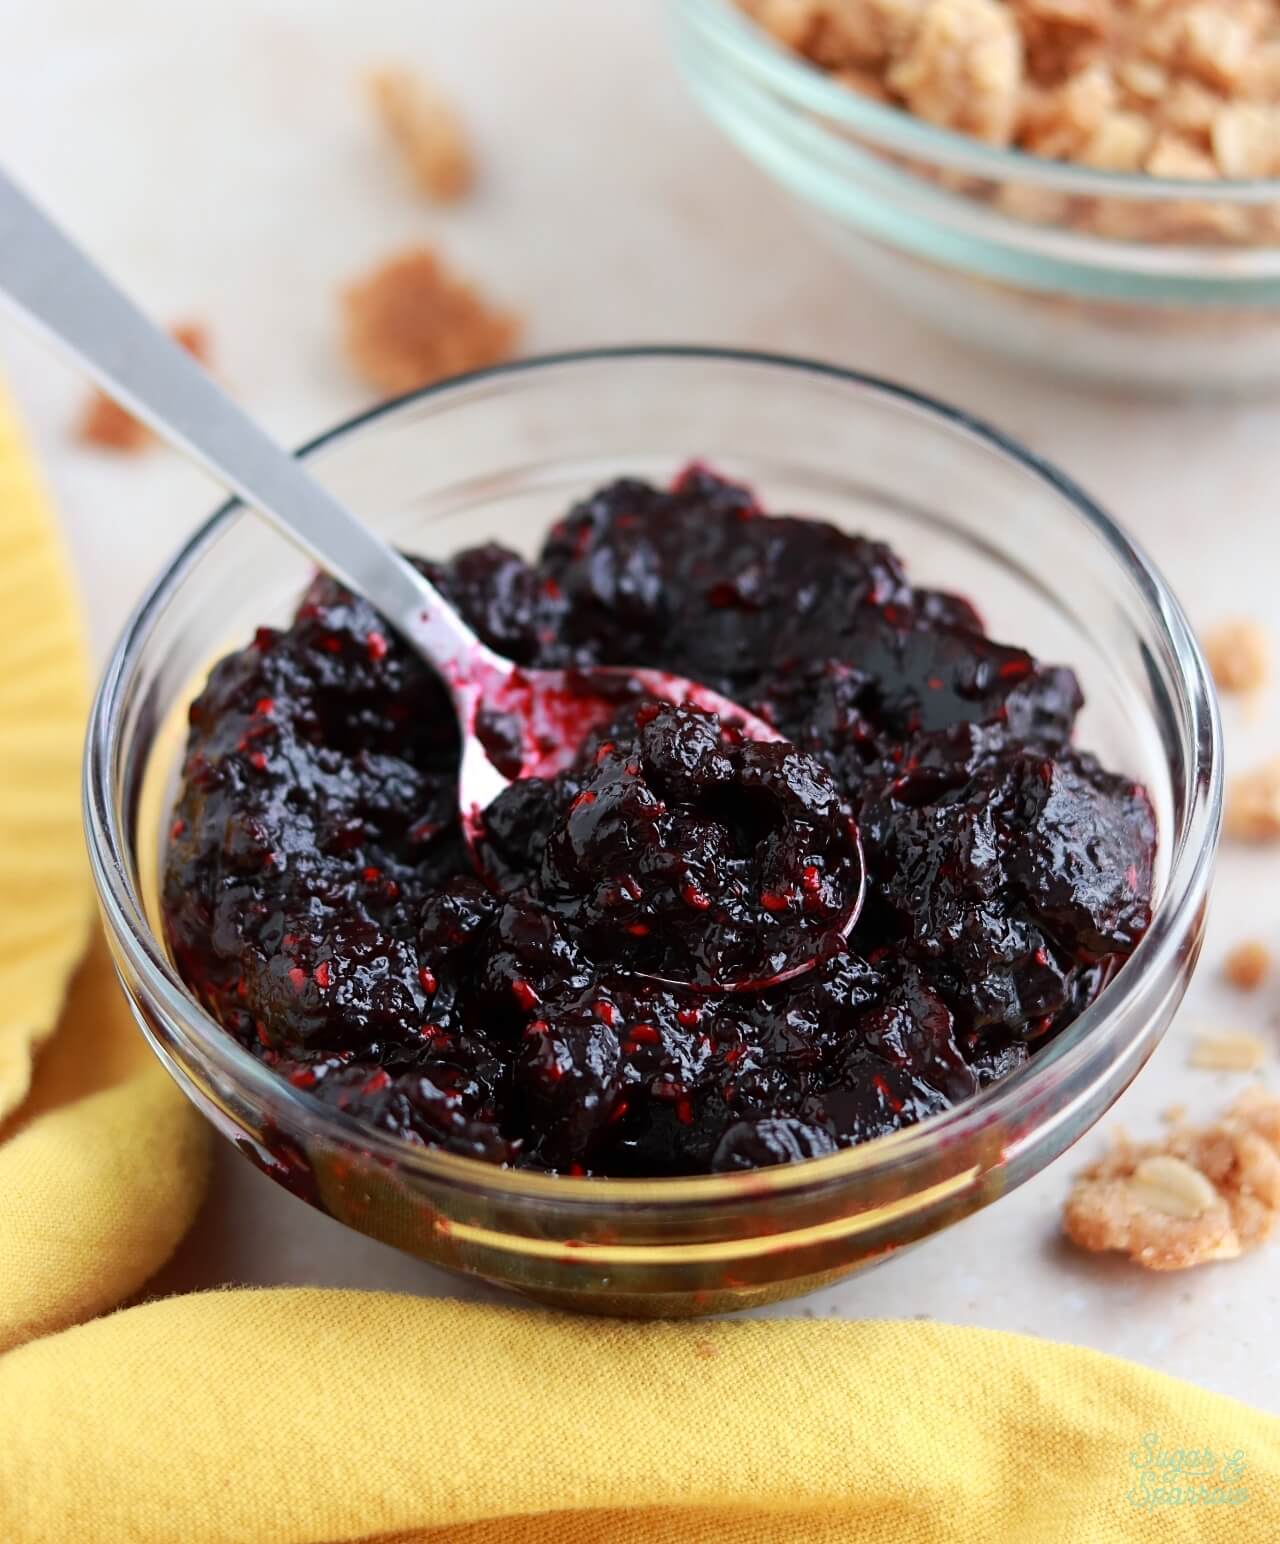
Step 1. Make the Berry Filling: Place the berries, granulated sugar, cinnamon, and salt into a medium saucepan set over medium heat. Cook until the berry mixture begins to boil, then reduce the heat to a simmer and continue cooking until most of the liquid has evaporated and the mixture is more of a jam-like consistency. Then, transfer the berry filling to another container to cool in the refrigerator.

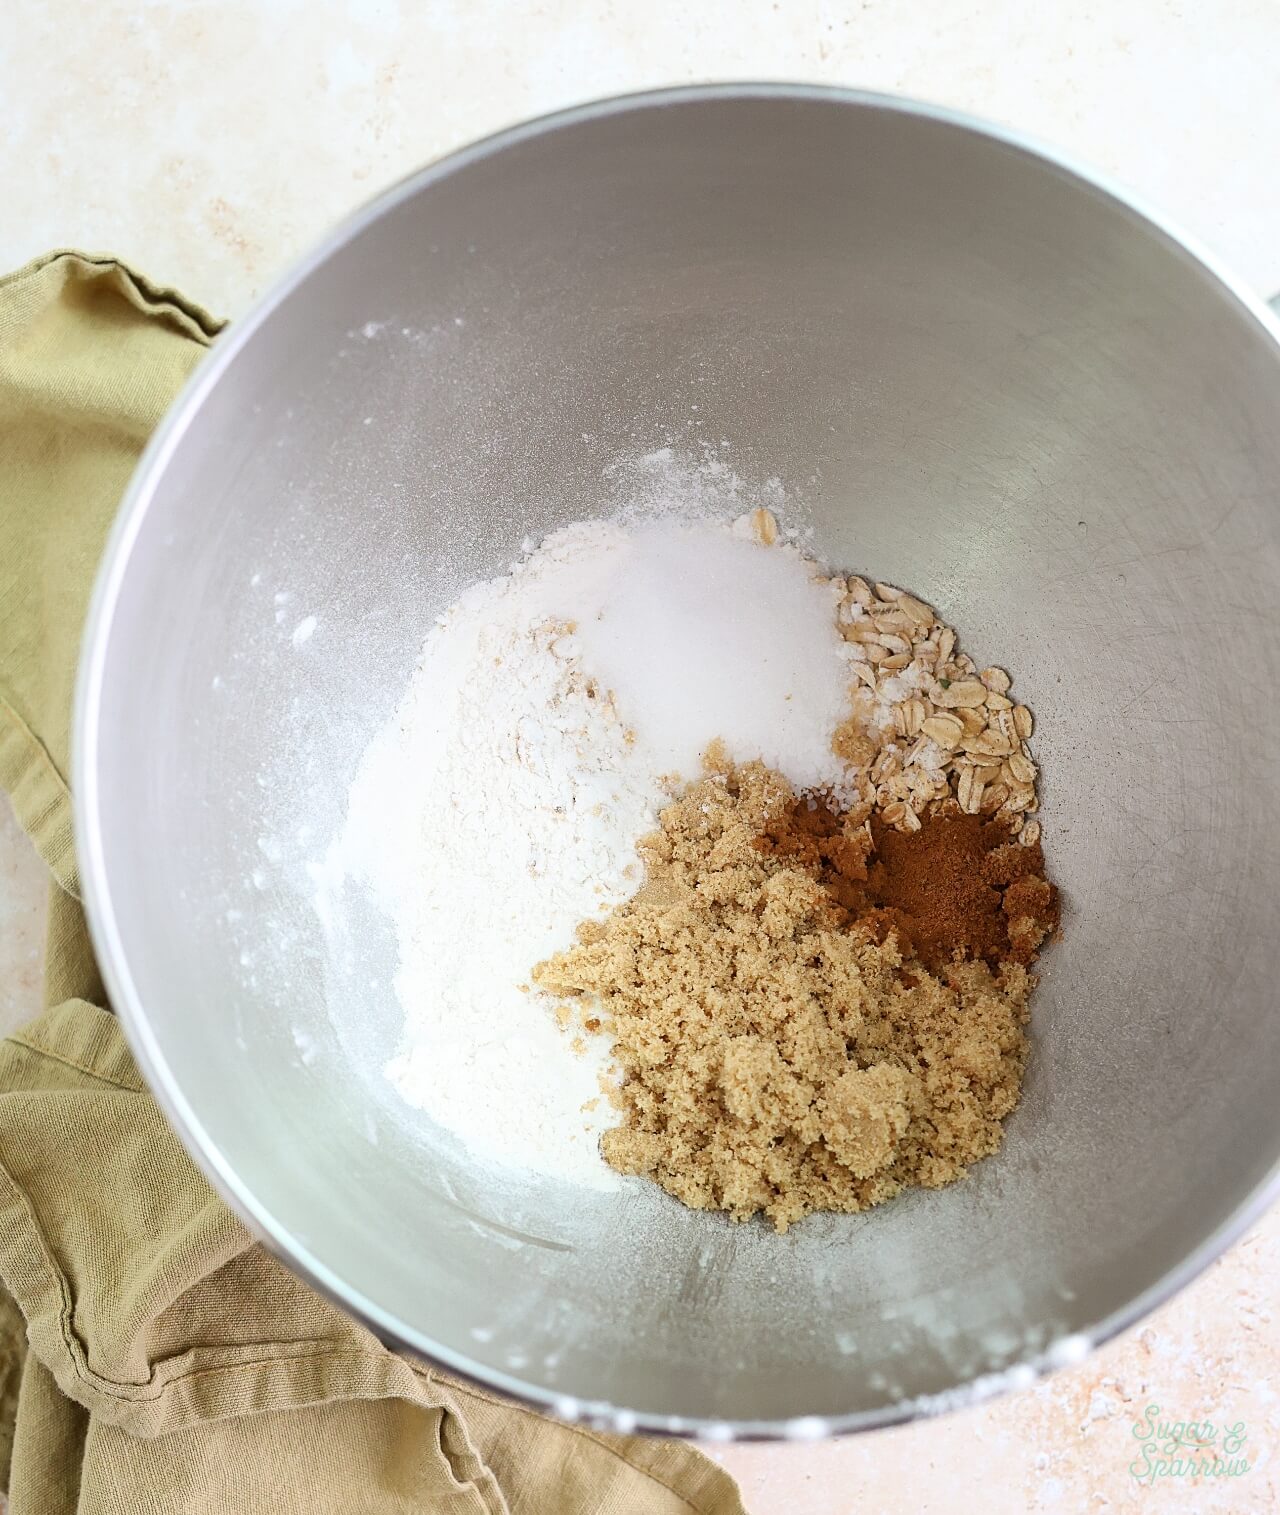
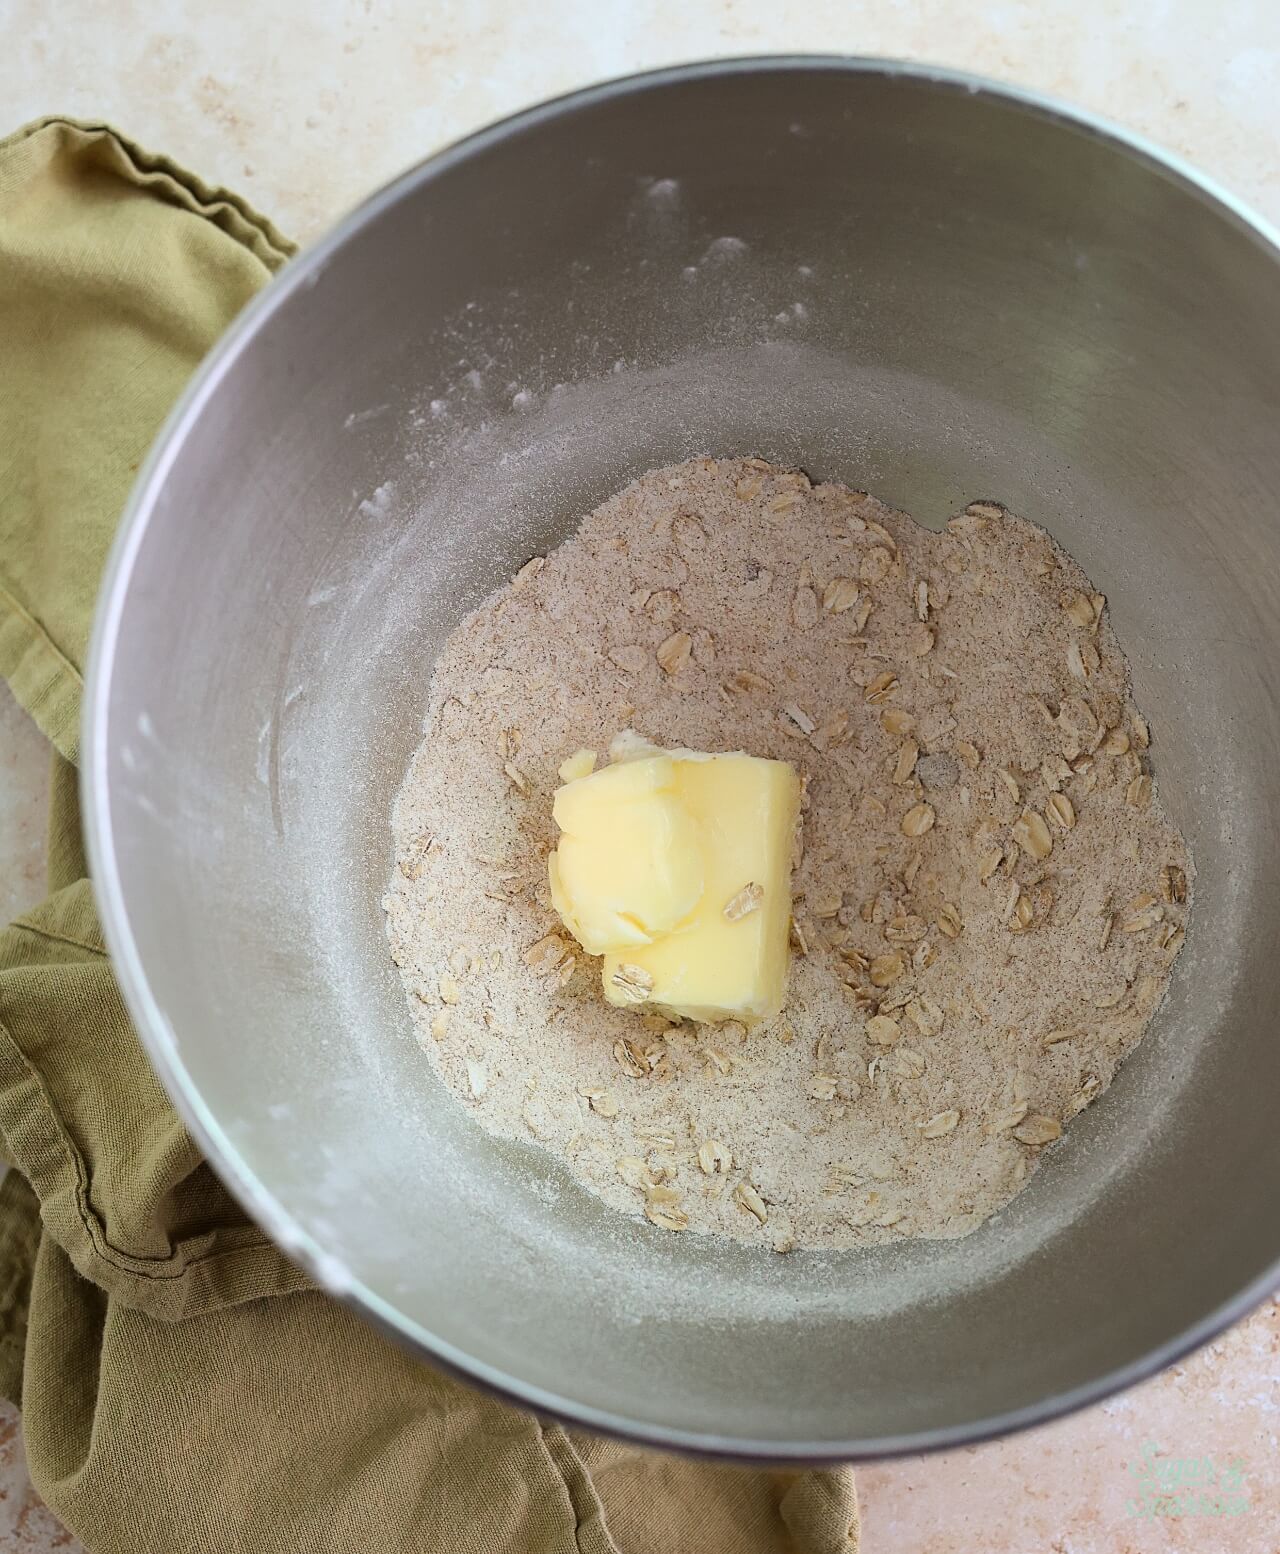
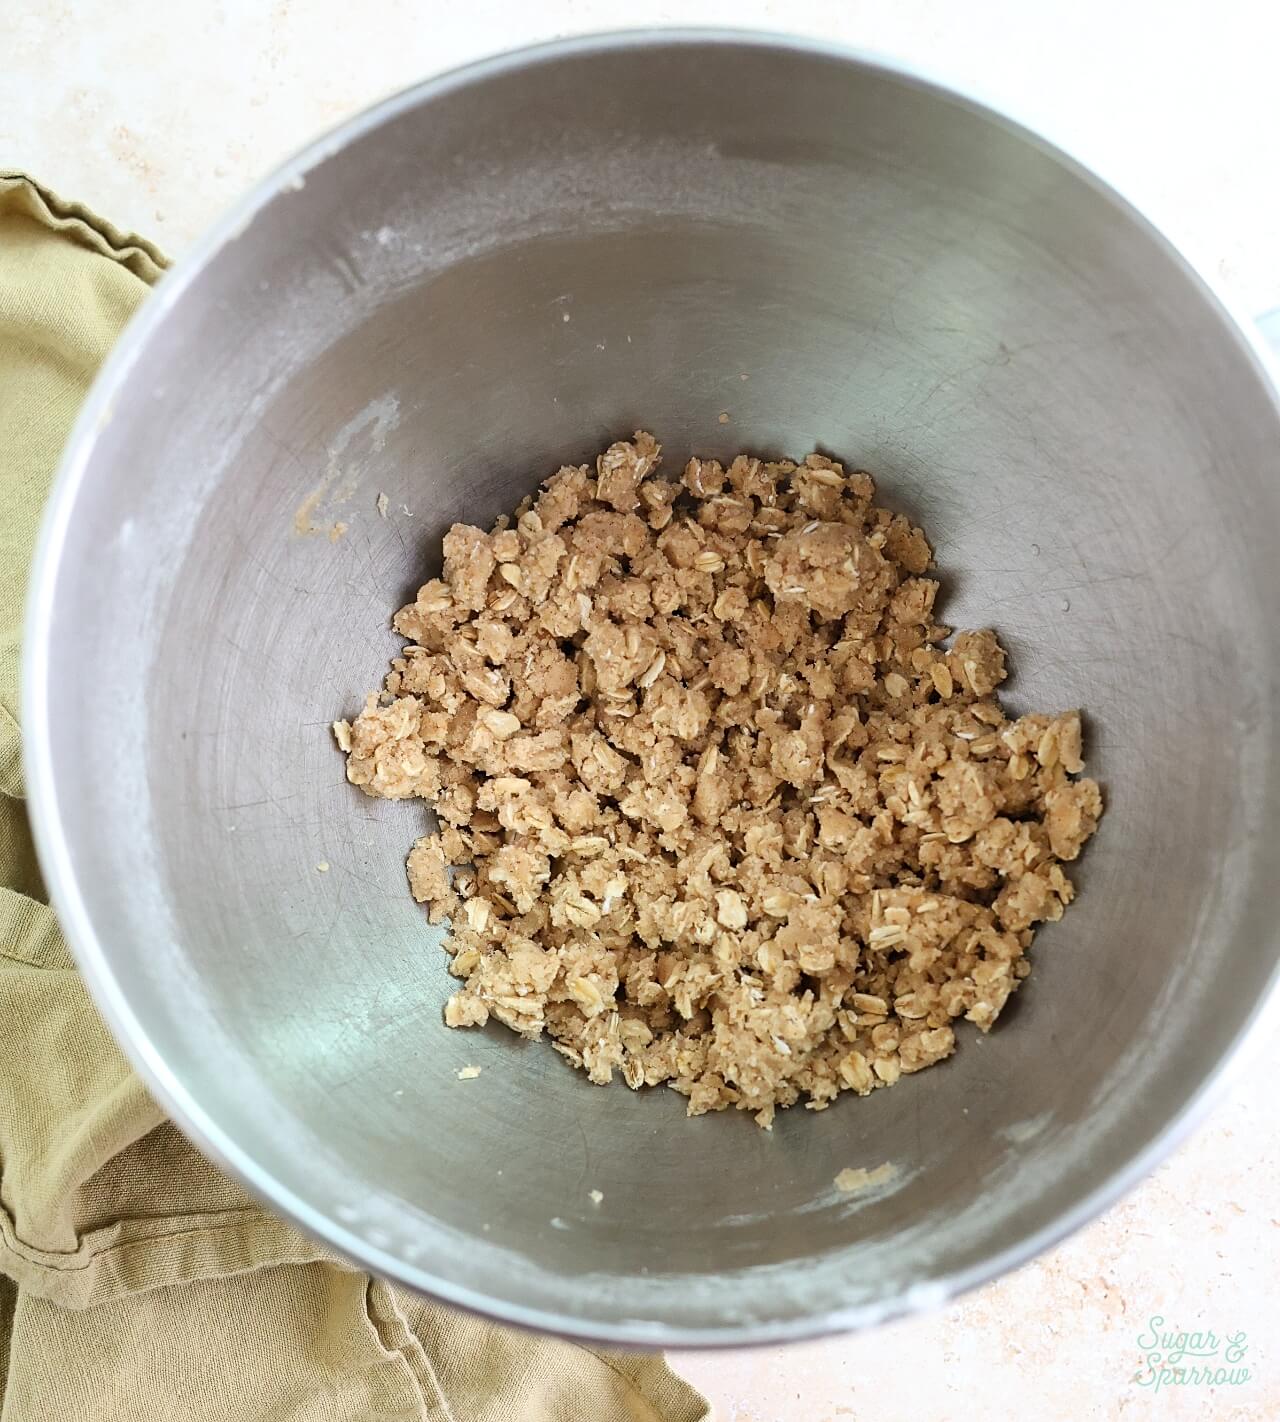
Step 2. Make the Oat Streusel: Combine all of the dry ingredients in the oat streusel recipe in a stand mixer fitted with the paddle attachment, then add the softened butter and mix on low speed until pea sized clumps form.
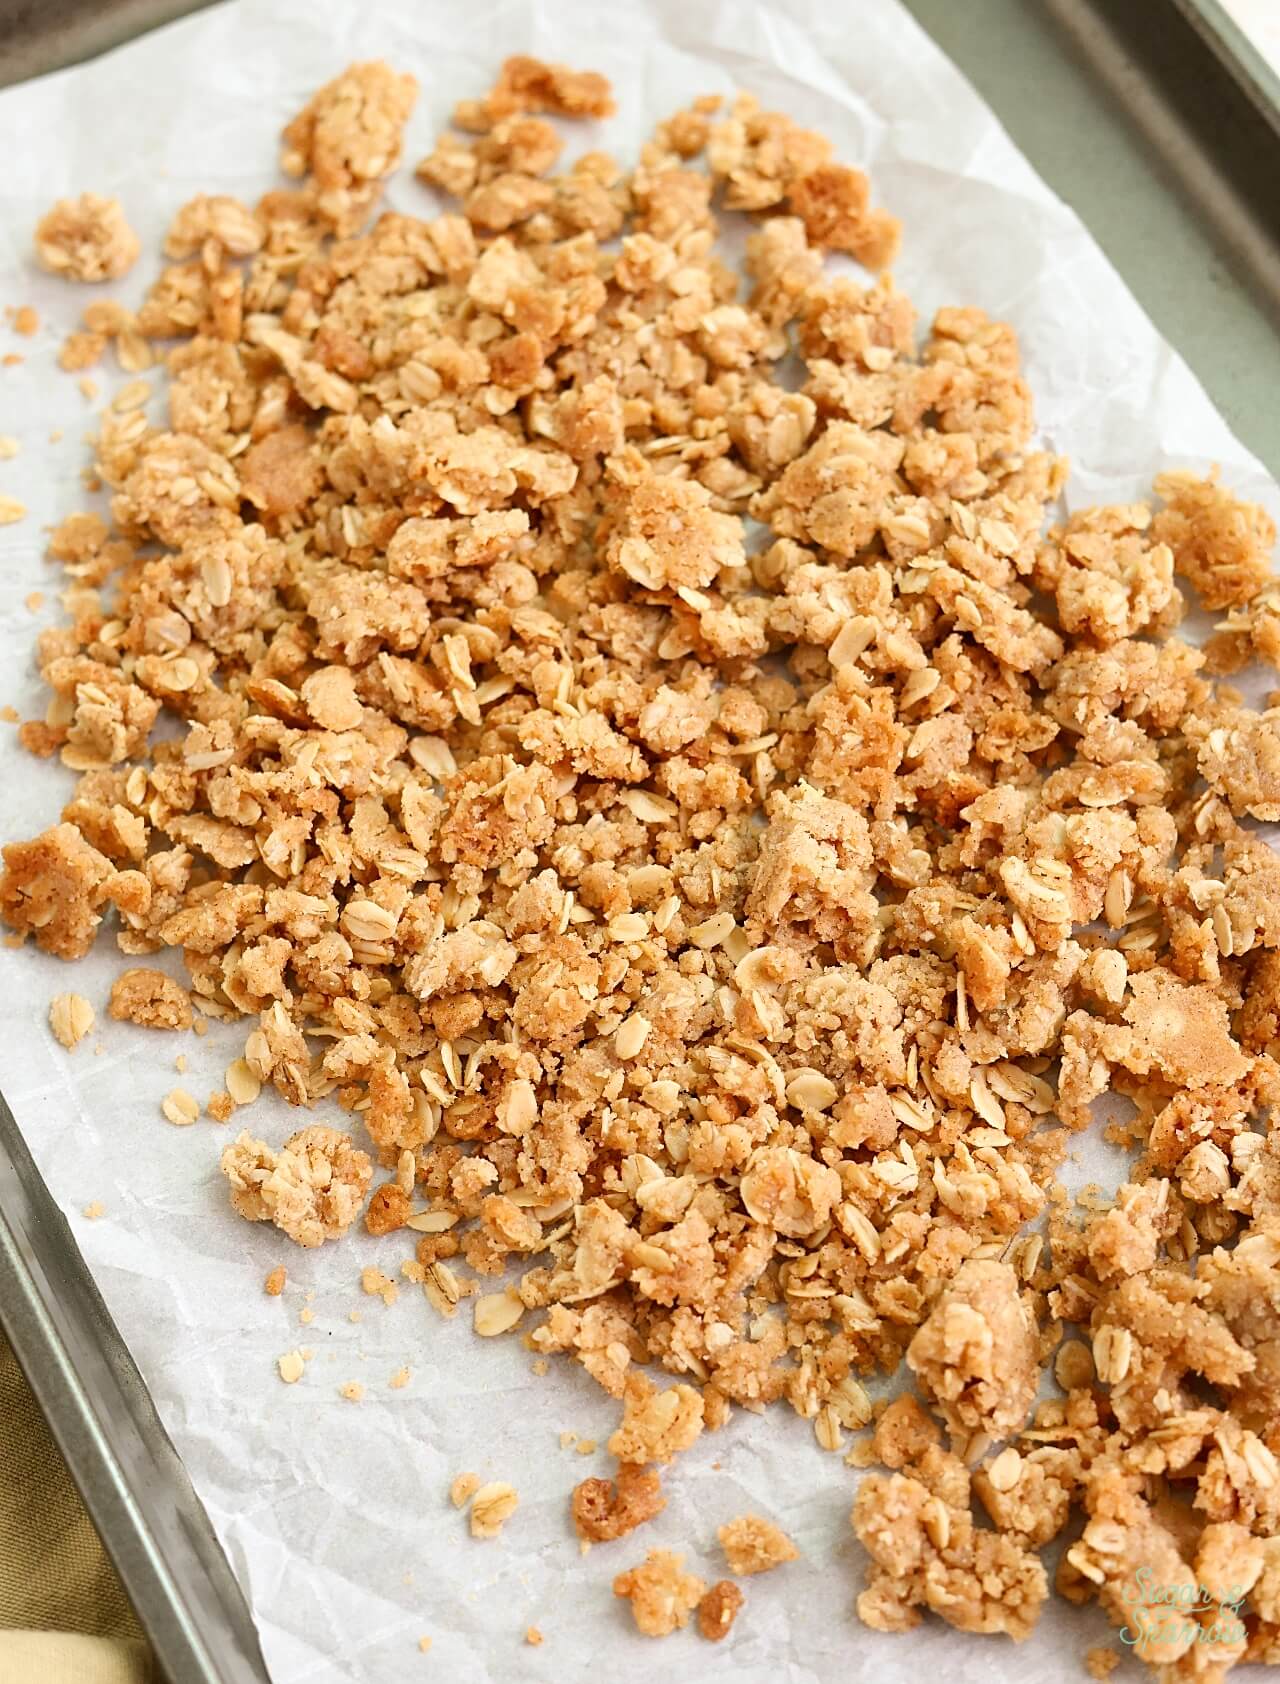
Step 3. Bake the Oat Streusel: Add the oat streusel onto a parchment lined baking sheet and bake at 350ºF (177ºC) for 5 minutes, stir, then bake for another 3 minutes. Remove from the oven and let it cool completely.
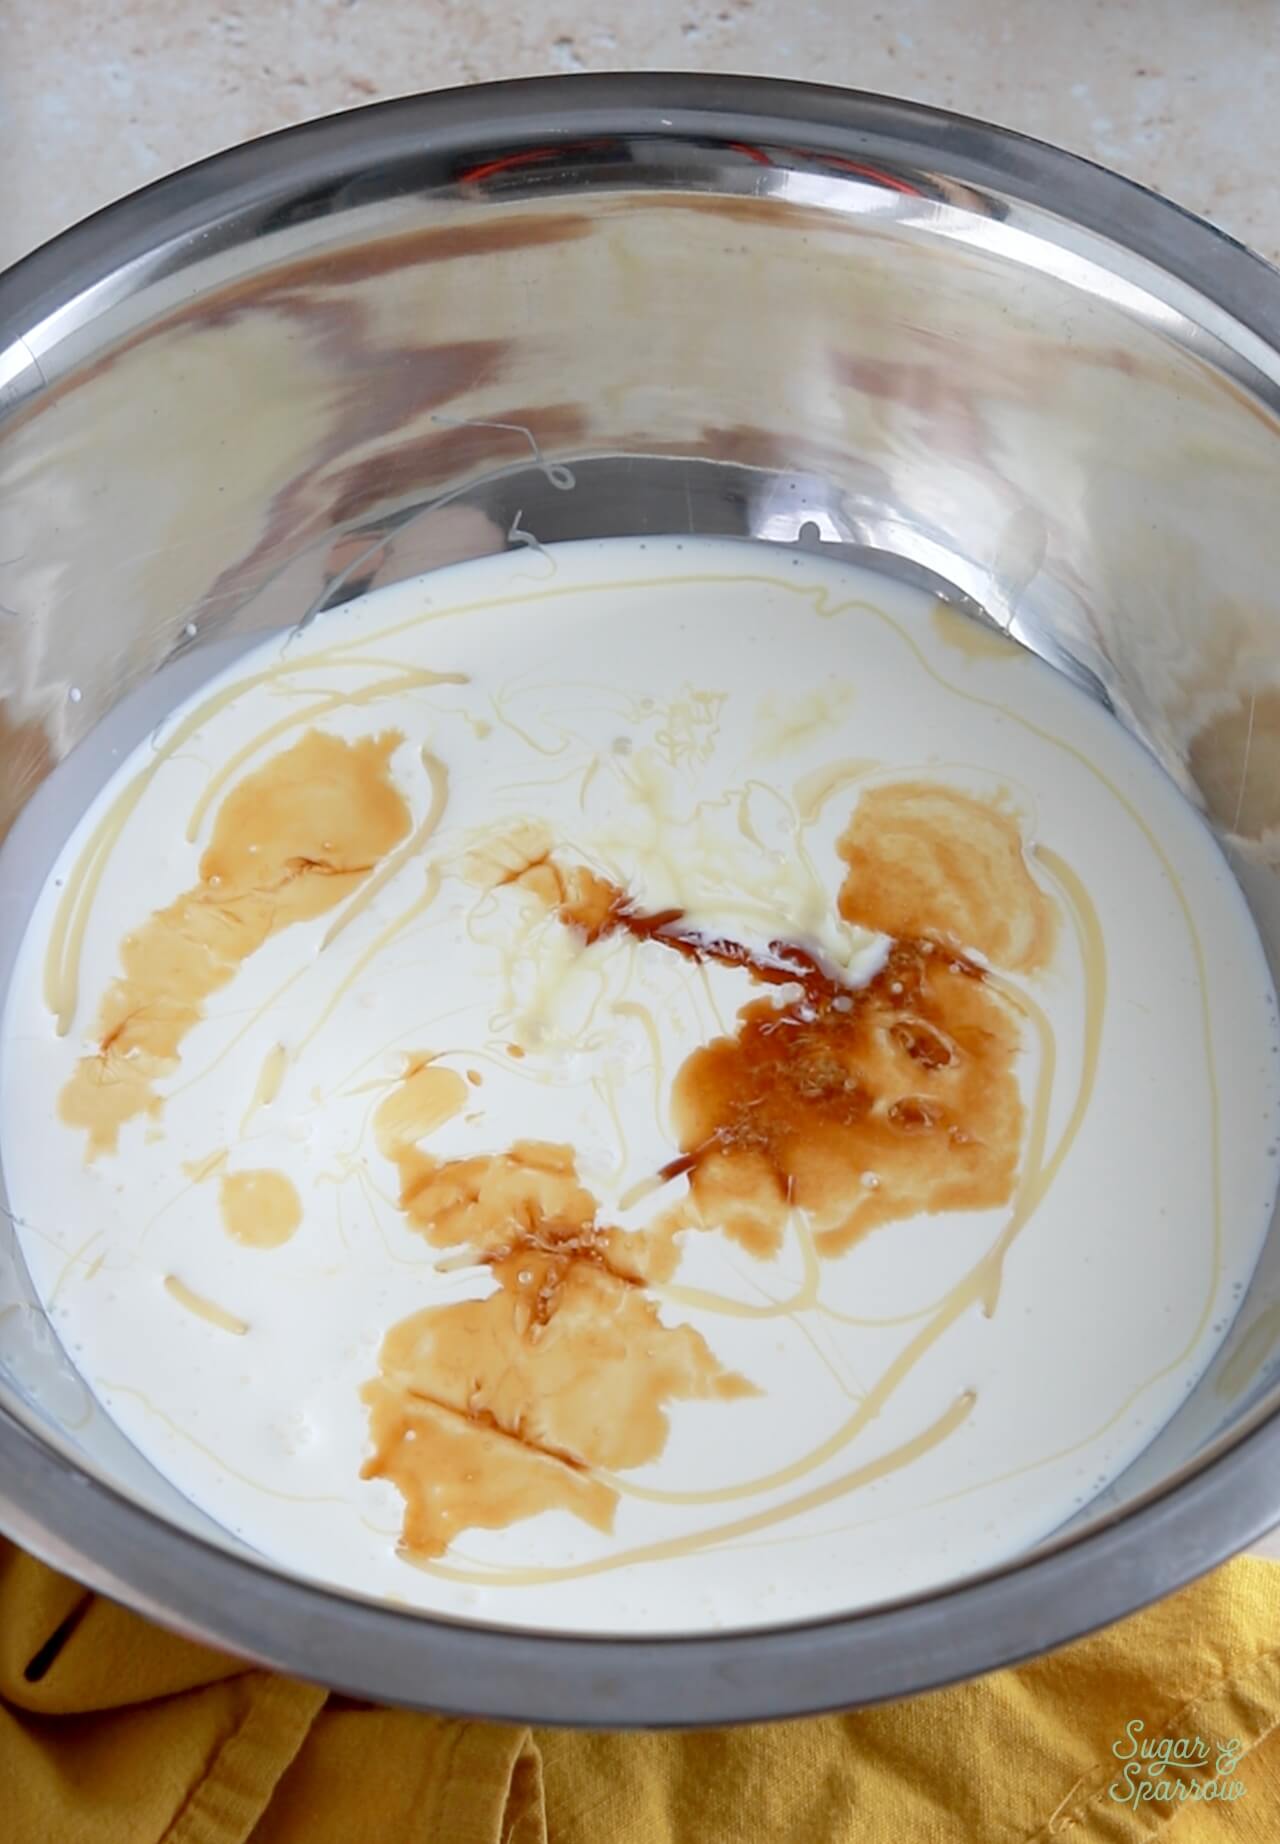
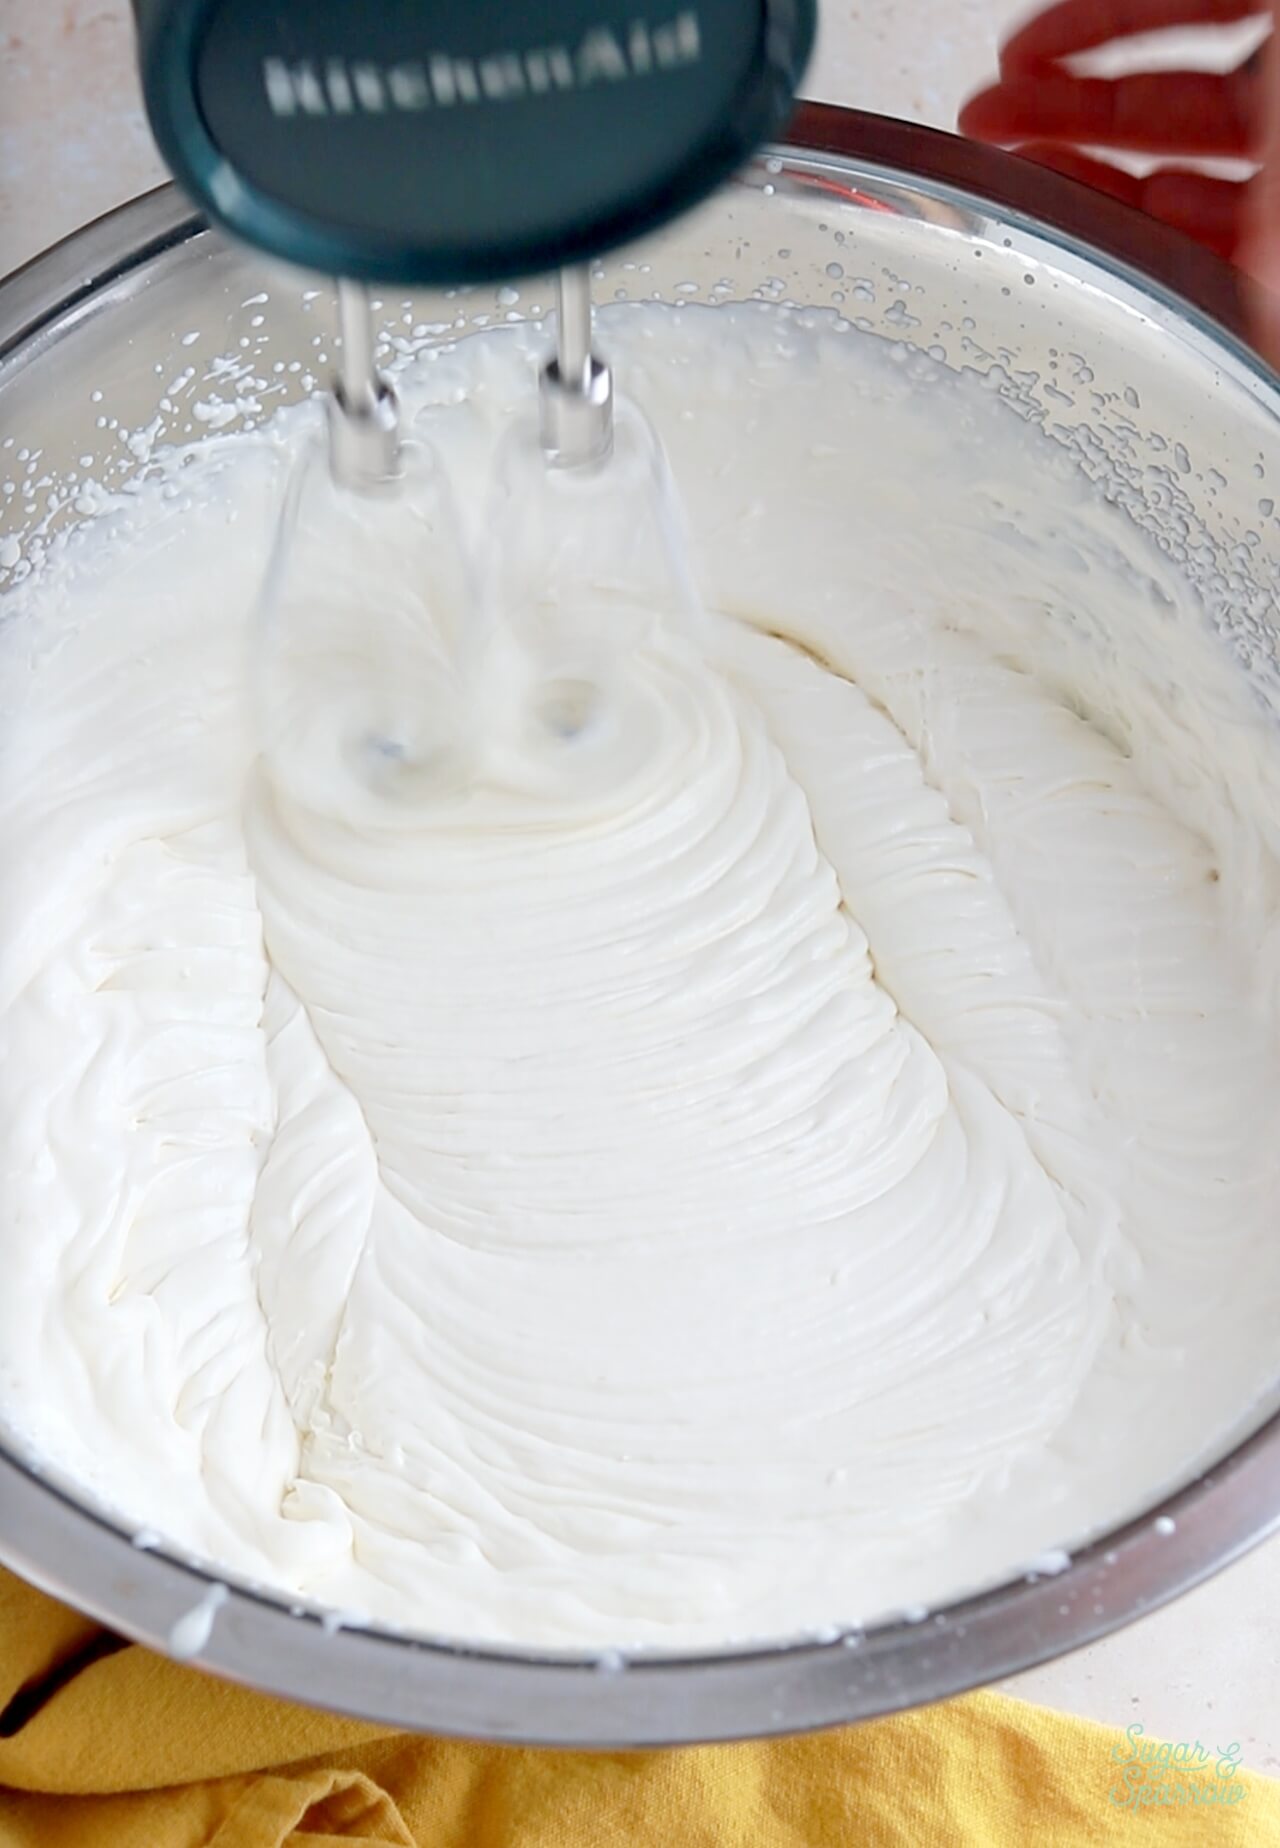
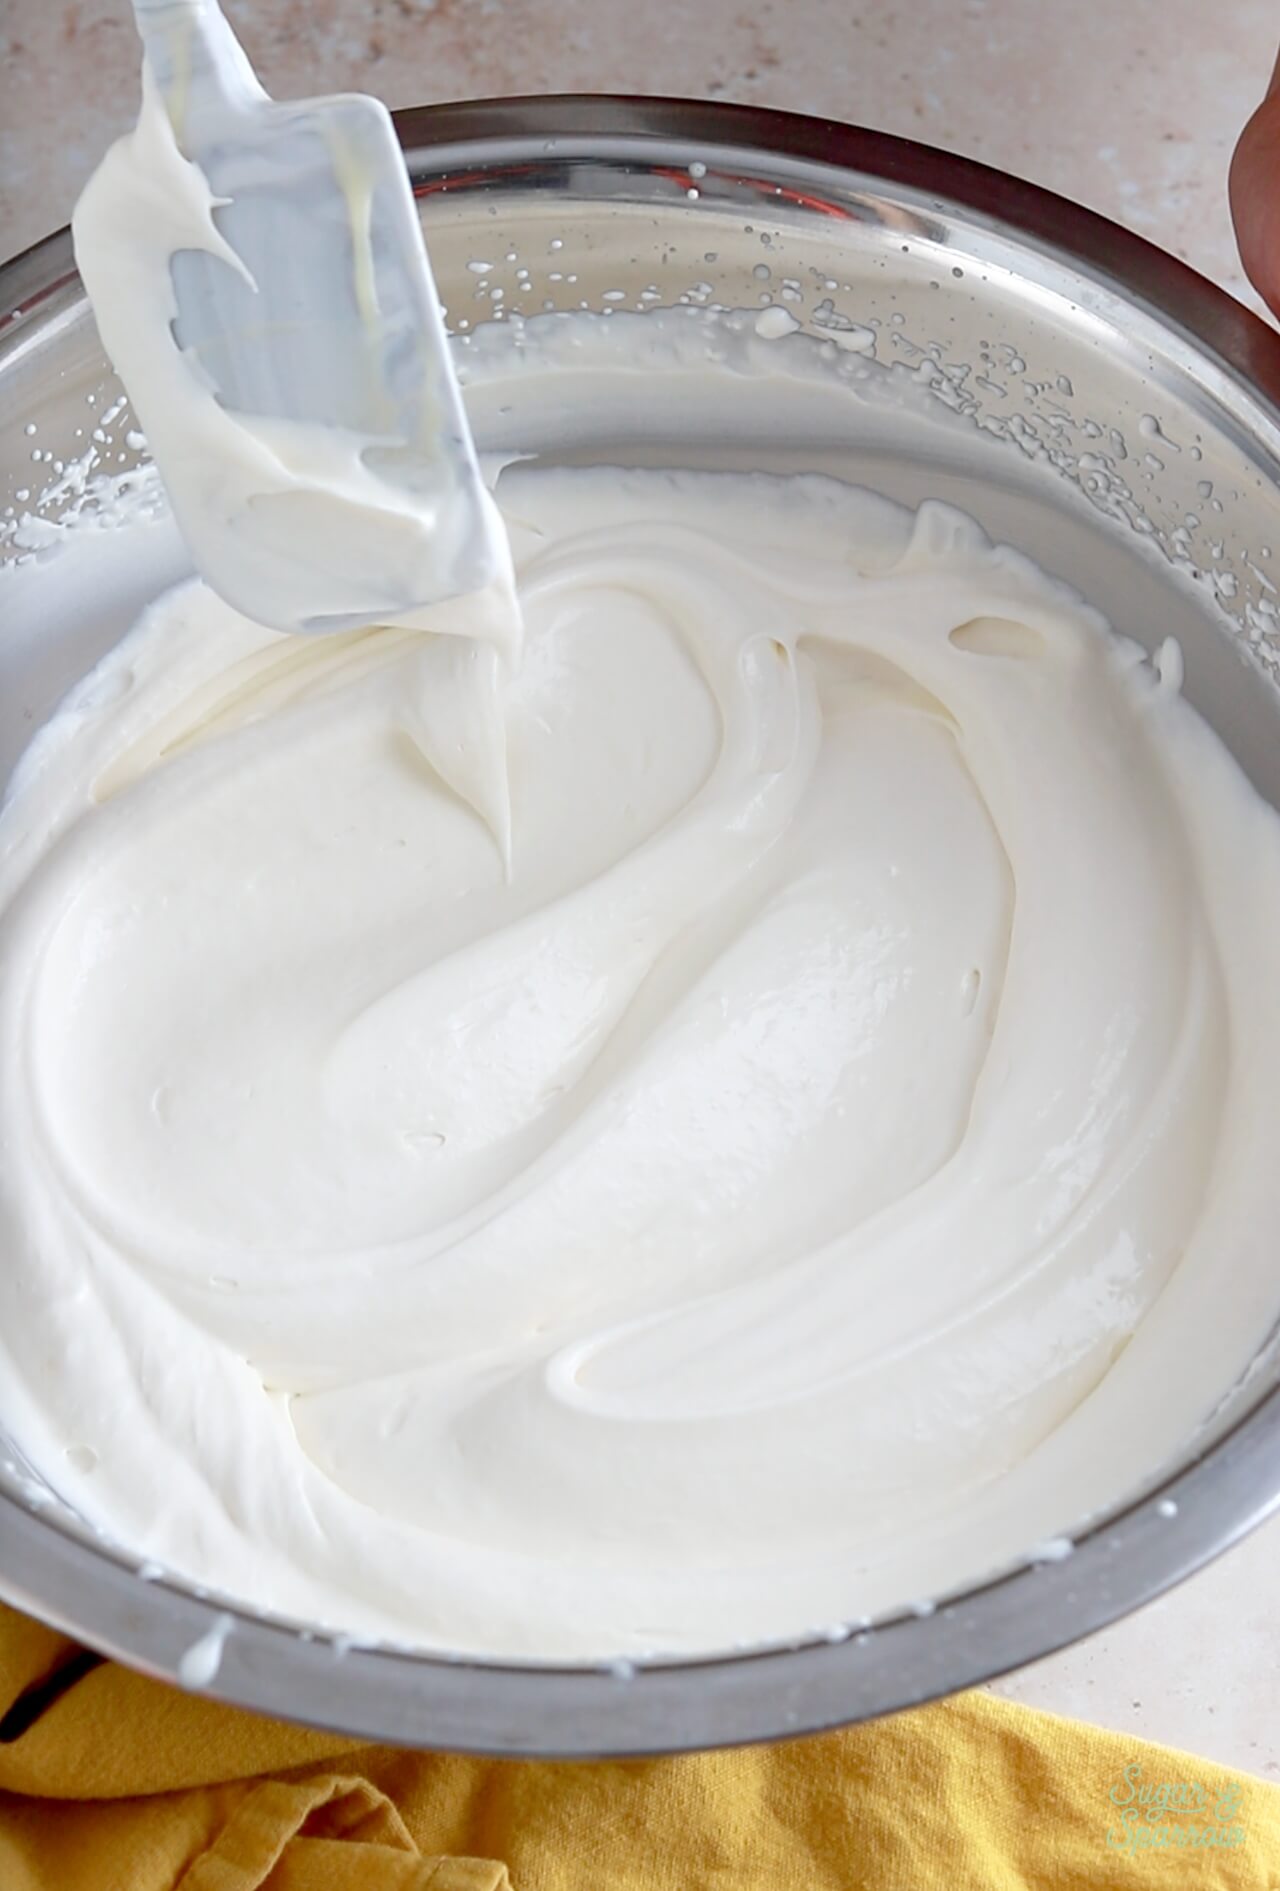
Step 4. Make the No-Churn Vanilla Ice Cream: Place the heavy whipping cream, sweetened condensed milk, and vanilla extract into a large chilled bowl (or the bowl of your stand mixer). Whip on high speed until soft peaks form, about 7 minutes.
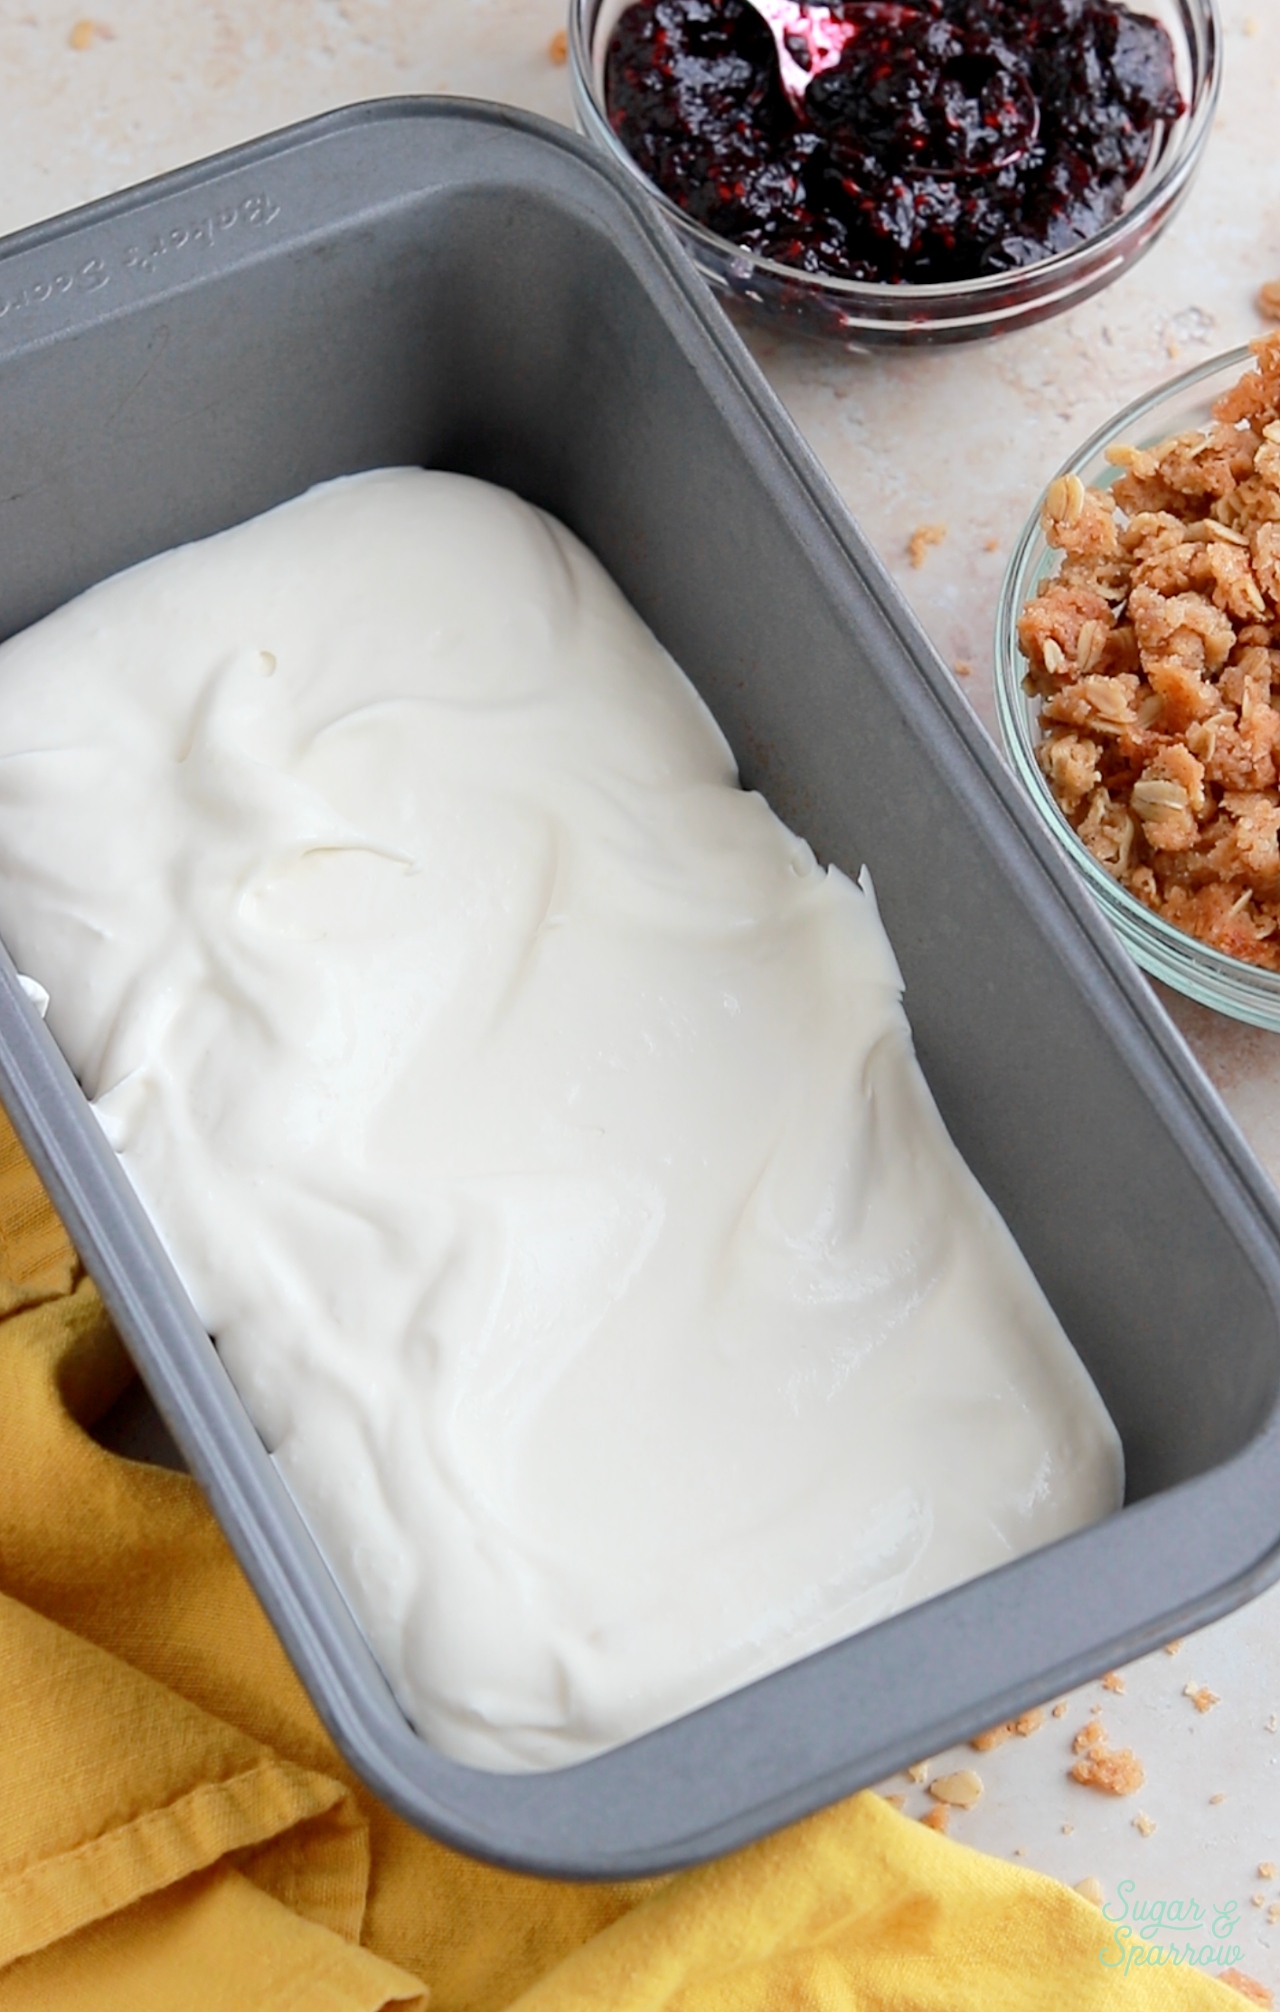
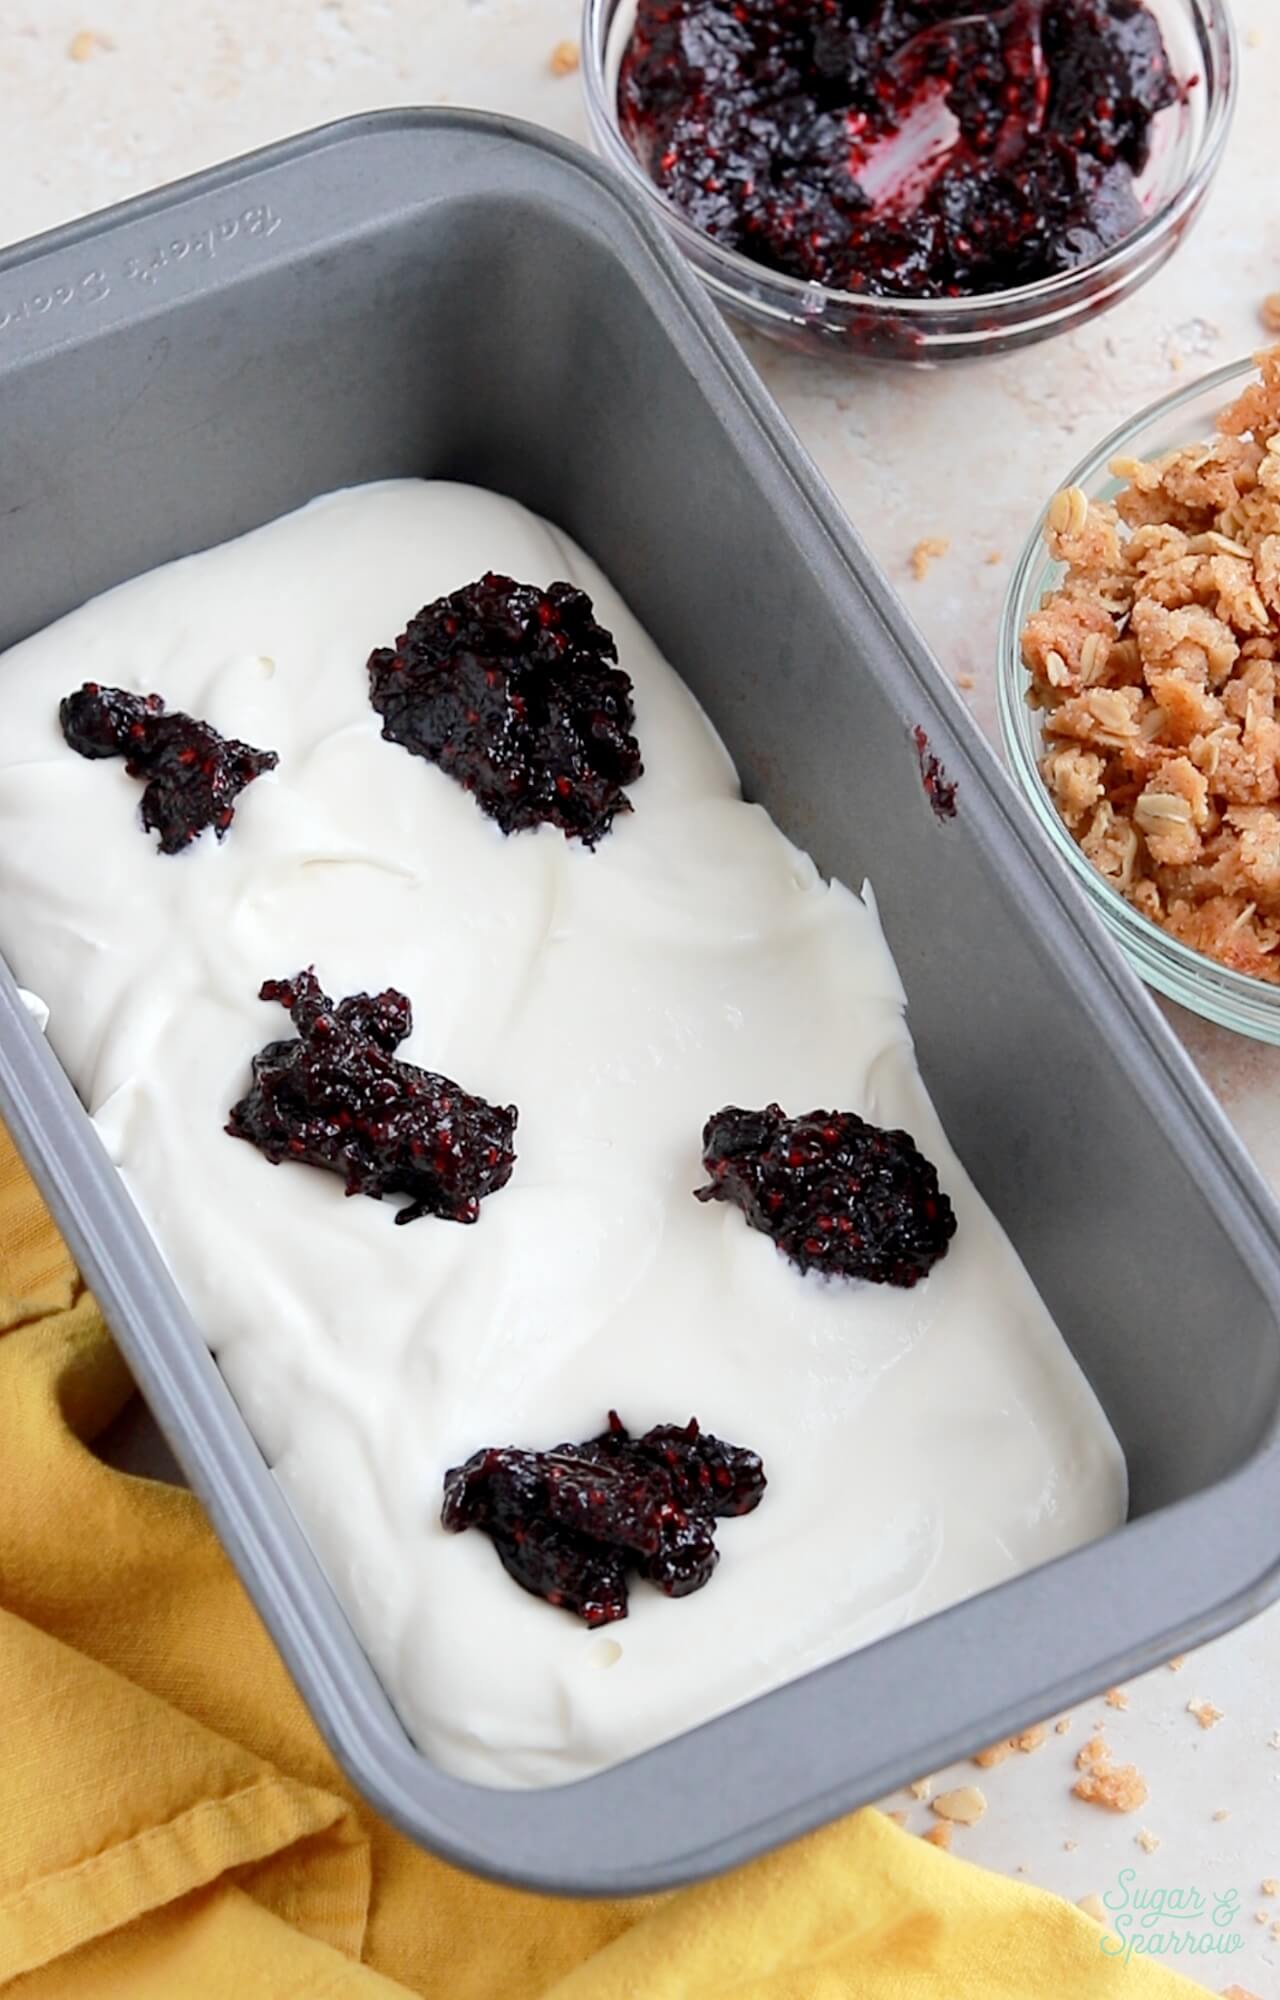
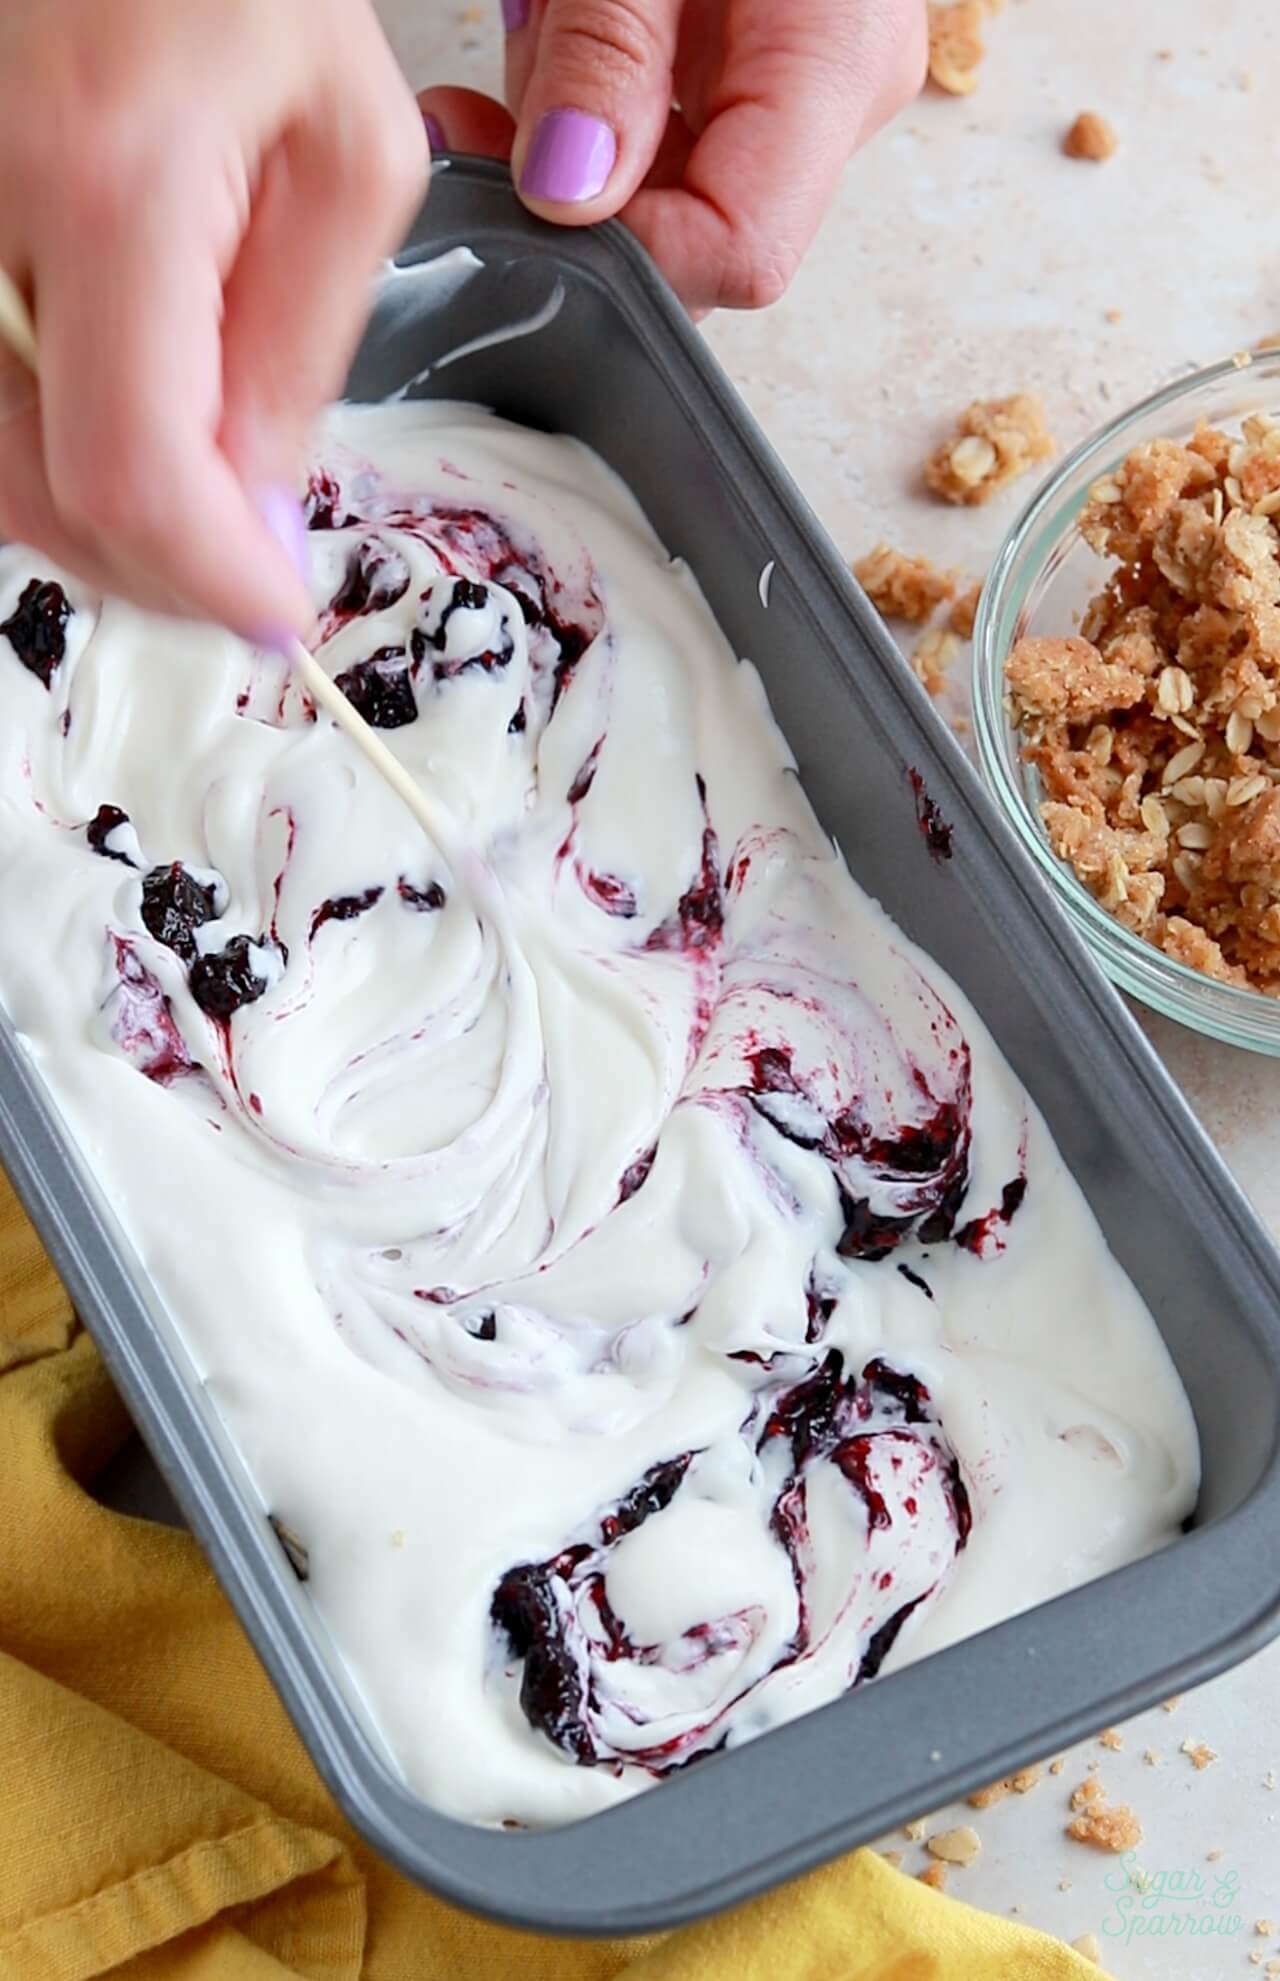
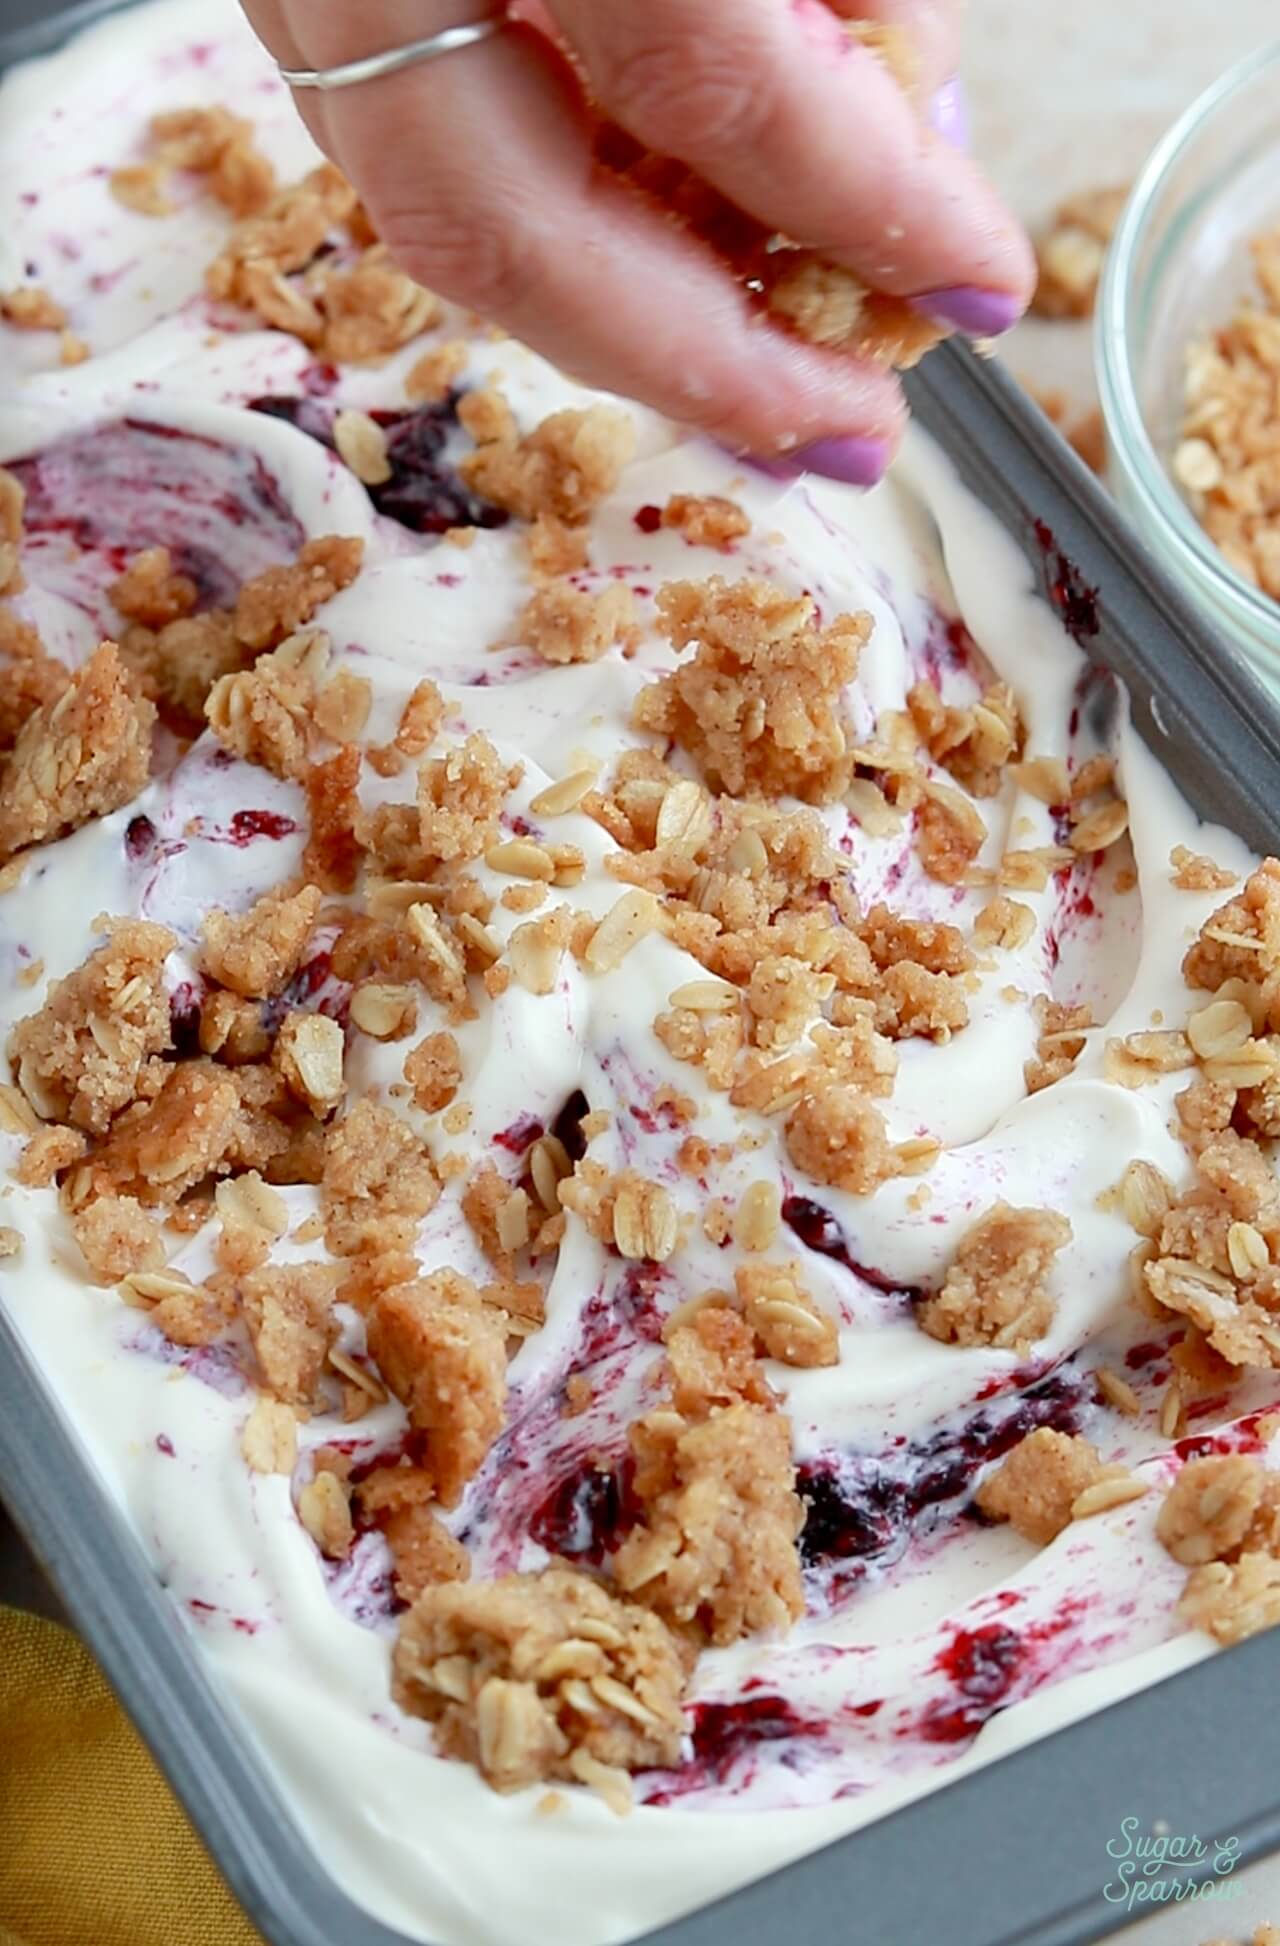
Step 5. Assemble the Berry Crisp Ice Cream: Place ⅓ of the no-churn vanilla ice cream into a chilled loaf pan, top with ⅓ of the berry filling and ⅓ of the oat streusel. Swirl the ingredients together to create ribbons in the ice cream.
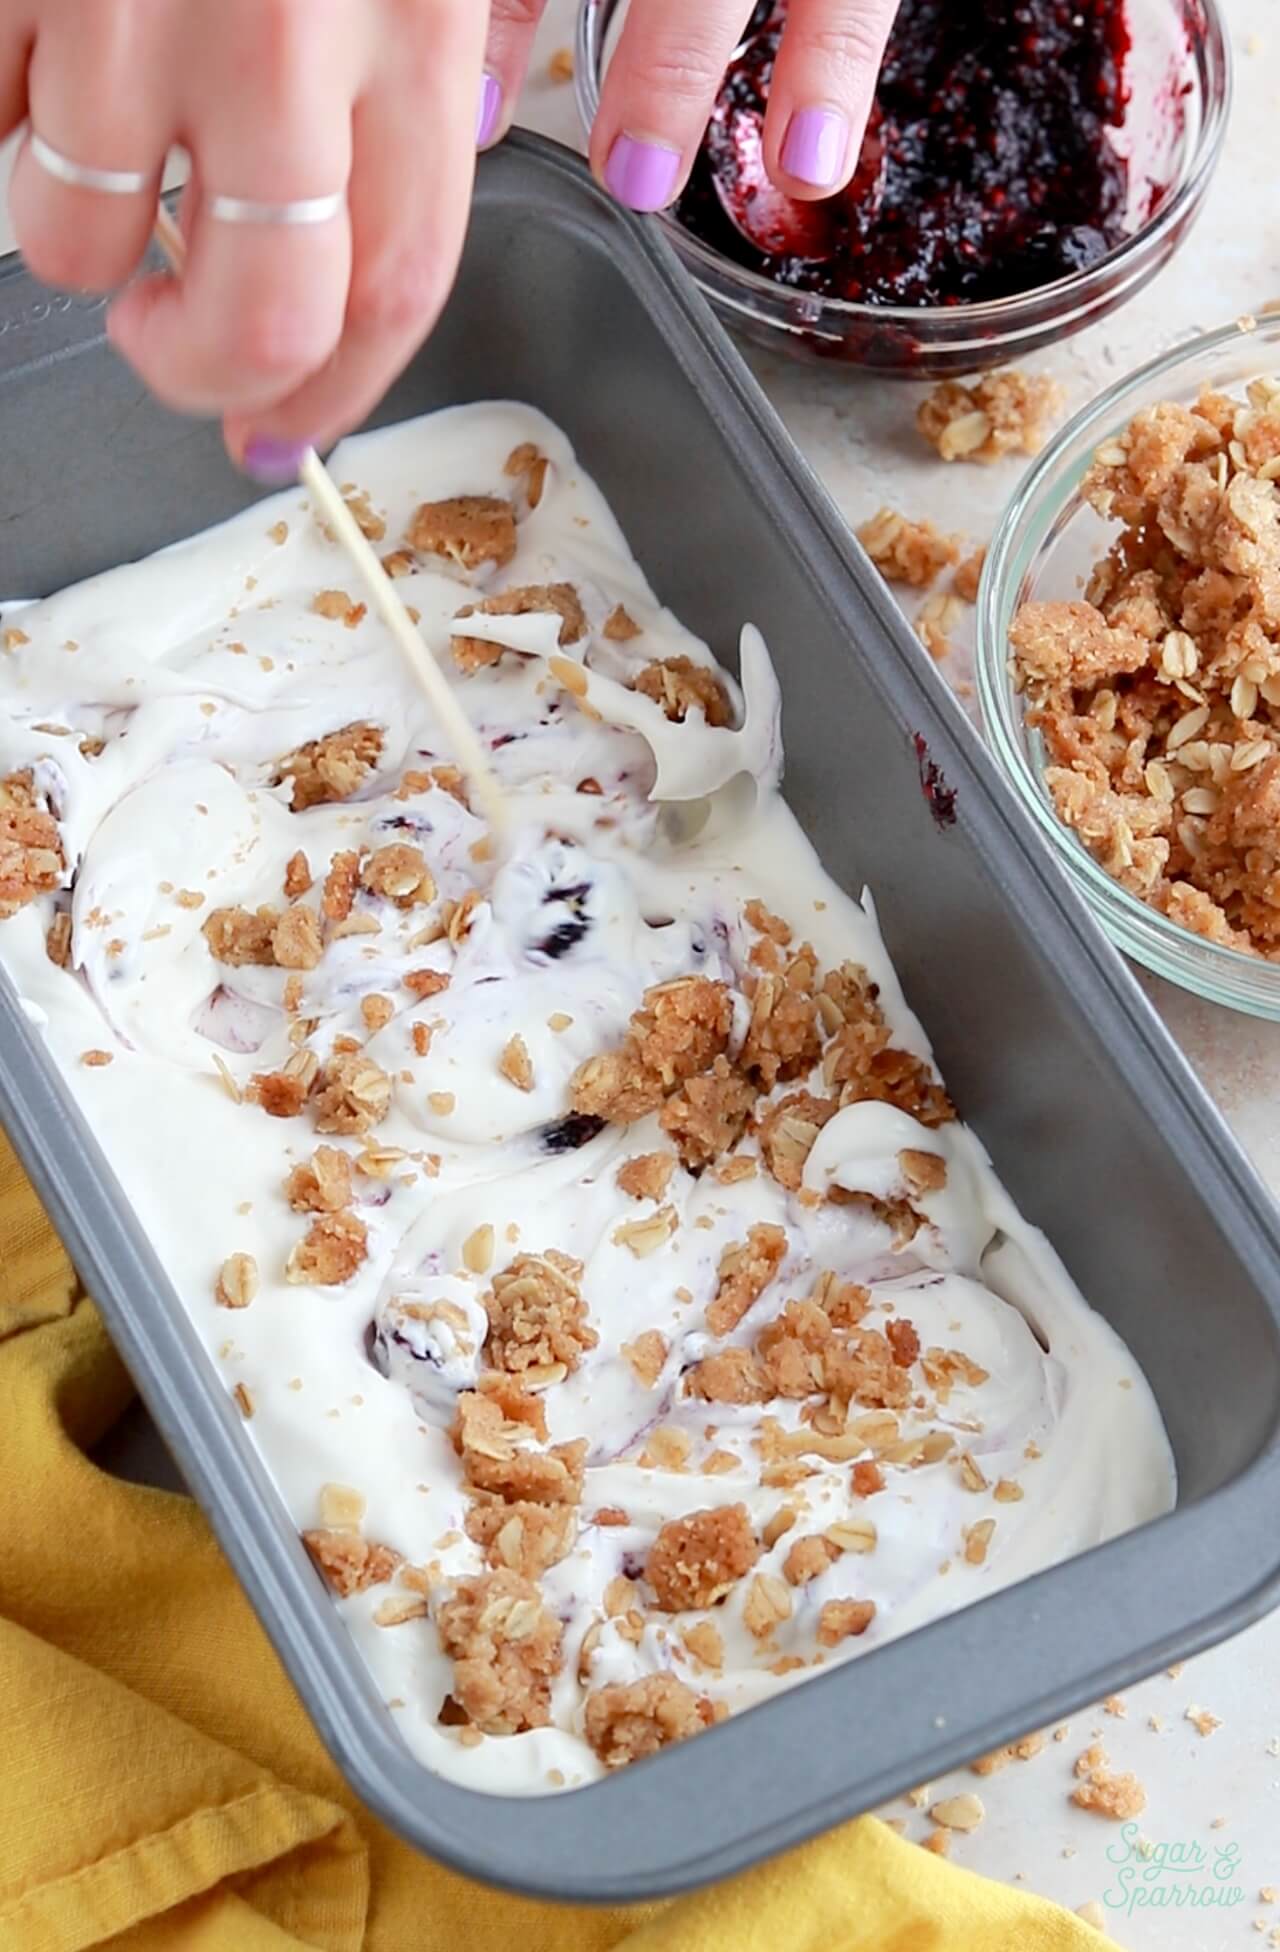
Repeat adding and swirling the ⅓ of the ice cream and ⅓ of the toppings twice more, so you have three swirled layers of ice cream total.
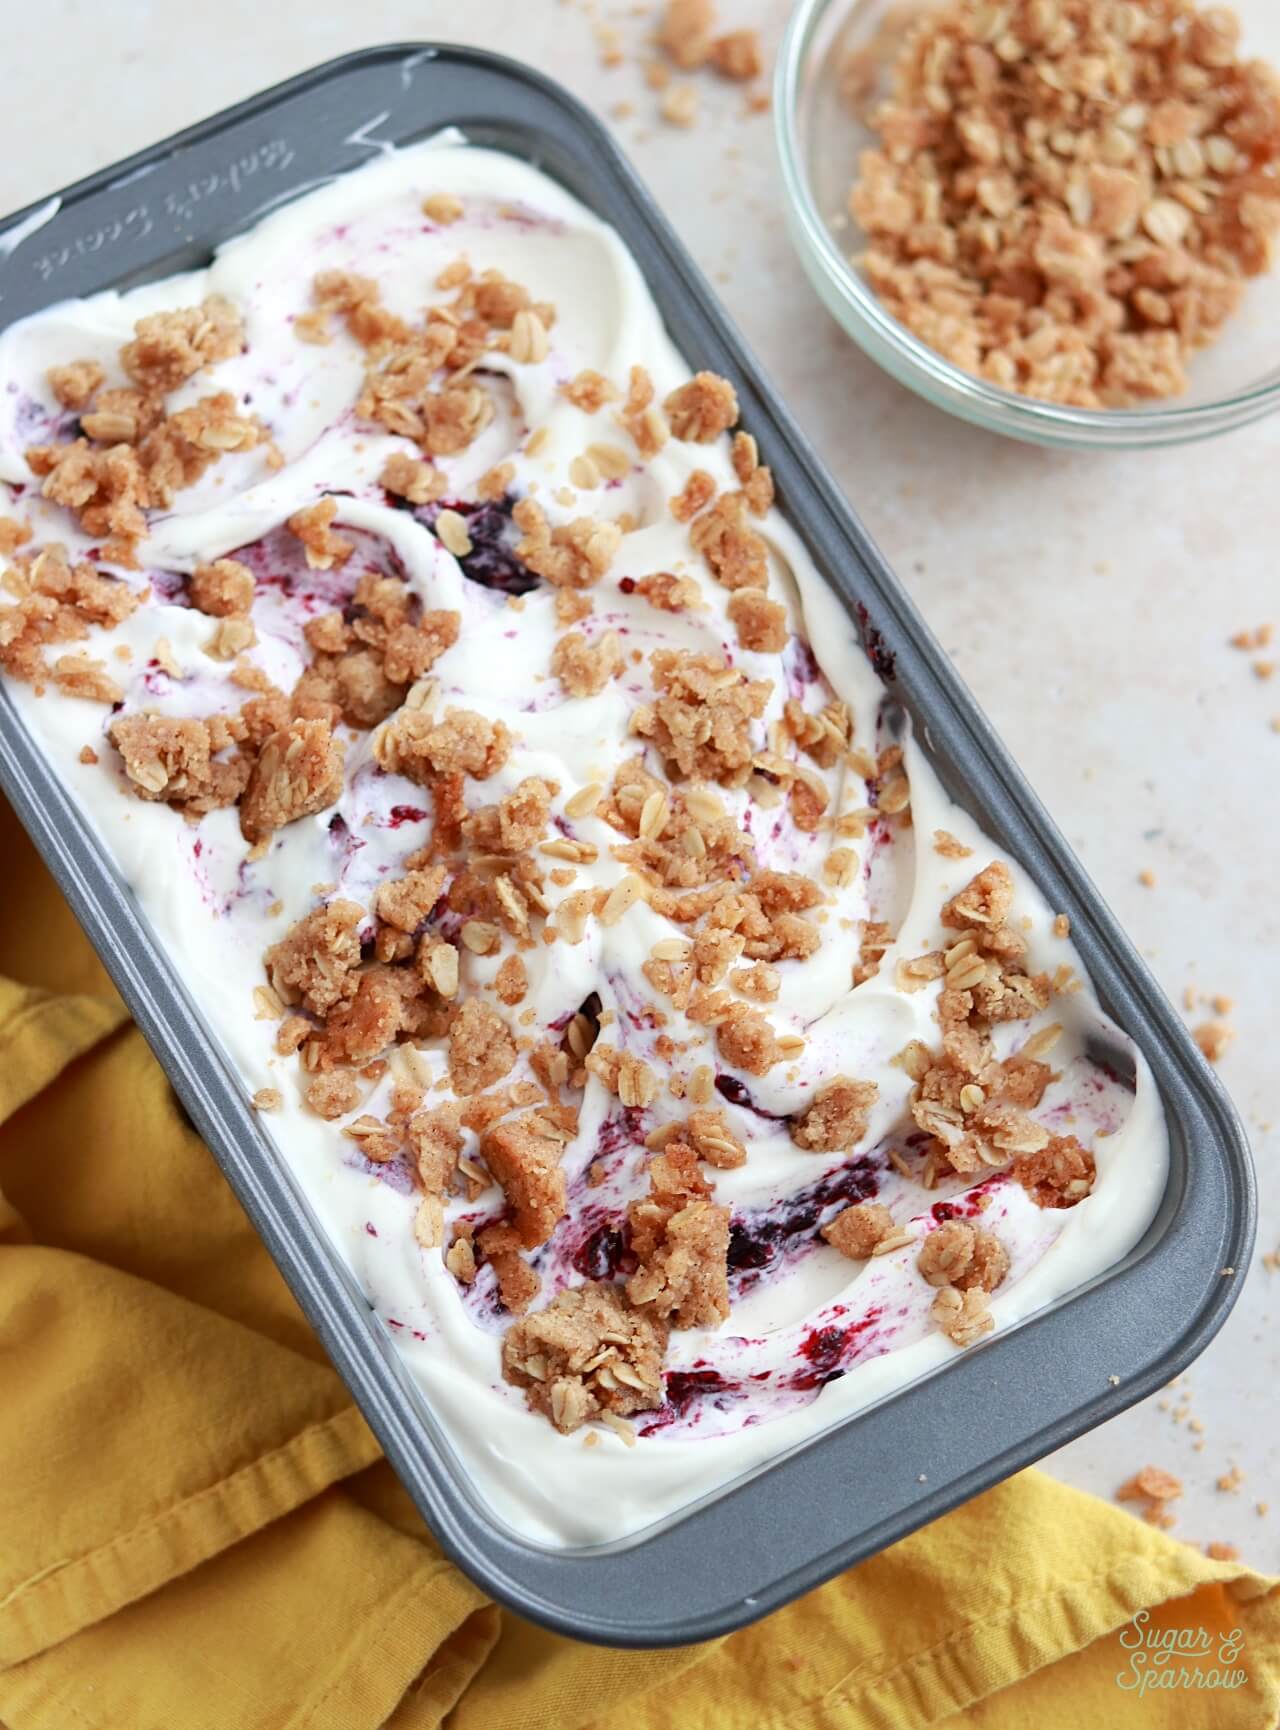
Step 6. Freeze the Berry Crisp Ice Cream: Cover the loaf pan with aluminum foil and freeze for at least 6 hours, until the ice cream is semi-firm and scoop-able.
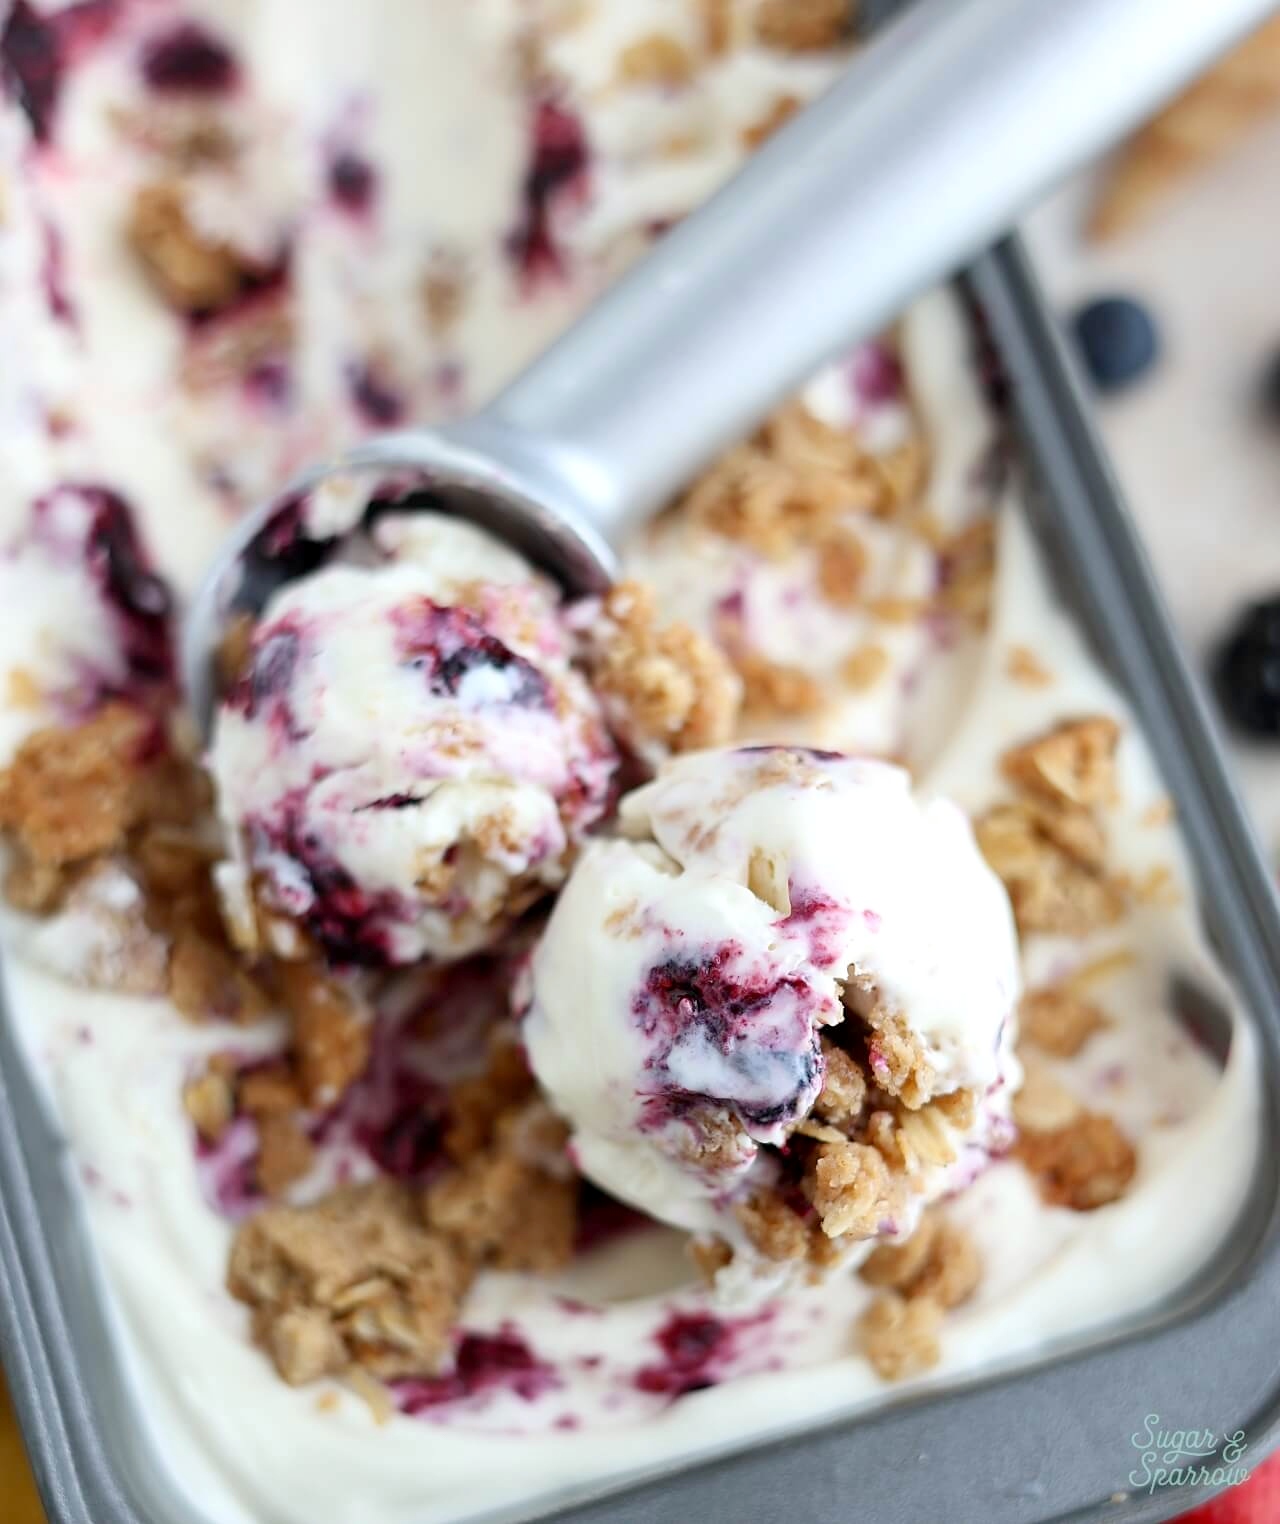
Step 7. Enjoy! Serve the berry crisp ice cream in bowls or cones, or just eat it by the spoonful straight from the freezer (no judgement).

More No-Churn Ice Cream Recipes You’ll Love
Once you learn the magic of no-churn ice cream, the flavor possibilities are endless. Here are some of my favorites:
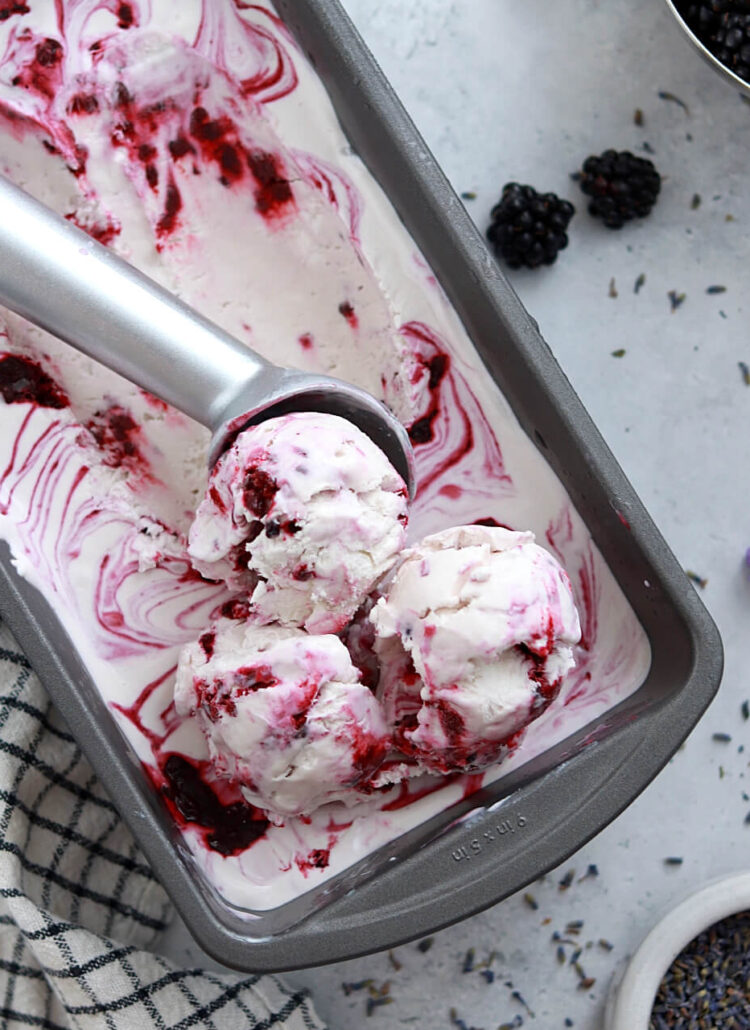
- Blackberry Lavender Ice Cream
- Strawberry Shortcake Ice Cream
- Samoa Ice Cream
- Dulce de Leche Ice Cream
- S’mores Ice Cream
- Mint Chocolate Chip Ice Cream
If you’re a fan of berry crisp a la mode, you’re going to LOVE this ice cream flavor. Let me know if you make it in the comments below and feel free to tag @sugarandsparrowco on Instagram to show me. I love to see what you create with my recipes!
No-Churn Berry Crisp Ice Cream
Ingredients
Homemade Berry Filling
- 2 Cups (300g) mixed berries* fresh or frozen
- 1/3 Cup (70g) granulated sugar
- 1/2 tsp ground cinnamon
- pinch of salt
Oat Streusel Clusters
- 1/4 Cup (20g) old fashioned rolled oats
- 1/4 Cup (30g) all purpose flour
- 1 Tbsp (13g) granulated sugar
- 2 Tbsp (25g) brown sugar light or dark
- 1/4 tsp ground cinnamon
- 1/8 tsp ground nutmeg
- pinch of salt
- 2 Tbsp (28g) unsalted butter, softened
No-Churn Vanilla Ice Cream
- 2 Cups (480ml) heavy whipping cream
- 14 Oz sweetened condensed milk
- 2 tsp pure vanilla extract
Instructions
Make the Berry Filling
- In a medium saucepan over medium heat, combine the mixed berries, sugar, cinnamon, and salt. The berries will begin to release their juices. Bring the mixture to a simmer and mash up the berries as you cook them down.
- Simmer over medium-low heat until most of the liquid has evaporated, about 20 minutes, stirring occasionally. The mixture should become somewhat of a jam-like consistency after the reduction. Place into a separate container and refrigerate until cold.
Bake the Oat Streusel Clusters
- Preheat the oven to 350ºF (177ºC) and line a cookie sheet with parchment paper. Add all of the ingredients except for the butter into the bowl of a stand mixer fitted with the paddle attachment. Mix together on low speed to combine, then add in the softened butter. Continue mixing on low speed until the mixture begins forming pea-sized clusters.
- Spread the mixture evenly onto the parchment-lined cookie sheet, then bake for 5 minutes. Stir the topping around a bit with a silicone spatula, then bake for another 3 minutes until it begins to turn golden brown. Let the crumble topping cool completely to room temperature, then store in an airtight container until you’re ready to assemble the ice cream.
Make the No-Churn Vanilla Ice Cream + Assemble
- Place a large metal bowl into the refrigerator and a loaf pan into the freezer to chill for at least 15-20 minutes.
- Remove the large chilled metal bowl from the refrigerator and add the heavy whipping cream, sweetened condensed milk, and vanilla into it. Beat with a hand mixer (or using the whisk attachment on your stand mixer) until soft peaks form, about 7 minutes.
- Remove the chilled loaf pan from the freezer and add 1/3 of the vanilla ice cream mixture into it. Smooth it down with a rubber spatula and add 1/3 of the berry filling and 1/3 of the oat streusel clusters on top. Use a skewer to marble the toppings into the ice cream. Repeat twice more.
- Cover the loaf pan with a piece of aluminum foil and freeze for at least 6 hours, after which the ice cream should be semi-firm, scoop-able, and ready to enjoy!


This was absolutely perfect. The consistency was creamy and just the right firmness, the bit of tart from the berries, the crunch from the oatmeal…. everyone in my family raved AND it was so easy. We can’t wait to make this with different mix ins but I don’t really know that we could find anything better than this particular combination. Your recipes are consistently the best around!
Yay, Chelsea! I’m so happy you and your family loved this ice cream as much as I did!