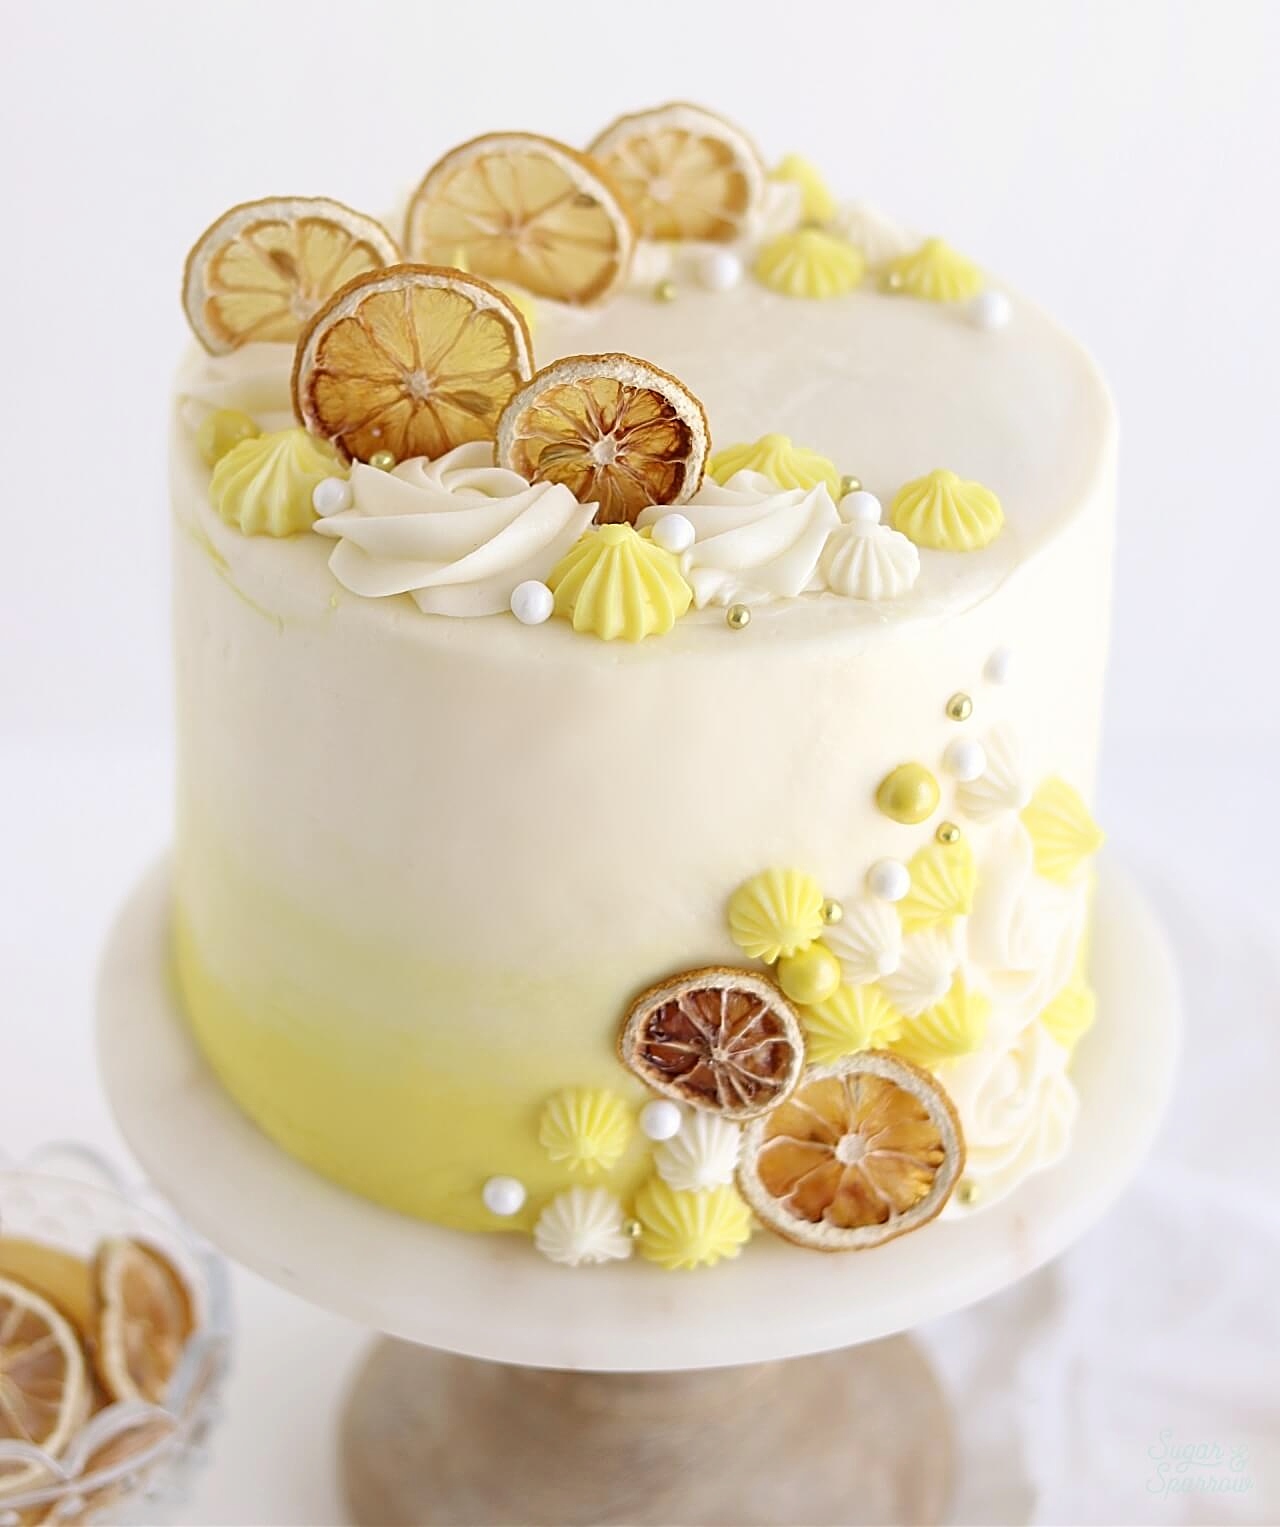
We spent the 4th of July bbq-ing with friends, and this year I thought I’d bypass the star spangled cake designs and flavors all together. Instead, I reached for the perfect lemon cake recipe (always a crowd favorite!) and paired it with the tastiest lemon cream cheese buttercream. It did not disappoint. I think this lemon cake is so perfect for any Summer gathering (or year round!), and I can’t wait to share this recipe with all of you lemon fans.
Last month, after tons of recipe testing and plenty of fails, this magical lemon cake was created. My insides squealed as I took it out of the oven and discovered that I had finally stumbled upon a lemon cake that’s fluffy, moist, packed with lemon flavor, and has the perfect amount of rise! Since lemon is such an acidic ingredient, you’ve got to be extra careful with which rising agent ratios you choose. I’m happy to say that these ones are perfection, so you can expect a beautiful lemon cake every time you bake it!
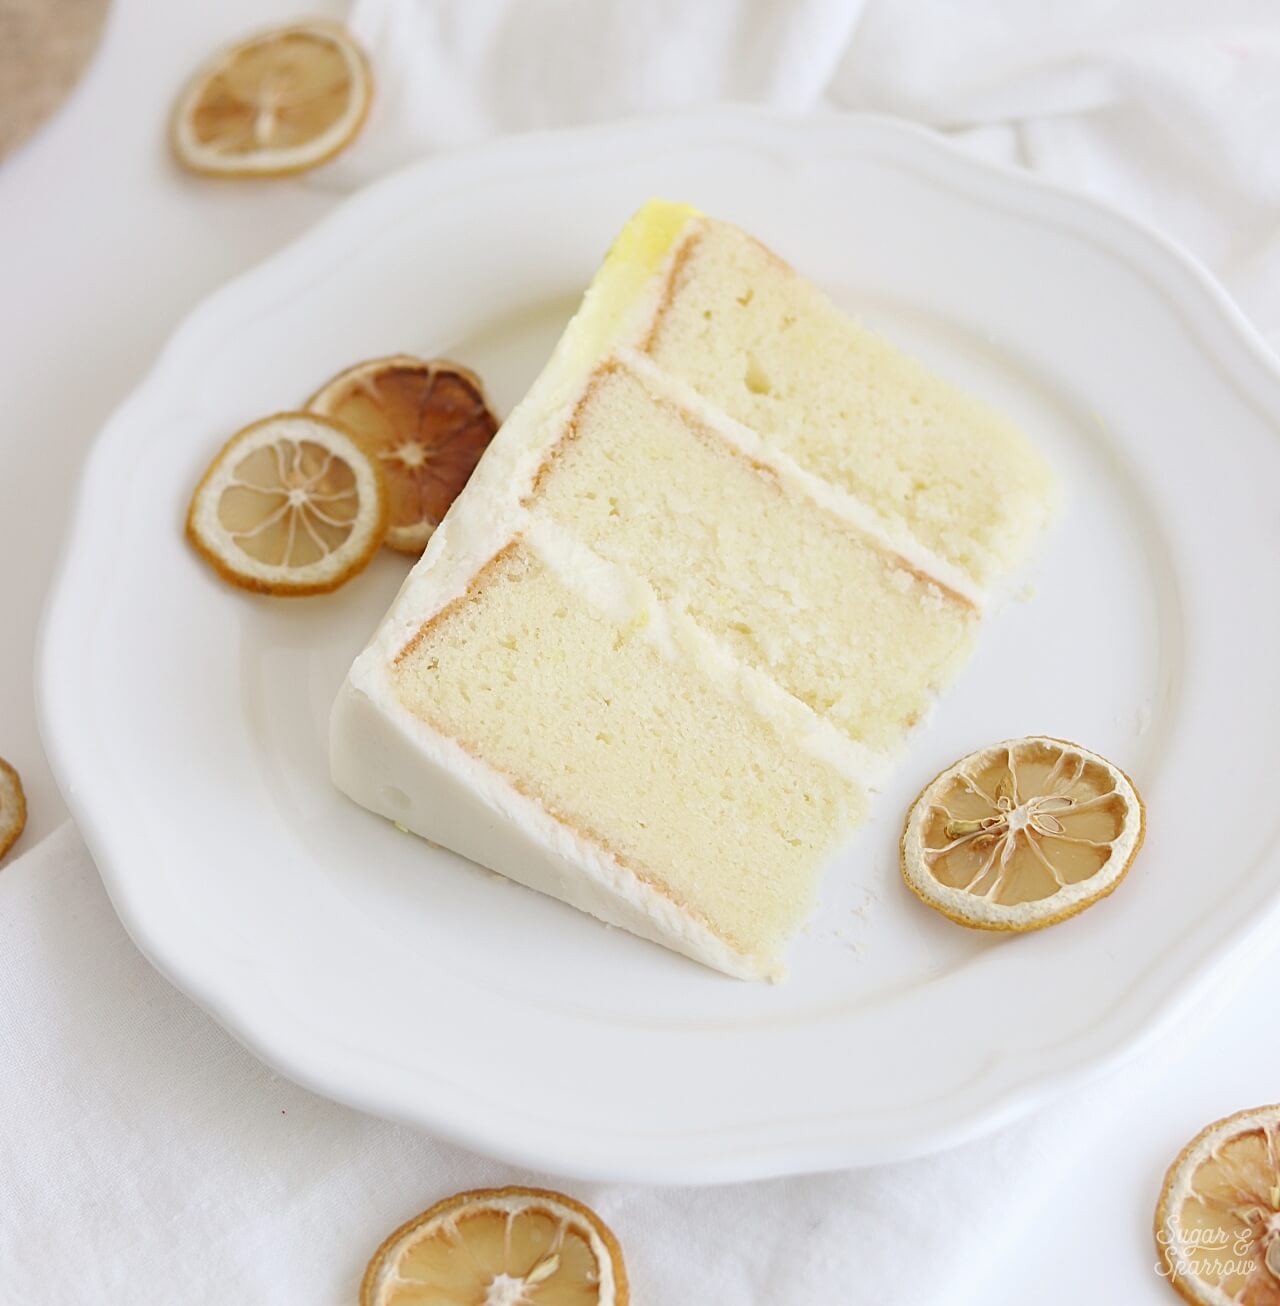
The first time I attempted a lemon cake recipe, I was flavoring the batter with fresh squeezed lemon juice. It turns out that lemon juice doesn’t really do much for flavor because most of it bakes off in the oven, and the most potent flavors of lemon actually come from the peel. So in the end, fresh lemon zest and a little lemon extract (which is made from distilled zest) add the perfect amount of zingy lemon flavor to this cake. Don’t worry about wasting any lemon juice though, you can save that for the lemon cream cheese buttercream!
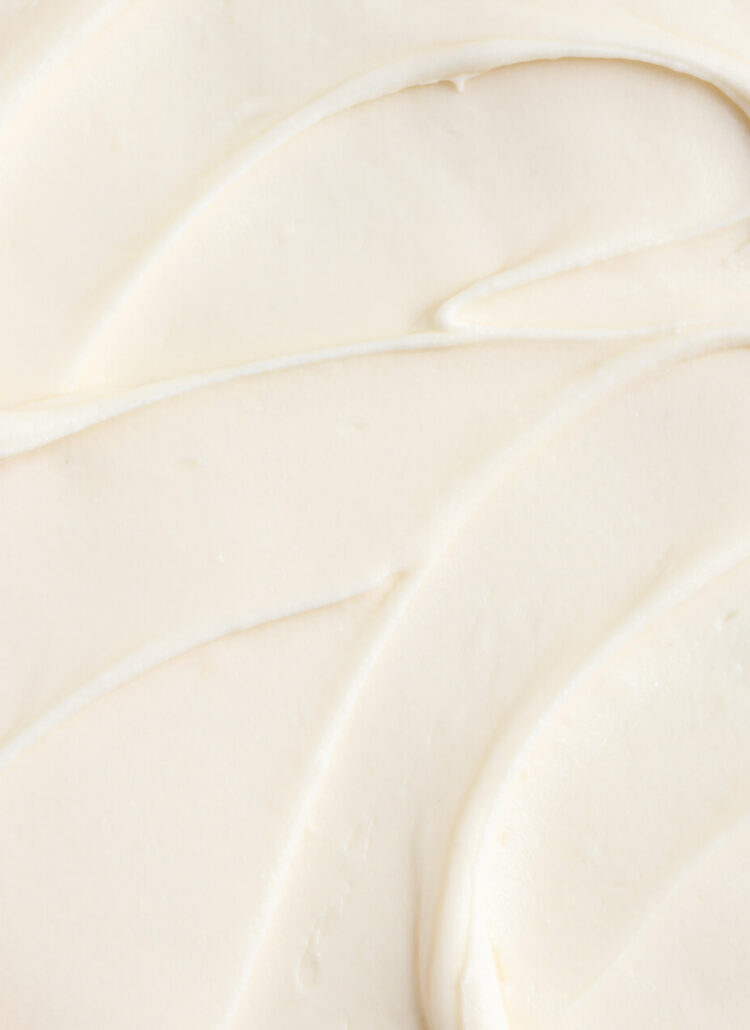
I’ve paired this lemon cake with blueberry buttercream before, and it’s a beautiful flavor combination. This time around, I whipped up some lemon cream cheese buttercream and it is so, so dreamy with this cake. While cream cheese buttercreams tend to be on the softer side, this one is actually perfect for both frosting the cake and piping on designs, so it’s a real winner! And flavoring it with a little hit of fresh squeezed lemon juice really helps bring out the perfect amount of lemon flavor throughout the cake. So tasty!


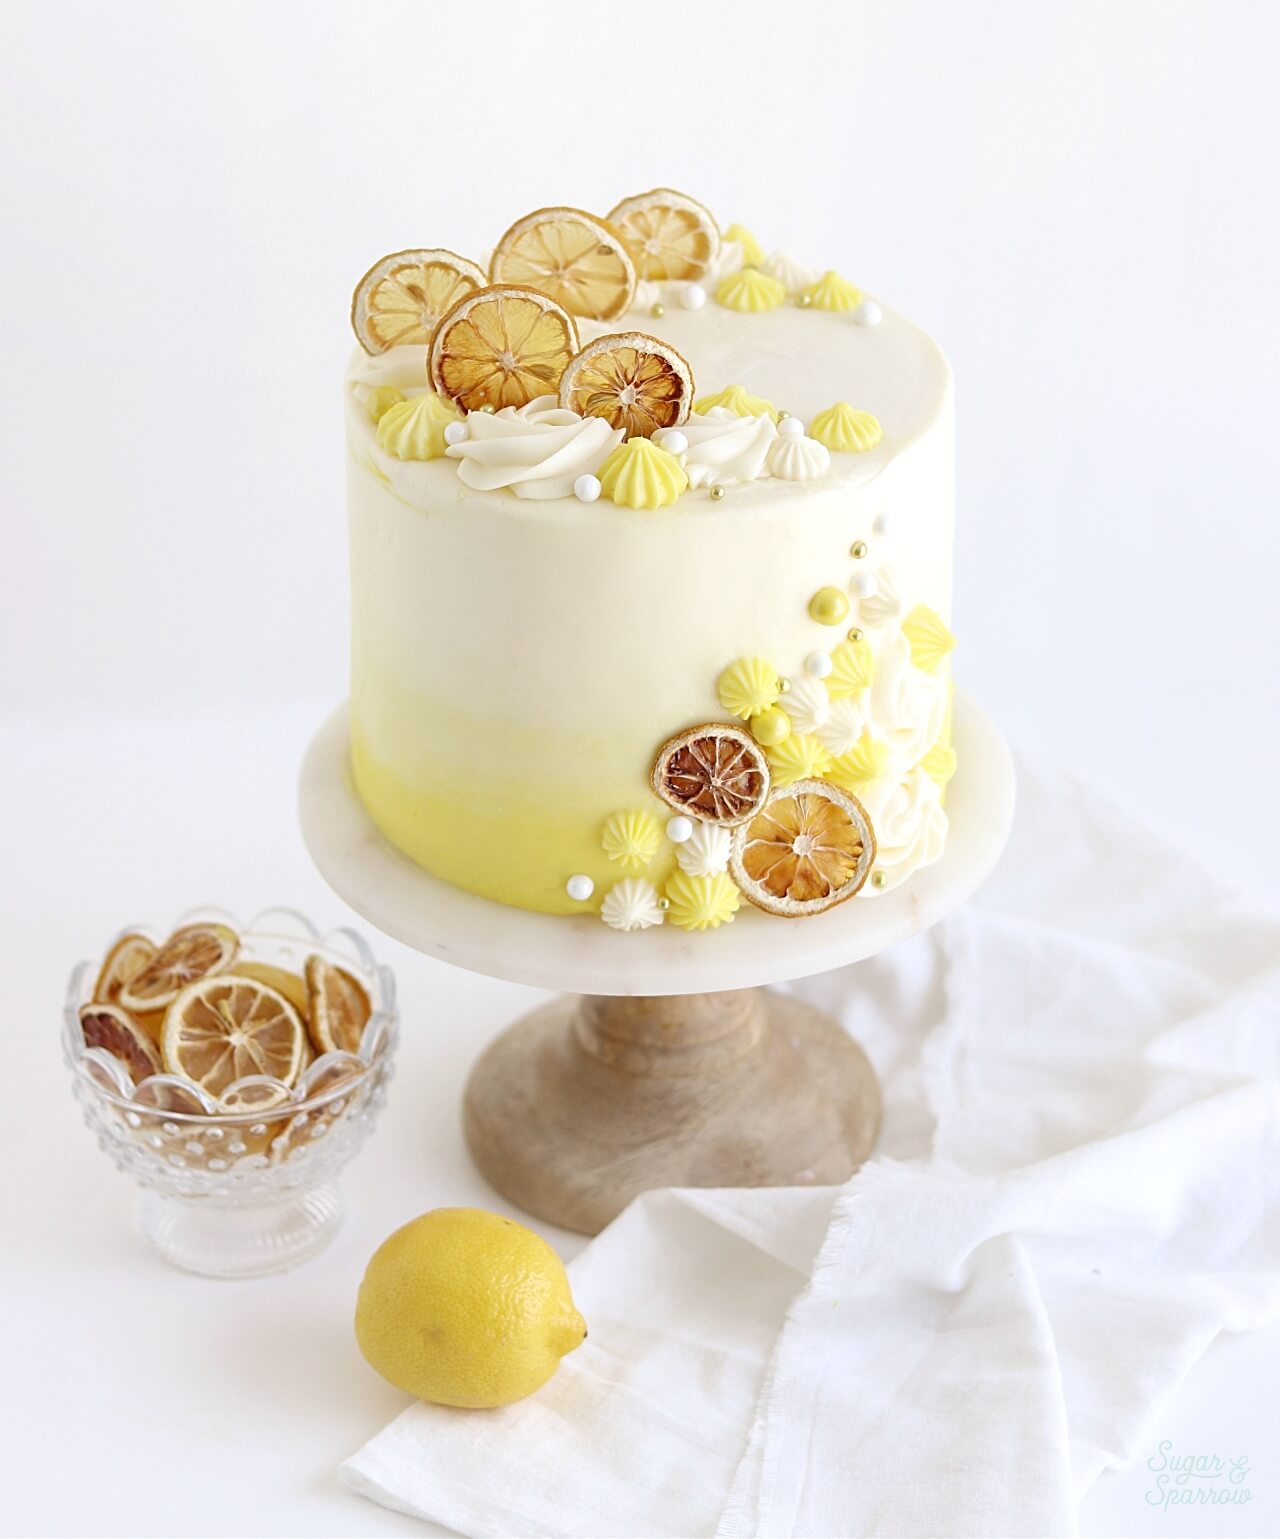
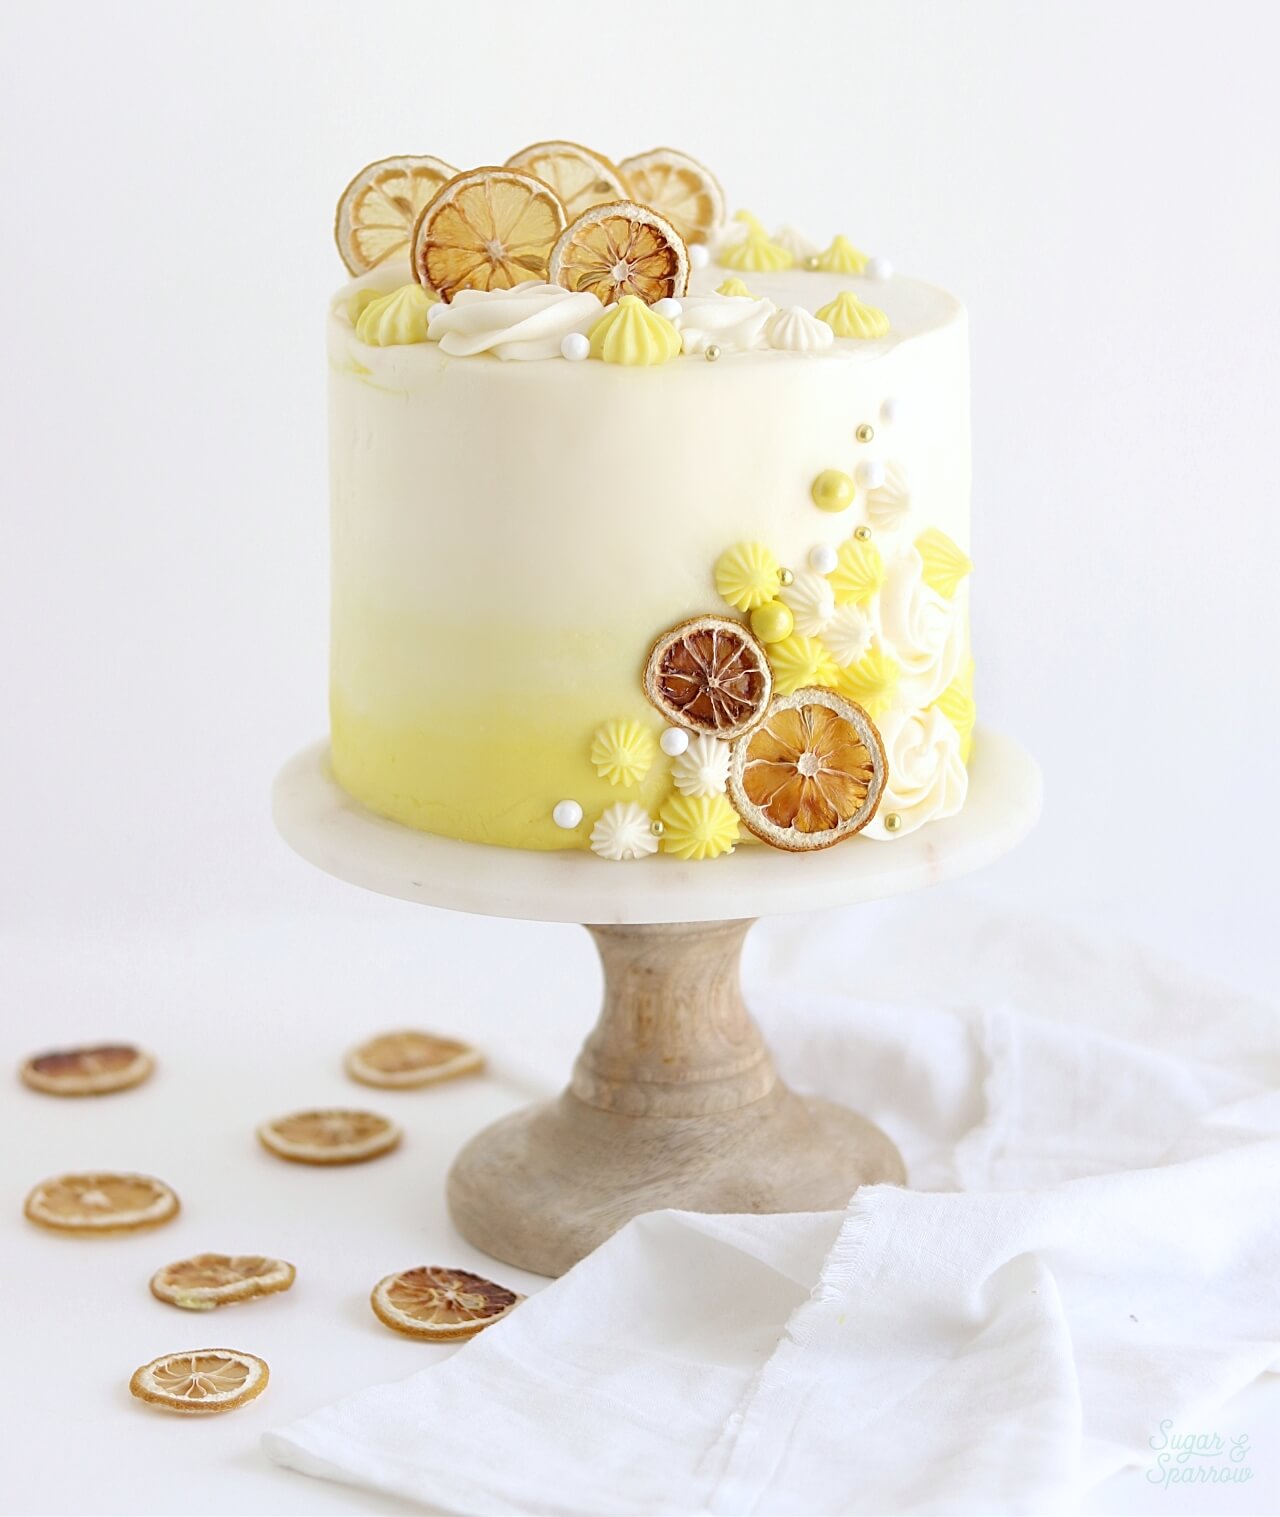
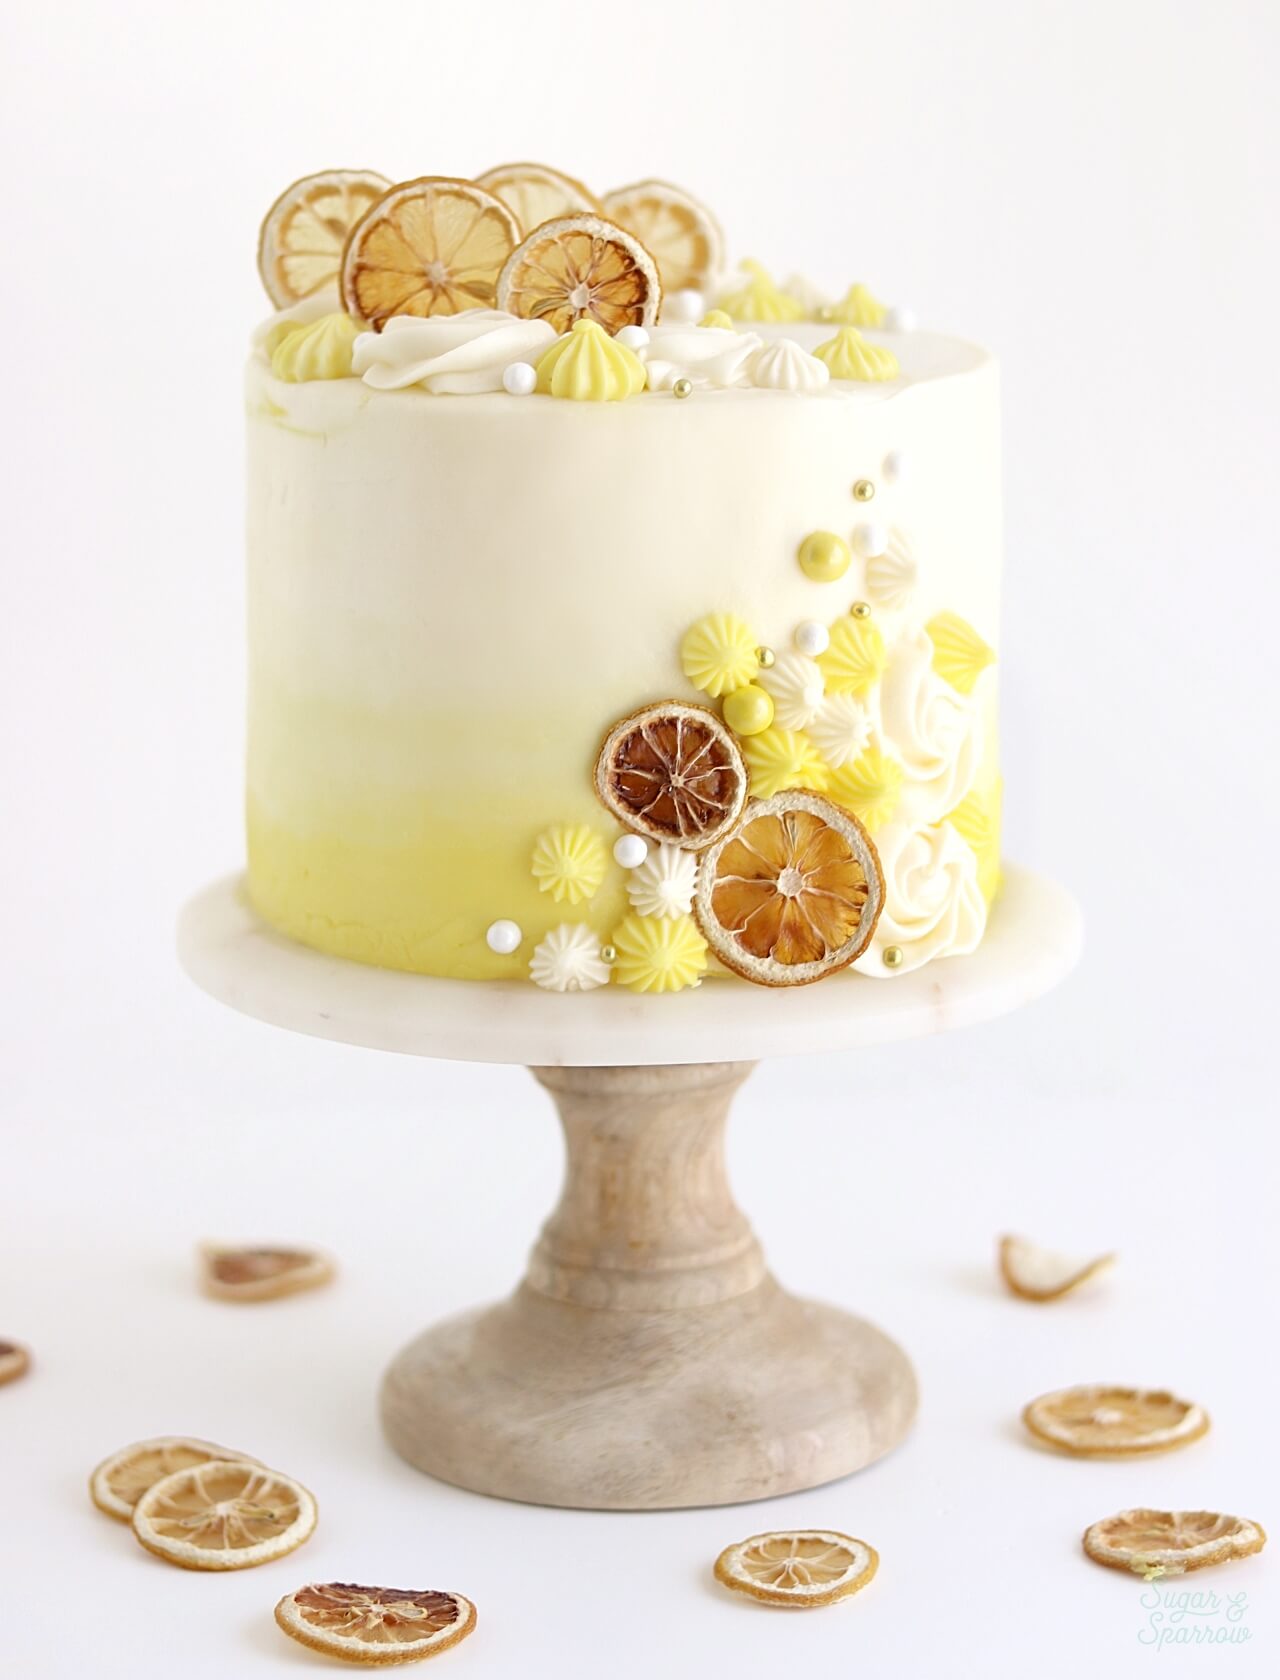
As a finishing touch, I oven dried some lemon slices and stuck them onto the frosted cake. I think they’re so pretty, and really easy to make if you’ve got some down time. All it takes is slicing some lemons, baking them on a piece of parchment paper for 2-3 hours in a 200º oven (until they’re dry to the touch), and voila! The prettiest little lemon accents for your cake! However you choose to decorate, this lemon cake will have everyone reaching for that second (and third) slice.
Lemon Cake With Lemon Cream Cheese Buttercream
Ingredients
Lemon Layer Cake
- 3 1/4 Cups (344g) cake flour, sifted before measuring
- 1 Tbsp baking powder
- 1/4 tsp baking soda
- 1 1/4 tsp salt
- 1 Cup (226g) unsalted butter, room temperature
- 2 Cups (410g) white granulated sugar
- 4 eggs, room temperature
- 1/3 Cup (75g) sour cream, room temperature
- 1 tsp pure vanilla extract
- 2 tsp pure lemon extract
- 1 Tbsp fresh lemon zest (about 1 small lemon)
- 1 1/4 Cups (300ml) whole milk, room temperature
Lemon Cream Cheese Buttercream
- 1 Cup (226g) unsalted butter, room temperature
- 16 oz (452g) cream cheese, room temperature brick-style, not the spread*
- 8 Cups (960g) powdered sugar
- 1 Tbsp fresh lemon juice (about 1/2 small lemon)
- 1/2 tsp salt
Instructions
Make The Lemon Layer Cake
- Preheat the oven to 350°F. Prepare three 6-inch or two 8-inch cake pans by spraying the sides with a cooking spray (Baker’s Joy is my favorite) and a wax paper circle fitted to the bottom of the pan. Alternatively, you can grease and lightly flour the pans.
- Sift the cake flour and then measure by spooning and leveling it in your measuring cup. Add the cake flour, baking powder, baking soda, and salt into a bowl and whisk to combine. Set aside.
- In the bowl of your stand mixer (a handheld mixer works fine too!), cream the butter for on high for two minutes until it’s light and fluffy. Add in sugar and continue to mix on medium-high for another two minutes, scraping down the bowl and paddle as needed. Add the eggs one at a time, mixing thoroughly after each addition. Add sour cream, vanilla extract, lemon extract, and lemon zest and mix for one minute on high, scraping down the bowl and paddle once more.
- With the mixer on low speed, add in the dry ingredients and mix until just combined. Add the milk slowly and mix until just incorporated. Scrape down the sides and bottom of the bowl and give it a few stirs to make sure there are no lumps.
- Pour batter into prepared cake pans (no more than 2/3 of the way full) and bake for 30-35 minutes. They’re done when they spring back to the touch and a toothpick inserted into the middle comes out clean. Let the cakes cool in the pan for five minutes before turning them out onto a wire rack for an additional few hours of cooling. Make sure they’re entirely room temperature before applying any frosting.
Make The Lemon Cream Cheese Buttercream
- In the bowl of a stand mixer fitted with the paddle attachment, cream the butter and cream cheese on high until light, fluffy, and uniform (no lumps), about five minutes. Turn the mixer to low and add the powdered sugar a few cups at a time, mixing thoroughly after each addition. Add the lemon juice and salt, mixing on low for another 30 seconds.
Assembly
- After the lemon cake is cooled, torte each layer to remove the excess cake dome. Fill and frost with lemon cream cheese buttercream. To replicate the design pictured, after crumb coating the cake, divide the lemon cream cheese buttercream amongst three separate bowls. Color one bowl with yellow food coloring (I used Americolor Lemon Yellow). Mix a little of the yellow buttercream into another bowl of plain white to create a middle yellow shade. You should now have one bowl of deep yellow buttercream, one bowl of mid-yellow buttercream, and one bowl of white buttercream.
- Frost the bottom third of the cake with the deepest shade of yellow buttercream, the middle third with the mid-tone buttercream, and the top third with white buttercream. Smooth it with an icing smoother to create an ombre finish. Top with pretty piping, oven dried lemon slices, and a few yellow and white sprinkles for good measure.
Notes
Did you make this cake recipe? I want to know how it went! Let me know in the comments below or feel free to tag @sugarandsparrowco on Instagram. I love to see your cake creations!

Hi Whitney,
I have been experimenting with cream cheese fillings for a red velvet naked cake for my brothers wedding. Would you recommend this recipe for frosting 3 layers of 8’ cakes? Would you say this is a sturdy frosting? I’ve just had difficulty with consistency and am worried with cream cheese it’ll be too soft and buckle. Thank-you!
Hi Hannah! Cream cheese buttercream can be so finicky. This one is the sturdiest I’ve tried without having to add tons of powdered sugar to firm it up. I believe it’s sturdy enough to uphold three 8 inch cake layers but if you want an extra bit of protection, I recommend using the “Filling cakes with soft fillings” method from this Cake Basics post: https://sugarandsparrow.com/fill-and-stack-cake-layers/ and using either a sturdier buttercream as the piped circle or reserving some cream cheese buttercream and adding more powdered sugar to that to sturdy it up for the piped circle. Hope that helps!
Okay great thank-you so much.
I’m using your salted caramel buttercream for the chocolate bottom 10’ tier and it’s absolutely delicious!!
Hi Whitney! The taste of the cake and the buttercream is sheer perfection.. However, the cake weighed too much to hold the buttercream and I ended up with an utter mess . I used 3 pans as intended and I followed the recipe to every detail. Yet, my buttercream turned too slippery for some reason and in combination with the weight of each cake, I couldn’t fill or even crumbcoat no matter how hard I tried. In fact, it seemed quite sturdy in the bowl but once applied on the cake (which was completely cooled, wrapped and stored in the fridge for a while), it became runny. Ah! Any ideas?
Oh no, Katia! Was it warm in your kitchen? That is my first thought – that the buttercream was too runny because either you were working in a warm environment or you over-softened the butter/cream cheese. If that happens again you can always thicken it up by placing the buttercream in the refrigerator for about 10 minutes and then re-mixing it on low speed for a minute or two before applying it to your cake. Another way to thicken it is to add more powdered sugar, but you’ll need to balance it with more salt to make sure it doesn’t end up too sweet. Hope that helps!
I think it makes sense, thanks Whitney! The taste was so heavenly that I will try again. Could it be that I might have over-beaten the cake batter as well, hence its density/weight? I intend to make it fluffy next time – I just can’t put my finger on what I did wrong. Thank you for your reply
Hey Whitney!
I’m hoping to do your painted buttercream cake for my wedding cake but was thinking of using this recipe as the base, and decorating it with the plain buttercream swatches.
Do you think that would work with the cream cheese as the base icing and then making the standard vanilla buttercream to decorate? Or could I use the cream cheese one to decorate the swatches too?
Thanks so much, your cakes are beautiful!!
Hi Sam! I would use the cream cheese buttercream for both the frosting and the painted swatches! This cream cheese buttercream recipe is really easy to color so it should be a breeze. Just follow the steps in my painted cake tutorial and you’ll be good to go.
can you use 6 in pan for this
Hi Anthony! Yes, this recipe is written for three 6-inch pans. Enjoy!
Hello! How could I covert this for 3 8-inch layers? 1.5 times the recipe?
Thank you!
Hi Erin! Yes – 1.5x the recipe should be the perfect amount.
I love your site and recipes (so excited to play with your vegan chocolate cake!)! The crumb on this cake looks so lovely. Have you frozen in advance per your make-ahead note? I hate how butter cakes lose their tender crumb once frozen (but am worried that a chiffon cake wouldn’t be sturdy enough for what I have in mind..) and was wondering if this stays light. If not, I’ll plan on making the day before, wrapping, and leaving out as you also suggest. Thank you in advance!
Hi Emily! I rarely freeze cake layers but when I do they don’t seem to lose their tender crumb. Most often I just make them a day ahead and wrap them once cooled in plastic wrap, then store at room temp until the next day. Hope that helps!
Hi Whitney, I’m planning to make this cake for a birthday with 2 x 8inch pans that are 3.75 in tall (doubling recipe). Do I need to adjust the temp for the height? Thanks in advance!
Hi Michelle! You will need to adjust the baking time for a cake pan that has taller sides like that, but I’ve never baked one of my recipes in a tall pan so I’m not sure how long you’ll need to bake it. Here’s an article that shows how to adjust the oven temp and time for deeper pans though: https://fatdaddios.com/inspiration/reach-incredible-heights hope that helps!
Would the cream cheese buttercream be sturdy enough for piping decorations?
Hi Haley! It is sturdy enough for piping. It’s what I used to pipe the decorations on this cake!
I made this cake for my mother’s Birthday and every love it! It was an absolute success. I made variations, I use just for the filling the cream cheese frosting, and for frosting an Italian meringue. Love this recipe and definitely is one of my favorites!
Yay, Ivanna! So happy this recipe was a hit for your mother’s birthday! Thanks for taking the time to let me know 🙂
Hi Whitney
This recipe looks amazing! Im going to make it for a birthday. I’m going to making it in three tins, and then halving each layer of cake once cooked…to make six layers. Do you think I’ll need to double the butter cream cheese?
Or do you think the six layers is a no go?!
Please let me know!
Meri
Hi Meri! I’m so excited for you to make this cake! I think 6 thin layers would be amazing, although I’ve never tried it myself. You’ll definitely need to make more buttercream for filling, but I think it will totally work! Just make 1.5x the buttercream recipe and you should be good to go. Enjoy!
Hi Whitney,
Can I use lemon justice instead of the lemon extract??
Hi Karina! I have actually tried this recipe with lemon juice and it doesn’t add much flavor. Instead, most of the flavor of a lemon comes from the zest. I definitely recommend adding both zest and lemon extract to give it that extra zing!
Hi, Im just wondering abt the amount of confectioners sugar for the buttercream. It sounds alot to me (European taste maybe lol). Would it work with half the amount?
Hi Sofia! I actually decreased the amount of confectioner’s sugar in this recipe compared to other American buttercreams, and when balanced with salt it isn’t too sweet by my standards. Decreasing the amount of confectioner’s sugar more than this will result in a runnier buttercream. If you do decide to decrease the sugar by half, be sure to decrease the liquid by half as well to try and keep the consistency like frosting. It will end up tasting more buttery this way as well. All that to say it would be an experiment as I have never attempted that before, so if you do try it be sure to report back with the results!
Hi! Can I use all purpose flour instead of cake flour for this recipe?
Hi Merna! Cake flour is what makes this cake extra light and fluffy. You can use all purpose flour, but the cake will be more dense. Instead, I recommend making this DIY cake flour using all purpose flour for the recipe: https://sugarandsparrow.com/homemade-cake-flour-recipe/
Hi Whitney! Curious about using oil instead of butter in this cake. The cake is divine as is, but the next time I make it, I will need to refrigerate it and also expect there to be leftovers. Given the time in the fridge, I’m worried that the butter will firm up the cake too much and detract from its amazing-ness. I know butter offers such a great flavor, but oil keeps as cake so moist. really curious what your thoughts are on the butter vs. oil specifically for use in this cake. Thanks!
Hi Jules! I’ve never tried subbing oil in this cake recipe, so I cannot say for sure how it will turn out. Feel free to experiment and report back! Otherwise, I have refrigerated leftovers of this cake recipe and as long as it’s properly wrapped (I place saran wrap over the cut portions of the cake) it should be perfectly moist when brought back to room temperature. Hope that helps!
Hi Whitney can I add a cup of frozen blueberries to make it a lemon blueberry cake?
Hi Kaitlin! I would use fresh blueberries if you’re wanting to make a lemon blueberry cake, only because the frozen ones may incorporate too much liquid while baking. If you do add fresh blueberries, I would use about 1.5 cups and coat them with a few tbsp of flour before folding them in at the end of the recipe. That should keep them from sinking while the cakes bake. Hope that helps!